Scanning and Image Processing -by Steve Clough
|
|
|
- Melvin Strickland
- 5 years ago
- Views:
Transcription
1 Scanning and Image Processing -by Steve Clough

2 cdna microarrays use two dyes with well separated emission spectra such as Cy3 and Cy5 to allow direct comparisons on single slide GSI Lumonics
3 Ratio of Expression of Genes from Two Sources Cells from condition A Cells from condition B mrna Label Dye 1 Label Dye 2 cdna equal higher in A higher in B
 2 1")
4 False Coloring of Fluorescent Signal Scale of increasing fluorescent intensities Steve Clough, USDA-ARS University of Illinois, Urbana 2 65,536 Stronger signal (16 bit image)

5 Cy3 Scan Cy5 Scan Overlay

6 We use a ScanArray Express from Perkin Elmer
7 After double clicking the ScanArray icon on the desktop, the following window will appear. Click on the Laser 1 and Laser 2 tabs to turn on the lasers.
8 After lasers have warmed up, the laser tabs turn green. Click on the Configure button on the left.

9 The following small Configure window will appear.
10 Note: the scans do not have to be perfectly balanced between the 2 dyes as a mathematical correction called normalizing or smoothing will be performed later. However, having the scan levels approximately balanced will minimize the magnitude of the normalization correction Click on Scan Protocols to select a protocol to use for Quick Scanning. The purpose of Quick Scanning is to determine the correct laser levels needed to have balanced intensities between Cy3 and Cy5 channels and to find levels that provide a nice spread of intensities across the spectrum without having too many saturated spots.

11 In this example we are using one of the Vodkin soybean 9k arrays such as 1021/83, 1070, or To begin the Quick Scanning process, highlight the 9K QUICK protocol and click Change
12 These are default settings. Verify that nobody has changed them and click Next.
13 The quick scan will only cover a small portion of the slide as this reduces the likelihood of bleaching the dyes and you only need a small sampling to determine if the colors are balanced. Verify only this top section is selected and then click Next.

14 For our scanner, we found that using a default of: Cy3: 80 PMT and 70 Laser Cy5: 70 PMT and 70 Laser works well as an initial starting point for scanning. Change values as needed by highlighting the dye that needs changing and clicking Change

15 Enter new values And click OK
16 Highlight the two dyes and then click on the Copy Current Area to all Fluorophores to set the scan areas.

17 These are default settings. Verify that nobody has changed them and click Next.

18 Click Run in the Quick Scan window.

19 The settings should be as they appear below. Be sure resolution is set at 50 um or else you re more likely to bleach dyes. Click Start
20 When run ends, click Finish to view the results and determine what adjustments will need to be made to balance the signals between the two dye channels.
21 In this example, the composite Cy3_Cy5 image is too green indicating that the overall fluorescence level of Cy3 labelling was much stronger than Cy5. Therefore, we need to either adjust the Cy3 down or the Cy5 up to balance them.
22 Clicking on the Cyanine 3 (Control) tab shows the intensity related to the Cy3 label. Check to determine the level of saturation. We believe that about 1-3 saturated spots per subgrid is a good level. To see the spots more clearly, click the Zoom In tab.
23 Close up of a sub grid shows that we are in this range of having about 1-3 saturated spots per subgrid. Therefore, we ll keep this Cy3 setting and adjust the Cy5. Click the Cyanine 5 (Source) tab to see the Cy5 levels.
24 Clicking on the Cyanine 5 (Source) tab shows the intensity related to the Cy5 label. In this example, the levels are low with none approaching saturation. We will need to increase the Cy5 laser and/or PMT levels to be closer to that of the Cy3 levels. It takes some experience to determine how much to adjust (and this may vary with machine). Here we will try adjusting laser up 10 and PMT up 15 points.
25 To change Cy5 value: Go back to Step 3, 4, 5, 6. Change Cy5 values as needed by highlighting Cyanine 5 and clicking Change. Based on the first quick scan we decided to change the Cy5 to 85 PMT and 80 laser and to leave Cy3 at 80 PMT and 70 Laser
26 Repeating the quick scan with these new values for Cy5 produced an image with good balance between the two dyes as most spots look yellow with a fairly similar number of reddish and greenish spots. Can click on the Zoom In tab to have a better view..

27 Use the Zoom In tab to get better picture of a given subgrid.
28 Now that the Quick Scans has given us an acceptable balance between Cy3 and Cy5 images, we need to do a real scan at higher resolution at these same laser and PMT levels. Go back to the Configure tab and click on the Scan Protocols
 so")
29 Change on the appropriate real scan protocol. This example uses one of the 9K slides (ex: Gm-1021/83, Gm-r1070 or Gm-r1088) so highlight the 9K Real Scan and hit the Change tab.

30 Verify that these default settings are in place and click Next.
31 Verify that the default area is set correctly and click Next.
32 Change the PMT and Laser settings to use levels determined from Quick Scans. In this example the Quick Scans suggested Cy3: 80 PMT and 70 Laser, Cy5: 85 PMT and 80 Laser.

33 Highlight both dyes and click on Copy Current Area to all Fluorophores. Then click Next.
34 Click Finish tab.
35 Click Close tab as you have finished setting the scan parameters and are now ready to scan.
36 Click Scan tab

37 Select 9K REAL SCAN. Verify that the default scan area has not been changed and click Start
38 The scanner will scan the slide with both the Cy3 and Cy5 lasers and show the composite image, which should be mostly yellowish if the dyes are fairly balanced. The image looks better if click the 3x3 median tab which averages pixels based on neighboring pixel values.
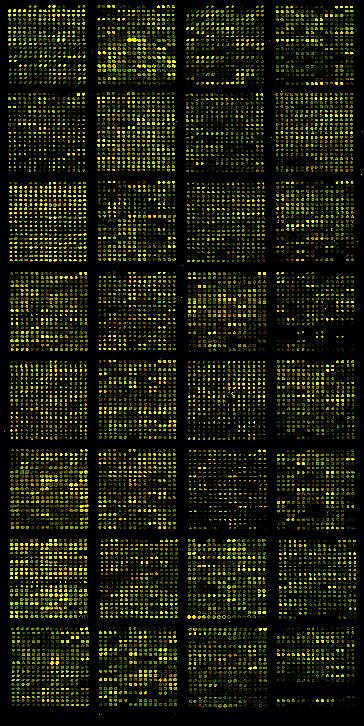
39 Image after applying the 3x3 Filter. Note that most spots are fairly yellow and that there are not too many saturated spots (no more than 2-3 per subgrid).
40 To save the images, you need to save the individual Cy3 and Cy5 scans. Click the Cyanine 3 (Control) tab and then click the File tab to pop up the File Options window.

41 Click Save As and the then click ok
, and than SB followed by the scan for this slide (SB01 for first scan and SB02 for second, etc if one decides")
42 Identify your folder and type in the file name. To make it easier, you can click on the name of a previous slide and that name will pop into the File name box and you can modify it. The naming convention we use is to follow slide name with channel (1 for Cy3, 2 for Cy5), and than SB followed by the scan for this slide (SB01 for first scan and SB02 for second, etc if one decides they do not like the scan and wish to repeat it). Save every scan as there is always a chance that the next scan will be worse as dyes might begin to fade after repeated scanning.
43 Save Cy5 image
ScanArray Overview. Principle of Operation. Instrument Components
 ScanArray Overview The GSI Lumonics ScanArrayÒ Microarray Analysis System is a scanning laser confocal fluorescence microscope that is used to determine the fluorescence intensity of a two-dimensional
Scan slides (Axon Genepix 4200AL)
") Page 1 Scan slides (Axon Genepix 4200AL) We need to scan the slides on both channels (Cy3 and Cy5) to obtain a 16-bit grayscale TIFF file for each. Typically these files are about 20-26Mb per channel,
Page 1 Scan slides (Axon Genepix 4200AL) We need to scan the slides on both channels (Cy3 and Cy5) to obtain a 16-bit grayscale TIFF file for each. Typically these files are about 20-26Mb per channel,
Things to check before start-up.
 Byeong Cha Page 1 11/24/2009 Manual for Leica SP2 Confocal Microscope Enter you name, the date, the time, and the account number in the user log book. Things to check before start-up. Make sure that your
Leica SPEII confocal microscope. Short Manual
 Leica SPEII confocal microscope Short Manual Switching ON sequence: 1. Turn on the Workstation under the bench (top, far right). 2. Turn on the Supply Unit - Laser box (big green switch first and then
Product Information. Introduction
 Microarray Scanner Calibration Slide To quantitatively analyze scanners performance and output, adjust and fine-tune scanners, and perform comparative analysis for multiple scanner units. To verify scanners
Leica SP8 TCS Users Manual
 Version : 07/08/0 Leica SP8 TCS Users Manual Start up:. Turn the PC Microscope, Scanner Power, Laser Power, and the Laser Emission key to on (bottom right of desk).. Turn on the fluorescent lamp (top left
In our previous lecture, we understood the vital parameters to be taken into consideration before data acquisition and scanning.
 Interactomics: Protein Arrays & Label Free Biosensors Professor Sanjeeva Srivastava MOOC NPTEL Course Indian Institute of Technology Bombay Module 7 Lecture No 34 Software for Image scanning and data processing
Leica TCS SP8 Quick Start Guide
 Leica TCS SP8 Quick Start Guide Leica TCS SP8 System Overview Start-Up Procedure 1. Turn on the CTR Control Box, EL6000 fluorescent light source for the microscope stand. 2. Turn on the Scanner Power
LSM 710 Confocal Microscope Standard Operation Protocol
 LSM 710 Confocal Microscope Standard Operation Protocol Basic Operation Turning on the system 1. Switch on Main power switch 2. Switch on System / PC power button 3. Switch on Components power button 4.
LSM 780 Confocal Microscope Standard Operation Protocol
 LSM 780 Confocal Microscope Standard Operation Protocol Basic Operation Turning on the system 1. Sign on log sheet according to Actual start time 2. Check Compressed Air supply for the air table 3. Switch
b. Turn the power switch and key to on position for blue laser.
 OLYMPUS FLUOVIEW 300 CONFOCAL MICOSCOPE OPERATION PROCEDURE 1. Turn ON microscope in this order: 1) Turn on mercury lamp (Note: once the mercury lamp is turned off, DO NOT turn it back on for at least
LSM 800 Confocal Microscope Standard Operation Protocol
 LSM 800 Confocal Microscope Standard Operation Protocol Turning on the system 1. Switch on the Main switch (labeled 1 and 2 ) mounted on the wall. 2. Turn the Laser Key (labeled 3 ) 90 clockwise for power
Leica Sp5 II Confocal User Guide
 Leica Sp5 II Confocal User Guide Turning on the Confocal System (instructions are posted in the room) 1. Turn on Laser Power Button 2. Turn Key to On position 3. Turn on Scanner Power Button 4. Turn on
Instructions for Mapping * µarray Images using GenePix 5.0
 Instructions for Mapping * µarray Images using GenePix 5.0 Preliminary Information Make sure that the GenePix 5.0 software has been installed on your computer and you have the USB hardware dongle that
Fire CR Calibration Guide
 1 Fire CR Calibration Guide This reference guide will guide you through the steps to complete the calibration for the Fire CR.. Getting Started: 1. Click on the Opal Icon on the Desktop. Figure 1 2. Once
Topics. - How to calibrate the LSM scanner. - How to clean the microscope. - How to adjust the pinhole alignment. - How to adjust the Collimator
 Topics - How to calibrate the LSM scanner - How to measure the PSF - How to clean the microscope - How to adjust the pinhole alignment - How to adjust the Collimator How to calibrate the LSM scanner The
Training Guide for Leica SP8 Confocal/Multiphoton Microscope
 Training Guide for Leica SP8 Confocal/Multiphoton Microscope LAS AF v3.3 Optical Imaging & Vital Microscopy Core Baylor College of Medicine (2017) Power ON Routine 1 2 Turn ON power switch for epifluorescence
GenePix Application Note
 GenePix Application Note Biological Relevance of GenePix Results Shawn Handran, Ph.D. and Jack Y. Zhai, Ph.D. Axon Instruments, Inc. 3280 Whipple Road, Union City, CA 94587 Last Updated: Aug 22, 2003.
Supplemental Method Information Zeiss LSM710
 Supplemental Method Information Zeiss LSM710 1 Under the Light Path window set up the confocal for imaging a green dye (Alexa488-EGFP). For example, set up the light path as shown here using the 488 nm
Leica TCS SP8 Quick Start Guide
 Leica TCS SP8 Quick Start Guide Leica TCS SP8 System Overview Start-Up Procedure 1. Turn on the CTR Control Box, Fluorescent Light for the microscope stand. 2. Turn on the Scanner Power (1) on the front
Microscopy from Carl Zeiss
 Microscopy from Carl Zeiss Contents Page Contents... 1 Introduction... 1 Starting the System... 2 Introduction to ZEN Efficient Navigation... 5 Setting up the microscope... 10 Configuring the beam path
Cell Biology and Bioimaging Core
 Cell Biology and Bioimaging Core Leica TCS SP5 Operating Instructions Starting up the instrument 1. First, log in the log book located on the confocal desk. Include your name, your lab s PI, an account
TRAINING MANUAL. Olympus FV1000
 TRAINING MANUAL Olympus FV1000 September 2014 TABLE OF CONTENTS A. Start-Up Procedure... 1 B. Visual Observation under the Microscope... 1 C. Image Acquisition... 4 A brief Overview of the Settings...
Confocal imaging on the Leica TCS SP8. 1) Turn the system on. 2) Use TCS user account. 3) Start LAS X software:
 Turn the system on. 2) Use TCS user account. 3) Start LAS X software:") Confocal imaging on the Leica TCS SP8 1) Turn the system on. 2) Use TCS user account. 3) Start LAS X software: 4) Do not touch the microscope while the software is initializing. Choose your options: Turn
Confocal imaging on the Leica TCS SP8 1) Turn the system on. 2) Use TCS user account. 3) Start LAS X software: 4) Do not touch the microscope while the software is initializing. Choose your options: Turn
EmbryoCellect. RHS Scanning and Analysis Instructions. for. Genepix Pro Software
 EmbryoCellect RHS Scanning and Analysis Instructions for Genepix Pro Software EmbryoCellect Genepix Pro Scanning and Analysis Technical Data Sheet Version 1.0 October 2015 1 Copyright Reproductive Health
Quick Guide. NucleoCounter NC-3000
 Quick Guide NucleoCounter NC-3000 Table of contents Setting up the FlexiCyte Protocol 2 Editing Image Capture and Analysis Parameters 3 Optimizing Exposure Time 4 Compensation for Spectral Overlap 6 Creating
Operating Checklist for using the Laser Scanning Confocal Microscope. Leica TCS SP5.
 Smith College August 2010 Operating Checklist for using the Laser Scanning Confocal Microscope Leica TCS SP5. CONTENT, page no. Startup, 1 Initial set-up, 1 Software, 2 Microscope Specimen observation
GenePix Application Note
 GenePix Application Note Determining the Signal-to-Noise Ratio and Optimal Photomultiplier gain setting in the GenePix 4000B Siobhan Pickett, M.S., Sean Carriedo, Ph.D. and Chang Wang, Ph.D. Axon Instruments,
MAKE SURE YOUR SLIDES ARE CLEAN (TOP & BOTTOM) BEFORE LOADING DO NOT LOAD SLIDES DURING SOFTWARE INITIALIZATION
 BEFORE LOADING DO NOT LOAD SLIDES DURING SOFTWARE INITIALIZATION") Olympus VS120-L100 Slide Scanner Standard Operating Procedure Startup 1) Red power bar switch (behind monitor) 2) Computer 3) Login: UserVS120 account (no password) 4) Double click: WAIT FOR INITIALIZATION
Olympus VS120-L100 Slide Scanner Standard Operating Procedure Startup 1) Red power bar switch (behind monitor) 2) Computer 3) Login: UserVS120 account (no password) 4) Double click: WAIT FOR INITIALIZATION
Chapter 16: Batch Scanning
 Chapter 16: Batch Scanning The Batch Scanning module allows users to scan and upload various versions of voter registration forms as a batch into the system. Once they are scanned, documents are available
Leica SP8 TCS Users Manual
 Leica SP8 TCS Users Manual Follow the procedure for start up and log on as posted in the lab. Please log on with your account only and do not share your password with anyone. We track and confirm usage
Title: Leica SP5 Confocal User Manual
 Title: Leica SP5 Confocal User Manual Date of first issue: 23/10/2015 Date of review: Version: Admin For assistance or to report an issue Office: CG07 or 05 Email: Igmm-imaginghelpdesk@igmm.ed.ac.uk Website:
SIMPLY TIFFANY STUDIOS SCRAPANEERS.COM
 Get Prepped Organize & Prepare The tips I want to share with you today will help you prepare tomorrow for Scanning Day and increase your scanning speed. Tip 1: Divide & Conquer Arrange your photos into
Automatic gene expression estimation from microarray images. Daniel O. Dantas Adviser: : Junior Barrera
 Automatic gene expression estimation from microarray images Daniel O. Dantas Adviser: : Junior Barrera IME-USP Summary Introduction Problem definition Solution strategy Image segmentation Signal estimation
Guide to Confocal 5. Starting session
 Guide to Confocal 5 Remember that when booking and before starting session you can check for any problems at https://www.bris.ac.uk/biochemistry/uobonly/cif/index.html Starting session Switch on microscope
Leica SP8 Resonant Confocal. Quick-Start Guide
 Leica SP8 Resonant Confocal Quick-Start Guide Contents Start-up Preparing for Imaging Part 1 On the scope Part 2 Software interface Part 3 Heat & CO2 incubation Part 4 Other hardware options Shut-down
LEICA TCS SP5 AOBS TANDEM USER MANUAL
 LEICA TCS SP5 AOBS TANDEM USER MANUAL STARTING THE SYSTEM...2 THE LAS AF SOFTWARE...3 THE «ACQUIRE» MENU...5 CHOOSE AND CREATE A SETTING...6 THE CONTROL PANEL...8 THE DMI6000B MICROSCOPE...10 ACQUIRE ONE
Extending the Dynamic Range of Film
 Written by Jonathan Sachs Copyright 1999-2003 Digital Light & Color Introduction Limited dynamic range is a common problem, especially with today s fine-grained slide films. When photographing contrasty
ZEISS LSM510META confocal manual
 ZEISS LSM510META confocal manual Switching on the system 1) Switch on the Remote Control button located on the table to the right of the microscope. This is the main switch for the whole system including
3 Choose the Channels button and set the Channel Settings. Set the Pinhole to 1 Airy unit.
 1 Set up the confocal light path for imaging a green dye (e.g. Alexa488-EGFP). For example, under the Configuration Control window the light path could be set up as shown here using the 488 nm LASER (found
Instructions for Howto Scan µarrays
 Instructions for Howto Scan µarrays Introduction After probing the µarray slides with samples, one is now ready to scan them. To scan a µarrays slide is too convert the biological information trapped on
MIF ZEISS VIOLET CONFOCAL ZEN 2009 PROTOCOL
 MIF ZEISS VIOLET CONFOCAL ZEN 2009 PROTOCOL START-UP On the Switchbox, turn both black switches to the ON position. Wait for the microscope to boot up completely (watch the screen on the side of the microscope).
Developed by BioDiscovery, Inc. DualChip evaluation software User Manual Version 1.1
 Developed by BioDiscovery, Inc. DualChip evaluation software User Manual Version 1.1 1 Table of contents 1. INTRODUCTION...3 2. SCOPE OF DELIVERY...4 3. INSTALLATION PROCEDURES...5 3.1. SYSTEM REQUIREMENTS...
RENISHAW INVIA RAMAN SPECTROMETER
 STANDARD OPERATING PROCEDURE: RENISHAW INVIA RAMAN SPECTROMETER Purpose of this Instrument: The Renishaw invia Raman Spectrometer is an instrument used to analyze the Raman scattered light from samples
OPT3: Operating Procedure for Horiba Jobin Yvon LabRam Aramis Raman/PL System See LabSpec_6_2 General User Quick Start Guide on the computer desktop
 OPT3: Operating Procedure for Horiba Jobin Yvon LabRam Aramis Raman/PL System See LabSpec_6_2 General User Quick Start Guide on the computer desktop 1. Log in usage using the SMIF web site 2. Turn power
Nikon AZ100. Laser Scanning Macro Confocal Microscope. Jordan Briscoe Adam Fries Kyle Marchuk Kaitlin Corbin. May 2017.
 Nikon AZ100 Laser Scanning Macro Confocal Microscope Jordan Briscoe Adam Fries Kyle Marchuk Kaitlin Corbin May 2017 Contents 1 Introduction 2 2 Hardware - Startup 2 3 Software/Operation 4 3.1 Multidimensional
Quick Start Guide. Leica SP5 X
 Quick Start Guide Leica SP5 X Please note: Some of the information in this guide was taken from Leica Microsystems Leica TCS SP5 LAS AF Guide for New Users. This work is licensed under the Creative Commons
Quality control of microarrays
 Quality control of microarrays Solveig Mjelstad Angelskår Intoduction to Microarray technology September 2009 Overview of the presentation 1. Image analysis 2. Quality Control (QC) general concepts 3.
NPTEL VIDEO COURSE PROTEOMICS PROF. SANJEEVA SRIVASTAVA
 HANDOUT LECTURE-31 MICROARRAY WORK-FLOW: IMAGE SCANNING AND DATA PROCESSING Slide 1: This module contains the summary of the discussion with Mr. Pankaj Khanna, an application specialist from Spinco Biotech,
Photoshop: Manipulating Photos
 Photoshop: Manipulating Photos All Labs must be uploaded to the University s web server and permissions set properly. In this lab we will be manipulating photos using a very small subset of all of Photoshop
Preparation of Sample Hybridization Scanning and Image Analysis
 Preparation of Sample Hybridization Scanning and Image Analysis Sample preparation 1. Design experiment 2. Perform experiment Question? Replicates? Test? mutant wild type 3. Precipitate RNA 4. Label RNA
Supplemental Figure 1: Histogram of 63x Objective Lens z axis Calculated Resolutions. Results from the MetroloJ z axis fits for 5 beads from each
 Supplemental Figure 1: Histogram of 63x Objective Lens z axis Calculated Resolutions. Results from the MetroloJ z axis fits for 5 beads from each lens with a 1 Airy unit pinhole setting. Many water lenses
Zeiss LSM 880 Protocol
 Zeiss LSM 880 Protocol 1) System Startup Please note put sign-up policy. You must inform the facility at least 24 hours beforehand if you can t come; otherwise, you will receive a charge for unused time.
MIF ZEISS LSM510 CONFOCAL USER PROTOCOL
 MIF ZEISS LSM510 CONFOCAL USER PROTOCOL START-UP Turn on the Mercury Bulb Power Supply (if needed). Power-on the Control Box. Turn on the computer. Open the LSM 510 software. Choose Scan New Images and
Operation Guide for the Leica SP2 Confocal Microscope Bio-Imaging Facility Hunter College October 2009
 Operation Guide for the Leica SP2 Confocal Microscope Bio-Imaging Facility Hunter College October 2009 Introduction of Fluoresence Confocal Microscopy The first confocal microscope was invented by Princeton
Operating Rausch ScanCam within POSM.
 Operating Rausch ScanCam within POSM. POSM (Pipeline Observation System Management) // posmsoftware.com // info@posmsoftware.com // 859-274-0041 RAUSCH USA // www.rauschusa.com // reusa@rauschusa.com //
Computational Genomics. High-throughput experimental biology
 Computational Genomics 10-810/02 810/02-710, Spring 2009 Gene Expression Analysis Data pre-processing processing Eric Xing Lecture 15, March 4, 2009 Reading: class assignment Eric Xing @ CMU, 2005-2009
Quick Guide. LSM 5 MP, LSM 510 and LSM 510 META. Laser Scanning Microscopes. We make it visible. M i c r o s c o p y f r o m C a r l Z e i s s
 LSM 5 MP, LSM 510 and LSM 510 META M i c r o s c o p y f r o m C a r l Z e i s s Quick Guide Laser Scanning Microscopes LSM Software ZEN 2007 August 2007 We make it visible. Contents Page Contents... 1
NPTEL VIDEO COURSE PROTEOMICS PROF. SANJEEVA SRIVASTAVA
 LECTURE-31 MICROARRAY WORK-FLOW: IMAGE SACNNING AND DATA PROCESSING TRANSCRIPT Welcome to the proteomics course. In today s lecture we will talk about microarray work-flow the image scanning and processing.
Zeiss LSM 780 Protocol
 Zeiss LSM 780 Protocol 1) System Startup F Please note the sign-up policy. You must inform the facility at least 24 hours beforehand if you can t come; otherwise, you will receive a charge for unused time.
Photoshop: Manipulating Photos
 Photoshop: Manipulating Photos All Labs must be uploaded to the University s web server and permissions set properly. In this lab we will be manipulating photos using a very small subset of all of Photoshop
1 Set up the confocal light path for imaging a green dye (Alexa488-EGFP). For example, the
. For example, the") 1 Set up the confocal light path for imaging a green dye (Alexa488-EGFP). For example, the light path as shown here using the 488 nm LASER (Laser Unit 1) reflecting off of the 405/488 nm Dichroic mirror
1 Set up the confocal light path for imaging a green dye (Alexa488-EGFP). For example, the light path as shown here using the 488 nm LASER (Laser Unit 1) reflecting off of the 405/488 nm Dichroic mirror
The Zeiss AiryScan System, Confocal Four.
 The Zeiss AiryScan System, Confocal Four. Overview. The Zeiss AiryScan module is a segmented, radially stacked GaASP detector and collector system designed to subsample the airy disk of a point emission
Editing your digital images:
 Editing your digital images: 1 By Garry Sankowsky zodpub@rainforestmagic.com.au All images taken with a digital camera need to be edited. You will usually get software with your camera that can do at least
GlassSpection User Guide
 i GlassSpection User Guide GlassSpection User Guide v1.1a January2011 ii Support: Support for GlassSpection is available from Pyramid Imaging. Send any questions or test images you want us to evaluate
Zeiss 880 Training Notes Zen 2.3
 Zeiss 880 Training Notes Zen 2.3 1 Turn on the HXP 120V Lamp 2 Turn on Main Power Switch Turn on the Systems PC Switch Turn on the Components Switch. 3 4 5 Turn on the PC and log into your account. Start
Lesson 1: Introducing Photoshop
 Chapter 1, Video 1: "Lesson 1 Introduction" Welcome to the course. Over the next six weeks, you'll learn the basics of Photoshop. You'll retouch old photos to get rid of wear and tear. You'll retouch new
OPERATING INSTRUCTIONS
 Zeiss LSM 510 M eta Confocal M icroscope OPERATING INSTRUCTIONS Starting the System: 1. Turn the black knob on the laser box one-quarter turn from Off to On. You will hear the laser cooling mechanisms
Generations Automatic Stand-Alone Lace By Bernie Griffith Generations Software
 We are going to create an open Italian lace. Generations software products provide advanced image processing features allowing for the creation of stand-alone lace with just a few simple techniques. A
Quick Guide for Zeiss 710 Laser Scanning Confocal MGH Cancer Center
 Quick Guide for Zeiss 710 Laser Scanning Confocal MGH Cancer Center For any questions or concerns, please contact: Linda Nieman lnieman@mgh.harvard.edu Office: (617) 643-9684 Cell: (512) 565-8076 Chenyue
BacklightFly Manual.
 BacklightFly Manual http://www.febees.com/ Contents Start... 3 Installation... 3 Registration... 7 BacklightFly 1-2-3... 9 Overview... 10 Layers... 14 Layer Container... 14 Layer... 16 Density and Design
Star Defender. Section 1
 Star Defender Section 1 For the first full Construct 2 game, you're going to create a space shooter game called Star Defender. In this game, you'll create a space ship that will be able to destroy the
Creating a Color Compensation file for Roche LightCycler 480 vers.i & vers. II
 Creating a Color Compensation file for Roche LightCycler 480 vers.i & vers. II Due to ROX and Cy5 dye emmision spectra overlap Roche LightCycler 480 can pick up signals from a dye measured by another channel.
AgilEye Manual Version 2.0 February 28, 2007
 AgilEye Manual Version 2.0 February 28, 2007 1717 Louisiana NE Suite 202 Albuquerque, NM 87110 (505) 268-4742 support@agiloptics.com 2 (505) 268-4742 v. 2.0 February 07, 2007 3 Introduction AgilEye Wavefront
Zeiss LSM880 Operating Instructions. UTMB Optical Microscopy Core Jan. 16, 2018
 Zeiss LSM880 Operating Instructions UTMB Optical Microscopy Core Jan. 16, 2018 1 1. Power up the microscope Sing the LOGBOOK Steps below will provide power to the computer and all of the microscope components.
Part I: Bruker Esprit Mapping Options
 Part I: Bruker Esprit Mapping Options Mapping Panel Overview 5. 4. 2. 6. 3. 7. 8. 9. 1. 10. Mapping Panel Overview 1. Element selector - can turn individual elements (as well as the image overlay) on/off.
Using the Nikon TE2000 Inverted Microscope
 Wellcome Trust Centre for Human Genetics Molecular Cytogenetics and Microscopy Core Using the Nikon TE2000 Inverted Microscope Fluorescence image acquisition using Scanalytic s IPLab software and the B&W
Quick Guide for Zeiss 710 Laser Scanning Confocal MGH Cancer Center
 Quick Guide for Zeiss 710 Laser Scanning Confocal MGH Cancer Center For any questions or concerns, please contact: Linda Nieman lnieman@mgh.harvard.edu Office: (617) 643-9684 Cell: (512) 565-8076 Chenyue
Contents. Introduction
 Contents Page Contents... 1 Introduction... 1 Starting the System... 2 Introduction to ZEN Efficient Navigation... 5 Setting up the microscope... 10 Configuring the beam path and lasers... 12 Scanning
Microarray Data Pre-processing. Ana H. Barragan Lid
 Microarray Data Pre-processing Ana H. Barragan Lid Hybridized Microarray Imaged in a microarray scanner Scanner produces fluorescence intensity measurements Intensities correspond to levels of hybridization
Nasmyth Ultraview Vox User Protocol
 Nasmyth Ultraview Vox User Protocol Switch on all wall sockets labelled Nasmyth, switch camera on (power supply located on table behind monitor), switch on laser switch in laser rack, switch computer on
Training Guide for Carl Zeiss LSM 880 with AiryScan FAST
 Training Guide for Carl Zeiss LSM 880 with AiryScan FAST ZEN 2.3 Optical Imaging & Vital Microscopy Core Baylor College of Medicine (2018) Power ON Routine 1 2 Turn ON Main Switch from the remote control
GIS Module GMS 7.0 TUTORIALS. 1 Introduction. 1.1 Contents
 GMS 7.0 TUTORIALS 1 Introduction The GIS module can be used to display data from a GIS database directly in GMS without having to convert that data to GMS data types. Native GMS data such as grids and
Practical work no. 3: Confocal Live Cell Microscopy
 Practical work no. 3: Confocal Live Cell Microscopy Course Instructor: Mikko Liljeström (MIU) 1 Background Confocal microscopy: The main idea behind confocality is that it suppresses the signal outside
Training Guide for Carl Zeiss LSM 7 MP Multiphoton Microscope
 Training Guide for Carl Zeiss LSM 7 MP Multiphoton Microscope ZEN 2009 Optical Imaging & Vital Microscopy Core Baylor College of Medicine (2017) Power ON Routine 1 2 Turn Chameleon TiS laser key from Standby
it.med.harvard.edu/ris UMAX Flatbed Scanner Pathology
 it.med.harvard.edu/ris UMAX Flatbed Scanner Pathology Research Imaging Solutions RIS@hms.harvard.edu it.med.harvard.edu/ris Beth Beighlie Digital Imaging Coordinator Research Imaging Solutions Information
v. 8.0 GMS 8.0 Tutorial GIS Module Shapefile import, display, and conversion Prerequisite Tutorials None Time minutes
 v. 8.0 GMS 8.0 Tutorial Shapefile import, display, and conversion Objectives Learn how to import and display shapefiles with and without ArcObjects. Convert the shapefiles to GMS feature objects. Prerequisite
3D light microscopy techniques
 3D light microscopy techniques The image of a point is a 3D feature In-focus image Out-of-focus image The image of a point is not a point Point Spread Function (PSF) 1D imaging 1 1 2! NA = 0.5! NA 2D imaging
a) How big will that physical image of the cells be your camera sensor?
 How big will that physical image of the cells be your camera sensor?") 1. Consider a regular wide-field microscope set up with a 60x, NA = 1.4 objective and a monochromatic digital camera with 8 um pixels, properly positioned in the primary image plane. This microscope is
1. Consider a regular wide-field microscope set up with a 60x, NA = 1.4 objective and a monochromatic digital camera with 8 um pixels, properly positioned in the primary image plane. This microscope is
Point Calibration. July 3, 2012
 Point Calibration July 3, 2012 The purpose of the Point Calibration process is to generate a map of voltages (for galvos) or motor positions of the pointing device to the voltages or pixels of the reference
Everest System / Slidebook Operating Procedures
 Everest System / Slidebook Operating Procedures NOTICE: This guide is meant to supplement training, not replace it. All users must be trained first hand by a core employee. Training of others in your lab
Miniature Effect With Tilt-Shift In Photoshop CS6
 Miniature Effect With Tilt-Shift In Photoshop CS6 This effect works best with a photo taken from high overhead and looking down on your subject at an angle. You ll also want a photo where everything is
The operation manual of spotlight 300 IR microscope
 The operation manual of spotlight 300 IR microscope Make sure there is no sample under the microscope and then click spotlight on the desktop to open the software. You can do imaging with the image mode
Imaging Beyond the Basics: Optimizing Settings on the Leica SP8 Confocal
 Imaging Beyond the Basics: Optimizing Settings on the Leica SP8 Confocal Todays Goal: Introduce some additional functionalities of the Leica SP8 confocal HyD vs. PMT detectors Dye Assistant Scanning By
Getting started with Fluorospot plates.
 Getting started with Fluorospot plates. This document will guide you through the first steps in FluoroSpot assays analysis, which can be done with the AID ispot and the AID ispot Spectrum machine. It is
Axioscan - Startup. 1. Turn on the Axioscan (button to the left) and turn on the computer. 2. Log on and start the ZEN Blue software from the desktop
 and turn on the computer. 2. Log on and start the ZEN Blue software from the desktop") Axioscan - Startup 1. Turn on the Axioscan (button to the left) and turn on the computer 2. Log on and start the ZEN Blue software from the desktop 3. Press ZEN slidescan and Start System 4. Start by changing
Axioscan - Startup 1. Turn on the Axioscan (button to the left) and turn on the computer 2. Log on and start the ZEN Blue software from the desktop 3. Press ZEN slidescan and Start System 4. Start by changing
Training Guide for Carl Zeiss LSM 510 META Confocal Microscope
 Training Guide for Carl Zeiss LSM 510 META Confocal Microscope AIM 4.2 Optical Imaging & Vital Microscopy Core Baylor College of Medicine (2017) Power ON Routine 1 2 Turn ON Components and System/PC switches
ZEISS LSM 710 CONFOCAL MICROSCOPE USER MANUAL
 ZEISS LSM 710 CONFOCAL MICROSCOPE USER MANUAL START THE SYSTEM... 2 START ZEN SOFTWARE... 3 SET THE TEMPERATURE AND THE CO2 CONTROLLERS... OBSERVATION AT OCULARS... 5 STATIF PRESENTATION... 6 ACQUIRE ONE
Renishaw InVia Raman microscope
 Laser Spectroscopy Labs Renishaw InVia Raman microscope Operation instructions 1. Turn On the power switch, system power switch is located towards the back of the system on the right hand side. Wait ~10
it.med.harvard.edu/ris UMAX PowerLook 1120 Flatbed Scanner WQGF
 it.med.harvard.edu/ris UMAX PowerLook 1120 WQGF Research Imaging Solutions RIS@hms.harvard.edu it.med.harvard.edu/ris Beth Beighlie Digital Imaging Coordinator Research Imaging Solutions Information Technology