The Onager Project Group 4
|
|
|
- Annice Kimberly Harrington
- 6 years ago
- Views:
Transcription

1 . Contact Information: Bryce Trushel 4209 Brooke Tower Morgantown, WV (304) Vivid Consulting Inc. The Onager Project Group Intuitive Designs for the Future of Your Company
2 ENGINEERING PROJECT 2 The Onager Project Contact Information: Vivid Consulting Inc. Engineering Sciences Building Room 249/G11 Phone (304) btrushel@mix.wvu.edu Team Members: Bryce Trushel Garret Donahue Scott Boas Ryan Jenkins Matthew Allday 1
3 . Executive Summary Our catapult is designed for the utmost accuracy and precision, with the simplicity that anyone can maintain and use. After many tests and trials, we are confident in our design and proud to place our company s name on the design. The design was based around the concept of safety, ease of use, and low cost, allowing anyone to use it without the fear of being injured. We appreciate you for considering us and are confident you will be pleased by our product. 2
4 . The Onager Project Intuitive Designs for the Future of Your Company Introduction When presented with this project we set a short list of goals that we wanted to accomplish in our finished design: Safety Ease of use Maintainable Accuracy and Precision Adjustable Reliability We feel that our final product meets or exceeds all these goals. Throughout the research and development of this project we had many trials and tribulations, but we overcame all of our obstacles and are proud to present you with our final product. Our initial prototype was a let down to put it lightly, and major revisions needed to be done afterwards. However, we did stay true to our original concept of an onager style catapult that has a final design similar in looks, but is much more refined. Overall, our changes brought forth a whole new catapult ready to lay siege to whatever comes its way with a few very simple adjustments. Over 2000 years ago, the Greeks and Romans did not know about gunpowder, yet were able to hurl projectiles over a large distance using energy storage devices. Through the years, some modifications were made to increase the accuracy and throwing distance of these machines. The first two types of throwing machines were the catapult and the ballista. The ballista started out as a large cross bow to shoot oversized arrows at an enemy. The catapult was about 10 times larger than a ballista and threw large stones. The ballista s design consists of two pieces of wood, each fastened at one end to a torsion device rotating about a more or less horizontal axis. The free ends of the wooden pieces are connected together with a rope. The projectile to be thrown is held by the connecting rope used as a sling. When most people think of the catapult, they are actually thinking about an onager. The strange name is derived from a wild donkey kicking with its hind legs. The onager (or gonne, mangonel or nag) was typically a single arm held in a more or less vertical position by a torsion device rotating around a horizontal axis. The projectile was located in either a pocket at the top end of the arm or in an attached sling. 3
5 Methodology Brainstorming Sessions Our initial brainstorming sessions lead to the decision to build an onager style catapult. In these sessions we decided that we must have a very simple design with as few working parts as possible, yet still be as complex in the sense that it could offer a wide variety of adjustments. We also decided on what materials would be used, such as the 1 x1 x3 used to structure the impact-frame and the arm of our catapult and the.5 plywood base that would be used to provide a smooth surface for us to attach our hinge and impact-frame. At this point we had also decided that it would be springs that would power our catapult. Not only did these sessions provide us with ideas, they also allowed us to eliminate some ideas. This is where we decided that a trebuchet type design would be far too complex, and just wouldn t be as practical as an onager. We also ruled out using medical tubing as a possible power source due to its limited availability. The issue of torsion was also thrown out in this process because it was extremely hard to create a power source using this method. Construction Figures Total cost: $ Time spent building: 4 hours Time spent testing: 1 hour 30 minutes Parts: x4 s X3 s x sheet of 0.5 plywood 4 10 mini bungee cords 1 Easter egg 1 U chain coupler 1 Standard Hook 1 Shoulder hook 2 Eye hooks 2 L brackets 3 Bricks 1 Washcloth 1 Door hinge As you can see the parts a readily available and the production cost is quite low. The construction process can easily be done with minimal wood working skills and easily be automated. Requirements and Rules of the Competition The rules of the competition were fairly simple and are as follows: Fire a 50 gram projectile (golf ball) No ballista style designs Score the most points possible in 4 attempts The catapult cannot jump across firing line Must have trigger assembly 4
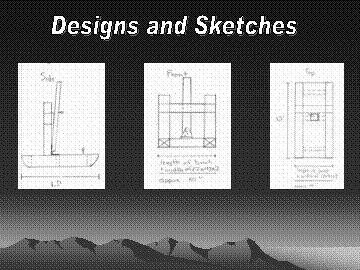
6 Must not exceed 1.5 x1.5 x1.5 in size Target Dimensions: Bulls-eye Center 100 Points Second Ring 90 Points Third Ring 80 Points Fourth Ring 60 Points Outer Ring 50 Points Target Diameter: 23.5 Target Bulls-eye Height: 20.5 Catapult Distance From Target: appox. 9 8 Sketches 5
7 6

8 Results and Discussions The Prototype This catapult was a disappointment to put it at its best. The design was simple as we had set out to do, but unfortunately it was too simple and lacked the proficiency we were looking. The overall score for our catapult was 100 points which was a tie for 2 nd to last place which depressed us slightly, however it did not discourage us and just gave us the drive to create an even better product. We knew from this performance that we needed a major overhaul, so it was back to the drawing boards to give this great idea the luster it deserved. The Retrofit We knew the concept was good but refinement was needed in order for it to achieve its true potential. There were several issues that needed to be addressed: Trigger mechanism Stable base that doesn t skip or jump Holding Device Power system Safety Adjustability The two most important was non-existent trigger mechanism and a holding device for the projectile. The one that took precedence was the trigger mechanism and the lack there of. This presented an issue with safety due to the fact it had to be launched by the hand of its user. This was solved by the use of a custom made part that was consisted of a few everyday workshop items. The latter of the major problems with catapult revolved around the fact it didn t cradle the projectile as well as it should, leading to sporadic shots that constantly went off target. We solved this by using the wider end of a large Easter egg that held our projectile much tighter than the previous coat hanger cup and stop it from bouncing around. Safety was one issue we mad sure addressed in our revision. With the invention of the trigger mechanism the majority of the safety issue was solved, but we still had to worry about a few sharp points and ends of screws that protruded through the surface of the wood. We fixed these problems by rounding a few edges and using the proper length screws. The minor issues such as the base, power system, and adjustability were initially separate, but we found as the separate pieces came together they not only solved one another but actually made for an even better product. The first minor change was the base in which we decided to add 2 x4 s and 1 x3 s to form a structure that would fit snuggly over 3 bricks. We also added screws to make adjustable feet to raise the pitch of our catapult slightly, which inherently brought adjustability with them. The second change was a swap out from springs to mini-bungee cords. These cords allowed for much smoother operation and did not stretch out when used excessively. With the use of these cords, we were then able to choose from 1 to 4 bands as a power source thereby aiding in the solution of adjustability. 7


9 Before Revision After Revision Trigger Mechanism The trigger mechanism is composed of a U-chain coupler, two eye hooks, and 1 shoulder hook. It is designed to allow for maximum safety by attaching a cord of any length to the U coupler, thereby keeping the launcher away from the arm apparatus. The cord is then pulled, unlatching the coupler from the shoulder hook and allowing the arm to travel forward. Power System The power system is composed of 4 mini-bungee cords. Each one has approximately the same force and can easily be added or removed from the catapult. This provides an incremented power system that can further be tuned by adjusting the pitch screws on the base of the catapult. The Base The base is specially designed to fit over 3 bricks snuggly. These bricks add both friction and stability to the base by not allowing it to jump or wobble in any direction. The bricks go in a 2 brick slot and a 1 brick slot. Conclusion In conclusion, with a trigger mechanism, launching is now easier and safer. Our projectile holder allows for accuracy and greater precision. The adjustable power system allows for incremented power adjustments. The padded arm rest reduces wear and tear from everyday use. With it being designed to fit snuggly over three bricks, it now stays in place when launched. Adjustable feet in the front allow for minor height adjustments. Overall this provides greater accuracy and better structural integrity guaranteeing you get the most enjoyment and reliability from your catapult. 8


10 9


11 10


12 11
13 . Index Executive Summary 2 Introduction 3 Methodology 4 Brainstorming Sessions 4 Construction Figures 4 Restrictions and Rules of the Competition 4 Sketches 5, 6 Results and Discussions 7 The Prototype 7 Prototype Picture 7 The Retrofit 7 Before Revision Picture 8 After Revision Picture 8 Trigger mechanism 8 Power System 8 The Base 8 Conclusion 8 Power Point Presentation 9, 10, 11 Index 12 Appendix Product Picture 12
Catapult Engineering
 With support from Oxfordshire County Council, Science Oxford is pleased to present; Catapult Engineering The Physics of Siege Weapons STEM Club Resource Pack Introduction: Catapult engineering involves
Tri- State Consulting Co. Engineering 101 Project # 2 Catapult Design Group #
 Tri- State Consulting Co. Engineering 101 Project # 2 Catapult Design Group # 8 12-03-02 Executive Summary The objective of our second project was to design and construct a catapult, which met certain
About Trebuchets. WarSerpent Construction. Paul Schmidt s WarSerpent trebuchet construction article. Left:
 Paul Schmidt s WarSerpent trebuchet construction article Left: Two full sized trebuchets, reenacting the historic construction of the famous WarWolf on NOVA s video documentary Secrets of Lost Empires
Desktop Trebuchet Kit Assembly Instructions
 Desktop Trebuchet Kit Assembly Instructions Contents of package (drawings are not to scale for clarity, parts that have duplicates are indicated with total number of that part to be found, example: 2X
12 Projectile Motion 12 - Page 1 of 9. Projectile Motion
 12 Projectile Motion 12 - Page 1 of 9 Equipment Projectile Motion 1 Mini Launcher ME-6825A 2 Photogate ME-9498A 1 Photogate Bracket ME-6821A 1 Time of Flight ME-6810 1 Table Clamp ME-9472 1 Rod Base ME-8735
Grade 8 Enriched Math Catapult Project 2012 Step by Step Instructions to building a catapult
 Grade 8 Enriched Math Catapult Project 2012 Step by Step Instructions to building a catapult Grade 8 Enriched Math Project INSTRUCTION SHEET FOR CATAPULT Procedures, materials and tools: below is a step-bystep
Project: Trebuchet Overview: This medieval launcher would reek. Materials: 3/4 plywood, 2 of 5/8 threaded. Minimum Cutting Area: 2 sheets of plywood
 Project: Trebuchet Overview: This medieval launcher would reek havoc on enemies castles. However, the modern day conversion using 20lbs of weight will easily through a tennis ball the length of a gymnasium.
Catapult Project. For our catapult project, we based our design off of two different types of historical
 Johnson 1 Cameron Johnson Nathan Ericksen Physics 221 November 18, 2012 Catapult Project For our catapult project, we based our design off of two different types of historical designs and then added our
Central New York Rocket Team Challenge 2018 Rocket Assembly Instructions
 Central New York Rocket Team Challenge 2018 Rocket Assembly Instructions Note: These instructions vary from those provided by the manufacturer of the rocket kits. There is also considerable varying discussion
Shoot n Sail. Why we didn t choose it: The idea was too simple. It did not have enough challenges for gamesters mentalities.
 Shoot n Sail Group 4: Lauren Davis Deborah Kasner, Yinan Kuang Alex Reiner Step 1: Brainstorming Idea: Wind-up Boats Why we didn t choose it: The idea was too simple. It did not have enough challenges
Pneumatic Catapult Games Using What You Know to Make the Throw. Pressure x Volume = Energy. = g
 Pneumatic Catapult Games Using What You Know to Make the Throw Pressure x Volume = Energy θ Mega Pascal s KE PE Range = Release Velocity g 2 1 Pneumatic Catapult Games Using What You Know to Make the Throw
Trebuchet Parts List and Overview
 Trebuchet Trebuchet Parts List and Overview The trebuchet pictured above is armed and ready to throw an object. Pulling the pin out of the trigger allows the counterweight to fall. The long end of the
DATE: January, 01, 2011 AUTHOR: Craig Macomber TOPIC: Making and operating a model onager
 DATE: January, 01, 2011 AUTHOR: Craig Macomber TOPIC: Making and operating a model onager INTRODUCTION This guide will walk you through the construction and operation of a hand held scale Roman Onager,
2018 Product Catalog
 2018 Product Catalog Modular Brass Weight Plate Our Venom Xtreme HD, (High Density Brass), is the most innovative Archery Finger Tab on the market. Combining all of the features of the Venom Xtreme finger
GE 100 Trebuchet Field Activity Instruction Sheet
 GE 100 Trebuchet Field Activity Instruction Sheet Safety Instructions: 1) Make sure that at the time of trebuchet launch, no person is leaning over/or is in close proximity of the rotating arm. 2) Only
WHICH ONE WOULD YOU CHOOSE? PART 1
 STUDENT INSTRUCTION OVERVIEW You will use a computer game as an introduction to the catapult and how it functions. You will construct a catapult. After it is constructed, you will test your catapult against
The Mighty Roman Mangonel
 The Mighty Roman Mangonel Dear Student, This exercise gives you a fun opportunity to explore some of the important aspects of engineering:- design, structures, materials, dynamics, scientific programming
Cautionary and Warning Statement. How a Trebuchet Works. Materials Included. Items Required (not included) Building the Base.
 Building the Base.") Cautionary and Warning Statement This kit is designed and intended for educational purposes only. Use only under the direct supervision of an adult who has read and understood the instructions provided
Cautionary and Warning Statement This kit is designed and intended for educational purposes only. Use only under the direct supervision of an adult who has read and understood the instructions provided
Bradley Balltrip, Andrew Coleman, AranArab, Matthew Yarbrough Team D-11, The Board Boys EF152 Spring, 2017 April 4, 2017
 Bradley Balltrip, Andrew Coleman, AranArab, Matthew Yarbrough Team D-11, The Board Boys EF152 Spring, 2017 April 4, 2017 Design and build a prototype for a child s toy. Identify a customer, they will provide
MKPLAY VAULT MINI TRAMPOLINE SERIES
 MKPLAY VAULT MINI TRAMPOLINE SERIES 55 INCH (4.5FT) TRAMPOLINE WITH SAFETY NET ENCLOSURE Weight Limit 100lbs (45kg) Person Limit 1 Persons Age Limit 3-6 years 1 TABLE OF CONTENTS Parts List Trampoline
How To Measure Your Finished Opening
 3000 Series Bifold Doors How To Measure Your Finished Opening MEASURE FROM RIGHT TO LEFT 2 PLACES (WIDTH) MEASURE FROM TOP TO BOTTOM 2 PLACES (HEIGHT) Tools Required for Assembly: Tools Needed: Phillips
Physics Lab 2.2: Tug-of-War
 Physics Lab 2.2: Tug-of-War Name Period Purpose: To investigate the tension in a string, the function of a simple pulley, and a simple tug-of-war. Materials: 1 75 cm string 2 30-cm strings 1000 g of assorted
Projectiles: Earth to Earth; The Dynamics of Catapults & Trebuchets
 NATURE Sunday Academy 2012-2013 Projectiles: Earth to Earth; The Dynamics of Catapults & Trebuchets Ann Vallie (TMCC) and Dr. Bob Pieri (NDSU) Description: In this Sunday Academy session, students will
Boat Lift Canopy Frame Assembly Instructions
 Patriot Docks Boat Lift Canopy Frame Assembly Instructions Helpful Tips: Assembling and installing the canopy frame and cover is a two person job. Additional help makes installation easier and is recommended.
SNIPERARCHERY 5.1. Press Vertical support for proper adjustment of sight, rest, etc. String jig Cam synchro bench Shooting bench
 SNIPERARCHERY 5.1 Thank you very much for acquiring a SNIPERARCHERY product. This multi-adjustment tool is an easy to use product that allows almost all of the adjustments a compound bow needs on a single
Display/Accessory Furniture
 1 Multimedia Display End-of-Range, 60-013-S00 End-of-range displayer has five 59 1 /2" 19 3 /8" 16" 163 Sloped Shelving Book Displayer sloping shelf spaces for displaying books spine out at an angle for
The Phoenix. Professional Quilting Frame. Copyright January 1, 2016 Jim M. Bagley, GraceWood, Inc (Reproduction Prohibited) Version 2.
 Version 2.") The Phoenix Professional Quilting Frame Copyright January 1, 2016 Jim M. Bagley, GraceWood, Inc (Reproduction Prohibited) Version 2.1 1 The Phoenix Professional Quilting Frame Parts List Box 1...3 Box
The Phoenix Professional Quilting Frame Copyright January 1, 2016 Jim M. Bagley, GraceWood, Inc (Reproduction Prohibited) Version 2.1 1 The Phoenix Professional Quilting Frame Parts List Box 1...3 Box
Continue gluing the remaining top parts ensuring the angled piece is glued well. Set aside and let dry. See photo below
 Radiator rev 1.1 The SE5a s radiator is one of the most recognized radiators in WW1. It is one of the components that defines the SE5a. The original SE5a has seen multiple radiator designs used during
WHEATHAMPSTEAD ARCHERY CLUB
 The Bow Beginner s Course Notes There are several types of bow available to the modern archer including recurve, compound, and longbow. Of these the recurve is the most common and is the type of bow that
16ft Polytunnel Assembly Instructions
 CONTENTS Section Page 1. FOUNDATION TUBES: Option A Ground Anchor Plates 3 2. FOUNDATION TUBES: Option B Concreted Foundation Tubes 5 3. STEEL FRAME ASSEMBLY & INSTALLATION 6 4. CROP BARS 8 5. TIMBER END
The Queen Quilter Professional Quilters Kit Frame
 The Queen Quilter Professional Quilters Kit Frame Assembly Instructions Table of Contents: Before you begin......................... Pg. 2 Wood parts............................. Pg. 3 Hardware..............................
SHOREMASTER CANOPY TABLE OF CONTENTS
 SHOREMASTER CANOPY PAGE TABLE OF CONTENTS SECTION OWNERS MANUAL Canopy Models: 1684, 16108, 2596, 30108, 40108, 40120, 50120, 20855, 30966, 40966,401066, 501066, 701066. All Hydraulic Lifts 2 Introduction
Sport-Thieme Safety Aluminium Mini Training Goal
 Assembly instructions Art.-Nr.: 116 3852 Sport-Thieme Safety Aluminium Mini Training Goal 0218214 2018 Sport-Thieme GmbH D-38367 Grasleben Germany sport-thieme.com info @sport-thieme.com Phone: +49 53
fun and adaptable pie shooting catapult!
 fun and adaptable pie shooting catapult! (made with 3D printing) a project by Maya & Noah the MyPie Catapult project: The MyPie Catapult is designed by Maya and Noah. Maya is the brains behind the design.
Introduction to Carpentry Power Tools
 Youth Explore Trades Skills Introduction to Carpentry Power Tools Description s use power tools every day, and the ability to use these tools correctly and safely is paramount. In this Activity Plan, students
Contest Field Border Construction Manual
 Contest Field Border Construction Manual TABLE OF CONTENTS Section 1 Field Construction...3 Section 2 Bill of Materials 3 Section 3 Construction.. 4 Step 1 - Layout...4 Step 2 - Bottom...4 Step 3 1 st
Sport-Thieme Safety Aluminium Mini Training Goal
 Assembly instructions Art.-Nr.: 116 3881 Sport-Thieme Safety Aluminium Mini Training Goal 0218214 2018 Sport-Thieme GmbH D-38367 Grasleben Germany sport-thieme.com info @sport-thieme.com Phone: +49 53
Sketching Fundamentals
 Sketching Fundamentals Learning Outcome When you complete this module you will be able to: Make basic engineering sketches of plant equipment. Learning Objectives Here is what you will be able to do when
Page 1. SureMotion Quick-Start Guide: LACPACC_QS 1st Edition - Revision A 03/15/16
 R K C T I Repair Kit Product Compatibility Repair Kit # Linear Actuator Assembly # LACPACC-002 LACPACC-003 LACP-16TxxLP5 (0.5-in lead screw pitch) LACP-16TxxL1 (1-in lead screw pitch) C P I R K 4 ea Flanged
The four pieces of plywood were fastened together as shown here in this view of the end of the tube in its cradle:
 After seeing how well antenna poles worked for Mike KC2EGL, Tom WB3FAE, and Don K3RLL, I pried open my wallet and bought myself a Jackite 28 foot pole to use this year for our portable operations. Actually
Fryer's Trebuchet Paper Kits
 Fryer's Trebuchet Paper Kits Things you will need 7 sheets of card approx. 0.3 mm or 0.01 inches thick 1 sheet of paper to print out to download. 2 x 6-7 mm dowel or pencils 1 paper clip String 6 cms (2.5
V4 Premium Kit. Prusa i3 Build Guide
 V4 Premium Kit Prusa i3 Build Guide Hi! Congratulations on your purchase of the DIYElectronics.co.za Prusa I3 kit, the best South African 3D Printer Kit! Hopefully this should serve as complete guide to
Door Installation. Bulletin Install Read and understand these instructions before proceeding! It saves frustration!
 Door Installation Door Series: 3300 Bulletin 1 Preparation Preliminary Examination Inspect the packaging. If the package was damaged when it arrived, contact the shipping carrier first, then notify Woodfold.
Merloni Elettrodomestici. Technical Fitting Manual FRIDGE. Language Issue/Edition Page GB /
 GB 99-11-03/01 1-38 Index 1 CONFORMITY OF APPLIANCE 3 2 MAIN ASSEMBLY TYPES 3 2.1 Under worktop 3 2.2 Double door 10 2.3 Combined 14 2.4 Single door Fridge or single door Freezer 19 2.5 Combined free-standing
ClearSpan Twist-of-the-Wrist Assembly Instructions
 ClearSpan Twist-of-the-Wrist Assembly Instructions Curved-Wall for Roll-Up Side Flat-Wall for Curtain Application 2008 ClearSpan All Rights Reserved. Reproduction is prohibited without permission. Revision
Assembly, Use and Care Instructions
 Assembly, Use and Care Instructions Product #336677 Instruction #1068318 Rev. F Thank you for purchasing a Caldwell Lead Sled DFT 2. The Lead Sled DFT 2 comes to you partially assembled. It will require
Siding Components. Installation Guide
 Siding Components Installation Guide 2016 MID-AMERICA SIDING COMPONENTS INSTALLATION GUIDE This guide will show you the products of the Mid-America Siding Components family. It provides specific installation
Dowelling joints with VS 600
 No. 112 Dowelling joints with VS 600 A Description Dowelling joints with round dowels (in addition to flat dowels) are part of the standard wood joints in furniture manufacture. This joint is very stable.
USING THE 2 TELETUBE XLS TM & TELECAT XLS TM ADJUSTABLE SIGHT TUBE
 USING THE 2 TELETUBE XLS TM & TELECAT XLS TM ADJUSTABLE SIGHT TUBE Revised 09/20/08 With the rapid proliferation of larger-aperture, low f-ratio Newtonian telescopes with 2" focusers and larger diagonal
Revised
 Indentify Non-powered panels and separate from Powered panels. Non-powered panel shown at left.. Powered panel shown at left has powerway mounted at factory. Also separate panels by surface type, width
LM6051 EASY FIORE RUCKSACK CROCHET. Find more ideas & inspiration: redheart.com 2018 Coats & Clark. Page 1 of 5
 EASY FIORE RUCKSACK CROCHET Page 1 of 5 WHAT YOU NEED RED HEART Ombra : 6 balls 3358 Viola Susan Bates Crochet Hook: 5mm [US H-8] Yarn needle. GAUGE: 12 sts = about 4 [10 cm]; 14 rows = about 4 [10 cm]
Fracture Packaging Report
 Fracture Packaging Report PKG4008 Distribution and Transport Packaging April 20 th, 2016 Team Members Group 3 Charles Buckley Luis Chong Bryce Reeves Mary Regan Maxwell Sanders Lucy Toman Table of Contents
Hip Roof Canopy Instructions
 Hip Roof Canopy Instructions - PUT SAFETY FIRST. NOT COMPLYING WITH THE PROCEDURES AND PRECAUTIONS OUTLINED IN THIS MANUAL MAY RESULT IN PERSONAL INJURY AND WILL INVALIDATE THE WARRANTY.. Before attempting
POP PLUS / SPIDER SET-UP INSTRUCTIONS
 POP PLUS / SPIDER SET-UP INSTRUCTIONS 1 Place system frame on floor with screws indicating top. Expand upwards & outwards and secure frame connectors. Pop-Up display systems are made to be set-up and taken
Clock 35 - Toyland. Construction instructions for Clock 35
 This clock has been designed for children, it is a stand-alone unit and can be positioned on a shelf or cabinet out of the reach of very young hands who may be tempted to touch. The clock is shown in two
MARQUEE INSTALLATION HANDBOOK. Curved Structures
 MARQUEE INSTALLATION HANDBOOK Curved Structures 12m Curved Roof Beam Assembly Instructions Ensure there are no overhead or underground obstructions or services before starting to assemble frame. Square
12ft Ultra Polytunnel Assembly Instructions
 CONTENTS Section Page 1. FOUNDATION TUBES: Option A Hammered-In Foundation Tubes 3 2. FOUNDATION TUBES: Option B Ground Anchor Plates 4 3. FOUNDATION TUBES: Option C Concreted Foundation Tubes 5 4. STEEL
Rolling Curtain door Manual
 Rolling Curtain door Manual Installation Maintenance parts Model 944 PHONE 800 448 8979 FAX 800 236 8722 website www.tracrite.com EMAIL tr@tracrite.com ADDRESS 216 Wilburn Road Sun Prairie, WI 53590 This
Installation Guide: Oval Trampoline
 Trampolines & trampoline parts designed to survive in the harsh Oz climate. www.oztrampolines.com.au Installation Guide: Oval Trampoline Safety Tips Here at Oz Trampolines we are passionate about your
Senior Design Project
 University of Tennessee, Knoxville Trace: Tennessee Research and Creative Exchange University of Tennessee Honors Thesis Projects University of Tennessee Honors Program 5-2016 Senior Design Project Lee
The Stirling WarWolf Trebuchet Kit RLT.com Industries Copyright, 2007
 The Stirling WarWolf Trebuchet Kit RLT.com Industries Copyright, 2007 If any part of these instructions are unreadable, you can download a PDF version from http://www.rlt.com/instructions/stirlingwarwolf.pdf
Drill Line Tension Guide User Procedure Manual
 Oilfield Solutions Inc. Drill Line Tension Guide User Procedure Manual Special Instructions I Conditions of Use Reading this user procedure manual prior to use is essential. Slip & Cut, Drill Line Tension
ANATOMY OF A BIT TM how you can tell top from bottom. four on the floor!
 ARCADE GAME BASICS 1 Learn BITSNAP ANATOMY OF A BIT TM how you can tell top from bottom. TOP BOTTOM BIT FEET 2 which COLOR-CODED BY FUNCTION Bits TM are grouped into four different categories, are color-coded.
INSTRUCTION SHEET U19
 U19 All Refrigerator and All Freezer Trim Kit Installation Product Line: U19 All Refrigerator and All Freezer Models Parts Included in Kit TRIMKITEZ1 (Part# 297333500): Single Trim Kit Components Single
Precision Steel Car s 100 T Steel Coil Car
 Precision Steel Car s 100 T Steel Coil Car Precision Steel Car www.precisionsteelcar.com info@precisionsteelcar.com Paul Vernon: (513) 571-5739 Revised 4/30/2009 Contents of Kit Main Tube Side Frame 2
APSC 150 Project: Remotely Controlled Satellite Launcher Design [Feb.2015]
![APSC 150 Project: Remotely Controlled Satellite Launcher Design [Feb.2015]](/thumbs/93/112255227.jpg "APSC 150 Project: Remotely Controlled Satellite Launcher Design [Feb.2015]") APSC 150 Project: Remotely Controlled Satellite Launcher Design [Feb.2015] Summary Through the course of 4 lab components (Lab 2-2, 2-3, 2-4, and 2-5) you will be given the opportunity to work as a group
APSC 150 Project: Remotely Controlled Satellite Launcher Design [Feb.2015] Summary Through the course of 4 lab components (Lab 2-2, 2-3, 2-4, and 2-5) you will be given the opportunity to work as a group
installation guide
 JANUS INTERNATIONAL 1 866 562 2580 w w w. j a n u s i n t l. c o m 2000 2500 3000 installation guide RIGHT DRIVE END SHOWN LH OPPOSITE LEFT TENSION END SHOWN RH OPPOSITE PUSH-UP OPERATION 2000 2500 3000
Brother Industries, Ltd. Nagoya, Japan
 4. 2001. This service manual has been compiled for explaining repair procedures of the MODEL XL-6562, XL6452, XR- 46. This was produced based on up-to-date product specifications at the time of issue,
MINI-LATHE QUICK CHANGE TOOL POST
 MINI-LATHE QUICK CHANGE TOOL POST Cutting and assembly details Machinists should familiarize themselves with the contents of this section before jumping in to the drawings. Many details are described here
PS40/PS55/PS65. Installation Instructions. Articulated TV Wall Mount Range. Issue 002
 PS40/PS55/PS65 Articulated TV Wall Mount Range Installation Instructions Issue 002 Safety Disclaimer Manual Product Safety Disclaimer - IMPORTANT SAFETY INSTRUCTIONS BELOW WARNING: Failure to provide adequate
Usage and Assembly Instructions
 Instructions #1037447 Product #795234 Revision D Usage and Assembly Instructions Rear Fork (Buttstock) Rear Fork Lock Knob Rail Lock Knob Front Fork (Forend) Rails Tilt Friction Knob Rail Extension Locks
Ping Pong Ball Launcher. Version 3.0 New Matter, 2016 Part number: 11069
 Ping Pong Ball Launcher Version 3.0 New Matter, 2016 Part number: 11069 Hardware needed to complete this project: Size Length Used Label Screw, Type 25, Phillips Pan head, Thread Cutting #4 0.375 29 A
Aerospace Speciality Products
 Specifications:! Length: 18.75"/47.6 cm! Diameter: 0.98"/24.9 mm! Weight: 1.5 oz/44 gm! Streamer Recovery! Recommended Engines:!! A8-3; B4-4; B6-4; C6-5! Skill Level: Beginner This is a model rocket kit
2008 Technical Manual
 2008 Technical Manual Adjusting the let off Before making any adjustments to the limb bolts, the four pocket set screws need to be loosened about one full turn. After adjusting the limb bolts to the desired
Open shipping crate and separate all of the different parts. Over The Top Shelters LLC
 ASSEMBLY INSTRUCTIONS FOR MODEL SH122110GN and SH122110GY Open shipping crate and separate all of the different parts. Count each part and match up with parts list. Shortages or damaged parts should be
Figure 1 - sundeck and ladder
 The Problem: The problem that has been presented to the group is the case of an elderly woman who wishes to spend time with her family on their boat. The client in this case is Vivian Alford, a 92 year
Linear Hook- on Worksurfaces
 Linear Hook- on Worksurfaces Linear Hook-On Worksurfaces come in three depths and seven lengths. Different worksurfaces have different reqirements for installation that are outlined below. 27 inch deep
Stream NXT - assembly instructions
 Stream NXT - assembly instructions Recommended settings CG (measured from root leading edge): Speed/launch camber (+down, near the wing root): Cruise camber (+down, near the wing root): Thermal camber
Installation Guide 2016
 Installation Guide 2016 BUILDERS EDGE INSTALLATION GUIDE This guide will show you the products of the Builders Edge family. It provides specific installation steps and application details. Our main goal
HD installation guide
 JANUS INTERNATIONAL 1 866 562 2580 www.janusintl.c o m 1950 1950HD installation guide RIGHT DRIVE END SHOWN LH OPPOSITE LEFT TENSION END SHOWN RH OPPOSITE PUSH-UP OPERATION 1950 1950HD SHOWN A rolling
TRAMPOLINE A SSEMBLY I N S T RUC T I ONS
 OVAL TRAMPOLINE A SSEMBLY I N S T RUC T I ONS Safety Tips At Oz Trampolines, we are passionate about your family s safety when using our trampolines and accessories. We have put together a list of safety
Wall mounting bracket
 Install Manual Wall mounting bracket Please read this manual carefully before operating your set and retain it for future reference. OSW200 P/NO : MFL63640578 (1502-REV01) www.lg.com COMPONENT Install
3 BRACKET TO GUIDE ATTACHMENT. RIGHT END Figure 1. EXTENDED BRACKET (for doors taller than 8-8 ) SERIES 650. RIGHT END COTTER PIN Figure 6
 SERIES 650. RIGHT END COTTER PIN Figure 6") 2 DOOR ARRANGEMENT. A Lay door on a clean floor inside of building and in front of opening (see Figure 1). NOTE: Door can be damaged if laid on unclean surface. B Distribute parts bags, guides, stops and
2 DOOR ARRANGEMENT. A Lay door on a clean floor inside of building and in front of opening (see Figure 1). NOTE: Door can be damaged if laid on unclean surface. B Distribute parts bags, guides, stops and
Big Oz. Rocket. User Guide V0313
 Big Oz Rocket User Guide 59824 V0313 Materials Included The Big Oz Rocket Kit should include the following materials. If something is missing, contact Customer Service at 800-358-4983. 20-ounce plastic
SETUP GUIDE FOR THE HANGING MINIBAY and SUPERBAY Golf Simulator Screen Systems.
 SETUP GUIDE FOR THE HANGING MINIBAY and SUPERBAY Golf Simulator Screen Systems www.allsportsystems.com Page 2 of 15 Rev 3/1/2018 Table of Contents INTRODUCTION 4 What s Included: 5 Additional Items Needed:
Allora ALCOVE ENCLOSURE INSTALLATION BEFORE INSTALLATION CHECK THAT YOUR ALLORA SHOWER ENCLOSURE SYSTEM IS UNDAMAGED
 Allora ALCOVE ENCLOSURE INSTALLATION BEFORE INSTALLATION CHECK THAT YOUR ALLORA SHOWER ENCLOSURE SYSTEM IS UNDAMAGED ALCOVE SHOWER Your shower can be installed to open Left hand or Right hand by rotating
GENERAL NOTES: Page 1 of 9
 Laminating A Zia Into A Turning Blank by W. H. Kloepping, Jan. 2009 This describes how a zia (the New Mexico state symbol) can be laminated into a turning blank. Materials needed: Square Turning Block
Wall mounting bracket
 Install Manual Wall mounting bracket Please read this manual carefully before operating your set and retain it for future reference. OTW150 P/NO : MFL63640588 (1503-REV01) www.lg.com COMPONENT Wall mount
Paramount MYT Tripod User Guide
 Paramount MYT Tripod User Guide Revision 1.1 December, 2014 Software Bisque, Inc. All rights reserved. Table of Contents MYT Tripod Setup and Use... 3 Height Adjustments... 3 Top Plate Adjustment... 7
Ziptrak. Overview. Ziptrak system considerations. Ziptrak Vertical screening ideal for outdoor restaurants, patios, verandas, corporate signage.
 Overview Vertical screening ideal for outdoor restaurants, patios, verandas, corporate signage. Operating big window and pergola blinds has been a difficult task for many people. Conventional spring loaded
Entrance Cabinet Plans
 Entrance Cabinet Plans www.andrewharriswoodwork.com Page 1 of 19 Introduction I have tried to ensure all steps are covered in these plans but if you find any errors in the plans or have a question then
Storage Cabinets 9000 Series Assembly Instructions
 Storage Cabinets 9000 Series Assembly Instructions Thank you for selecting Salsbury s storage cabinets. We are confident that the quality and construction of the cabinets will prove to be a good investment.
BROWNCOATS Team 7842 Engineering Notebook - Rover Ruckus
 Date Location Start Time End Time Week # September 14, 2018 AvaLAN Wireless 2:00 p.m. 6:00 p.m. 2 Meeting Goals: Discuss Brainstorming Ideas, Continue assembly of drive train Team Members in Attendance:
Mortise & Tenon Routing Procedures
 See Appendix I for complete joint specifications and guide and bit selection FMT PRO CHAPTER 4 Mortise & Tenon Routing Procedures Single Mortise & Tenon, Test Production Procedures Production Procedures
Insolroll Clutch Operated Shades Installation Instructions Installation Instructions
 All clutch operated shades are shipped fully assembled and ready for installation. Mounting screws are not provided. Screws for chain guide installation to meet the child safety standards are provided.
Angled Side Flush with Panel Face
 Identify and sort panels by like sizes, fabrics, surface type (tackable vs hard), and NON- POWERED vs POW- ERED. Non-powered panels ship without a powerway. Powered panels include a powerway. See below.
SIDE FOLDING POST ADJUSTMENTS
 SIDE FOLDING POST ADJUSTMENTS TABLE OF CONTENTS WARNINGS AND SAFETY INFORMATION 3 TOOLS REQUIRED 4 GENERAL NOTES 5 POST IDENTIFICATION 6 POST TO CURTAIN CONNECTIONS 8 P01/P03 LOCK PLATE HEIGHT ADJUSTMENT
Safe BB Gun Shooting
 CMP BB Gun Shooting Poster Series - I Safe BB Gun Shooting Safe BB Gun Handling: 1. I will always keep my gun muzzle pointed in a safe direction I will never point it at a person 2. I will always keep
O W N E R ' S M A N U A L
 TABLE TENNIS TABLE MODEL NOS. T861 T861B O W N E R ' S M A N U A L 1. Read this manual carefully before starting assembly. Read each step completely before beginning each step.. Some smaller parts may
Installation Manual. Solid Plastic Toilet Partitions. IN CANADA & AREAS OTHER THAN U.S.A.: IN THE U.S.A.:
 Installation Manual Solid Plastic Toilet Partitions Toilet Partitions & Lockers IN THE U.S.A.: Hadrian Inc., 7420 Clover Avenue, Mentor, OH 44060 Telephone: 440-942-9118 Fax: 440-942-9618 U.S. toll free