Drop Spine Box. Tricia Morris. Design by: 2006 Craft TV Weekly, Inc.
|
|
|
- Annabelle Paulina Fields
- 5 years ago
- Views:
Transcription


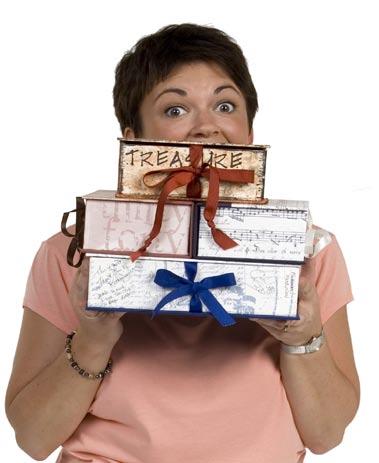


1 Drop Spine Box Design by: Tricia Morris

 Scissors FEATURED PRODUCTS Club Scrap: Drop Spine Box kit (see Tip Box below for list of supplies included) SUPPLIES")
2 1 Think inside the box! In a marathon of gluing, folding and smoothing, Tricia shows how to make a Drop Spine Box. The steps are many, but the reward is great! So take a little time, rewind the Webisode and follow along as Tricia guides you step-by-step. When it s done, it will seem like it was easy, and you ll have a beautiful box of your own in which to store your treasures. TOOLS Bone Folder Ruler Pencil Foam Brush for glue (included in Club Scrap Kit) Scissors FEATURED PRODUCTS Club Scrap: Drop Spine Box kit (see Tip Box below for list of supplies included) SUPPLIES (included in Club Scrap Kit) Book Binding Glue Ribbon, 1 yard Starting your Box The Club Scrap Drop Spine Box Kit includes all the Cover Board and Papers you need for this project. If you don t wish to use the kit, you will need the following: 1/8 Book Board cut to the following sizes: Two Cover Pieces, 5 1/4 x 7 3/8 One Spine Piece, 2 5/8 x 7 3/8 Two Long Walls, 2 1/2 x 6 3/4 Two Short Walls, 2 1/2 x 5 1/8 One Box Tray Base, 5 1/8 x 7 Solid Cardstock for the cover, cut to the following sizes: Outer Wrap, 8 3/4 x 10 3/4 Inside Spine Wrap, 5 x 7 Patterned Text Weight Paper for front cover and tray base, cut as follows: Box Tray, 25 1/4 x 6 1/2 Inside Box Tray, 4 3/4 x 6 5/8 Outside Cover, 5 x 8 3/4 Inside Cover 5 x 7


3 2 1 Identify and label all Cover Board, Wall Board, and Cover Paper pieces with a pencil according to the measurements in the Tip Box above. GLUE TIP: Throughout this project, Tricia places glue on the piece that has a specific boundary where the glue begins and ends. By doing this, she can be certain that there is glue exactly where she needs without any excess. 2 Assemble the Box Base. Locate the Long and Short Walls and the Tray Base. Arrange as indicated in Figure A. Run a bead line of glue onto the long edge of the Short Wall and position onto the top surface of a short edge of the Tray Base. Hold the board in place until it stands on it s own. GLUE TIP: Tapping the glue with the foam brush will spread the glue evenly and remove any excess to keep your gluing neat. SHORT WALL LONG WALL BOX TRAY BASE LONG WALL FIG. A SHORT WALL


4 3 3 Apply glue to one short edge and one long edge of a Long Wall piece and place onto the top surface of the long edge of the Tray Base to create a corner with the piece glued in Step 2. Use gentle pressure while pushing the boards together and hold in place for 60 seconds. Glue the second Long Wall piece in the same manner. When gluing the last Short Wall, apply the glue to the face of the short edges and to the bottom of the long edge. The last Short Wall is attached with the long edge resting on the Base and the face resting against the edges of the Long Walls. All of the Walls rest on top of the Box Tray Base, not against the edges or next to the Base Assemble the Cover. Lay the Cardstock Outer Wrap horizontally onto the work surface, right side down. Measure 1 1/2 in from the right edge of the Wrap and draw a pencil guideline. Taking the Cover Board, make a pencil line 1 1/2 from the right edge. 4 5 Brush glue onto the Cover Board in the 1 1/2 measured space. Place the Cover Board onto the Outer Wrap lining it up on the guideline and centering it vertically as shown. GLUE TIP: When gluing, apply the glue to the center and brush it from the center out to the edges to get an even application.


5 4 Place a ruler along the bottom edge of the freshly glued Cover Board to act as a guide. Brush glue onto the back of the Spine Board piece and place onto the Outer Wrap, leaving a 1/4 gutter between the Cover Board and the Spine Board. This gutter allows space for the Cover to open and close easily. 6 7 Brush glue onto the face of the remaining Cover Board; lay the Cover Board onto the Outer Wrap, 1/4 from the Spine Board. Use the ruler to ensure that it is lined up with the other boards. GLUE TIP: By now, you have plenty of glue in the foam brush. Instead of adding more glue from the bottle, use the glue that is already on the brush. This will give you enough glue without creating oozing. 1/4 gutter glued area COVER SPINE COVER outer wrap 1/4 gutter FIG. B


6 5 8 Create mitred corners. Using a ruler turned up on its edge, make a pencil line at a 45 degree angle across each corner of the Outer Wrap. Cut off the corners just outside the pencil line. Use a bone folder to create score lines onto the Outer Wrap along the Cover Boards edges. Wrap the Outer Flaps around the Cover Boards to train them, before gluing anything down. 9 Brush glue onto the long Outer Wrap flaps and wrap over the Cover Boards. To make the mitred corners, use the bone folder to tuck in the little overhang of Cardstock that resulted from folding the flap up--like wrapping a package. Do this for both corners. Glue the short flaps to the Cover Board. Smooth all flaps with bone folder. While the glue is still wet, turn the Cover over and gently smooth the Cover Wrap Cardstock to the center using the bone folder and then use your fingers to push the Cover Wrap into the gutters. 10 With the Cover lying right side up on the work surface, apply glue to the exposed Cover Board. Lay the Patterned Outside Cover Paper onto the exposed Cover Board, centering it from top to bottom and overlapping the Cardstock Outer Wrap slightly. Smooth with the bone folder.


7 6 11 Turn the Cover over. Mark and cut the corners at a 45-degree angle leaving 1/8 around the corners of the cover board. Glue and wrap the flaps following the instructions in Step 9. Run the bone folder along all edges of the Cover to make them square and neat. GLUE TIP: If you sense you need more glue, run a thin line of glue in the crease and brush it out to the edges. This will ensure the glue does not ooze out as you push the paper onto the surface. Brush glue onto the Inside Spine Cardstock and place onto the center of the uncovered Spine Board. The Spine Cardstock will glue over the top of the 1/4 gutters and into the margins of each of the Cover Boards. Work the paper into the gutters while the glue is still wet making sure the cover lies flat, but is still able to bend. 12


8 7 13 Attach ribbon tie. Place the Cover on the work surface so that the inside is facing up. Cut 1 yard of ribbon in half. Glue a piece of ribbon to the center point of each Cover Board. To finish covering the lid of the box, locate the Cover Board that has the Patterned Outside Cover already glued to the other side. This is the Inside Front Cover. Brush glue onto the Patterned Inside Cover Paper and adhere it to the Inside Front Cover Board, leaving a small proportioned border around the edges and aligning the paper with the Inside Spine. 14 Important: Take great care to locate the Inside Front Cover and glue the Patterned Inside Cover Paper to it. The lid of the box should be covered with the patterned paper, and the rest of the box covered with the solid cardstock and the finished Box Tray. 15 Wrap the Box Tray Base. On the unprinted side of the long Patterned Box Tray Paper, measure 1 in from the short edge on the left side of the paper, and make a pencil line. Measure 1/2 up from the long side bottom edge and draw a pencil line.


9 8 16 Brush glue onto the outside of a Short Wall of the Box Tray Base you made earlier. Lay the Box Tray Base onto the Patterned Box Tray Paper, aligning the bottom corner of the box with the 1 and 1/2 guide marks. Glue the 1 flap to the side of the Box Base. 17 Glue the Patterned Paper to each of the three remaining walls of the Box Base in the same manner, gluing and wrapping one wall at a time, making sure to align your box with the pencil guideline at the bottom of the paper. 18 Cut a V into each corner of the paper at the bottom of box to create a mitred flap. Glue flaps onto the bottom of the Box Tray Base, making sure not to use too much glue.


10 9 19 Make a crease in the Patterned Paper at each corner of the Box Tray Base. Use scissors or a craft knife to cut along each of the four creases to create flaps. Fold the short flaps into the inside of the box to train the paper. Pull the short flaps out, apply glue and refold them smoothly into place. On the two long flaps, trim off 1/8 of paper on each side. This will allow the Patterned Paper to easily fold over the edge of the Box Tray Base. Repeat the process in Step 19 to train and glue the flaps. Cover the inside bottom of the box. Apply glue to the Patterned Inside Box Tray Paper and place in the bottom of the box. Smooth with a bone folder Attach the Box Tray Base to the Cover. Thoroughly brush glue onto the entire bottom of the Box Tray Base. Position it onto the only remaining exposed Cover Board, centering it with the three outer edges and aligning it towards the gutter. Take great care not to allow it to extend into the gutter-fold area. Gluing the Box Tray into the gutter-fold will prevent the box from folding in and closing aroung the tray. Guess what? You re done!


11 10 You can create a variety of beautiful boxes using different papers and ribbons and different sized book board pieces. Once you ve made the box, add ink, stamps, embellishments, whatever you can think of to enhance the box. All of these boxes were made using Clup Scrap kits available online at You can also create divider trays for the inside of the box, as was done here. The techniques are the same as for creating the box itself. So have fun, and think inside the box! Congratulations You ve just completed your Drop Spine Box, but the fun doesn t stop there! Be sure to stop back by The Scrapbook Lounge every week for more exciting new twists on scrapbooking!
card KeEper Tricia Morris Design by: 2006 Craft TV Weekly, Inc.
 card KeEper Design by: Tricia Morris card KeEper 1 Tricia folds and she scores! With basic bookbinding materials and a handy Scor-it tool, Tricia creates an elegant organizational Card Keeper that can
MonOgrams To Mail. Tricia Morris. Design by: 2007 Craft TV Weekly, Inc.
 MonOgrams To Mail Design by: Tricia Morris 1 Stamp and mail! Tricia is reviving two classic arts: monogramming and hand-written notes! She starts by making two clever folders to hold her projects. Then
Pocket Album. Supplies Needed: CS Bookbinding Glue CS Grid Ruler Bone Folder Foam Brush Pencil Scissors
 Pocket Album Kit Ingredients: (2) 5.25x7.25 Book Board (2) 6.5x8.5 Cover Papers (2) 4-7/8x7-1/8 Inside Covers 7x11.5 Spine (7) Die Cut and Scored Inside Pages (7) 5.5x7 Translucent Inside Pages 1 Yard
Basic Scrapbook Cover
 A KoalaKat Designs TUTORIAL SKILL LEVEL: BEGINNER Basic Scrapbook Cover 2014 by Geneva Campitelli / Koalakat Designs All Rights Reserved www.koalakat.com This tutorial is about creating a basic chipboard
Pop UPS with Ease JUDI WATANABE. Design by: 2006 Craft TV Weekly, Inc.
 Pop UPS with Ease Design by: JUDI WATANABE 1 It s poppin fresh! Judi Watanabe from JudiKins pops in to show how to add a fun 3-D element to pages--the pop up! She creates a beautiful layout of a day exploring
Design Guide. Windows of Wonder. with Tricia Morris TVWeekly.com, Inc.
 Design Guide Windows of Wonder with Tricia Morris 2008 TVWeekly.com, Inc. Shake, Shake, Shake Tricia shakes things up a bit in The Scrapbook Lounge with both a birthday card and a scrapbook page lots of
A Proper Gentleman's Board Book
 Designed by ~ Annette Green Graphic 45 Supplies: 1 pack A Proper Gentleman DCE 1 pack 12x12 Chipboard Sheets Black 1 pack G45 Staples Antique Metal Clock Keys 1 pack G45 Staples Regular Tags Black (4501806)
Retreat 2007 Greetings to Go Hometown
 Retreat 2007 Greetings to Go Hometown Materials: Hometown Greetings to Go UM Borders and Backgrounds Embellishment Pack Don t Get Us Started Wood Mounted Stamp Welcome Home Alphabet Stickers White Glossy
Wax Resist. Judi Watanabe. Design by: 2007 Craft TV Weekly, Inc.
 Wax Resist Design by: Judi Watanabe 1 Wax on, wax off! Judi is resisting her paper crafting projects with wax! She protects photos and inked items with a little wax and then she gets creative. Judi rubs
September 2008 Greetings to Go Cyprus
 September 2008 Greetings to Go Cyprus Materials: Cyprus Greetings to Go Cyprus Unmounted Font and Borders & Backgrounds Cyprus Wood Mounted Stamp Cyprus Wood Mounted Celebrate Everything Stamp Cyprus Wood
BuTterflies are free. Michael Strong. Design by: 2007 Craft TV Weekly, Inc.
 BuTterflies are free Design by: Michael Strong 1 Paper cloisonn! Michael is recycling magazines and reinventing cloisonn. He starts by stamping onto a colorful magazine page. Some gold emobssing powder
Garden Goddess Mixed Media Binder Album
 Designed by ~ Annette Green Graphic 45 Supplies: 1 each Garden Goddess 8 x 8 Paper Pad 1 pack Garden Goddess Chipboard 1 pack Garden Goddess Tags & Pockets 1 each Mixed Medium Album Kraft 1 pack G45 Staples
Decorative Box with Easel Card Set & Side Waterfall Album
 Designed by ~ Annette Green Graphic 45 Supplies: 1 ea Botanical Tea Deluxe Collector's Edition (4501684) 1 ea Kraft 5 x 5 Mixed Media Box (4500984) 1 pk G45 Staples Metal Door Pulls (4500548 or 4500842)
Christmas Magic Merry Christmas Lantern
 Designed by ~ Annette Green Graphic 45 Supplies: 1 each Deep Rectangular Matchbook Box (4501520) 1 each Christmas Magic Collection Pack (4501735) 1 pack Christmas Magic Chipboard (4501737) 1 pack Metal
~MINI Scrapbooks~ By: Charlene Adair Hunter Of the Dating Divas Step 1) Make sure you have ALL the supplies you will need.
 Make sure you have ALL the supplies you will need.") ~MINI Scrapbooks~ By: Charlene Adair Hunter Of the Dating Divas Step 1) Make sure you have ALL the supplies you will need. Cutting For cutting you are welcome to use scissors and a ruler, I used a 12 paper
~MINI Scrapbooks~ By: Charlene Adair Hunter Of the Dating Divas Step 1) Make sure you have ALL the supplies you will need. Cutting For cutting you are welcome to use scissors and a ruler, I used a 12 paper
There are three primary units to this box: two three-sided trays (one made to fit over the other) and one case that wraps around the trays.
 and one case that wraps around the trays.") Instructions for Basic Drop-Spine Box by Sandra Liddell Reese There are three primary units to this box: two three-sided trays (one made to fit over the other) and one case that wraps around the trays.
Instructions for Basic Drop-Spine Box by Sandra Liddell Reese There are three primary units to this box: two three-sided trays (one made to fit over the other) and one case that wraps around the trays.
Hot Wired. Michael Strong. Design by: 2007 Craft TV Weekly, Inc.
 Design by: Michael Strong 1 Extra foam, please! Michael recycles scrap foam into scrapbook embellishments and a whole lot more. With the help of a hot new foam cutter, he takes old foam packing materials
DOROTHY SIMPSON KRAUSE: PROJECTS
 DOROTHY SIMPSON KRAUSE: PROJECTS Gathering Memories: a paper portfolio This small portfolio of colored paper with pockets is perfect to hold and display some of the small items you ll collect on your cruise.
September 2010 Greetings to Go Adobe
 September 2010 Greetings to Go Adobe Materials: Adobe Greetings to Go Adobe Wood Mounted Adobe Collage Stamp Adobe Art Nouveau Today is Yours Stamp Adobe Greeting Great Stamp Adobe and FontArt Adobe Beads
Binding a Limp-bound Book which make great site tokens or personal largess
 Binding a Limp-bound Book which make great site tokens or personal largess As presented by THLady Jorhildr Hrafnkelsdottir version 1.2 2 Miniature Bookbinding - THLady Jorhildr Hrafnkelsdottir Larger books
DO-IT-YOURSELF DISNEY-INSPIRED GIFT WRAP DISNEY
 DO-IT-YOURSELF DISNEY-INSPIRED GIFT WRAP YOU WILL NEED*: Printed templates Scissors Tape Glue Craft paper Various ribbon *Additional supplies may be needed for each version and are listed before Step 1.
Handmade Hard-Bound Scrapbook Cover
 Handmade Hard-Bound Scrapbook Cover Equipment Guilotine paper cutter Mod Podge roller applicator Mod Podge roller Paper folding knife The Cinch binding machine Scissors Iron Wire cutters Materials 15 inch
Design Guide. Divide and Conquer. Designed by: Michael Strong TV Weekly, Inc.
 Design Guide Divide and Conquer Designed by: Michael Strong 2008 TV Weekly, Inc. One stamp, many ways In this week s Webisode Mike conquers his fear of division and shares some artistic design tips too.
March 2009 Club Scrap Common Threads
 March 2009 Club Scrap Common Threads Materials: Common Threads CS Kit Common Threads Embellishment Pack Common Threads Unmounted Borders & Backgrounds Tools: 12 Paper Trimmer 13 CS Grid Ruler Adhesive
Do # 11 Tile Message Board
 Do # 11 Tile Message Board Supplies Needed: 6x6 tiles (or larger!), felt scraps, embellishments (feather, copies of the Be you, Bravely logo, ribbon, stickers, scrapbook paper), Mod Podge, 1 dry erase
Designed by Annette Green
 Designed by Annette Green Graphic 45 Supplies: 2 sheets Botanical Tea (#4500875) 1 sheet Robin's Egg (#4500881) 1 sheet Hello Friend (#4500882) 1 sheet Sweet Chamomile (#4500884) 1 pack Chipboard Tags
How To Make A Simple Circuit & Switch
 How To Make A Simple Circuit & Switch Our video tutorial at www.artgonewild.com shows how to make a simple circuit & switch, which you can view at www.artgonewild.com. The sample card shown in the video
Six FUN! projects for those who are new to sewing, returning to sewing or just want to sharpen basic skills.
 Six FUN! projects for those who are new to sewing, returning to sewing or just want to sharpen basic skills. 1. Clutter Control Bags 2. 3-Button Book Cover 3. Fabric Stash Pincushion 4. Pocket Tissue Case
lay it on me sketch layouts
 scrapbook s lay it on me sketch layouts featured products/ Chatterbox Happy Garden papers Scenic Route Loveland papers Crate Paper Sweet Branch papers BasicGrey painted brads Crate Paper brads and rub-ons
June 2017 Greetings to Go. Pattern Play
 Assembly Line Cardmaking June 2017 Greetings to Go Pattern Play Pattern Play Materials: Greetings to Go Tools and Supplies: Scor-Pal Adhesive Tape Bone Folder CS Foam Adhesive Circles Paper Trimmer 3x14
Easy Twist Pop-Up Panel Card
 Easy Twist Pop-Up Panel Card These cards are very popular, and the instructions online vary greatly. Some are just way to complicated. This is the easiest way I ve found to make it. I hope it helps you.
Designed by Gloria Stengel
 Designed by Gloria Stengel Graphic 45 Supplies: 1 sheet August Cut Apart (#4501043) 1 sheet August Flourish (#4501044) 1 each 6x6 Patterns & Solids Pad (#4501053) 1 2 pack Ephemera Cards *1 for each month
Trebuchet Construction Instructions
 Trebuchet Construction Instructions Follow these instructions step by step to create your trebuchet. Materials: Trebuchet Template (6 pages cardstock) Trebuchet Template (1 page paper) One unsharpened
April 2011 Greetings to Go Welcome
 April 2011 Greetings to Go Welcome Materials: Welcome Greetings to Go Welcome Unmounted Borders & Backgrounds and FontArt Welcome Wood Mounted Welcome Home Stamp Welcome Wood Mounted Extraordinary Stamp
Surprise Box With Flair
 Design by: Judi Watanabe 1 Boxed Greetings! Judi has come up with a surprise gift box that is sure to please everyone on your list. Lots of dimension, lots of decorating space, and there s even room for
Syracuse University Library Department of Preservation and Conservation Manuals. Drop Spine Box
 Drop Spine Box The "drop spine" box is a more rigid enclosure than the phase box. It is designed to protect vellum and significant bindings from wear, light and rapid environmental changes. All measurements
Additional Supplies: Tools, Adhesives & Ink: Notes:
 Designed by ~ Annette Green Supplies: 1 ea Imagine 12x12 Collection Pack 1 pk Imagine Chipboard 1 ea Antique Brass Door Plates & knobs 1 ea Decades Dye Pad : Robin's Egg Light Blue (4501717) (4501719)
Printable Tutorial: Exploding Box Mini Album
 Printable Tutorial: Exploding Box Mini Album scrapgirls.com/all-posts/printable-tutorial-exploding-box-mini-album/ Digital scrapbooking supplies used: Spring is Here Collection Biggie ScrapSimple Craft
May 2008 Greetings to Go Body & Soul
 May 2008 Greetings to Go Body & Soul Materials: Body & Soul Greetings to Go Body & Soul CS Wood Mounted Stamp Set Body & Soul Unmounted Borders & Backgrounds and Fonts Body & Soul I Love Your Spirit Stamp
August 2008 Greetings to Go Cruisin
 August 2008 Greetings to Go Cruisin Materials: Cruisin Greetings to Go Cruisin Unmounted Font and Borders & Backgrounds Cruisin Wood Mounted Stamp Set Cruisin Wood Mounted Happy Birthday Stamp Tools: Bone
euphoria collection kit
 scrapbook.com euphoria collection kit featuring/ Euphoria paper collection collection kit created by/ kelly goree designer note/ Use scraps first if at all possible. instructions/ kit supplies/ 1 Euphoria
cards and Memories Judi watanabe Design by: 2007 Craft TV Weekly, Inc.
 cards and Memories Design by: Judi watanabe Cards and memories 1 Scrap your cards! Judi has an intriguing idea: use the same rubber stamp throughout the year to create beautiful cards for every occasion.
by Jen (ozegran) for Scrapadabadoo Craft
 for Scrapadabadoo Craft") by Jen (ozegran) for Scrapadabadoo Craft Supplies Used Tools Used Tim Holtz Wallflower paper 12"x12 pad Paper trimmer Chipboard (medium weight) Scoreboard & bone folder - 5 @ 12 x12 Scissors - 2 @ 11 3/8
by Jen (ozegran) for Scrapadabadoo Craft Supplies Used Tools Used Tim Holtz Wallflower paper 12"x12 pad Paper trimmer Chipboard (medium weight) Scoreboard & bone folder - 5 @ 12 x12 Scissors - 2 @ 11 3/8
The Art of Giving. Soapbox Gift Boxes
 The Art of Giving Soapbox Gift Boxes Our adorable DIY little gift boxes are not only beautiful but fragranced too. Easy to make, these little gems embody the art of giving. box size 3¾ x 2½ X 1½ What s
Features in Fabric STEP: 2 STEP: 1
 Features in Fabric We have all been saving scraps of fabric left over from other projects, right? With the Features in Fabric Board, you can mount fabric and embroidery for display simply and attractively.
PROJECT TITLE: Celtic Unity. PROJECT MAKER: Leanne Ballschmieter Quilted by: Emily Klein-Ballschmieter ISSUE: 28-05
 PROJECT TITLE: Celtic Unity PROJECT MAKER: Leanne Ballschmieter Quilted by: Emily Klein-Ballschmieter ISSUE: 28-05 PROJECT BLURB: Fascinated by the Celtic interlinked designs Leanne finally plucked up
December 2009 Greetings to Go Ornamental
 December 2009 Greetings to Go Ornamental Materials: Ornamental Greetings to Go Ornamental Unmounted Borders & Backgrounds and Font Ornamental CS Wood Mounted Brightest Ornament Stamp Ornamental I Love
Hello Pumpkin. Deluxe Scrapbooking Workshop. 2 single pages, 2 layouts. Featured Technique: Using Mixed Media
 Deluxe Scrapbooking Workshop Hello Pumpkin 2 single pages, 2 layouts Featured Technique: Using Mixed Media Additional Materials Needed: D1784 Z2805 Z6502 Z2812 Z4181 Z1204 Z2060 Z2089 Z4214 My Acrylix
Collapsible Book Cradle These instruction copyright Tara O Brien, 2014
 Collapsible Book Cradle These instruction copyright Tara O Brien, 2014 Materials: book board covering material - we ve used tyvek and buckram pva 3BT (Board Thickness) jig the height of the cradle book
How to make a... Strictly Dancing Tri Fold Box
 Shopping List Grand Calibur Die Cutting Machine : Shopping WIZGC-200 List:- Grand Sue Calibur Wilson Die New Cutting Zealand Machine Collection : WIZCAL Sue ~ Wilson Wellington Austrian Die Collection
Great Outdoors. October 2007 Club Scrap. Materials: Club Scrap Great Outdoors Kit Embellishment Pack Wood Mounted Stamp Set UM Borders and Backgrounds
 October 2007 Club Scrap Great Outdoors Materials: Club Scrap Great Outdoors Kit Embellishment Pack Wood Mounted Stamp Set UM Borders and Backgrounds Tools: 12 Paper Trimmer Adhesive Tape Paper Piercing
August 2007 Greetings to Go Academy
 August 2007 Greetings to Go Academy Materials: Academy Greetings To Go Academy UM Borders and Backgrounds Tools: Paper Trimmer Adhesive Small Circle Punch Dark Brown Dye Ink (3) Photo Turns White Cardstock
INSTRUCTIONS. Vintage Scrapbook Page Layout #1 12 x 12 inches with photo mat and pull-out photo/journaling tag
 INSTRUCTIONS Vintage Scrapbook Page Layout #1 12 x 12 inches with photo mat and pull-out photo/journaling tag My Angel Policy You may use the instructions included with this tutorial to create and produce
andy Cane Pop-Up Card
 andy Cane Pop-Up Card Project created by Jo-Ann Fabric and Craft Stores SUPPLIES & TOOLS: Cardstock: white, green, light red 12"x12" Paper, cream holly print Glitter alphabet stickers, black Self-adhesive
Designed by Gloria Stengel
 Designed by Gloria Stengel Graphic 45 Supplies: 2 sheets Cut Apart (#4501051) 2 sheets Flourish (#4501052) 1 pack Cardstock Tags and Pockets (#4501056) 2 Large Tags - Ivory (#4500849) 1 pack Washi Tape
Design Guide TVWeekly, Inc.
 Design Guide Host: Nikki Mueller 2008 TVWeekly, Inc. Nikki joins our team with a great jewelry project The common denominator for beads is that they all have a hole in them. From there, they can be made
Cardboard Model Buildings
 Cardboard Model Buildings Get more model kits from http://www.modelbuildings.org PRINTING & ASSEMBLY TIPS: These OO designs can easily be resized by reducing the print percentage as follows: OO scale is
October 2013 Greetings to Go Lock & Key
 October 2013 Greetings to Go Lock & Key Lock & Key Materials: Greetings to Go Club Scrap Collection Unmounted Stamps Lock & Key Materials not included in the Club Stamp kit: Unmounted (UM) Borders & Backgrounds
Designed by Maria Cole
 Designed by Maria Cole Graphic 45 Supplies: 1 sheet of Every Blooming Thing (4501472) 1 sheet of Plant Kingdom (4501474) 1 sheet of Seasonal Splendor (4501475) 1 sheet of Verdant Woodlands (4501479) 2
SASKATOON, Saskatchewan
 CONSTRUCTION GUIDE AVRO ARROW (CONTEST VERSION) Copyright, Bill Jones, 2004 SASKATOON, Saskatchewan This is a work in progress, so there are a couple of rough areas ( I ll point out those that I m aware
Design Guide. Heavy Metal. with Michael Strong TVWeekly.com, Inc.
 Design Guide Heavy Metal with Michael Strong 2008 TVWeekly.com, Inc. It s Pop Art. Mike is the known around The Lounge as the king of recycling. This week he s doing his part to save aluminum soda cans
Reunion. Assembly Line Cardmaking. December 2014 Greetings to Go
 Assembly Line Cardmaking December 2014 Greetings to Go Reunion Reunion Materials: Greetings to Go Club Scrap Collection Unmounted (UM) Stamps Unmounted (UM) Borders & Backgrounds Unmounted Greeting Unmounted
Club Scrap Special Edition From the Heart
 Club Scrap Special Edition From the Heart Supplies: From the Heart Kit From the Heart Unmounted Rubber Stamps Tools: Adhesive Scissors Tape Paper Trimmer Memories Chalk Red Ink Stylus Tool with Blender
CARD # 1. Designed by Gloria Stengel. Place In Time - December Card Be Merry. Graphic 45 Supplies: Additional Supplies: Tools & Adhesive Instructions:
 Place In Time - December Card Be Merry CARD # 1 Designed by Gloria Stengel Graphic 45 Supplies: 218 sheets piece December of red Cut-Apart twine (#4500614) 18 sheet piece December of red Foundations sparkle
SEPTEMBER 2018: MINIATURE PHOTO ALBUM
 SEPTEMBER 2018: MINIATURE PHOTO ALBUM Materials and Supplies: Thin cardboard or cardstock for the album cover Attractive complementary papers Tacky Glue Glue Stick X-acto knife Scissors Strip of soft,
October 2007 Greetings to Go Great Outdoors
 October 2007 Greetings to Go Great Outdoors Materials: Great Outdoors Greetings To Go Wood Mounted Grass and Tree Line Stamp Set Wood Mounted Enjoy Stamp Wood Mounted Got Adventure? Stamp Club Stamp Wood
House of ATC cards. Michael strong. Design by: 2007 Craft TV Weekly, Inc.
 House of ATC cards Design by: Michael strong House of atc cards 1 Scallops! Michael is building a house of cards for his Artists Trading Cards. Because each card is a work of art in miniature, each deserves
August 2015 Club Scrap Deluxe. Woven Strands
 Assembly Line Scrapbooking August 2015 Club Scrap Deluxe Woven Strands Materials: Woven Strands Deluxe Kit with Embellishment Option Tools and Supplies: 12 Paper Trimmer Adhesive Foam Adhesive Tape 3x14
Graphic 45 club august 2013
 Graphic 45 club august 2013 STUDENT SUPPLY LIST Paper Trimmer Adhesive (dry, liquid, glue dots, 1/8 sookwang tape) Foam Squares Pencil Ruler Scissors Craft Knife & Cutting Mat Vertical Photos: one 4 x
June 2007 Club Scrap Chapter One
 June 2007 Club Scrap Chapter One Materials: Club Scrap Chapter One Kit Embellishment Pack Wood Mounted Rubber Stamp Set Unmounted Borders & Backgrounds You Did It Wood Mounted Stamp Tools: Stapler 12 Paper
Constellations. Assembly Line Cardmaking. January 2015 Greetings to Go
 Assembly Line Cardmaking January 2015 Greetings to Go Constellations Constellations Materials: Greetings to Go Club Scrap Collection Unmounted (UM) Stamps Unmounted (UM) Borders & Backgrounds Unmounted
Visit our web site:
 The all-in-one, compact carry-case which allows you to score, measure, trim, embellish; and create boxes, shaped card blanks, envelopes and more Visit our web site: www.crafterscompanion.co.uk Introduction
Design Guide. Spinning Class. with Tricia Morris TVWeekly.com, Inc.
 Design Guide Spinning Class with Tricia Morris 2008 TVWeekly.com, Inc. No calories will be burned! Get ready for a paper crafting workout with Tricia. Although you won t burn any extra calories, you ll
The {Stamps} of Life Blue Snow Globe Shaker Card
 The {Stamps} of Life Blue Snow Globe Shaker Card Designed by Gilbert Whitmer, Jr. For more of my card designs visit: Products used The Stamps of Life November 2009 Joy2Christmas Digital Stamp Set Snowflake
Terrific Papers Creative Project Instructions
 Origami flowers You ll need: two sheets of Terrific Papers in the design of your choice, glue or a glue gun, small-diameter dowel, florist s tape, green construction paper, and scissors Note: Each flower
How to make a... Let it Snow Box Card~ Part 1. Shopping List:-
 How to make a... Let it Snow Box Card~ Part 1 Shopping List:- Grand Calibur Die Cutting Machine : WIZCAL Spellbinders All in One Tool : WIZTOOL Sue Wilson `LET IT SNOW` Die Festive Collection : CED3004
Sky Eagle. User Guide. Cautionary and Warning Statements
 Sky Eagle User Guide 60089 V0613 Cautionary and Warning Statements This kit is designed and intended for educational purposes only. Use only under the direct supervision of an adult who has read and understood
The Hearse Carriage Assembly Instructions Page 1.
 The Hearse Carriage Assembly Instructions Page 1. The Hearse Carriage Assembly Instructions Page 2. WHAT YOU'LL NEED: Scissors, Elmer's glue (or a glue stick), a needle, two toothpicks, a sharpened pencil,
{mini} MAKER STATION CUTTING: When width is specifi ed, insert 7 or 9 depending on which size station you are making.
 {mini} MAKER STATION This arm rest organization station has a hidden superpower a thin piece of metal in the body and magnets in the interchangeable accessories that include a small storage basket and
Cupcake Box Gift Set Designed By: Amanda Corbet June 2012
 Cupcake Box Gift Set Designed By: Amanda Corbet June 2012 Do you need a really bright and fun gift to celebrate someone s birthday? Well this set has it all for you! There are instructions to create this
Design 2006 Shannon Lawrence Images Stampin Up! Design 2006 Shannon Lawrence Some images Stampin Up!
 Design and instructions 2006 Shannon Lawrence. All rights reserved. Printed images may be copyrighted by the manufacturer. You may share and reuse this document in full for personal use and nonprofit purposes
Makes Sense SCIENCE GRADE LEVEL KINDERGARTEN FIRST MATERIALS
 MATERIALS FOR STUDENT: (one per student unless otherwise noted) FloraCraft Make It: Fun Foam Ball, 4" diameter Jar band (from a canning jar lid) (optional) Cardstock paper features (See FOR TEACHER below)
ONE SHEET WONDER SUPPLIES FOR ALL CARDS
 ONE SHEET WONDER SUPPLIES FOR ALL CARDS Stamp: Something to Say Paper: Park Lane Designer Series Paper, Whisper White, Sahara Sand, Soft Suede Ink: Soft Suede Other: Daffodil Delight ¼ Cotton Ribbon, Whisper
I Heart Us. Scrapbooking Workshops Your Way. 3 layouts. (P) = portrait (L) = landscape. Gather photos (15 total) Project 1. Project 2 Project 3
 = portrait (L) = landscape. Gather photos (15 total) Project 1. Project 2 Project 3") Scrapbooking Workshops Your Way I Heart Us 3 layouts (P) = portrait (L) = landscape Gather photos (5 total) 3µ3 3 µ (P) µ µ 6 (L) 5 µ 7 (P) 5 µ 7 (L) Project Project 2 Project 3 3 2 Getting Started: Gather
Scrapbooking Workshops Your Way I Heart Us 3 layouts (P) = portrait (L) = landscape Gather photos (5 total) 3µ3 3 µ (P) µ µ 6 (L) 5 µ 7 (P) 5 µ 7 (L) Project Project 2 Project 3 3 2 Getting Started: Gather
April 2016 Club Scrap Deluxe. Preparation: Trim the White and Pink Printed Cutaparts into sections as indicated by the artwork.
 Assembly Line Scrapbooking April 2016 Club Scrap Deluxe Dahlia Materials: Dahlia Deluxe Kit with Embellishment Option Tools and Supplies: 12 Paper Trimmer Adhesive Foam Adhesive Tape 3x14 CS Grid Ruler
Twelve Days of Christmas Mixed Media Album
 Designed by ~ Kathy Clement Graphic 45 Supplies: 1 pack Twelve Days of Christmas DCE 1 each Mixed Media Album Red (4501741) (4501790) Additional Supplies: 1 piece 8½ x 11 Cardstock cream or ivory 36 May
Floral Shoppe Four Card Set w/ Die Cut Paper Flowers
 Designed by ~ Maggi Harding Graphic 45 Supplies: 1 sheet Midnight Medley (4501689) 1 sheet Sunlit Medley (4501690) 1 sheet Burgundy Blossoms (4501691) 2 sheets Verdant Blossoms (4501692) 1 sheet Pink Lilies
Shopping List:- How to make a... Strictly Dancing Tri Fold Box. How to make a... Sue Wilson 3D Snow Globe Wrap
 Shopping List:- Grand Calibur Die Cutting Machine : WIZGC-200 Shopping Sue Wilson Festive List:- Collection Ornate Holly Framed Peace Grand Die : CED3074 Calibur Die Cutting Machine : WIZCAL Sue Creative
Bound and Determined:
 Think You Don t Have Time to Create Beautiful Quilts? From quick-quilt adaptations of classic patterns to fun, fresh novelty designs, McCall s Quick Quilts provides you with a treasury of time- and effort-saving
August 2010 Greetings to Go Arts 'n Crafts
 August 2010 Greetings to Go Arts 'n Crafts Materials: Arts 'n Crafts Greetings to Go Arts 'n Crafts Wood Mounted Swirly Leaf Stamp Arts 'n Crafts Art Nouveau Art is a Craft Stamp Arts 'n Crafts Greeting
May 2016 Greetings to Go. Creative License
 Assembly Line Cardmaking May 2016 Greetings to Go Creative License Creative License Materials: Greetings to Go Tools and Supplies: Scor-Pal Adhesive Tape Foam Adhesive Paper Trimmer 3x14 CS Grid Ruler
ARTFUL LANGUAGE Creating with Crayola
 ARTFUL LANGUAGE Creating with Crayola TABLE OF CONTENTS Rod Puppet I Have a Story to Tell... Fun Finger Puppet... Graphic Story Viola Desmond... Triarama Retelling A Story... Story Souvenir Fabric Hanging...
Shopping List:- How to make a... Strictly Dancing Tri Fold Box. How to make a... A Friend is like a Rainbow Kite Card
 Shopping List:- Grand Calibur Die Cutting Machine : WIZCAL Couture Shopping Creations Vintage List:- Rose 12" x 12" Paper Pad : CO723971 Sue Grand Wilson Calibur Noble Die Collection Cutting Pierced Machine
MAKE IT YOURS. Digital Photo Decoupage Art. How-2 instruction books for cool projects you can make your own.
 MAKE IT YOURS Digital Photo Decoupage Art How-2 instruction books for cool projects you can make your own. DIGITAL PHOTO DECOUPAGE ART WHAT YOU WILL NEED Computer / Internet Connection Digital photos you
Paper Pinwheel. Supplies
 Paper Pinwheel 1. Draw some lines. Measure and cut a square piece of paper.» Use the ruler and pen to draw lines from each corner of the paper towards the center. These lines should be half the size of
Building the Gothic Church
 Building the Gothic Church Mold #54 does not contain all of the blocks to build this church. You will need extra regular blocks (1/2" x 1/2" x 1") and square blocks (1/2" x 1/2" x 1/2"). These blocks can
HP Create. HP Create: Winter Rosettes
 : Winter Rosettes Pretty paper rosettes are so much fun to make and can be used so many ways during the holidays. Follow the directions in this project and you ll have created rosettes in just minutes!
Overview: These flying oddities aren t your typical paper airplane. They may be strange to look at, but they re simple to make and fun to fly.
 17 THESE THINGS FLY! Overview: These flying oddities aren t your typical paper airplane. They may be strange to look at, but they re simple to make and fun to fly. Paper Paper or foam cups Straw Elastic
Pressed Flowers. Materials: Directions: Pressed flowers Heavyweight paper Picture frame Craft glue Small paint brush Tweezers
 Pressed Flowers Pressed flowers Heavyweight paper Picture frame Craft glue Small paint brush Tweezers 1. Pressed flowers can be purchased online or you can easily press them yourself. Begin by folding
Planner / Journal Tutorial
 Planner / Journal Tutorial Sewing your own planners and journals is so much fun! You get to choose every part of the design, and your new book will delight you every time you open it. This method quickly