MFP 277 (CF400A/X-201A/X
|
|
|
- Vivian McGee
- 5 years ago
- Views:
Transcription


1 Technical Guide Remanufacturing the HP LaserJet Pro M252 and MFP 277 (CF400A/X-201A/X series) black and colour toner cartridges
. The M252 cartridges use a new type of toner that HP calls ColorSphere 3 and a new type of chip HP calls JetIntelligence.")

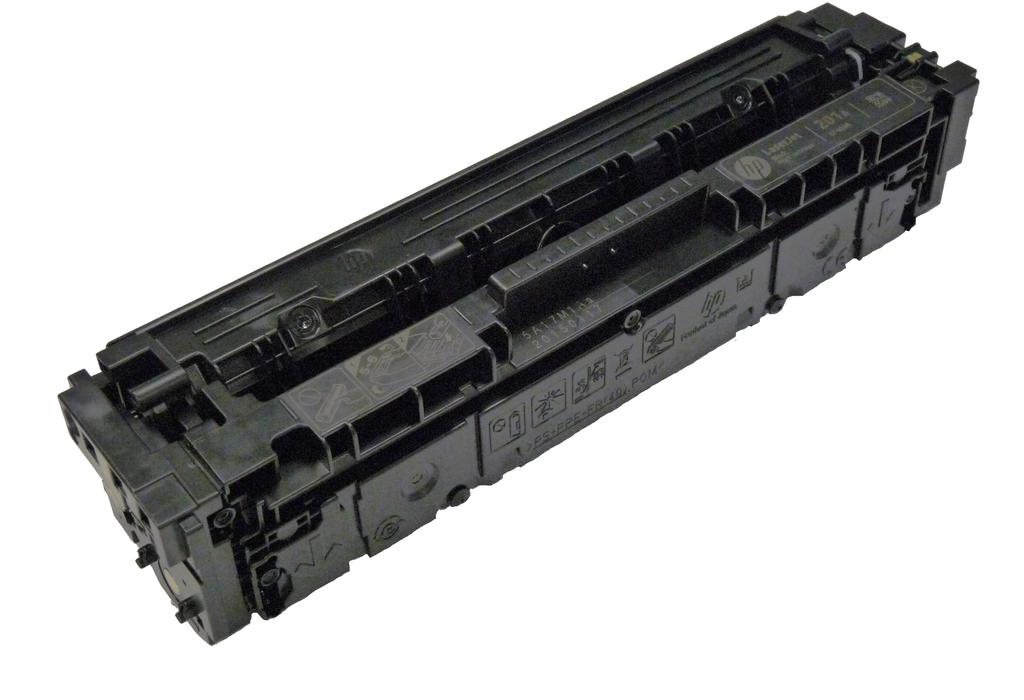
2 Remanufacturing the HP LaserJet Pro M252 and MFP 277 (CF400A/X-201A/X series) black and colour toner cartridges First released in July 2015, the Pro M252/277 series of colour laser printers are based on a 19ppm black and colour, 600dpi engine (3,600dpi with RET). The M252 cartridges use a new type of toner that HP calls ColorSphere 3 and a new type of chip HP calls JetIntelligence. Per the HP datasheet, the toner gives a higher yield when compared to the HP 131A, and the new chip technology provides anti-fraud technology. The first page out is stated at under 11.5 seconds. Standard installed memory for the M252n is 128MB, while the M252dw and the M277dw both come standard with 256MB. New cartridges do not come with a drum cover. They use a new type of box insert to protect the cartridge. It s a good idea to have your customers save these inserts (see Figure 1). The end caps are plastic welded, and the doctor blade has a left-hand threaded screw, but once past the welds are not that difficult to do. The cartridges used in these machines are (HP 201A/X series): CF400A (Black) 1,500 pages $66.99 ( 58.75)List* CF401A (Cyan) 1,400 pages $78.99 ( 69.28) List* CF402A (Magenta) 1,400 pages $78.99 ( 69.28) List* CF403A (Yellow) 1,400 pages $78.99 ( 69.28) List* Figure 1 CF400X (Black HY) 2,800 pages $89.99 ( 78.93) List * CF401X (Cyan HY) 2,300 pages $99.99 ( 87.70) List * CF402X (Magenta HY) 2,300 pages $99.99 ( 87.70) List * CF403X (Yellow HY) 2,300 pages $99.99 ( 87.70) List * * Pricing current as of September With the new machines shipping with 1,500 page black but 700 page colour starter cartridges, there is sure to be a fast growing demand for remanufactured cartridges! The printers currently based on the M252 engine are the: HP LaserJet Pro M252n HP LaserJet Pro M252dw HP LaserJet Pro MFP M277dw REQUIRED TOOLS Toner-approved vacuum A small common screw driver A Phillips head screwdriver Needle nose pliers Flat blade screw driver REQUIRED SUPPLIES Colour toner for use in the HP M252/277 series cartridges (check for standard or high-yield) New replacement chip (check standard or high-yield) New long-life drum New wiper blade New PCR [optional] New doctor blade [optional] Good quality double-sided tape 1/8 wide (3M brand preferred) Lint-free cloths Conductive grease 2015 Recycler Publishing & Events Ltd THE RECYCLER - TECHNICAL GUIDE PAGE 2


3 STEP ONE With the HP top label facing you, remove the spring from the left side of the cartridge. STEP TWO On the same side, using a flat blade screwdriver, pry out the top of the end cap until you feel the weld give way. STEP THREE Slide the screwdriver inside the end cap to the place indicated, and gently pry again until the end cap comes free. STEP FOUR Remove the end cap Recycler Publishing & Events Ltd THE RECYCLER - TECHNICAL GUIDE PAGE 3


4 STEP FIVE Start to separate the two halves. You will see a small white plastic tab on the drum gear assembly that blocks you from removing the waste chamber. Lift up on that tab while pulling the end cap out to separate the two halves. STEP SIX Remove the drum from the waste chamber. STEP SEVEN Remove the PCR. Clean with your preferred PCR cleaner and place aside in a clean area. STEP EIGHT Remove the two wiper blade screws and the wiper blade Recycler Publishing & Events Ltd THE RECYCLER - TECHNICAL GUIDE PAGE 4


.")
5 STEP NINE Clean out all the waste toner from the chamber. Make sure all the wiper blade seals are clean. STEP TEN Coat the new wiper blade with your preferred lubricant and install. Install the two screws. STEP ELEVEN Install the cleaned PCR. Make sure to place a small amount of conductive grease on the black PCR holder. STEP TWELVE On the supply chamber, remove the two screws from the gear side end cap. Remove the end cap. Be careful of the spring loaded drum drive gear, it will come loose (see Figures A, B and C). A C B 2015 Recycler Publishing & Events Ltd THE RECYCLER - TECHNICAL GUIDE PAGE 5


.")
6 STEP THIRTEEN Remove the two gears. STEP FOURTEEN Pry off the white inner end cap. STEP FIFTEEN Remove the large and small gears as shown. STEP SIXTEEN Slide the developer roller over and remove. Be careful not to lose the two round bushings or alignment tab (see Figures A and B). A 2015 Recycler Publishing & Events Ltd THE RECYCLER - TECHNICAL GUIDE PAGE 6 B


7 STEP SEVENTEEN There are two screws holding the doctor blade in place. There are two screws holding the doctor blade in place. The The left screw is a normal thread screw; the right side left screw is a normal thread screw; the right side uses a left uses a left hand thread screw. Be careful not to mix hand thread screw. Be careful not to mix them up them up. STEP EIGHTEEN Vacuum out the remaining toner from the hopper from the slot next to the feed roller. STEP NINETEEN At this point while tight, you can fill the hopper with toner for use in the HP M252 series of printers. STEP TWENTY Clean the doctor blade foam seals. Install the doctor blade and two screws. Remember the right side uses the left hand threaded screw. STEP TWENTY-ONE Install the developer roller. Make sure both ends have the bushings in place and the left side also has the tab bushing long side up Recycler Publishing & Events Ltd THE RECYCLER - TECHNICAL GUIDE PAGE 7


8 STEP TWENTY-TWO Install the small and large gears as shown. STEP TWENTY-THREE Press the inner end cap in place. STEP TWENTY-FOUR Install the two gears on the feed and developer roller shafts. STEP TWENTY-FIVE Install the drum drive gear. STEP TWENTY-SIX Install the end cap and two screws Recycler Publishing & Events Ltd THE RECYCLER - TECHNICAL GUIDE PAGE 8


9 STEP TWENTY-SEVEN Cut the chip holder with a flat blade in the two places indicated. Remove and replace the chip. A B C STEP TWENTY-EIGHT Coat the drum with your preferred lubricant and install the drum in the waste hopper. STEP TWENTY-NINE Place the two halves together. Lift up on the small white drum gear tab while pulling the end cap out to align them properly. STEP THIRTY Place a small piece of a good double-sided tape on the inside of the end cap. Install the end cap Recycler Publishing & Events Ltd THE RECYCLER - TECHNICAL GUIDE PAGE 9

 THE RECYCLER TEAM Editor & Publisher David Connett - publisher@therecycler.com Deputy Publisher Stefanie Unland s.")
10 STEP THIRTY-ONE Install the spring. TAKING TEST PRINTS Supplies status page 1. Press OK to open the menus 2. Scroll until REPORTS appears on the display 3. Press OK 4. Scroll until Print Supplies Status Page appears on the display 5. Press OK REPETITIVE DEFECT CHART Cartridge station pitch 67mm ITB 66.7mm OPC drum 63mm Fuser pressure roller 56.5mm Fuser sleeve 56.5mm Transfer rollers 51.5mm Registration roller 44mm Primary charge roller 23.6mm Developer roller sleeve 22.6mm Output kicker rollers 11mm THE RECYCLER - ISSN (Print) THE RECYCLER TEAM Editor & Publisher David Connett - publisher@therecycler.com Deputy Publisher Stefanie Unland s.unland@therecycler.com Deputy Editor William Roszczyk w.roszczyk@therecycler.com Journalist Nicholas Dawson n.dawson@therecycler.com Designer Ian Winter - production@therecycler.com Publishing Consultant Anthony Critchley a.critchley@therecycler.com THE SMALL PRINT Articles may be photocopied for the private use of paid subscribers only. For other copying or republication please contact The Recycler. The Recycler (ISSN (Print)) is published 12 times per year (every four weeks) by David Connett. Copyright by David Connett. The editorial content does not reflect the opinions of the publisher or editorial team. The Recycler is printed in the United Kingdom by Buxton Press Limited. The regular retail price of The Recycler is 120 for 12 months (12 issues) worldwide, and is delivered free to your home or office worldwide. THE RECYCLER Wittas House, Two Rivers, Station Lane, Witney, United Kingdom OX28 4BH Phone: +44 (0) Fax: +44 (0) info@therecycler.com Website: Bureau Office Australia Graham McCusker Phone: +61 (0) g.mccusker@therecycler.com Bureau Office Germany Stefanie Unland Phone: +49 (0) info@therecycler.com Bureau Office United States Olivia Stephens Phone: usa@therecycler.com Recycler Publishing & Events Ltd THE RECYCLER - TECHNICAL GUIDE PAGE 10

11
Technical Guide. Remanufacturing the HP LaserJet Pro M402/MFP M426 CF-226A/X toner cartridge. By Mike Josiah and the Technical Staff at Uninet
 Technical Guide Remanufacturing the HP LaserJet Pro M402/MFP M426 CF-226A/X toner cartridge Remanufacturing the HP LaserJet Pro M402/MFP M426 CF-226A/X toner cartridge First introduced in September 2015,
PRO 400 M401 MFP M425 CF-280A/X TONER CARTRIDGE REMANUFACTURING INSTRUCTIONS
 HP PRO 400 M401 MFP M425 CF-280A/X TONER CARTRIDGE REMANUFACTURING INSTRUCTIONS HP CF-280A/X TONER CARTRIDGE REMANUFACTURING THE HP LASERJET PRO 400 M401/MFP M425 (CF-280A/X) TONER CARTRIDGE By Mike Josiah
XEROX PHASER 3600 TONER CARTRIDGE REMANUFACTURING INSTRUCTIONS
 XEROX PHASER 3600 TONER CARTRIDGE REMANUFACTURING INSTRUCTIONS XEROX PHASER 3600 TONER CARTRIDGE REMANUFACTURING THE XEROX PHASER 3600 TONER CARTRIDGE By Mike Josiah and the Technical Staff at UniNet The
HP M506/MFP M527 CF-287A/X
 HP M506/MFP M527 CF-287A/X TONER CARTRIDGE REMANUFACTURING INSTRUCTIONS HP CF-287A/X TONER CARTRIDGE REMANUFACTURING THE HP LASERJET ENTERPRISE M506/MFP M527 CF-287A/X TONER CARTRIDGE By Mike Josiah and
TONER CARTRIDGE REMANUFACTURING INSTRUCTIONS DELL 1130 TONER CARTRIDGE
 DELL 1130 TONER CARTRIDGE REMANUFACTURING INSTRUCTIONS DELL 1130 TONER CARTRIDGE REMANUFACTURING THE DELL 1130 CARTRIDGE By Mike Josiah and the Technical Staff at UniNet DELL 1130 CORE CHANGE UNINET TECH
Technical Specifications:
 Technical Specifications: Print Method: Print Speed: Duplex Speed: First page out: Resolution: Duty Cycle: Memory: Laser Color up to 5ppm Monochrome up to 21ppm Color up to 5ipm Monochrome up to 9.5ipm
Samsung SCX-4200 Remanufacturing Instructions
 Samsung SCX-4200 Remanufacturing Instructions Oasis Imaging Products, Inc. Technical Support: 800-322- 8992 ext 110 Reference Information: OEM Cartridge Yield @ 5% Tools Required SCX-4200A 3000 Phillips
HP COLOR LASERJET 3500
 HP COLOR LASERJET 3500 TONER CARTRIDGE REMANUFACTURING INSTRUCTIONS HP COLOR LASERJET 3500 TONER CARTRIDGE REMANUFACTURING THE HP 3500 COLOR LASERJET TONER CARTRIDGE By Javier Gonzalez and the Technical
AbsoluteCOLOR AbsoluteBLACK UniDrums UniRollers UniParts UniCoatings JAPAN EUROPE
 AbsoluteCOLOR AbsoluteBLACK UniDrums UniRollers UniParts UniCoatings HP 2600 CARTRIDGE REMANUFACTURING INSTRUCTIONS HP 2600N COLOR LASER PRINTER PRELIMINARY TECHNICAL DETAILS AND REMANUFACTURING INSTRUCTIONS
REMANUFACTURING INSTRUCTIONS
 REMANUFACTURING INSTRUCTIONS V 1.1: 5-16 HP Color LaserJet M252 Printer, M277 MFP HP CF400A, CF401A, CF402A, CF403A, CF400X, CF401X, CF402X, CF403X CONTENTS Tools & Supplies... 2 Separating the Two Halves...
Technical Instructions Printers OEM Info Tools 1
 HPP3005TECH Technical Instructions Printers OEM Info Tools 1 CORPORATE LOS ANGELES, USA US 1 800 394.9900 Int l +1 818 837.8100 FAX 1 800 394.9910 Int l +1 818 838.7047 ATLANTA, USA US 1 877 676.4223 Int
REMANUFACTURING INSTRUCTIONS
 REMANUFACTURING INSTRUCTIONS V5.4: 02-14 HP LaserJet CP1025/100 M175 MFP, HP TopShot LaserJet Pro P200 M275 MFP, Canon LBP-7010c/7016c/7018c, (i-sensys, imageclass, Satera ) HP CE310A/CE311A/CE312A/CE313A/CE314A
Technical Instructions Supplies Tools 1
 HP2500/HP1500TECH Technical Instructions Supplies Tools 1 CORPORATE LOS ANGELES, USA US 1 800 394.9900 Int l +1 818 837.8100 FAX 1 800 394.9910 Int l +1 818 838.7047 ATLANTA, USA US 1 877 676.4223 Int
KONICA MINOLTA PAGEPRO 1400W DRUM UNIT REMANUFACTURING INSTRUCTIONS
 Absolute COLOR Absolute BLACK Unidrums Unirollers Uniparts Unicoatings KONICA MINOLTA PAGEPRO 1400W DRUM UNIT REMANUFACTURING INSTRUCTIONS KONICA MINOLTA 1400W COLOUR LASER PRINTER DRUM UNIT Summit Technologies
The User may not distribute, share, and otherwise convey the copyrighted documents to any other persons, corporations or individuals.
 LICENSE AGREEMENT Static Control Components, Inc. (Static Control ) grants this limited license to the person, firm or corporation (hereinafter "User") downloading electronically or by printing this file
Technical Instructions Printers OEM Info Tools 1
 ML2250TECH Technical Instructions Printers OEM Info Tools 1 CORPORATE LOS ANGELES, USA US 1 800 394.9900 Int l +1 818 837.8100 FAX 1 800 394.9910 Int l +1 818 838.7047 ATLANTA, USA US 1 877 676.4223 Int
The User may not distribute, share, and otherwise convey the copyrighted documents to any other persons, corporations
 LICENSE AGREEMENT Static Control Components, Inc. (Static Control) grants this limited license to the person, firm or corporation (hereinafter "User) downloading electronically or by printing this file
Remanufacturing Instructions HP 2500 OPC Drum Unit
 For, please call Memphis, TN at (888) 757-0762 or Nashua, NH at (888) 833-5727. OEM Reference Information OEM Product #: Drum Unit (C9704A) OEM Yield: Color: 5,000 pages Black: 20,000 pages 1. Remove the
COLOR LASERJET PRO MFP. Repair Manual
 OK COLOR LASERJET PRO MFP Repair Manual X M76 M77 HP Color LaserJet Pro MFP M76, M77 Repair Manual Copyright and License 03 Copyright Hewlett-Packard Development Company, L.P. Reproduction, adaptation,
REMANUFACTURING INSTRUCTIONS
 REMANUFACTURING INSTRUCTIONS V 1.5: 12-17 HP LaserJet Pro M102/Pro MFP M130 HP CF217A CONTENTS Tools & Supplies... 2 Disassembly... 4 Reassembly... 6 Chip Removal/Replacement... 9 About Static Control...
PRINTER REPAIR ARTICLE HP LJ 4345/M4345 Swing Plate Replacement
 a1 output bin a2 DUPLEXER a4 FORMATTER COVER a5 FORMATTER a3 fuser entr. guide PRINTER REPAIR ARTICLE HP LJ 4345/M4345 Swing Plate Replacement Grinding noise near the fuser means it is time to replace
Replacing the print cartridges
 http://www.hp.com/support/lj9500 1 2 3 Replacing the print cartridges The printer uses four color print cartridges: yellow, magenta, cyan, and black. Follow this procedure to install the print cartridges.
Remanufacturing Instructions
 Cartridge Reference System Support Series 367 HP LaserJet 9000 Remanufacturing Instructions About the Printer The HP LaserJet 9000 was introduced in May 2001 and targeted at the general departmental office
Place Value. Get in Place. WRITE how many tens and ones you see. Then WRITE the number they make. 5 3 = 53
 Place Value Get in Place WRITE how many tens and ones you see. Then WRITE the number they make. 1. 2. 5 3 53 3. 4. 5. 6. 7. 8. 2 Place Value Get in Place 10 1 1 WRITE how many tens and ones you see. Then
Installation Instructions: Epson R200 CFS
 Installation Instructions: Epson R200 CFS Photo Stylus R200 Installation Procedure Prerequisite - Before starting this installation, you MUST test your printer to make sure it is printing 100% correctly.
Tech Tip for February 2000 Installing a 124 Spider Convertible Top
 Page 1 of 6 Back to Tech Tips Click on the animation for order info. Tech Tip for February 2000 Installing a 124 Spider Convertible Top Updated from Ciao!News volume 3 number 1, Summer 1996 Like our other
Installation Instructions: Epson R800 CFS
 Installation Instructions: Epson R800 CFS Photo Stylus R800 Installation Procedure Prerequisite - Before starting this installation, you MUST test your printer to make sure it is printing 100% correctly.
HP LaserJet Pro M401/M425MFP Printer Series Continuous Paper Jams, Possible Noises and/or Broken Parts in Toner Cartridge Area
 HP LaserJet Pro M401/M425MFP Printer Series Continuous Paper Jams, Possible Noises and/or Broken Parts in Toner Cartridge Area Users may report that new-out-of-box or lightly used devices continuously
HP Color LaserJet CP3525 Series Manage and maintain
 Load paper and print media Load Tray 1 1 Open Tray 1. CAUTION: To avoid jams, never add or remove paper from Tray 1 during printing. 2 Fold out the tray extension to support the paper and set the side
HP LaserJet M2727 MFP Series Maintenance
 HP LaserJet M2727 MFP Series Maintenance Fill Paper Trays Load paper and print media Tray 1 1 Tray 1 is accessed from the front of the product. Tray 1 holds up to 50 sheets of 75 g/m 2 (20 lb) media or
JASPER INSTRUCTIONS CODE: 0097 CODE: 0197 TOLL FREE/SANS FRAIS: _Jasper_11x11_Instructions_V1.2. Front Elevation.
 INSTRUCTIONS JASPER CODE: 0097 CODE: 0197 11'-10 3 4" [363 cm] 10'-8 1 2" [326 cm] WINDOW WINDOW WINDOW WINDOW WINDOW 9'-4 1 16" [285 cm] WINDOW WINDOW WINDOW WINDOW 10'-8 1 2" [326 cm] 11'-10 3 4" [363
Replay Top w/ Tinted Side and Rear Windows and Upper Door Skins Installation Instructions For: Jeep Wrangler (TJ) Part Number: 51197
 Part Number: 51197") Replay Top w/ Tinted Side and Rear Windows and Upper Door Skins Installation Instructions For: Jeep Wrangler (TJ) 1997 2002 Part Number: 51197 Table of Contents FABRIC REPLACEMENT TOP PARTS LIST... PAGE
Replay Top w/ Tinted Side and Rear Windows and Upper Door Skins Installation Instructions For: Jeep Wrangler (TJ) 1997 2002 Part Number: 51197 Table of Contents FABRIC REPLACEMENT TOP PARTS LIST... PAGE
Product End-of-Life Disassembly Instructions Product Category: Printers
 Product End-of-Life Disassembly Instructions Product Category: Printers Marketing Name / Model [List multiple models if applicable.] HP Officejet Pro X45dn/ CN459A HP Officejet Pro X45dw/CN463A HP Officejet
How to remove Jammed Paper
 How to remove Jammed Paper MC851(+)/MC860/MC861(+)/ ES8451MFP/ES8460MFP/ ES8461MFP Rev.1 Paper Jams Paper jams occasionally occur due to paper misfeeding from a paper tray or at any point on the paper
PLEASE READ THE ENTIRE BULLETIN BEFORE BEGINNING THE PROCEDURE
 Bulletin # 205 System 4 Board Replacement Page 1 of 5 Summary Products Affected Key Word Tags Tools/Equipment (If Required) Parts/Materials (If Required) Related Media Replacing the System 4 control board
Black 22 Cyan 10 Magenta 10 Yellow 10
 Installation Instructions: Filled Epson 860 CFS Procedure: 1. Fill Cartridges with Ink Get a place to work where you can spill a little ink and not ruin anything. Spread some newspapers down and have plenty
How To Make a Ladybird Bag
 How to Make a Light-Up Ladybird Bag Description Make this decorative & fun light up ladybird bag with 3 LEDs that are programmed to have 3 settings: continuously lit all the time, flashing together slowly,
HP LaserJet 1320 Teardown
 HP LaserJet 1320 Teardown The first laser printer teardown on ifixit Written By: jrw01 ifixit CC BY-NC-SA www.ifixit.com Page 1 of 35 INTRODUCTION The first laser printer teardown on ifixit. TOOLS: Metal
WSG 8-115; 8-125; P; WSG ; WSG P; WSG PS; WSG P; WSG 15-70Inox
 Repair instructions Page of 47 Contents. Models described 2. Technical data 3. Notes and requirements 4. Tools required 5. Lubricants and auxiliary substances required 6. Disassembly 7. Assembly 8. Connection
Xyron Professional 2500 Laminating System
 Xyron Professional 2500 Laminating System Instruction Manual Provided By http://www.mybinding.com http://www.mybindingblog.com U S E R S G U I D E 2500 Adhesive Application & Laminating System The XM2500
OPERATIONAL MANUAL V1.0. Removing/Replacing Blades
 OPERATIONAL MANUAL V1.0 BLUEROCK WS-212 Wire Stripper Removing/Replacing Blades CAUTION!! IMPORTANT!! DANGER!! WARNING!! DISCONNECT MACHINE FROM POWER BEFORE PROCEEDING!! Estimated Completion Time: 90
Sailcloth Fabric Replacement Top and Doors with Tinted Side and Rear Curtains Installation Instructions
 Sailcloth Fabric Replacement Top and Doors with Tinted Side and Rear Curtains Installation Instructions TM For: Wrangler / TJ 2003 - Current Part Number: 79129 Inc. This product is only designed for the
INSTALL/REMOVAL INSTRUCTIONS: WINDOW REGULATOR
 REMOVAL/INSTALL OF WINDOW REGULATOR (741-768) Jeep Cherokee 1997 2001 General Tech Tips: Use painter s tape rather than duct tape to secure window. It will not damage paint or leave sticky residue. A plastic
No September, Char-Lynn. Power Steering. Repair Information. 20 Series Steering Control Unit 001
 Char-Lynn Power Steering No. 7-313 September, 1997 Repair Information 20 Series Steering Control Unit 001 Bearing Race Retaining Ring Needle Thrust Bearing Bearing Race Seal Ring Backup Washer Seal (3
Sailcloth Fabric Replacement Top and Doors Installation Instructions
 Sailcloth Fabric Replacement Top and Doors Installation Instructions For: Wrangler/TJ 1997-2002 Part Number: 79121 This product is only designed for the vehicles listed above. DO NOT INSTALL THIS PRODUCT
REFILLABLE CARTRIDGE SYSTEM FOR THE EPSON STYLUS PRO 4900
 REFILLABLE CARTRIDGE SYSTEM FOR THE EPSON STYLUS PRO 4900 Thank you for purchasing an Ink2image bulk ink feed system. You have just taken the first step to enjoying the cost saving and superior performance
MILANO INSTRUCTIONS CODE: 0093 TOLL FREE: _Milano_11x11_Instructions_V1.2. Front Elevation Plan View Footprint 12'-0" 11' "
 INSTRUCTIONS CODE: 0093 12'-0" 11'-0 3 4 " 12'-0" 6'-9" 9'-4 15 16 " 11'-0 3 4 " 12'-0" Front Elevation Plan View Footprint 0093_Milano_11x11_Instructions_V1.2 EN IMPORTANT CODE: 0093 TOOLS NEEDED BEFORE
Replay Top with Tinted Side and Rear Windows Installation Instructions For: Jeep Wrangler (TJ) Part Number: 51141
 Part Number: 51141") Replay Top with Tinted Side and Rear Windows Installation Instructions For: Jeep Wrangler (TJ) 2003 2006 Part Number: 51141 Table of Contents FABRIC REPLACEMENT TOP PARTS LIST... PAGE 2 FABRIC REPLACEMENT
Replay Top with Tinted Side and Rear Windows Installation Instructions For: Jeep Wrangler (TJ) 2003 2006 Part Number: 51141 Table of Contents FABRIC REPLACEMENT TOP PARTS LIST... PAGE 2 FABRIC REPLACEMENT
Print-Quality Problems
 Print-Quality Problems This topic includes: "Paper Type" on page 4-20 "Diagnosing Print-Quality Problems" on page 4-20 "Color Settings" on page 4-26 "Color Calibration" on page 4-26 "Lighten/Darken Colors"
Adhesive Application & Laminating System
 U S E R S G U I D E Adhesive Application & Laminating System The XM2500 is an economical and easy to use document finishing system. This versatile and non-electric system has been designed to laminate
Fabric Replacement Top and Doors
 Fabric Replacement Top and Doors Installation Instructions For: Wrangler/TJ 1997 and Newer Part Number: 51131 WARNING This product is designed to enhance the appearance of the vehicle and to shield the
FD 1202 AutoSeal Tabletop Pressure Sealer
 FD 1202 AutoSeal Tabletop Pressure Sealer 4/2015 OPERATOR MANUAL FIRST EDITION TABLE OF CONTENTS TOPIC PAGE SPECIFICATIONS 1 UNPACKING, COMPONENTS 2 SET-UP 3 OPERATION 5 DETERMINING FOLD TYPE 6 ADJUSTING
AFB (AIR FAN BEARING) INSTALLATION GUIDE
 INSTALLATION GUIDE") 654 AFB (AIR FAN BEARING) INSTALLATION GUIDE AFB PARTS Bearing Housing - Secured together with two 3/8 x 1.25 in. Cap Screws Black Wiper Seals - Secured together with O-ring cord (Subsequently depicted
654 AFB (AIR FAN BEARING) INSTALLATION GUIDE AFB PARTS Bearing Housing - Secured together with two 3/8 x 1.25 in. Cap Screws Black Wiper Seals - Secured together with O-ring cord (Subsequently depicted
Date of birth Day Month Year Scottish candidate number
 FOR OFFICIAL USE Total X116/11/01 NATIONAL QUALIFICATIONS 2014 friday, 2 MAY 1.00 PM 2.30 PM HOME ECONOMICS FASHION AND TEXTILE TECHNOLOGY INTERMEDIATE 2 Fill in these boxes and read what is printed below.
INSTALL/REMOVAL INSTRUCTIONS: WINDOW REGULATOR
 REMOVAL/INSTALL OF WINDOW REGULATOR (741-665) Ford Crown Victoria, Mercury Grand Marquis 1992-2010 General Tech Tips: Use painter s tape rather than duct tape to secure window. It will not damage paint
Quick Fit Installation Guide Retractable Screen - Double Door
 Quick Fit Installation Guide Retractable Screen - Double Door 1 REMOVE KIT PARTS FROM SHIPPING TUBE 2 Slide bolts 2 Rail receiver Clips 15 Mounting screws 1 Housing end cap screw 2 Handles 1 Housing end
INSTALL/REMOVAL INSTRUCTIONS: WINDOW REGULATOR
 REMOVAL/INSTALL OF WINDOW REGULATOR (741-526) Jeep Liberty 2002 2006 General Tech Tips: Use painter s tape rather than duct tape to secure window. It will not damage paint or leave sticky residue. A plastic
TOSHIBA E-STUDIO 166:
 specialist's guide TOSHIBA E-STUDIO 166: A MODERN OFFICE PRINTING MULTIFUNCTION TOOL. PART 2 By VLADIMIR KAMENOV In this issue of RechargEast Magazine we are continuing the analysis of e-studio 166 copier,
Open Air. Kit includes: Drawer Full Indicator board assembly, (2) retainers, and (4) screws. PREPARATION
 retainers, and (4) screws. PREPARATION") Open Air Installation Video You will need: 8-inch #2 Phillips screwdriver Needle-nose pliers DFI INSTALLATION GUIDE For installation videos, visit the Customer Service playlist at www.youtube.com/user/thelitterrobot
Open Air Installation Video You will need: 8-inch #2 Phillips screwdriver Needle-nose pliers DFI INSTALLATION GUIDE For installation videos, visit the Customer Service playlist at www.youtube.com/user/thelitterrobot
HP 564 and 920 InkJet Cartridges Refill Instructions (Professional Version)
") HP 564 and 920 InkJet Cartridges Refill Instructions (Professional Version) For the following cartridges: 934, 934XL, 935, and 935XL Series 5869 Terminal Ave. I Colorado Springs, CO 80915 PH: 719-578-0506
HP 564 and 920 InkJet Cartridges Refill Instructions (Professional Version) For the following cartridges: 934, 934XL, 935, and 935XL Series 5869 Terminal Ave. I Colorado Springs, CO 80915 PH: 719-578-0506
TUSCANY INSTRUCTIONS CODE: 0096 TOLL FREE/SANS FRAIS: _Tuscany_11x11_Instructions_V1.2. Footprint Plan.
 INSTRUCTIONS CODE: 0096 11'-6 7 8" [353 cm] 10'-11 1 4" [333 cm] 6'-9" [206 cm] 9'-9 15 16" [300 cm] 9'-7 1 4" [293 cm] Front Elevation Footprint Plan 0096_Tuscany_11x11_Instructions_V1.2 EN TOLL FREE/SANS
Epson Work Force 1100 CFS System Installation Instructions
 Epson Work Force 1100 CFS System Installation Instructions Epson Work Force 1100 with MIS CFS System Prerequisite - Before starting this installation, you MUST test your printer to make sure it is printing
Replacing the Reciprocator on an SWF Multi-head.
 Replacing the Reciprocator on an SWF Multi-head. Follow the instructions below to replace the reciprocator in the SWF multi-head machines. The tools required are found in the tool kit that came with the
Repairing Microsoft Wedge Touch Mouse Battery Cover Retaining Clip
 Repairing Microsoft Wedge Touch Mouse Battery Cover Retaining Clip Disassembly, repair and reassembly of Wedge Touch mouse when the battery cover will not stay closed. Also is a good guide to repair other
Learn your Fours. 1 Homeshcool
 Learn your Fours 1 Homeshcool Fours These are some pages I made to help my daughter learn her multiplication. They go in order systematically introducing each new concept one at time. The lessons are not
Forename(s) Surname Number of seat. Date of birth Day Month Year Scottish candidate number
 Surname Number of seat. Date of birth Day Month Year Scottish candidate number") H PRELIM Mark Graphic Communication FOR OFFICIAL USE Date January Duration hours Fill in these boxes and read what is printed below. Full name of centre Town Forename(s) Surname Number of seat Date of
H PRELIM Mark Graphic Communication FOR OFFICIAL USE Date January Duration hours Fill in these boxes and read what is printed below. Full name of centre Town Forename(s) Surname Number of seat Date of
HURST COMP STICK KIT DODGE CHARGER, MAGNUM, AND CHRYSLER 300 (with AUTO-STICK) Catalog # & by Hurst Performance
 Catalog # & by Hurst Performance") HURST COMP STICK KIT 2005-2007 DODGE CHARGER, MAGNUM, AND CHRYSLER 300 (with AUTO-STICK) Catalog #538 0410 & 538 0411 2009 by Hurst Performance FORM 159 0410 03/09 Thank you for purchasing the Hurst Comp
HURST COMP STICK KIT 2005-2007 DODGE CHARGER, MAGNUM, AND CHRYSLER 300 (with AUTO-STICK) Catalog #538 0410 & 538 0411 2009 by Hurst Performance FORM 159 0410 03/09 Thank you for purchasing the Hurst Comp
LEFT-SIDE CARTR. LATCH REPLACEMENT
 Service Edge Page 5 long screw A. TOP COVER: 3 short screws, 1 long screw B. LEFT COVER: 4 tabs, 2 screws SCREW SCREW LEFT-SIDE CARTR. LATCH REPLACEMENT CLJ 3000, 3600, 3800, CP3505 This printer series
INSTALL/REMOVAL INSTRUCTIONS: WINDOW REGULATOR
 REMOVAL/INSTALL OF WINDOW REGULATOR (741-870) Ford Windstar 1995 2003, Ford Freestar 2004 2006 & Ford Monterey 2004 2006 General Tech Tips: Use painter s tape rather than duct tape to secure window. It
Cordless Operable Sidelights
 Installation Instructions Parasol Cellular Shades Cordless Operable Sidelights CONTENTS Getting Started: Product View...1 Tools and Fasteners Needed...2 Installation: Installation Overview... Mount the
Midwest RDH Handpiece Repair Procedure
 Midwest RDH Handpiece Repair Procedure The Midwest RDH handpiece is fairly common and is used by hygienists to clean teeth. The most common problems for this handpiece include a bad prophy head or a dirty
INSTALLATION AND CARE INSTRUCTIONS
 INSTALLATION AND CARE INSTRUCTIONS Skylight Manually Operated Honeycomb Shades 20 C8-10-1806 2/15 1 INTRODUCTION Thank you for purchasing our product. Your new shade has been custom built for you from
Quick Fit Installation Guide Retractable Screen - Single Door
 Quick Fit Installation Guide Retractable Screen - Single Door 1 REMOVE KIT PARTS FROM SHIPPING TUBE 15 Mounting screws 1 Housing end cap screw 2 Handles 1 Housing end cap 1 Bushing 1 Pull bar end cap 2
MMD Convertible Styling Bar Customer Installation Guide
 MMD Convertible Styling Bar Customer Installation Guide TOOLS REQUIRED/RECOMMENDED: Electric Drill 1 Forstner Bit (Hole Saw) 1 3/8 Hole Saw (manual calls for 1 ¾ ) 1/8, 3/8 & ¾ Drill Bits Rivet Gun Trim
BARLOW CORNER TV
 6480 BARLOW CORNER TV ASSEMBLY INSTRUCTIONS. IMPORTANT - RETAIN FOR FUTURE REFERENCE - READ CAREFULLY. Tools Needed Helpline If you have any problems with this product or require any replacement fittings
OKI B721/B731/MPS5501 Printer Important Information Update
 OKI B721/B731/MPS5501 Printer Important Information Update 543 Toner Sensor Error after installing a new or replacement print cartridge into the printer. Check the print cartridge for the following problem
Installation Instructions for FC2 & FC15 Forward Controls for the Super Magna
 Installation Instructions for FC2 & FC15 Forward Controls for the Super Magna It is highly recommended that you use a thread lock compound such as Loctite brand on all threads to keep them from vibrating
Instructional Tools Math Pack: Money n2y Unique Learning System
 5 5 1 1 5 1 1 1 1 1 1 1 1 1 1 1 5 5 1 1 15 5 5 5 15 20 5 5 5 5 5 20 25 5 5 5 5 5 25 25 5 25 30 30 25 5 35 35 25 5 40 40 25 5 45 45 25 5 50 50 25 25 60 60 25 25 70 75 25 25 25 25 25 75 80 25 25 25 25 25
INSTALL/REMOVAL INSTRUCTIONS: WINDOW REGULATOR
 REMOVAL/INSTALL OF WINDOW REGULATOR (741-584) Ford Focus 2000-2007 General Tech Tips: Use painter s tape rather than duct tape to secure window. It will not damage paint or leave sticky residue. A plastic
Removing outter components
 Y Axis Motor Replacement Replacing the Y axis motor is a process that requires the individual to be somewhat mechanically inclined and can follow detailed instructions. If any of the following steps are
The Bowflex Revolution XP Home Gym Assembly Instructions. P/N: Rev ( /0 )
") P/N: 001-7057 Rev ( /0 ) The Bowflex Revolution XP Home Gym Assembly Instructions 2 Table of Contents Before You Start... 2 Tools You Will Need / Hardware Contents... 3 Box Contents... 6 Assembling Your
P/N: 001-7057 Rev ( /0 ) The Bowflex Revolution XP Home Gym Assembly Instructions 2 Table of Contents Before You Start... 2 Tools You Will Need / Hardware Contents... 3 Box Contents... 6 Assembling Your
Powerbook G3 Lombard (1999) USB Repair Manual
 USB Repair Manual") Powerbook G3 Lombard (1999) USB Repair Manual Copyright 2003 Powerbookmedic.com. All rights reserved. Any portion of this manual may not be copied, reproduced, or distributed without the express written
Powerbook G3 Lombard (1999) USB Repair Manual Copyright 2003 Powerbookmedic.com. All rights reserved. Any portion of this manual may not be copied, reproduced, or distributed without the express written
INSTALL/REMOVAL INSTRUCTIONS: WINDOW REGULATOR
 REMOVAL/INSTALL OF WINDOW REGULATOR (748-569) Jeep Liberty 2002 2006 General Tech Tips: Use painter s tape rather than duct tape to secure window. It will not damage paint or leave sticky residue. A plastic
Transcriber(s): Baldev, Prashant Verifier(s): DeLeon, Christina Date Transcribed: Spring 2008 Page: 1 of 5
: Baldev, Prashant Verifier(s): DeLeon, Christina Date Transcribed: Spring 2008 Page: 1 of 5") Page: 1 of 5 Speaker Transcription So, how about for eight? So you re saying, so how would you do for eight? For eight? [pointing to the paper] So your saying, your taking.. So why did you pick thirty-four?
Page: 1 of 5 Speaker Transcription So, how about for eight? So you re saying, so how would you do for eight? For eight? [pointing to the paper] So your saying, your taking.. So why did you pick thirty-four?
Ringblaster Mark IV Maintenance Guide. Version 1.5
 Ringblaster Mark IV Maintenance Guide Version 1.5 WARNING Winchester Industrial Equipment and Loads must be properly stored, handled and maintained for safe and proper function. Mishandling or failure
Contemporary 3 Panel Classic 5 Panel French Panel
 Contemporary 3 Panel Classic 5 Panel French Panel (X) Operating / Lock Panel Left (O) Fixed Panel Right Note : Glazing Beads For All Panel Face To The Exterior 2 Panel XO Left Is Shown Above Opposite =
The Useless Machine. DIY Soldering Edition. Instruction Guide v0004
 The Useless Machine DIY Soldering Edition Instruction Guide v0004 TM For the best outcome, follow each step in order. We recommend reading this guide entirely before you get started. Tools required: Soldering
How to remove Jammed Paper
 How to remove Jammed Paper C801/C810/C821/C830/ C8600/C8800/ES2632a3/ ES8430 Rev.1 Paper Jams Paper jams occasionally occur due to paper misfeeding from a paper tray or at any point on the paper path through
GMQ 16 Adapter Set Assembly Instructions Copyright November, 2003 GraceWood, Inc. Table of Contents
 GMQ 16 Adapter Set Assembly Instructions Copyright November, 2003 GraceWood, Inc. Table of Contents Parts List.................................................................. 1 Assembly Instructions.......................................................3
Woodman Casting X - Rihanna Samuel.mp4. 1 Los Condes Santiago, Chile China China.
 Woodman Casting X - Rihanna Samuel.mp4. 1 Los Condes Santiago, Chile China China. Woodman Casting X - Rihanna Samuel.mp4 >>>DOWNLOAD LINK
VYTEX PREMIUM SLIDING GLASS DOOR. Table of Contents. Precautions and Safety 2. Tools Required...3. Inspect and Prepare Door...4
 VYTEX PREMIUM SLIDING GLASS DOOR Table of Contents Precautions and Safety 2 Tools Required...3 Inspect and Prepare Door...4 Hardware and Parts Check List....4 Master Frame Assembly 5 Master Frame Installation..7
Braille Repair 101 PRESENTED BY: THE GEORGIA BRAILLE TRANSCRIBERS. The problem with 90% of inoperable braillers is that they need to be cleaned!
 Braille Repair 101 PRESENTED BY: THE GEORGIA BRAILLE TRANSCRIBERS The problem with 90% of inoperable braillers is that they need to be cleaned! Supplies needed: PERKINS BRAILLER STEP BY STEP CLEANING
How to remove Jammed Paper
 How to remove Jammed Paper MC760/MC770/MC780 ES7470/ES7480 Rev.1 Paper Jams Paper jams occasionally occur due to paper misfeeding from a paper tray or at any point on the paper path through the printer.
Slitter/E-Prom Upgrade for Duplo CC-228
 This Service Bulletin covers the upgrade of the Post Card Slitter and E-Prom for the Duplo CC-228 machines at Staples locations nationwide. Be sure to review and follow ALL of these instructions. Failure
Table of Contents. HP Z3100 Printer Installation Guide. Contact information... 2
 Table of Contents Contact information... 2 Introduction to HP Z3100... 3 Safety Precautions... 3 Overview of the printer s Features... 3 Installation... 3 Unpacking the Printer... 3 Mounting the Printer...
35 mw HeNe Laser Ballast Resistor Insulation Upgrade Instructions
 35 mw HeNe Laser Ballast Resistor Insulation Upgrade Instructions A video that demonstrates the laser upgrade process can be found at: http://www.reoinc.com/site/14309- instructions General Notes Please
Hinojosa Kinder Math Vocabulary Words. Topic 1. number. zero. one
 Topic 1 Word Picture number 2 zero 0 one 1 two 2 three 3 four 4 five 5 count 1 2 3 whole part none 0 picture objects order 0 1 2 3 4 represent triangle describe blue 3 sides 3 corners Topic 2 Word Picture
Chapter 6 Frame And Lens Repairs
 Chapter 6 Frame And Lens Repairs 6.1 General Information All maintenance on the frame of the EXO Full-Face mask can be accomplished with common hand tools. 6.2 Lens Replacement Tools required: Dow DC-111
S T E P 1. Tools Needed. Curved Needle Nose Pliers. L Shaped Tool (Supplied w/ kit) Flathead Eyeglasses Screwdriver
 Flathead Eyeglasses Screwdriver") Curved Needle Nose Pliers Flathead Eyeglasses Screwdriver L Shaped Tool (Supplied w/ kit) Tools Needed 2 Make sure weapon is pointed in a safe direction, unloaded, and on safe. 3 Remove lower receiver
Curved Needle Nose Pliers Flathead Eyeglasses Screwdriver L Shaped Tool (Supplied w/ kit) Tools Needed 2 Make sure weapon is pointed in a safe direction, unloaded, and on safe. 3 Remove lower receiver
KN-8828B Upgrade Directions
 KN-8828B Upgrade Directions This document outlines the steps to take to update earlier Hottop Bean Roasters to the KN-8828B 2007 by Chang Yue and Hottop USA - All Rights Reserved No part of this document