Mach Wall Installation Instructions
|
|
|
- Shauna Johnston
- 5 years ago
- Views:
Transcription
1 Mach Wall Installation Instructions Planning the Job Since Mach Wall is an innovative product that accomplishes 3 tasks at the same time (frame, insulate and drywall) and it replaces traditional framing, it is necessary to install the Panels vertically. It is best to plan your installation with the least amount of joints (the seam where Panels meet). Less joints will mean less finish work later. To determine how many panels you will need simply calculate the total surface area of your walls by multiplying the length times the height of all of the walls (do not deduct for doors and windows). Then divide the total area calculated by the square footage of a Mach Wall Panel (32 square feet for an 8 foot board) and then round up to determine the number of Panels that you will need. Tools Needed; Tape measure electric 7 ¼ circular saw with plywood blade 4 foot T square or straight edge Safety glasses or goggles Marking pencil Dust mask 4 foot level Chalk line Wallboard saw or electric router Tin snips Step ladder Electric or battery powered screw gun


2 Installation Instructions Locate the position of the wall on the floor at opposite ends. Using a chalk line snap a line on the floor to follow along the entire length. Use a level or a laser dot to transfer that line to the ceiling. If that line is between joists then blocking will have to be installed first.


3 Place a section of metal track along the line on the floor and fasten it using screws or nails if the floor is wood composition. If the floor is concrete then a concrete screw or power actuated fastener may be used. Be sure to stop the track even with the door openings since it will be difficult to cut out the track later. Then pre-cut sections of track to be used for the top of the Panels (20-36 inches recommended).

. Place ½ spacer blocks on the floor underneath the bottom edge of the panel (prevents moisture from wicking into drywall).")
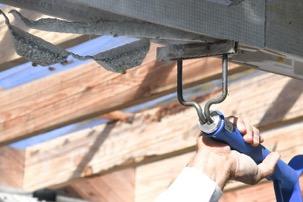
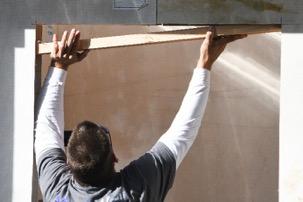
4 Along the flange of the track cut and bend out 2-4 tabs that align with the spacing of the ceiling framing You are now ready to build your Mach Wall! 2 people lift the Panel along the 8 foot sides. Grasp the panel supporting the bottom edge and not between the core sections Stand the panel up inserting the flanges of the floor track into the pre-cut slots on the bottom edge of the Panel (integral chaises are directional in the panel so place marked sides of the panel in the same direction). Place ½ spacer blocks on the floor underneath the bottom edge of the panel (prevents moisture from wicking into drywall). Slide 2 pieces of the pre-cut track into the top slots of the Panel with the tabs extended


5 and slide them to meet with the ceiling framing. Align these pieces of track with the chalk line on the ceiling and secure the tabs of the track to the ceiling framing with screws or nails. (If this is the first Panel then use a level to make sure the Panel is plumb). Place 1 ¼ drywall screws into the bottom and top tracks so that they are ½ from the edges of the Panel.*** (See alternate methods of installing the top track below) To continue installing additional Panels insert the flat metal spline into the pre-cut slot along the side of the panel and fasten it with 1 ¼ drywall screws 24 on center and ¾ from the edge of the Panel. Then follow the same process to install each individual Panel along the same run.


6 To install perpendicular walls follow the same procedure to locate the position of the wall on the floor. Use a level to mark this line up the face of the standing Panel. Screw a 90 degree spline to the already installed Panel following this line with the spline turned so that the new Panel will cover the spline. Stand up the next Panel onto the bottom track so that the flange goes into the slot and slide the vertical Panel slot onto the 90 degree spline and abut the already installed wall. Secure the Panel to the 90 degree spline and bottom track. Slide the pre-cut pieces of track into the top slots as before, align with the marked line on the ceiling and fasten those tracks to the ceiling framing and screw the panel to the top track.***
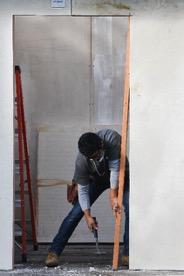
7 Proceed with installing as many panels as necessary to complete this wall following the procedures previously described. To install the last Panel in this run measure the width of the last Panel and cut the Panel to that dimension. Install this panel by sliding the panel onto the bottom track and insert a precut section of track into the top slots as previously done. (There will not be enough room to insert splines into the vertical surfaces). Once this panel is installed apply a thin bead of construction adhesive into the corner that is formed with the perpendicular wall. Once this cures it will provide enough support to keep the panel from flexing.*** Alternate methods of installing the top track There are several options to install the top track for the MachWall Panels; If there is a structural slab or ceiling joist framing at the height of your wall- You can follow the procedure previously described or you can install full lengths of 2 deep track (bottom track will be 1 1/8 deep) following the layout line that is marked on the ceiling framing. The procedure used in this method varies slightly. Once you stand up the Panel you will lift the panel up onto the 2 top track inserting the flange of the track into the top slot of the Panel and lower the Panel down onto the 1 1/8 bottom track and the ½ spacer blocks on the floor so that the flange of the track inserts into the slot on the bottom of the Panel. Then install the screws into the top and bottom track as previously described. If this is a curtain wall installation (the height of your wall does not reach the roof structure)- Follow the procedure to install the MachWall Panels but do not insert the pre-cut sections of top track. Once you have installed 2 panels together onto the bottom track then simply drop in a full length of top track into the slots on top of the panel and screw the Panel to the inserted track (temporary bracing of the first 2 Panels may be required). Then permanently secure the top of the track to the structure with blocking. Continue to alternate installing 2 sections of MachWall Panels and top track to complete the wall section. Cut Outs You will need to cut openings in your Panels to accommodate electrical outlets and light fixtures. To make these cutouts mark the outline of the box on the face of the Panel and use the drywall saw or router to cut through the face and the foam core. This can be done before or after the Panel is installed. Remove the cutout and use the integral chaises to run the wire from one box to the next. To make door and window openings lay the Panels flat on a firm surface with the Panel fully supported. Mark the desired opening on the face of the panel. Use the circular saw to cut out the opening following the marked lines. Carefully flip the panel over and duplicate the procedure on the other face to complete the cutout. Use care in installing this Panel because the long sections of the cutout may be fragile until it is installed.


8 Once the panels with the door cutouts are installed the foam core will need to be removed 1 ¾ deep along the legs and head of the cutout. This will allow for wood or metal framing to be inserted to attach the door jambs to. If you are using metal door jambs the inserted studs will provide extra support for the metal jambs.
9
Gambrel Barn with Overhang Manual
 Tools Needed: -Cordless Drill (12V or higher) -#2 Square Drive Bit -Hammer -6 Step Ladder -Tape Measure -Square utility knife w/ blade & hook blade -Speed Square Little Cottage Co. PO Box 455 Berlin, OH
TOLL FREE:(888) FAX:(941) ASSEMBLY of ProTEC CONCRETE STRUCTURAL INSULATED PANEL
 FAX:(941) ASSEMBLY of ProTEC CONCRETE STRUCTURAL INSULATED PANEL") ASSEMBLY of ProTEC CONCRETE STRUCTURAL INSULATED PANEL The ProTEC panels are manufactured with grooves on all four sides to accept the steel components. This grooving applies to the regular panel whose
ASSEMBLY of ProTEC CONCRETE STRUCTURAL INSULATED PANEL The ProTEC panels are manufactured with grooves on all four sides to accept the steel components. This grooving applies to the regular panel whose
MONKEY BARS OVERHEAD RACK INSTALLATION
 MONKEY BARS OVERHEAD RACK INSTALLATION Thank you for purchasing the New Monkey Bars Overhead storage rack. The most innovative overhead rack on the market WARNING THE PROPER INSTALLATION OF THIS STORAGE
Installation Instructions Split Shake, Staggered Shake, Shingle, Perfection Shingle, and Shapes
 Installation Instructions Split Shake, Staggered Shake, Shingle, Perfection Shingle, and Shapes General Guidelines These instructions show one type of installation and are intended for the professional
Gambrel Barn Construction Manual 8x8 through 16x24 Units
 Gambrel Barn Construction Manual 8x8 through 16x24 Units Tools Needed: Cordless drill (12V or higher) #2 square drive bit Hammer 6 step ladder Tape measure Square utility knife w/ blade & hook blade Little
Ensure there is reasonable access for materials and working space, ensure the shed site is level and consider the disposal of run-off water.
 INSTALLATION GUIDE TM Flat Roof Homesheds THE POTTER BEFORE YOU START It is important to check your Local Government Authority requirements before the installation of your new Stratco Potter Flat Roof
Tools needed. Supplies Needed
 Installation Guide Key System Components Main beam Cross tee Tools needed Chalk line Drill (cordless) ¼" drill bit Hammer Miter saw Pencil String line(s) Stud finder Tape measure ½" to 1" wood chisel Calculator
Chapter 1. Beam and Sill Plates
 Chapter 1. Beam and Sill Plates 1.1 ESTABLISHING SQUARE SILL PLATE CHALK LINES 1.2 INSTALLING TREATED SILL PLATES 1.3 INSTALLING LAMINATE BEAM Tools needed by volunteers: Hammer Nail apron Tape measure
EZ Shed. Tool eeded ST MER SER I E
 00 EZ Shed PLEASE READ ALL INSTRUCTIONS AND HELPFUL HINTS CAREFULLY BEFORE CONSTRUCTION Tool eeded ST MER SER I E 203 591-9032 - 30-5 30 INSTRUCTIONS 1. Separate and stack all parts included in kit. STUD
Installation Guidelines
 Page 1 Tools You ll Need 4 ft. Carpenter s level Chalk line (to mark U channel locations) Cordless drill/nut driver Caulking gun Chop saw with a metal cutting blade on it (required to make accurate and
CEILING SYSTEMS. Between us, ideas become reality. Installing. Suspended Ceilings. International Version
 CEILING SYSTEMS Between us, ideas become reality Installing Suspended Ceilings International Version 1 Installing Armstrong Suspended Ceilings An Armstrong suspended mineral fiber ceiling is functional,
Chapter 22. Shed Construction
 Chapter 22. Shed Construction 22.1 BUILDING SHED FLOOR 22.2 BUILDING SHED WALLS 22.3 BUILDING SHED ROOF 22.4 ASSEMBLING SHED Tools needed by volunteers: Hammer Nail apron Tape measure Square Utility knife
GIRTS ON BACK OF BUILDING
 GIRTS ON BACK OF BUILDING ALL GIRTS ARE 1 1/2 SQUARE TUBE. GIRT LENGTHS FOR 12, 20, 24, AND 30 WIDE BUILDINGS: ON 12 WIDE BUILDINGS GIRTS ARE 67 3/4 LONG ON 20 WIDE BUILDINGS GIRTS ARE 56 3/4 LONG ON 24
PVC Composite Railing & Stair Kit
 FREEDOM-WEB PVC Composite Railing & Stair Kit INSTALLATION INSTRUCTIONS Read all instructions prior to installing product. Refer to manufacturers safety instructions when operating any tools. To register
Installation Instructions. Conventional Wainscot Wall Padding Panels MODEL # RWC25321 RWC26321 RWC253X1 RWC263X1 RWC25321 RWC25XXX RWC26XXX
 Conventional Wainscot Wall Padding Panels MODEL # RWC25321 RWC26321 RWC253X1 RWC263X1 RWC25321 RWC25XXX RWC26XXX Installation Instructions FOR CONVENTIONAL PANELS 07/05 SPT050026 CUSTOMIZED PADS We offer
Dura-Lock Roof System
 DLR-14 Dura-Lock Roof System Assembly and Installation Instructions Read the instructions before starting the job. They explain the steps required to produce a finished product that will meet factory specifications.
TrendWall Floor-To-Ceiling Panels Installation Instruction
 TrendWall Floor-To-Ceiling Panels Installation Instruction TrendWall Components Covered by this Instruction: Crown (and accessories) Floor Plate Solid Panel Filler Panel Wall Channel Door Section Pilaster
Chapter 3. Wall Layout
 GFCAHFH March 15, 2018 Construction Manual Version 18.0 Chapter 3. Wall Layout 3.1 LAYING OUT EXTERIOR WALLS 3.2 CUTTING EXTERIOR WALL PLATES 3.3 MARKING WINDOW AND DOOR LOCATIONS ON EXTERIOR WALL PLATES
Chapter 3. Wall Layout
 Chapter 3. Wall Layout 3.1 LAYING OUT EXTERIOR WALLS 3.2 CUTTING EXTERIOR WALL PLATES 3.3 MARKING WINDOW AND DOOR LOCATIONS ON EXTERIOR WALL PLATES 3.4 MARKING STUDS ON EXTERIOR WALL PLATES 3.5 LAYING
SLATTEX (Textured Slatwall) INSTALLATION GUIDE
 INSTALLATION GUIDE") SLATTEX (Textured Slatwall) INSTALLATION GUIDE Preparing for the Installation: Here are some suggestions to help you to help you simplify the installation process and maximize the beauty of your 3D Textured
SLATTEX (Textured Slatwall) INSTALLATION GUIDE Preparing for the Installation: Here are some suggestions to help you to help you simplify the installation process and maximize the beauty of your 3D Textured
E-Z BUILD STEEL BARN 12' 12' 12' 16' 12' 20'
 E-Z BUILD STEEL BARN 12' 12' 12' 16' 12' 20' BUILD You can construct your own E-Z frame barn with the help of this step by step guide. North American softwood dimensional lumber sizes: Nominal Actual in
E N G L I S H GARDEN SHED. Assembly Instructions. Suitable for Models WITH VARYING DEPTHS
 GARDEN SHED Assembly Instructions Suitable for Models 6' Wide 8' Wide 0' Wide WITH VARYING DEPTHS GI0003 November 0 INSTALLATION ADVICE It's Not That Difficult! The construction of your shed isn't as complicated
Precut Value Shed Manual Gambrel Barn
 Tools Needed: -Cordless Drill (12V or higher) -#2 Square Drive Bit -Hammer -6 Step Ladder -Tape Measure -Square utility knife w/ blade & hook blade -Speed Square Little Cottage Co. PO Box 455 Berlin, OH
Country Cabin. Assembly Manual. HomePlace Structures
 Country Cabin Assembly Manual Country Cabin Assembly Manual revised 3/20/10 Dear Customer, Thank you for your purchase of our Country Cabin. The craftsmanship and detail in this building is unmatched.
Installation Guidelines
 Page 1 Tools You ll Need 4 ft. Carpenter s level Chalk line (to mark U channel locations) Cordless drill/nut driver Caulking gun Chop saw with a metal cutting blade on it (required to make accurate and
Chapter 23. Garage Construction
 Chapter 23. Garage Construction 23.1 ESTABLISHING CHALK LINES 23.2 MEASURING AND CUTTING WALL PLATES 23.3 MARKING WINDOW & DOOR LOCATIONS ON EXTERIOR WALL PLATES 23.4 MARKING STUDS ON EXTERIOR WALL PLATES
INSTALLATION GUIDE. Flat Roof Homesheds TM. Onto Concrete BEFORE YOU START TOOLS REQUIRED
 INSTALLATION GUIDE Flat Roof Homesheds TM Onto Concrete BEFORE YOU START It is important to check your Local Government Authority requirements before the installation of your new Stratco Flat Roof Homeshed.
Build a Full Height Wall
 Youth Explore Trades Skills Description Standard wall sections are an important feature in residential house construction, and their components must conform to building code specifications. In this lesson,
Installation Instructions for. Handrail Component System
 Handrail STEP-BY-STEP Installation Instructions for Handrail Component System Rise in Inches Run in Inches 8 8.5 9 9.5 10 10.5 11 11.5 12 12.5 13 13.5 14 14.5 15 8.5 47 45 43 42 40 39 38 36 35 34 33 32
C-Series & S-Series Classic Frame with Transom (Single or Pair)
") 1. TOOLS REQUIRED Tape measure 6' magnetic level 3' magnetic level Safety Glasses Screw gun #2 Screwdriver tip #3 Screwdriver tip Philips Head screwdriver (Used to move frame on wall using oval slots on
1. TOOLS REQUIRED Tape measure 6' magnetic level 3' magnetic level Safety Glasses Screw gun #2 Screwdriver tip #3 Screwdriver tip Philips Head screwdriver (Used to move frame on wall using oval slots on
Cape Cod Manual. Little Cottage Co. PO Box 455 Berlin, OH Little Cottage Co.
 Tools Needed: -Cordless Drill (12v or higher) -#2 Square drive bit -Hammer -6 Step Ladder -Tape Measure -Square utility knife with blade & hook blade -Speed Square Little Cottage Co. PO Box 455 Berlin,
The Castle House Assembly Instructions By Laser Dollhouse Designs
 The Castle House Assembly Instructions By Laser Dollhouse Designs HOUSE PARTS First floor slots labeled 1A-1G First floor Walls labeled 1A-1G First floor interior door frames (4) Wall 1A frames (6) Main
INSTALLATION GUIDE. Flat Roof Homesheds TM BEFORE YOU START TOOLS REQUIRED
 INSTALLATION GUIDE Flat Roof Homesheds TM BEFORE YOU START It is important to check your Local Government Authority requirements before the installation of your new Stratco Flat Roof Homeshed. Read these
Installation Instructions Palladium Square Edge Panels
 Please read all instructions before installing wall panels Important 1. Before installation: a. Acclimate Palladium Panels, Trim, adhesives and wall substrates to room temperature 24 hours before installation.
Assembly Instructions
 10' and 12' Octagon Cedar Gazebo Assembly Instructions Toll Free: 866.768.8465 Hours: 9-5 Monday-Friday EST www.homeplacestructures.com Package ships as shown revised 06/20/09 Cedar Gazebo Assembly Instructions
MAGNUM BOARD INTERIOR INSTALLATION GUIDELINES
 TECHNICAL BULLETIN No.: 090509-1405 Subject: Issue Date: September 4, 2009 Issue No.: II MAGNUM BOARD INTERIOR INSTALLATION GUIDELINES 1. CUTTING MAGNUM BOARD You can easily cut Magnum Board with carbide
#11179 Wellington ARBOR
 #11179 Wellington ARBOR Assembly INSTRUCTIONS TOOLS NEEDED Tape Measure Variable Speed Drill with #2 Phillips Bit (recommended) or Phillips Screwdriver Hammer or Mallet ARBOR SIDE PANEL ASSEMBLY (Refer
Install Like The Pros
 CertainTeed Install Like The Pros Installing Gypsum Board Like The Pros CertainTeed Install Like The Pros GETTING STARTED RIGHT Use the right products For the best, lasting results choose the right CertainTeed
AFCO-Rail Post INSTALLATION INSTRUCTIONS AFCO-RAIL POST
 AFCO-Rail Post INSTALLATION INSTRUCTIONS TOOLS REQUIRED: Drill Bits (for the appropriate fastener) Drill (with adjustable clutch, recommended) Level String Line Tape Measure Tools to install fasteners
RENU PANELING SYSTEM Installation Guide PLEASE READ GUIDE COMPLETELY BEFORE ASSEMBLY. Version 1.0 ALL STATED SIZES ARE NOMINAL DIMENSIONS.
 RENU PANELING SYSTEM Installation Guide Version 1.0 PLEASE READ GUIDE COMPLETELY BEFORE ASSEMBLY. ALL STATED SIZES ARE NOMINAL DIMENSIONS. Components Trim Track (TT) 1" x 1 3 4" (GER3TTAA): fastens to
How to Install the QuickHang Installation Kit
 FOR RESIDENTIL USE: The QuickHang hardware in this kit is designed to work with solid wood and engineered wood joists in residential ceiling applications. KIT INLUDES: (3) 6' Main beams (9) ross tees (9)
COMPOSITE RAILING INSTALLATION
 COMPOSITE RAILING INSTALLATION Tools All you ll need is a hammer and screw gun, circular saw (carbidetipped blade with fewer than 20 teeth is recommended), level, tape measure, rasp and blue chalk line.
INSTALLATION INSTRUCTIONS
 INSTALLATION INSTRUCTIONS SOLID PHENOLIC TOILET PARTITIONS 1080 DuraLine Series 1180 DuraLine Series Class-A Fire Rated IMPORTANT: Review these instructions thoroughly prior to installation. FLOOR ANCHORED
" BASE CABINET
 INSTALLATION GUIDE INSTALLATION GUIDE Before You Begin Installing Your Kitchen Cabinets 1. Read through installation guide to understand all steps and gather tools needed. 2. Verify that all of the hardware,
Installation Instructions and Details
 Installation Instructions and Details Contents Page General Notes 2 Typical System Perspective 3 Panel, Hardware & Trim Details 4-6 Hardware & Trim Fabrication Details 7-9 Installation Procedures 10-12
Revision Date: April 01, Paramount Enclosure
 Paramount Enclosure www.urbanindustries.com 15 Urban Industries, Inc. 2008 Tools The following tools are recommended for the installation of the Paramount Aluminum Enclosure and roof. 1 2 Level 1 4 Level
Unit 9. Wall and Ceiling Framing
 Unit 9 Wall and Ceiling Framing Wall construction Wall framing includes the assembly of horizontal and vertical members that make up exterior walls and interior partitions. Theses walls support the ceilings
STACKING MULTI-SLIDE DOOR SYSTEM INSTALLATION INSTRUCTIONS
 STACKING MULTI-SLIDE DOOR SYSTEM INSTALLATION INSTRUCTIONS 1290363 Revision 1 12/16 Page 1 Weather Shield Mfg., Inc. NOTICE CAUTION! Failure to install and maintain our product according to these instructions
Install Like the Pros
 CertainTeed Install Like the Pros Drywall Installation Guide GETTING STARTED RIGHT Use the right products For the best, lasting results choose the right CertainTeed gypsum board for the job you re planning.
Versatrim Side-Snap Frame
 Versatrim Side-Snap Frame net door width finished opening width rough opening width (finished opening width plus 1 1/2") Figure 1 Cross section of strike and hinge jambs The rough opening width is equal
Adorn Mortarless Stone Veneer Installation Natural Concrete Products
 Adorn Mortarless Stone Veneer Installation Adorn Mortarless Stone Veneer can be used on new or existing construction. Adorn is nailed or screwed onto the wall; therefore no brick ledge is required. Adorn
Qwik-Fence Installation Instructions
 Qwik-Fence Installation Instructions 1 Tools Required The following installation instructions should be used as a guide for installing Folding Guard Qwik-Fence Partitions. Good common sense and appropriate
TRIM & DOORS. Note Interior work demands more precision than framing - be exact in your measurements! Outfitting the interior.
 104 TRIM & DOORS Outfitting the interior Table of Contents Interior Doors... 105 Single... 106 Double... 108 Paint Prep... 110 Caulking & Spackling... 112 Baseboard... 113 Window Sills... 115 Nail Gun
Chapter 11. Siding and Soffit
 Chapter 11. Siding and Soffit 11.1 SIDING PREP 11.2 INSTALLING HOUSE SIDING 11.3 INSTALLING SHED SIDING 11.4 INSTALLING SOFFIT 11.5 INSTALLING FASCIA 11.6 INSTALLING SHUTTERS 11.7 SITE CLEANUP Tools needed
Installation Instructions for. Before You Begin TOOLS REQUIRED
 Composite Railing System STEP-BY-STEP Installation Instructions for Spectrum Composite Railing Virtually maintenance free 20-year warranty EverNew Spectrum Railing system is designed to work with a number
Sauna & Steam. Traditional Sauna Installation Instruction Manual
 Traditional Sauna Installation Instruction Manual Oceanic Ltd, Pountney Street, Wolverhampton, WV2 4HX Phone: 01902 450 550 sales@oceanic-saunas.co.uk www.oceanic-saunas.co.uk Contents 1.Introduction................................................
Laminate Cabinet Installation Instructions
 Laminate Cabinet Installation Instructions www.easygaragestorage.com/installation How To Use These Instructions Thank you for your purchase! Please read each step of this manual thoroughly to ensure proper
FOLDING DOOR - FOR FACTORY ASSEMBLED JAMBS WITH APPLIED SILL
 FOLDING DOOR - FOR FACTORY ASSEMBLED JAMBS WITH APPLIED SILL READ SPECIFIC INSTALLATION INSTRUCTIONS COMPLETELY BEFORE STARTING ANY INSTALLATION Failure to install and maintain our product according to
THANK YOU FOR PURCHASING FROM HERITAGE PATIOS
 Installation Guide THANK YOU FOR PURCHASING FROM HERITAGE PATIOS Your purchase is engineered by nearly a half century of commercial and residential product design proudly manufactured in the USA from responsibly
x2 1/4 (6mm) Floor Anchor
 Floor Anchor") INSTALLATION GUIDE Main Components x1 Rail x5 Wall Spacer x2 Anti-jump Block x2 Straight Strap x1 Right Stopper x1 Left Stopper x5 5/16 (8mm x 60mm) Carriage Bolt x5 5/16 (8mm x25mm) Anchor x5 5/16 (8mm
INSTALLATION GUIDE Main Components x1 Rail x5 Wall Spacer x2 Anti-jump Block x2 Straight Strap x1 Right Stopper x1 Left Stopper x5 5/16 (8mm x 60mm) Carriage Bolt x5 5/16 (8mm x25mm) Anchor x5 5/16 (8mm
E-Z BUILD SHED BUILDING GUIDE 10' 10' 10' 12' 10' 14' 10' 16' 10' 20'
 E-Z BUILD SHED BUILDING GUIDE 12' 14' 16' 20' North American softwood dimensional lumber sizes: NOMINAL in in 1 4 1 6 2 4 2 6 ACTUAL in in ¾ 3½ ¾ 5½ 1½ 3½ 1½ 5½ Shown with rollup door Construct your own
installation care & maintenance instructions lifecycledecking.com 25-year limited residential warranty 20-year limited commercial warranty
 installation care & maintenance instructions lifecycledecking.com 25-year limited residential warranty 20-year limited commercial warranty Installation Instructions As with any building project, use proper
PORTA-FAB Cleanroom Wall Systems
 PORTA-FAB Cleanroom Wall Systems FABLINE BATTEN 2000 INSTALLATION INSTRUCTIONS IMPORTANT Porta-Fab Advises A Thorough Reading of These Instructions Before Beginning Installation. INTRODUCTION Porta-Fab
INSTALLATION INSTRUCTIONS FIXTURE SERIES: SAE 202 MOUNTING TYPE: RECESSED WALL / SLOT PAGE: 1 OF 8
 INSTALLATION INSTRUCTIONS FIXTURE SERIES: SAE 202 MOUNTING TYPE: RECESSED WALL / SLOT PAGE: 1 OF 8 90v INNER CORNER KIT "R" (REGRESSED) POSITION CROSS-SECTION VIEW "S" (SHIELDING AT TOP) POSITION CROSS-SECTION
SIDING-MASTER VINYL SIDING ATTACHMENT & ALIGNMENT SYSTEM & OVERHANG ATTACHMENT & ALIGNMENT SYSTEM INSTALLATION INSTRUCTIONS
 Patent Pending SIDING-MASTER & OVERHANG ATTACHMENT & ALIGNMENT SYSTEM INSTALLATION INSTRUCTIONS Overview... SIDING-MASTER Strip Diagram... How to cut strips for length... Accessory Diagrams... How to (and
Installation Instructions
 Installation Instructions For Models: Model Number / Description File Name 1540 Classic Series P-Lam Toilet Partitions 1540.pdf 1 INSTALLATION INSTRUCTIONS LAMINATED PLASTIC TOILET PARTITIONS 1540 Classic
Tips for Professional Ceiling Installers
 Tips for Professional Ceiling Installers Over the years, Armstrong installation instructors and professional installers have solved many ceiling installation problems. Here is a compilation of their solutions...
9 X 9 REMOVABLE TYPE ALUMINUM WINDOW BARS INSTALLATION INSTRUCTIONS Import Note : 9 X 9 Spacing Removable Type Installation is covered in this
 Import Note : 9 X 9 Spacing Removable Type Installation is covered in this Instruction. Removable Bars Only Mount in Recess Position ( Between Window Jamb/ Frame ) The spacing between horizontal bars is
FrameSaver Jamb Bottom Replacement Instructions
 FrameSaver Jamb Bottom Replacement Instructions 8817 West Market Street Colfax, NC 27235 800.334.2006 www.enduraproducts.com Utility Knife Straight Edge Circular Saw Reciprocating Saw Miter Saw Shims Screws
Desk/Wall-Mount Rack
 Desk/Wall-Mount Rack Patent(s) Pending Installation Instructions Post P/N: 119-1752 119-1781 119-1782 119-4014 Frame P/N: 119-1591 119-1754 119-1755 Kit Contents (2) Frames (4) Posts Assembly Hardware
Post & Rail Crossbuck
 Post & Rail Crossbuck 1. Getting Started 6. Crossbuck Be sure to call underground prior to digging Assemble gates (if necessary) and decide where they will be located Stake out the fence line Space and
Steel Sound Enclosure
 Steel Sound Enclosure INSTALLATION MANUAL List of tools recommended for use during installation: vise grips c clamp ladder electric drill drill bits / taps as req d screw drivers hammer rubber mallet pipe
Open Lattice tube Patio Cover- Basic Installation Guidelines
 Before You Begin: DOUBLE HEADER/SINGLE RAFTER Open Lattice tube Patio Cover- Basic Installation Guidelines 1. Take the time to read and understand the basic guidelines before opening or starting your patio
- 2 JOINER ALIGNERS - 2 JOINING BRACKETS - 4 HEX BOLTS. Factory pre-installed mud flange TOOLS REQUIRED: Phillips screwdriver, 5/16 nut driver.
 - 2 JOINER ALIGNERS - 2 JOINING BRACKETS - 4 HEX BOLTS TruGroove Drywall A3 MOUNTING Ceiling INSTALLATION System Overview These instructions review how to install drywall trim versions of TruGroove recessed
Low Headroom Rear Mount TorqueMaster
 Low Headroom Rear Mount Supplemental Instruction Insert This supplemental installation instruction is to be used as a supplement to the main Installation Instruction and Owner s Manual provided with the
Installation Instructions Standalone or continuous run configurations - 2 JOINER ALIGNERS - 2 JOINING BRACKETS - 4 HEX BOLTS
 - 2 JOINER ALIGNERS - 2 JOINING BRACKETS - 4 HEX BOLTS TruGroove Drywall A3 MOUNTING Ceiling INSTALLATION System Overview These instructions review how to install trimless drywall versions of TruGroove
Open Lattice Tube Patio Cover- Basic Installation Guidelines
 Open Lattice Tube Patio Cover- Basic Installation Guidelines Before You Begin: 1. Take the time to read and understand the basic guidelines before opening or starting your patio kit. 2. Please read this
INSTALLATION: D1-NOTCH DRYWALL TRIM FLANGE
 T F W 604.549.979 604.549.9555 fluxwerx.com INSTALLATION: D1-NOTCH DRYWALL TRIM FLANGE fixture housing endcap kit optic kit join kit notch 2 cross section notch 4 cross section 4 4" 4-11/2" 4 /8 (111)
Keystone Garage Assembly Manual
 Keystone Garage Assembly Manual 14x24 Garage Kit ships as shown Toll Free: 866.768.8465 Hours: 9-5 Monday-Friday EST 13 8 deep AMISH ORIGINAL KEYSTONE 14x24 GARAGE s p e c i f i c a t i o n s Optional
Pacifica Pool House. Assembly Manual. Toll Free: Hours: 9-5 Monday-Friday EST. Package ships as shown. Suncast Corporation
 Pacifica Pool House Assembly Manual Toll Free: 866.768.8465 Hours: 9-5 Monday-Friday EST Package ships as shown Simpson Hurricane Straps Double Insulated Raised-Panel Door in back wall (71 x71 Total opening)
INSTALLATION INSTRUCTIONS
 INSTALLATION INSTRUCTIONS SOLID PHENOLIC TOILET PARTITIONS 1080 DuraLineSeries Class-A Fire Rated Includes Institutional Hardware Option.67 IMPORTANT: Storage and Handling Information on last page. Review
WoodTrac Direct Mount Ceiling System
 WoodTrac Direct Mount Ceiling System Assembly Instructions All product is Class C rated and some product is available Class A rated. Check the ordering information to obtain the class rating for your product.
WOODWORKS Walls. Installation Instructions WALL
 WALL Systems Between us, ideas become reality WOODWORKS Walls Installation Instructions 1. GENERAL 1.1. Product Description WoodWorks walls consist of 2' x 4', 2' x 8', 2' x 9' or 2' x 10' perforated and
Office Installation Guidelines
 UH Structures Inc. dba Ebtech Industrial 2241 Industrial Drive Connellsville, PA 15425-6181 Telephone: 724-628-6100 Fax: 1-412-774-2429 www.ebtechindustrial.com Office Installation Guidelines INTRODUCTION
How To Measure Your Finished Opening
 3000 Series Bifold Doors How To Measure Your Finished Opening MEASURE FROM RIGHT TO LEFT 2 PLACES (WIDTH) MEASURE FROM TOP TO BOTTOM 2 PLACES (HEIGHT) Tools Required for Assembly: Tools Needed: Phillips
Baby Grande with Crank, Housing, and Side Rails Installation Instructions
 Baby Grande with Crank, Housing, and Side Rails Installation Instructions Tools Needed Hardware Provided (per shade) Hardware Needed Drill 3/8 Metal Drill Bit ¼ Masonry Drill Bit Measuring Tape Pencil
PRO CYC PRO CYC, INC. SYSTEM SUPER 3EZ
 ASSEMBLY INSTRUCTIONS SYSTEM SUPER 3 EZ Congratulations on your decision to use the world s most advanced and user-friendly cyclorama system. We have taken a great deal of care to create and ship your
TIP FOR GETTING STARTED
 Tip for getting started TIP FOR GETTING STARTED Be careful not to drill into any electrical wires, ductwork, plumbing or other damagable components. If you have any questions on the locations of these
Chapter 7 - Porch Framing
 Chapter 7 - Porch Framing Contents Chapter 7 - Porch Framing... 7-1 Timing & Prerequisites... 7-2 Concrete Porches Caps (Contractor)... 7-3 Organize the Porch Framing Lumber... 7-3 Types of Porch Roofs...
Versette Cultured Stone Installation Instructions with Universal Corner
 Versette Cultured Stone Installation Instructions with Universal Corner Personal Protective Equipment: 1. Safety Glasses/Goggles 2. NIOSH approved N-95 Series disposable particulate filtering face piece
Building Instructions
 Building Instructions Tools Required Tape measure Straight edge Pencil/pen Jigsaw Table Saw Circular Saw Electric drill 1 Hole saw bit Saw horses/table Protractor Staple gun Caulk gun Paint brush Wrenches
U. M. ARMY Texas Conference. Wheel Chair Ramp Manual
 U. M. ARMY Texas Conference Wheel Chair Ramp Manual June 2014 U. M. ARMY Texas Conference Building & Repair Tips Wheelchair Ramps Complete a site survey to determine the design and layout of the ramp.
14.0 SIDING AND SOFFITS SECTION
 14.0 SIDING AND SOFFITS SECTION 1. Introduction At the present time, Habitat homes in St. Louis are being sided in vinyl. This is to keep the price down, and to provide the homeowner with a relatively
INSTALLATION GUIDE
 MASON S BRICK INSTALLATION GUIDE 800.945.4440 WWW.STYLECRESTINC.COM MASON S BRICK INSTALLATION GUIDE INSTALLATION SUMMARY Your new Mason s Brick skirting comes in 4-1/2 foot long panels that are either
10 Octagon Cedar Gazebo Assembly Instructions
 10 Octagon Cedar Gazebo Assembly Instructions Toll Free: 866.768.8465 Hours: 9-5 Monday-Friday EST www.homeplacestructures.com Package ships as shown revised 06/22/09 10 Cedar Gazebo Assembly Instructions
PRE-ENGINEERED HORSE STALL SYSTEMS SDFD SLIDING DOOR c/w FOLD-DOWN GRILL. & Assembly. Installation Instructions
 PRE-ENGINEERED HORSE STALL SYSTEMS 4800 SDFD SLIDING DOOR c/w FOLD-DOWN GRILL & Assembly Installation Instructions 4800 SDFD Sliding Door c/w Fold-Down Grill Components - 1 3 /4" x 2" x 88" channels (2)
Blokes Shed INSTALLATION INSTRUCTIONS Custom Design & Build. Nationwide Delivery
 Blokes Shed 10 Year Guarantee On Sanders workmanship Made in NZ Using NZ timber supplies 40+ Years Experience In business since 1975 Professional Install Available NZ wide Nationwide Delivery Available
VINYL CLASSIC FREESTANDING PERGOLA ASSEMBLY INSTRUCTIONS
 P a g e 1 VINYL CLASSIC FREESTANDING PERGOLA ASSEMBLY INSTRUCTIONS Shown: 8' x 12' Vinyl Classic Pergola with 12" Top and Main Runner Spacing The design of this pergola is based on all posts being installed
INSTALLATION INSTRUCTIONS
 INSTALLATION INSTRUCTIONS 5-in x 84-in x 3/8-in 12.7 cm x 213.36 cm x 9.525 mm 10 planks 29 sq.ft. IMPORTANT INFORMATION Open cartons 2-3 days prior to the install and allow material to adjust to the relative
3.1 Continuous top and bottom lock 3.2 Engineered nailing hem 3.3 Temperature markings
 AOBP recommends 2-1/2 ring shank nails be used. Installation over foam will require longer fasteners to assure a penetration of at least 3/4 into a structural member (stude or nail base). Corner accessories