Cape Cod Manual. Little Cottage Co. PO Box 455 Berlin, OH Little Cottage Co.
|
|
|
- Harold Tyrone Lane
- 5 years ago
- Views:
Transcription


1 Tools Needed: -Cordless Drill (12v or higher) -#2 Square drive bit -Hammer -6 Step Ladder -Tape Measure -Square utility knife with blade & hook blade -Speed Square Little Cottage Co. PO Box 455 Berlin, OH Little Cottage Co.
2 1 2 3 To begin construction of your Cape Cod playhouse simply lay out (2) 4x4 flooring sections side by side. Make sure it is on a level area. 4 Make sure the plywood is even before fastening. If it is not, you will have an uneven floor. Screw the sections together. Put one screw towards the plywood, and the other toward the top. Put 4 screws on each side roughly 8-10 apart Next add additional sections. Note: 8x8 floor will be larger. 5 6 Again, make sure the plywood is even or you will have an uneven floor. Fasten these in the same manner. Space screws in sets of (2) 8-10 apart. Construction Manual Little Cottage Co. Page 1


3 7 8 9 This pictures shows the optional 4x4 runner, you will need 3 in order to have 1 under the joint. If you use only 2 the floor will sag. Note: these aid in moving the building later, but are optional, unless you are adding the deck & rail, then you must add them or the child door will not clear the deck. 10 Turn the floor on the back with the plywood facing up. Make certain that the ground is level where the floor sets or you may have problems with the panels or the roof. Install section A BE SURE to install the trim toward the center as shown! This is the trim for the small door. This is the start for a 6x8 other sizes are slightly different. The same basic structure is used. Refer to the wall layout documents for the alphabetical order Make sure your panel is flush with the edge of the floor. This is something that you will need to check throughout the assembly process. Push the wall in as shown so the siding is against the floor. This is again something to do throughout the entire assembly process. Install header block B Construction Manual Little Cottage Co. Page 2


4 13 14 Now make sure it is even on top. Fasten the trim on the header block B into the siding. Install panel C. Fasten this onto the header block as shown Be sure to measure from 2x3 to 2x3 that the opening is 20. Do not measure in between the door stop. If it is not you may need to adjust it one way or the other. Fasten the other side of the header block B to panel C Install panel D. Panel E s edge will fit over the edge of panel D. Install this panel. You can fasten the entire building like this roughly every with 2 1/2 screws. Construction Manual Little Cottage Co. Page 3


5 19 20 Install panel E. Be sure to keep them even as shown. Fasten all joints like this roughly every 8-10 with 2 1/2 screws. Install panel F. Again keep square and level Fasten corner like this. Install panel G. Fasten in corner and bottoms as shown before Assemble panels H and I. Make sure they are even on the bottom. Fasten. Fasten the top of the trusses as shown. This draws them tight together. Construction Manual Little Cottage Co. Page 4


6 25 26 Press together trim as shown and fasten. The trim is not fastened to allow for adjustments. Install this assembled gable top Measure in 5 1/2 from the outside as shown. Be sure to pull in against siding and fasten as shown. Have someone press in from the outside as shown While someone presses in on the outside fasten on the inside. Put 2 1/2 screws on either side of the splices to provide strength. Install panel J. Construction Manual Little Cottage Co. Page 5


7 31 32 Install panel K. Measure in between these two panels. From 2x3 to 2x3 it should measure 34. Fasten panels L & M together. Note to keep the bottom edge even. This will be the top of the door so it is very important Install this gable top. Make sure that the edges by the door side are even. Fasten once it is even Fasten other side in the same fashion. Install (3) 2x3x36 pieces over the top of the door and sides over joints. This will provide strength for the door. Keep even with the edge of the door. Construction Manual Little Cottage Co. Page 6


8 37 38 Install screws as shown over joints. This provides strength for joints Install 2x6 with trim, match sets of three with numbers on the pieces. For other size buildings refer to layout page for layout and number of pieces. Keep even on the inside as shown and fasten. Install other side Next install the center piece. Note: speed square, keep these edges even. Fasten, be sure to use enough screws. Construction Manual Little Cottage Co. Page 7


 the angles are")


9 Precut Workshop Manual Fasten as shown right by joints. Fasten the 1x3 to the center section using black screws. This will straighten the 2x6 and make it strong Lay trusses as shown. On the 4x6 and 6x8 sizes, the trusses are the same angle. On the larger sizes (8x8, 8x10, and 8x12) the angles are different on one end. Make sure the correct angles are matching. You can check this with the gusset angles Keep the top of the truss even and install 2 1/2 screws as shown. Fasten the truss gussets, keep the top even. Use black headed screws for this. Install one gusset on either side of the truss. For a total of 2 per truss. Flip the truss and install gusset on other side. Construction Manual Little Cottage Co. Page 8


 sheeting.")


10 49 50 Install truss as shown. Truss should fit as shown. Make sure truss does not go past the edge of the 2x6 onto the trim Install first sheet of OSB (orient strand board) sheeting. Fasten only on the bottom first. Refer to layout diagram for your specific building. Use black-headed screws to fasten Fasten the top onto the gable side. Note gap between OSB and 2x2 with trim. Be sure you have this before fastening on top. Continue installing sheeting around the building. Construction Manual Little Cottage Co. Page 9


11 55 56 Install top pieces of sheeting. Repeat these steps on the other side Install drip edge all around the edge of building as shown. Now you are ready to begin shingles. Refer to your shingle package for additional shingle instructions You will want to install shingles in a staggered fashion. When you have done both sides, cut caps for the peak of the roof. To cut caps cut the tabs. For Example: If there are 3 tabs per shingle there will be 3 caps, just continue to cut the line through the shingle. Construction Manual Little Cottage Co. Page 10


12 Install the caps as shown. When you reach the end you can use only the exposed part of the shingle to give it a nice finish. For Example: The cap would then be cut in half for this. 64 Check the layout diagram for correct measurements for your size building. Measure from the edge of the building to edge of the treated dormer frame. There is a cut angle right where the fingers and tape are in the picture. Make sure this angle is turned up and not down toward the roof. Measure from the bottom up, the edge of the roof to the base of the dormer frame. Make a small pencil or chalk mark once you have positioned the base. Once you have the correct position apply caulk to the bottom of the base. Make sure it is the bottom! Screw the bas into the roof. You can use 2 1/2 screws. Be sure to check on the inside and break off the screw that is exposed. Make sure the frame is square. Construction Manual Little Cottage Co. Page 11


13 Once the frame is fastened on the outside you can break screws poking through the roof. You can also fasten the frame from the inside out. 70 This shows the dormer parts, except for the Plexiglas window. Frame is already installed at this point. Slide the pieces together as shown. Use 2 1/2 screws to fasten together. Flip to other side and fasten together Fasten small truss as shown. Fasten one side of OSB to trusses. Construction Manual Little Cottage Co. Page 12


14 73 74 Fasten other side to trusses. Install grid window Install pre drilled dormer grid window trim. Install dormer to treated base. Dormer shown does not have the trim or window in Use your speed square to make sure the dormer is square to the building. If it is not squared correctly it can look different. Fasten the dormer onto the base. Construction Manual Little Cottage Co. Page 13


15 79 80 Fasten sides. Fasten the sheeting to the base Install a starter shingle strip Cut the excess past the dormer. Be sure to use a hook blade so you do not cut into the other roof shingles Install the next row of shingles. Once the last row is installed measure 4 1/4 from the top down and snap a chalk line. This ensures a straight line for the cap. Construction Manual Little Cottage Co. Page 14


16 85 86 Cut the caps for the dormer roof. Start by installing a starter cap Continue installing the cap. When you get to the back, trim to conform to the roof line Install a siding piece below the child door and the adult door. Be sure to keep level with the floor. Place the provided spacer bar by edge. Construction Manual Little Cottage Co. Page 15


. Install turner knob.")

17 91 92 Place the door on the spacer bar. Fasten using only one screw per hinge. This way if adjustments are needed you will not have to undo all the screws. Use black head screw for these Next install the top door piece. Try to center the door between the header block and the bottom door. If both doors work well, install the rest of the screws and remove spacer bar. You will now begin to install 3 door pulls (2 on the out side, and one on the inside at the top). Install turner knob. Install top door piece on the adult door Measure the doorway on the adult door, 34 inches. It should be very close to this measurement in order for the adult door to work. Place the spacer bar by the adult door. Again use only 1 black head screw per hinge. Construction Manual Little Cottage Co. Page 16


18 Install top door piece and door latch. Once everything is working install the rest of the screws in the hinges. You can also make the adult door 1 piece by fastening them together if you prefer 1 solid door. 100 Install the shutters and flower box and window trim. Install the corner trim with small white nails. Be careful to not wrinkle the corners when installing. Your house is now ready to move into!!! Please see additional manuals for, deck & rail, chimney, or additional windows. Construction Manual Little Cottage Co. Page 17


19 Thank You for purchasing from Little Cottage Co. We wish you many years of enjoyment! Pictured playhouses are shown with additional options. Construction Manual Little Cottage Co. Page 18
20
21

22


23 Chimney Option 1 2 Locate and prepare to assemble chimney sections. Secure corners of chimney using two (2) 1¼ black headed screws per side. 3 4 Complete chimney assembly. Carefully lift chimney to the roof. Measure inward 6 from end of roof and set chimney in place. 5 Secure chimney to roof using two (2) 2½ screws along base of chimney on both sides. Construction Manual 2007 Little Cottage Co. Page 1
24
25
26
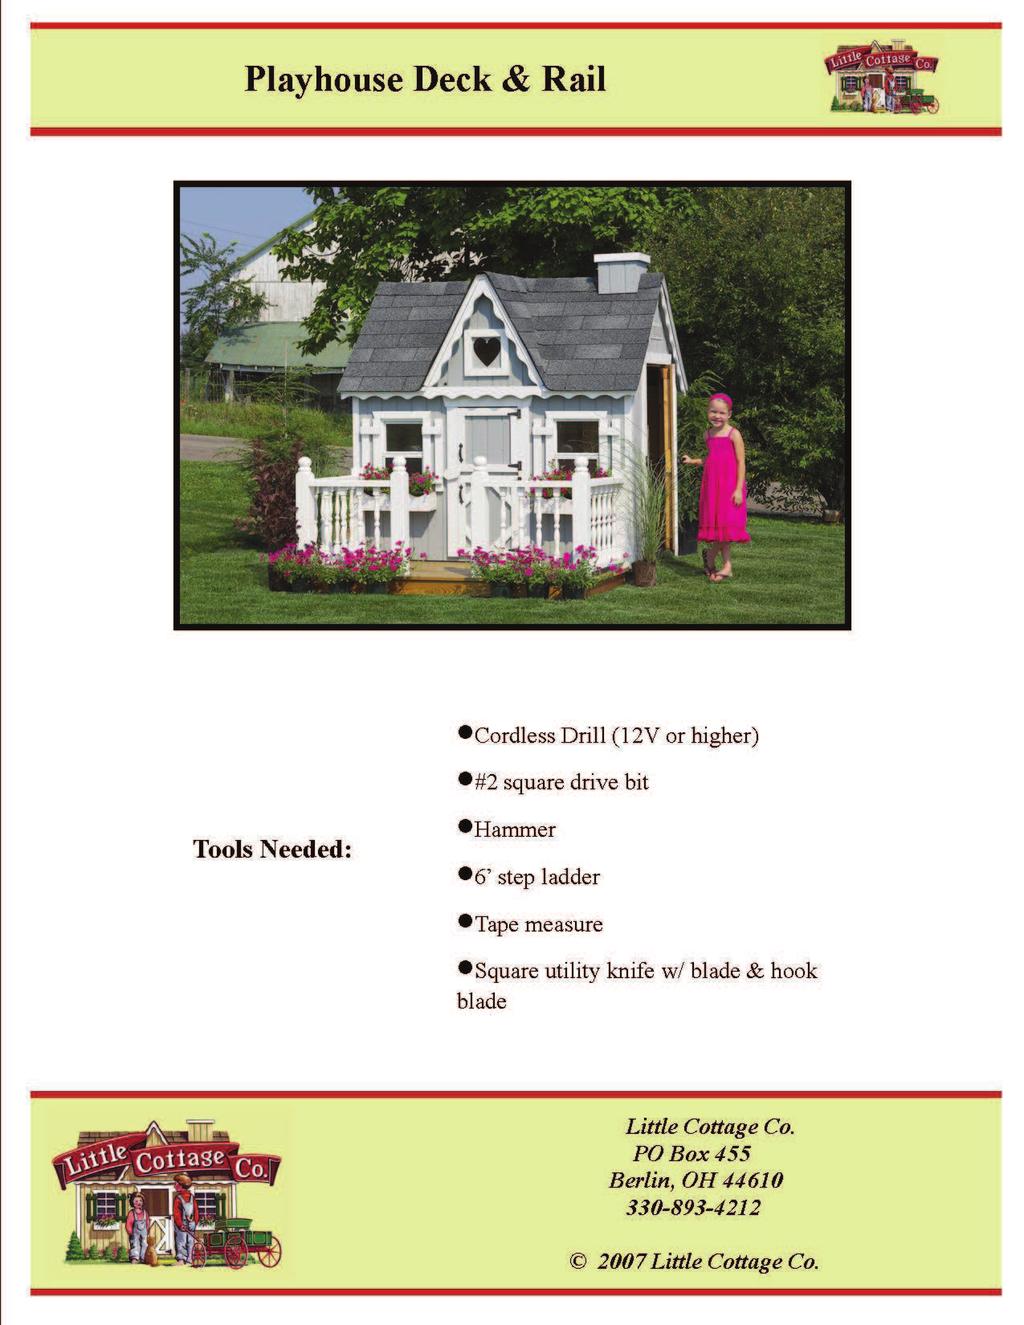
 2-10 foot long pieces drip edge with 1 inch face Note- Deck and rail are not attached to playhouse.")
27 Little Cottage Co. You will need to buy the following to complete your 4*6 kit. 2- Bundles shingles (There are usually 3 bundles per square if they want to sell it by the square) 2-10 foot long pieces drip edge with 1 inch face Note- Deck and rail are not attached to playhouse. The deck justs sits in front of the house. Hardware Box (included with kit) Use: ¾ Roofing nails for main part of roof. 7/8 Roofing nails for the ridge cap. 2 ½ Screws to fasten main parts of playhouse. 1 ¼ Black headed screws to fasten roof and doors. 1 White aluminum nails for outside corner trim. Downloadable instructions are available at: Be sure to download instructions before starting!
Victorian Playhouse Manual
 Tools Needed: -Cordless Drill (12V or higher) -#2 Square Drive Bit -Hammer -6 Step Ladder -Tape Measure -Square utility knife w/ blade & hook blade -Speed Square Little Cottage Co. PO Box 455 Berlin, OH
10x12 Cape Cod Manual
 Tools Needed: -Cordless Drill (12V or higher) -#2 Square Drive Bit -Hammer -6 Step Ladder -Tape Measure -Square utility knife w/ blade & hook blade -Speed Square Little Cottage Co. PO Box 455 Berlin, OH
10x12 Victorian Manual
 Tools Needed: -Cordless Drill (12V or higher) -#2 Square Drive Bit -Hammer -6 Step Ladder -Tape Measure -Square utility knife w/ blade & hook blade -Speed Square Little Cottage Co. PO Box 455 Berlin, OH
Firehouse Manual. Tools Needed:
 Tools Needed: -Cordless Drill (12V or higher) -#2 Square Drive Bit -Hammer -6 Step Ladder -Tape Measure -Square utility knife w/ blade & hook blade -Speed Square Little Cottage Co. PO Box 455 Berlin, OH
Gambrel Barn with Overhang Manual
 Tools Needed: -Cordless Drill (12V or higher) -#2 Square Drive Bit -Hammer -6 Step Ladder -Tape Measure -Square utility knife w/ blade & hook blade -Speed Square Little Cottage Co. PO Box 455 Berlin, OH
Precut Workshop & Gable Manual
 Tools Needed: -Cordless Drill (12V or higher) -#2 Square Drive Bit -Hammer -6 Step Ladder -Tape Measure -Square utility knife w/ blade & hook blade -Speed Square Little Cottage Co. PO Box 455 Berlin, OH
Precut Value Shed Manual Gambrel Barn
 Tools Needed: -Cordless Drill (12V or higher) -#2 Square Drive Bit -Hammer -6 Step Ladder -Tape Measure -Square utility knife w/ blade & hook blade -Speed Square Little Cottage Co. PO Box 455 Berlin, OH
Classic Saltbox Manual
 Tools Needed: -Cordless Drill (12V or higher) -#2 Square Drive Bit -Hammer -6 Step Ladder -Tape Measure -Utility knife w/ blade & hook blade -Speed Square -5/16 Wood Drill bit Little Cottage Co. PO Box
Sara s Victorian Mansion
 Tools Needed: Cordless Drill (12V or higher) #2 square drive bit Hammer 6 step ladder Tape measure Square utility knife w/ blade & hook blade Speed Square Little Cottage Co. PO Box 455 Berlin, OH 44610
Star Barn Manual. Tools Needed:
 Tools Needed: -Cordless Drill (12V or higher) -#2 Square Drive Bit -Hammer -6 Step Ladder -Tape Measure -Square utility knife w/ blade & hook blade -Speed Square Little Cottage Co. PO Box 455 Berlin, OH
Gambrel Barn Construction Manual 8x8 through 16x24 Units
 Gambrel Barn Construction Manual 8x8 through 16x24 Units Tools Needed: Cordless drill (12V or higher) #2 square drive bit Hammer 6 step ladder Tape measure Square utility knife w/ blade & hook blade Little
4x6 Barn/Gable Coop With Wheels
 4x6 Barn/Gable Coop With Wheels Tools Needed: -Cordless Drill (12V or higher) -#2 Square Drive Bit -Hammer -Tape Measure -Speed Square Little Cottage Co. PO Box 455 Berlin, OH 44610 330-893-4212 www.cottagekits.com
4x4 Barn/Gable Coop with Run Manual
 Manual Tools Needed: -Cordless Drill (12V or higher) -#2 Square Drive Bit -Hammer -Tape Measure -Speed Square Little Cottage Co. PO Box 455 Berlin, OH 44610 330-893-4212 www.cottagekits.com 2008-2009 Little
Octagon Greenhouse Manual
 Tools Needed: -Cordless Drill (12V or higher) -#2 Square Drive Bit -Hammer -6 Step Ladder -Tape Measure -Utility knife w/ blade & hook blade -Speed Square -5/16 Wood Drill bit Little Cottage Co. PO Box
Pine Log Cabin and Cape Cod Playhouse
 Pine Log Cabin and Cape Cod Playhouse Assembly Manual Pine Log Cabin Assembly Manual revised 7/15/02 Dear Customer, Thank you for your purchase of our Pine Log Cabin Playhouse. The craftsmanship and detail
Keystone Garage Assembly Manual
 Keystone Garage Assembly Manual 14x24 Garage Kit ships as shown Toll Free: 866.768.8465 Hours: 9-5 Monday-Friday EST 13 8 deep AMISH ORIGINAL KEYSTONE 14x24 GARAGE s p e c i f i c a t i o n s Optional
Shed Building 2.0. Custom 8 by 8 by 8 Shed Plans Designed for Sheds of Hope
 Page 1 Shed Building 2.0 Custom 8 by 8 by 8 Shed Plans Designed for Sheds of Hope Door - Left - Widest to the Left Center a 54 wide door opening Door - Right Shed provided by Local Churches for Sheds of
Pacifica Pool House. Assembly Manual. Toll Free: Hours: 9-5 Monday-Friday EST. Package ships as shown. Suncast Corporation
 Pacifica Pool House Assembly Manual Toll Free: 866.768.8465 Hours: 9-5 Monday-Friday EST Package ships as shown Simpson Hurricane Straps Double Insulated Raised-Panel Door in back wall (71 x71 Total opening)
Roofing Training - Basics. Sandy Wesch
 Roofing Training - Basics Sandy Wesch Tools Hammer Measuring Tape Chalk Line & Chalk Speed Square Framing Square Utility Knife Metal Snips Extension Ladder(s) 2 Safety Any tools or material up on the roof
Assembly Instructions
 10' and 12' Octagon Cedar Gazebo Assembly Instructions Toll Free: 866.768.8465 Hours: 9-5 Monday-Friday EST www.homeplacestructures.com Package ships as shown revised 06/20/09 Cedar Gazebo Assembly Instructions
Boxed Shed. QUAKER or A-FRAME SIZES: 6 x 8 6 x 10 T1-11Siding
 Boxed Shed QUAKER or A-FRAME SIZES: 6 x 8 6 x 10 T1-11Siding Required Equipment; * Power Drill with square head bit * Hammer, Square, Gloves & an Allen wrench * Step Ladder Screws Supplied; * 2 for roof
Manufactured by Reynolds Building Systems, Inc.
 up EZ Sheds Assembly Book the Ashbury January 19, 2008 8' x 12' Manufactured by Reynolds Building Systems, Inc. 205 Arlington Drive Greenville, PA 16125 724-646-3775 This manual is copyrighted. Under the
Country Cabin. Assembly Manual. HomePlace Structures
 Country Cabin Assembly Manual Country Cabin Assembly Manual revised 3/20/10 Dear Customer, Thank you for your purchase of our Country Cabin. The craftsmanship and detail in this building is unmatched.
Best Barns USA Assembly Book
 Best Barns USA Assembly Book Revised September 19, 2017 the Millcreek 12'x 20' Manufactured by Reynolds Building Systems, Inc 205 Arlington Drive Greenville, PA 16125 This manual is copyrighted Under the
Best Barns USA. Assembly Book. 12'x 16' the Millcreek. Revised September 19, 2017
 Assembly Book Best Barns USA Revised September 19, 2017 the Millcreek 12'x 16' Manufactured by Reynolds Building Systems, Inc 205 Arlington Drive Greenville, PA 16125 This manual is copyrighted Under the
Shed Assembly Instructions
 Shed Kit Contents The shed kit includes all the parts needed to assemble your shed except for tools and fasteners such as screws and nails. The various pieces are pre-cut and many are marked to indicate
8x12 SpaceMaker Garden Shed Assembly Manual
 8x12 SpaceMaker Garden Shed Assembly Manual Version #6 Revised June / 2007 Thank you for purchasing a 8x12 SpaceMaker Garden Shed. Please take the time to identify all the parts prior to assembly. Safety
KIT ASSEMBLY INSTRUCTIONS
 KIT ASSEMBLY INSTRUCTIONS We have designed these instructions as a stepby step procedure to simplify the assembly process. Nevertheless, we do recommend including someone with carpentry expertise on your
Octagon Vinyl Gazebo Assembly Instructions For 10 & 12 Models
 Octagon Vinyl Gazebo Assembly Instructions For 10 & 12 Models Toll Free: 866.768.8465 Hours: 9-5 Monday-Friday EST www.homeplacestructures.com Package ships as shown revised 04/29/09 Vinyl Gazebo Assembly
Best Barns USA Assembly Book
 Best Barns USA Assembly Book Revised February 4, 2016 the Millcreek-R 12'x 20' Manufactured by Reynolds Building Systems, Inc. 205 Arlington Drive Greenville, PA 16125 724-646-3775 This manual is copyrighted.
Installation Instructions Split Shake, Staggered Shake, Shingle, Perfection Shingle, and Shapes
 Installation Instructions Split Shake, Staggered Shake, Shingle, Perfection Shingle, and Shapes General Guidelines These instructions show one type of installation and are intended for the professional
Best Barns USA Assembly Book
 Best Barns USA Assembly Book Revised December 6, 2013 the Denver-R 12' x 20' Manufactured by Reynolds Building Systems, Inc. 205 Arlington Drive Greenville, PA 16125 724-646-3775 This manual is copyrighted.
Best Barns USA Assembly Book
 Best Barns USA Assembly Book Revised September 12, 2017 the Denver 12' x 16' Manufactured by Reynolds Building Systems, Inc. 205 Arlington Drive Greenville, PA 16125 This manual is copyrighted. Under the
Assembly Book. the Brandon Building Size 12' x 20' Revised September 13, 2017
 Assembly Book Revised September 13, 2017 the Brandon Building Size 12' x 20' Manufactured by Reynolds Building Systems, Inc. 205 Arlington Drive Greenville, PA 16125 This manual is copyrighted. Under the
Garden Chalet 4X2 Assembly Manual
 Revision #6 April 12th, 2010 Garden Chalet 4X2 Assembly Manual Thank you for purchasing a 4x2 Garden Chalet. Please take the time to identify all the parts prior to assembly. Please use Safety Eyewear
STOP! Call Us First! DO NOT RETURN TO STORE.
 16549 STOP! Call Us First! DO NOT RETURN TO STORE. For immediate help with assembly or product information call our toll free number: 1-800-844-9273 or email: customerservice@backyardproductsllc.com Our
the Greenbriar 12' x 20' Best Barns USA Assembly Book Revised April
 Best Barns USA Assembly Book Revised April 28 2015 the Greenbriar 12' x 20' Manufactured by Reynolds Building Systems, Inc. 205 Arlington Drive Greenville, PA 16125 724-646-3775 This manual is copyrighted.
Grand Garden Chalet 6X3 Assembly Manual - Costco
 Revision #16 March 22nd, 2013 Grand Garden Chalet 6X3 Assembly Manual - Costco Thank you for purchasing a Grand Garden Chalet. Please take the time to identify all the parts prior to assembly. Please use
8x12 Santa Rosa Assembly Manual
 8x12 Santa Rosa Assembly Manual Version #10 Revised June 17, 2009 Thank you for purchasing an 8x12 Santa Rosa Garden Shed from Outdoor Living Today. Please take the time to identify all the parts prior
Grand Garden Chalet 6X3 Assembly Manual
 Revision #8 November 1, 2009 Grand Garden Chalet 6X3 Assembly Manual Thank you for purchasing a Grand Garden Chalet. Please take the time to identify all the parts prior to assembly. Please use Safety
6x6 Maximizer Storage Shed Assembly Manual Version #9 Feb 26th, 2015
 6x6 Maximizer Storage Shed Assembly Manual Version #9 Feb 26th, 2015 Thank you for purchasing a 6x6 Maximizer Storage Shed. Please take the time to identify all the parts prior to assembly. Please Note-
8x12 Santa Rosa Assembly Manual
 8x12 Santa Rosa Assembly Manual Revision #15 October 31st, 2016 Thank you for purchasing an 8x12 Santa Rosa Garden Shed from Outdoor Living Today. Please take the time to identify all the parts prior to
Octagon Vinyl Gazebo Assembly Instructions
 Octagon Vinyl Gazebo Assembly Instructions For 10 & 12 Models Toll Free: 866.768.8465 Hours: 9-5 Monday-Friday EST www.homeplacestructures.com Package ships as shown revised 04/29/09 Vinyl Gazebo Assembly
Grand Garden Chalet 6X3 Assembly Manual
 Revision #11 June 15, 2010 Grand Garden Chalet 6X3 Assembly Manual Thank you for purchasing a Grand Garden Chalet. Please take the time to identify all the parts prior to assembly. Please use Safety Eyewear
10 Octagon Cedar Gazebo Assembly Instructions
 10 Octagon Cedar Gazebo Assembly Instructions Toll Free: 866.768.8465 Hours: 9-5 Monday-Friday EST www.homeplacestructures.com Package ships as shown revised 06/22/09 10 Cedar Gazebo Assembly Instructions
Best Barns USA Assembly Book
 Best Barns USA Assembly Book Revised August 17, 2017 the Roanoke 16'x32' Building w/ full loft Manufactured by Reynolds Building Systems, Inc 205 Arlington Drive Greenville, PA 16125 This manual is copyrighted
8 x 12 with Double Doors
 8 x 12 with Double Doors Assembly Instructions Required Tools: Screwgun or Variable Speed Electric Drill Screwdriver Bit (Robertson #2) Hammer Handsaw Tape Measure Step Ladder Optional Tools: Square /
Best Barns USA Assembly Book
 Best Barns USA Assembly Book Revised February 4, 2016 the Millcreek-R 12'x 16' Manufactured by Reynolds Building Systems, Inc. 205 Arlington Drive Greenville, PA 16125 724-646-3775 This manual is copyrighted.
Best Barns USA Assembly Book
 Best Barns USA Assembly Book Revised July 27, 2012 the North Dakota with pocket doors 12' x 20' Manufactured by Reynolds Building Systems, Inc. 205 Arlington Drive Greenville, PA 16125 724-646-3775 This
Chapter 23. Garage Construction
 Chapter 23. Garage Construction 23.1 ESTABLISHING CHALK LINES 23.2 MEASURING AND CUTTING WALL PLATES 23.3 MARKING WINDOW & DOOR LOCATIONS ON EXTERIOR WALL PLATES 23.4 MARKING STUDS ON EXTERIOR WALL PLATES
E-Z BUILD SHED GUIDE 12' 12' 12' 16' 12' 20'
 E-Z BUILD SHED GUIDE 12' 12' 12' 16' 12' 20' BUILD You can construct your own E-Z frame shed with the help of this step by step guide. North American softwood dimensional lumber sizes: Nominal Actual in
REGENCY TIMBER BUILDINGS
 REGENCY TIMBER BUILDINGS TEL 01948 830460 UNIT 22 PENLEY IND EST, PENLEY.WREXHAM. LL13 0LQ 1 Garage fitting instructions Tools needed handsaw, hammer, Stanley knife with hook blade, tape measure, battery
8x4 SpaceSaver Garden Shed Bevel Model Assembly Manual Revision #18 March 9th, 2017
 8x4 SpaceSaver Garden Shed Bevel Model Assembly Manual Revision #18 March 9th, 2017 Thank you for purchasing an 8x4 SpaceSaver Garden Shed. Please take the time to identify all the parts prior to assembly.
Installation Instructions
 Installation Instructions As with most building projects there's more than one way to build your storage building. But after building literally hundreds of them I believe I have figured out the easiest
STOP! Call Us First! DO NOT RETURN TO STORE.
 16549 STOP! Call Us First! DO NOT RETURN TO STORE. For immediate help with assembly or product information call our toll free number: 1-800-844-9273 or email: customerservice@backyardproductsllc.com Our
Best Barns USA Assembly Book
 Best Barns USA Assembly Book Revised November 27, 2013 the Easton - R 12'x 20' Manufactured by Reynolds Building Systems, Inc. 205 Arlington Drive Greenville, PA 16125 724-646-3775 This manual is copyrighted.
Assembly Book. the Brandon. Building Size 12'x12' or 12'x16' Revised September 13, 2017
 Assembly Book Revised September 13, 2017 the Brandon Building Size 12'x12' or 12'x16' Manufactured by Reynolds Building Systems, Inc. 205 Arlington Drive Greenville, PA 16125 This manual is copyrighted.
Best Barns USA. Regency Deluxe. 8' x 12' Assembly Book. revised February 15, 2017
 Best Barns USA Assembly Book revised February 15, 2017 Regency Deluxe 8' x 12' Manufactured by Reynolds Building Systems, Inc. 205 Arlington Drive, Greenville, PA 16125 This manual is copyrighted. Under
Chapter 22. Shed Construction
 Chapter 22. Shed Construction 22.1 BUILDING SHED FLOOR 22.2 BUILDING SHED WALLS 22.3 BUILDING SHED ROOF 22.4 ASSEMBLING SHED Tools needed by volunteers: Hammer Nail apron Tape measure Square Utility knife
8x4 SpaceSaver Garden Shed Assembly Manual
 8x4 SpaceSaver Garden Shed Assembly Manual Revision #8 July 5, 2010 Thank you for purchasing an 8x4 SpaceSaver Garden Shed. Please take the time to identify all the parts prior to assembly. Safety Points
12x8 Cabana Garden Shed Assembly Manual
 12x8 Cabana Garden Shed Assembly Manual Revision #15 Feb 13th, 2015 Thank you for purchasing our 12x8 Cabana Garden Shed. Please take the time to identify all the parts prior to assembly. Safety Points
Best Barns USA Assembly Book
 Best Barns USA Assembly Book Revised September 12, 2017 the Arlington Building Size 12' x 20' Manufactured by Reynolds Building Systems, Inc. 205 Arlington Drive Greenville, PA 16125 This manual is copyrighted.
8x12 SpaceMaker Garden Shed Assembly Manual Revision #20 June 27th, 2017
 8x12 SpaceMaker Garden Shed Assembly Manual Revision #20 June 27th, 2017 Thank you for purchasing our 8x12 SpaceMaker Garden Shed. Please take the time to identify all the parts prior to assembly. Safety
Best Barns USA Assembly Book
 Best Barns USA Assembly Book Revised September 12, 2017 the Easton 12'x 16' Manufactured by Reynolds Building Systems, Inc. 205 Arlington Drive - Greenville, PA 16125 This manual is copyrighted. Under
Building An Outdoor Playhouse
 Building An Outdoor Playhouse If you want to give the children in your family their own retreat and improve your do-it-yourself skills at the same time, this playhouse is the perfect project for you. Not
STOP! Call Us First! DO NOT RETURN TO STORE.
 16575 STOP! Call Us First! DO NOT RETURN TO STORE. For immediate help with assembly or product information call our toll free number: 1-800-844-9273 or email: customerservice@backyardproductsllc.com Our
Chapter 3. Wall Layout
 Chapter 3. Wall Layout 3.1 LAYING OUT EXTERIOR WALLS 3.2 CUTTING EXTERIOR WALL PLATES 3.3 MARKING WINDOW AND DOOR LOCATIONS ON EXTERIOR WALL PLATES 3.4 MARKING STUDS ON EXTERIOR WALL PLATES 3.5 LAYING
Installation Instructions
 Installation Instructions As with most building projects there's more than one way to build your storage building. But after building literally hundreds of them I believe I have figured out the easiest
STOP! Call Us First! DO NOT RETURN TO STORE.
 16632 STOP! Call Us First! DO NOT RETURN TO STORE. For immediate help with assembly or product information call our toll free number: 1-800-844-9273 or email: customerservice@backyardproductsllc.com Our
Item #BUILD SHED. build your shed today HOW TO BUILD A SHED. Copyright windows.
 WWW.SHED-WINDOWS.COM build your shed today Item #BUILD SHED HOW TO BUILD A SHED www.shed-windows.com 1 These shed plans will show you how to build a 10 x14 storage shed using T1 11 for sheathing and asphalt
Best Barns USA Assembly Book
 Best Barns USA Assembly Book Revised September 19, 2017 the Woodville 10' x 12' Manufactured by Reynolds Building Systems, Inc. 205 Arlington Drive Greenville, PA 16125 This manual is copyrighted. Under
8 x 12 Garden Shed. Assembly Instructions. Parts List on Next Page
 8 x 12 Garden Shed Assembly Instructions 6 2 Required Tools: Screwgun or Variable Speed Electric Drill Screwdriver Bit (Robertson #2) Hammer Handsaw Tape Measure Step Ladder Optional Tools: Square / Level
Best Barns USA Assembly Book
 Best Barns USA Assembly Book Revised February 17, 2015 the Meadowbrook-R 12' x 10' Manufactured by Reynolds Building Systems, Inc. 205 Arlington Drive Greenville, PA 16125 724-646-3775 This manual is copyrighted.
Best Barns USA Assembly Book
 Best Barns USA Assembly Book Revised November 20, 2013 the Easton - R 12'x 16' Manufactured by Reynolds Building Systems, Inc. 205 Arlington Drive Greenville, PA 16125 724-646-3775 This manual is copyrighted.
Best Barns USA Assembly Book
 Best Barns USA Assembly Book Revised November 19, 2015 the Arlington-R Building Size 12' x 20' Manufactured by Reynolds Building Systems, Inc. 205 Arlington Drive Greenville, PA 16125 724-646-3775 This
Best Barns USA Assembly Book
 Best Barns USA Assembly Book Revised September 19, 2016 the Meadowbrook-R 12' x 10' Manufactured by Reynolds Building Systems, Inc. 205 Arlington Drive Greenville, PA 16125 724-646-3775 This manual is
Chapter 9. Windows and Exterior Doors
 Chapter 9. Windows and Exterior Doors 9.1 INSTALLING WINDOWS 9.2 INSTALLING EXTERIOR HOUSE DOORS 9.3 INSTALLING SHED DOOR 9.4 INSTALLING BASEMENT EGRESS COMPONENTS Tools needed by volunteers: Hammer Nail
12x12 SunShed Garden Shed
 12x12 SunShed Garden Shed Revision #9 August 21, 2010 Thank you for purchasing a 12x12 SunShed Garden Shed from Outdoor Living Today. Please take the time to identify all the parts prior to assembly. Safety
Best Barns USA Assembly Book Revised November 3, 2016
 Best Barns USA Assembly Book Revised November 3, 2016 the Aspen II 12' x 8' Manufactured by Reynolds Building Systems, Inc. 205 Arlington Drive, Greenville, PA 16125 This manual is copyrighted. Under the
Assembly Book. 10' x 12' the Cambridge II. revised June 13, 2014
 Assembly Book revised June 13, 2014 the Cambridge II 10' x 12' Manufactured by Reynolds Building Systems, Inc. 205 Arlington Drive Greenville, PA 16125 724-646-3775 This manual is copyrighted. Under the
Best Barns USA Assembly Book
 Best Barns USA Assembly Book Revised October 11, 2018 the Woodville 10' x 16' Manufactured by Reynolds Building Systems, Inc. 205 Arlington Drive Greenville, PA 16125 This manual is copyrighted. Under
Chapter 9. Windows and Exterior Doors
 Chapter 9. Windows and Exterior Doors 9.1 INSTALLING WINDOWS 9.2 INSTALLING EXTERIOR HOUSE DOORS 9.3 INSTALLING SHED DOOR 9.4 INSTALLING EGRESS COMPONENTS Tools needed by volunteers: Hammer Nail apron
9x6 Cabana Assembly Manual
 9x6 Cabana Assembly Manual Version #10 June 8, 2010 Thank you for purchasing a 9x6 Cabana. Please take the time to identify all the parts prior to assembly. Note, The General Assembly Manual illustrates
AMISHGAZEBOSHOP.COM VINYL GAZEBO KIT CONTENTS
 VINYL GAZEBO KIT CONTENTS Hardware for assembling your gazebo (provided): 2 1/2" screws Use to fasten joist together fasten posts to outside joist fasten rafters to rafter header fasten benches & cupola
Sunhouse. Assembly Manual
 Sunhouse Assembly Manual Thank you for your purchase of this sunhouse. Sunhouse Assembly Manual This manual is designed to simplify the assembly process, however we recommend having an experienced carpenter
Best Barns USA. the Danbury - R 8' x 12' Assembly Book. Revised September 30, 2016
 Best Barns USA Assembly Book Revised September 30, 2016 the Danbury - R 8' x 12' Manufactured by Reynolds Building Systems, Inc. 205 Arlington Drive Greenville, PA 16125 724-646-3775 This manual is copyrighted.
Best Barns USA Assembly Book
 Best Barns USA Assembly Book Revised September 12, 2017 the Arlington Building Size 12' x 16' Manufactured by Reynolds Building Systems, Inc. 205 Arlington Drive Greenville, PA 16125 This manual is copyrighted.
8x4 SpaceSaver Garden Shed - Double Door - Bevel Model Assembly Manual Revision #18 January 3rd, 2018
 8x4 SpaceSaver Garden Shed - Double Door - Bevel Model Assembly Manual Revision #18 January 3rd, 2018 Thank you for purchasing an 8x4 SpaceSaver Garden Shed. Please take the time to identify all the parts
Chapter 3. Wall Layout
 GFCAHFH March 15, 2018 Construction Manual Version 18.0 Chapter 3. Wall Layout 3.1 LAYING OUT EXTERIOR WALLS 3.2 CUTTING EXTERIOR WALL PLATES 3.3 MARKING WINDOW AND DOOR LOCATIONS ON EXTERIOR WALL PLATES
Best Barns USA. the Brookhaven 10' x 16' Assembly Book. revised March 23, 2016
 Best Barns USA Assembly Book revised March 23, 2016 the Brookhaven 10' x 16' Manufactured by Reynolds Building Systems, Inc. 205 Arlington Drive Greenville, PA 16125 724-646-3775 This manual is copyrighted.
- Before You Begin - Standard Apex / Tall Apex Shed Kit Instructions IMPORTANT!
 Customer Service: (801)754-3334 810 W Utah Ave #8 Payson, Utah 84651 email: apexshedcompany@gmail.com Standard Apex / Tall Apex Shed Kit Instructions Tools Needed: Framing Hammer Tape Measure (25 ft.)
Assembly Book. the Fairview. Building Size 12'x12' Revised July 25, 2012
 Assembly Book Revised July 25, 2012 the Fairview Building Size 12'x12' Manufactured by Reynolds Building Systems, Inc. 205 Arlington Drive Greenville, PA 16125 724-646-3775 This manual is copyrighted.
6X3 Patio Garden Shed Assembly Manual
 Thank you for purchasing a 6x3 Patio Garden Shed. Please take the time to identify all the parts prior to assembly. Revision #4 July 6th, 2016 6X3 Patio Garden Shed Assembly Manual Please use Safety Eyewear
Best Barns USA Assembly Book
 Best Barns USA Assembly Book Revised March 6, 2017 the Arlington Building Size 12' x 24' Manufactured by Reynolds Building Systems, Inc. 205 Arlington Drive - Greenville, PA 16125 This manual is copyrighted.
Best Barns USA Assembly Book
 Best Barns USA Assembly Book Revised September 13, 2017 the North Dakota with pocket doors 12' x 20' Manufactured by Reynolds Building Systems, Inc. 205 Arlington Drive Greenville, PA 16125 This manual
Assembly Instructions 10 X 10 Aluminum Roof Support
 Assembly Instructions 10 X 10 Aluminum Roof Support Aluminum Roof Support Bolt Package 16-5/16 X 2 ¼ SS Bolt 24-5/16 X 1 SS Bolt 40-5/16 SS Nylon Lock Nuts 16-5/16 SS Flat Washers 28-4 ½ Wood Screws 36-1
Best Barns USA Assembly Book Revised October 24, 2017
 Best Barns USA Assembly Book Revised October 24, 2017 Garage Door by Owner the Tahoe 12'x 16' Manufactured by Reynolds Building Systems, Inc. 205 Arlington Drive Greenville, PA 16125 This manual is copyrighted.
Best Barns USA Assembly Book
 Best Barns USA Assembly Book Revised September 19, 2017 Garage Door by Owner the Tahoe 12'x 20' Manufactured by Reynolds Building Systems, Inc. 205 Arlington Drive Greenville, PA 16125 This manual is copyrighted.
Best Barns USA Assembly Book
 Best Barns USA Assembly Book Revised November 19, 2015 the Arlington-R Building Size 12' x 24' Manufactured by Reynolds Building Systems, Inc. 205 Arlington Drive Greenville, PA 16125 724-646-3775 This
8x8 Sunshed Garden Shed Assembly Manual Revision #9 June 11th, 2012
 8x8 Sunshed Garden Shed Assembly Manual Revision #9 June 11th, 2012 Thank you for purchasing an 8x8 SunShed Garden Shed from Outdoor Living Today. Please take the time to identify all the parts prior to