REGENCY TIMBER BUILDINGS
|
|
|
- Gloria Lawson
- 5 years ago
- Views:
Transcription
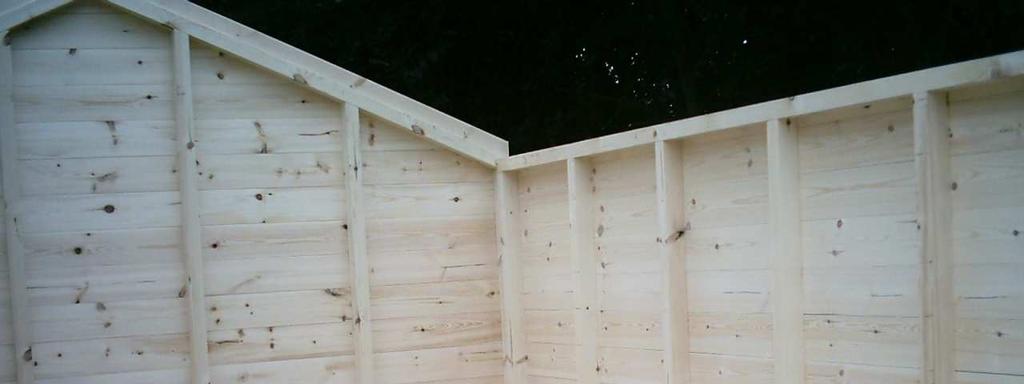
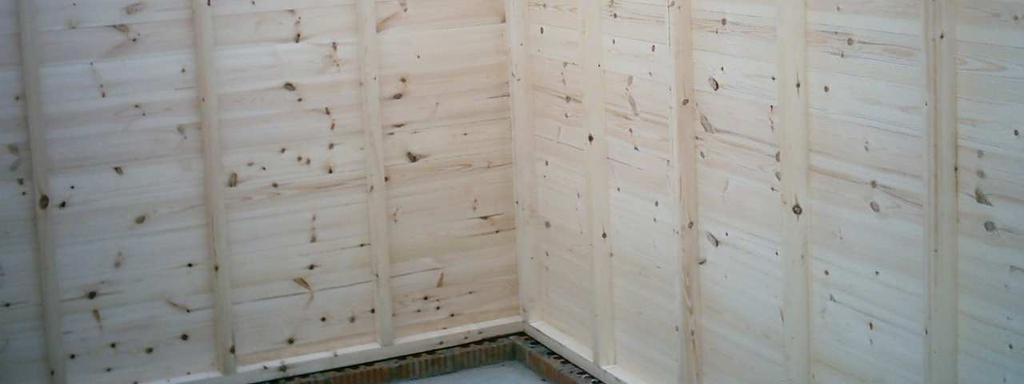
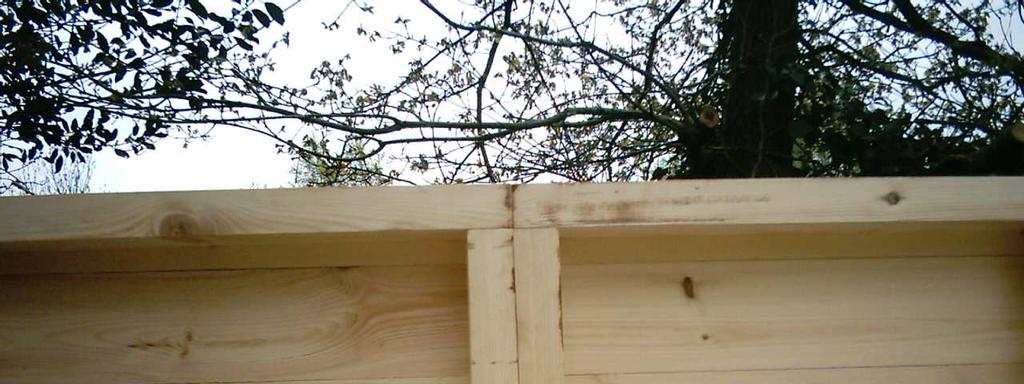
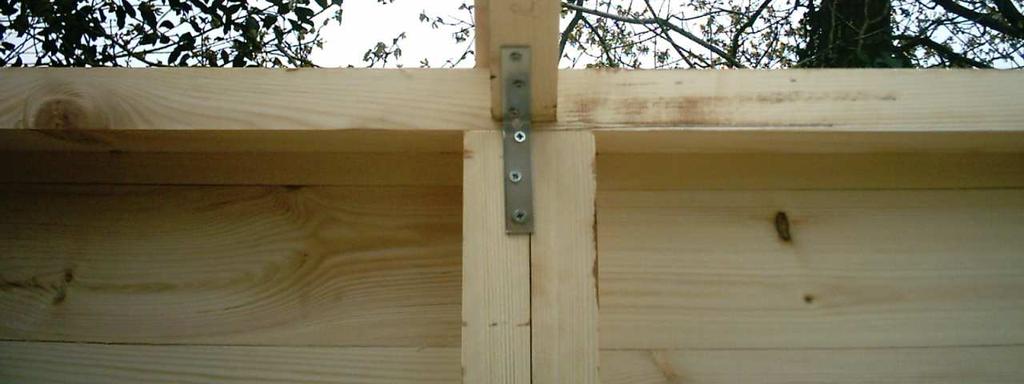
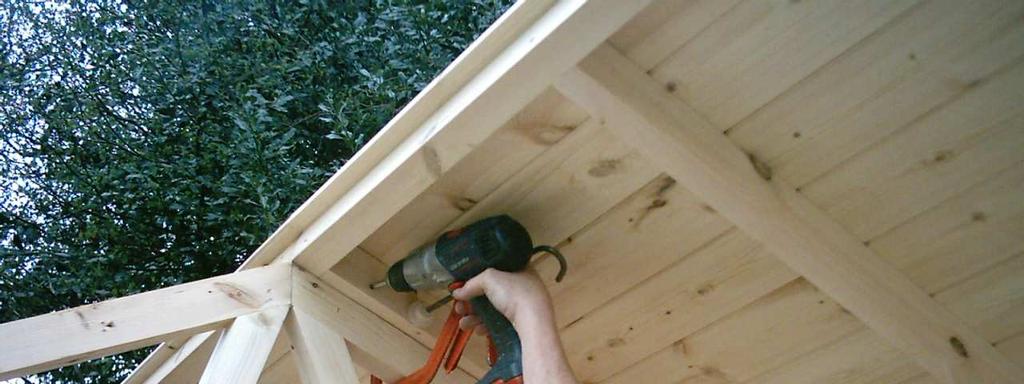
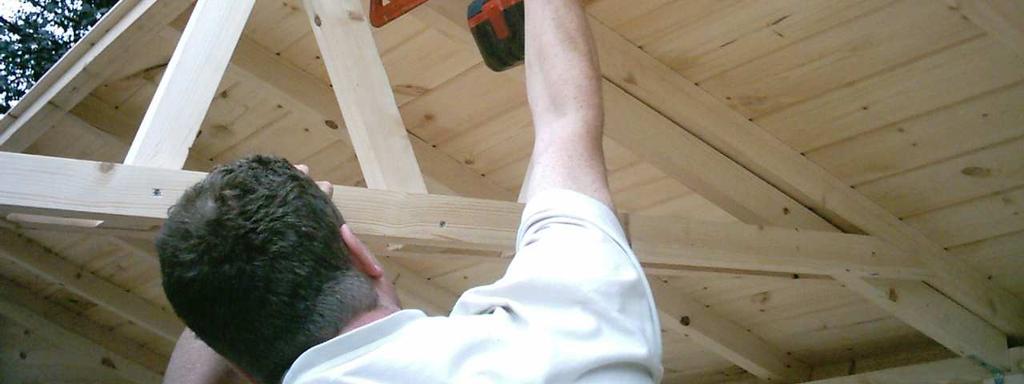
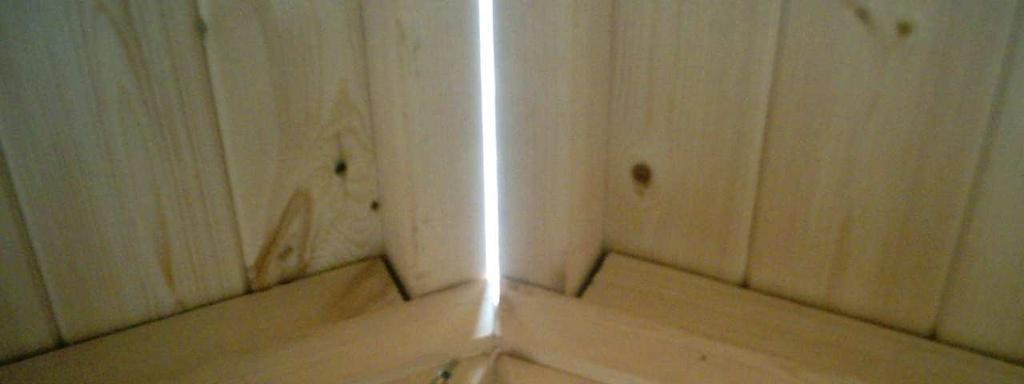
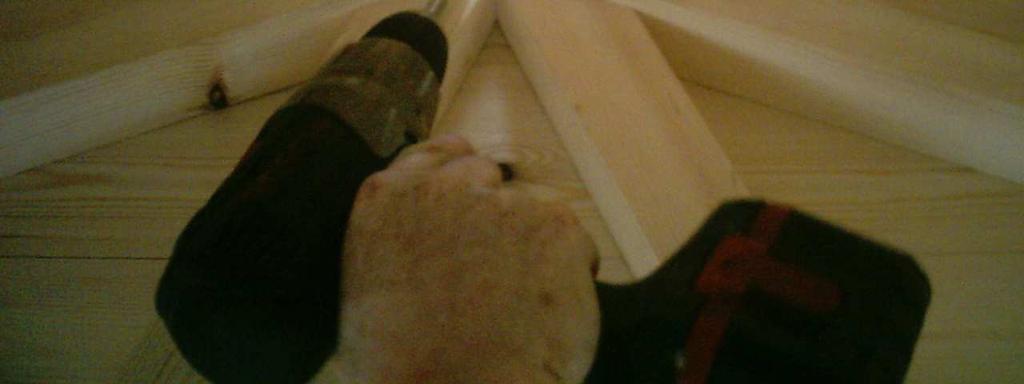
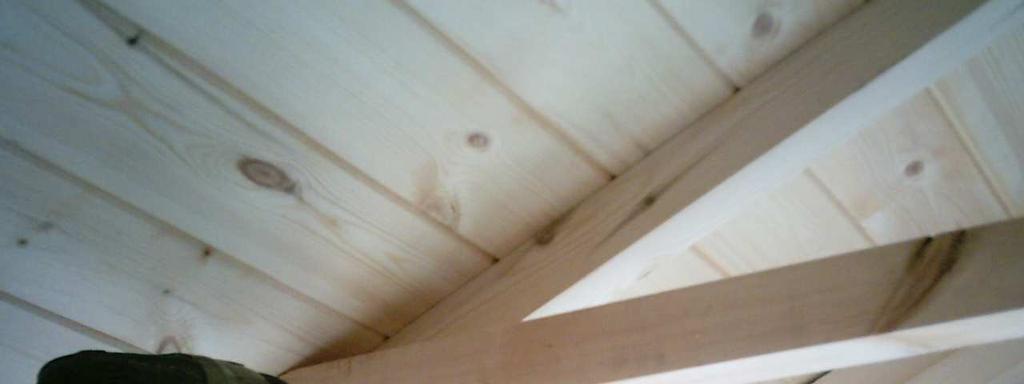
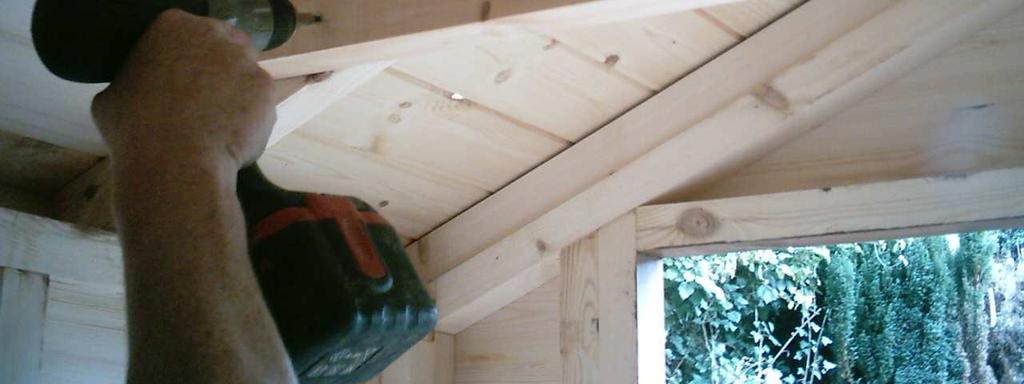
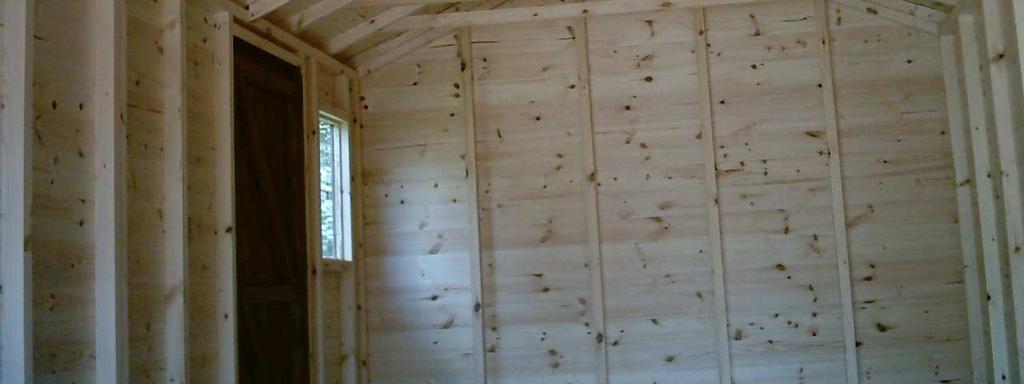
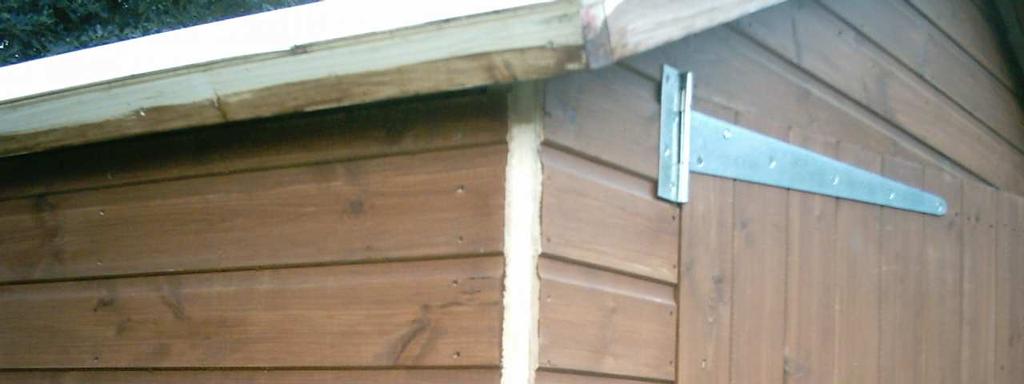
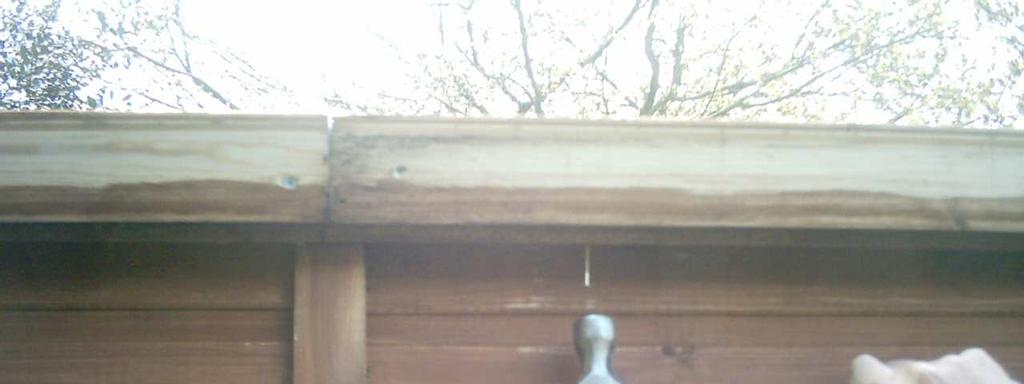
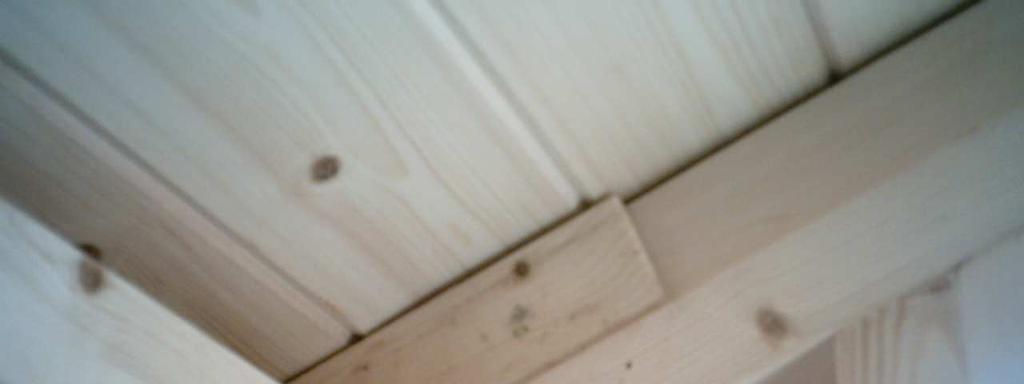
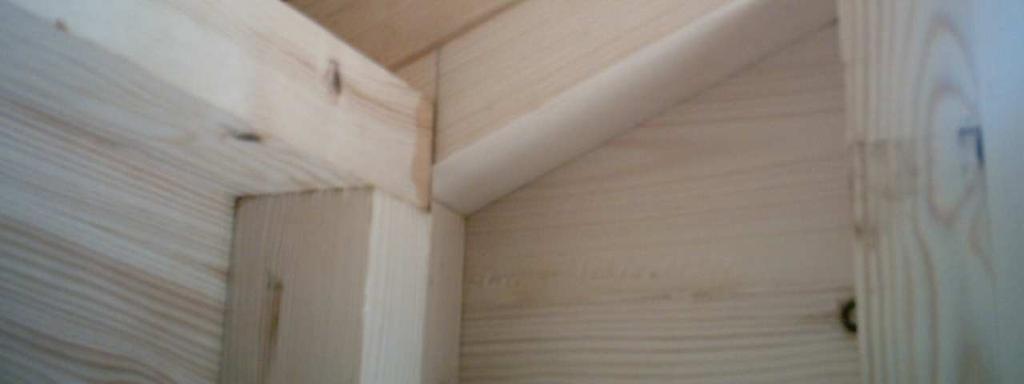
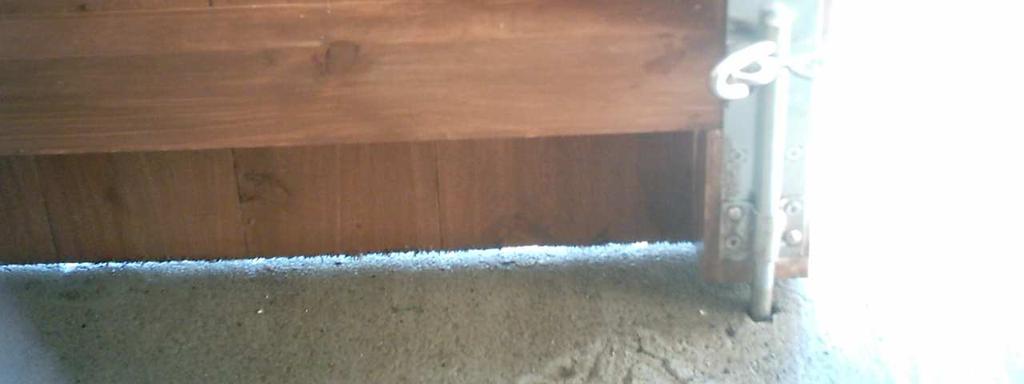
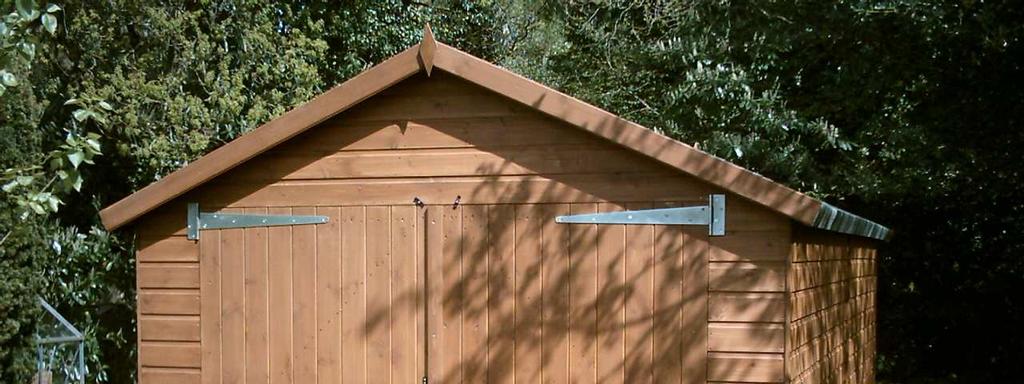
1 REGENCY TIMBER BUILDINGS TEL UNIT 22 PENLEY IND EST, PENLEY.WREXHAM. LL13 0LQ 1 Garage fitting instructions Tools needed handsaw, hammer, Stanley knife with hook blade, tape measure, battery powered screwdriver, 12 mm wood drill bit 12mm masonry bit, 14 mm masonry drill bit, 3 or 4 mm wood drill bit for pilot holes to prevent the wood splitting and power drill. We recommend putting down a strip of damp course before you begin. Place the back of the building on to the base and position it central on the bricks. With the bottom overlapping board overhanging the bricks. You can use a temporary support or a 3rd person at this stage just to hold the back in position when the side panel is put into position. Place side onto base and push tight against the back Hold the outside corner tight together were they join, make sure the bottom of the 2 panels are flush and screw 3 screws in the inside to hold the 2 panels together. Attach the next side panel to the back as in step 2. Larger Garage sides are in 2 or more panels. Silicone down one edge of the panels then screw them together top middle and bottom (making sure they are level at top and bottom, sometimes a clamp is handy to keep the panels tight together) do the same with the opposite side. Put the door side on to the base screw corners together making sure they are flush at the bottom and fix with 3 screws on either side as you did with the back. screw a spare piece of wood onto the back of both ends of the roof truss. Lift the truss into position in the centre of the building. While one person holds the truss the other can then fix a bracket *6 onto either end of the truss and then fix the bracket to the side walls (use the 1 1/2 inch screws).
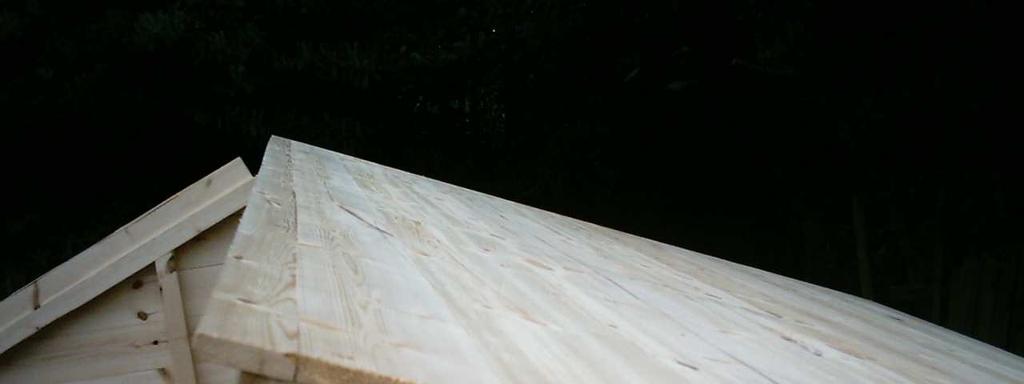
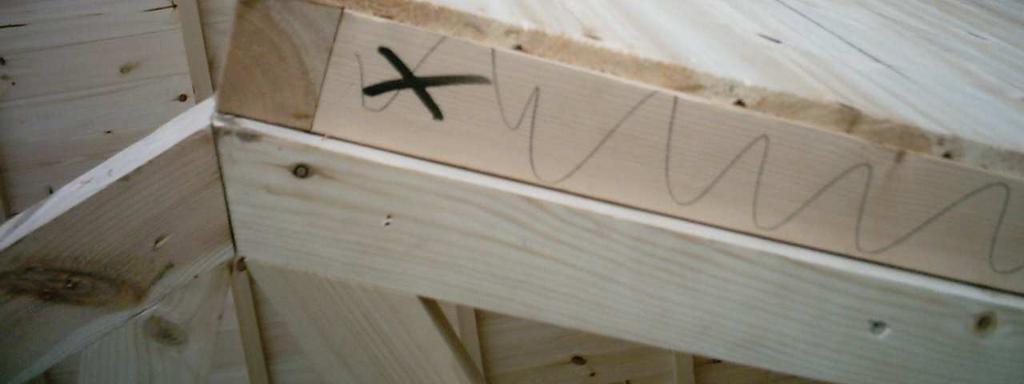
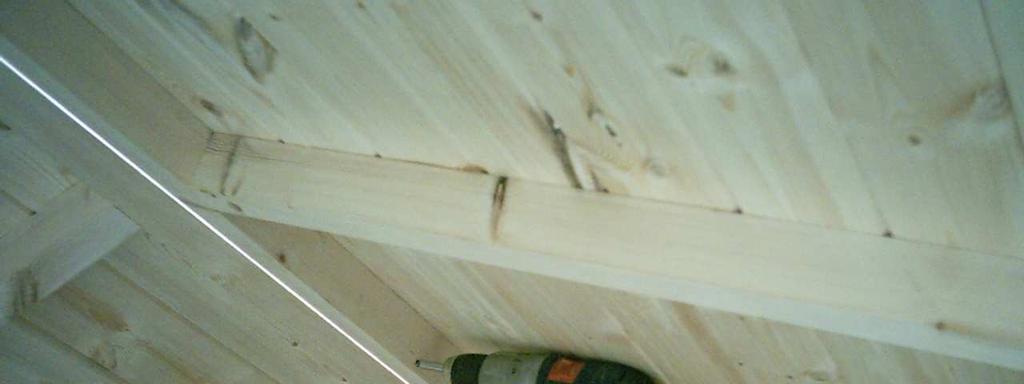
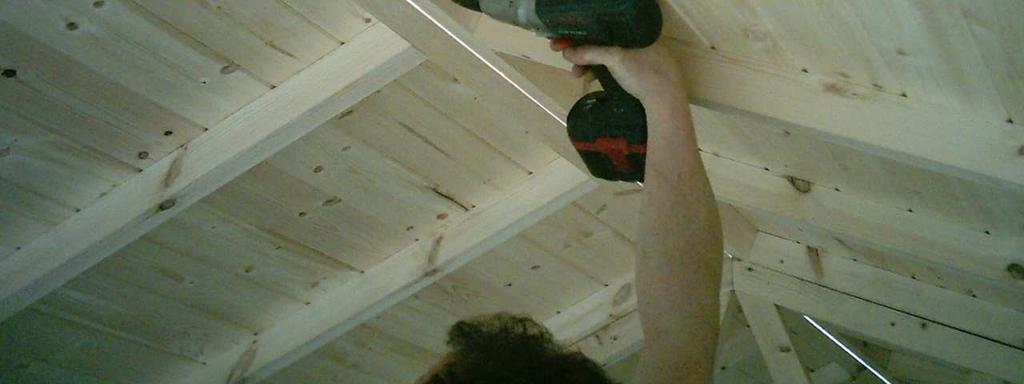
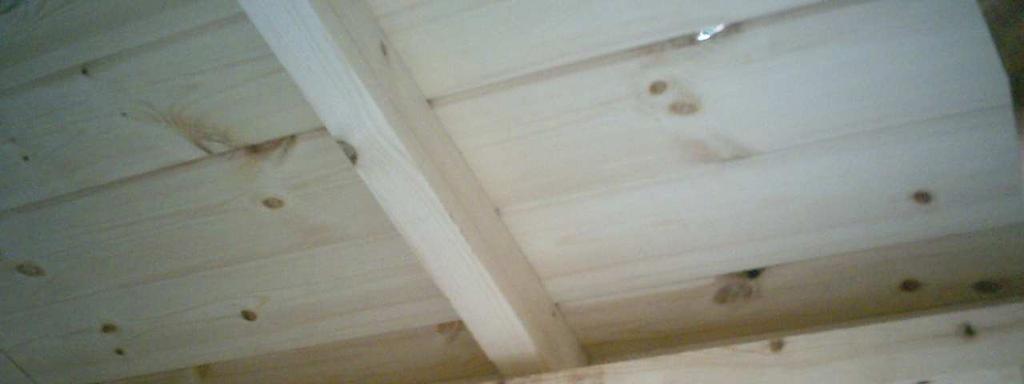
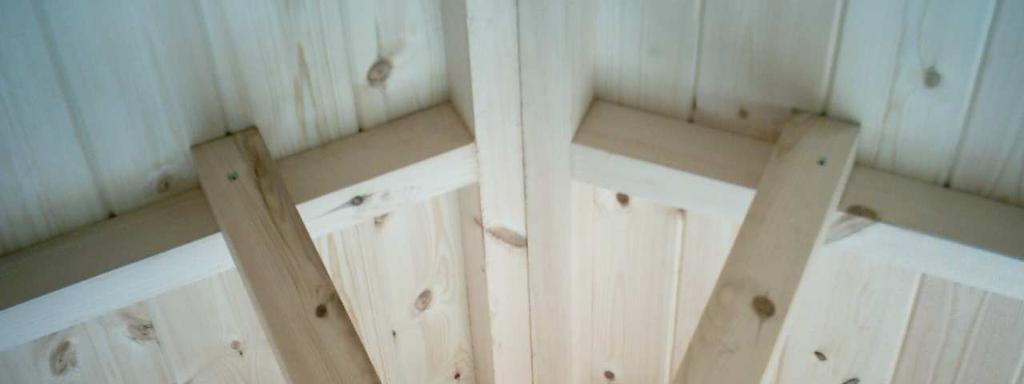
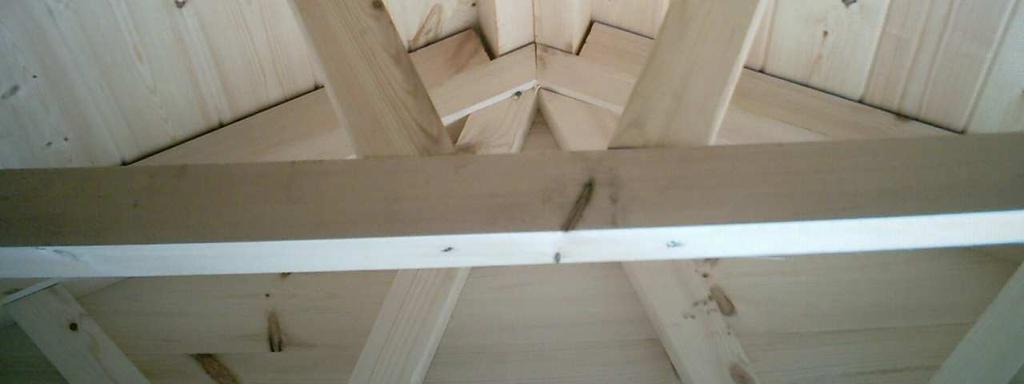
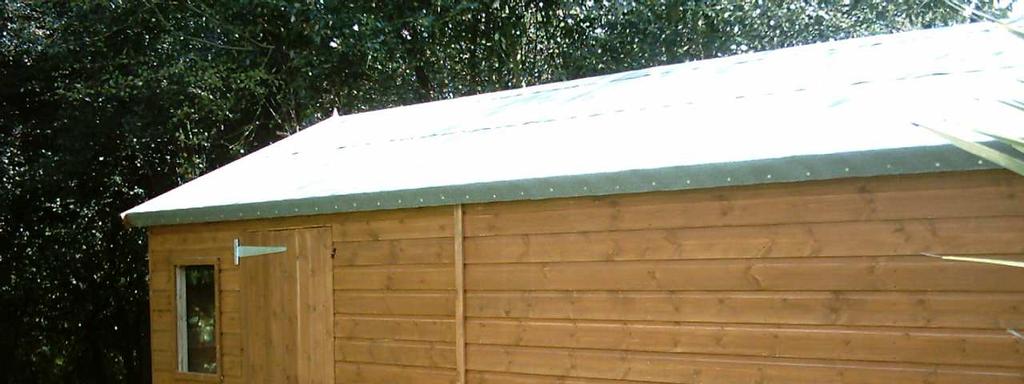
2 2 Push one of the roofs up onto the shed and into the cut out notch. Push the roof until it is flush to the top of the truss then fix a screw through the truss into the roof to secure. Align the roof with the centre of the side wall and Fix upwards through the top rail of the side panel into the roof. Push up the opposite roof until it meets the first roof and fix as you did with the previous roof. Do the same with the next 2 roofs and fix the roofs together were they meet in the middle. (a clamp might be handy to pull the roofs tight together) Put some screws through the middle of the truss into the roofs to secure. Next to fix the top of the roofs together screw through one roof into the other at an angle every 60 cm or so. Screw upwards through the front and back gables into the roof joists were they come into the shed through the notches, To secure the roof to the building. Screw through the top of the side rails into all of the roof timbers to hold the roof down to the building. Next fix up the sub-truss pieces by holding up level and putting a screw in either end into the roof beam. Then slide the sub truss supports into position until it gets tight against the roof then fix one screw up through the sub truss into it and one through the sub truss support into the roof beam. Continue with all the other sub truss bits one by one until they are all fixed. Roll the felt out on the roof starting at the bottom. Let the felt over hang the roof at the sides and the bottom by approx 70 mm (A hooked Stanley knife blade is needed to cut the felt) to cover the timber. Nail one corner with the 13 mm clout nails supplied (be sure that any nails into the roof go through the centre of the roof board and not through the joint of 2 joining boards ) Then stretch the felt at the opposite corner and nail. Then do the same with the 2 remaining corners stretching again to remove any ripples. Then nail only the top of the felt inline with were the nailing pencil mark is on the boards.(we do the main nailing up later) Bend the felt around to cover the 3 edges and fix to side edges. You must then do the same to cover the bottom part of the other side of the roof.
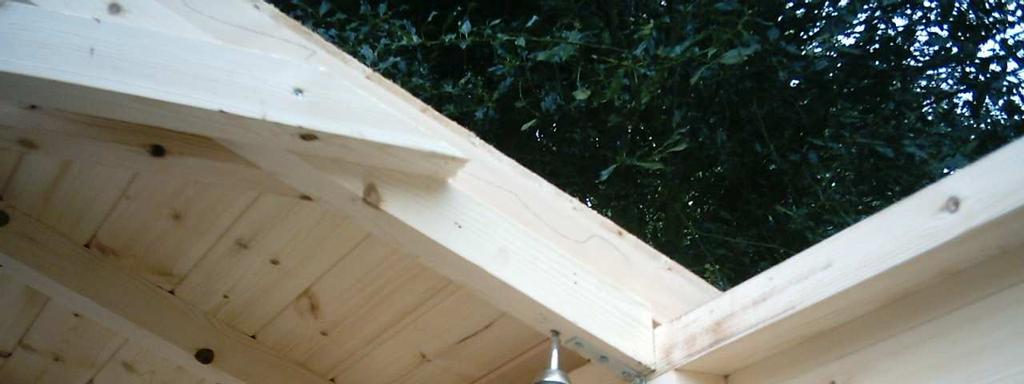
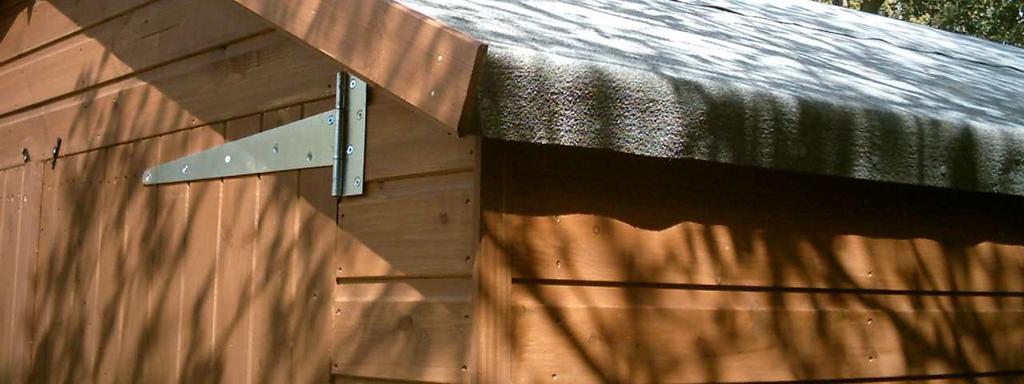
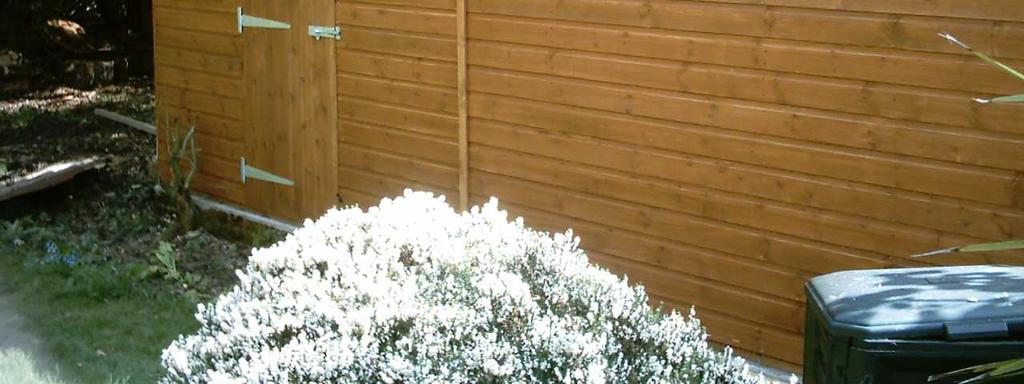
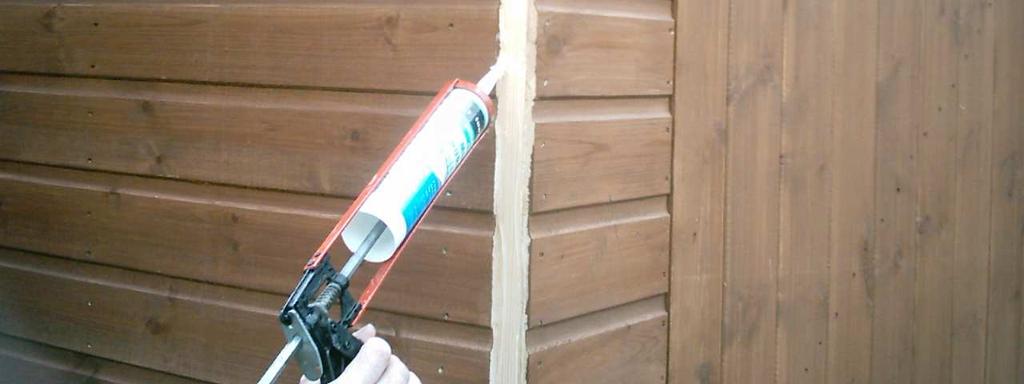
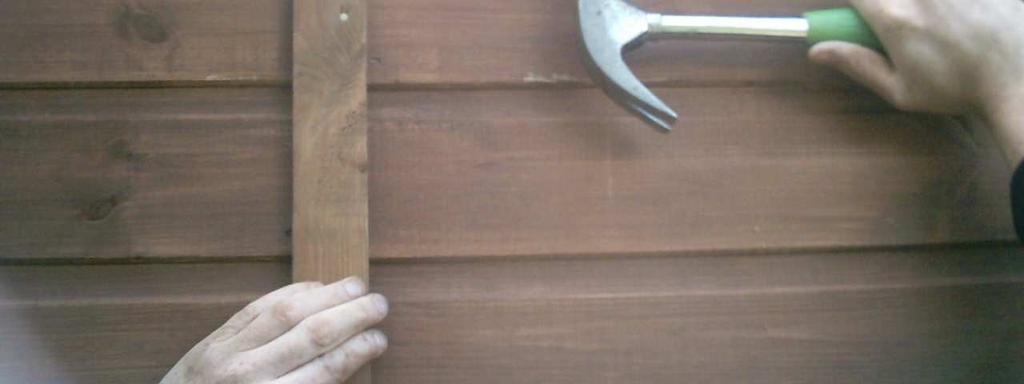
3 3 Next roll another row of felt out overlapping the first row by approximately 10 cm and again nail only the top of the felt into were you can see the nailing up pencil marks on the roof. Then bend the outer edges and nail to the sides of the roof. Do the same on the other side of the roof. Now we must cut the black strip off one of the pieces of felt that we are going to use for the cap sheet. Position centrally on the roof over hanging at the edges. Nail the 4 corners and stretch out any ripples as you nail it. Then fold over and fix at the edges. Now we nail all the joins of the felt with clout nails approx 12 cm apart. The same for the bottoms of the 2 roofs, bend round at the bottom and nail 12 cm apart. nail on the roof fascia boards and roof final to cover the felted edges with the 38 mm galvanised nails provided. Next silicone the corner joints to half way up from the bottom and nail on the side strips with the 38 mm nails. Now you must fit the under strips, one person must hold up and align the strip to the centre of the roof and the other can then nail it to the underside of the roof. Now you must silicone seal were the sides are joined in the centre and then nail on the covering strip. Now we go back inside and Push the corner covering pieces into position inside the 4 corners and fit with a 38 mm nail. Fix the 45 corner strengtheners to the bottom corner inside of the 2 front doors with 3 inch screws.
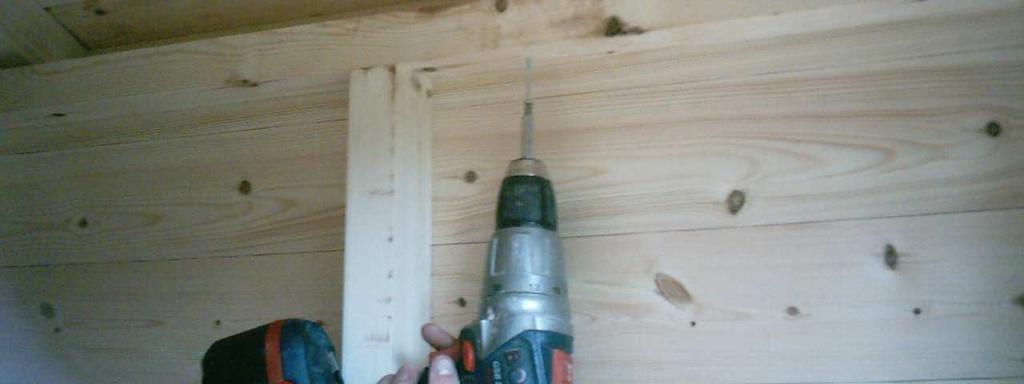
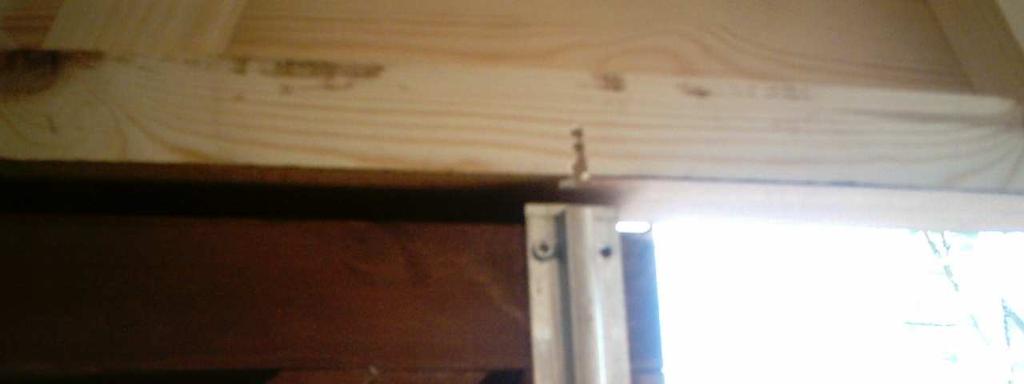
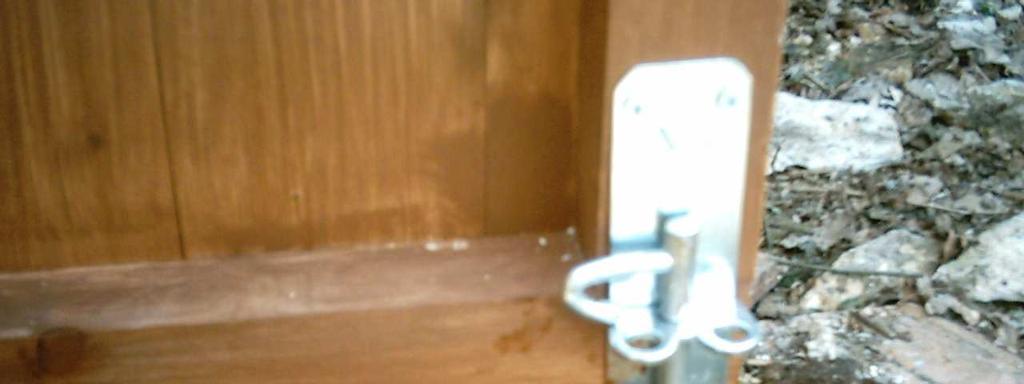
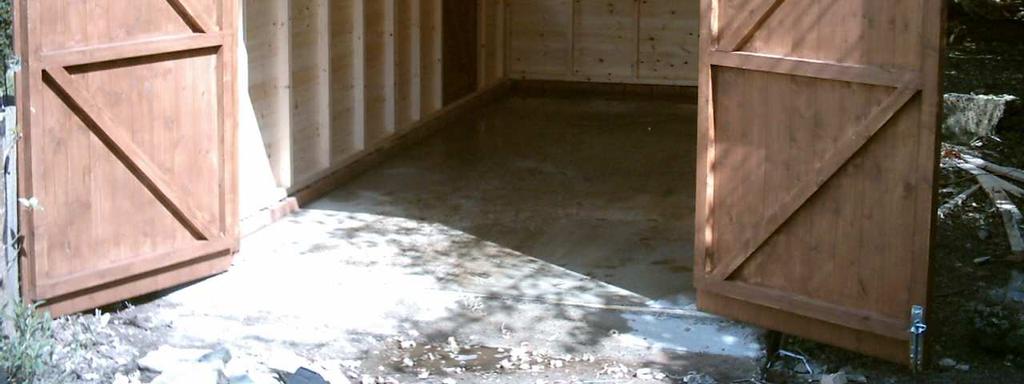
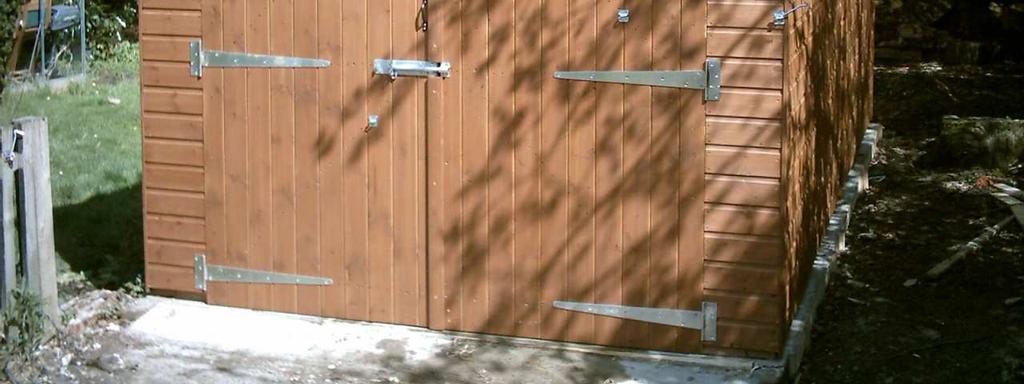
4 4 Measure the door opening from the very top of the door opening (were the top of the door boards will go against) down to the concrete and deduct approx 8 mm for the door to open freely without catching the concrete (measure both sides and the middle of the opening in case the concrete is uneven) double check all measurements then cut the doors to the correct length with a hand saw. Now push the doors up into position (they will be supported by the bottom rail) then fix with the 2 inch screws provided. Before putting any screws into any board please make a pilot hole with a 3 or 4mm drill bit is used to stop splitting. Fix the 6 inch tower bolt to the top of the inside of the door that has not got the tower bolt on the outside. Then drill a 12 mm hole into the timber that is to receive the tower bolt. Cut out the bottom timber that goes across the doorway. Measure from the underside of the door frame to the concrete and deduct 10 mm then cut a piece of timber to this size (from the timber you just cut out) And fix it by screwing a couple of 1 1/2 inch screw through the door into the piece. (a small pilot hole can be used to stop any splitting of the wood ) Next fix the 8 inch tower bolt to the piece of timber you just attached to the door using 1 1/2 inch screws. Then close the door and mark were you need to drill a 14 mm hole into the concrete to receive the tower bolt. Attach the heavy duty padbolt to the middle of the door that is to be the first opening one. Remember to pre-drill the all holes. Fix the receiver to the opposite door. Next cut the door covering strips to fit the top and bottom of the door and fix onto the door that is to open first, let it overhang the opposite door by approx 2cm. Pre-drill and fix to the closing side with 2inch x 10 gauge screws provided. We recommend fixing down the garage to the concrete on completion.


5 5


6 6
Gambrel Barn with Overhang Manual
 Tools Needed: -Cordless Drill (12V or higher) -#2 Square Drive Bit -Hammer -6 Step Ladder -Tape Measure -Square utility knife w/ blade & hook blade -Speed Square Little Cottage Co. PO Box 455 Berlin, OH
Chapter 22. Shed Construction
 Chapter 22. Shed Construction 22.1 BUILDING SHED FLOOR 22.2 BUILDING SHED WALLS 22.3 BUILDING SHED ROOF 22.4 ASSEMBLING SHED Tools needed by volunteers: Hammer Nail apron Tape measure Square Utility knife
INSTRUCTIONS FOR ASSEMBLY 2355mm x 3125mm Workshop
 Manufacturer of Christie Glasshouses and Sheds INSTRUCTIONS FOR ASSEMBLY 2355mm x 3125mm Workshop 1 Thomas Burns Street, Dunedin Phone (03) 477 7909 www.allans.co.nz Congratulations on your purchase of
INSTRUCTIONS FOR ASSEMBLY 2355mm x 4665mm Workshop
 Manufacturer of Christie Glasshouses and Sheds INSTRUCTIONS FOR ASSEMBLY 2355mm x 4665mm Workshop 1 Thomas Burns Street, Dunedin Phone (03) 477 7909 www.allans.co.nz Congratulations on your purchase of
Precut Value Shed Manual Gambrel Barn
 Tools Needed: -Cordless Drill (12V or higher) -#2 Square Drive Bit -Hammer -6 Step Ladder -Tape Measure -Square utility knife w/ blade & hook blade -Speed Square Little Cottage Co. PO Box 455 Berlin, OH
ASSEMBLY INSTRUCTIONS GG77. BASE SIZE: 2.190m x 2.020m
 ASSEMBLY INSTRUCTIONS GG77 BASE SIZE: 2.190m x 2.020m CONGRATULATIONS ON PURCHASING A DURATUF GUARDIAN SHED. BEFORE YOU BEGIN THE ASSEMBLY PLEASE NOTE SOME IMPORTANT POINTS: BEFORE YOU START: Read all
Precut Workshop & Gable Manual
 Tools Needed: -Cordless Drill (12V or higher) -#2 Square Drive Bit -Hammer -6 Step Ladder -Tape Measure -Square utility knife w/ blade & hook blade -Speed Square Little Cottage Co. PO Box 455 Berlin, OH
Octagon Vinyl Gazebo Assembly Instructions
 Octagon Vinyl Gazebo Assembly Instructions For 10 & 12 Models Toll Free: 866.768.8465 Hours: 9-5 Monday-Friday EST www.homeplacestructures.com Package ships as shown revised 04/29/09 Vinyl Gazebo Assembly
Classic Saltbox Manual
 Tools Needed: -Cordless Drill (12V or higher) -#2 Square Drive Bit -Hammer -6 Step Ladder -Tape Measure -Utility knife w/ blade & hook blade -Speed Square -5/16 Wood Drill bit Little Cottage Co. PO Box
INSTALLATION PROCEDURE
 Vinyl Siding INSTALLATION PROCEDURE Tools Needed and Preparation MOST ESSENTIAL TOOLS The proper tools, materials and equipment can make the installation of Durabuilt Vinyl Siding much easier. Here are
Assembly Instructions
 10' and 12' Octagon Cedar Gazebo Assembly Instructions Toll Free: 866.768.8465 Hours: 9-5 Monday-Friday EST www.homeplacestructures.com Package ships as shown revised 06/20/09 Cedar Gazebo Assembly Instructions
Octagon Vinyl Gazebo Assembly Instructions For 10 & 12 Models
 Octagon Vinyl Gazebo Assembly Instructions For 10 & 12 Models Toll Free: 866.768.8465 Hours: 9-5 Monday-Friday EST www.homeplacestructures.com Package ships as shown revised 04/29/09 Vinyl Gazebo Assembly
NEVADA ASSEMBLY INSTRUCTIONS
 NEVADA ASSEMBLY INSTRUCTIONS BASE SIZE: 2.700m x 1.500m NEVADA Tools Required: Battery Drill Riveter Hammer Tape Measure Ladder Skillsaw Level Screwdriver - Flat 3/8 Hex Drive bit 8mm Hex Drive bit Drill
ASSEMBLY INSTRUCTIONS SS2520. BASE SIZE: 2.520m x 2.020m
 ASSEMBLY INSTRUCTIONS SS50 BASE SIZE:.50m x.00m CONGRATULATIONS ON PURCHASING A SMART STORE SHED. BEFORE YOU BEGIN THE ASSEMBLY PLEASE NOTE SOME IMPORTANT POINTS: BEFORE YOU START: Read all instructions
GROWING BETTER THROUGH DESIGN. 6ft Lean-To LEAN-TO. Assembly Instructions 04/02
 GROWING BETTER THROUGH DESIGN 6ft Lean-To LEAN-TO Assembly Instructions 04/02 6ft Lean-To Greenhouse Base Plan Introduction/Tools/Contents / / Contents This is a copy of our Lean-To greenhouse base plan.
10 Octagon Cedar Gazebo Assembly Instructions
 10 Octagon Cedar Gazebo Assembly Instructions Toll Free: 866.768.8465 Hours: 9-5 Monday-Friday EST www.homeplacestructures.com Package ships as shown revised 06/22/09 10 Cedar Gazebo Assembly Instructions
8x12 SpaceMaker Garden Shed Assembly Manual
 8x12 SpaceMaker Garden Shed Assembly Manual Version #6 Revised June / 2007 Thank you for purchasing a 8x12 SpaceMaker Garden Shed. Please take the time to identify all the parts prior to assembly. Safety
SteelChief Installation Instructions for pre-assembled panel form sheds GABLE ROOF
 SteelChief Installation Instructions for pre-assembled panel form sheds GABLE ROOF Please read fully before commencing work...any queries will be promptly answered, contact theboss@steelchief.com.aui MPORTANT
Cape Cod Manual. Little Cottage Co. PO Box 455 Berlin, OH Little Cottage Co.
 Tools Needed: -Cordless Drill (12v or higher) -#2 Square drive bit -Hammer -6 Step Ladder -Tape Measure -Square utility knife with blade & hook blade -Speed Square Little Cottage Co. PO Box 455 Berlin,
Chapter 23. Garage Construction
 Chapter 23. Garage Construction 23.1 ESTABLISHING CHALK LINES 23.2 MEASURING AND CUTTING WALL PLATES 23.3 MARKING WINDOW & DOOR LOCATIONS ON EXTERIOR WALL PLATES 23.4 MARKING STUDS ON EXTERIOR WALL PLATES
Shed Assembly Instructions
 Shed Kit Contents The shed kit includes all the parts needed to assemble your shed except for tools and fasteners such as screws and nails. The various pieces are pre-cut and many are marked to indicate
Corner Potting Store Assembly Instructions
 Corner Potting Store Assembly Instructions English SS225E Before assembly We recommend that time is taken to read the instructions before starting assembly, then follow the easy step by step guide. The
GIRTS ON BACK OF BUILDING
 GIRTS ON BACK OF BUILDING ALL GIRTS ARE 1 1/2 SQUARE TUBE. GIRT LENGTHS FOR 12, 20, 24, AND 30 WIDE BUILDINGS: ON 12 WIDE BUILDINGS GIRTS ARE 67 3/4 LONG ON 20 WIDE BUILDINGS GIRTS ARE 56 3/4 LONG ON 24
Gambrel Barn Construction Manual 8x8 through 16x24 Units
 Gambrel Barn Construction Manual 8x8 through 16x24 Units Tools Needed: Cordless drill (12V or higher) #2 square drive bit Hammer 6 step ladder Tape measure Square utility knife w/ blade & hook blade Little
PINEHAVEN SHEDS Assembly Instructions FOR LEAN-TO SHEDS
 PINEHAVEN SHEDS Assembly Instructions FOR LEAN-TO SHEDS GARDEN PRODUCTS www.pinehavensheds.co.nz 5/16 hex drive bit, By asking about our products at your nearest DIY or gardening store www.pinehavensheds.co.nz
ASSEMBLY INSTRUCTIONS GL75. BASE SIZE: 2.190m x 1.520m
 ASSEMBLY INSTRUCTIONS GL75 BASE SIZE: 2.190m x 1.520m CONGRATULATIONS ON PURCHASING A DURATUF GUARDIAN SHED. BEFORE YOU BEGIN THE ASSEMBLY PLEASE NOTE SOME IMPORTANT POINTS: BEFORE YOU START: Read all
IDAHO ASSEMBLY INSTRUCTIONS. BASE SIZE: 1.800m x 1.200m
 IDAHO ASSEMBLY INSTRUCTIONS BASE SIZE: 1.800m x 1.200m IDAHO Tools Required: Battery Drill Riveter Hammer Tape Measure Ladder Skillsaw Level Square Drive Bit No.2 3/8 Hex Drive Bit 8mm Hex Drive Bit Drill
Assembly Instruction. 9,2 m² Grillkota
 Assembly Instruction 9,2 m² Grillkota Dear customers, Thank you for purchasing our product. We recommend that you read these instructions before installation and make the necessary preparations for building.
Dura-Lock Roof System
 DLR-14 Dura-Lock Roof System Assembly and Installation Instructions Read the instructions before starting the job. They explain the steps required to produce a finished product that will meet factory specifications.
Octagon Greenhouse Manual
 Tools Needed: -Cordless Drill (12V or higher) -#2 Square Drive Bit -Hammer -6 Step Ladder -Tape Measure -Utility knife w/ blade & hook blade -Speed Square -5/16 Wood Drill bit Little Cottage Co. PO Box
Installing your new Bevella Top. L Shaped Countertop with Joints No Finished Ends (Fits Between Four Walls)
") Installing your new Bevella Top L Shaped Countertop with Joints No Finished Ends (Fits Between Four Walls) Bevella RTI Countertops are engineered and manufactured to the highest quality standards, built
Installing your new Bevella Top L Shaped Countertop with Joints No Finished Ends (Fits Between Four Walls) Bevella RTI Countertops are engineered and manufactured to the highest quality standards, built
Country Cabin. Assembly Manual. HomePlace Structures
 Country Cabin Assembly Manual Country Cabin Assembly Manual revised 3/20/10 Dear Customer, Thank you for your purchase of our Country Cabin. The craftsmanship and detail in this building is unmatched.
Firehouse Manual. Tools Needed:
 Tools Needed: -Cordless Drill (12V or higher) -#2 Square Drive Bit -Hammer -6 Step Ladder -Tape Measure -Square utility knife w/ blade & hook blade -Speed Square Little Cottage Co. PO Box 455 Berlin, OH
E N G L I S H GARDEN SHED. Assembly Instructions. Suitable for Models WITH VARYING DEPTHS
 GARDEN SHED Assembly Instructions Suitable for Models 6' Wide 8' Wide 0' Wide WITH VARYING DEPTHS GI0003 November 0 INSTALLATION ADVICE It's Not That Difficult! The construction of your shed isn't as complicated
CAUTION: Before opening the crate place it flat on its side (not up right as show in the photo) Hardware included for assembling your gazebo:
 Hardware included for assembling your gazebo:") Octagon Wood Gazebo Kit Contents Hardware included for assembling your gazebo: 5/16" Lag Bolts Use to fasten post to floor 2 1/2" screws Use to fasten joist together fasten posts to outside joist fasten
Octagon Wood Gazebo Kit Contents Hardware included for assembling your gazebo: 5/16" Lag Bolts Use to fasten post to floor 2 1/2" screws Use to fasten joist together fasten posts to outside joist fasten
KIT ASSEMBLY INSTRUCTIONS
 KIT ASSEMBLY INSTRUCTIONS We have designed these instructions as a stepby step procedure to simplify the assembly process. Nevertheless, we do recommend including someone with carpentry expertise on your
ASSEMBLY INSTRUCTIONS SS2010. BASE SIZE: 2.020m x 1.020m
 ASSEMBLY INSTRUCTIONS SS010 BASE SIZE:.00m x 1.00m CONGRATULATIONS ON PURCHASING A SMART STORE SHED. BEFORE YOU BEGIN THE ASSEMBLY PLEASE NOTE SOME IMPORTANT POINTS: BEFORE YOU START: Read all instructions
SLIDING MECHANISM TROLLEY CATCH TROLLEY ASSEMBLY FLOOR GUIDE
 Set A Set B PFD30 Fire Door Kit FITTING INSTRUCTIONS For use with 44mm thick doors only For Single and Double doors IF INSTALLING A TOUCH LATCH, PLEASE READ THE CORRESPONDING FITTING INSTRUCTIONS FIRST
Roofing Training - Basics. Sandy Wesch
 Roofing Training - Basics Sandy Wesch Tools Hammer Measuring Tape Chalk Line & Chalk Speed Square Framing Square Utility Knife Metal Snips Extension Ladder(s) 2 Safety Any tools or material up on the roof
Roof drainage system
 Kroftman storage building Roof drainage system (E and H Models) Installation manuel V0.00KR 180501 HANG GUTTER Hang gutters are available in dimensions 125mm and in 2 different. HANG GUTTER GUTTER JOINT
NEW equinox INSTALLATION GUIDE Issue
 NEW equinox INSTALLATION GUIDE Issue 2 CONTENTS 1. Preparing the ring beam 2 2. Installing the framework 3 3. How to install structural support posts 7 4. Insulation and waterproofing 8 5. Tile application:
Metro Series Sauna. installation instructions
 Metro Series Sauna installation instructions Please immediately check for any hidden damage that may have occurred in shipping. If any damage is found you must notify the delivering carrier within seven
Tools Required Page 1. KIT CONTENTS: Smoking Shelter Page 1-2 Smoking Shelter Optional Extras Page 3
 TM MODUS SHELTER 770 AND 1280 FLAT PACK ASSEMBLY & FIXING INSTRUCTION LEAFLET NOTE: Ensure that all relevant personnel read the points listed below and that a copy is passed on to staff involved with the
SLIDING MECHANISM TROLLEY CATCH TROLLEY ASSEMBLY FLOOR GUIDE
 Set A Set B P7001 Standard Kit FITTING INSTRUCTIONS For use with 44mm thick doors only For Single and Double doors IF INSTALLING A TOUCH LATCH, PLEASE READ THE CORRESPONDING FITTING INSTRUCTIONS FIRST
SLIDING MECHANISM TROLLEY CATCH TROLLEY ASSEMBLY FLOOR GUIDE
 Set A Set B PFD30 SG Fire Door Kit FITTING INSTRUCTIONS For use with 44mm thick doors only For Single and Double doors SUGGESTED TOOLS DRILL G-CLAMP TAPE MEASURE (Image for reference only) HACKSAW POCKET
Mount to the Wall INSTALLATION MANUAL
 Mount to the Wall 15 Locate the Wooden Studs This step applies to wooden stud wall installation only. Determine and mark the exact locations of two stud centers on the wall. Wooden studs should be spaced
INSTALL IN 2 DAYS. *Assumes 3-man fitting team. equinox. Tiled roof system. Installation guide ISSUE 1
 INSTALL IN 2 DAYS *Assumes 3-man fitting team equinox Tiled roof system Installation guide ISSUE 1 Equinox tiled roof system Installation guide Contents Pre-installation checks 1. Installing the framework
The Festival Assembly Instructions
 The Festival Assembly Instructions Toll Free: 866.768.8465 Hours: 9-5 Monday-Friday EST www.homeplacestructures.com Package ships as shown CONTACT INFORMATION: HomePlace Structures 301 Commerce Drive New
12x12 Pavilion. Assembly Manual
 12x12 Pavilion Assembly Manual 12x12 Pavilion Assembly Manual Congratulations on purchasing your new Pavilion. Thank You for your purchase and Welcome to the YardCraft Famiy. This manual is designed to
NEW equinox INSTALLATION GUIDE Issue
 NEW equinox INSTALLATION GUIDE Issue 1 CONTENTS If in doubt at any stage 1. Preparing the ring beam 2 2. Installing the framework 3 3. Insulation and waterproofing 7 4. Tile application: Steel tiles 9
Pergola Installation Instructions
 Pergola Installation Instructions TOOLS REQUIRED HAMMER DRILL 1/2 MASONRY BIT PENCIL DRILL 3/16 DRILL BIT LEVEL SQUARE LADDER WRATCHET & SOCKETS RUBBER MALLET 2 TAPE MEASURE Column/Post Placement Table
SmartVent Eave Edge Installation Instructions
 SmartVent Eave Edge Installation Instructions STEP 1: Cut a slit 1 wide (or a series of 1 ¾ holes at 3 on center) into the roof decking 6 to 7 up from the drip edge. SmartVent is rated 9NFA. Ensure drip
modular/panel-built sauna kit
 modular/panel-built sauna kit installation instructions Please immediately check for any hidden damage that may have occurred in shipping. If any damage is found you must notify the delivering carrier
Chapter 11. Siding and Soffit
 Chapter 11. Siding and Soffit 11.1 SIDING PREP 11.2 INSTALLING HOUSE SIDING 11.3 INSTALLING SHED SIDING 11.4 INSTALLING SOFFIT 11.5 INSTALLING FASCIA 11.6 INSTALLING SHUTTERS 11.7 SITE CLEANUP Tools needed
Deluxe Cabana INSTALLATION INSTRUCTIONS. INSTALLATION Deluxe INSTRUCTIONS Cabana
 INSTALLATION Deluxe INSTRUCTIONS Cabana 1 Deluxe Cabana 10 Year Guarantee On Sanders workmanship Made in NZ Using NZ timber supplies 40+ Years Experience In business since 1975 Professional Install Available
Blokes Shed INSTALLATION INSTRUCTIONS Custom Design & Build. Nationwide Delivery
 Blokes Shed 10 Year Guarantee On Sanders workmanship Made in NZ Using NZ timber supplies 40+ Years Experience In business since 1975 Professional Install Available NZ wide Nationwide Delivery Available
Installation Instructions
 Supafold Slide Aside System Three Fold Room Divider Installation Instructions Distinctive Doors Ltd Supafold Slide Aside Internal Folding System IMPORTANT: Before proceeding with the installation, and
CONSTRUCTION GUIDE 21ft Wide and 24ft Wide SHEEP HOUSE
 The Outside, Inside CONSTRUCTION GUIDE 21ft Wide and 24ft Wide SHEEP HOUSE Thank you for purchasing a Premier Sheep House. Please take the time to carefully read through this Construction Guide before
STOP! Call Us First! DO NOT RETURN TO STORE.
 16632 STOP! Call Us First! DO NOT RETURN TO STORE. For immediate help with assembly or product information call our toll free number: 1-800-844-9273 or email: customerservice@backyardproductsllc.com Our
STOP! Call Us First! DO NOT RETURN TO STORE.
 16549 STOP! Call Us First! DO NOT RETURN TO STORE. For immediate help with assembly or product information call our toll free number: 1-800-844-9273 or email: customerservice@backyardproductsllc.com Our
Oval Vinyl Gazebo. Assembly Manual
 Oval Vinyl Gazebo Assembly Manual Gazebo Assembly Thank you for your purchase of this Gazebo. This manual is designed to simplify the assembly process, however we strongly recommend having an experienced
Classic Roll Tarp. Installation Instructions. Attention Dealers: Please give this owners manual to the customer when the product is delivered.
 Serving the Truck & Trailer Industry Since 1944 Classic Roll Tarp Attention Dealers: Please give this owners manual to the customer when the product is delivered. Call 800-535-9545 www.aeroindustries.com
4. Components and Stairs
 4. Components and Stairs 4.1 BUILDING WINDOW AND DOOR COMPONENTS 4.2 BUILDING STAIRS Tools needed by volunteer: Hammer Nail apron Tape measure Square Utility knife Pencil Tools and equipment needed: Materials
Potting Store Assembly Instructions
 Before assembly We recommend that time is taken to read the instructions before starting assembly, then follow the easy step by step guide. The instruction sheet is only a guide to the assembly. Certain
INSTALLATION GUIDE. Outback. Flat Attached BEFORE YOU START ADDITIONAL MATERIALS TOOLS REQUIRED. VERAnDAHS PATIOS CARPORTS
 INSTALLATION GUIDE Outback VERAnDAHS PATIOS CARPORTS Flat Attached BEFORE YOU START It is important to check your Local Government Authority requirements before the installation of your new Stratco Outback
S H E D A S S E M B L Y I N S T R U C T I O N S
 T I T A N R A N G E S H E D A S S E M B L Y I N S T R U C T I O N S 8 X 10 ft Approx = 2550 x 3140 cm COMPONENT LIST Component illustrations are given as a visual guide only and are not in proportion PART
FLOW HIVE ASSEMBLY GUIDE. If we look after the bees they will look after us, and the honey really is an amazing bonus. Flow Hive Hybrid 3 Frame
 AUSTRALIAN MADE If we look after the bees they will look after us, and the honey really is an amazing bonus. FLOW HIVE ASSEMBLY GUIDE Flow Hive Hybrid 3 Frame Read all instructions first. If you are unfamiliar
SIDING-MASTER VINYL SIDING ATTACHMENT & ALIGNMENT SYSTEM & OVERHANG ATTACHMENT & ALIGNMENT SYSTEM INSTALLATION INSTRUCTIONS
 Patent Pending SIDING-MASTER & OVERHANG ATTACHMENT & ALIGNMENT SYSTEM INSTALLATION INSTRUCTIONS Overview... SIDING-MASTER Strip Diagram... How to cut strips for length... Accessory Diagrams... How to (and
8x4 SpaceSaver Garden Shed Assembly Manual
 8x4 SpaceSaver Garden Shed Assembly Manual Revision #8 July 5, 2010 Thank you for purchasing an 8x4 SpaceSaver Garden Shed. Please take the time to identify all the parts prior to assembly. Safety Points
Vinyl Gazebo Instructions
 P a g e 1 Vinyl Gazebo Instructions 10 Vinyl Gazebo Shown Thank you for the purchase of your New Gazebo. Depending on the size of your Gazebo, installation can usually be completed in 1 to 2 days. These
ASSEMBLY INSTRUCTIONS
 Quality Built In ASSEMBLY INSTRUCTIONS MK3 BASE SIZE 3380mm x 1715mm ASSEMBLY INSTRUCTIONS Tools Required: Drill Drill Bit 3.5mm Drill Bit 6mm (for clear roof panel only) Hex Drive 5/16 Riveter Hammer
OUTBACK FLAT ATTACHED VERANDAH PATIO CARPORT - INSTALLATION GUIDE BEFORE YOU START TOOLS REQUIRED ADDITIONAL MATERIALS
 BEFORE YOU START It is important to check your Local Government Authority requirements before the installation of your new Stratco Outback Flat Verandah. It is the builder s responsibility to ensure any
STOP! Call Us First! DO NOT RETURN TO STORE.
 16575 STOP! Call Us First! DO NOT RETURN TO STORE. For immediate help with assembly or product information call our toll free number: 1-800-844-9273 or email: customerservice@backyardproductsllc.com Our
6x6 Maximizer Storage Shed Assembly Manual Version #9 Feb 26th, 2015
 6x6 Maximizer Storage Shed Assembly Manual Version #9 Feb 26th, 2015 Thank you for purchasing a 6x6 Maximizer Storage Shed. Please take the time to identify all the parts prior to assembly. Please Note-
Installation Guidelines
 Page 1 Tools You ll Need 4 ft. Carpenter s level Chalk line (to mark U channel locations) Cordless drill/nut driver Caulking gun Chop saw with a metal cutting blade on it (required to make accurate and
Before fitting door, check opening size and squareness of timber frame. The door is made smaller to give correct clearance within the frame.
 Slideaway Single & Maximizer Door Gear INSTALLATION INSTRUCTIONS 11 This garage door has been designed to be as as easy as possible to use, service and automate when installed correctly. Please therefore
Laminate Cabinet Installation Instructions
 Laminate Cabinet Installation Instructions www.easygaragestorage.com/installation How To Use These Instructions Thank you for your purchase! Please read each step of this manual thoroughly to ensure proper
Assembly and Installation Guide
 The Easy Hang Closet Solution SM Install Your elfa In An Instant. Enjoy The Benefits For A Lifetime. Basic Tools For elfa Assembly and Installation Level Hand or Power Drill Drill Bits 1/8", 3/8", 5/16"
Chapter 1. Beam and Sill Plates
 Chapter 1. Beam and Sill Plates 1.1 ESTABLISHING SQUARE SILL PLATE CHALK LINES 1.2 INSTALLING TREATED SILL PLATES 1.3 INSTALLING LAMINATE BEAM Tools needed by volunteers: Hammer Nail apron Tape measure
MONKEY BARS OVERHEAD RACK INSTALLATION
 MONKEY BARS OVERHEAD RACK INSTALLATION Thank you for purchasing the New Monkey Bars Overhead storage rack. The most innovative overhead rack on the market WARNING THE PROPER INSTALLATION OF THIS STORAGE
TREX TRANSCEND RAILING
 RAILING NOTES:» RAILINGS ARE DESIGNED TO BE INSTALLED OVER THE DECKING FRAME OR ON INSIDE OF RIM JOIST. NOTCHING OF PRESSURE-TREATED POSTS OR POSTS INSTALLED ON OUTSIDE OF RIM JOIST IS NOT ALLOWED.» All
DUTCH GABLE FREESTANDING CARPORT
 DUTCH GABLE FREESTANDING CARPORT STRATCO OUTBACK ASSEMBLY INSTRUCTIONS. Your complete guide to building a FREESTANDING Outback DUTCH GABLE CARPORT BEFORE YOU START Carefully read these instructions. If
Best Barns USA. Regency Deluxe. 8' x 12' Assembly Book. revised February 15, 2017
 Best Barns USA Assembly Book revised February 15, 2017 Regency Deluxe 8' x 12' Manufactured by Reynolds Building Systems, Inc. 205 Arlington Drive, Greenville, PA 16125 This manual is copyrighted. Under
Kentucky 4H Wood Science Plans Notebook. Plans Level 1
 Kentucky 4H Wood Science Plans Notebook Plans Level 1 MATERIALS NEEDED: 1 piece wood 3/4" x 2 x 2 1 piece wood 3/4" x 3 x 3 1/2" 1 wooden spring-type clothespin 2-1 1/2" nails 1-1/2 woodscrew Wood Glue
AMISHGAZEBOSHOP.COM VINYL GAZEBO KIT CONTENTS
 VINYL GAZEBO KIT CONTENTS Hardware for assembling your gazebo (provided): 2 1/2" screws Use to fasten joist together fasten posts to outside joist fasten rafters to rafter header fasten benches & cupola
CONSTRUCTION GUIDE 27ft Wide and 30ft Wide SHEEP HOUSE
 The Outside, Inside CONSTRUCTION GUIDE 27ft Wide and 30ft Wide SHEEP HOUSE Thank you for purchasing a Premier Sheep House. Please take the time to carefully read through this Construction Guide before
INSTALLATION GUIDE. 1. Overview. 2. Measuring. 3. Tools & fixings you will need B C. Opening Width. Opening Height
 INSTALLATION GUIDE Please take a few minutes to read through this guide before getting started. 1. Overview A Typical Sliding Wardrobe Door Layout A Frame - Top Liner (optional) B Top Track C Frame - Strike
Best Barns USA. the Brookhaven 10' x 16' Assembly Book. revised March 23, 2016
 Best Barns USA Assembly Book revised March 23, 2016 the Brookhaven 10' x 16' Manufactured by Reynolds Building Systems, Inc. 205 Arlington Drive Greenville, PA 16125 724-646-3775 This manual is copyrighted.
 SUPREME WALL GARDEN ASSEMBLY INSTRUCTIONS 24/08/16 www.hallsgreenhouses.com Please refer to website for the most up to date instructions. SAFETY WARNING 1. Always wear protective glasses, shoes, gloves
8 Wide Evolution Cedar Partition Assembly Instructions
 09/13 8 Wide Evolution Cedar Partition Assembly Instructions Contents: Introduction Overview Base Preparation Partition Frame Assembly Glazing Door Installation Parts List Section - 1 2 3 4 5 Page 3 4
Stratco Sanctuary INSTALLATION BEFORE YOU START TOOLS REQUIRED GUIDE
 INSTALLATION GUIDE Stratco Sanctuary Verandahs, Patios and Carports BEFORE YOU START It is important to check with your Local Government Authority prior to the installation of your new Stratco Sanctuary
Keystone Garage Assembly Manual
 Keystone Garage Assembly Manual 14x24 Garage Kit ships as shown Toll Free: 866.768.8465 Hours: 9-5 Monday-Friday EST 13 8 deep AMISH ORIGINAL KEYSTONE 14x24 GARAGE s p e c i f i c a t i o n s Optional
INTRODUCTION. EqunioxRoof.com. Pro Tip
 INSTALLATION MANUAL INTRODUCTION The Equinox Louvered Roof System is designed to be installed in an aluminum frame. All these sections are 1/8" thick extruded aluminum. All engineering for this system
Log cabins. Pentagon log cabin models ASSEMBLY INSTRUCTIONS. Recommended tools Cordless screwdriver
 ASSEMBLY INSTRUCTIONS Log cabins Pentagon log cabin models Recommended tools Cordless screwdriver Spirit level Screw clamp Pliers Tape measure Hammer Generally two persons are required for the assembly;
ASSEMBLY INSTRUCTIONS DIY WALL BED KIT QUEEN BI FOLD DOOR CABINET & MECHANISM. Tools Required For Assembly. 6.5mm Masonry Drill Bit
 ASSEMBLY INSTRUCTIONS DIY WALL BED KIT QUEEN BI FOLD DOOR CABINET & MECHANISM Tools Required For Assembly No 2 & No 4 Phillips Head Screwdrivers No 2 Slot Head Screwdriver Hammer Electric Drill (Hammer
IF INSTALLING ANY OF THE PORTMAN SELF CLOSING SYSTEMS, PLEASE READ THE CORRESPONDING FITTING INSTRUCTIONS SUPPLIED WITH THE CLOSING SYSTEM FIRST
 Set A Set B PFD60 Fire Door Kit FITTING INSTRUCTIONS IF INSTALLING ANY OF THE PORTMAN SELF CLOSING SYSTEMS, PLEASE READ THE CORRESPONDING FITTING INSTRUCTIONS SUPPLIED WITH THE CLOSING SYSTEM FIRST SUGGESTED
Classic Roll Tarp. Installation Instructions. Attention Dealers: Please give this owners manual to the customer when the product is delivered.
 Serving the Truck & Trailer Industry Since 1944 Classic Roll Tarp Attention Dealers: Please give this owners manual to the customer when the product is delivered. Call 800-535-9545 www.aeroindustries.com
STOP! Call Us First! DO NOT RETURN TO STORE.
 16580-R STOP! Call Us First! DO NOT RETURN TO STORE. For immediate help with assembly or product information call our toll free number: 1-800-577-9663 or email: customerservice@backyardproductsllc.com
Qwik-Fence Installation Instructions
 Qwik-Fence Installation Instructions 1 Tools Required The following installation instructions should be used as a guide for installing Folding Guard Qwik-Fence Partitions. Good common sense and appropriate
woodworkersjournal.com MATERIAL LIST
 MATERIAL LIST T x W x L 1 Legs (2) 1 1 2" x 3 1 2" x 36 7 16" 2 End Uprights (2) 1 1 2" x 3 1 2" x 32 1 2" 3 Stringers (4) 1 1 2" x 3 1 2" x 42" 4 Top Cladding, Long (2) 3/4" x 7 1 4" x 65 3 4" 5 Side