Copyright Bumblebee Linens LLC
|
|
|
- Edward Lee
- 5 years ago
- Views:
Transcription
1
2 Crafts Instructions Included 1. Hankie Wedding Dress 2. Pillowcase Dress 3. Hankie Bonnet 4. Hankie Pin Cushion 5. Hankie Angel 6. Hankie Bunny 7. Pillowcase Reusable Grocery Bag 8. Linen Towel Drawstring Backpack 9. Stamped Hankie Favor 10. Doily Wall Art


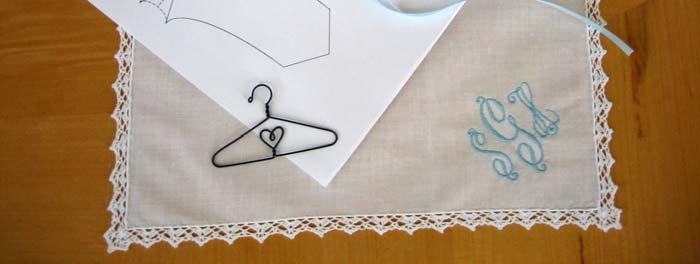
3 Hankie Wedding Dress Materials Needed

4 Materials Needed One White Lace or Embroidered Handkerchief One Sheet of White Card Stock One Wedding Dress Template - send us an at info@bumblebeelinens.com or you may design your own. One Strip of 1/4in Ribbon One 3 inch Miniature Wire Hanger Directions How To Make A Wedding Dress Hankie Favor 1. Iron the handkerchief flat

5 2. Fold the handkerchief diagonally in half and press the fold with an iron 3. Fold both corners of the handkerchief towards the bottom corner forming a diamond shape and press the fold with an iron


6 4. Fold the left and right corners of the handkerchief towards the middle of the handkerchief and press the fold with an iron


7 5. Using our wedding dress template, cut out the wedding dress top from the card stock.


8 6. Fold the template in half along the dotted line. If you haven't already done so, cut out the neckline from the hankie dress top at this time. 7. Flip the wedding dress template inside out making sure that the shoulders are tucked in along the dotted lines. The printed lines should be facing the inside.


9 8. Open up the wedding dress top and tape the handkerchief to the base of the dress using double sided tape. Likewise, use the tape to fasten the hanger to the dress as well.


10 9. Press both sides of the wedding dress top together. 10. Using the ribbon, tie a bow at waist level. Congratulations, you've just made a wedding dress handkerchief favor!
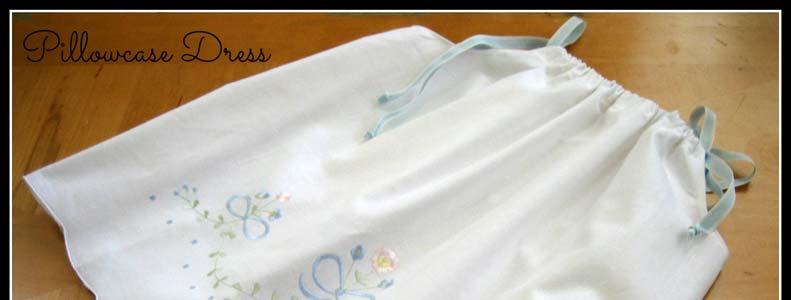
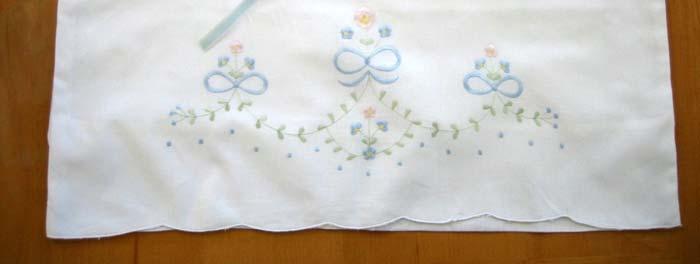
11 Pillowcase Dress Materials Needed


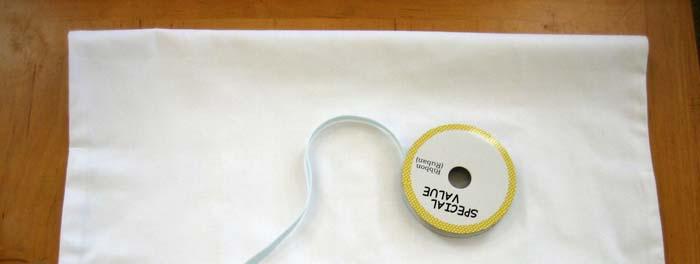
12 Materials Needed One Embroidered Pillowcase Needle and Thread (Sewing machine recommended) 2 yds of 3/8-1/2 inch ribbon, cut into 2 pieces Directions How To Make A Pillowcase Dress 1. Measure your child from the shoulder to where you want the hem to rest and then add approx 7/8in to the total. The following measurements can also be used. 6 months /4in 12 months /4in 18 months /4in 2T /4in 3T /4in 4T /4in


13 2. From the hemmed edge, measure up the length that you just determined and cut straight across the top to remove the pillowcase portion. This cut portion will be the top of the dress. 3. Fold the pillowcase vertically in half


14 4. Cut armholes into the pillowcase. 5. By folding the case in half, you have created two identical armholes. Note: The shape of the armholes should be like a J. For a smaller child, make the armholes 1.5in wide and 3in deep. For a larger child make it 2in wide and 4in deep.


15 6. Now hem each armhole to avoid fraying. 7. Fold the top of the front and back of the pillowcase, first 1/4in then 5/8in to form a casing.


16 8. Sew a seam to stitch this closed. 9. Thread 1 yd of ribbon through each casing by using a small bobby pin.


17 10. Tie a small knot at the ends of each ribbon. 11. Take the ribbon from the front and back, and tie bows on the shoulders.
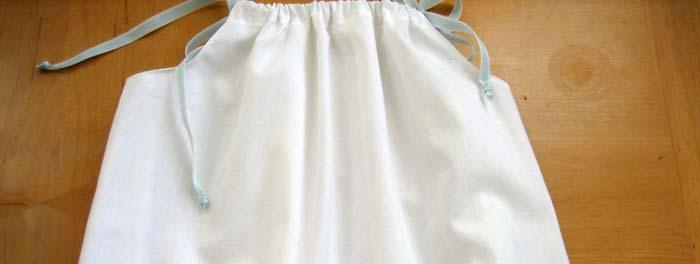

18 12. Congratulations!


19 Hankie Bonnet Materials Needed
 White Needle and Thread 1/4in Wide")

20 Materials Needed Handkerchief (size 12 or larger) White Needle and Thread 1/4in Wide White Ribbon Embellishments (Optional) Directions How To Make A Hankie Bonnet 1. Iron the handkerchief flat


21 2. Fold one edge approximately one inch (this will be the back on the hankie). Depending the size of the hankie or the way you would like the bonnet to look, you may want to adjust this fold anywhere from 1 to 2 inches. 3. Fold the opposite edge toward the first fold approximately 3 inches. Again, this length of this fold may depend on the size of your hankie. Make sure to leave some space between the two rows of lace. 4. Press both folded edges with an iron. 5. Open the hankie and hand stitch running stitches along the first fold. Do not knot or finish this stitch off. 6. Refold the hankie along the pressed line.


22 7. Now with the first fold, pull on the thread to gather the hanky into a bonnet. 8. When the desired size is reached, secure the thread and finish the bonnet off by adding ribbon at the back of the bonnet.


23 9. Now with the second fold, take each corner and fold a small edge into the hankie (this will form a small triangle inside the bonnet) 10. Add a length of ribbon for tying onto each corner of the front of the bonnet. If desired, add small embellishments to add a decorative touch.


24 11. Congratulations you have made a wonderful hankie bonnet Hankie Bonnet Poem I am just a little hankie, as square as can be; But with a stitch or two, they've made a bonnet out of me. I'll be worn home from the hospital, and on special days, And then I'll be carefully pressed and neatly packed away. Then on the wedding, I have been told, Every well dressed Bride must have something old. So what would be more fitting than to find Little Old Me, A few stitches snipped and a wedding handkerchief I will be! And if per chance, it is a boy, someday he still will wed. So to his Bride he can present the handkerchief once worn upon his head.


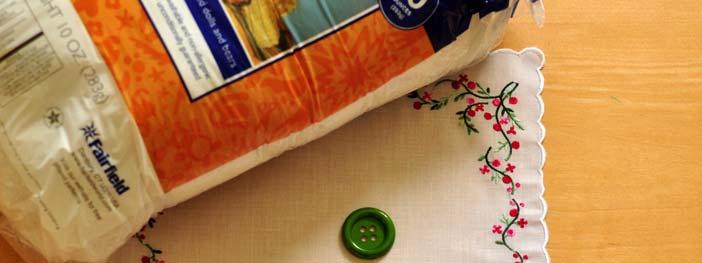
25 Hankie Pin Cushion Materials Needed


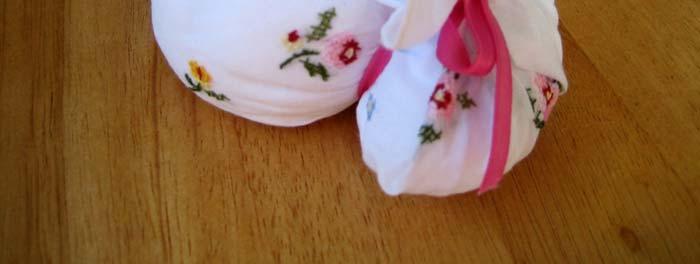
26 Materials Needed One ladies handkerchief Cotton/Poly Filling Needle and Thread 2 Decorative Buttons Directions How To Create a Hankie Pin Cushion 1. Iron the handkerchiefs flat. 2. Fold three corners of the hankie to meet in the center


27 3. Hand (whip) stitch the hankie sides together, making sure that the lace edges meet. Leave one side open so that you can stuff the filling 4. Stuff the pin cushion to the desired thickness by filling it with the cotton filling.


28 5. Hand stitch the opening closed. 6. Turn the pin cushion upside down and in the center, add one of the buttons by sewing through the pillow to the other side.


29 7. Catch the needle on the other side of the pillow and pull the thread taut. This will create a fuller looking pillow. 8. Once through the pillow, take the needle and thread the second button onto the thread. 9. Continue to go back and forth through the pillow several times until both buttons are secure. Finish off in the back of the pillow.

30 10. Congratulations! You have just made a beautiful pin cushion. Happy Sewing!


31 Hankie Angel Materials Needed
")

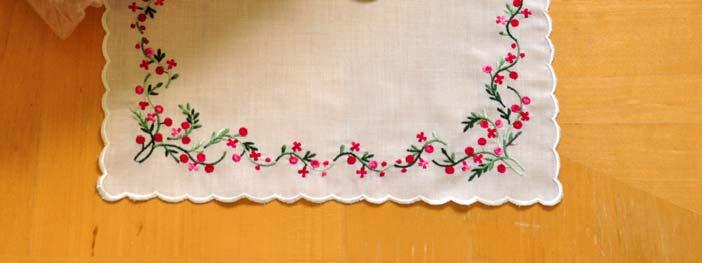
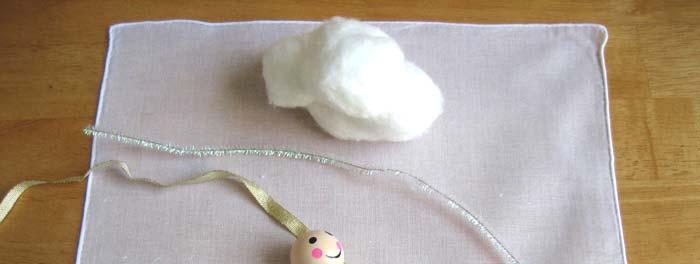
32 Materials Needed One Lace Handkerchief or Embroidered Handkerchief A Handful of cotton balls 10 inches of 1/4 inch thick ribbon 1 small wooden doll head 1 pipe cleaner Glue (Optional) Directions How To Make A Hankie Angel 1. Iron a handkerchief flat and place the hankie with the embroidery facing down and away from you. Place the cotton balls near the bottom of the handkerchief.


33 2. Roll the handkerchief up towards the top of the handkerchief, leaving a small corner loose. 3. Turn the hankie roll over and pull both ends of the handkerchiefs towards the center and have the ends cross each other


34 4. Tie a ribbon in the center of where the handkerchiefs ends meet. You have now created the angel wings. 5. Stick the angel head (directions below) between the angel wings with the head pointing towards the front of the angel.


35 6. Now tie the ribbon over the pipe cleaner and below the hankie head to attach the head to the angel body. Turn the angel around and bend the pipe cleaner up to make a U shape. 7. Congratulations, you have just made a hankie angel.


36 Directions for Angel Head 1. With a pipe cleaner, on one side, fold it roughly in half. On the other side, create a halo by make a big loop.


37 2. Fold the pipe cleaner as shown below. 3. Stick the pipe cleaner into the bottom of the doll s head. Optional, use glue to attach.


38 Hankie Bunny Tutorial Materials Needed


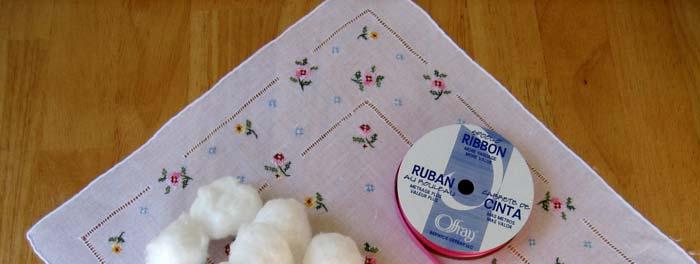
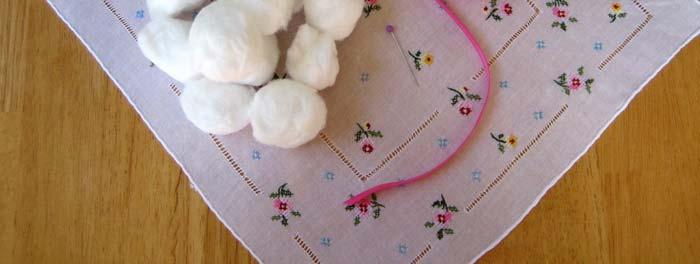
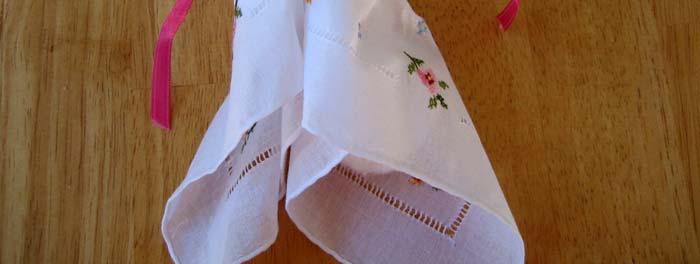
39 Materials Needed One Lace or White Embroidered handkerchief Handful of cotton balls 12 inches of 1/4 inch thick ribbon 1 sewing needle Directions How To Make A Hankie Bunny 1. Iron a handkerchief flat. If your handkerchief is embroidered, make sure you iron the handkerchief over a towel to protect the embroidery. Place the cotton balls in the center of the handkerchief with the embroidery facing down.


40 2. Fold the top of the handkerchief over the cotton balls to meet the bottom edge of the handkerchief. 3. From the bottom of the handkerchief, roll the handkerchief tightly and into the cotton balls


41 4. Fold the roll in half 5. Tie the ribbon halfway up the roll


42 6. Take the two dangling ends of the handkerchief and pull it towards the body of the bunny. Tie the ribbon again. Pull the ends of the hankies out to make the ears. 7. To make the bunny tail, take another cotton ball and attach it by pinning it to the bunny underneath the cotton ball.
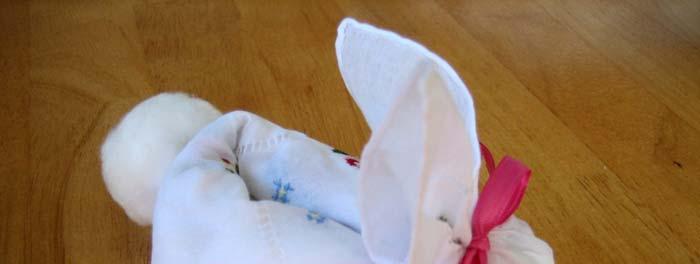
43 8. Congratulations, you have just made a hankie bunny!
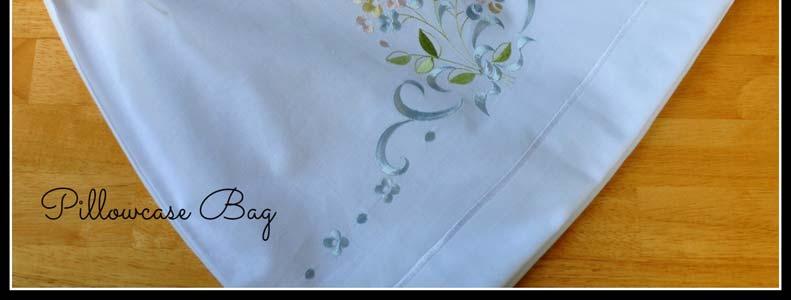
44 Pillowcase Reusable Grocery Bag Tutorial Materials Needed


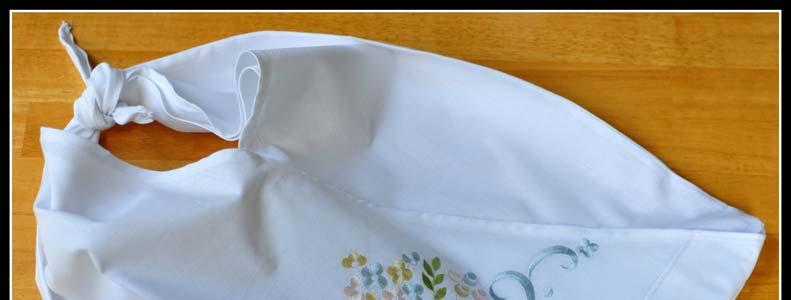
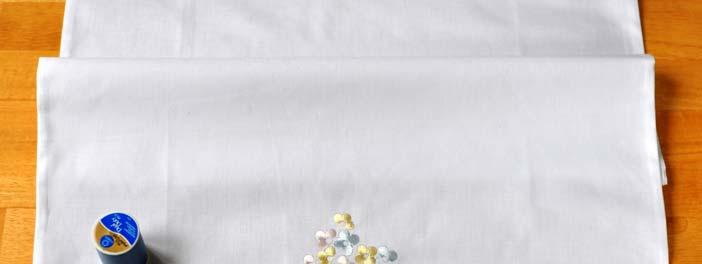
45 Materials Needed One Embroidered Pillowcase Scissors or rotary cutter Needle and thread Directions How To Make A Pillowcase Bag 1. From the pillowcase closed edge, measure down.25" and remove this amount by cutting if off.


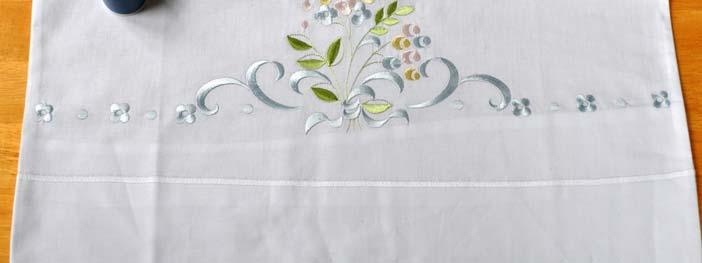
46 2. Fold the pillowcase diagonally in half and press with an iron to create a crease 3. Cut along the pressed crease. You now have two pillowcase halves


47 4. Now hem along each diagonal pillowcase edge to avoid fraying. 5. Rotate one of the pillowcase halves and place it inside the other pillowcase by lining it up along the bottom edge.


48 6. Now where the pillowcase case diagonal edges overlap, pin and stitch the pieces together. Repeat on the back side of the bag. 7. Turn the bag inside out and machine stitch the bottom edges of the pillowcase pieces together.


49 8. Turn the bag right side out. 9. Tie a knot at the top of the bag. 10. Congratulations you are now able to use your pillowcase bag.

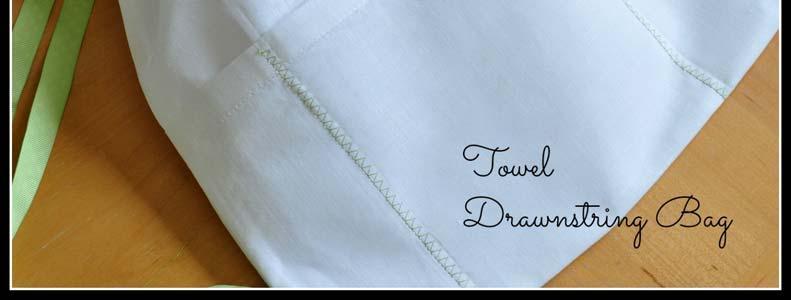
50 Linen Towel Drawstring Backpack Materials Needed
 Two pins Directions How To Make A Linen Towel Drawstring Backpack 1.")

51 Materials Needed Two White Hemstitched Linen Towels Needle and Thread Two Strips of 5/8 in Ribbon (54in each) Two pins Directions How To Make A Linen Towel Drawstring Backpack 1. Face one of the linen guest towels with the hemstitched hem on top. If desired, you can monogram the guest towel 2 inches above the hemstitched hem. To create the backpack's pockets, fold the towel up nine inches up from the bottom. Press with an iron.


52 2. Machine stitch the pockets by stitching a straight line from the crease of the towel up to the hem. You will create different pocket sizes by stitching the lines close together or far apart. 3. Repeat instructions 1 and 2 on the second towel.


53 4. Now piece the two guest towels together with the hemstitched edges matching. The top towel should have the pockets facing inward and the second towel should have the pockets facing outward. By having the pockets facing outward, this will create the pockets to be inside the backpack. 5. Now you are going create the backpack straps. Thread the first 24 inch strip of ribbon through the top hemstitch casing from the right hand side of the towel.


54 6. Once threaded through the top towel casing, you now will use the same ribbon and thread the ribbon into the bottom left hand side casing. 7. Pull the ribbon through the bottom casing to the right hand side so that both sides of the ribbon are now dangling equally on the right hand side of the towel.


55 8. Repeat with the second strip of ribbon but now you are going to start threading from the top left hand side hemstitched casing and into the bottom right hand side casing.


56 9. Make sure that the ribbons are now hanging equally on both sides of the towel casings. 10. Now with the ribbons hanging on the left hand side of the towel, take the two edges and pin them in between the two towels at the bottom. Repeat with the right hand side ribbons.


57 11. Once pinned, tuck the ribbons in between the towels and machine stitch the sides and the bottom of the towels together. 12. Flip your drawstring backpack inside out


58 13. Congratulations you are finished your drawstring backpack.


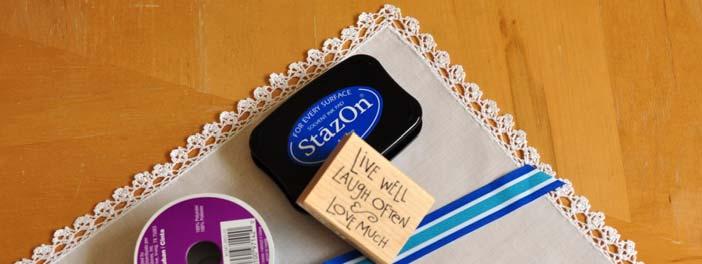
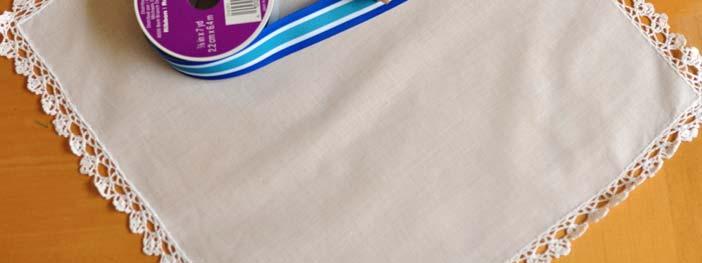
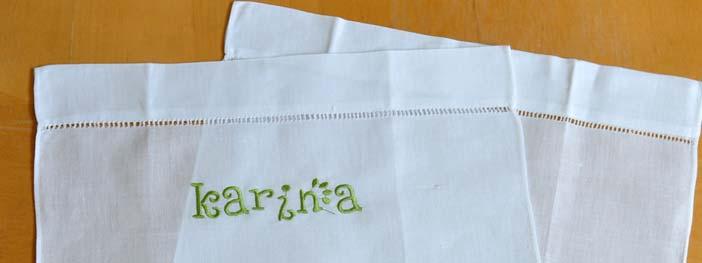
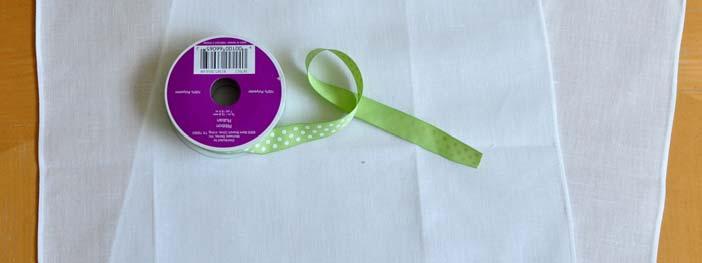
59 Stamped Hankie Favor Materials Needed
 1.")

60 Materials Needed Lace handkerchiefs Permanent Ink Pad for multi surfaces Stamp (pick one up at your craft store or order a custom one with your names and dates) 1.5 ft of 7/8 inch ribbon Piece of paper Directions How To Make A Stamped Wedding Hankie Favor 1. Place your handkerchief facing up and on top of a piece of paper (in case the ink bleeds through)


61 2. Press the stamp firmly onto the ink pad 3. With firm pressure, press the stamp into the desired corner. Be sure to place center it in the corner


62 4. Let the ink of the hanky dry 5. Once dry, turn the hankie upside down and fold the right hand side 1/3 of the way over


63 6. Repeat on the opposite side 7. Fold the top piece of the hankie down to meet the lace on the bottom 8. Tie a ribbon around the handkerchief to finish


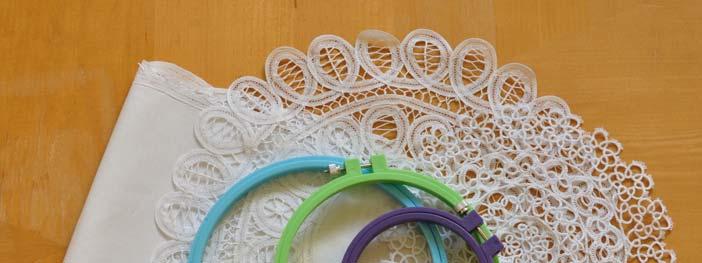
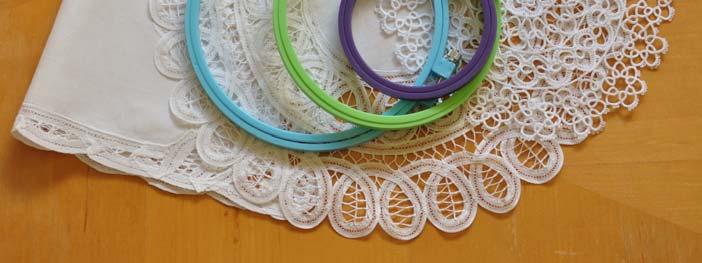
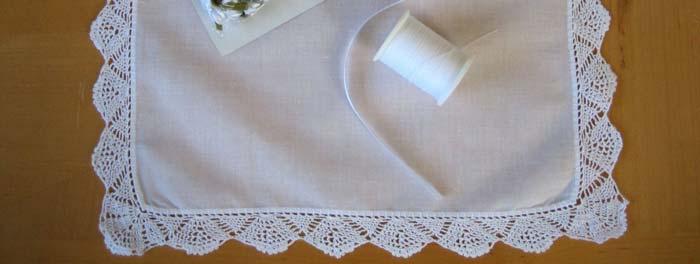
64 Doily Wall Art Materials Needed
 Scissors")

65 Materials Needed Various doilies Various Size Embroidery Hoops. (This example uses 6in, 8in and 10in embroidery hoops) Scissors Directions How To Create Doily Hoop Art 1. Position your doily into your hoop, making sure that the middle displays the center of your design.


66 2. Separate the hoop and slide the doily between the two forms. Once positioned, tighten the set screw at the top to hold in place 3. Repeat steps 1 and 2 with a different doily and hoop


67 4. Repeat again with any remaining doilies and hoops


68 5. Trim off the excess of each doily 6. Voila! You have now created a cute wall display.
CAMELOT FABRICS. 3. Draw a vertical line on the pointed end of each Strap, a tiny bit longer than the diameter of your buttons.
 Other Supplies - 2 buttons in coordinating color - paper printer - basic sewing supplies - sewing machine with buttonhole foot - iron & pressing surface - scissors & fabric shears - measuring tape - fabric
2015 Amanda Clark. Adding Christmas decorations is optional, but it does add a beautiful touch of sparkle to your finished Christmas tree.
 2015 Amanda Clark This Christmas tree is made using fabric triangles. The triangles are first sewn together on a sewing machine, and then folded and hand stitched into place. Finally, the folded triangles
Chatelaine. Read on for project instructions to create a beautiful and useful chatelaine! Chatelaine
 Chatelaine Chatelaines have a long history, dating back to the 18th century. A chatelaine is a decorative belt hook or clasp worn at the waist with a series of chains (or cords, in this project) suspended
Beginning Level (9-11 Years)
") OKLAHOMA COOPERATIVE EXTENSION SERVICE 4-H Fabrics & Fashions Construction Items Beginning Level (9-11 Years) Division of Agricultural Sciences and Natural Resources Oklahoma State University OKLAHOMA
OKLAHOMA COOPERATIVE EXTENSION SERVICE 4-H Fabrics & Fashions Construction Items Beginning Level (9-11 Years) Division of Agricultural Sciences and Natural Resources Oklahoma State University OKLAHOMA
Linda Brown, Sue Dittler, Sandy Miller, Lucy Ricardo, and Carole Thommen
 Linda Brown, Sue Dittler, Sandy Miller, Lucy Ricardo, and Carole Thommen Edited by: Sharon Reilly Teena Livsey YO-YO s especially ornament balls By: Lucy Ricardo Supply list: Scraps of fabric 1 ½ circle
The Panty Pack Skill Level: Intermediate
 The Panty Pack Skill Level: Intermediate http://www.pellonprojects.com Designed By Michelle Dorsey Sewn By Michelle Dorsey What girly girl wouldn t want a special bag to hold her delicate undies when she
Sew Sweet Bunny Basket
 Sew Sweet Bunny Basket Crafter level: Intermediate to Advanced Time needed: 2½ hours What you'll need Printouts of templates ¾ yd. linen fabric for basket ¾ yd. cotton print fabric for lining Pins Sharp
Bowled Over Bag. Supplies Needed. Notes. Swatches. Special Thanks To
 Supplies Needed Main fabric (front, back, and side panels) 1yd Contrasting fabric and lining 2 yds 20in Coats heavyweight metal zipper 2/3 of a yard of VELCRO FABRIC FUSION brand fastener Dual duty xp
Sewing Roll. Base Fabric. Base Fabric. Third Fabric. Second Fabric (Bottom Pockets) Pockets)
 Pockets)") You will need Brother Creative Sewing Pack (Free Motion Foot, Braiding Foot, Narrow Hem Foot, Piping Foot and Concealed Zipper Foot) Base fabric 1 x fat ¼ (50cm square) cut in half Second fabric 50cm x
You will need Brother Creative Sewing Pack (Free Motion Foot, Braiding Foot, Narrow Hem Foot, Piping Foot and Concealed Zipper Foot) Base fabric 1 x fat ¼ (50cm square) cut in half Second fabric 50cm x
Sasha Sundress, Knickers, Bolero & Flip-flops
 Sasha Sundress, Knickers, Bolero & Flip-flops Materials: 0.5 metre Cotton Fabric 0.25 metre fabric for lining Bolero 0.5 metre 1/4 wide elastic for Waist and legs 2 Snap Fasteners Small Beads or Sequins
 Supplies WARM AND NATURAL COTTON BATTING FIBER FILL STUFFING COTTON PRINT FABRIC FOR DRESS OLD LIGHT WEIGHT SWEATER TO CUT UP SMALL PIECE OF MUSLIN FOR CANDY RABBIT PLAID-APPLE BARREL NUTMEG BROWN CRAFT
Kimono Collection MATERIALS. Finished quilt size CUTTING
 Kimono Collection Colourful Japanese fabrics take the place of traditional paper in these tiny origami kimonos and a simple nine-patch quilt shows them off to perfection. MATERIALS Nine pieces of assorted
Angel Pets Memorial Mug Rug PDF Pattern
 Angel Pets Memorial Mug Rug PDF Pattern Finished Size: 6 1/2 x 8 inches If you are only making one animal, be sure to print only that page. Use these with a snack, or hang on your wall. They also make
For a flat or four-sided reticule:
 Page 1 of 8 DRAWSTRINGS When purchasing, one fabric store meter is the minimum to make two drawstrings of a nice length for one reticule in most designs. If you like longer drawstrings, increase the length.
NOTES 1. Please wash, dry & iron your fabric before beginning. 2. Use a 1/4 seam allowance throughout. 3. All seams are sewn Right Sides together.
 OTHER TOOLS & SUPPLIES - fiber stuffing or fabric scraps - paper printer - 24 contrasting embroidery floss & an embroidery hoop, for eyes - 2 yds of ribbon, for hanging (optional) - basic sewing supplies:
Gadget Bag In-the-hoop project
 Gadget Bag In-the-hoop project 2009 Peggy Severt, Pegboard Crafts pegboard1@yahoo.com or peggy@pegboardcrafts.com http://www.pegboardcrafts.com (419) 586-3135 Do not resize this design. The zipper will
Union Jack Variation Free Pattern Approximately 75-3/8 x 57
 Paper Pieces P.O. Box 68 Sycamore, IL 60178 Paper Pieces Precut Paper Shapes for English Paper Piecing 1-800-337-1537 US ONLY 1-815-899-0925 1-815-899-2900 Fax or Direct Line Union Jack Variation Free
Drawstring Backpack. Project Needs & Notes:
 Drawstring Backpack A handy drawstring bag made out of durable nylon fabric is perfect for camping trips, kids gear, and more! Add your favorite embroidery design to personalize it, too. Project Needs
Country Commandments Stitchery
 Country Commandments Stitchery Notes 1. Read pattern through before starting. 2. Sewing Terms: RST-right sides together RSO right side(s) out 3. Thank you for purchasing my pattern! You may sell the finished
Aimee s Dolly Apron. SAGA Stitches - A Kids Can Stitch Tutorial
 Aimee s Dolly Apron SAGA Stitches - A Kids Can Stitch Tutorial Aimee s Dolly Apron Purpose- To inspire the next generation of smockers. The Yankee Chapter of SAGA with the assistance of Denis Lamb, came
Pincushion and Thread Catcher Organiser
 Pincushion and Thread Catcher Organiser Designed by Angie Wilson of GnomeAngel.com Read instructions carefully before starting the project. Tools Required: Brother Sewing Machine General Sewing Supplies
Easter Bunnies. Finished Size Approximately 11½in (29cm) tall. Fig A
 tall. Fig A") 1 Easter Bunnies These sweet bunnies make cute gifts at any time of year. We chose certain fabrics, with details given in the instructions, but you can easily replace these fabrics with others from the
1 Easter Bunnies These sweet bunnies make cute gifts at any time of year. We chose certain fabrics, with details given in the instructions, but you can easily replace these fabrics with others from the
Whimsical Hot Air Balloon (Hooped Applique with Lace)
") Whimsical Hot Air Balloon (Hooped Applique with Lace) And a whimsical touch to your decor with this pretty hot air balloon! Stitch the balloon design using your choice of applique fabric, then hoop in
Whimsical Hot Air Balloon (Hooped Applique with Lace) And a whimsical touch to your decor with this pretty hot air balloon! Stitch the balloon design using your choice of applique fabric, then hoop in
Triangle Earrings. Another important step is to use split or jump rings on the hooks. They help the earrings dangle more freely.
 Triangle Earrings Description: The Triangle Earrings are based on the Celtic Triangle knot, which is an artistic design called the Triquetra. This Celtic symbol represents the Trinity as well as Body,
featuring STARGAZER COLLECTION BY AGF STUDIO Space Trip FREE PATTERN
 featuring STARGAZER COLLECTION BY AGF STUDIO Space Trip FREE PATTERN Space Trip DESIGNED BY FABRICS DESIGNED BY CAP-ST-1106 TWINKLY PHASES CAP-ST-1108 PLANETARIUM CAP-ST-1103 INTERRUPTED SIGNAL CAP-ST-1104
Materials. 1 Cut out the pattern pieces for the doll. Cut out the pattern for the arms and legs twice in mirror image.
 Making the doll All the dolls are made from the same pattern (see Doll Template). The body and head are the same, only the facial expressions and the hair change. Carefully follow the instructions below,
sew kids Delight your little one this Easter with
 easter bunny_layout 1 01/02/2013 14:40 Page 1 sew kids Delight your little one this Easter with Corinne Bradd s Tilda bunny Created using beautiful Tilda cotton, our girlie rabbit toy is the perfect springtime
DIY Tote Bag: Kraft Tex Paper. DIY: Kraft-Tex Paper Fabric Tote Bag
 DIY Tote Bag: Kraft Tex Paper DIY: Kraft-Tex Paper Fabric Tote Bag This series is written by guest blogger, Pamela Cox. Pamela is an expert embroiderer, designer, digitizer and all around wonderful girl!
Dollytime. Tiny Topsy the tooth fairy. who are new to the craft. She measures 12cm (5 in) and is a topsy turvy or upside and added lots of pictures.
 and is a topsy turvy or upside and added lots of pictures.") Dollytime Tiny Topsy the tooth fairy As I d like to encourage e more people to knit I ve designed Tiny Topsy for knitters who are new to the craft. She measures 12cm (5 in) and is a topsy turvy or upside
Dollytime Tiny Topsy the tooth fairy As I d like to encourage e more people to knit I ve designed Tiny Topsy for knitters who are new to the craft. She measures 12cm (5 in) and is a topsy turvy or upside
Embroidered Scrap Bag and Bed Caddy Carol A. Brown
 Embroidered Scrap Bag and Bed Caddy Carol A. Brown Materials: 1. Outer fabric for Scrap Bag (sturdy fabric such as poplin): at least 12-1/2 wide by 22 high. 2. Outer fabric for Bed Caddy (sturdy fabric
Retro Gathered Apron
 Retro Gathered Apron I inherited my nan s collection of aprons when she moved into sheltered accommodation, and with my heart in my mouth, took to scissors to one to create this pattern, I think it was
Butterfly Cushions. Finished size Approx. 22 wide x 14 tall
 Butterfly Cushions Finished size Approx. 22 wide x 14 tall Requirements A selection of off cuts to make the wings 13 x 5.5 for the body 18 x 24 for the back 8 x 8.5 for the internal wings Toy filler/stuffing
Cozy Crock Pot Carrier
 Cozy Crock Pot Carrier At our recent visit to the Heathers embroidery group near our Minnesota home, several of the members said they'd love to see us create a crock pot carrier project. Kenny thought
Serger Daygown. It's Sew Easy. By Kathy McMakin Martha Pullen Company
 Serger It's Sew Easy By Kathy McMakin 2014 Martha Pullen Company Serger It's Sew Easy By Kath y McMaki n Expand your serger skills while making this soft batiste daygown for that special baby. Constructed
Mini 4-H SEWING PROJECT
 Mini 4-H SEWING PROJECT Each Mini 4-H'er can take only one of the projects offered. All Mini 4-H Projects are entered on the Wednesday before the fair. Mini 4-H is open to 4-H'ers who are currently in
Sewing Machine Cover. Project Needs & Notes
 Sewing Machine Cover Create a stylish and sophisticated sewing machine cover for your craft room. A handy pocket holds all your sewing needs; adjustable measurements and side straps means this cover will
The Jan An In-the-Hoop Project
 The Jan An In-the-Hoop Project Shoulder purse with 2 zippered pockets. Optional quilting. 2009 Peggy Severt, Pegboard Crafts pegboard1@yahoo.com or peggy@pegboardcrafts.com http://www.pegboardcrafts.com
Written By: Sherri Haab
 Macramé 101 Written By: Sherri Haab PARTS: Cotton yarn (1) 4-ply worsted weight. Corrugated cardboard (1) Binder clip (1) Wooden beads (1) Hem sealant (1) or fabric glue. Needle (1) Thread (1) Button (1)
Happy Winter Snowman Quilt
 1 Happy Winter Snowman Quilt This quilt is sure to become a classic addition to your décor at Christmas time. Rows of fun snowmen and loving hearts are highlighted against a deep blue winter sky. The quilt
Hermione Granger Style Bag
 Hermione Granger Style Bag Finished size: 6 x 6 x 6 Read all of the instructions before you begin. All Rights Reserved Page 1 Materials: 11 x 14 (28 x 35 cm) of four different purple fabrics (I used velvet,
Intermediate Laptop Holdall
 Intermediate Laptop Holdall Add a stylish twist to your laptop holdall with this personalised yet practical design from online sewing and embroidery expert Sally McCollin of www.stitcharena.co.uk You will
Freya tunic 300min. For a novice, add approx 195 min STITCH DICTIONARY
 tternfreepatternfreepatternfreepatternfreepatternfreepatternfreepatternfreepatternfreepatternf YourFREE Dress &Tunic Pattern Freya tunic 300min For a novice, add approx 195 min Your FREE downloadable pattern
All Around Cover-up by Ellen Osten, National Director of Education Original Design for Sulky of America
 by Ellen Osten, National Director of Education Original Design for Sulky of America You have a need for a stylish cover-up, and in a hurry? This original design answers the need. Make it for yourself,
Double Layer Half Apron with Fancy Details
 Published on Sew4Home Double Layer Half Apron with Fancy Details Editor: Liz Johnson Tuesday, 18 July 2017 1:00 With this design, we've packed a whole lot of style into one half apron. To start, why settle
Maritime Knots. Materials: Directions: Red jute twine Scissors
 Maritime Knots Red jute twine 1. Measure twine to gift box size (with a little extra). 2. Cut 6 equal lengths. 3. Separate into two sets of 3 strands. 4. Form each into a loop. 5. Arrange side-by-side.
Hoop-It-Up Organizer
 Hoop-It-Up Organizer This helpful catchall organizer is perfect for the craft room or the laundry room! Add an embroidery design, and it becomes a nice addition to the room's decor as well. The embroidery
The Allie An in-the-hoop project
 The Allie An in-the-hoop project A wallet/coin purse for the 5x7 hoop. The Allie has 3 credit card slots in the front section which features a large flap with a snap closure. You can carry coins or other
By Laurie Pessetto. Create your pattern. The decorative fabric will be on the edges of the circle layers.
 By Laurie Pessetto Create an elegant, soft, travel pouch to protect jewelry from damage and keep it organized even when your suitcase gets tossed into a plane or trunk! Skill Level Good sewing skills,
Little Dresses for Haiti - Revised
 Little Dresses for Haiti - Revised Now that the team has been to Haiti, we have discovered that the Haitians are a very modest people. It is not acceptable for girls over the age of 6 to have their shoulders
3D Freestanding Lace Birds
 3D Freestanding Lace Birds Let one of these feathered lace friends land in your home! Multiple pieces of embroidered lace come together in the shape of a chickadee, cardinal, goldfinch, and more. Hang
Christmas Bow-tique Stocking
 Christmas Bow-tique Stocking Add a stunning bow to your Christmas stockings for a lovely, elegant look. The bold bow is a fabulous way to customize a stocking for your loved ones. Use red and green for
Embroidered Scrap Bag Carol A. Brown
 Embroidered Scrap Bag Carol A. Brown Materials: 1. Outer fabric (sturdy fabric such as poplin): at least 12 1/2 wide by 22 high. 2. Medium weight fusible interfacing: same size as for fabric. 3. Lining
Camo Carryall. Project Needs & Notes
 Camo Carryall Carry your gear in style with this sturdy carryall! Perfect for travel, camping, sporting, laundry, and more, this all-terrain bag is a terrific way to tote your belongings. Project Needs
Make Trousers (beginners)
") Make Trousers (beginners) This tutorial will help you to make your first pair of trousers. If you have already made some in the past and are just looking for a recap, you probably want the refresher tutorial.
Make Trousers (beginners) This tutorial will help you to make your first pair of trousers. If you have already made some in the past and are just looking for a recap, you probably want the refresher tutorial.
Women's Travel Toiletry Bag
 Traveling just got a little more organized with this handy toiletry bag, designed specifically for the ladies! Large inside pockets made of clear vinyl and mesh make it easy to find just what you need.
Generations Test Drive Multi Media Project
 Generations Test Drive Multi Media Project A Creative and Inspirational project that incorporates different decoration techniques including a print transfer, embroidery applique, monogramming, and rhinestones.
Rag Quilt Stamper s Tote Designed By: Carrie Rhoades January 2012
 Rag Quilt Stamper s Tote Designed By: Carrie Rhoades January 2012 The Rag Quilt Stamper s Tote is the perfect accessory for any crafter. It will organize your essentials and it is so cute!!! Load it up
Floriani Embroidery Project Drawstring Backpack
 Floriani Embroidery Project Drawstring Backpack Floriani Embroidery Project Drawstring Backpack Presented by RNK Distributing Supplies Needed: 1 yard 45 cotton print yard 45 coordinating cotton solid yard
Name: Class: Monster Doll. Grading Rubric
 Name: Class: Monster Doll Grading Rubric Grade yourself on the skills listed below. (0 being the lowest, and 5 being the highest.) Once you have graded yourself in each area, pin your grading sheet to
Dolly s Darling Dungarees
 Dolly s Darling Dungarees All photos, text, and pattern pieces Dandelions n Dungarees 2013. All rights reserved. No part of this publication may be reproduced or transmitted in any form or by any means
Table of Contents. Pom-Pom Bookmark Yarn covered Pencil Holder Yarn Hangers... Yarn Hair Bows
 1 Table of Contents Pom-Pom Bookmark... 3-5 Yarn covered Pencil Holder... 6-8 Yarn Hangers... 9-11 Yarn Hair Bows... 12-14 Tassel Necklace or Gift Wrapping... 15-17 No Knit Infinity Scarf... 18-20 Braided
SUPPLIES OTHER SUPPLIES Carson 10 Teddy Bear Pattern
 SUPPLIES Fat 1/8 yd of 5/8 faux fur or mohair (sample is faux fur) 5 x 5 piece of wool felt for paw pads 11mm black glass eyes (1 pair) Small piece white felt (optional) eye whites 2 1 1/8 Joint discs
Lesson 2 CREATING THE SKIRT: LACE SHAPING
 1 Extension 1 Extension Lesson 2 CREATING THE SKIRT: LACE SHAPING For this lesson we will be working with the skirt pieces one skirt front and two skirt backs and your lace insertion. Are you ready to
Pattern By Nemiha Studebaker for Sarah Jane Studios. Sizes 2-6
 Pattern By Nemiha Studebaker for Sarah Jane Studios Sizes 2-6 General Instructions 1. Carefully read through all instructions before you begin. 2. Wash, dry, and iron your fabric before starting. 3. Seam
Jamie - 11 Soccer Bear
 Jamie - 11 Soccer Bear Artist Designed Bear with Flexlimb by Laura Matthews of TeddiesbyLauraLynn.com and FreeTeddyBearPatterns.NET This is not intended to be a child s toy due to the glass eyes and pellets.
Spring Diaries Quilt ~ ~ ~ ~ ~ ~ ~ ~ ~ ~
 Spring Diaries Quilt ~ ~ ~ ~ ~ ~ ~ ~ ~ ~ This lovely quilt is perfect for any time of year in the spring and summer to echo the sunny seasons, or in autumn and winter to bring a welcome splash of warm
jarswe are all familiar with the concept of recycling
 Gifts in jarswe are all familiar with the concept of recycling glass bottles and jars but for thrifty crafters there is also the possibility of upcycling turning plain unwanted items into something beautiful
Kitchen Crafts Hot Potatoes
 Half Apron Size: 28 W x 31 H Pot Holder Size: 9 x 6 ½ Placemat Size: 18 x 13 Tote Bag with Pockets Size: 21 W x 16 H x 6 D Designed by: Phyllis Dobbs Skill Level:Beginner Toaster Cover Size: 11 W x 8 H
Central. Fabric. Dot to Dot Quilt. Supplies Needed. Instructions. Skill Level 2: Experience necessary. Project Instructions
 Fabric Project Instructions Central Dot to Dot Quilt Skill Level 2: Experience necessary Crafting Time: Weekend Project Supplies Needed 1 Fabric Central Dot Bundle 1 1 Fabric Central Dot Bundle 2 Fabric
INSTRUCTIONS BFC716 QIH LEOPARD BAG
 INSTRUCTIONS BFC716 QIH LEOPARD BAG This bag can be done in many ways! You can stitch it as I did the medium size bag shown at the end of this document (with the Orange trim). For this bag I embroidered
Summer Sewing ~ Classic Tote Tutorial
 Summer Sewing ~ Classic Tote Tutorial Classic Tote Tutorial by Irene www.sewmamasew.com Let s get started! Supplies: 1 yard of home décor cotton fabric (1½ yards for fabric with nap or if you d like to
36" (90cm) wide. selvedges. fold. 45" (115cm) wide selvedges. fold. right side out and press well. Slip-stitch the opening closed.
 wide. selvedges. fold. 45 (115cm) wide selvedges. fold. right side out and press well. Slip-stitch the opening closed.") Baby dungarees These gorgeous dungarees are also really baby-friendly, with shoulder straps that button up at the front and snap fastenings at the inside leg Project: VANESSA MOONCIE - www.lovesewingmag.com
Baby dungarees These gorgeous dungarees are also really baby-friendly, with shoulder straps that button up at the front and snap fastenings at the inside leg Project: VANESSA MOONCIE - www.lovesewingmag.com
Festive Fabric Gift Bag
 Festive Fabric Gift Bag Add a personal touch (and fa-la-la festive embroidery) to your holiday gift wrap this year with a homemade fabric gift bag. Bright patterned fabric and a hand-picked embroidery
Table of Contents. Fun Halloween Tree page 03. Chenille Spider with Rhinestone Eyes page 06. Inexpensive Fall Decoration page 09
 Table of Contents Fun Halloween Tree page 03 Chenille Spider with Rhinestone Eyes page 06 Inexpensive Fall Decoration page 09 Festive Fall Wreath page 12 Primitive Country Ribbon Turkey page 15 Dog Toy
Mini 4-H SEWING PROJECT
 Mini 4-H SEWING PROJECT Mini 4-H is open to youth who are currently in Kindergarten, first, or second grade at the time of their enrollment on 4HOnline. Enroll in Mini 4-H through the 4HOnline website
Weighted Pincushion Organizer
 Weighted Pincushion Organizer from Sew, Mama, Sew! This sturdy pincushion has plenty of space to store pins and a wool felt strip for your needles. The hanging pocket is a perfect place for storing easily-misplaced
Ring Bearer Pillow. Pearls, ribbons, and other baubles give it an elegant finish -- a marvelous Cinderella and Prince Charming effect.
 Ring Bearer Pillow A couple's special day will be even brighter with this beautiful Ring Bearer Pillow Cover. Sew it for them as your special gift; it will make a wonderful heirloom to be shared through
owl bear plush a free sewing pattern by
 owl bear plush a free sewing pattern by 2 owl bear plush This pattern is a variation of my previous owl plush, an adorable bear version that's an homage to the classic monsters from Dungeons and Dragons
January Fabric Covered Wire Word & No Sew Mini Bunting Tutorials By Nova a cuppa and a catch up
 January Fabric Covered Wire Word & No Sew Mini Bunting Tutorials By Nova a cuppa and a catch up Liberty scraps supplied by Jo @ The Organic Stitch Co Fabric Covered Wire Word What you will need :: Pipe
Sewing. # Yanna Jo Doll. Fulk-size Patterns for 22" Doll and Clothing
 Sewing LeisureArtsLibrary.com #800613 Yanna Jo Doll Fulk-size Patterns for 22" Doll and Clothing Click Here to sign up for the FREE Leisure Arts E-newsletters at www.leisurearts.com to receive free projects,
DIY Christmas Advent Calendar Sewing Tutorial
 DIY Christmas Advent Calendar Sewing Tutorial I love counting down the days until Christmas with my children and seeing the smiles on their faces each morning as they get to check the advent calendar to
Kindle Case with Pocket 1 An In-the-Hoop Project
 Kindle Case with Pocket 1 An In-the-Hoop Project 2011, 2015 Peggy Severt, Pegboard Crafts Updated April 2015. Minor improvements. pegboard1@yahoo.com or peggy@pegboardcrafts.com http://www.pegboardcrafts.com
Halloween Countdown Mansion. 64 Designs. INCLUDES 43 DESIGNS FOR 4" x 4" HOOPS, 21 DESIGNS FOR 5" x 7" HOOPS. In-the-Hoop!
 constructed in sections in-the-hoop on cut-away mesh stabilizer. structed individually in-the-hoop, this easy Project Halloween Countdown Mansion Create the Halloween season s must-have interactive countdown
Noteables: Medium Composition Books {Double Hoop Version}
 The medium composition book can be made in a single 8 x 12 hoop or in two 6 x 10 hoops. Noteables: Medium Composition Books {Double Hoop Version} Kimberbell Noteables are composition book covers that turn
M Mylar Swirly Sewing
 M Mylar Swirly Sewing Stabilizer rganizer Supplies: CD-Mylar Swirly Sewing: choose 5 designs and load on machine. Printout of color change chart for each chosen design. hreads per color chart for each
DOROTHY SIMPSON KRAUSE: PROJECTS
 DOROTHY SIMPSON KRAUSE: PROJECTS Gathering Memories: a paper portfolio This small portfolio of colored paper with pockets is perfect to hold and display some of the small items you ll collect on your cruise.
Nautical Patio Pillow
 Nautical Patio Pillow Decorate your beach getaway or backyard patio with this stylish nautical pillow. The ocean-inspired cushion is made out of outdoor canvas and is perfect for relaxing near the salt
The Sunshine An in-the-hoop project
 The Sunshine An in-the-hoop project All the music I walk to is on my phone, but my new iphone 6+ is too big to fit in my pocket. This case is the perfect solution. That s my iphone 6+ peeking out of it
Pretty Quick Pillow Case PO Box 1206 Langley, WA
 Pretty Quick Pillow Case www.jillmccloydesigns.com PO Box 1206 Langley, WA 98260 info@jillmccloydesigns.com Pillow cases make terrific projects. They are pretty, practical, quick, easy to make, and may
A few notes about PDF patterns from Designs by Jude...
 A few notes about PDF patterns from Designs by Jude.... This PDF pattern requires legal size paper (8.5 x 14 ) or A4 size paper (8.27 x 11.69, 210mm x 297mm). It will not print on standard letter. Patterns
Under The S ea Table Runner
 Finished Size: 12" x 48" (30.48cm x 121.92cm) Under The S ea Supp lies Needed B efore you begin 3 Wishes Fabric Under the Sea Collection 1 yd. (91.44cm) 12281-Lt. Blue 3 8 yd. (34.29cm) 12289-Lt. Blue
Emily Variation 1 By: BurdaStyle
 Emily Variation 1 By: BurdaStyle http://www.burdastyle.com/projects/emily-variation-1 Here is a fun variation of our classic Emily blouse. With wide bell sleeves and a sweet flat collar, this is a great
Crazy Patch Block Stocking STEP: 2
 Crazy Patch Block Stocking This is a new twist to an old favorite. With your embroidery machine you can create a vintage look crazy patch block to use in many ways. Make several for a quilt top. Make one
sugar skull kit ty plush a sewing pattern by
 sugar skull kit ty plush a sewing pattern by sugar skull kit ty plush This pattern pays homage to the beautiful calaveras seen in Dia de Muertos art. It s a simple kitty plush with button jointed limbs
Spooky Halloween Pillow by Pamela Cox
 by Pamela Cox Original Design for Sulky of America Project Overview Halloween is such a family-fun time. Children spend weeks deciding who they want to be this year! And they also love having their homes
Supplies Needed: Steps:
 Welcome to the pillowcase clothespin bag tutorial. This is my very own design and uses one of my favorite fabric sources, old pillowcases, to make another love - anything to do with clotheslines. I hope
All seam allowances are 1/2 unless otherwise noted. All pattern pieces include the seam allowance. Please read all instructions before beginning.
 This small bag will allow you to try out several fun bag-making techniques; adding a metal twist lock, using piping in a bag, making darts, and adding elastic pockets. Use your favorite print and combine
Fabergé Bunny. Skill level 2. Courtesy of Cranston Fabircs. Supplies: Directions:
 Skill level 2 Fabergé Bunny Courtesy of Cranston Fabircs Supplies: 3/4 yd. V.I.P. by Cranston Egg Print, for rabbit 1/4 yd. V.I.P. by Cranston Turquoise Crackle, for inner ears 1/4 yd. V.I.P. by Cranston
Read all instructions before beginning. Instructions: 1. Prepare embroidery designs.
 Project Quilting Feathers and Frills Table Runner Detailed quilting gives breathtaking beauty to this whole cloth quilting inspired table runner. Only you will know how easy it was to make thanks to your
Amazing Three Seam Pillow Cases with Venice Initials.
 Amazing Three Seam Pillow Cases with Venice Initials. This is a really fun project and fabrics can be changed to be formal, fun, or funky! I made these for my niece (in nursing school) and nephew (new