Name: Class: Monster Doll. Grading Rubric
|
|
|
- Barrie Maxwell
- 5 years ago
- Views:
Transcription
1 Name: Class: Monster Doll Grading Rubric Grade yourself on the skills listed below. (0 being the lowest, and 5 being the highest.) Once you have graded yourself in each area, pin your grading sheet to your project and turn it in to be graded. *Turn in your Skills Packet along with this grading sheet. Requirements Student Grade Teacher Grade 1. Measuring and Seam Allowances Examples and questions answered correctly. 2. Buttonhole and Casing Measuring Examples and questions answered correctly. 3. Pattern Drafting and Creation Pattern was sketched out and approved by teacher. Seam allowances were accounted for in pattern creation. 4. Working with Felt and Fusibles Felt pieces are used and placed appropriately on Monster Doll. The fusible adhesive (Heat N Bond) was used correctly to attach felt to Monster Doll. Each felt piece has been sewn to the Monster Doll using either a 1/8 seam allowance or a zigzag stitch. 5. Patch Pocket Patch pocket is an appropriate size for the Monster Doll. The pocket is square or rectangular and has mitered corners that have been pressed correctly. The top edge of the pocket flap has been sewn down using a 1/8 seam allowance and the buttonhole is in an appropriate place. The top corners of the pocket are backstitched and secured in place. The pocket is sewn to the doll using a 1/8 seam allowance. 6. Buttons and Buttonholes There is at least one buttonhole on the patch pocket. It is sewn correctly and there are no loose threads. The button has been sewn to the Monster Doll with a thread shank using the toothpick method. It is secure, centered with the buttonhole and all threads have been trimmed. 7. Pivoting and Backstitching Where appropriate, proper pivoting and backstitching have been used while constructing the Monster Doll. 8. Clipping and Notching All outward curved areas have been notched and all inward curved areas have been clipped appropriately. Any square corners have had the seam allowances clipped. Curved and pointed seams lie flat and smooth with no bunching or stretching. 9. Slipstitching Slipstitched areas are stitched correctly. Thread is hidden in the seam. Stitches are an appropriate size in length to secure the seam. There are no loose threads. 10. Neatness/Organization (Threads Clipped, Pressed, Instructions Followed, Backstitching, etc.) TOTAL: / 50 / 50 Teacher Comments:
2 Name: Class: Thread Pouch Grading Rubric Grade yourself on the skills listed below. (0 being the lowest, and 5 being the highest.) Once you have graded yourself in each area, pin your grading sheet to your project and turn it in to be graded. Requirements Student Grade Teacher Grade 1. Cutting Out the Pattern Pieces The pattern pieces of the thread pouch are cut to the correct size and are the size and shape intended. 2. Seams and Seam Allowances All seams are sewn even and straight. Seam allowances are the correct size for each part of the project. All seams are pressed the correct direction to allow the thread pouch to lay as flat as possible. 3. Seam Finishes Each of the six seam finishes were completed correctly: Serged Open, Serged Closed, Zig Zaged, Graded, Clean Finished, Stitched and Pinked. 4. Curved Top Edge The top curved edge of the thread pouch has been sewn well and pressed flat. The curved area has been notched before it was turned right side out to prevent bunching. 5. Topstitching The topstitching around the bag is straight and 1/8 away from the edge. The topstitching around the curved area is smooth and even. The opening where the thread pouch was turned right side out is folded in and stitched down appropriately. There is NO topstitching going across the folded bottom edge of the thread pouch. 6. Velcro The Velcro has been cut to about 1 ½ in length. The Velco has been sewn onto the thread pouch in the appropriate place and is secured using a 1/8 seam allowance. The Velcro is not loose or falling off. The stitches are secure and straight. 7. Neatness and Organization Threads Clipped, Pressed, Instructions Followed, Backstitching, etc. TOTAL: / 35 / 35 Teacher Comments:

3
4
5
6
7
8


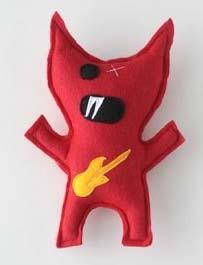
9 Clothing I Monster Doll Skills Packet This Belongs To: Name Class Period
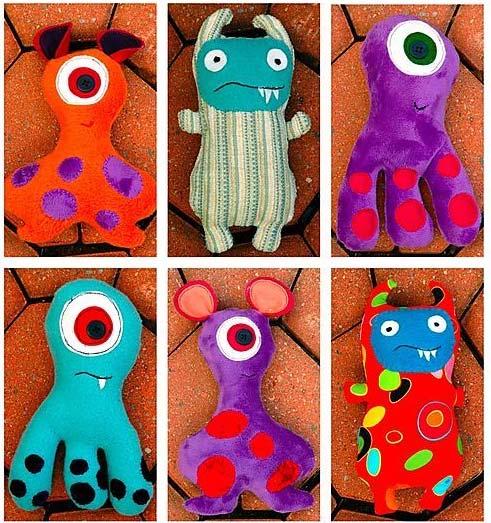
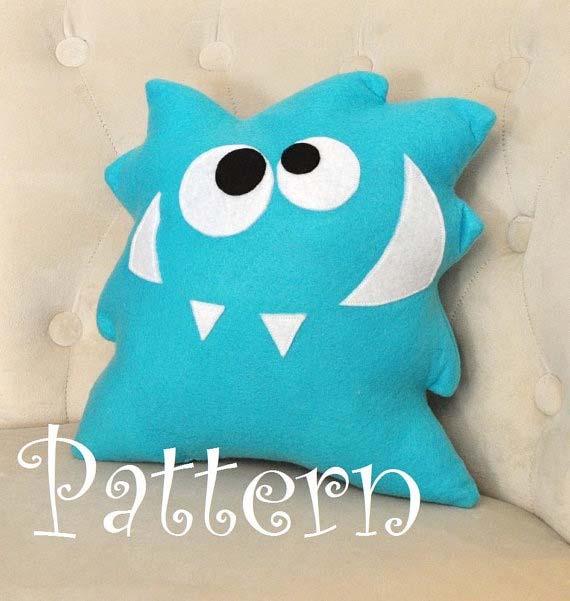
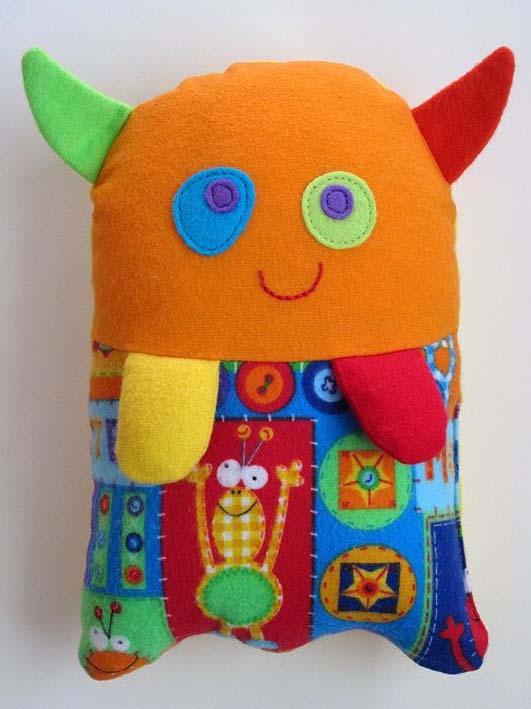
10 Monster Doll Skills Packet This packet will help teach you basic sewing skills and construction techniques. It will also help you to learn how to read and follow a pattern. When you are finished with this project, not only will you have learned some critical sewing skills, but you will also have a custom made and unique pillow. Below are some of the sewing skills and techniques that need to be checked off as you complete your pillow: 1. Measuring and Seam Allowances 2. Buttonhole and Casing Measuring 3. Pattern Drafting 4. Working with Felt and Fusibles 5. Patch Pocket 6. Buttons and Buttonholes 7. Pivoting and Backstitching 8. Clipping and Notching 9. Slipstitching Skills 1 3 must be checked off by the teacher before moving forward in the skills packet. All other skills do not need to be checked off by the teacher, but must still be completed to receive full credit. It may by easiest to complete skills 4 9 in the order given in this packet, but they can be completed in any order. Good luck and have fun!
11 1. Measuring and Seam Allowances Teacher Check Off 1. Identify the correct measurements on the ruler below: (Remember to simplify the fractions to lowest terms.) A: in E: in B: in F: in C: in G: in D: in H: in 2. Using a RED colored pencil, draw in the slider on the specified measurement for each seam gauge below: Draw the slider at 1/4 on the seam gauge. Draw the slider at 5/8 on the seam gauge. Draw the slider at 3 1/8 on the seam gauge. 3. Draw a colored line along the guideline on the stitch plate for the following measurements: 1/8 = Brown 1/4 = Purple 1/2 = Red 3/4" = Blue 7/8 = Green 1 = Orange
12 2. Buttonhole and Casing Measuring Teacher Check Off Calculate the length of each of the buttonholes below. You may use a seam gauge, ruler or measuring tape, but not a calculator. Calculate the width of each of the casings below: You may use a seam gauge, ruler or measuring tape, but not a calculator.
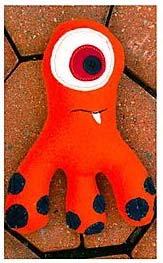
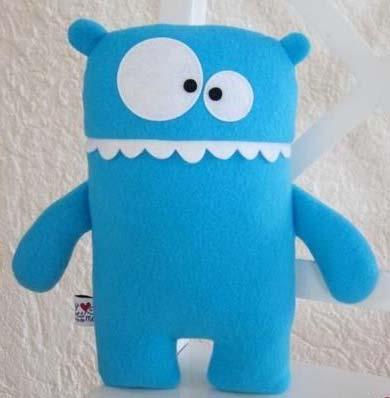
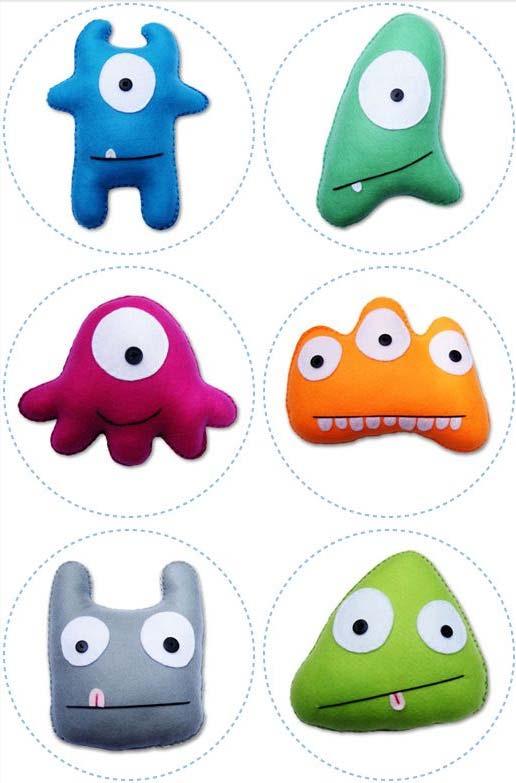
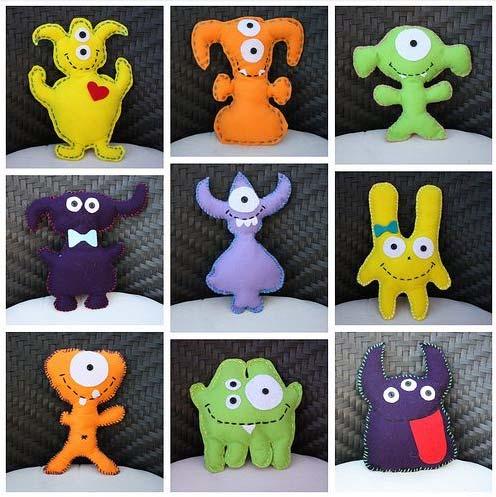
13 3. Pattern Drafting Teacher Check Off Use the space below to sketch out your monster doll. Your design must include: An Outward Curve An Inward Curve Enough Space for a Square/Rectangular Patch Pocket with Button/Buttonhole Areas to Incorporate Felt and Fusibles (Eyes, Mouth, Mustache, etc.) FRONT BACK Teacher Check Off Pattern Creation After your sketch has been approved, use the paper provided by your teacher to create the pattern pieces you will use for your Monster Doll. Don t forget to account for seam allowances. It is better to make your doll and all of the pieces too big, rather than too small. Ask your teacher if you need any help.
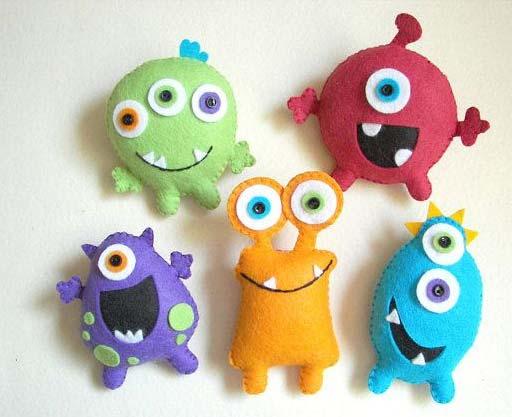
14 4. Working with Felt and Fusibles Felt is a non woven fabric. It comes in a variety of thicknesses, will not unravel and can be used for a variety of decoration. Interfacing is another non woven fabric used to strengthen and stabilize other fabrics. Most have a heat activated fusible side that allows you to glue the interfacing right to the fabric. Fusible Adhesive is what we will be using to attach the felt to your monster doll. It is a double sided heat activated fusible adhesive that is great for gluing two pieces of fabric together. Some popular brands of this adhesive are Heat N Bond, Wonder Under, ThermoWeb and Steam A Seam. It has a paper backing on one side that you peel away after ironing it to one side of your fabric. Follow the procedure below for attaching the fusible adhesive to your felt: 1. Choose the color and the size of the felt you will need for your Monster Doll pattern pieces. The felt and adhesive will need to be slightly larger than the actual pieces themselves. You will be tracing the pattern pieces onto the paper backing and cutting them out AFTER it has been fused to the felt. 2. Turn the iron down to low. Place the fusible side of the adhesive touching the felt. Iron over the paper backing to attach the adhesive to the felt. 3. Wait a few minutes for the felt to cool down. 4. Trace the pattern pieces onto the paper side of the adhesive. Remember, the direction you trace your pattern pieces will be flipped when you remove the paper backing and attach the felt to your Monster Doll. Pay close attention to this step. 5. Cut out your pattern pieces and then carefully remove the paper backing off of each piece. You should see a light layer of adhesive on the wrong side of the felt. 6. Position the felt pattern pieces on your Monster Doll with the adhesive side touching the right side of your fabric and iron in place. Don t place your felt pieces too close to any edge of your Monster Doll. Don t forget to account for the seam allowance that you will use to sew your monster doll together. 7. Once your felt pieces have been fused to your Monster Doll, you will need to also sew them into place. You can sew a straight stitch 1/8" from the edge around the pieces, or use a zigzag stitch along the edge of each piece. Be sure to trim your threads.

 3.")
15 5. Patch Pocket Determine how big you would like your patch pocket. Your pocket will need to be square or rectangular so that you can practice making a mitered corner. One edge of your pocket measurement will need to be 1 1/2 inches larger than the other side. For example, the fabric for your pocket might measure 4 x 5 1/2. This will give you a finished pocket of about 3 x 3. To Construct the Patch Pocket: 1. Serge around each edge of the patch pocket fabric. Try not to cut too much off as you serge. Press flat if needed. 2. Using a seam gauge, press the taller edge of your pocket down 1 1/2 toward the RIGHT side of the fabric. (Right sides should be touching each other.) 3. Sew a straight seam around the 3 unfolded sides at 5/8, pivoting at each corner and backstitching at the beginning and end. You will be sewing over the folded edge. 4. Clip the corners on the folded edge, being careful not to cut through the stitching. Turn out the top folded edge to the right side and poke out the corners until they are sharp and square. This will also fold under the side seam allowances of the pocket. Press the sides down as they naturally fold to the wrong side of the pocket. Fold the bottom up as well to create a crease along the bottom. 5. To make the mitered corners, unfold the bottom and sides of the pocket. Fold the bottom corners of the pocket to the WRONG side, diagonally at the pivot point, about 1 ¼ in from each edge. Press these in place. 6. Fold the side seam allowances toward the wrong side of the pocket again and press in place. Finally, fold the bottom edge of the pocket up toward the wrong side to complete the mitered corner. Press in place. Make sure that the stitching is pressed toward the back of the pocket so that they cannot be seen on the right side. 7. From the wrong side of the pocket, sew the folded top edge of the pocket down at 1/4" from the serged edge. 8. Choose a button from the button bin. Larger buttons are easier to work with. Measure and sew the buttonhole using the buttonhole formula on the top edge of the patch pocket. It will be easier to do it now before you sew it onto the Monster Doll. See the next page for instructions on how to measure and sew the buttonhole. 9. After the buttonhole is made, position the pocket where you want it on the Monster Doll, then pin in place. 10. Sew the sides and bottom of the packet pocket, pivoting at the corners, at 1/8 from the edge of the pocket. Be sure to backstitch well at the beginning and end. Be sure to trip any threads. 11. After the pocket is in place, sew the button to the Monster Doll centered with the buttonhole. See the next page for instructions on how to sew on the button.

16 6. Buttons and Buttonholes Follow the procedure below to sew a buttonhole and button to your Monster Doll: Sewing the Buttonhole: Buttonhole Formula 1. Using the buttonhole formula, measure and mark one buttonhole in the center of the top folded edge of the patch pocket BEFORE it is sewn onto your Monster Doll. Remember the buttonhole formula is: Button Diameter + Button Depth 2. Change your sewing machine presser foot to a #3 buttonhole foot. 3. Select the buttonhole stitch (Number 11) on your sewing machine. It will automatically change all of the settings needed to complete the buttonhole. 4. Follow the steps below to sew the buttonhole: Buttonhole Stitch Selector a. Align the #3 presser foot so that the needle starts at the top of the buttonhole marking. The needle should enter the fabric right where the vertical and horizontal lines meet. b. Slowly begin sewing. The machine will automatically begin sewing a very tight zigzag stitch down the left side of the buttonhole marking. Stop sewing when you reach the bottom of the buttonhole marking. c. Hold in the backstitch button and begin sewing again. Keep the backstitch button pressed in only until the machine begins sewing a straight stitch, backwards, back up to the top of the buttonhole marking. Then, let go of the backstitch button, but continue sewing. Stop sewing when you reach to top of the marking. d. Hold in the backstitch button again and slowly begin sewing. The machine will automatically begin sewing the top bartack of the buttonhole. Once it begins sewing, let go of the backstitch button, but continue sewing. The machine will automatically begin sewing another tight zigzag stitch, this time down the right hand side of the button hole marking. Stop sewing when you reach the bottom of the buttonhole marking. e. Hold in the backstitch button and begin sewing again. The machine will automatically begin sewing the bottom barktack of the buttonhole. Let go of the backstitch button when the machine begins sewing the bartack. f. After the machine finishes the bottom bartack, it will stitch in place for 3 or 4 stitches as a backstitch to secure the threads. Once this has happened, the buttonhole is finished. g. Lift the presser foot, remove the pocket and trim all of the threads. Carefully cut the buttonhole open, being careful not to cut through the stitching. 5. Once your buttonhole is sewn and cut open, position the pocket where you want it on the Monster Doll, and then sew in place. Sewing On the Button: 1. After your pocket is sewn to your Monster Doll, you will sew your button centered with the buttonhole on the pocket. You will need thread, a hand sewing needle and a toothpick. 2. Fold a very long piece of thread in half. Thread the folded end of the thread through the hand needle and fold the thread in half again. Tie a not at the end. (You should have a group of 4 threads tied together.) 3. Stick the needle through the center of the buttonhole and all the way through the Monster Doll fabric. Pull the thread all the way to the back so that the knot rests up against the fabric. 4. Bring the needle back up from the wrong side of the fabric next to the knot. Slide the button onto the needle through one of the holes on the button. Place the toothpick across the button before you stick the needle down through the next hole. This will allow you to sew a shank underneath your button. 5. Continue sewing the button to the Monster Doll using the toothpick method (See Picture). 6. After you have sewn through the holes on the button enough times for the button to be secure, remove the toothpick, settle the threads and stick the needle through one of the holes on the button, but NOT through the fabric. Pull the needle between the button and the fabric. 7. Wrap the thread tightly three times around the threads under the button. This will tighten the threads and make a shank under the button. The shank will provide space which will allow the buttonhole to lie flat under the button. 8. Tie a knot to secure the threads, stick the needle through the fabric of the Monster Doll and pull the thread all the way through to the wrong side. Cut the thread with a little bit of a thread tail left over

17 7. Pivoting and Backstitching Pivoting allows you to turn corners sharply while sewing, or sew around tight curves, without having to remove the fabric. To pivot, follow the procedure below: 1. Select the Needle Down position on the selector button. When the down position is engaged, the needle will remain down in the fabric whenever you stop sewing. 2. Begin sewing. When you come to a corner or a tight turn where you need to pivot, stop sewing. The needle should remain in the fabric. Lift the presser foot, turn or pivot the fabric in the direction you will be sewing. 3. Lower the presser foot and begin sewing again. 4. If you are pivoting around tight curves, you may need to pivot several times. Don t forget to backstitch. Needle Up/Down Selector Backstitching secures the ends of the thread in the fabric so the seam will not come undone. To backstitch, follow the procedure below: 1. Place the edge of the fabric in the sewing machine. You want to position the fabric so the needle will go through the fabric about 1/4" to 1/2 in from the edge. If the needle starts too close to the edge of the fabric, it may push it under the stitch plate. 2. Sew forward 3 or 4 stitches and then stop sewing. 3. Press in the backstitch button, located on the front of the sewing machine, and keep it pressed in to backstitch. Begin sewing. The machine will stitch backwards as long as the backstitch button is pressed in. 4. Once you reach the edge of the fabric, let go of the backstitch button and sew forward again. 5. You will usually backstitch at the beginning and the end of a seam. Sew the Monster Doll Together Place the pieces of your Monster Doll together with right sides touching. Sew around the Monster Doll using a 1/4" seam allowance, backstitching and pivoting as needed. Don t forget to leave an opening somewhere on your Monster Doll so that you can turn it right side out.
18 8. Clipping and Notching Clipping allows inwardly curved seams to stretch, bend and lay flat when turned to the right side. Follow the procedure below to clip inwardly curved seams: 1. After the seam has been sewn around the curved area, carefully cut small clips along the curve of the seam allowance. You will just be making straight cuts into the seam allowance. You will not be removing any fabric. Be careful to NOT cut through the stitching line itself. Clipping Corners is another technique that reduces bulk on square corners. Follow the procedure below to clip corners: 1. For more stability, it is best to clip corners that have been reinforced with backstitching. Corners where you have pivoted are weaker and could poke through when turned to the right side. 2. Cut a triangle shaped wedge away from the square corner. Get close to the stitching, but do not cut through the stitching. Notching reduces the bulk of outwardly curves seams so they lay flat when turned to the right side. Follow the procedure below to notch outwardly curved seams: 1. After the seam has been sewn around the curved area, carefully notch out small pieces of the fabric in the seam allowance. You will be removing small triangle like pieces along the curve of the seam. Be careful to NOT cut through the stitching line itself. Clipping and Notching The Monster Doll Clip and Notch the curved areas on your Monster Doll. Be careful not to cut through the stitching line itself. Clip any square corners on your Monster Doll as well. Once this step is completed, turn the Monster Doll right sides out and press. Then, stuff the Monster Doll with fiberfill. Don t stuff it too full or it will be difficult to slipstitch it shut.
19 9. Slipstitching A Slipstitch, sometimes known as an Invisible Stitch or Blind Stitch, is a hand sewing technique that allows you to close open seams so that it looks like it was sewn on a machine. The thread is invisible or cannot be seen on the right side of the project. Follow the procedure below to sew a slipstitch: 1. Thread a hand needle with one strand of thread and tie the two ends together. 2. Place the needle behind the last stitch you made on the sewing machine, from the inside. Pull the needle up through the seam allowance so that the knot will stay inside the pillow. 3. If you are right handed, you will sew from right to left across the seam. If you are lefthanded, you will sew from left to right across the seam. 4. Pinch the folded edges of the seam together. Slip the needle, down and up, only through the top fold about 1/4 away from where you started. Pull the thread all the way through. 5. Then, slip the needle, down and up, only through the bottom fold about 1/4" away from where you left off. 6. Repeat steps 4 and 5 all the way across the opening, going back and forth between the top and bottom folds. 7. When you reach the end of the opening, slip the needle under the last stitch you did on the sewing machine. Pull the thread through until a small loop of thread remains. 8. Stick your needle through the loop and then pull tight to create a knot. Stick the needle down through the seam allowance into the Monster Doll and pull it through the side of the doll. Cut the thread close to the Monster Doll. This will leave a hidden thread tail that will prevent the knot from coming undone.
20 Name: Class: Monster Doll Grading Rubric Grade yourself on the skills listed below. (0 being the lowest, and 5 being the highest.) Once you have graded yourself in each area, pin your grading sheet to your project and turn it in to be graded. *Turn in your Skills Packet along with this grading sheet. Requirements Student Grade Teacher Grade 1. Measuring and Seam Allowances Examples and questions answered correctly. 2. Buttonhole and Casing Measuring Examples and questions answered correctly. 3. Pattern Drafting and Creation Pattern was sketched out and approved by teacher. Seam allowances were accounted for in pattern creation. 4. Working with Felt and Fusibles Felt pieces are used and placed appropriately on Monster Doll. The fusible adhesive (Heat N Bond) was used correctly to attach felt to Monster Doll. Each felt piece has been sewn to the Monster Doll using either a 1/8 seam allowance or a zigzag stitch. 5. Patch Pocket Patch pocket is an appropriate size for the Monster Doll. The pocket is square or rectangular and has mitered corners that have been pressed correctly. The top edge of the pocket flap has been sewn down using a 1/8 seam allowance and the buttonhole is in an appropriate place. The top corners of the pocket are backstitched and secured in place. The pocket is sewn to the doll using a 1/8 seam allowance. 6. Buttons and Buttonholes There is at least one buttonhole on the patch pocket. It is sewn correctly and there are no loose threads. The button has been sewn to the Monster Doll with a thread shank using the toothpick method. It is secure, centered with the buttonhole and all threads have been trimmed. 7. Pivoting and Backstitching Where appropriate, proper pivoting and backstitching have been used while constructing the Monster Doll. 8. Clipping and Notching All outward curved areas have been notched and all inward curved areas have been clipped appropriately. Any square corners have had the seam allowances clipped. Curved and pointed seams lie flat and smooth with no bunching or stretching. 9. Slipstitching Slipstitched areas are stitched correctly. Thread is hidden in the seam. Stitches are an appropriate size in length to secure the seam. There are no loose threads. 10. Neatness/Organization (Threads Clipped, Pressed, Instructions Followed, Backstitching, etc.) TOTAL: / 50 / 50
21 Teacher Comments:


22 Thread Pouch Instructions Supplies/Materials: Fabric Scraps From Other Projects 1 Spool All Purpose Thread 1 Piece of Velcro About 1 ½ Long Step 1 Cutting the Pieces of the Thread Pouch: 1. Be sure that your fabric is pressed flat. 2. Use the rotary cutter to cut the following pieces for your thread pouch: a. SEVEN Strips = 2 ¾ X 6 b. ONE Back Piece = 6 X 12 Step 2 Sewing the Strips together: 1. Place two of the small rectangular strips RIGHT sides together. 2. Sew down one long edge at a 5/8 seam allowance. Be sure to backstitch and trim all threads. 3. Place another small rectangular strip RIGHT side touching the un sewn right side of one of the strips you have just sewn together. 4. Sew down one long edge at a 5/8 seam allowance. Be sure to backstitch and trim all threads. 5. Repeat steps 3 and 4 until all 7 strips have been sewn together, with all of the seam allowances on the same side. 6. Press all the seam allowances open to flatten out the fabric.

23 Step 3 Making the Seam Finishes: 1. You will be constructing six different seam finishes to each of the seam allowances you have just sewn. Remember, you are sewing just the seam allowances. DO NOT sew through the fabric to the right side. Follow the instructions below for making each of the seam finishes. a. Serged Open: 1. Using one set of seam allowances, serge down each seam allowance SEPARATELY. Then, press the seam allowance open. b. Serged Closed: 1. Using one set of seam allowances, serge down both seam allowances TOGETHER. Then, press the seam allowance to one side. c. Zig Zaged: 1. Adjust your STITCH WIDTH to a size 5 zig zag stitch. 2. Line up the left edge of your presser foot with one of the straight 5/8 seam lines already sewn. 3. Zig zag down the seam allowances TOGETHER, backstitching at both ends. 4. Using a pair of shears, trim away the excess fabric to the RIGHT of the zig zag stitches. Be careful not to cut through the stitching. 5. Reset your stitch width selector to a straight stitch, or a size Press the seam allowance to one side.
24 d. Graded: 1. Using one set of seam allowances, trim only ONE of the two seam allowances about 1/4" away from the seam line with a pair of shears. (Grading is done to decrease bulk so that the seam lies flat.) 2. Press the seam allowance to one side with the trimmed seam allowance showing. e. Clean Finished: 1. Press one set of seam allowances OPEN. Then, fold each seam allowance UNDER to the stitch line and press in place. 2. Sew down the seam allowances separately at 1/8 from the folded edge. SEW ONLY THE FOLDED SEAM ALLOWANCES! Do not sew the seam allowances to the right side of the fabric. Be sure to backstitch at each end. 3. Then, press the seam open again so that the clean finished seam allowances lie flat. f. Stitched and Pinked: 1. Press one set of seam allowances OPEN. Then, sew a straight stitch down each seam allowance SEPARATELY at 1/4" from the stitch ditch by lining up the left edge of the presser foot with the 5/8 seam line already sewn. Remember to backstitch. 2. Using the pinking shears, pink the seam allowances SEPARATELY, to the RIGHT of the new stitch line, being careful not to cut through the stitching. 3. Then, press the seam open again so that the stitched and pinked seam allowances lie flat. 2. Turn the rectangle over and press the right side to make sure that everything is flat. This new rectangle should now measure 6 x 12, the same size as the back piece. CHECK OFF YOUR COMPLETED SEAM FINISHES WITH YOUR TEACHER BEFORE MOVING ON TO THE NEXT STEP!!! Bring your grading sheet to your teacher with your completed seam finishes.


25 Step 4 Sewing the Back Piece to the Front Piece: 1. Place the back piece of the thread pouch flat and RIGHT side up. 2. Place the rectangle with all of the seam finishes flat and RIGHT side facing down on top of the back piece, lining up all of the edges. 3. The seam allowances should lie flat, but if not, press them again. Pin the two pieces together. Using a 5/8 seam allowance, sew down each of the long sides, backstitching at the beginning and the end. It will be helpful to sew the two pieces together with the rectangle with the seam allowances facing up. Be sure to sew the seam allowances facing the same direction on both edges so that they do not bunch or twist. 4. Sew across ONE of the short ends at 5/8. 5. Using a seam gauge and a marking pen, mark a 2 inch gap in the center of the opposite unsewn short end of the rectangle. 6. Sew from each of the edges IN on this short marked side, backstitching at the beginning of the seam and at the mark. You should have an open space in the center of one short edge of the thread pouch. Step 5 Creating the Curved Top: 1. Using an old CD, place the CD on the thread pouch along the short end that has been fully sewn. The CD should rest between the two long side seams and just meet the top seam on the short side. 2. With a marking pen, trace the curved area of the CD where it meets all three seam allowances. (You will NOT be tracing around the whole CD, only about halfway from side to side where the CD meets the seams.)
26 3. Using a straight stitch, sew directly on the curved marking, being sure to backstitch at the beginning and the end where the seams meet. To easily sew around curved areas, it may be helpful to use the pivot technique. 4. To Pivot: a. When you first get to a curved area, stop sewing with the needle down in the fabric. (Turn the hand wheel toward you to pt the needle down in the fabric. You can also push the Needle Up/Down button so that every time you stop sewing, the needle remains down in the fabric.) b. Lift the presser foot, slightly turn the fabric until it is lined up on the stitch plate guideline, or until you line up the fabric in the new direction you are sewing. c. Lower the presser foot and sew forward a few stitches. Then, pivot again as the fabric continues to curve. Repeat the process until you have sewn around the entire curved area. 5. Trim all threads and return the CD and marking pen. Step 6 Serging Around the Sides and Curved Edge: 1. Using a serger, serge around the thread pouch from one edge to the other, going around the curved area. You will NOT be serging across the short bottom edge with the opening in the center. 2. Remember the Three Rules of Serging: a. Keep your fingers away from the knife. b. ALWAYS leave a thread tail. (Use your shears to cut the thread, do NOT wrap the thread around to the knife.) c. Don t lift up the presser foot, unless you are serging around curved areas. 3. Place the thread pouch in the serger lining up the 5/8 seam with the groove on the presser foot. Begin serging one of the long straight edges going toward the curve. It will be helpful to serge the edges with the seam allowances facing up so that you can be sure the stay flat and do not bunch or twist. Remember, the serging should not go over your straight 5/8 stitching line. There should be a small space between the seam line and the serging when you are done. 4. When you get to the top of the thread pouch, you will be serging according to the curved line. This will cut off the excess fabric around the curve. 5. To serge around curved areas: a. Stop serging (remove your foot from the foot pedal) when you get to a curved area.


27 b. Lift the presser foot and pivot the fabric slightly. c. Lower the presser foot and serge forward about ½ to 1. d. Stop serging, lift the presser foot, pivot the fabric and lower the presser foot. e. Serge forward again about ½ to 1. f. Repeat Step D until you have serged around the entire curved area. 6. After serging around the curved area, finish serging down the other long straight edge. 7. Trim all of the threads, including the serger threads. Step 7 Notching the Curved Edge and Clipping the Corners: 1. In order for the curved edge to lie flat when the thread pouch is turned right side out, you will need to notch out areas of the curve. 2. Using a pair of shears, cut triangle shaped notches out of the seam allowance only around where the thread pouch curves. Be careful not to cut through the stitching. The notches should be about ¼ to ½ apart. 3. After notching around the curved area, you will need to clip the bottom square corners at the bottom of the thread pouch to reduce bulk. 4. Using a pair of shears, cut diagonally across the square corners at the bottom of the thread pouch. Be careful not to cut through the stitching. Just remove the bulk from the bottom corners.


28 Step 8 Turning the Pouch Right Side Out: 1. Turn the thread pouch right side out through the opening left along the short end. 2. Use a point turner to smooth out the curve and poke out the bottom corners to make them sharp and straight. 3. Press the thread pouch flat making sure the seam edges are all the way pushed out. Make sure that the seam allowance at the opening stays folded inside the thread pouch. Step 9 Top Stitching the Bottom Straight Edge: 1. Top stitch the short bottom edge of the thread pouch from side to side at 1/8. (Remember, use the inside edge of the presser foot as your guideline to give you 1/8.) This will also close the opening on that edge that was used to turn the thread pouch right side out. 2. Be sure to backstitch at the beginning and the end. Trim all threads. Step 10 Sewing on the Velcro and Finishing the Pouch: 1. Determine which side of the thread pouch you want on the outside, and which side you want on the inside. The inside of the bag will now be called the lining. 2. Fold the short bottom edge of the thread pouch up toward the curved edge at 4 and press in place so that the lining is touching each other. 3. Fold the curved edge over the bottom edge to create the pouch. Press in place. Then, unfold the pouch all the way so you can sew on the Velcro.
 along the short bottom edge, on the RIGHT side, about 1 5/")

29 4. Cut a piece of Velcro about 1 ½ long. Position the tape part of the Velcro (the soft piece) along the short bottom edge, on the RIGHT side, about 1 5/8 in from the sides and about 1 ¼ down from the bottom edge. Pin in place. 5. Make sure the thread pouch is all the way unfolded and begin sewing around the edges of the tape part of the Velcro at 1/8 from the edges. Pivot at all the corners. Backstitch at the beginning and the end and be sure to trim all of the threads. 6. Fold the bottom edge up 4 again so that the lining is touching each other. Pin this fold together. Do NOT fold the top curved edge down, leave it up. You will be topstitching around the thread pouch beginning at the bottom corner of one of the folded edges, working your way around the curved edge, and back down the other folded edge at 1/8 seam allowance. DO NOT topstitch across the bottom folded edge. You may need to pivot while sewing around the curved edge. Backstitch at the beginning and the end. Trim all threads. 7. Position the hook part of the Velcro (the scratchy piece) on the lining side of the curved flap on the thread pouch so that it lines up with the tape side of Velcro you have already sewn on. It should be close to about ½ down from the top of the curve. 8. Begin sewing around the edges of the hook part of the Velcro at 1/8 from the edges. Pivot at all the corners. Backstitch at the beginning and the end and be sure to trim all of the threads. 9. Turn in your thread pouch with your grading sheet to your teacher.


30 Sports and Outdoor Clothing Performance Objectives Standards and Objectives: *Stain Square: Standards 1.1, 1.3, 1.4 Demonstrate use and care of a sewing machine and tools. *Stain Square: Standard 1.2 Demonstrate use and care of a serger. *Monster Blanket: Standard 6.1 Complete appropriate seam finishes. *Monster Doll: Standard 6.6 Construct a machine stitched hem. *Monster Doll: Standard 6.8 Complete a hand stitch. *Monster Blanket: Standard 6.4 Construct a buttonhole. *Monster Doll: Standard 6.5 Attach a button by using a hand needle and thread. *Pattern Layout: Standards 4.2, 4.3 Demonstrate pattern preparation and correct layout on fabric.
 from the top to the bottom of your fabric. BACKSTITCH at both ends. 4. DO NOT BACKSTITCH.")

31 Stains Square Machine Stitches 1. Get a 8 X11 piece of fabric from your teacher. 2. Divide your fabric into 1/3 sections both horizontally and vertically. (Make a tic-tac-toe grid.) 3. Sew a ZIGZAG stitch (Adjust your stitch width to 5) from the top to the bottom of your fabric. BACKSTITCH at both ends. 4. DO NOT BACKSTITCH. Parallel to the zig-zag stitch, sew a BASTING stitch (Change your STITCH LENGTH to 5 and adjust your stitch width back to 0) from the top to the bottom of your fabric. Leave a LONG TAIL of about 4-5 inches of thread at the beginning of the seam. DO NOT BACKSTITCH at the end of the seam. Leave another LONG TAIL of about 4-5 inches of thread. Repeat step 4 at a 1/4" seam allowance from the first basting stitch. 5. Perpendicular to the first two seams, sew a DECORATIVE stitch (Do stitch #6) from side to side of your fabric, BACKSTITCH at both ends. 6. Parallel to the last seam, sew a DECORATIVE stitch (Do stitch #9) from side to side of your fabric, BACKSTITCH at both ends. Serging 1. Serge around the SQUARE sample. Try not to cut off any of the fabric as you serge. Seam Allowances and Pivoting 1/4" Seam Allowance: 1. Using the OUTSIDE edge of your presser foot, or the 1/4 seam guideline on your stitch plate, begin sewing a 1/4 seam allowance down one side of your square. (Remember to backstitch at the beginning.) STOP when you are about 1/4" from the bottom edge of the square. 2. To Pivot, make sure the needle is DOWN in your fabric, lift your presser foot and PIVOT your square to a new, un-sewn edge. LOWER your presser foot and sew forward at a 1/4" seam allowance. (Remember to use the OUTSIDE of your presser foot as a guide.) DO NOT backstitch here. 3. REPEAT steps 1-2 until you have sewn all four edges all the way around the square. PIVOT at each corner and BACKSTICH at the end. 5/8 Seam Allowance: 4. Using the 5/8 seam guideline on your stitch plate, sew a 5/8 seam allowance box all the way around your square, repeating steps 1-2 above. 5. Remember to BACKSTITCH at the beginning and end and to PIVOT at each corner. 1 Seam Allowance: 6. Using the 1 seam guideline on your stitch plate, sew a 1 seam allowance box all the way around your square, repeating steps 1-2 above. 7. Remember to BACKSTITCH at the beginning and end and to PIVOT at each corner.
32 Monster Blanket- Seam Finishes -Cut two blanket pieces 8x8 or larger. DO NOT serge around any of the blanket at this point. -Layer the two pieces with pretty sides showing and sew, using a 5/8 seam allowance around the blanket connecting the two pieces. Pivot at the corners. -On each side of the blanket complete a different seam finish. (Only do 1 of the serged) Serged- Closed: 1. Sew 2-( 2 X 6 ) rectangles of fabric together at a 5/8 seam allowance down a LONG edge. Backstitch at both ends. 2. Serge down the same seam allowance. Make sure to sew the seam allowances together. Serged- Open: 1. Sew TWO-( 2 X 6 ) rectangles of fabric together at a 5/8 seam allowance down a LONG edge. Backstitch at both ends. Remember to sew right sides together. 2. Serge down each seam allowance separately. Then, press the seam allowance open. Zigzaged: 1. Sew 2-(2 X 6 ) rectangle of fabric together at a 5/8 seam allowance down a LONG edge. Backstitch at both ends. 2. Turn your sewing machine to a zigzag stitch. Zigzag down the seam allowance. Use the left edge of your presser foot as a guideline on your straight stitch. Backstitch at both ends. Trim away any excess fabric to the right of the zigzag stitches. Remember to reset your stitch selector to a straight stitch. Clean Finished: 1. Sew 2-(2 X 6 ) rectangle of fabric together at a 5/8 seam allowance down a LONG edge. Backstitch at both ends. 2. Fold under and press both edges of the seam allowances. Sew down the seam allowances at 1/8 from the folded edge. ONLY SEW THE SEAM ALLOWANCES! DO NOT sew through the rectangles. Backstitch at both ends. Graded: 1. Sew 2-(2 X 6 ) rectangle of fabric together at a 5/8 seam allowance down a LONG edge. Backstitch at both ends. 2. Trim only ONE seam allowance close to the stitching, but not through it. You should be about 1/8 to 1/4 away from the stitching line. *Grading is done to decrease bulk so that the seam lies flat. Stitched and Pinked: 1. Sew TWO-(2 X 6 ) rectangles of fabric together at a 5/8 seam allowance down a LONG edge. Backstitch at both ends. Remember to sew right sides together. 2. Sew a straight stitch down each seam allowance separately at 1/4" from the stitch ditch by lining up the left edge of the presser foot with the 5/8 seam line already sewn. Remember to backstitch. 3. Using the pinking shears, pink the seam allowances separately, to the right of the new stitch line, being careful not to cut through the stitching. 4. Press the seam open.

33 Monster Blanket Button & Buttonholes Follow the procedure below to sew a buttonhole on your Monster Blanket: Sewing the Buttonhole: 1. Using the buttonhole formula, measure and mark one buttonhole somewhere on your blanket. Remember the buttonhole formula is: Button Diameter + Button Depth 2. Change your sewing machine presser foot to a #3 buttonhole foot. 3. Select the buttonhole stitch (Number 11) on your sewing machine. It will automatically Buttonhole Formula change all of the settings needed to complete the buttonhole. 4. Follow the steps below to sew the buttonhole: a. Align the #3 presser foot so that the needle starts at the top of the buttonhole marking. The needle should enter the fabric right where the vertical and horizontal lines meet. b. Slowly begin sewing. The machine will automatically begin sewing a very tight zigzag stitch down the left side of the buttonhole marking. Stop sewing when you reach the bottom of the buttonhole marking. c. Hold in the backstitch button and begin sewing again. Keep the backstitch button pressed in only until the machine begins sewing a straight stitch, backwards, back up to the top of the buttonhole marking. Then, let go of the backstitch button, but continue sewing. Stop sewing when you reach to top of the marking. d. Hold in the backstitch button again and slowly begin sewing. The machine will automatically begin sewing the top bar tack of the buttonhole. Once it begins sewing, let go of the backstitch button, but continue sewing. The machine will automatically begin sewing another tight zigzag stitch, this time down the right hand side of the button hole marking. Stop sewing when you reach the bottom of the buttonhole marking. e. Hold in the backstitch button and begin sewing again. The machine will automatically begin sewing the bottom bar tack of the buttonhole. Let go of the backstitch button when the machine begins sewing the bar tack. f. After the machine finishes the bottom bar tack, it will stitch in place for 3 or 4 stitches as a backstitch to secure the threads. Once this has happened, the buttonhole is finished. g. Lift the presser foot, remove the pocket and trim all of the threads. Carefully cut the buttonhole open, being careful not to cut through the stitching. 5. Once your buttonhole is sewn and cut open, position the pocket where you want it on the Monster Doll, and then sew in place. Buttonhole Stitch Selector Sewing On the Button: 1. On the body of your Monster pick your button spot BEFORE you sew your Monster Doll together. You will need thread and a hand sewing needle. 2. Fold a very long piece of thread in half. Thread the folded end of the thread through the hand needle and fold the thread in half again. Tie a not at the end. (You should have a group of 4 threads tied together.) 3. Stick the needle through the center of the buttonhole and all the way through the Monster Doll fabric. Pull the thread all the way to the back so that the knot rests up against the fabric. 4. Bring the needle back up from the wrong side of the fabric next to the knot. Slide the button onto the needle through one of the holes on the button. Be sure to allow space to sew a shank underneath your button. 5. Continue sewing the button to the Monster Doll. 6. After you have sewn through the holes on the button enough times for the button to be secure, settle the threads and stick the needle through one of the holes on the button, but NOT through the fabric. Pull the needle between the button and the fabric. 7. Wrap the thread tightly three times around the threads under the button. This will tighten the threads and make a shank under the button. The shank will provide space which will allow the buttonhole to lie flat under the button. 8. Tie a knot to secure the threads, stick the needle through the fabric of the Monster Doll and pull the thread all the way through to the wrong side. Cut the thread with a little bit of a thread tail left over.
34 Monster Doll Pattern Drafting Use a blank piece of paper to sketch out your monster doll. Your design must include: -An Outward Curve -An Inward Curve -Enough Space for a Button/Buttonhole -Areas to Incorporate Felt and Fusibles (Eyes, Mouth, Mustache, etc.) After your sketch has been approved, create the pattern pieces you will use for your Monster Doll. Don t forget to account for seam allowances. It is better to make your doll and all of the pieces too big, rather than too small. Ask your teacher if you need any help. Working with Felt and Fusibles Felt is a non-woven fabric. It comes in a variety of thicknesses, will not unravel and can be used for a variety of decoration. Interfacing is another non-woven fabric used to strengthen and stabilize other fabrics. Most have a heat-activated fusible side that allows you to glue the interfacing right to the fabric. Fusible Adhesive is what we will be using to attach the felt to your monster doll. It is a double-sided heat activated fusible adhesive that is great for gluing two pieces of fabric together. Some popular brands of this adhesive are Heat N Bond, Wonder Under, ThermoWeb and Steam A Seam. It has a paper backing on one side that you peel away after ironing it to one side of your fabric. Follow the procedure below for attaching the fusible adhesive to your felt: 1. Choose the color and the size of the felt you will need for your Monster Doll pattern pieces. The felt and adhesive will need to be slightly larger than the actual pieces themselves. You will be tracing the pattern pieces onto the paper backing and cutting them out AFTER it has been fused to the felt. 2. Turn the iron down to low. Place the fusible side of the adhesive touching the felt. Iron over the paper backing to attach the adhesive to the felt. 3. Wait a few minutes for the felt to cool down. 4. Trace the pattern pieces onto the paper side of the adhesive. Remember, the direction you trace your pattern pieces will be flipped when you remove the paper backing and attach the felt to your Monster Doll. Pay close attention to this step. 5. Cut out your pattern pieces and then carefully remove the paper backing off of each piece. You should see a light layer of adhesive on the wrong side of the felt. 6. Position the felt pattern pieces on your Monster Doll with the adhesive side touching the right side of your fabric and iron in place. Don t place your felt pieces too close to any edge of your Monster Doll. Don t forget to account for the seam allowance that you will use to sew your monster doll together. 7. Once your felt pieces have been fused to your Monster Doll, you will need to also sew them into place. You can sew a straight stitch 1/8" from the edge around the pieces, or use a zigzag stitch along the edge of each piece. Be sure to trim your threads.

35 Clipping and Notching Clipping allows inwardly curved seams to stretch, bend and lay flat when turned to the right side. Follow the procedure below to clip inwardly curved seams: 1. After the seam has been sewn around the curved area, carefully cut small clips along the curve of the seam allowance. You will just be making straight cuts into the seam allowance. You will not be removing any fabric. Be careful to NOT cut through the stitching line itself. Clipping Corners is another technique that reduces bulk on square corners. Follow the procedure below to clip corners: 1. For more stability, it is best to clip corners that have been reinforced with backstitching. Corners where you have pivoted are weaker and could poke through when turned to the right side. 2. Cut a triangle shaped wedge away from the square corner. Get close to the stitching, but do not cut through the stitching. Notching reduces the bulk of outwardly curves seams so they lay flat when turned to the right side. Follow the procedure below to notch outwardly curved seams: 1. After the seam has been sewn around the curved area, carefully notch out small pieces of the fabric in the seam allowance. You will be removing small triangle like pieces along the curve of the seam. Be careful to NOT cut through the stitching line itself. Clipping and Notching The Monster Doll Sew the Monster Front to the Monster Back with ugly sides together using a ¼ seam allowance. Leave a SMALL opening (about 2 ) on a straight edge of the monster- this opening is to turn it. Clip and Notch the curved areas on your Monster Doll. Be careful not to cut through the stitching line itself. Clip any square corners on your Monster Doll as well. Once this step is completed, turn the Monster Doll right sides out and press. Then, stuff the Monster Doll with fiberfill. Be sure to stuff completely or you will have a limp Monster.
36 Slipstitching A Slipstitch, sometimes known as an Invisible Stitch or Blind Stitch, is a hand sewing technique that allows you to close open seams so that it looks like it was sewn on a machine. The thread is invisible or cannot be seen on the right side of the project. Follow the procedure below to sew a slipstitch: 1. Thread a hand needle with one strand of thread and tie the two ends together. 2. Place the needle behind the last stitch you made on the sewing machine, from the inside. Pull the needle up through the seam allowance so that the knot will stay inside the pillow. 3. If you are right-handed, you will sew from right to left across the seam. If you are left-handed, you will sew from left to right across the seam. 4. Pinch the folded edges of the seam together. Slip the needle, down and up, only through the top fold about 1/4 away from where you started. Pull the thread all the way through. 5. Then, slip the needle, down and up, only through the bottom fold about 1/4" away from where you left off. 6. Repeat steps 4 and 5 all the way across the opening, going back and forth between the top and bottom folds. 7. When you reach the end of the opening, slip the needle under the last stitch you did on the sewing machine. Pull the thread through until a small loop of thread remains. 8. Stick your needle through the loop and then pull tight to create a knot. Stick the needle down through the seam allowance into the Monster Doll and pull it through the side of the doll. Cut the thread close to the Monster Doll. This will leave a hidden thread tail that will prevent the knot from coming undone.
Clothing Construction I Samples Packet
 Clothing Construction I Samples Packet Name Objectives: 1. To identify how to use and care for the sewing machine and tools. (#1 & #2) 2. Demonstrate how to use a variety of stitches and presser feet.
Practicing Basic Machine Operation Sample #1
 Practicing Basic Machine Operation Sample #1 Listed below are various tasks required in basic sewing machine operation. Demonstrate your ability to perform each task by creating a sample. The samples that
Basic Sewing Portfolio. Name
 Basic Sewing Portfolio Name Back stitching Whip stitch Starting in the corner of a sample begin stitching diagonally. 3-4 stitches Hold up the back stitching lever and backstitch to the beginning. Release
Pockets; Seam Finishes
 Lessons 4, 5 Complete the sentences. 4. A zipper should be applied a facing has been applied, but a band has been applied to a garment. 5. Coil zippers are made of or. One advantage of them is the ease
Sewing Vocabulary & Equipment
 Sewing Vocabulary & Equipment 1. Basting Stitch Long, temporary stitches used to hold pieces of fabric together. (Changed by twisting the stitch length knob.) Regular Stitch Length Basting Stitch Length
Sample Packet. Directions: Describe the functions of the following basic parts of a sewing machine.
 Sample Packet NAME: Directions: Describe the functions of the following basic parts of a sewing machine. SEWING MACHINE PARTS: Needle stitch plate: Feed dog system: Presser foot: Bobbin case: Spool pin:
Note: Yardage and supplies listed are for all three bags.
 Stash Pouches Finished sizes: Large 10" (25.4 cm) wide x 81/2" (21.6 cm) tall x 31/2" (8.9 cm) deep Medium 9" (22.9 cm) wide x 7" (17.8 cm) tall x 3" (7.6 cm) deep Small 8" (20.3 cm) wide x 6" (15.2 cm)
CLOTHING I TEST #350 MULTIPLE-CHOICE IDENTIFY THE LETTER OF THE CHOICE THAT BEST COMPLETES THE STATEMENT OR ANSWERS THE QUESTION.
 CLOTHING I TEST #350 MULTIPLE-CHOICE IDENTIFY THE LETTER OF THE CHOICE THAT BEST COMPLETES THE STATEMENT OR ANSWERS THE QUESTION. 1. A ROTARY CUTTER: A. Can only be used on woven fabrics. B. Should only
CAMELOT FABRICS. 3. Draw a vertical line on the pointed end of each Strap, a tiny bit longer than the diameter of your buttons.
 Other Supplies - 2 buttons in coordinating color - paper printer - basic sewing supplies - sewing machine with buttonhole foot - iron & pressing surface - scissors & fabric shears - measuring tape - fabric
Project #4: Tooth Fairy Pillow
 Project #4: Tooth Fairy Pillow This is the 4 th project in our Get Kids Sewing Series with SINGER and SkipToMyLou.org. The tooth fairy will always find you with your own special pillow! Choose your favorite
week ONE Sewing 101 Getting Familiar with your Sewing Machine NOTES TO THE ADULTS #janomecamp18 Page 1
 se 2018 week ONE Sewing 101 with Getting Familiar with your Sewing Machine If this is your first time sewing, or a refresher, this week s activities are sure to be fun! Here s an overview of some of the
OTHER TOOLS & SUPPLIES
 OTHER TOOLS & SUPPLIES - Fat Eighth of fusible fleece - 1/4 yd of fusible cotton interfacing (22 wide) - 1 yd of piping in coordinating color - (1) 1 D-Ring - (1) 1 swivel hook - (1) 8 closed-end zipper
Creative Sewing. Quilt Block Pillow Instructions and Visual Aid
 Creative Sewing Quilt Block Pillow Instructions and Visual Aid 1. You will need (2) 3 wide strips of fabric that will coordinate well with a T-Shirt of your choice. Place the strips right sides together
Arrowhead stitch/arrow- Triangular stitch used as decoration when stitched loosely or to reinforce strain areas of a garment when stitched tightly
 Dictionary of Sewing Terms A Armscye- armhole Arrowhead stitch/arrow- Triangular stitch used as decoration when stitched loosely or to reinforce strain areas of a garment when stitched tightly Awl-hand-held
Photo location courtesy of Judith Batty. McCallsQuilting.com McCall s Quick Quilts 1
 Photo location courtesy of Judith atty. McCallsQuilting.com 017 McCall s Quick Quilts 1 Changing Lanes simple patches of color make this unusual quilt quick & colorful Designed and Sewn by Stephanie Sheridan
CLOTHING AND TEXTILES I (350)
") DESCRIPTION The first assessment in a series, Clothing and Textiles I introduces students to basic sewing and pressing equipment, textiles, and introductory level project construction techniques. Total
DESCRIPTION The first assessment in a series, Clothing and Textiles I introduces students to basic sewing and pressing equipment, textiles, and introductory level project construction techniques. Total
Six FUN! projects for those who are new to sewing, returning to sewing or just want to sharpen basic skills.
 Six FUN! projects for those who are new to sewing, returning to sewing or just want to sharpen basic skills. 1. Clutter Control Bags 2. 3-Button Book Cover 3. Fabric Stash Pincushion 4. Pocket Tissue Case
Construction Cards Beginning Level (9-11 Years)
") Beginning Level (9-11 Years) Division of Agricultural Sciences and Natural Resources Oklahoma State University Beginning Level (9-11 Years) No. 801 Seam Finishes Seam finishes make clothes look neat on
Beginning Level (9-11 Years) Division of Agricultural Sciences and Natural Resources Oklahoma State University Beginning Level (9-11 Years) No. 801 Seam Finishes Seam finishes make clothes look neat on
Beginning Level (9-11 Years)
") OKLAHOMA COOPERATIVE EXTENSION SERVICE 4-H Fabrics & Fashions Construction Items Beginning Level (9-11 Years) Division of Agricultural Sciences and Natural Resources Oklahoma State University OKLAHOMA
OKLAHOMA COOPERATIVE EXTENSION SERVICE 4-H Fabrics & Fashions Construction Items Beginning Level (9-11 Years) Division of Agricultural Sciences and Natural Resources Oklahoma State University OKLAHOMA
Owyhee County 4-H. Cloverbud. Activity Book
 Owyhee County 4-H Cloverbud Activity Book Name Age Year in 4-H 20 Club Name Member s Signature Parent/Guardian s Signature Leader s Signature Projects or activities I worked on this year were: I attended
The Allie An in-the-hoop project
 The Allie An in-the-hoop project A wallet/coin purse for the 5x7 hoop. The Allie has 3 credit card slots in the front section which features a large flap with a snap closure. You can carry coins or other
The Lydia Bag, featuring 2018 Pantone Color of the Year: Ultra Violet
 Published on Sew4Home The Lydia Bag, featuring 2018 Pantone Color of the Year: Ultra Violet Editor: Liz Johnson Monday, 29 January 2018 1:00 Sometimes you just need something simple! This beautiful bag
Original Recipe. Let s Go Trippin by Polly Monica
 Original Recipe Let s Go Trippin by Polly Monica Hello again! I m Polly from Aunt Polly s Porch blog {auntpollysporch.blogspot.com} and I m so happy to be sharing my designs again on the Moda Bake Shop!
*All seam allowances are 1/4 unless otherwise noted. All pattern pieces include the seam allowance.
 Kelley Crossbody Bag Supplemental Instructions to Online Video Course www.craftygemini.com http://craftygemini.com/2016cgbagclub 2015 Crafty Gemini LLC. All rights reserved. *This pattern cannot be photocopied,
FOUNDATION ~ HAND & MACHINE STITCHES
 FOUNDATION ~ HAND & MACHINE STITCHES AIM ~ To show some of the many hand and machine stitches and their uses. ~ To show the necessity of some of the stitches when sewing seams. 3. SEAMS ~ Straight open
DIY Christmas Advent Calendar Sewing Tutorial
 DIY Christmas Advent Calendar Sewing Tutorial I love counting down the days until Christmas with my children and seeing the smiles on their faces each morning as they get to check the advent calendar to
pattern BONUS Ruffled Halter By LiesL Gibson {from page 41}
 ruffled halter This adorable halter has a simple pull-on style that s easy and fun for summer, featuring a casing formed by the first ruffle for a clean, uncluttered finish. For other fun looks, try making
Summer Picnic Blanket
 Technique: Machine sewing Summer Picnic Blanket Brand: Crafting time: Size 56 x 70 Dual Duty XP An Evening Skill level - Beginner/Easy Materials Coats and Clark Dual Duty XP Heavy thread in a coordinating
Cut 1 lightweight interfacing
 1 2 A note on interfacing for this bag: This pattern is intended to produce a slouchy bag, so you will want to look carefully at your fabrics before you decide on which interfacing and stabilisers to use.
Double-Sided Cook's Apron with Handy Towel Loop
 Published on Sew4Home Double-Sided Cook's Apron with Handy Towel Loop Editor: Liz Johnson Thursday, 28 July 2016 1:00 Bold blocks of color define this classic cook's apron. It's a great project to take
4-H Fabrics & Fashions
 OKLAHOMA COOPERATIVE EXTENSION SERVICE 4-H Fabrics & Fashions Setting Your Stitch Length 1. Stitch, as shown, using six inches to one inch. --------------------------------------------------------------------------------------------------------------------
london calling bag a sewing pattern by
 a sewing pattern by london calling bag This project on its own is a very big gusseted bag with a zippered top closure. But the optional details include a front pocket with Union Jack applique, buckle adjustable
Impulse. 1/4 yard each very dark green (A), dark green (B),
, dark green (B),") design by LUCY A. FAZELY & MICHAEL L. BURNS Purple/Blue Impulse 12" x 12" Block Make 12 Blue/Green Impulse 12" x 12" Block Make 12 Orange/Red/Green Impulse 12" x 12" Block Make 12 Red/Purple Impulse 12"
design by LUCY A. FAZELY & MICHAEL L. BURNS Purple/Blue Impulse 12" x 12" Block Make 12 Blue/Green Impulse 12" x 12" Block Make 12 Orange/Red/Green Impulse 12" x 12" Block Make 12 Red/Purple Impulse 12"
featuring STARGAZER COLLECTION BY AGF STUDIO Space Trip FREE PATTERN
 featuring STARGAZER COLLECTION BY AGF STUDIO Space Trip FREE PATTERN Space Trip DESIGNED BY FABRICS DESIGNED BY CAP-ST-1106 TWINKLY PHASES CAP-ST-1108 PLANETARIUM CAP-ST-1103 INTERRUPTED SIGNAL CAP-ST-1104
Fox Fun Mug Rug H I J. Figure 1
 one day only DESIGN BY JOANNA WILCZYNSKA Fox Fun Mug Rug Good things come in small packages. Create a cute coaster that may end up on a wall instead. ScRap- FRIENDLY PROJECT SPECIFICATIONS Skill Level:
Prima Diva. .Style, function and loads of compliments That s what the Stella Sling Bag brings!!
 .Style, function and loads of compliments That s what the Stella Sling Bag brings!! Supplies: 1/2 Yard Main Print (Outside of wallet, Outside of pockets, optional strap, etc..) 5/8 Yard Accent Print (Lining
Garden Kneeling. Supplies. Visit bernina.com. Projects Webinars Promotions. Created by Kay Hickman
 Garden Kneeling Created by Kay Hickman Spring is just around the corner, a time for gardening and adding a bit of creativity to your landscape. Whether gardening is a joy or a chore, you can add a bit
Bound and Determined:
 Think You Don t Have Time to Create Beautiful Quilts? From quick-quilt adaptations of classic patterns to fun, fresh novelty designs, McCall s Quick Quilts provides you with a treasury of time- and effort-saving
Personalize An Off-The-Rack Tee
 Published on Sew4Home Personalize An Off-The-Rack Tee Editor: Liz Johnson Friday, 26 June 2015 1:00 Now's the time to stock up on cute summer tees. They're on sale nearly everywhere. We hit the local Target
FREE PATTERN. featuring RAISE THE VOLUME COLLECTION BY AGF STUDIO
 FREE PATTERN featuring RAISE THE VOLUME COLLECTION BY AGF STUDIO QUILT DESIGNED BY AGF STUDIO FABRICS DESIGNED BY AGF STUDIO CAP-RV-8000 MEASURED TEMPO CAP-RV-8001 WAVES OF ECHO CAP-RV-8002 TWINKLING TUNE
set; press. Repeat to make 17 strip sets. Cut each strip set into 8 (21/2" x 41/2") B segments as shown in Figure 1.
 B segments as shown in Figure 1.") DESIGN BY SUE HARVEY Posy Patch Frayed edges form the petals in this garden of pastel posies. SPECIFICATIONS Skill Level: Confident Beginner Quilt Size: 56" x 72" Block Size: 8" x 8" Number of Blocks:
DESIGN BY SUE HARVEY Posy Patch Frayed edges form the petals in this garden of pastel posies. SPECIFICATIONS Skill Level: Confident Beginner Quilt Size: 56" x 72" Block Size: 8" x 8" Number of Blocks:
By Laurie Pessetto. Instructions:
 Materials: 1 yard Fusi Form Lightweight Interfacing (fusible) 1 ¼ yards base fabric 1 ½ yards contrast fabric 3 packages of medium rick rack (7½ yards) Thread Button Stitch Witchery Tools: Fabric scissors
Flannel Apron with Rick Rack Accents
 Published on Sew4Home Flannel Apron with Rick Rack Accents Editor: Liz Johnson Wednesday, 06 March 2019 1:00 An apron in flannel makes for some cozy cookin'! We created our original sample from fat quarters,
Sports Team Tailgate Apron
 Published on Sew4Home Sports Team Tailgate Apron Editor: Liz Johnson Tuesday, 18 October 2016 1:00 Show your team spirit with a fan-favorite tailgate apron in team logo fabric. Since Sew4Home is located
mermaid quilt a sewing pattern by
 a sewing pattern by mermaid quilt This project is a simple and straightforward piece for applique lovers. I personally designed it for a coworker s daughter -- a sweet little girl who s current obsession
Gadget Bag In-the-hoop project
 Gadget Bag In-the-hoop project 2009 Peggy Severt, Pegboard Crafts pegboard1@yahoo.com or peggy@pegboardcrafts.com http://www.pegboardcrafts.com (419) 586-3135 Do not resize this design. The zipper will
HOW TO SEW FLEECE FABRIC
 1H HOW TO SEW FLEECE FABRIC http://localhost/techniques/how-to-sew-fleece-fabric Some tips to sew on a wonderful fabric. Step 1 Fleece fabrics are made of polyester or acrylic fibers which are water resistant.
The Sunshine An in-the-hoop project
 The Sunshine An in-the-hoop project All the music I walk to is on my phone, but my new iphone 6+ is too big to fit in my pocket. This case is the perfect solution. That s my iphone 6+ peeking out of it
2016 Courtesy of Art Gallery Quilts LLC. All Rights Reserved.
 ST YL E NAME 2016 Courtesy of Art Gallery Quilts LLC. All Rights Reserved. CONSTRUCTION Sew all rights sides together with ¼"seam allowance. Arrange the triangles together in rows. QUILT DESIGNED BY AGF
Figure Out Your Feet!
 i s s u e 1 7 Figure Out Your Feet! By Yvonne Porcella These feel good" sewing projects give you opportunities to try a variety of specialty presser feet that make stitching easier and the results better.
All seam allowances are 1/2 unless otherwise noted. All pattern pieces include the seam allowance. Please read all instructions before beginning.
 This small bag will allow you to try out several fun bag-making techniques; adding a metal twist lock, using piping in a bag, making darts, and adding elastic pockets. Use your favorite print and combine
Ruffle Bunnies: Fun Appliqué Kitchen Towels
 Published on Sew4Home Ruffle Bunnies: Fun Appliqué Kitchen Towels Editor: Liz Johnson Monday, 06 March 2017 1:00 These kitchen towel Ruffle Bunnies are ready to hop-to-it and help with your dish drying.
SINGER Tooth Fairy Pillow
 SINGER Tooth Fairy Pillow The Tooth Fairy will always find you with your own special pillow! Shopping List: ½ yard 44-45 wide sturdy woven fabric for Pillow 10 x 14 of white or cream flannel for Tooth
Child s Purse An In-the-Hoop Project
 Child s Purse An In-the-Hoop Project Shoulder bag in two sizes, with optional quilting. You may also choose to close the bag with Velcro or with a snap or other type of closure. Files and instructions
Sunday: My Way-Life s Little Everything Bag
 Sunday: My Way-Life s Little Everything Bag The Sunday Bag was designed to be like a lazy Sunday afternoon- A Blank Canvas. The design was created to be simple; a beginner sew, but an open canvas for those
Pincushion and Thread Catcher Organiser
 Pincushion and Thread Catcher Organiser Designed by Angie Wilson of GnomeAngel.com Read instructions carefully before starting the project. Tools Required: Brother Sewing Machine General Sewing Supplies
Zip Zap Mini Pouch with Side Loop Straps
 Published on Sew4Home Zip Zap Mini Pouch with Side Loop Straps Editor: Liz Johnson Wednesday, 17 February 2016 1:00 Sometimes extra-cute is exactly what you need to get your sewing creativity flowing.
Snowman Gift Card Case In-the-hoop project
 Snowman Gift Card Case In-the-hoop project 2008 Peggy Severt, Pegboard Crafts pegboard1@yahoo.com or peggy@pegboardcrafts.com http://www.pegboardcrafts.com (419) 586-3135 Do not resize these designs. The
Apparel Design & Production 2 Boxie Pouch Grading Sheet
 Apparel Design & Production 2 Boxie Pouch Grading Sheet Strand 4 Intermediate Construction Techniques Standard 3a - Apply interfacing Standard 7 Insert an exposed zipper Name Period 8-10- Sewing expert;
Crazy Seminole Cell Phone bag
 Crazy Seminole Cell Phone bag By Soni Grint Have some fun making this crazy seminole cell phone bag. Learn how to make a basic seminole pieced unit and a foundation pieced crazy patchwork pocket while
Double Layer Half Apron with Fancy Details
 Published on Sew4Home Double Layer Half Apron with Fancy Details Editor: Liz Johnson Tuesday, 18 July 2017 1:00 With this design, we've packed a whole lot of style into one half apron. To start, why settle
Frou Frou Bag Intermediate
 Frou Frou Bag Intermediate Sewn By Sara Lawson http://www.sewsweetness.com This bag features ruffled flaps, snap closure and an adjustable strap. The small front pockets are 3-dimensional. Beautiful detailing
Learn To Sew: Xtra EZ Pony Tail Bolster Pillow
 Published on Sew4Home Learn To Sew: Xtra EZ Pony Tail Bolster Pillow Editor: Liz Johnson Thursday, 17 October 2013 1:00 This finished pillow may look complex, but the steps are... as the name promises:xtra
Embroidered Scrap Bag and Bed Caddy Carol A. Brown
 Embroidered Scrap Bag and Bed Caddy Carol A. Brown Materials: 1. Outer fabric for Scrap Bag (sturdy fabric such as poplin): at least 12-1/2 wide by 22 high. 2. Outer fabric for Bed Caddy (sturdy fabric
2. Mark an additional 1¾ to the longer side on one side only to add seam allowance and ease.
 Appliquéd Monogram Tablet Sleeve By Sue Hausmann Thanks to Karen Hinrichs for idea and instructions!! Recently I was having lunch with my friend Karen Hinrichs and pulled out my Ipad. She was horrified
Three Tier Ombre Apron with Shabby Chic Style
 Published on Sew4Home Three Tier Ombre Apron with Shabby Chic Style Editor: Liz Johnson Tuesday, 11 April 2017 1:00 Ombre is a French word for shading or graduating. In fashion, it refers to the graduation
Jodie s Sewing Studio
 Jodie s Sewing Studio Children s Kuspuk Pattern How to Use a Jodie s Sewing Studio Pattern For best results, study the pattern pieces first and read the notes and terms on each piece. Pieces are labeled
Charmed. Finished Size 48 x 60 Finshed Block 9
 Charmed Finished Size 48 x 60 Finshed Block 9 Materials Needed: 3 1/2 yards of the brown floral (8786-9), for blocks and backing 1 1/4 yards of the brown stripe (8792-9) 1 1/4 yards of the pink butterfly
For a flat or four-sided reticule:
 Page 1 of 8 DRAWSTRINGS When purchasing, one fabric store meter is the minimum to make two drawstrings of a nice length for one reticule in most designs. If you like longer drawstrings, increase the length.
Full details of the products you ll need including the colours of Decracraft Felt, can be found on the next page.
 PATTERN BY Our light yet sturdy drawstring bag features a combination of stunning colours from our Decracraft Felt range. Create your own drawstring bag using this pattern. Full details of the products
A SPOOKY SLEEPOVER. This is a free pattern provided by The Red Boot Quilt Company The Red Boot Quilt Company
 A SPOOKY SLEEPOVER The Red Boot Quilt Company The Red Boot Quilt Company A SPOOKY SLEEPOVER Approx. Size 38 1/2in x 57 1/2in BEFORE THE FUN BEGINS Please read all instructions before you begin. Abbreviations.
Wrap your favorite novel in a quilted cover to protect it and turn heads. It adjusts to fit any size paperback and has a handy bookmark.
 DESIGNED & QUILTED BY CINZIA ALLOCCA Mini Quilt Bookwrap SPECIFICATIONS Skill Level: Confident Beginner Bookwrap Size: 17" x 9" (excluding ties and bookmark) Wrap your favorite novel in a quilted cover
FINISHED HEAD SIZE: 0 3 MONTHS: 14"; 3 6 MONTHS: 16"; 6 9 MONTHS: 18"; 9 12 MONTHS: 20"
 Amy Butler s Little Stitches for Little Ones Two Very Cute Hats FINISHED HEAD SIZE: 0 3 MONTHS: 14"; 3 6 MONTHS: 16"; 6 9 MONTHS: 18"; 9 12 MONTHS: 20" DIFFICULTY LEVEL: 3 For hip baby boys and girls alike!
SINGER PROJECTS Sewing Machine Mat with Pockets PROJECT SKILL LEVEL:
 SINGER PROJECTS Sewing Machine Mat with Pockets This handy sewing machine mat with pockets not only helps protect your table surface, it keeps your go-to notions right at your fingertips. The four pockets
Kid-Size Lil' Chef Apron
 Published on Sew4Home Kid-Size Lil' Chef Apron Editor: Liz Johnson Wednesday, 07 September 2016 1:00 If you hang out with us here at Sew4Home on a regular basis, you know we love aprons! We've done retro
Embroidered Scrap Bag Carol A. Brown
 Embroidered Scrap Bag Carol A. Brown Materials: 1. Outer fabric (sturdy fabric such as poplin): at least 12 1/2 wide by 22 high. 2. Medium weight fusible interfacing: same size as for fabric. 3. Lining
The Jan An In-the-Hoop Project
 The Jan An In-the-Hoop Project Shoulder purse with 2 zippered pockets. Optional quilting. 2009 Peggy Severt, Pegboard Crafts pegboard1@yahoo.com or peggy@pegboardcrafts.com http://www.pegboardcrafts.com
The Little Bow Zipper Wallet PDF Pattern
 A PDF PATTERN BY MICHAEL ANN MADE The Little Bow Zipper Wallet PDF Pattern By Michael Ann Made Photo Instructions PDF This pattern was created by Michael Ann Shreeve for MichaelAnnMade.com. So glad you're
Mini 4-H SEWING PROJECT
 Mini 4-H SEWING PROJECT Each Mini 4-H'er can take only one of the projects offered. All Mini 4-H Projects are entered on the Wednesday before the fair. Mini 4-H is open to 4-H'ers who are currently in
Measuring Tape Neck Strap Sewing Caddy
 Published on Sew4Home Measuring Tape Neck Strap Sewing Caddy Editor: Liz Johnson Wednesday, 31 May 2017 1:00 How many of you loop a tape measure around your neck while you re sewing? I m pretty sure there
Artsy Bag. materials and tools. materials and tools
 materials and tools Created by Pat Bravo materials and tools ½ yard of main fabric* ½ yard of lining fabric* Pink, yellow, and blue fabric scraps* ½ yard of quilt batting 10 square of non-woven, ultralightweight
A simple strip-pieced large center block turned on point with triangle corners makes for a quick yet sophisticated wall quilt. seams toward E.
 the man cave DESIGN BY TRICIA LYNN MALONEY A simple strip-pieced large center block turned on point with triangle corners makes for a quick yet sophisticated wall quilt. SPECIFICATIONS Skill Level: Confident
Small Fry Duffle Bag Skill Level: Intermediate
 Small Fry Duffle Bag Skill Level: Intermediate Designed By Heather Parsons www.smallfryandco.blogspot.com Take just the right amoung of stuff with this kid size duffle bag! Small enough that your child
Back to School: Zippered Pencil & School Supplies Case
 Published on Sew4Home Back to School: Zippered Pencil & School Supplies Case Editor: Liz Johnson Friday, 20 August 2010 9:00 I have a wooden pencil box that has been a fixture on my desk since grade school.
By Laurie Pessetto. Create your pattern. The decorative fabric will be on the edges of the circle layers.
 By Laurie Pessetto Create an elegant, soft, travel pouch to protect jewelry from damage and keep it organized even when your suitcase gets tossed into a plane or trunk! Skill Level Good sewing skills,
Keepsake T-Shirt Pillow with Knotted Corners
 Published on Sew4Home Keepsake T-Shirt Pillow with Knotted Corners Editor: Liz Johnson Wednesday, 06 August 2014 1:00 We all have them: those "special" T-shirts from events, vacations or sports teams.
Canadian Quilters Association Pattern: Quilting Tools Tote Bag
 Canadian Quilters Association Pattern: Quilting Tools Tote Bag Description: * Size: 24 x 28", storage for: 6 x 24" ruler and 18 x 24" cutting mat, and all other equipment. * Easy to carry to workshops
a free sewing pattern by
 a free sewing pattern by 2 kitty wallet This project is a fun companion piece to my Kitty Purse pattern. It's a bi-fold wallet with the traditional slots for cards (6) and one for receipts or bills. A
{ FEATURING PRISMA ELEMENTS}
 { FEATURING PRISMA ELEMENTS} FREE PROJECT SHEET DESIGNED BY FABRICS DESIGNED BY AGF-STUDIO FOR ART GALLERY FABRICS FINISHED SIZE: 52 1/2" x 73" CUTTING DIRECTIONS ¼" seam allowances are included. FABRIC
Margaret Moorehead s. Virtual Sewing Guild Video Series
 Margaret Moorehead s Virtual Sewing Guild Video Series Contents What You ll Learn... 2 Supplies You ll Need... 2 Equipment You ll Need... 2 Fabric Preparation... 3 Section 1 Machine Embroidery... 4 Section
Zipped Up Selvage Pouch
 Zipped Up Selvage Pouch created by Vanessa Christenson materials and tools Selvages from past projects; you ll need approximately eight 6 -long strips for each square (12 squares = about 100 strips) Two
How to Make a Rolled Hem with Your Sewing Machine
 Published on Sew4Home How to Make a Rolled Hem with Your Sewing Machine Editor: Liz Johnson Tuesday, 20 January 2015 1:00 There's always a certain amount of hemming and hawing about having to hem. Just
Basketball Coin Purse An in-the-hoop project
 Basketball Coin Purse An in-the-hoop project 2009 Peggy Severt, Pegboard Crafts pegboard1@yahoo.com or peggy@pegboardcrafts.com http://www.pegboardcrafts.com (419) 586-3135 Do not resize this design. The
- OUR TOP TIPS - Seam allowance is 1.5cm or 5/8 unless otherwise stated. Use the markings on the base of your machine to help you keep to this.
 - OUR TOP TIPS - Always check the size chart to work out which size is best suited to you. Sew Over It patterns tend to have less ease than other patterns as most of the designs are intended to have a
GHOSTS & GHOULS. This is a free pattern provided by The Red Boot Quilt Company 2017 STRICTLY NOT FOR RESALE OR DISTRIBUTION
 GHOSTS & GHOULS This is a free pattern provided by The Red Boot Quilt Company 2017 STRICTLY NOT FOR RESALE OR DISTRIBUTION The Red Boot Quilt Company GHOSTS & GHOULS Wall-hanging 40 1/2in square Trick
Shamrock Coin Purse An in-the-hoop project
 Shamrock Coin Purse An in-the-hoop project 2012 Peggy Severt, Pegboard Crafts pegboard1@yahoo.com or peggy@pegboardcrafts.com http://www.pegboardcrafts.com (419) 586-3135 Do not resize this design. The
The Beth An in-the-hoop project
 The Beth An in-the-hoop project A classic wristlet. Tab on front pocket snaps closed to keep your phone safe. The back zipper opens to reveal 6 credit card slots and room to hold other necessities. Comes
Notepad Folder To Go. Published on Sew4Home. Editor: Liz Johnson Friday, 04 December :00
 Published on Sew4Home Notepad Folder To Go Editor: Liz Johnson Friday, 04 December 2015 1:00 My mother was the ultimate note taker. She recorded everything from gifts she'd received (in order to write
A Penny Saved Suspender Strap Apron
 Published on Sew4Home A Penny Saved Suspender Strap Apron Editor: Liz Johnson Wednesday, 19 July 2017 1:00 Unisex in style, tone, and fit, this apron welcomes the rosy mornings of the season with a vintage,
Re-Make & Re-Use: Up-cyled Cloth Grocery Bags - Stronger, Cuter
 Published on Sew4Home Re-Make & Re-Use: Up-cyled Cloth Grocery Bags - Stronger, Cuter Editor: Liz Johnson Friday, 17 February 2012 9:00 This clever idea of how to strengthen and 'makeover' existing cloth