Freya tunic 300min. For a novice, add approx 195 min STITCH DICTIONARY
|
|
|
- Jennifer Dean
- 6 years ago
- Views:
Transcription
1


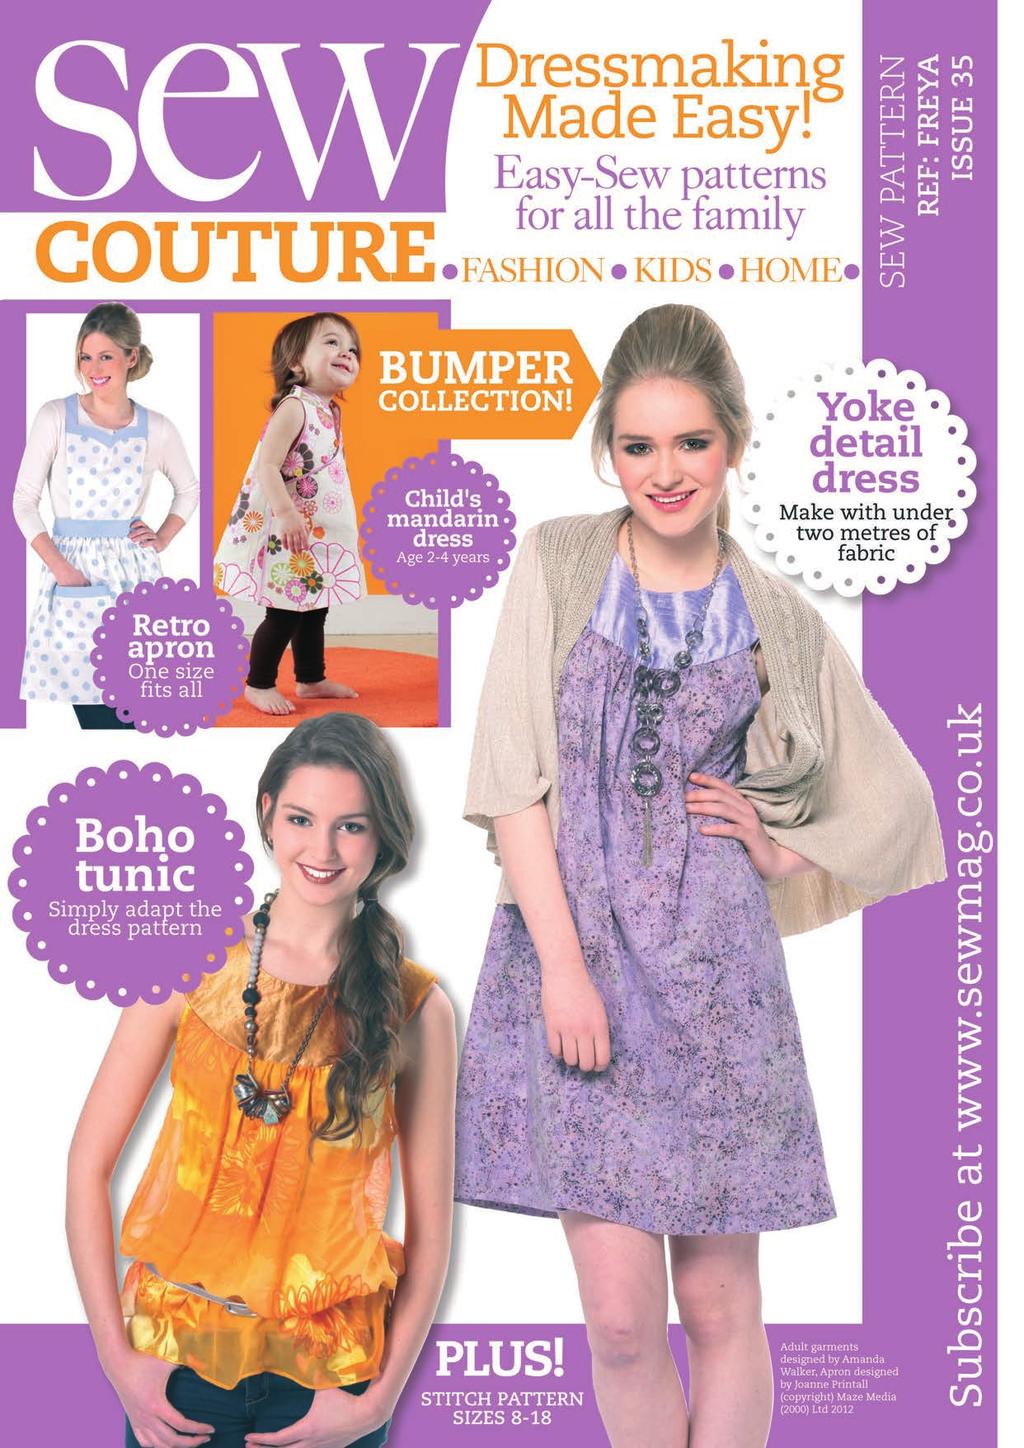
2 tternfreepatternfreepatternfreepatternfreepatternfreepatternfreepatternfreepatternfreepatternf YourFREE Dress &Tunic Pattern Freya tunic 300min For a novice, add approx 195 min Your FREE downloadable pattern contains all the information you need to start making this easy Freya Dress and Tunic, plus an apron and child's dress. Easy-to-follow instructions for printing off a full-sized pattern on your home printer Exclusive three-piece pattern allows you to create two versatile garments Graded and sized for you! Choose from 8 10; and Supplies list for fabric and notions STITCH DICTIONARY Grain The fibres in every fabric run in two directions: lengthwise and crosswise. These directions are called the grain of the fabric. The straight or lengthwise grain runs parallel to the selvedge. Meet the dressmaker... Amanda Walker There are a couple of techniques to master when sewing this pattern (applying a concealed zip and attaching bias binding) but a beginner should be able to complete these garments without too much trouble. The Freya Tunic is perfect for lightweight, slightly sheer fabrics to add a touch of glamour to your summer wardrobe. Floaty materials such as this can move around as you are stitching them so novices should practise sewing on spare pieces before working on the final garment. sewmag.co.uk


3 patternfreepatternfreepatternfreepatternfreepatternfreepatternfreepattern sewfashion This pretty dress uses under two metres of fabric so can be inexpensive to make. We've used a polycotton for the main garment and combined it with a silky material for the upper collar which adds an interesting contrast. Dress 240min For a novice, add approx 180 min The FREYA Collection These dress and tunic designs are easy to wear and versatile pieces for a summer wardrobe. The pattern could easily be extended to make a full-length maxi dress, ideally in a fine cotton to wear on a holiday evening out. Made to measure When making your own clothing getting the fit and shaping just right is the key to success. The best way to ensure this is to start out with accurate body measurements. We always recommend taking careful notes of your proportions before you being working on your pattern, this way you will be much happier with the finished results. 1 Wear wellfitting underwear and use a fabric tape measure 2 Note down the stated body measurements 3 Use the sizing chart on the download to select your size BUST WAIST BACK NECK TO WAIST HIP Workshop Wisdom If you have a favourite scrap of fabric but there is not enough for a whole garment this is a good opportunity to use it on the yoke of this tunic or dress. You could find a plain fabric to coordinate with it to make the body of the garment. Both garments are unlined, however the yoke is self-lined which means the outer fabric is also used to make the inner lining. Adding a lining to a garment helps it hang better and gives it more body, it also provides structure and helps maintain the shape. sewmag.co.uk


4 tternfreepatternfreepatternfreepatternfreepatternfreepatternfreepatternfreepatternfreepatternf 4 FREE PATTERNS for all the family Transferring pattern markings onto fabric can be tricky, so use a hole punch to perforate your paper pattern pieces where the marked dots appear. You can then easily mark the fabric at the centre of the punched-out circle while the pattern template is still pinned on your fabric. sewmag.co.uk essentials Freya dress Cotton, print, 1.80m Contrast cotton, plain, 40cm Zip, concealed, 23cm Fastening, hook and bar PATTERN PIECES Front and Back Dress cut two on fold Front Yoke cut two on fold Back Yoke cut two on fold 1Refer to the Pattern Layout and print off the pieces you require, each page is numbered grid-wise to make identification easier. Establish the size required which best suits your proportions and note the corresponding pattern markings. Working on a flat surface lay out the pattern and join the pieces using the Reference Sheet to guide you. Cut out each individual pattern piece. 2Prepare your fabric. Ensure it is flat and crease free and lay on a smooth surface. Place and pin the pattern pieces onto the fabric using the Fabric Layout to guide you. Using sharp scissors cut around each piece. Remove the paper pattern pieces and transfer any markings onto the fabric including notches, zip placement and cutting lines. Place to one side. 3From the scraps of fabric cut two bias strips. The bias of a fabric is a 45º angle from the grain. Cut the pieces 4cm x 30cm. Fold and press in 1cm on either side of the strips or use a bias binding tool to complete this process. 4Neaten the seams. Take the Front and Back Dress pieces and neaten the edges of all the side seams by either working a zig zag stitch or overlocking them. With the right sides of the fabric facing join the seams, working one from top to base; the other seam should be stitched from the bottom as far as the zip notch. Press the seam allowances open. 5Insert the zip. Stitch the concealed zip into the side seam opening using a zip foot or a concealed zip foot. Fold and press the seam allowance along the two edges of the side opening. Open out the seam allowance and, with the right side of the fabric facing, place the opened zip face down, matching the teeth to the crease line in the seam allowance. Pin in place. If you are using a concealed zip foot then place the teeth of the zip into the groove and as you stitch the foot will uncurl the teeth and the stitching will be placed right alongside them. 6If you are stitching with a normal zip foot, you will need to uncurl the teeth with your fingertips; stitch from the top of the side seam. It is impossible to stitch to the end of a concealed zip so leave approximately 3cm of the zip base unstitched. Back stitch and then sew the other side of the zip in place. Carefully thread the zip pull through to the right side at the base of the side seam and pull up to close. This seam becomes the left-hand side seam. 7Attach the bias binding to the armholes. Open one side of one of the bias strips and position it, with right sides facing, around the inside of the right armhole, aligning the edge of the armhole with the edge of the bias strip. Pin in place and stitch along the fold line pressed into the bias strip. Next fold the strip over onto the wrong side of the armhole and position the remaining folded edge over the stitching line, pin and edge stitch in place by hand sandwiching the raw edge of the armhole inside the bias binding. Trim away any excess binding at the tops of the armholes. 8For the left-hand armhole, cut the bias strip in half, stitch the two pieces in the same way as before leaving approximately 1cm protruding over the top of the zip ends. Fold these ends in after stitching the first row and then complete the process, folding and edgestitching. 9Gather across the front and back of dress. Adjust the stitch length of the machine to a wide, straight or gathering stitch. Make two lines of stitching close to one
5 patternfreepatternfreepatternfreepatternfreepatternfreepatternfreepattern sewfashion another between the two notches within the seam allowance. Pull up the threads until the top of the Front and Back Dress pieces fit between the notches of the Front and Back Yokes. Stitch the yoke 10shoulder seams. Separate the yoke pieces matching the Front and Back pieces together across the shoulder seams, pin and then stitch together. Press the seams open. Stitch the two yokes 11 together around the neckline. With the right side of the yokes facing, match the shoulder seams and the necklines together. Pin in place and stitch all the way around. Clip the seam allowance around the curved lines and press the seam allowance in one direction. Turn right sides out and stay stitch on top of the seam allowances on the right side of the fabric. This side will become the lining of the yoke and help the seam to roll inside the neckline. Attach the Front and 12Back Dress pieces to the Front and Back Yoke pieces. Position the gathered top Front Dress between the notches on the right side of the Front Yoke. Pin in place and stitch. Repeat the process attaching the Back Dress to the Back Yoke. Stitch the lower edges 13of the yoke and yoke lining together. Carefully fold and press in 1.5cm along the lower edges of the outside yokes on either side of the gathered areas on the Front and Back Dress. Fold and press 1.5cm around the lower edge of the lining yoke. Match the two folded edges of the yoke and yoke lining together, pin and then hand slip stitch the two edges together. Hem the dress. Neaten 14 the base of the dress by either using a zig zag stitch or overlocking. Fold and press up 3cm, pin and hand stitch the hem in place. Finally hand stitch a hook and bar fastening to the top of the zip. essentials Freya tunic Chiffon, print, 1.20m Contrast fabric, plain, 40cm Zip, concealed, 23cm Elastic, 5mm wide, 1m Fastening, hook and bar PATTERN PIECES Front and Back Dress - cut two on fold and cut along line indicated on the pattern piece Front Yoke cut two on fold Back Yoke - cut two on fold Please note: Follow Steps 1 13 in the making up instructions for the Freya Dress, then proceed to Step 15. Attach the elastic. 15Cut a piece of elastic that fits comfortably around your waist very slightly stretched. Pin the elastic along the line indicated on the front and back pattern piece, evenly stretching it as you pin. Machine stitch through the centre of the elastic. Hem the top. Make a 16small machine stitched roll hem at the base of the top. Finally hand stitch a hook and bar fastening to the top of the zip. Selvedge Freya Collection Cutting layout guide Use these diagrams to determine how your pattern pieces should be laid on the fabric. Freya Dress Back & Front: Cut two on the fold Freya Tunic Back & Front: Cut two on the fold (shorten at indicated line) Yoke Cut two on the fold. Folded Edge of Fabric Selvedge 150cm (wide) 1.8m main fabric folded as shown: Folded Edge of Fabric sewmag.co.uk


6 tternfreepatternfreepatternfreepatternfreepatternfreepatternfreepatternfreepatternfreepatternf mandarin dress essentials Fabric: cotton, 1m Thread, coordinating Fusible interfacing, lightweight, small piece Bias binding, double-fold, two metres, 0.5cm wide Elastic cording, 36cm Buttons, four DIMENSIONS: Age: Waist size: 53cm 56cm 59cm Finished length: 46cm 50cm 55cm Seam allowances: 6mm unless stated otherwise make a dress 1Determine your child's size using the chart to guide you. Lay out your fabric in a single layer with the right-side facing up. Piece together then position the pattern pieces according to the cutting layout and cut them out as follows: right front: cut one, left front: cut one, back: cut one, collar: cut two. Cut a collar from interfacing. Transfer the markings from the pattern, including the button loop placement, to the wrong side of the fabric. 2With right-sides together, pin the left front and right front to the back piece at the shoulders and stitch. Press the seams toward the back of the dress. With the right sides together, pin the front pieces to the back piece at the side seams and stitch. Press the side seams toward the back of the dress. 3At the inside straight edge of the left front, stitch a 6mm double-fold hem. Stitch a 1.2cm double-fold hem along the bottom edge of the entire dress. 4Fuse the interfacing onto the wrong side of one collar piece following the manufacturer's instructions. The interfaced collar becomes the inner collar piece. Pin the inner and outer collar pieces with the right sides together and the dress neckline sandwiched between the two collars, aligning all the neck edges. Take care to match the notch at the centre of the collar with the centre back of the dress. Stitch through all three layers with a 6mm seam allowance. Turn and press the collar pieces up, away from the dress. The pieces will now be wrong sides together. Secure the top raw edges of the collar together with a 3mm seam allowance. 5Unfold the double-fold bias tape and pin it along the raw edge of the right front, starting at the top straight edge of the right front, with right sides together. Pin along the entire length of the right front piece, leaving a 2.5cm tail of bias tape extending beyond the bottom edge. Stitch the bias tape in the crease closest to the raw edge. 6Press the bias tape away from the right front and press the 2.5cm tail at the bottom edge up. Fold the bias tape to the wrong side of the right front and pin. For neat stitches, sew close to the inside folded edge of the trim from the right side of the front. If you are unable to catch the bias tape when you stitch from the right side, sew with the wrong side up, along the edge of the tape. sewmag.co.uk CUTTING LAYOUT STEP 6 STEP 5 STEP 9 STEP 4


7 patternfreepatternfreepatternfreepatternfreepatternfreepatternfreepattern sewfashion 7Starting from the bottom edge of the keyhole opening on the left front collar piece, unfold the bias tape and pin it along the raw edge with the right sides together. Leave a 1.5cm tail of bias tape extending beyond the edge of the left front. Continue pinning the bias tape in place around the top edge of the collar and then along the keyhole neckline of the right front. Trim the bias tape, leaving a 1.2cm tail extending beyond the edge of the right front. Turn the dress over so the wrong side is facing up. Fold the tails of bias tape to the wrong side and pin them in place. Press the bias tape away from the garment, fold it over to encase the raw edges of the left and right fronts and collar, and stitch in place as before. 8Pin bias tape along the armhole edges, encasing all the fabric raw edges the same as for the side front, keyhole edges and neck opening. Overlap the bias tape slightly where the ends meet, taking care to turn and press the short raw edge to the wrong side. Stitch the tape in place, making sure to catch the back of it in the stitching. 9Cut the elastic cording into four 9cm lengths. Fold each elastic piece in half and knot the two ends together, so that you have 1.2cm of looped cord to work with. Make sure the knot is very secure. Using a needle and thread, secure the elastic loops onto the wrong side of the right front at the placement marks. Make two running stitches over the cord at the bottom of the loop, just above the knot. Trim the ends of the cord to 3mm. Determine button 10 placement by closing the front of the dress and marking button position on the left front. Securely sew on the buttons. Vintage apron Your pattern includes the following pattern pieces: Neck Ties Waistband Waist Ties Skirt Pocket Pocket Edge Neckline Bodice Bodice essentials Fabric: cotton: print, 1m; contrast, 50cm Fusible webbing, lightweight Thread Tailor's chalk DIMENSIONS: One size fits all vintage apron 1Carefully cut out all of the paper pattern pieces, piece and secure together. Iron the fabric flat and pin the pattern shapes to the wrong side of the material. Cut out all pieces, transferring any markings, including the pocket position, with tailor's chalk; snip all notches. Iron-on the interfacing as directed. 2Place the fused, interfaced bodice neckline, and the bodice piece right sides facing, carefully pinning them along the curved edges. Sew them together allowing for a 1cm seam allowance and press. Run a line of stay stitching along the edge of the printed fabric 2mm away from the stitched seam. 3Hem the two longest sides of the bodice. Take the neck ties and hem the three longest edges. Pin the ties to the top of the bodice, right sides together, line them up with the notches and sew in place. Fold under the 1cm seam allowance along the top edge (snipping through the seam allowance at the centre front), press and stay stitch on the front, 2mm away from the top edge. Place all to one side. 4Lay the two pocket pieces right sides together and sew along the top edge. Press the seam allowance at the back, turn back over to the front and stay stitch 2mm away from the seam just worked. Hem or bind all four sides of the pocket. Pin the pocket in place where you have marked on the skirt and sew along three sides. 5Hem the skirt along the two short sides and the bottom edge. Set the sewing machine to a long stitch length and sew two straight lines along the top edge, 5mm apart, leaving long threads at the ends. Hold the threads and gently pull to gather the fabric. Continue until it is Why not fix fastenings to the ribbon so you can cross it over your back too? the width of the waistband (approx 35cm). Change to a straight stitch setting on your machine and sew between the two gathered rows to secure. 6Prepare the waist ties as for the neck straps, hemming the three longest sides.take the two waistband pieces: the fused section needs to be at the front, and the edge with notches needs to be at the top. Put these right sides together and between them enclose the bodice, correctly lined up with the centre front and notches; also enclose the waist ties along the shortest edges. Sew along the three sides. Turn out and press. 7Tuck in the two raw edges on the waistband and insert the skirt with them. Pin securely in place and stay stitch along the bottom edge of the waistband, 2mm from the edge to secure in place. sewmag.co.uk
8 2T 3T 4T Sew Freya Pattern Reference Sheet Visit us online at Find us on Pattern layout guide Guide to sizes Yoke Dress & Top (tunic): Size 8-10 Size Size Mandarin Dress: Size age 2 Size age 3 Size age 4 The following pattern pieces are included... Yoke Dress & Top (tunic): Back & front Front yoke Back yoke Mandarin Dress: Left front Right front Back Collar Vintage Apron: Skirt Neckline bodice Waistband Waist ties Neck ties Pocket Pocket edge Layout key: 1-12 Mandarin dress Yoke dress Vintage apron Vintage Apron: Jo Printall, Mandarin Dress: Rebecca Yaker and Patricia Hoskins, Freya garments: Amanda Walker, Garments and accessories featured on this download pattern are for personal home use only and cannot be sold or used for commercial purposes. Pattern pieces cannot be reproduced for commercial purposes Maze Media (2000) Ltd 2012.
9
10
11 4T 3T 2T
12
13
14
15
16
17
18
19
20
21
22
23
24
25
26
27
28
29
30
31
32
33
34
35
36
37
38
39
40
41
42
43
44
Pattern By Nemiha Studebaker for Sarah Jane Studios. Sizes 2-6
 Pattern By Nemiha Studebaker for Sarah Jane Studios Sizes 2-6 General Instructions 1. Carefully read through all instructions before you begin. 2. Wash, dry, and iron your fabric before starting. 3. Seam
SPRING SHORTS # 1403
 PATTERN RUNWAY SPRING SHORTS # 1403 Launch into spring with these super cute and easy to wear elastic waist shorts. With a Paper-Bag waist and front side pockets, these little sweeties are sure to be a
ELIZABETH DRESS. Copyright 2014 Spitupandstilettos.com All Rights Reserved. Level: Advanced Time: 4-5 Hours Pages: 36
 ELIZABETH DRESS Level: Advanced Time: 4-5 Hours Pages: 36 This dress features a sweetheart neckline, darts, pleats, bias binding and contrast! Copyright 2014 Spitupandstilettos.com All Rights Reserved
THE FOLD LINE PRESENTS TRIBE PATTERNS. hello sailor top
 THE FOLD LINE PRESENTS TRIBE PATTERNS hello sailor top contents fabric and pattern pieces 2 layplans 3 Instructions 4-18 glossary 19 sizes 20 Fabric and pattern pieces fabrics We recommend light weight
A few notes about PDF patterns from Designs by Jude...
 A few notes about PDF patterns from Designs by Jude.... This PDF pattern requires legal size paper (8.5 x 14 ) or A4 size paper (8.27 x 11.69, 210mm x 297mm). It will not print on standard letter. Patterns
09/2011 Dirndl and apron
 09/2011 Dirndl and apron By: burda style magazine http://www.burdastyle.com/projects/092011-dirndl-and-apron Dirndl and apron burda style magazine patterns FAQ Materials Cotton velvet, flannel, batiste,
Sasha Sundress, Knickers, Bolero & Flip-flops
 Sasha Sundress, Knickers, Bolero & Flip-flops Materials: 0.5 metre Cotton Fabric 0.25 metre fabric for lining Bolero 0.5 metre 1/4 wide elastic for Waist and legs 2 Snap Fasteners Small Beads or Sequins
patterns MN2206 // VERONIKA
 patterns MN2206 // VERONIKA SIZES XS - XL SKILL www.megannielsen.com VERONIKA // Basic full circle skirt for woven or stretch fabrics. Pattern features include optional roomy scalloped pockets and two
Martha s A-Line Skirt with Darts
 Martha s A-Line Skirt with Darts Add a tailored look to a basic skirt with darts, a zipper, and a waist facing made of fabric or ribbon. The waist is flat with no band, and the skirt lies smoothly over
A few notes about PDF patterns from Designs by Jude...
 A few notes about PDF patterns from Designs by Jude.... This PDF pattern requires legal size paper (8.5 x 14 ) or A4 size paper (8.27 x 11.69, 210mm x 297mm). It will not print on standard letter. Patterns
By Laurie Pessetto. Instructions:
 Materials: 1 yard Fusi Form Lightweight Interfacing (fusible) 1 ¼ yards base fabric 1 ½ yards contrast fabric 3 packages of medium rick rack (7½ yards) Thread Button Stitch Witchery Tools: Fabric scissors
A few notes about PDF patterns from Designs by Jude...
 A few notes about PDF patterns from Designs by Jude.... This PDF pattern requires legal size paper (8.5 x 14 ) or A4 size paper (8.27 x 11.69, 210mm x 297mm). It will not print on standard letter. Patterns
Jodie s Sewing Studio
 Jodie s Sewing Studio Children s Kuspuk Pattern How to Use a Jodie s Sewing Studio Pattern For best results, study the pattern pieces first and read the notes and terms on each piece. Pieces are labeled
CAMELOT FABRICS. 3. Draw a vertical line on the pointed end of each Strap, a tiny bit longer than the diameter of your buttons.
 Other Supplies - 2 buttons in coordinating color - paper printer - basic sewing supplies - sewing machine with buttonhole foot - iron & pressing surface - scissors & fabric shears - measuring tape - fabric
Wenlan Blouse, Design Twinkle by Wenlan
 Wenlan Blouse, Design Twinkle by Wenlan By: burdastyle http://www.burdastyle.com/projects/wenlan-blouse-design-twinkle- If you were waiting for the blouse to go with last week s Twinkle by Wenlan skirt
Sisters of Edwardia Blouse
 Sisters of Edwardia Blouse Sisters of Edwardia is inspired by the several blouses Lady Edith and Lady Sybil wear in the period drama Downton Abbey. The blouse features relaxed-fit elbow length kimono sleeves
oliver + s a free pattern from not for resale Girl s A-line sundress. Loose-fitting pull-on style with contrast yoke and bias ties at shoulder.
 a free pattern from not for resale Popover sundress sizes: 2, 3, 4, 5, 6, 7 + 8 Girl s A-line sundress. Loose-fitting pull-on style with contrast yoke and bias ties at shoulder. cutting layouts suggested
Amanda Plus. By: burdastyle.
 Amanda Plus By: burdastyle http://www.burdastyle.com/projects/amanda-plus Since the Amanda is so pretty, we had to offer it in Plus as well. We bring the past to the present with our vintage-inspired silk
Retro Gathered Apron
 Retro Gathered Apron I inherited my nan s collection of aprons when she moved into sheltered accommodation, and with my heart in my mouth, took to scissors to one to create this pattern, I think it was
View A. View B. Ciao Bella Size September 2012 Ellie Inspired, Laura Johnson
 View A View B Ciao Bella Size 1-12 September 2012 Ellie Inspired, Laura Johnson Quick Measure 1 2 3 4 5 6 Ciao Bella is written for wovens and stretch knits. View A has an optional overskirt of overlapping
ISABELLA TANK. Copyright 2014 Spitupandstilettos.com All Rights Reserved. Level: Easy Time: 2-3 Hour Pages: 23
 ISABELLA TANK Level: Easy Time: 2-3 Hour Pages: 23 This woven tank features a partial facing, button back closure and a Copyright 2014 Spitupandstilettos.com All Rights Reserved Size Chart (1) BUST: Measure
Amanda Plus By: BurdaStyle
 Amanda Plus By: BurdaStyle http://www.burdastyle.com/projects/amanda-plus Since the Amanda is so pretty, we had to offer it in Plus as well. We bring the past to the present with our vintage-inspired silk
Dolly s Darling Dungarees
 Dolly s Darling Dungarees All photos, text, and pattern pieces Dandelions n Dungarees 2013. All rights reserved. No part of this publication may be reproduced or transmitted in any form or by any means
A few notes about PDF patterns from Designs by Jude...
 A few notes about PDF patterns from.... This PDF pattern requires legal size paper (8.5 x 14 ) or A4 size paper (8.27 x 11.69, 210mm x 297mm). It will not print on standard letter. Patterns containing
A few notes about PDF patterns from Designs by Jude...
 A few notes about PDF patterns from Designs by Jude.... This PDF pattern requires legal size paper (8.5 x 14 ) or A4 size paper (8.27 x 11.69, 210mm x 297mm). It will not print on standard letter. Patterns
Beginning Level (9-11 Years)
") OKLAHOMA COOPERATIVE EXTENSION SERVICE 4-H Fabrics & Fashions Construction Items Beginning Level (9-11 Years) Division of Agricultural Sciences and Natural Resources Oklahoma State University OKLAHOMA
OKLAHOMA COOPERATIVE EXTENSION SERVICE 4-H Fabrics & Fashions Construction Items Beginning Level (9-11 Years) Division of Agricultural Sciences and Natural Resources Oklahoma State University OKLAHOMA
THE STELLAN TEE A free pattern
 A free pattern BEGINNER // SIZES XXS - XXL A modern take on the basic T-shirt, the Stellan Tee has a boxy, slightly cropped fit, proportionally long sleeves (super cute when rolled-up) and a subtly curved
Slipper Sole. Cut 1 in Main Cut 1 in lining Cut 1 in wadding PER SLIPPER
 Slipper Sole Cut 1 in Main Cut 1 in lining Cut 1 in wadding PER SLIPPER Slipper Top Cut 1 in Main Cut 1 in lining Cut 1 in wadding PER SLIPPER Sorbetto Top with Tucks: 1 Getting Started Body Measurements
back detail top Cutting guide
 Download pattern online Essentials Silk fabric, 1.9m Fusible interfacing Frog fastener Hook and bar fasteners, two Dimensions Small, medium, large Make today, wear tonight! back detail top Cutting guide
A few notes about PDF patterns from Designs by Jude...
 A few notes about PDF patterns from Designs by Jude.... This PDF pattern requires legal size paper (8.5 x 14 ) or A4 size paper (8.27 x 11.69, 210mm x 297mm). It will not print on standard letter. Patterns
3/2011 Maxi Dress. By: burda style magazine. Materials
 3/2011 Maxi Dress By: burda style magazine http://www.burdastyle.com/projects/32011-maxi-dress Maxi Dress burda style magazine patterns FAQ Materials Silk batiste, knit tulle 1 Step 1 Preparation Trace
FOUNDATION ~ HAND & MACHINE STITCHES
 FOUNDATION ~ HAND & MACHINE STITCHES AIM ~ To show some of the many hand and machine stitches and their uses. ~ To show the necessity of some of the stitches when sewing seams. 3. SEAMS ~ Straight open
UPDATED. the littlest studio. Knit Bodice Pattern With Circle Skirt Pattern! 2nd Edition Updated July 2016
 UPDATED the littlest studio Knit Bodice Pattern With Circle Skirt Pattern! 2nd Edition Updated July 2016 c The Littlest Studio 2015 www.thelittleststudio.com The contents of this pattern (including instructions,
Jodie s Sewing Studio
 Jodie s Sewing Studio Friday s Kuspuk Pattern How to Use a Jodie s Sewing Studio Pattern For best results, study the pattern pieces first and read the notes in the margins and the terms on each piece.
Sewing Roll. Base Fabric. Base Fabric. Third Fabric. Second Fabric (Bottom Pockets) Pockets)
 Pockets)") You will need Brother Creative Sewing Pack (Free Motion Foot, Braiding Foot, Narrow Hem Foot, Piping Foot and Concealed Zipper Foot) Base fabric 1 x fat ¼ (50cm square) cut in half Second fabric 50cm x
You will need Brother Creative Sewing Pack (Free Motion Foot, Braiding Foot, Narrow Hem Foot, Piping Foot and Concealed Zipper Foot) Base fabric 1 x fat ¼ (50cm square) cut in half Second fabric 50cm x
Emily Variation 1 By: BurdaStyle
 Emily Variation 1 By: BurdaStyle http://www.burdastyle.com/projects/emily-variation-1 Here is a fun variation of our classic Emily blouse. With wide bell sleeves and a sweet flat collar, this is a great
Pattern Pieces Copy Paper with DinA4 Print: Cut the pattern pieces for your size
 Pattern Pieces 1 Bodice Front 2x 2 Bodice Back 1x 3 Neck Band 2x 4 Sleeves 2x 5 Sleeve Flounce 2x 6 Facing for Slit 2x 7 Skirt Front 1x 8 Skirt Back 1x 9 Front Hem Band 1x 10 Back Hem Band 1x 11 Skirt
pattern BONUS Ruffled Halter By LiesL Gibson {from page 41}
 ruffled halter This adorable halter has a simple pull-on style that s easy and fun for summer, featuring a casing formed by the first ruffle for a clean, uncluttered finish. For other fun looks, try making
CHAIR COVER AND PILLOW A. 1 Front. 2 Side. 3 Arm Front. 4 Skirt Front. 5 Back. 6 Pillow CUTTING LAYOUTS CHAIR COVER AND PILLOW A
 ## PATTERN PIECES 4069 McCALL'S CRAFTS CHAIR COVER AND PILLOW A 1 Front 2 Side CHAIR COVER C,D 7 Guide PAGE 1 of 6 3 Arm Front 4 Skirt Front 5 Back 6 Pillow CUTTING LAYOUTS Cut other pieces first, allowing
Intro to Sewing Coats: Chloe Coat. Chloe Coat. sizes 8-20
 Intro to Sewing Coats: Chloe Coat Chloe Coat sizes 8-20 Chloe Coat - Instructions - Please use these instructions alongside our online videos to help you sew your Chloe Coat. All the seam allowances are
Flannel Apron with Rick Rack Accents
 Published on Sew4Home Flannel Apron with Rick Rack Accents Editor: Liz Johnson Wednesday, 06 March 2019 1:00 An apron in flannel makes for some cozy cookin'! We created our original sample from fat quarters,
10/2011 Dress with Peter Pan collar and pin tucks
 10/2011 Dress with Peter Pan collar and pin tucks By: burda style magazine http://www.burdastyle.com/projects/102011-dress-with-peter-pan-co 10/2011 Dress with Peter Pan collar and pin tucks burda style
good-night nightie SIZE CHART FABRIC 45" (115.5 cm) 54" (137 cm) OTHER SUPPLIES RESOURCES Cot ton l aw n or cot ton voile
 54 (137 cm) OTHER SUPPLIES RESOURCES Cot ton l aw n or cot ton voile") good-night nightie This sweet nightgown is easy to construct and effortless to wear. With a shirred elastic detail at the neckline, shoulder ties, comfortable French seams, and lace detail at the hem,
good-night nightie This sweet nightgown is easy to construct and effortless to wear. With a shirred elastic detail at the neckline, shoulder ties, comfortable French seams, and lace detail at the hem,
Construction Cards Beginning Level (9-11 Years)
") Beginning Level (9-11 Years) Division of Agricultural Sciences and Natural Resources Oklahoma State University Beginning Level (9-11 Years) No. 801 Seam Finishes Seam finishes make clothes look neat on
Beginning Level (9-11 Years) Division of Agricultural Sciences and Natural Resources Oklahoma State University Beginning Level (9-11 Years) No. 801 Seam Finishes Seam finishes make clothes look neat on
The Tee 30 59" ( cm) full bust
 full bust") .pdf patterns Cake s are sewable, wearable, remakeable patterns for intermediate to advanced sewists. The Tee is a great way for beginners learning to sew knits, too! Inside you ll f nd customizable Cake
.pdf patterns Cake s are sewable, wearable, remakeable patterns for intermediate to advanced sewists. The Tee is a great way for beginners learning to sew knits, too! Inside you ll f nd customizable Cake
YSR Everywear Tails Design by lila_
 1 YSR 12-10 Everywear Tails Design by lila_ PIECES 0 Print Check 1 Front Left 1x Fabric 2 Front Side Left 1x Fabric 3 Back Side 2x Fabric 4 Back 2x Fabric 5 Under Collar 2x Fabric 6 Upper Collar 2x Fabric
Design, pattern, text and images are 2017 Anna Maria Horner and are intended for personal use.
 Introducing the Snuggle & Play Dress inspired by my feisty, littlest girl, Mary Anna, who loves being able to get dressed by herself every morning. The ease and comfort of the stretch knit top of the dress
Dunja By: BurdaStyle. Materials.
 1D Dunja By: BurdaStyle http://www.burdastyle.com/projects/dunja With a few fairly simple modifications, the JJ blouse can become the sugary confection we call the Dunja top, which is perfect for celebrating
Frilly Jelly Bag. Bag Dimensions are 12 inches wide x 15 inches high (to base of handle), and 4 ½ inches deep.
, and 4 ½ inches deep.") Frilly Jelly Bag This frilly fun bag is another great one to use up some favourite left-over Jelly Roll Strips (or a bag worth buying a bright new jelly roll for!) Aside from the gathered jelly roll strips,
Frilly Jelly Bag This frilly fun bag is another great one to use up some favourite left-over Jelly Roll Strips (or a bag worth buying a bright new jelly roll for!) Aside from the gathered jelly roll strips,
A few notes about PDF patterns from Designs by Jude...
 A few notes about PDF patterns from Designs by Jude.... This PDF pattern requires legal size paper (8.5 x 14 ) or A4 size paper (8.27 x 11.69, 210mm x 297mm). It will not print on standard letter. Patterns
Autumn Stroll for 12 Marley
 Designs by Jude www.fletcherpatterncompany.com Autumn Stroll for 12 Marley Designed by Tamara Casey Mw117 $12.95 US Designs by Jude Autumn Stroll For 12 Marley Basic Instructions Use a ¼ seam allowance
Designs by Jude. Shining Hour. for DeeAnna. designed by Gary Fletcher. Dd108 $12.95us
 for DeeAnna designed by Gary Fletcher Dd108 $12.95us 2009, All RIGHTS RESERVED. Personal use only. Not licensed for commercial use. For DeeAnna Denton Fabric: Lightweight cottons, calicos, shirting and
Copyright 2014 HulaKitty Design / ClothingPatterns101. All rights reserved
 1 Copyright 2014 HulaKitty Design / ClothingPatterns101. All rights reserved Contents Printing and Assembling Your Pattern Choosing Your Size Cutting the Fabric General Sewing Tips and Instructions Instructions
Mila. By: burdastyle. Materials. Step 1
 Mila By: burdastyle http://www.burdastyle.com/projects/mila This dress comes from our very own and very talented MilasFashion The was part of BurdaStyle s Open Call for Designers back in late November.
12/2011 Wool pants. By: burda style magazine. Wool pants burda style magazine patterns FAQ
 12/2011 Wool pants By: burda style magazine http://www.burdastyle.com/projects/122011-wool-pants Wool pants burda style magazine patterns FAQ 1 Materials Wool Step 1 Preparation Paper cut for ANSI A (German
Swing Top, Dress and Leggings
 Swing Top, Dress and Leggings DG PATTERNS Thank you for downloading the Swing top, tunic and dress, plus the basic leggins. Please refer to this document for printing instructions and a stepby- step tutorial.
- OUR TOP TIPS - Seam allowance is 1.5cm or 5/8 unless otherwise stated. Use the markings on the base of your machine to help you keep to this.
 - OUR TOP TIPS - Always check the size chart to work out which size is best suited to you. Sew Over It patterns tend to have less ease than other patterns as most of the designs are intended to have a
SINGER PROJECTS Sewing Machine Mat with Pockets PROJECT SKILL LEVEL:
 SINGER PROJECTS Sewing Machine Mat with Pockets This handy sewing machine mat with pockets not only helps protect your table surface, it keeps your go-to notions right at your fingertips. The four pockets
18 ½ INCH CABBAGE PATCH KIDS BLOUSE
 18 ½ INCH CABBAGE PATCH KIDS BLOUSE Make Your Outfit Instructions 1. Preview of Completed Outfit Play this video and check out this great outfit that YOU will make! 2. Tools and Resources Required 1) Paper
T-shirt Size as per your own measurements
 T-shirt Size as per your own measurements Any long-sleeved T-shirt you happen to have on hand can be taken and transformed into a personalised short-sleeved T decorated with lace tape. Materials: Long-sleeved
Sadie By: BurdaStyle. Materials.
 Sadie By: BurdaStyle http://www.burdastyle.com/projects/sadie Here is our perfect basic knit tank. We are in the middle of a wicked heat wave here in Brooklyn, and these pictures of this lovely tank top
Scallop Button Up Skirt
 Scallop Button Up Skirt By: nettevivante http://www.burdastyle.com/projects/scallop-button-up-skirt 1 2 Oh, I tried myself on pattern making for a garment for the very first time. I was inspired by Megan
1THE ORLA DRESSPlease see instructions for additional information GATHER BETWEEN CIRLCES
 G 1THE ORLA DRESS Please see instruction 2 www.frenchnavy.co.za s for additional information ATHER BETWEEN CIRLCES XS S M L XL 3 4 Orla dress Front 5 eam Straight grain Orl 6 a dress Back Skirt cutx2 7
A few notes about PDF patterns from Designs by Jude...
 A few notes about PDF patterns from.... This PDF pattern requires legal size paper (8.5 x 14 ) or A4 size paper (8.27 x 11.69, 210mm x 297mm). It will not print on standard letter. Patterns containing
Designs by Jude. PlayTime for 12 Senson. SEN102 $12.95 US
 www.fletcherpatterncompany.com PlayTime for 12 Senson SEN102 $12.95 US 2010, All RIGHTS RESERVED. Personal use only. Not licensed for commercial use. Play Time for 12 Senson Dolls Notions & Fabric Cottons,
WIDE LEG PANTS ISSUE 38 SKILL LEVEL
 SKILL LEVEL WIDE LEG PANTS ISSUE 8 ABOUT IN THE FOLDS PATTERNS GARMENT OVERVIEW (INCLUDING FABRIC SUGGESTIONS AND NOTIONS) SIZING + GARMENT MEASUREMENTS (INCLUDING FABRIC REQUIREMENTS) CONTENTS ABOUT IN
BUTTON-UP DRESS ISSUE 39 SKILL LEVEL
 BUTTON-UP DRESS ISSUE 9 SKILL LEVEL ABOUT IN THE FOLDS PATTERNS GARMENT OVERVIEW (INCLUDING FABRIC SUGGESTIONS AND NOTIONS) SIZING + GARMENT MEASUREMENTS (INCLUDING FABRIC REQUIREMENTS) CONTENTS ABOUT
shift dress This timeless style works for all seasons Download pattern online Essentials Dimensions Cutting guide
 Download pattern online Essentials Linen, 115cm wide, 2.3m Invisible zip, 36cm Coordinating sewing thread Small hook and eye Dimensions Body 8 10 12 14 16 18 Measurements Bust (cm) 80 82.5 86.5 91.5 96.5
Alexander Blouse. By: burdastyle.
 Alexander Blouse By: burdastyle http://www.burdastyle.com/projects/alexander-blouse This blouse is truly a work of art and quite a unique pattern. The ruffled sleeves and rippling hemline are created by
Child s Apron Tutorial
 Supplies Child s Apron Tutorial for Ann Kelle http://www.annkelle.com/tutorial-childrens-apron/ ½ yard fabric (apron skirt and bib pocket) Fat quarter fabric (bib and apron skirt pockets) ¼ yard fabric
PLEATED SUMMER DRESS
 PLEATED SUMMER DRESS SIZES A - K INTERMEDIATE Pattern made exclusively for Peppermint Magazine by In the Folds We re super excited to bring you these patterns in partnership with the lovely people at The
Hikaru By: BurdaStyle
 1H Hikaru By: BurdaStyle http://www.burdastyle.com/projects/hikaru Need a jacket strong enough to match your determined personality! Try the Hikaru jacket, with its military style, yet feminine fit. It
A few notes about PDF patterns from Designs by Jude...
 A few notes about PDF patterns from Designs by Jude.... This PDF pattern requires legal size paper (8.5 x 14 ) or A4 size paper (8.27 x 11.69, 210mm x 297mm). It will not print on standard letter. Patterns
Italiano Kitchen: Mama Apron
 Published on Sew4Home Italiano Kitchen: Mama Apron Editor: Liz Johnson Monday, 25 October 2010 9:00 We love aprons here at Sew4Home. So we knew our Italiano Kitchen would not be complete without them.
07/2011 Jumpsuit. By: burda style magazine. Materials
 07/2011 Jumpsuit By: burda style magazine http://www.burdastyle.com/projects/072011-jumpsuit Jumpsuit burda style magazine patterns FAQ [Updated 1/17/2012] â Please note that the instructions for this
Garden Party Apron: Make it from Fat Quarters
 Published on Sew4Home Garden Party Apron: Make it from Fat Quarters Editor: Liz Johnson Tuesday, 09 May 2017 1:00 There they sat. Five gorgeous fat quarters we d been hoarding from Amy Butler s classic
Fairfield County 4-H Clothing Projects Guide Guidelines for completing Clothing projects
 Fairfield County 4-H Clothing Projects Guide Guidelines for completing Clothing projects Read and complete activities and requirements in the project book. Decide which fabrics best suit the pattern you
Appendix 1: Clothing Patterns
 Two-Seam Gathered Skirt Create a simple two-seam gathered skirt by using the following instructions. 1 Measure the person from her natural waistline to her midcalf. Add 4 inches to that measurement for
4-H Fabrics & Fashions
 OKLAHOMA COOPERATIVE EXTENSION SERVICE 4-H Fabrics & Fashions Setting Your Stitch Length 1. Stitch, as shown, using six inches to one inch. --------------------------------------------------------------------------------------------------------------------
HOW TO MAKE A SLIPCOVER INSTRUCTIONS Instructions are for slipcovering a wing-back chair. The principle is the same for an arm chair or sofa.
 HOW TO MAKE A SLIPCOVER INSTRUCTIONS Instructions are for slipcovering a wing-back chair. The principle is the same for an arm chair or sofa. YOU WILL NEED: Slipcover fabric Piping cord Zipper Thread Ruler
Floral Half Apron with Slash Pockets
 Published on Sew4Home Floral Half Apron with Slash Pockets Editor: Liz Johnson Monday, 03 July 2017 1:00 It may be a half apron, but it s full of pretty details. For yourself or as a delightfully easy
Fleece jacket. for mum and child
 Fleece jacket for mum and child This snuggly fleece jacket is just right when you re out walking in the autumn, harvesting the fruits of your labour in the garden or when you re doing the school run or
Sew Classic for Children Children s Corner: Classic Sewing Magazine, Spring 2016
 Claire BY LEZETTE THOMASON Since 1978 Children s Corner has honored the classic traditions of children s garment sewing with timeless designs. The four original owners began a shop that designed and stitched
Kid-Size Lil' Chef Apron
 Published on Sew4Home Kid-Size Lil' Chef Apron Editor: Liz Johnson Wednesday, 07 September 2016 1:00 If you hang out with us here at Sew4Home on a regular basis, you know we love aprons! We've done retro
Be Crafty. Technique Tutorial. How to Use Polyester Horsehair Braid HELPFUL HINTS: Page 1
 Page 1 How to Use Polyester Horsehair Braid Horsehair braid is a flexible polyester mesh designed to reinforce and define both straight and curved hems, transforming a limp skirt edge into one with flair
Pockets; Seam Finishes
 Lessons 4, 5 Complete the sentences. 4. A zipper should be applied a facing has been applied, but a band has been applied to a garment. 5. Coil zippers are made of or. One advantage of them is the ease
4/2010 Childrens' Bermuda shorts
 4/2010 Childrens' Bermuda shorts By: burda style magazine http://www.burdastyle.com/projects/42010-childrens-bermuda-shor Childrens Bermuda shorts burda style magazine patterns FAQ Materials Canvas Step
Simple Leggings Two girls. Same name. One mission. Teach the world to sew.
 Simple Simon and Company Simple Leggings Two girls. Same name. One mission. Teach the world to sew. Simple Leggings Sewing with knits is made easy with this simple leggings pattern. Once you are finished
Memories Past. SLIP FOR DOLL NEWS COAT DRESS Mary Ann Shandor
 Memories Past SLIP FOR DOLL NEWS COAT DRESS Mary Ann Shandor www.frenchdollfashions.com tuckarry@aol.com This pattern was created as a compliment slip for the coat dress pattern in the Winter Doll News
Gentleman s Suit. for 17 Super Hero. Tamara Casey. Designed by. Super103 $12.95 US
 www.fletcherpatterncompany.com Gentleman s Suit for 17 Super Hero Designed by Tamara Casey Super103 $12.95 US 2010, All RIGHTS RESERVED. Personal use only. Not licensed for commercial use. Gentleman s
High low dress. Short front, long back Pockets Eu size (US 12 months - 14 years)
") High low dress Short front, long back Pockets Eu size 80-164 (US 12 months - 14 years) This pattern is copyrighted, with all rights reserved. You may print copies of the PDF for your own use. You may not
High low dress Short front, long back Pockets Eu size 80-164 (US 12 months - 14 years) This pattern is copyrighted, with all rights reserved. You may print copies of the PDF for your own use. You may not
10/2011 Wrap blouse with ruffled collar
 10/2011 Wrap blouse with ruffled collar By: burda style magazine http://www.burdastyle.com/projects/102011-wrap-blouse-with-ruffle Wrap blouse with ruffled collar burda style magazine patterns FAQ Materials
36" (90cm) wide. selvedges. fold. 45" (115cm) wide selvedges. fold. right side out and press well. Slip-stitch the opening closed.
 wide. selvedges. fold. 45 (115cm) wide selvedges. fold. right side out and press well. Slip-stitch the opening closed.") Baby dungarees These gorgeous dungarees are also really baby-friendly, with shoulder straps that button up at the front and snap fastenings at the inside leg Project: VANESSA MOONCIE - www.lovesewingmag.com
Baby dungarees These gorgeous dungarees are also really baby-friendly, with shoulder straps that button up at the front and snap fastenings at the inside leg Project: VANESSA MOONCIE - www.lovesewingmag.com
Original Recipe. Let s Go Trippin by Polly Monica
 Original Recipe Let s Go Trippin by Polly Monica Hello again! I m Polly from Aunt Polly s Porch blog {auntpollysporch.blogspot.com} and I m so happy to be sharing my designs again on the Moda Bake Shop!
A few notes about PDF patterns from Designs by Jude...
 A few notes about PDF patterns from Designs by Jude.... This PDF pattern requires legal size paper (8.5 x 14 ) or A4 size paper (8.27 x 11.69, 210mm x 297mm). It will not print on standard letter. Patterns
A SPOOKY SLEEPOVER. This is a free pattern provided by The Red Boot Quilt Company The Red Boot Quilt Company
 A SPOOKY SLEEPOVER The Red Boot Quilt Company The Red Boot Quilt Company A SPOOKY SLEEPOVER Approx. Size 38 1/2in x 57 1/2in BEFORE THE FUN BEGINS Please read all instructions before you begin. Abbreviations.
Pintuck Pinny for Women and Girls Use measurements to create a cute and practical pinafore that s just the right size for you or a child.
 Pintuck Pinny for Women and Girls Use measurements to create a cute and practical pinafore that s just the right size for you or a child. Front and Back Band A: Measure around body, under arms, above breast.
M is for Moto Joggers (FREE Capri length version)
") M is for Moto Joggers (FREE Capri length version) M is for Moto Joggers (FREE Capri Length Version) is a multi-sized ladies capri length jogging/lounge pant pattern with an elastic waist band. The pattern
M is for Moto Joggers (FREE Capri length version) M is for Moto Joggers (FREE Capri Length Version) is a multi-sized ladies capri length jogging/lounge pant pattern with an elastic waist band. The pattern
OTTOBRE design collection for Spring/Summer 2013
 OTTOBRE design collection for Spring/Summer 0 - - Copyright STUDIO TUUMAT OY Rovaniemi, FINLAND, March 0 GENERAL INSTRUCTIONS Please read the following general instructions before starting your project.
Vintage Style Sweetheart Apron
 Published on Sew4Home Vintage Style Sweetheart Apron Editor: Liz Johnson Thursday, 18 August 2016 1:00 This apron is another Sew4Home design original, complete with a downloadable pattern that allows you