Spooky Halloween Pillow by Pamela Cox
|
|
|
- Myra Page
- 5 years ago
- Views:
Transcription

1 by Pamela Cox Original Design for Sulky of America


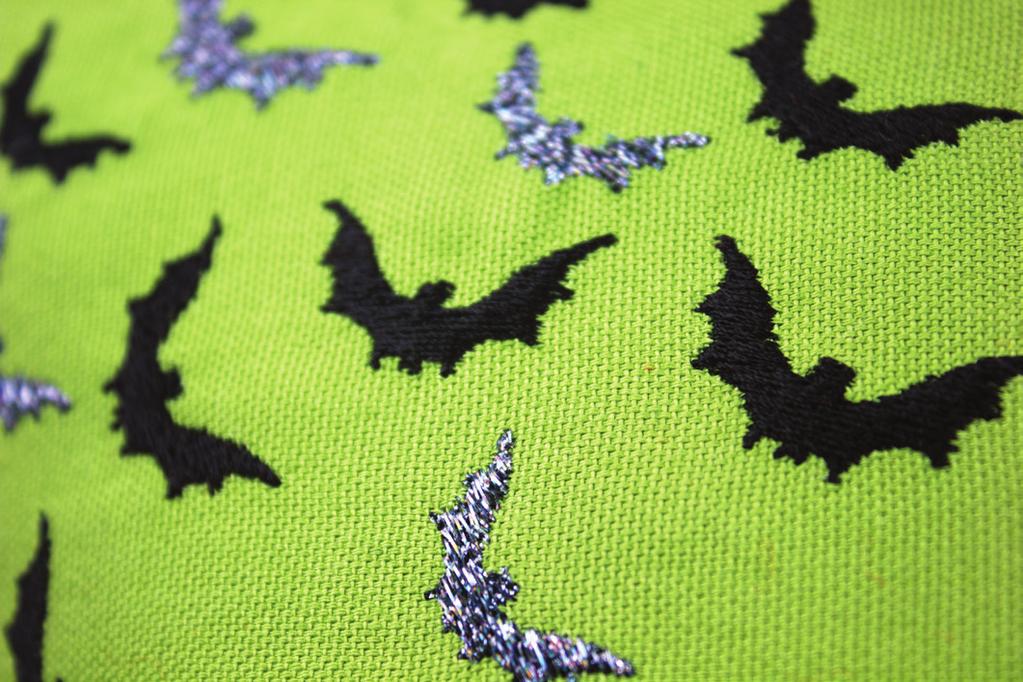
2 Project Overview Halloween is such a family-fun time. Children spend weeks deciding who they want to be this year! And they also love having their homes dressed-up in the spirit as well. This Halloween-themed throw pillow is sure to be a favorite for young and old alike! It s easy to make and not only combines fabric textures, but it incorporates applique and filled embroidery techniques. Several types of Sulky Threads are enjoyed throughout the process, including some of their metallic brands to add a bit of sparkle. Of course, it s that night-time Halloween glow, created by stitching strategic elements in Sulky Glowy Thread, that will thrill all the children! This large, 13 square design can be stitched in three segments, providing your embroidery machine will accept a 360mm x 200xx hoop. Individual elements, which require no larger than a 150mm x 150mm hoop, have also been made available as a free download. Although the smaller hoop restrictions will necessitate more hoopings (layout measurements for the smaller hoop can be found as a PDF file along with the designs to download) the only difference is that the fence will have a break. The smaller elements can also be creatively combined to design complimentary Halloween glow pillows. Just a couple of suggestions are seen below. 2
 6 x 13 textured")
3 Gather Supplies 14 to 16 square pillow form Shortcut: If you don t want to make the pillow, use this Pillow blank Fabric: 1 yd % sports-weight cotton-pillow fabric Helpful Hint: Sports-weight is a heavier broadcloth, duck cloth-not duck canvas, drill cloth or a twill that might be used for slacks) 6 x 13 textured fabric for fence (linen, osnaburg) 5 square cotton print for moon Thread: See design PDF for suggested colors Sulky 40 wt. Rayon Glowy blue on moon, white on fence, green on cat eyes, yellow on pumpkin faces and piping embellishment Metallic Threads Holoshimmer, Silver Metallic - PDF states type, color and when to use a specific type. Cotton+Steel 50 wt. Cotton Thread for construction Stabilizers: Soft n Sheer Soft n Sheer Extra Sulky KK 2000 Temporary Spray Adhesive 3
4 Other: Schmetz 90/14 Topstitch needle Use a new 90/14 Topstitch needle. This will eliminate the need to change needles when switching from 40 wt. Rayon thread to any of the Sulky metallic threads. 2 yds. of 1/4 cording Embroidery Designs Free download available here. General Information: Pre-wash, dry and press all fabrics prior to beginning this project 1/2 seam allowances are used throughout construction process Download, read and follow PDF directions that accompany each design which will tell you when to apply or trim applique fabrics. It also specifies specialty threads changes. 4
5 Making the Pillow Step 1 - Cut Fabric Pre-wash, dry and press all fabrics prior to beginning this project. Cut the following pieces from the base fabric following the layout below Cut two rectangles for the pillow back each having a 17 side along the selvage edge: One: 11 x 17 Second: 9-1/2 x 17 Cut one 18 square-pillow front Save the remaining fabric as a large single unit to be cut later for bias strips to cover cording Step 2 Hand baste the lines to divide the 18 square pillow front into quarters. The intersection of the two lines define the center of the pillow. Placement of all designs, even for smaller hoops, will be represented in relationship to pillow center Once designs are stitched, trim excess stabilizer and jump-threads; and press the embroidered fabric before moving on to the next stitching segment. 5

6 Step 3 Mark the three individual hoopings with hand-basted lines (see graphic). Use different thread colors to keep individual design centers apparent: 1ST HOOPING: CAT/FENCE 2 down and 1/4 left of fabric center 2ND HOOPING: PUMPKINS 4-3/4 down and 1/8 to the right of fabric center 1-5-3/4 x 6-1/2 cork for the pocket 3RD HOOPING: BATS/WITCH 4-1/8 up and 1/16 to the right of fabric center Step 4 Mark the top of the square fabric with a pin. This is important because fabric and design placement need to be in the same direction when stitching. Pay attention to how the design loads in the embroidery machine. 6


7 Step 5 Hoop the stabilizer. Base fabric will be fix/basted to the stabilizer. The more secure the stabilizer is, the more secure the fabric will be. Lightly spray the back of the base fabric with KK 2000 Temporary Spray Adhesive, and press the fabric firmly into stabilizer matching the center marking for cat fence design to hoop center. Step 6 Note: Only secure the stabilizer in the embroidery hoop frame. Pull the stabilizer as taut as possible, making it tight as a drum. Most larger frames include clips to reinforce security - use them! Yes, even on just the stabilizer. Match machine needle center to design center, baste/fix fabric in place and embroider the cat/fence design. Only remove the portion of the hand-basted lines indicating pillow center that will interfere with the embroidery. Allow the remaining stitches to stay in place as they will serve as cutting guide lines during the final squaring of the pillow front 7


8 HELPFUL SUGGESTIONS: Use a textured fabric for the fence applique. Paint the fabric with a tea bag which has been steeped in hot water shading the solid colored fabric. Brush the bag in the direction of the grain. When cutting the inside fence rectangles, it may be helpful to first slice into the top fabric with a seam ripper. Although the cat/fence design must be embroidered first, the order in which the remaining two designs are stitched is immaterial. Step 7 Repeat the process of hooping another piece of Soft n Sheer. Lightly spray the back of the base fabric with KK 2000, and press the fabric firmly onto the stabilizer, matching the center of the 2nd design to the hoop center markings. 8


9 Note that the center markings for the pumpkin design was covered by the fence fabric. Not to worry, because the basted stitched can still be seen on the back side of the fabric and can easily be reapplied to fabric front A quick method of double checking design placement is to cut a piece of scrap stabilizer the same size as the design being embroidered. Mark center lines on the rectangle and place the marked lines on top of the hand-basted ones for same design. Design placement does not need to be 100% exact to work well together. Slightly higher or lower, slightly more to the right or left will still result in a great looking pillow. Step 8 Once all three hoopings have been stitched, press the entire pillow front. Press all embroidered sections face down into a thick terry towel. This will preserve, rather than flatten out, the depth of the embroidery. 9


10 Step 9 Re-cut the front to a finished square size of 17. Begin by first checking the overall layout before cutting any sides. Place a ruler on center, measuring 8-1/2 over to the right. Check where the widest part of the layout falls. Repeat to the left and check where the widest part of the layout falls. If widest part of design is equal on both sides, it is safe to use the pillow center line to make the first cut 8-1/2 over. If the space between the widest design part and the end of the ruler is not equal, find the center of your overall stitching. and use this point to make your first cut. Step 10 The second cut is made by measuring over 17 from the first straight cut! Repeat the checking process prior to cutting the top and bottom. Once again, 10

11 measurements do not have to be perfect! If the embroidered stitches are a bit closer to the cording on one side, no one will notice. Center the design in the 17 square as close as possible. Embellishing the Pillow Step 1 Cut a 68 length of cording Step 2 From the remaining base fabric, cut a wide bias strip by folding the selvage edge down at a 90 angle. Measuring 3-3/4 away from the fold, cut a parallel straight line. When opened flat, it will be 7-1/2 wide and angled at each end. Step 3 Embellish the strip with alternating rows of Glowy and Holoshimmer Metallic threads: Wind a bobbin with yellow Glowy Thread the top of the machine with Holoshimmer Metallic #6011 Lt. Copper Choose a heavier straight stitch on the sewing machine (like a triple stitch) and lengthen to about 8 stitches per inch Stitch first row parallel to selvage edge, turn fabric over and stitch the second row using the edge of the presser foot to the keep rows evenly spaced Turn the fabric over every time a row is completed. This will alternate the rows of Metallic and Glowy rows. Repeat until fabric piece is covered. 11


12 HELPFUL SUGGESTIONS: For the continuous straight sewing in Holoshimmer Metallic, use The Thread Director to keep the specialty thread feeding flat and smoothly into the machine. I did not feel the need to use the thread adapter during the embroidery process since none of the metallic accents involved a lot of stitches. Step 4 Press the embellished strip of cloth. Use a pressing cloth. Although the base fabric is cotton and can withstand high temperatures, many of the design elements include a metallic thread accent which requires lower temperatures. So, to be on the safe side, always protect the embellished fabric with a pressing cloth. Assembly Step 1 Cut into 3 strips each 2-1/2 wide Step 2 Join strips together to equal 70 Before stitching the diagonal seam, pin it and open strip making sure stripes match. 12


13 Step 3 Stitch on the diagonal and trim ends even. Trim seam to 1/4 allowance and press seam open Step 4 Cover cording: Turn under 1/4 hem on the fabric strip and fold the fabric over the cording. Leave about 1 of fabric free of the cording and begin stitching at cording. Stitch close to the cording, but not right up snug. Step 5 Trim seam to 1/2 seam allowance 13


14 Step 6 Stitch the cording to the pillow front: Begin along a flat edge, leaving the 1 tail free. At the first corner, lay the scissor tip at a 45 angle on top of fabric Bring the bias strip straight into open scissor tip and clip the bias seam allowance up to, but not through the stitching 14


15 Step 7 Stitch straight off the pillow side Start the next side by matching the cut bias strip to the pillow edge, and straight stitch to the next corner. Repeat clipping process. Do all four corners, but stop stitching several inches from the starting point. Step 8 Join the cording ends: Open the tail and tuck the ending cord inside. Trim ending cord so the two cord ends butt up against each other. Step 9 Fold the tail over the end cord, encasing it completely, and stitch to the pillow. Step 10 With right sides together, pin one of the pillow backs to the front, with the selvage edge facing the pillow center. Stitch around the three sides snug against cording. Repeat for second backing piece. Selvage edges of the two pieces will overlap. Step 11 Turn pillow right side out and insert the pillow form! 15


16 Enjoy your Halloween Delight! 16
Cotton + Steel Scout Embroidery Pillow by Pamela Cox
 Cotton + Steel Scout Embroidery Pillow by Pamela Cox Familiar birds returning to backyards plus colorful flowers peeking into the warm sunshine are sure signs that Summer is in the air! And Spring is the
Pumpkins. by Pamela Cox
 Pumpkins by Pamela Cox Project Overview Fall is here! This seasonal change brings, crisp air, colorful leaves, hand-picked apples and pumpkins! Pumpkins always decorate our front door steps lighting a
DIY Tote Bag: Kraft Tex Paper. DIY: Kraft-Tex Paper Fabric Tote Bag
 DIY Tote Bag: Kraft Tex Paper DIY: Kraft-Tex Paper Fabric Tote Bag This series is written by guest blogger, Pamela Cox. Pamela is an expert embroiderer, designer, digitizer and all around wonderful girl!
Holiday Holly in 3-D A Wallhanging Ellen O. Designs for Sulky of America
 A Wallhanging Ellen O. Designs for Sulky of America What We Used WHAT FABRICS WE USED: Cotton Fabrics 42 to 44 (Image 1) Dark green 1/2 yard Medium green 1/4 yard Light green 1/4 yard Christmas/Holiday
Trick or Treat Garden Flag by Kelly Nagel
 Trick or Treat Garden Flag by Kelly Nagel Project Overview Show your Spooky Halloween Spirit with this fun and easy garden flag! By using Sulky Puffy Foam and Glowy Thread, show you are ready day or night
Under The S ea Table Runner
 Finished Size: 12" x 48" (30.48cm x 121.92cm) Under The S ea Supp lies Needed B efore you begin 3 Wishes Fabric Under the Sea Collection 1 yd. (91.44cm) 12281-Lt. Blue 3 8 yd. (34.29cm) 12289-Lt. Blue
Machine Embroidery Series Velvet
 Machine Embroidery Series Velvet This series is written by guest blogger, Pamela Cox. Pamela is an expert embroiderer, designer, digitizer and all around wonderful girl! We are so happy to have her contributing
Bowled Over Bag. Supplies Needed. Notes. Swatches. Special Thanks To
 Supplies Needed Main fabric (front, back, and side panels) 1yd Contrasting fabric and lining 2 yds 20in Coats heavyweight metal zipper 2/3 of a yard of VELCRO FABRIC FUSION brand fastener Dual duty xp
The Extraordinaire Wine Gift Bag by Ellen Osten Designer and National Educator for Sulky of America
 by Ellen Osten Designer and National Educator for Sulky of America Original Design for Sulky of America Project Overview I hope you enjoy the easy way you can add embellishment, and the construction features.
Bright stripes provide an unexpected departure from traditional holiday colors for these soft flannel sheets.
 By Jennifer Gigas Snuggled beneath these holiday flannel sheets, visions of sugarplums will no doubt be dancing through the dreams of your special little one. Non-traditional colors and cheerful trims
Machine Embroidery Series Linen
 Machine Embroidery Series Linen Linen is the perfect fabric for summer clothing and it is also very popular for home linens and decorative pillows. Let s not forget accessories such as aprons, purses/totes,
Christmas Tree Pillow By Marie Duncan
 Christmas Tree Pillow By Marie Duncan Christmas is coming and you want to be ready! This fun piped, patchwork pillow made with the Hex N More Ruler will go together quickly and be a treasured holiday decoration
Pretty Quick Pillow Case PO Box 1206 Langley, WA
 Pretty Quick Pillow Case www.jillmccloydesigns.com PO Box 1206 Langley, WA 98260 info@jillmccloydesigns.com Pillow cases make terrific projects. They are pretty, practical, quick, easy to make, and may
Organization to the Letter!
 Organization to the Letter! Created by Jeanne Delpit Neaten up your space using the clever Kwik Sew pattern #3900, Olivia s Organizers. With a few easy pattern changes, personalize your pockets with the
Lucky 13 Quilt. Finished size 39 x 39
 Finished size 39 x 39 Project Overview We love this quick and easy quilt with a modern flair. The perfect quilt for a new baby, to brighten up a living room or for your quilt-worthy pooch. Do you want
Beginning Level (9-11 Years)
") OKLAHOMA COOPERATIVE EXTENSION SERVICE 4-H Fabrics & Fashions Construction Items Beginning Level (9-11 Years) Division of Agricultural Sciences and Natural Resources Oklahoma State University OKLAHOMA
OKLAHOMA COOPERATIVE EXTENSION SERVICE 4-H Fabrics & Fashions Construction Items Beginning Level (9-11 Years) Division of Agricultural Sciences and Natural Resources Oklahoma State University OKLAHOMA
Floral Bag By Marie Duncan
 Floral Bag By Marie Duncan These fun and funky 3D flowers will bring a fresh breath of spring, to your wardrobe! The featured design, #200257006, is from HUSQVARNA VIKING embroidery collection 257, 3D
Chrysanthemum Pillow
 Chrysanthemum Pillow Created by Kay Hickman Chrysanthemums are lovely flowers, and the beauty of the posies in this OESD embroidery collection rivals that of the actual flowers. Chrysanthemums, OESD Premier
Project Overview. Finished Size Closed: 5 x 8 1/4. Finished Size Open: 5 x 11 1/4. Cutting Directions
 Badge Wallet What We Used WHAT FABRICS WE USED: 100% Cotton Recommended WHAT THREAD WE USED: Regular Sewing thread (Sulky 60 wt. PolyLite ) Sulky threads for embroidery, appliqué or other creative stitching
Bunny Bag. by Jen Frost
 by Jen Frost Project Overview Note: 1/4 yard of fabric will make multiple bunny bags; however, instructions are written (for simplicity) to make just one bag. Supplies: 4 fat quarters in Easter prints
"Pockets 1,2,3" 1Embroider your design: by Jim Suzio, c2011. Designer Patch Pockets in the hoop
 "Pockets 1,2,3" Designer Patch Pockets in the hoop by Jim Suzio, c2011 Making matching patch pockets are now easier than ever, when you do them within the embroidery hoop! In a few simple steps, and within
Abundant Textures. Sewing Supplies: Cut: By Marsha Kirsch
 Abundant Textures By Marsha Kirsch Achieve the look of luxury when you combine multiple textured elements with embroidery. Make a beautiful accent pillow for the home. Your PFAFF sewing and embroidery
DIY Tote Bag: Kraft Tex Paper. DIY: Kraft-Tex Paper Fabric Tote Bag
 DIY Tote Bag: Kraft Tex Paper DIY: Kraft-Tex Paper Fabric Tote Bag This series is written by guest blogger, Pamela Cox. Pamela is an expert embroiderer, designer, digitizer and all around wonderful girl!
Embroidery Collection OESD Divine Flowers & Vines - Crafter s Collection #1102 Designs Selected: BE110210, BE110212, BE110215, BE110222
 Divine Flowers Quilt Lovely flowers and delightful vines enhance this exquisite patchwork silk quilt. Stunning embroidery designs from the Divine Flowers & Vines Embroidery Collection add luxurious detail.
Encircled Throw Quilt Pattern
 Pattern Instructions Encircled Throw Quilt Pattern Geometrics are a favorite with quilters, with circles being a coveted favorite. This charming quilt pattern is designed to work with the Circles Sew Simple
P layful Cuties Quilt - Coral
 Finished Size: 40 ½" x 49" (1.03 meters x 1.24 meters) P layful Cuties Quilt - Coral Supp lies Needed 3 Wishes Fabric Playful Cuties - Coral Collection 1 yd. (91.44cm) - 12967-Gray ¾ yd. (68.58cm) - 12966-Lt.
Seasonal Stitchery #12515 / 35 Designs
 #12515 / 35 Designs Note: Some designs in this collection may have been created using unique special stitches and/or techniques. To preserve design integrity when rescaling or rotating designs in your
Organizer Bag By Marie Duncan
 Organizer Bag By Marie Duncan Make this fun little organizer to compliment your spring outfits! It s easy to make and uses three coordinated prints for miniature piping accent details. Our flower design
COLLECTION 3 GENERAL APPLIQUÉ AND LACE GUIDELINES:
 GENERAL APPLIQUÉ AND LACE GUIDELINES: SUPPLIES: Embroidery Thread: Use the same thread in the bobbin as the needle. Suggested Threads: Isacord Polyester Thread Yenmet Metallic Thread Needles: Use an Organ
Fabric Preparation: At the Computer: 1. Fabric A - (Print) Cut Five - 2½ x 32 strips (to be embroidered) Cut One - 26 x 32 (Back)
 Cut Five - 2½ x 32 strips (to be embroidered) Cut One - 26 x 32 (Back)") Fabric Preparation: 1. Fabric A - (Print) Cut Five - 2½ x 32 strips (to be embroidered) Cut One - 26 x 32 (Back) Cut Four - 2 x 44 (Binding and Ties) Fabric B - (Solid) Batting - Cut Four - 8 x 44 Cut
Fabric Preparation: 1. Fabric A - (Print) Cut Five - 2½ x 32 strips (to be embroidered) Cut One - 26 x 32 (Back) Cut Four - 2 x 44 (Binding and Ties) Fabric B - (Solid) Batting - Cut Four - 8 x 44 Cut
Six FUN! projects for those who are new to sewing, returning to sewing or just want to sharpen basic skills.
 Six FUN! projects for those who are new to sewing, returning to sewing or just want to sharpen basic skills. 1. Clutter Control Bags 2. 3-Button Book Cover 3. Fabric Stash Pincushion 4. Pocket Tissue Case
Lap Quilt. Project Needs & Notes:
 Lap Quilt Display your favorite embroidery on a homemade lap quilt! This project tutorial demonstrates how to embroider on quilt blocks, then assemble to make your own blanket. Project Needs & Notes: -
Little Forest Quilt. 1. Use a rotary cutter and acrylic ruler to cut the number of pieces from each fabric as shown.
 Little Forest Quilt Finished Size: 40 ½" x 48 ½" (102.87cm x 123.19cm). Supplies Needed 3 Wishes Fabric Little Forest Collection 5 8 yd. (57.15 cm) - 12944-Gray 3 8 yd. (34.29cm) - 12949-Brown (binding)
My Fair Lady Sweet Temptations Coin Purse
 SUPPLY LIST My Fair Lady Sweet Temptations Coin Purse Cut away mesh stabilizer Cotton fabric (pre-shrunk and ironed) for patches Fabric Scraps (pre-shrunk and ironed) for appliqués ⅛ yd fabric for the
All seam allowances are 1/2 unless otherwise noted. All pattern pieces include the seam allowance. Please read all instructions before beginning.
 This small bag will allow you to try out several fun bag-making techniques; adding a metal twist lock, using piping in a bag, making darts, and adding elastic pockets. Use your favorite print and combine
2809 Applique the Easy Way With Patrick Lose
 2809 Applique the Easy Way With Patrick Lose Patrick Lose representing the Warm Company shared a number of his delightful appliqué patterns with America Sews viewers. Patrick is a designer with a number
Love Always Quilt. Additional Supp lies Needed. Fabrics Needed. Finished Size: 44" x 58 ½" (113.03cm x cm)
") Love Always Quilt Finished Size: 44" x 58 ½" (113.03cm x 148.59cm) Fabrics Needed 3 Wishes Fabric Love Always Collection 1 Panel 13819-Multi (Bird & Flower Panel) 1 yd. (91.44cm) 13823-Purple (Purple Tonal)
Love Always Quilt Finished Size: 44" x 58 ½" (113.03cm x 148.59cm) Fabrics Needed 3 Wishes Fabric Love Always Collection 1 Panel 13819-Multi (Bird & Flower Panel) 1 yd. (91.44cm) 13823-Purple (Purple Tonal)
CHAIR COVER AND PILLOW A. 1 Front. 2 Side. 3 Arm Front. 4 Skirt Front. 5 Back. 6 Pillow CUTTING LAYOUTS CHAIR COVER AND PILLOW A
 ## PATTERN PIECES 4069 McCALL'S CRAFTS CHAIR COVER AND PILLOW A 1 Front 2 Side CHAIR COVER C,D 7 Guide PAGE 1 of 6 3 Arm Front 4 Skirt Front 5 Back 6 Pillow CUTTING LAYOUTS Cut other pieces first, allowing
Bedtime Story Pillow. Project Needs & Notes
 Bedtime Story Pillow Make bedtime stories extra-special with a sweet and charming pillow. A handy pocket stores your favorite storybooks, while the front panel opens to reveal a sweet surprise -- even
Tag... You re It! In-the-Hoop Felt Tags
 Tag... You re It! In-the-Hoop Felt Tags by Pamela Cox This time around...you want to be tagged!!! These quick-to-stitch, in-the-hoop projects are just too cute to pass on, or avoid being tagged by having
Sports Team Tailgate Apron
 Published on Sew4Home Sports Team Tailgate Apron Editor: Liz Johnson Tuesday, 18 October 2016 1:00 Show your team spirit with a fan-favorite tailgate apron in team logo fabric. Since Sew4Home is located
Bound and Determined:
 Think You Don t Have Time to Create Beautiful Quilts? From quick-quilt adaptations of classic patterns to fun, fresh novelty designs, McCall s Quick Quilts provides you with a treasury of time- and effort-saving
Precious Moments A Time to Play Project Lesson: Pillow for a Princess By Tamara Evans
 Precious Moments A Time to Play Project Lesson: Pillow for a Princess By Tamara Evans Precious Moments A Time to Play Project Lesson: Pillow for a Princess By Tamara Evans Show the princess in your life
Tiny Treasures Tote. Edge Joining foot Clear foot Empty bobbin
 Back Tiny Treasures Tote I just love this little bag. Can t help myself, it s just one of my favorite things. The techniques are a lot of fun and the lining is a snap! It s both pretty and practical and
Bee #2 - Tea Cozy. ** All seam allowances are ¼. ** To avoid dull or broken needles, always remove pins while sewing.
 How do you keep your last cup of tea as piping hot as the first? Follow these instructions to make a decorative and practical tea cozy. This Bee includes all of the instructions, supply list and 4 beautiful
OLD GLORY. Old Glory Lil Glory Blue Star Service Banner
 Old Glory Lil Glory Blue Star Service Banner A portion of the proceeds of this sale goes to Heroes Under God, a non-profit organization whose mission is to provide faith, hope, and love to service men
Central. Fabric. Dot to Dot Quilt. Supplies Needed. Instructions. Skill Level 2: Experience necessary. Project Instructions
 Fabric Project Instructions Central Dot to Dot Quilt Skill Level 2: Experience necessary Crafting Time: Weekend Project Supplies Needed 1 Fabric Central Dot Bundle 1 1 Fabric Central Dot Bundle 2 Fabric
It s all about the Presentation! Holiday Gift Bags
 It s all about the Presentation! Holiday Gift Bags Created by Catherine Gross Start with a rectangle; add some creativity and embroidery; your gift bags will be as exciting to receive as the treasures
Kitchen. by Michele Mishler. 20 CREATIVE MACHINE EMBROIDERY cmemag.com
 Kitchen Coordinates by Michele Mishler Combine large floral embroidery designs and smaller embroidered accents to add a splash of vintage style to a coordinating apron, towels and potholder. 20 CREATIVE
Made for Each Other Pillows
 Two embroidered pillows create the shape of a heart when displayed together. Use to decorate your home, or give as a wedding gift! Project Needs & Notes: - 18" pillow forms - 1 1/2 yards print cotton fabric
Textured Tote By Marie Duncan
 Textured Tote By Marie Duncan Not a day will go by where you won t fill your Textured Tote and enjoy the gorgeous embroidery while traveling through your day! The featured design, 145312, is from PFAFF
Battenburg Lace Pillow
 Battenburg Lace Pillow Home decor fabric is the perfect backdrop for the lovely Battenburg lace embellishments in this pillow project. The fabric is cut into graceful, arcing shapes to mimic the shape
Tutorial. Supplies. Taggies are great, easy, baby gifts. Start by picking 2
 Taggie Blankets Tutorial for Baby I love making things for babies and soon to be moms. Everything is always sweet, soft and truly appreciated. One of my favorite baby gifts, Taggies, also happens to be
Fabric Storybook. Project Needs & Notes:
 Fabric Storybook Create a soft, embroidered gift for your little ones! Use favorite fabrics, alphabets, and designs to publish your own embroidered page-turner with this project tutorial. Project Needs
Picnic Wine Tote. Supplies. Visit for additional Picnic Projects! 2012 BERNINA of America, Inc. Page 1 of 5. Created by Elva Mungai
 Picnic Wine Tote Created by Elva Mungai This insulated wine tote protects your wine and keeps it at the right serving temperature until it s time for pouring. It even features a pocket for a corkscrew
Sewing Roll. Base Fabric. Base Fabric. Third Fabric. Second Fabric (Bottom Pockets) Pockets)
 Pockets)") You will need Brother Creative Sewing Pack (Free Motion Foot, Braiding Foot, Narrow Hem Foot, Piping Foot and Concealed Zipper Foot) Base fabric 1 x fat ¼ (50cm square) cut in half Second fabric 50cm x
You will need Brother Creative Sewing Pack (Free Motion Foot, Braiding Foot, Narrow Hem Foot, Piping Foot and Concealed Zipper Foot) Base fabric 1 x fat ¼ (50cm square) cut in half Second fabric 50cm x
Football Cornhole Bags
 Football Cornhole Bags Skill level - Beginner/Easy By Lucy Fazely Technique: Applique Brand: Dual Duty XP Crafting time: An Evening Materials Dual Duty XP general purpose, colors #3690 Purple and #7540
Machine Embroidery Series Cork Fabric (And a Free Project!)
") Machine Embroidery Series Cork Fabric (And a Free Project!) This series is written by guest blogger, Pamela Cox. Pamela is an expert embroiderer, designer, digitizer and all around wonderful girl! We are
Machine Embroidery Series Cork Fabric (And a Free Project!) This series is written by guest blogger, Pamela Cox. Pamela is an expert embroiderer, designer, digitizer and all around wonderful girl! We are
Materials for Peppermint Candy Pillow
 Peppermint Candy Pillow Tutorial This adorable Peppermint Candy Pillow by BERNINA Ambassador Nancy Mahoney will give your decor a new look, whether for your bed or a decorative pillow for your couch. The
Embroidered Scrap Bag and Bed Caddy Carol A. Brown
 Embroidered Scrap Bag and Bed Caddy Carol A. Brown Materials: 1. Outer fabric for Scrap Bag (sturdy fabric such as poplin): at least 12-1/2 wide by 22 high. 2. Outer fabric for Bed Caddy (sturdy fabric
Master the Basics. Top Selling Features: Sell Up Features from the SAPPHIRE 960Q sewing machine:
 Utility Foot A, Utility Foot B, Buttonhole Foot C, Blind Hem Foot D, Zipper Foot E, Non-Stick Glide Foot H, Edging Foot J, Embroidery Darning Foot R, Sensor One-Step Buttonhole Foot, Self-Adhesive Glide
Machine Embroidery Series Embroidery on Straw!
 Machine Embroidery Series Embroidery on Straw! This series is written by guest blogger, Pamela Cox. Pamela is an expert embroiderer, designer, digitizer and all around wonderful girl! We are so happy to
Double Layer Half Apron with Fancy Details
 Published on Sew4Home Double Layer Half Apron with Fancy Details Editor: Liz Johnson Tuesday, 18 July 2017 1:00 With this design, we've packed a whole lot of style into one half apron. To start, why settle
Tea Towel Table Topper
 Tea Towel Table Topper Tea towels come in so many different colors and patterns, that it's a sure bet your tea towel table topper will be truly unique -- especially once you embroider it with designs of
Drawstring Backpack. Project Needs & Notes:
 Drawstring Backpack A handy drawstring bag made out of durable nylon fabric is perfect for camping trips, kids gear, and more! Add your favorite embroidery design to personalize it, too. Project Needs
Lacy Envelope Clutch (In-the-Hoop)
") Lacy Envelope Clutch (In-the-Hoop) Accent your outfits in soft, romantic style with this stylish in-the-hoop project! A classic rectangular zipper pouch is accented with a triangle of cotton lace to create
Lacy Envelope Clutch (In-the-Hoop) Accent your outfits in soft, romantic style with this stylish in-the-hoop project! A classic rectangular zipper pouch is accented with a triangle of cotton lace to create
Thread Painting Fabric Prints
 Straight Stitching Technique Thread Painting Fabric Prints Enhance the beauty of fabric prints by thread painting them with Sulky Threads, which gives them special texture and depth. 26 The Basics Free-motion
125 th Anniversary Quilt. Celebrating the BERNINA 125 th Anniversary!
 125 th Anniversary Quilt Celebrating the BERNINA 125 th Anniversary! : fabrics Fabric A: 5490M-33 Paisley Gold 1-5/8 yards Fabric B: Binding 5494M-07 1/2 yard Fabric G: 5490-07 highlights only for embroidered
Panel Place Mats with Large Motif Fabric
 Published on Sew4Home Panel Place Mats with Large Motif Fabric Editor: Liz Johnson Monday, 08 January 2018 1:00 By emphasizing a large motif and using a contrasting fabric for the borders, this place mat
Gingham Fruit Machine Applique Kitchen Towels
 Published on Sew4Home Gingham Fruit Machine Applique Kitchen Towels Editor: Liz Johnson Tuesday, 06 March 2018 1:00 There are lots of options for appliqué, which is essentially just adhering a feature
Embroidered Denim Bag
 Embroidered Denim Bag By: Jane Spolar of Quilt Poetry This little bag is a quick project and when completed will accessorize your casual summer wardrobe. What s more fun than finding a use for some of
Serger Daygown. It's Sew Easy. By Kathy McMakin Martha Pullen Company
 Serger It's Sew Easy By Kathy McMakin 2014 Martha Pullen Company Serger It's Sew Easy By Kath y McMaki n Expand your serger skills while making this soft batiste daygown for that special baby. Constructed
Fast Gift Wrap Sleeves in Felt & Cotton
 Published on Sew4Home Fast Gift Wrap Sleeves in Felt & Cotton Editor: Liz Johnson Thursday, 07 December 2017 1:00 Slice, stitch, tie, give. Just four steps to fast and festive (and reusable!) gift wrap
Sweet Dreams Gone Modern
 Sweet Dreams Gone Modern Created by Jeanne Delpit Experience the versatility of the BERNINA 830 as you create a baby quilt with a modern quilting twist! On-screen Editing, Jumbo Hoop Embroidery and template
Bold & Beautiful Table Topper
 Bold & Beautiful Table Topper Created by Elaine Cibelli Dress up the picnic table with a reversible, mitered border table topper using appliqué designs from the BERNINA Exclusive Bold & Beautiful Embroidery
2. Mark an additional 1¾ to the longer side on one side only to add seam allowance and ease.
 Appliquéd Monogram Tablet Sleeve By Sue Hausmann Thanks to Karen Hinrichs for idea and instructions!! Recently I was having lunch with my friend Karen Hinrichs and pulled out my Ipad. She was horrified
CAMELOT FABRICS. 3. Draw a vertical line on the pointed end of each Strap, a tiny bit longer than the diameter of your buttons.
 Other Supplies - 2 buttons in coordinating color - paper printer - basic sewing supplies - sewing machine with buttonhole foot - iron & pressing surface - scissors & fabric shears - measuring tape - fabric
Three Tier Ombre Apron with Shabby Chic Style
 Published on Sew4Home Three Tier Ombre Apron with Shabby Chic Style Editor: Liz Johnson Tuesday, 11 April 2017 1:00 Ombre is a French word for shading or graduating. In fashion, it refers to the graduation
Organza Shadowbox Ornament
 Organza Shadowbox Ornament Illuminate your holiday decor with this unique shadowbox ornament! Two layers of sheer embroidered organza create a beautiful scene with depth and dimension. When lights shine
INSTRUCTIONS BFC716 QIH LEOPARD BAG
 INSTRUCTIONS BFC716 QIH LEOPARD BAG This bag can be done in many ways! You can stitch it as I did the medium size bag shown at the end of this document (with the Orange trim). For this bag I embroidered
Floral Half Apron with Slash Pockets
 Published on Sew4Home Floral Half Apron with Slash Pockets Editor: Liz Johnson Monday, 03 July 2017 1:00 It may be a half apron, but it s full of pretty details. For yourself or as a delightfully easy
All Around Cover-up by Ellen Osten, National Director of Education Original Design for Sulky of America
 by Ellen Osten, National Director of Education Original Design for Sulky of America You have a need for a stylish cover-up, and in a hurry? This original design answers the need. Make it for yourself,
Easy Appliqué: Apple & Pear Kitchen Towels
 Published on Sew4Home Easy Appliqué: Apple & Pear Kitchen Towels Editor: Liz Johnson Wednesday, 16 August 2017 1:00 It's time to pack up those pencils and pens and find the new backpack. School has started
Technique Instructions
 L W H 9 5 0 L L E4 W: H: :6 W W: H: 0 1 Technique Instructions Fashionable Freestanding Lace These unique lace designs stand on their own without a base layer and look like expensive lace. Simply embroider
Fox Fun Mug Rug H I J. Figure 1
 one day only DESIGN BY JOANNA WILCZYNSKA Fox Fun Mug Rug Good things come in small packages. Create a cute coaster that may end up on a wall instead. ScRap- FRIENDLY PROJECT SPECIFICATIONS Skill Level:
Halloween Countdown Mansion. 64 Designs. INCLUDES 43 DESIGNS FOR 4" x 4" HOOPS, 21 DESIGNS FOR 5" x 7" HOOPS. In-the-Hoop!
 constructed in sections in-the-hoop on cut-away mesh stabilizer. structed individually in-the-hoop, this easy Project Halloween Countdown Mansion Create the Halloween season s must-have interactive countdown
Like to make the most of everything? Experiment with our challenge to create something special from a specific set of materials.
 Like to make the most of everything? Experiment with our challenge to create something special from a specific set of materials. + = 4 fat q uarters 1 fat quarter 2 1 Fabrics are from the Pumpkin Patch
a sewing pattern by moon kitty headband
 a sewing pattern by moon kitty headband moon kitty headbands These headbands are a classic piece for your head with a twist for Sailor Moon fans -- or at least cat fans! Make yours from black, white, or
SINGER PROJECTS Sewing Machine Mat with Pockets PROJECT SKILL LEVEL:
 SINGER PROJECTS Sewing Machine Mat with Pockets This handy sewing machine mat with pockets not only helps protect your table surface, it keeps your go-to notions right at your fingertips. The four pockets
Create a room outdoors with gorgeous garden-inspired table linens. Entertain to soft breezes and candle glow with a table fit for finery.
 Garden Party By Stephanie Corina Goddard Create a room outdoors with gorgeous garden-inspired table linens. Entertain to soft breezes and candle glow with a table fit for finery. Supplies Decorator fabric.
Sewing and Craft Half Apron
 Published on Sew4Home Sewing and Craft Half Apron Editor: Liz Johnson Thursday, 02 June 2016 1:00 We've always been partial to half aprons. Their smaller size tends to make them inherently more adorable.
Lavender Tea Cozy and Coasters pg. 1
 Lavender Tea Cozy and Coasters Marie Bostwick and Deb Tucker, Studio 180 Design, Ltd. To make this project, head to your scrap bags and gather up all those purple and green fabrics that make you think
Fall Appliqués #12601 / 6 Designs
 #12601 / 6 Designs Note: Some designs in this collection may have been created using unique special stitches and/or techniques. To preserve design integrity when rescaling or rotating designs in your software,
Snuggle Up Baby Quilt
 Snuggle Up Baby Quilt Created by Kay Hickman Create an adorable quilt for baby, youngster, or the young at heart using OESD Crafter s Collection Snuggle Up and the Benartex Habitat Fabric Collection. A
Floral Frenzy Pillow. Time to Sew! Created By: Alison O Grady Level: Confident Beginner Time: 2-3 Hours
 Created By: Alison O Grady Level: Confident Beginner Time: 2-3 Hours Sewing is fun! Set aside some time out of your day to make this easy, no fuss pillow that showcases many great features of the Horizon
Embroidered Scrap Bag Carol A. Brown
 Embroidered Scrap Bag Carol A. Brown Materials: 1. Outer fabric (sturdy fabric such as poplin): at least 12 1/2 wide by 22 high. 2. Medium weight fusible interfacing: same size as for fabric. 3. Lining
hard core hook case a sewing pattern by
 hard core hook case a sewing pattern by hard core hook case This case is something I designed for myself to store my crochet hooks and other tools. What gives it an edge are the contrast patches, skull
Clip & Save Coupon Organizer
 Clip & Save Coupon Organizer Keep coupons and clippers easy-to-access in this unique organizer! Made with durable canvas and lightweight cotton, this clip and save coupon organizer keeps scissors, pens,
Accent Rug with Little Sunshine Appliqué
 Published on Sew4Home Accent Rug with Little Sunshine Appliqué Editor: Liz Johnson Wednesday, 04 October 2017 1:00 The majority of nurseries we reviewed for our original Little Sunshine series opted for
A SPOOKY SLEEPOVER. This is a free pattern provided by The Red Boot Quilt Company The Red Boot Quilt Company
 A SPOOKY SLEEPOVER The Red Boot Quilt Company The Red Boot Quilt Company A SPOOKY SLEEPOVER Approx. Size 38 1/2in x 57 1/2in BEFORE THE FUN BEGINS Please read all instructions before you begin. Abbreviations.