Building the Merit 1/35th scale British HMS X-Craft Submarine. Chris King, February 2016.
|
|
|
- Dana Freeman
- 5 years ago
- Views:
Transcription


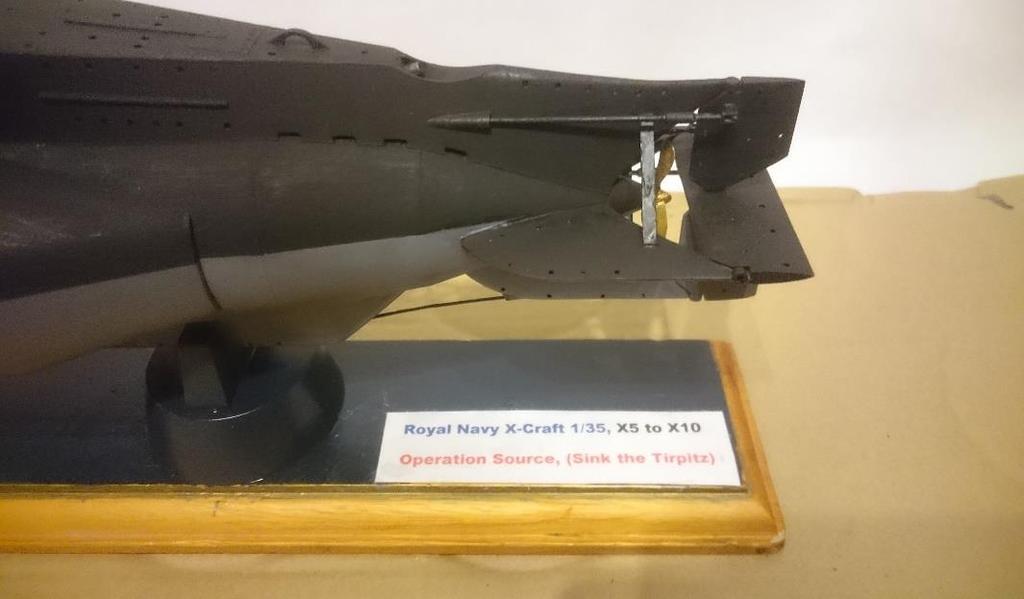
1 Building the Merit 1/35th scale British HMS X-Craft Submarine Chris King, February This kit is a great starting point to build one of the early X-craft: X5 through X10; and X20 through X25. My research shows that X5 through X10 were painted in standard naval colours of black upper surfaces and dark admiralty grey lower surfaces. The later craft painted all-over black. For those wishing to build X20 through X25, the kit will require further modifying - a visit to Gosport Submarine museum would be in order as X-24 is on display there. It should also be noted that the later X-craft, XE and X-51 through X-54 were 2 foot longer and slightly different in construction. Let s get started on the kit. The hull is built in 2 halves with one half having the complete upper deck. I began by opening up the flood holes and slots in both halves with a drill / knife (see photos 1 to 4 and 6). Photo 1, opened up flood holes fore Photo 2, opened up flood holes aft 1


.")

 at a time.")
2 Photo 3, opened up flood holes side Photo 4, opened up flood holes side At the rear, the model has raised dimples like rivets. These appear on the dive plane, rudder halves and rear fins as well (photo 5). There should be flood holes in here, so I carefully cut the tops off with a knife and used the proud white bits as markers for drilling. Photo 5, opened up flood holes aft side Photo 6, opened up flood holes both halves As I wished to display this model with the rear hatch open, I painted the visible interior white to simulate the interior (photo 7). I have seen some scratch built interiors, but unless you re doing a cutaway, very little will be seen. To join the two hull halves, take care to do it step by step, about 150mm (6 ) at a time. This leaves you with a nice join requiring no filler except at the keel (photo 10), as you can see in the photos 8 to 11. Photo 7, white paint to interior Photo 8, assembled hull 2
.")


3 Photo 9, assembled hull Photo 10, visible join line in keel Photo 11, a nice clean join line on the port side (left). A second area that needs attention is the kit s propeller which is sadly under-sized. It looks more like an aircraft propeller than a marine propeller. Fortunately, Eduard appeared to have taken notice of the online debate regarding this kit on Britmodeller and elsewhere and have issued a photo-etch set (HMS X-craft submarine, #53153). This corrects the propeller, the keel flood vents and adds detail to the rest of the kit (Photos 12 & 13). Photo 12, kit propeller and rectifying blades Photo 13, Eduard etch 3
.")

 side. This I confirmed whilst examining numerous photos in my research, including some I took of X-24 many moons ago.")
4 Once you have cut the old blades off, rolled the replacements to the correct shape and glued them in place with superglue, you will have an accurate looking propeller (photo 14). I then went on to add photo-etch panel details to the top of the hull, (photo 15). A word to the wise however, I would suggest using superglue gel rather than just normal superglue as it tends to grab the photo-etch quickly, leaving no time to position the panel, whereas gel gives you time to tinker before it sets. Photo 14, corrected propeller in place Photo 15, top etch panels added An inaccuracy with this kit is the fact that the dive plane is provided with linkages for both sides, when in reality they were only ever fitted to the starboard (right) side. This I confirmed whilst examining numerous photos in my research, including some I took of X-24 many moons ago. Having assembled the horizontal fins and the rudder/dive plane assembly with the braces, I filled in the 4 holes in front of the fins and the lug mounts top and bottom of the dive plane (photo 16). Photo 16, filled control linkage holes To prevent any unpainted parts showing once assembled, I pre painted the keel pipe and the inside of the fixing brackets on the sprue and also the area behind the pipe on the keel (photos 17, 18 & 19). 4


5 Photo 17, painted prior to assembly Photo 18, painted prior to assembly Photo 19, painted prior to assembly Having previously filled and sanded the join line on the bottom of the keel, this also received a coat of paint to highlight any areas needing attention. A coat of grey was applied to the rudder/dive plane assembly undersides to do the same (photo 20). Note this was also done because once the linkages are added your access to this area will be greatly restricted. Photo 20, base coat to lower aft 5
.")


6 The control linkages were assembled and a coat of matt black was applied (photos 21 & 22). Photo 21, control linkages added and paint Photo 22, control linkages added and paint Then I added the keel pipes and brackets - now you can see the wisdom in pre-painting, followed by the photo-etch to the keel. The Eduard flood hole panels had more rows of holes than the kit supplied ones, adding to the accuracy of your build (Photos 23, 24 and 25). Photo 23, keel pipes, brackets and etch, (eduard + kit supplied) Photo 24, keel pipes, brackets and etch Photo 25, keel pipes, brackets and etch 6

. I then added the photo-etch parts to the fore-deck (photo 29).")

.")

7 I then applied a coat of dark grey to the lower hull, (photos 26 and 27). Having decided to enhance the model with a couple of figures, I purchased the Italeri 1/35 th scale MTB crew. One figure was as I wanted it with woolly hat and Aldis lamp, the other had to be modified to suit, namely wearing waterproof overalls (photo 28). I then added the photo-etch parts to the fore-deck (photo 29). Photo 26, first coat of grey to lower hull Photo 27, first coat of grey to lower hull Photo 28, figures Photo 29, deck fittings added Regarding the two hatches, one was to be built closed and one open. I added the hinges and handles in their appropriate positions and added brass strip for inner handle of the open hatch (photos 30 and 31). Photo 30, hatch exteriors Photo 31, handle added to interior Continuing along the deck, the main periscope housing was added with the fixed scope guards glued in place, as well as the lifting horn and guard on both sides. The hatch wells were painted black leaving the hinge mounting points bare for gluing and a trial run with the figures (photos 32 and 33). 7
 side, to the top of")
.")


.")

8 Photo 32, paint to hatch wells, lifting lugs & guards Photo 33, trial fit of figures Photo-etch was then added to control linkages on starboard (right) side, to the top of the induction mast, to the lifting horn guards and the upper sides of the hull (photos 34 to 37). Photo 34, etch added to control linkages Photo 35, etch to top of mast Photo 36, foot plates to guards added Photo 37, dry fit of saddle tanks and etch to sides The kit lacks any saddle tank retaining gear, so I scratch-built some T-shaped lugs to sit over the release pins that do come with the kit. I also added some fuse wire to the bottom of the Aldis lamp for an electrical cable (photo 38). There are two recesses at the front that should have a proud pipe bulge, but don t, so I scratch-built a couple from my grandson s 1/72 nd scale Harrier bombs that he wasn t using. With a little profile sanding they fit without the need for filler (photo 39). Some paint was applied to figures, lugs, lamp and fixed scope (photos 40 and 41). Note the captain s arms were added and posed for the tiller. 8

 to tanks and the main submarine.")


.")
9 Photo 38, retaining lugs for tanks & wire to lamp Photo 39, pipe addition to sides Photo 40, paint added to figures Photo 41, lugs, lamp and fixed scope painted Now I started adding detail to the saddle tanks and then added two coats of dark sea grey (Humbrol 164 satin) to tanks and the main submarine. As I used enamels, it was the closest to dark admiralty grey I could find. For those wishing to use acrylics this colour is readily available. The top colour was also two coats of matt black (Humbrol 33). The induction mast was added with the isolators painted satin white, as well as the open hatch interior, (photos 42 and 43). Photo 42, grey paint to saddle tanks Photo 43, hull painted and work on base At the base of the induction mast I added fuse wire to represent the aerial cable connection from the hull to the base of the aerial (photo 44). The two figures were finished ready for mounting (photo 45). 9

. Photo 46, mooring line and retaining lugs Photo 47, 0.75mm dia.")


10 Photo 44, wire to ariel Photo 45, finished figures The release pins were painted brass (Humbrol 54) and the release lugs white, added after being painted black on the underside. The kit comes with the D shackles and eyes but no mooring cable. So courtesy of ebay I sourced some 0.75mm diameter scale cable for the job. The saddle tanks were now dry fitted (photos 46 and 47). Photo 46, mooring line and retaining lugs Photo 47, 0.75mm dia. wire rope Using the 8 fork rods supplied and cutting down 4 fork rods from the spare linkages that were included, I then scratch-built 4 brass forks from the photo-etch surround. I used the raised periscope and binnacle that was spare as I d built them in the lowered position for tension sleeves between the forks, drilling out the ends for the fork rods to sit in. This took care of 4 linkages, the spares box provided the other 4, also drilled out (photo 48). I used Micro Kristal Clear for the front of the Aldis lamp and the front of the fixed scope to make them look like glass. The saddle tanks were glued in place after the fork lugs were glued on and the final coat of black was added. One side of the linkages were painted black. Photo 48, saddle tank linkages with forked ends 10
 as I read that nylon rope was preferred for towing of the X-craft.")
 were applied, edged with a gold highlighter.")
11 Moving now to final assembly, the linkages and crew figures were superglued in place. A coat of matt black was added to the tops of the linkages making them black all over. The mooring line was painted light ghost grey (Humbrol 127 satin) as I read that nylon rope was preferred for towing of the X-craft. So a bit of modeller s licence, as it looked about right in the photos I ve seen. For a display base I used a Poundshop coat hanger rack, removing the brass hangers and filling in the screw holes. I then glued the two bases supplied with the kit to the wood. A couple of coats of navy blue (Humbrol 77) were applied, edged with a gold highlighter. I used one of the white ensigns supplied with the kit and printed off a label. Finally I gave it a coat of satin varnish and glued the model in place. Below are photos of the finished model. 11


12 12


13 Reference books: Underwater Warriors - Paul Kemp. Reference photo next to page 65, X-craft in dry dock. Above us the Waves - C.E.T. Warren and James Benson. Reference photo next to page 113, X-5 prior to hoisting out for towing to Tirpitz mission. Below are my own reference photos of X-24 at Gosport. Produced in the second batch, there are visible differences to the first batch. 13


14 14

15 And finally a big thank you to, Graham James, for his help in the publishing of this build guide. 15
San Felipe: Step by Step Pack 6
 Pack 6 Your parts Framing Tools and equipment Glue Knife Sandpaper Superglue Tweezers Clear varnish a Retrieve the grating that you assembled on Page 100. Cut two pieces of 2 x 3 mm wooden strip to fit
FINNEY7 4500G May17 SR 4500G TENDER. Fig 1. Original Appearance. Side raves Sanding gear Front water fillers TIA Water treatment system
 Fig 1. Original Appearance Side raves Sanding gear Front water fillers TIA Water treatment system 4500G - 3 Fig 2. Rebuilt Condition Cut down side raves with fire iron tunnels# TIA removed and replaced
50 FineScale Modeler January Finding (Captain) Nemo
 Nemo") 50 FineScale Modeler January 2005 Finding (Captain) Nemo 1/70 Scale Sci-Fi How-to In 1954, Walt Disney Pictures launched its big-screen adaptation of Jules Verne s classic adventure novel, 20,000 Leagues
50 FineScale Modeler January 2005 Finding (Captain) Nemo 1/70 Scale Sci-Fi How-to In 1954, Walt Disney Pictures launched its big-screen adaptation of Jules Verne s classic adventure novel, 20,000 Leagues
Building Instructions Diva cabin boat
 Building Instructions Diva cabin boat Order no. 3093/00 aero-naut Modellbau Stuttgarterstr. 18-22 D-72766 Reutlingen / Germany http://www.aero-naut.com 1 For pictured building instructions please see the
San Felipe: Step by Step Pack 3
 Pack 3 Your parts Bulwarks Gun port covers x 2 Tools and equipment Wood glue Sandpaper Brushes Wood stain Hammer Pin pusher/nails Razor saw a Remove the longer bulwark and test-fit it in place at the bow
Construction manual. Storskär (1908)
") Construction manual Storskär (1908) Rex-Schiffsmodelle Christian Rex Bavert 31 42719 Solingen Germany www.rex-schiffsmodelle.de cr@rex-schiffsmodelle.de It is recommended to read the construction manual
Construction manual Storskär (1908) Rex-Schiffsmodelle Christian Rex Bavert 31 42719 Solingen Germany www.rex-schiffsmodelle.de cr@rex-schiffsmodelle.de It is recommended to read the construction manual
Pump Assembly. Lloyd Matthews September 2013
 Pump Assembly Lloyd Matthews September 2013 Before proceeding with this part of the build, the author recommends that Pt. No 227 1 mm diameter Brass Wire Figure H1, is replaced with 0.8 mm straight brass
Continue gluing the remaining top parts ensuring the angled piece is glued well. Set aside and let dry. See photo below
 Radiator rev 1.1 The SE5a s radiator is one of the most recognized radiators in WW1. It is one of the components that defines the SE5a. The original SE5a has seen multiple radiator designs used during
FINNEY7 SR 5500G TENDER IN ORIGINAL CONDITION
 IN ORIGINAL CONDITION Fig 1. Original Appearance Side raves Sanding gear TIA Water treatment system 5500G - 3 5500G TENDER IN REBUILT CONDITION Fig 2. Rebuilt Condition Cut down side raves with fire iron
LANDING GEAR. 1. Fit landing gear into slots on bottom of fuselage.
 LANDING GEAR 1. Fit landing gear into slots on bottom of fuselage. 4. Use channel-lock pliers to press blind nuts into position (note: drilled hole should be slightly smaller than shaft of blind nut for
SE5a Instrument Board part 2 - rev 1.1
 SE5a Instrument Board part 2 - rev 1.1 Fuel (Petrol) Valve This valve uses two circular name plates, eight brass screws, one black plastic base, copper wire and two black plastic risers. You can pick any
Peter Krause ABN
 Peter Krause ABN 25 736 637 163 T/as O-Aust Kits PO Box 743 ALBANY CREEK QLD 4035 AUSTRALIA Phone +61 (0)7 3298 6283 (7.00pm to 9.30pm ONLY) Facsimile +61 (0)7 3298 6287 (24 hours) Mobile 0419 680 584
-1- Coach Instructions.
 -1- Coach Instructions. Insert the bogie pivot pins through the bottom of the coach body ensuring the dimples fit into the recesses. Glue the.06 x.25 short strips each side of the pivot head, bridge the
BOBS CARD MODELS. De Haviland Dash-8 water-bomber (1:72)
") BOBS CARD MODELS www.bobscardmodels.com De Haviland Dash-8 water-bomber (1:72) A Canada de Haviland Dash-8 fitted with a large water tank, complements the French aerial firefighters' fleet of Canadairs
BOBS CARD MODELS www.bobscardmodels.com De Haviland Dash-8 water-bomber (1:72) A Canada de Haviland Dash-8 fitted with a large water tank, complements the French aerial firefighters' fleet of Canadairs
Building The Precedent Perkasa. By Dave Kershaw
 Building The Precedent Perkasa By Dave Kershaw Kit Contents Here you can see the original 1/32nd scale kit from Precedent. It includes a nice instruction booklet with some essential photographs, plenty
Swift assembly guide
 Swift assembly guide Download the assembly guide at www.scihighmodels.com/swift.pdf Sample kit shown with aluminium bells (available with the Deluxe kit) Shown here without main tanks Version 10/12/2010
1Smooth pieces 4, 5 and 6, using
 Yamato: Step-by-step 109 Machine-guns, anti-aircraft guns and decking h e f a b c g d e f a Anti-aircraft gun base x 2 b Anti-aircraft gun (bottom) x 2 c Anti-aircraft gun (top) x 2 d Machine-gun base
Lima XPT/HST Re-Powering Conversion
 Lima XPT/HST Re-Powering Conversion Please read through these instructions before beginning the conversion process. Non-Powered Bogie The front non-powered bogie is the starting point for this conversion.
Brassmasters
 Brassmasters www.brassmasters.co.uk Scale Models LONDON & NORTH EASTERN RAILWAY 4200 GALLON GROUP STANDARD TENDER KIT Designed by Martin Finney 4MM SCALE OO - EM - P4 INSTRUCTIONS AND PROTOTYPE NOTES PO
Billy Body Kit HBK5 CHECKLIST. Modular Locomotive System Instruction Manual for HBK5 Billy Body Kit. Checked
 Billy Body Kit HBK5 CHECKLIST 1 Cab body panel (folded). 1 Cab floor. 1 Cab front panel. 1 Roof. 1 Body tank support. 2 Boiler bands with M2 Long Steel Screws & Nuts fitted. 1 Brass dome. 1 Cast brass
Modular Tanks: Tau Devilfish/Hammerhead
 Introduction & Overview This guide deals with the construction of modular Tau tanks that are easily convertible between the Devilfish and Hammerhead configurations. At the time of this articles writing,
Section 11 CABLE & ROD SYSTEMS, SIGN FIXING & SIGN STANDOFFS. Web. acrylicdesign.ie .
 Section 11 CABLE & ROD SYSTEMS, SIGN FIXING & SIGN STANDOFFS Web. acrylicdesign.ie Email. sales@acrylicdesign.ie Acrylic Design 2004-2015 Mobile Cable System Components Single panel clamp Stand Off for
Hasegawa 1/48 scale Nakajima B5N2 "Kate" by Dick Smith
 Hasegawa 1/48 scale Nakajima B5N2 "Kate" by Dick Smith The release of last summer's motion picture "Pearl Harbor," caused a flood of interest in the modeling world in the Japanese aircraft that took part
1. Underframe/Tank Bottom
 1. Underframe/Tank Bottom The construction process for the Class X tank cars is a little different as there is no true underframe. Instead we will use the tank bottom as part of the underframe, attaching
Captain Baxter, 3D Print instructions
 Captain Baxter, 3D Print instructions Baxter prototype printed by Shapeways and a home 3D printer Thank you for purchasing the Captain Baxter 3D print, this will instruct you on how to put this model together,
3Position the hull of the ship as
 Yamato: Step-by-step 25 The hull and stern deck c b d a b d c e e f a Rear frame b Stern deck x 2 c Stern deck x 2 d Side wall x 2 Wood glue Sandpaper (no. 400 grain) Craft knife Pliers d Side wall x 2
Converting a Bachmann Class 45 model to 45133
 Converting a Bachmann Class 45 model to 45133 Bachmann have yet to produce an accurate OO gauge model of a Class 45/1. The 45/1s that have been produced were let down by the presence of steam heat details
HAPPY HUNTER BUILD LOG
 HAPPY HUNTER BUILD LOG After finishing a Billings model of the Calypso in January, 2012, I decided to build a model of the Happy Hunter, a Robbe kit I had stashed 3036 3037 3038 3039 from an earlier purchase.
Upgrade set /72 nd scale Type VIIC U-Boat Deck & Floods Set
 Upgrade set 72-02 1/72 nd scale Type VIIC U-Boat Deck & Floods Set Instruction booklet Accurate Model Parts 72-02 1/72 nd Type VIIC U-Boat Deck & Floods Set Page 1 Content The Accurate Model Parts 72-02
Bobs Card Models
 Bobs Card Models www.bobscardmodels.com Canadair CL-415 (1:72) The Bombardier 415 (formerly Canadair CL-415) is a Canadian amphibious aircraft purpose-built as a water bomber. It is the only aircraft designed
CONSTRUCTION. Signal base.
 This booklet is put together purely to explain how we have constructed signals using our range of signal components which in themselves were produced at the behest of Graham Warburton Signalling Guru of
RESolution V2 Manual
 RESolution V2 Manual Note for the German Manual: Yellow Bottle thick CA Pink Bottle Med CA Blue tube 5 minute Epoxy Green tube 90 Minute Epoxy Construction of the Fuselage Step 1: Cover the plan with a
Note - the nose ribs and are thinner than the main ribs. These nose ribs will use a thinner rib cap than the ribs. This is per design.
 Stabilizer rev 1.2 The SE5a stabilizer is the heartbeat of the tail and is recreated like the full scale version. All tail pieces depend on the stabilizer. It uses the steel fittings, pulleys, inspection
Introduction: The model should be assembled following the sequence of the stages of construction described in these instructions.
 Victoria Bestell-Nr. 3082/00 Introduction: The model should be assembled following the sequence of the stages of construction described in these instructions. The laser-cut components are individually
Scratch Build a Water Tower
 Here s some Prototype details Photos Courtesy of Rodney Doster Water Spout and Discharge Pipe Tank Bands Here s some more Prototype details Photos Courtesy of Rodney Doster Weather Vane as a Finial Using
FUSELAGE CONSTRUCTION
 FUSELAGE CONSTRUCTION Note: prior to building and gluing on the work surface use protective covering on your building surface. (wax paper or clear wrap) Fit the laser cut Fuselage Front and Fuselage Rear
Field of Armor. 1/6th SCALE TIGER 1 MODEL TANK INSTRUCTIONS
 Field of Armor 1/6th SCALE TIGER 1 MODEL TANK INSTRUCTIONS Items needed for construction: - Well ventilated, clean 4' x 4' working space - 1 can black or clear ABS Glue (available in plumbing section of
BUILDING A SHIP S STOVE
 BUILDING A SHIP S STOVE Allan Yedlinsky A fun project and good practice in the minutiae that comes in building a ship model is building the galley stove. The British stoves were very similar from vessel
Instructions: PS-2CD 4000 Model Kit Revised 7/2008
 Instructions: PS-2CD 4000 Model Kit Revised 7/2008 Plastic Parts included: Body shell Parts Sprue #1 Roof, trainline, gravity outlet gates, and centersill/endsill pieces Parts Sprue #2 Underframe bolster
SUBMARINE Type VII b
 SUBMARINE Type VII b Technical data of the original of the : Scale 1:1 1:60 Length 66.5 m 1120 mm Width 6.2 m 125 mm Height (keel to top edge of tower) 9.5 m 170 mm Building Instructions Congratulations
Penobscot 14 Building Log
 Penobscot 14 Building Log Date July 26, 2004 Duration Activity plane jig boards July 27, 2004 July 28, 2004 cut jig boards cut frame boards, assemble jig July 29, 2004 6.75 hr assemble jig August 2, 2004
Comet USS Perch Build by R.F.Bennett
 Comet USS Perch Build by R.F.Bennett 02/21/09 Illustration 1: Comet Submarine Kit Number J4 Box top Illustration 2: Comet Submarine Kit Number J4 end plate, Note ;.75c 1 Illustration 3: Out of the box,
Instructions for Assembly of 9ft WB Wooden Underframe Kit
 Instructions for Assembly of 9ft WB Wooden Underframe Kit Prototype Notes Suitable Prototypes PO RCH 1923 7-plank minerals PO 8-plank minerals PO RCH 1923 5-plank merchandise LMS wooden mineral LMS wooden
Article (May, 2005) Scratch building a Berliner Helicopter in 1/72 scale
 Scratch building a Berliner Helicopter in 1/72 scale") Article (May, 2005) Scratch building a Berliner Helicopter in 1/72 scale This project was my longest running build, and took me approximately six months to complete. I embarked upon this path over a year
Article (May, 2005) Scratch building a Berliner Helicopter in 1/72 scale This project was my longest running build, and took me approximately six months to complete. I embarked upon this path over a year
Hull Modifications. General Introduction
 Hull Modifications General Introduction The living quarters for the Captain consisted of the Great Cabin, used for daily activities; Stateroom, used as sleeping quarters and the Coach Cabin, which in larger
Cabins and Hatchways. Bluenose II Part 5
 With the hull fully prepared, we can now add the deck furniture and other fittings. Unfortunately, this is where things begin to go badly wrong with this kit. If you compare the AL plans to the plans in
Historic Wings. 1:72 Metal Kit of the. Copyright unknown Antoinette VII. History, Notes and Assembly Instructions
 Historic Wings 1:72 Metal Kit of the Copyright unknown 1911 Antoinette VII History, Notes and Assembly Instructions History The Antoinette company was named after the daughter of the director, Jules Gastambide,
Instruction Manual book
 Instruction Manual book ITEM CODE BH53. SPECIFICATION Wingspan : 1,250mm 49.21 in. Length : 930mm 36.61in. Weight : 1.1kg 2.42 Lbs. Parts listing required (not included). Battery: 3 CELLS-LI-POLY-11.1V-2,500
Kentucky 4H Wood Science Plans Notebook. Plans Level 3
 Kentucky 4H Wood Science Plans Notebook Plans Level 3 MATERIALS: 2 pieces wood 3/4 x 10 x 4 1 piece wood 3/4 x 12 x 4 2 pieces wood 3/4 x 3 x 2 5 1/2" 2 pieces wood 3/4 x 3 x 1 8 1 piece wood 2 x 4 x
Tools and Tips: ( 1 )
") Tools and Tips: As you build instructions will show in my many picture manual how to assemble. You can use your own methods as you desire, my results are very good. A smooth, flat work surface is very
Tools and Tips: As you build instructions will show in my many picture manual how to assemble. You can use your own methods as you desire, my results are very good. A smooth, flat work surface is very
Rudder Pedals. Fig 1. Pedals and bar they slide on.
 Rudder Pedals Why adjustable pedals are needed on a kayak that is only paddled by one person can be answered by the question, do you always wear the same footwear? Personally I often go bare foot, wear
1Use the metal file to smooth
 Yamato: Step-by-step 85 Parts of the bridge and the hull a b c d e f a Part of the bridge b Part of the bridge c Part of the bridge d Radar x 2 e Part of the bridge x 2 f Wire Recommended tools and materials
10' Building Instructions for kit CC25 Caledonian Railway 20 Ton Brake Van
 Jim Smellie Mar. 1995 10' Building Instructions for kit CC25 Caledonian Railway 20 Ton Brake Van 20 TONS 3 5360 0 Caley Coaches Ltd CC25 Building Instructions Section 1 Prototype Notes A batch of 40 of
Citabria Pro. Aerobatic Parkflyer. by Joel Dirnberger
 Citabria Pro Aerobatic Parkflyer by Joel Dirnberger Revision C: December 21, 2004 Citabria Pro Building Instructions Length: Wingspan: Wing Area: Flying Weight: Wing Loading: Functions: Specifications:
Building a Giant Scale Electric EINDECKER Part 2
 Building a Giant Scale Electric EINDECKER Part 2 John Bernard N1KUB AMA 58903 IMAA 28971 In Part-1 of this series, we explored the 100 Eindecker kit from SR Batteries and started building the fuselage.
1Take the keel (3) and
 and") 1 The hull and the bridge 1Take the keel (3) and apply PVA wood glue in the second slot from the left: a toothpick may make it easier. Take care: the left end is the one that has a projection. THE HULL
1 The hull and the bridge 1Take the keel (3) and apply PVA wood glue in the second slot from the left: a toothpick may make it easier. Take care: the left end is the one that has a projection. THE HULL
Modular Locomotive System Instruction Manual for HBK22 Fowler Body Kit
 Modular Locomotive System Instruction Manual for HBK22 Fowler Body Kit Roundhouse Engineering Co. Ltd. Units 6-10 Churchill Business Park. Churchill Road, Wheatley. Doncaster. DN1 2TF. England. Tel. 01302
Right On Replicas, LLC Step-by-Step Review * Panzer IV Tank 1:32 Scale Monogram Model Kit # Review
 Right On Replicas, LLC Step-by-Step Review 20150108* Panzer IV Tank 1:32 Scale Monogram Model Kit #85-7861 Review The Panzer tank was used throughout World War II and had several modifications during that
Minicraft B-24D. Modeling a. Hand-painting and heavy weathering deliver a Liberator
 Carmine gave a Minicraft 1/72 scale B-24D a thorough going-over to model a Liberator of the Snow White Squadron, a famous participant in the low-altitude raid on the refineries at Ploesti in August 1943.
SAN FELIPE: Step by Step Pack 2
 Pack 2 Your parts Stern reinforcement Bulkheads The poop deck Bulkhead planks Planks Tools and equipment Knife Pencil Wood glue Sandpaper File a Using leftover 5 x 5-mm wooden strips, measure and cut beams
Bob's Card Models
 Bob's Card Models www.bobscardmodels My Mars Martin water bomber, compared with the same-scale 'Tracker' (both 1:72) Martin Mars water bomber (1:72). The Martin Mars were the largest flying boats ever
More Storage Space Under Yacht Bed
 More Storage Space Under Yacht Bed Open up storage space under your bed! Convert your bed deck to a Lifting Hatch with Gas Spring assist! Many bed decks on boats and RV s have two or three pieces of plywood
BOBS CARD MODELS. Canadair CL-215 (1:72)
") BOBS CARD MODELS www.bobscardmodels.com Canadair CL-215 (1:72) Canadair was a civil and military aircraft manufacturer in Canada. It was the subsidiary of other aircraft manufacturers and a nationalized
BOBS CARD MODELS www.bobscardmodels.com Canadair CL-215 (1:72) Canadair was a civil and military aircraft manufacturer in Canada. It was the subsidiary of other aircraft manufacturers and a nationalized
General Purpose Flat Wagon
 General Purpose Flat Wagon This is a freelance model of a flat wagon used by any number of railways for transporting large and awkward loads. The kit includes optional load securing rings and a pair of
KIT BUILDING ED SCHULTZ
 KIT BUILDING ED SCHULTZ KIT BUILDING FIVE BASIC MATERIALS: PLASTIC (STYRENE) WOOD LASER CUT & STANDARD PLASTER METAL RESIN ADDING DETAILS PLASTIC KITS TYPICALLY STYRENE TYPE PLASTIC DPM WALTHERS BACHMANN
Instruction Manual. Specification:
 Instruction Manual H I G Specification: Wingspan: 133 cm (52.3 inches) Length : 104 cm (40.9 inches) Weight : 1830gr Engine : 25-32 two stroke Radio : 4 channel - 4 servo H W I N G KIT CONTENTS: We have
25-200H. 12 Planer / Jointer. with Helical Cutterhead. Parts List.
 25-200H 12 Planer / Jointer with Helical Cutterhead 4001824 Parts List www.rikontools.com CABINET ASSEMBLY PARTS EXPLOSION & PARTS LIST KEY NO. DESCRIPTION KEY NO. DESCRIPTION 1 Pan Head Screw M6x12 P25-200H-1
Heacent 3D printer assembly manual. Prusa i3
 Heacent 3D printer assembly manual Prusa i3 Y-axis assembly 1. Y axis motor section: Find the belowing parts bag, Y-axis motor Assembled parts are separated as shown below, note that the motor between
Tip: Faller Water Mill Enhancements Date:
 Hi All, I have had this classic Faller 130225 water mill for well over forty years now and decided to service it and enhance the mill both in operation and aesthetics. I have had the mill installed on
Stream NXT - assembly instructions
 Stream NXT - assembly instructions Recommended settings CG (measured from root leading edge): Speed/launch camber (+down, near the wing root): Cruise camber (+down, near the wing root): Thermal camber
1909 Santos Dumont Demoiselle
 Historic Wings 1:72 Metal Kit of the Copyright unknown 1909 Santos Dumont Demoiselle History, Notes and Assembly Instructions History Alberto Santos-Dumont was born in Brazil on July 20, 1873, the young
Bob's Card Model
 Bob's Card Model www.bobscardmodels Conair C S 2F (Tracker) water-bomber(1:72) Securité Civile's converted Tracker, used for patrol duty, but also for water-bombing (3200 litres). Together with the Canadairs
Nanton Grain Mill Assembly
 ( 1 ) Nanton Grain Mill Assembly Locate package for assembling storage building. These are cut from 1/8 masonite. Inspect and lightly sand edges where it will be bonded. Use white glue or CA glue to bond.
MATTHEWS MODEL MARINE. B15F Corvette -- Fittings Replacement Sets -- General Instructions
 MATTHEWS MODEL MARINE B15F Corvette -- Fittings Replacement s -- General Instructions 1. Important! For working with Shapeways Frosted Detail plastic 3D Prints, read the How-To section at the end of this
1/72 Fujimi Nakajima Ki-43-I (64 th Sentai, Tateo Katou)
") 1/72 Fujimi Nakajima Ki-43-I (64 th Sentai, Tateo Katou) Name: Alexander Nam Tran Country: Australia, Sydney Model Scale: 1/72 Kit Maker: Fujimi Greetings all, A brief introduction, I m Alex Tran from
1/72 Fujimi Nakajima Ki-43-I (64 th Sentai, Tateo Katou) Name: Alexander Nam Tran Country: Australia, Sydney Model Scale: 1/72 Kit Maker: Fujimi Greetings all, A brief introduction, I m Alex Tran from
3Insert the second rod no. 4
 Yamato: Step-by-step 37 The stern block and searchlight control towers a b c d e f Recommended tools and materials Wood glue Sandpaper (no. 800 grain) Metal file Putty Craft knife For metal: Super Glue
G. Building the Cab, Cab Roof and Cab Boiler Extension Page 14 and Backhead.
 G. Building the Cab, Cab Roof and Cab Boiler Extension Page 14 and Backhead. Cab. In order to ensure that the cab and tender would actually look right, as what often appears on a drawing is not always
BRF-012 Type OTA Timber Wagon. Building Instructions
 Tel 07747 018544 www.prmrp.com BRF-012 Type OTA Timber Wagon Building Instructions SCALE MODEL PRODUCT FOR ADULT MODELLERS ONLY. WHITE METAL CONTAINS LEAD WASH HANDS AFTER USE. MAY CONTAIN SMALL PARTS.
84 WING SPAN MESSERSCHMITT BF-109
 84 WING SPAN MESSERSCHMITT BF-109 (COPYRIGHT PROTECTED 2014) ALL RIGHTS RESERVED MEISTER 84 ME-109 SIERRA GEAR UPDATE PLEASE NOTE: THE MAIN GEAR MOUNTING PLATE FROM SIERRA IS NOT SQUARE. YOU HAVE TO ROUND
RoR Step-by-Step Review Consolidated B-24J Liberator 1:48 Monogram # Review Click Here to Buy This Kit
 RoR Step-by-Step Review 201207011 Consolidated B-24J Liberator 1:48 Monogram #85-5629 Review Click Here to Buy This Kit The Consolidated B-24 Liberator was an American heavy bomber, designed by Consolidated
Sig Mfg. Co., Inc South Front Street...Montezuma, Iowa 50171
 Sig Mfg. Co., Inc...401-7 South Front Street...Montezuma, Iowa 50171 Introduction The SEALANE takes off and lands on water just as easy as the Sig Kadet LT40 does on solid ground. Gentle, graceful, sure
I hope you enjoy the Spirit as much as I have. Scott DeTray Model Aero
 We are excited to introduce the Model Aero Spirit. Inspired by the magnificent Northrop Grumman B-2 Spirit Stealth Bomber, the Spirit is a great flyer, on land or water. It tracks like an arrow and is
Panoptix PS60. Installation Instructions. Important Safety Information. Registering Your Device
 Panoptix PS60 Installation Instructions Important Safety Information WARNING See the Important Safety and Product Information guide in the chartplotter or fishfinder product box for product warnings and
HOn3-118 Denver, Boulder & Western Box Car
 HOn3-118 Denver, Boulder & Western Box Car 30 32 35 29 28 34 Door and Track on End Opposite Brake Wheel ONLY 31 3 36 2 6 24 33 Deadwoods Center Line of Coupler 27 We would like to thank you for purchasing
Scratchbuild A Backwoods Water Tank Part V - Making the Frost Box and Hanging the Water Spout
 Scratchbuild A Backwoods Water Tank Part V - Making the Frost Box and Hanging the Water Spout By Dwight Ennis In this section, we're going to make the Frost Box, and we'll build the Spout Hanger Assembly
Piper Cherokee /3 scale. Construction Manual
 Piper Cherokee 140 1/3 scale Construction Manual STAB CONSTRUCTION 1. Remove foam cores from cradle and place on flat surface. Inspect pieces before you epoxy halves together making sure leading and trailing
Tool Wagon Assembly Instructions
 Tool Wagon Assembly Instructions Adhesives Wood to wood joints are best done with a PVA wood glue but a good quality, slow acting (beware of instant grab ) cyanoacrylate super glue can be used if preferred.
Bob's Card Models and [Resources]
![Bob's Card Models and [Resources]](/thumbs/81/83816834.jpg "Bob's Card Models and [Resources]") Bob's Card Models www.bobscardmodels.altervista.org and www.zealot.com [Resources] Grumman Albatross HU-16E 1:72 The Grumman HU-16 Albatross is a large twin-radial engine amphibious flying boat. Originally
Bob's Card Models www.bobscardmodels.altervista.org and www.zealot.com [Resources] Grumman Albatross HU-16E 1:72 The Grumman HU-16 Albatross is a large twin-radial engine amphibious flying boat. Originally
USS. Build the CONSTITUTION. The world s oldest commissioned naval vessel afloat
 USS CONSTITUTION Build the The world s oldest commissioned naval vessel afloat 08 Build the USS STAGE CONSTITUTION Contents PAGE 7 Gun port lids, wooden strips and guns 7 7 Gun port lids, wooden strip
7mm/0Gauge BRF 025 ZUV SHARK Plough Brake. Building Instructions
 Tel 07807 225801 www.prmrp.com 7mm/0Gauge BRF 025 ZUV SHARK Plough Brake Building Instructions SCALE MODEL PRODUCT FOR ADULT MODELLERS ONLY. WHITE METAL CONTAINS LEAD WASH HANDS AFTER USE. MAY CONTAIN
NOT ALLOW YOUNG CHILDREN TO PLAY WITH THIS TOY UNSUPERVISED.
 SNAPPING ALLIGATOR This wooden toy is great for parents or grandparents to play with young children. Hold by the tail and move the alligator slowly along with the front wheel slightly off the ground and
4Wrap piece 7 around a rod. 5Remove piece 7 from the. 6Close up the join in both
 Yamato: Step-by-step 193 Parts of the command bridge and sides a b c d g e a Bow fairlead b Anchor x 2 c Machine-gun firing control mechanism x 2 d Base of machine-gun fire control mechanism x 2 e Launch
NSWGR Z12 CLASS LOCOMOTIVE AND TENDER KIT
 Australian Railway Kits ABN: 27 416 246 418 Incorporating Main West Models Manufacturers, Wholesalers and Retailers of Quality Australian Model Railways PO Box 252 Warwick, Queensland, 4370 Australia Phone/Fax:
The Phoenix FockeWulf FW-190 Part 2
 The Phoenix FockeWulf FW-190 Part 2 (refinishing) By: Roy Vaillancourt Overview: This is part 2 of the continuing story of the resurrection, rebuilding and restoration of my latest Focke Wulf FW-190. In
Right On Replicas, LLC Step-by-Step Review * How to Build a Vacuform (vacuum-formed) Scale Model
 Scale Model") Right On Replicas, LLC Step-by-Step Review 20140730* How to Build a Vacuform (vacuum-formed) Scale Model Review and Photos by Doug Cole If you ve been building models for a while you ve probably heard
Right On Replicas, LLC Step-by-Step Review 20140730* How to Build a Vacuform (vacuum-formed) Scale Model Review and Photos by Doug Cole If you ve been building models for a while you ve probably heard
High performance 90mm fiberglass jet
 High performance 90mm fiberglass jet Assembly manual For intermediate and advanced fliers only! Specs Wingspan: 1255mm Fuselage length: 1250mm Flying weight: 2600-3000g Wing area: 22.6 dm² Wing loading:
BRF-020 Type YCV Turbot Spoil Wagon. Building Instructions
 Tel 07747 018544 www.prmrp.com BRF-020 Type YCV Turbot Spoil Wagon Building Instructions SCALE MODEL PRODUCT FOR ADULT MODELLERS ONLY. WHITE METAL CONTAINS LEAD WASH HANDS AFTER USE. MAY CONTAIN SMALL
Revolution 3D-mini ARF
 Revolution 3D-mini ARF 1 Included Hardware 4 Dubro Micro Control Horns #DUB848 2.32 x 18" Linkage Wire (Music Wire) 1 1.5 x 1.25 x 1/8 Balsa Ply (for motor mount) 1 5" piece of Velcro (Optional recommended,
SPUNKY ASSEMBLY MANUAL
 SPUNKY ASSEMBLY MANUAL Please read the tips section at the back of this manual regarding the use of laser cut parts. The proper removal and preparation of these parts is important. When laser cut, some
Building the Wee Lassie Canoe. A Michigan Woodworkers Guild Presentation by Bob Mills
 Building the Wee Lassie Canoe A Michigan Woodworkers Guild Presentation by Bob Mills So you want to build a boat, eh? Ok, how about this for starters? Carved by Livio De Marchi, Woodcarver Extraordinaire