TABLE OF CONTENTS A. PBR
|
|
|
- Muriel Parsons
- 5 years ago
- Views:
Transcription

1
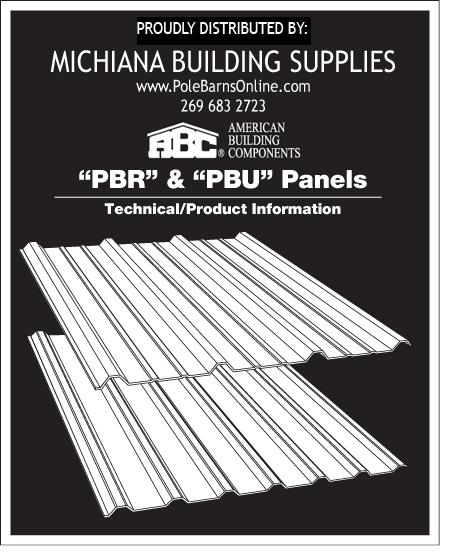
2 TABLE OF CONTENTS A. PBR Panel 1. PBR Panel Architect/Engineer Information PBR Panel UL 90 Requirements PBR Panel Product Checklist PBR Panel Attachment PBR Panel UL 90 Light Transmitting Panel Installation B. PBU Panel 1. PBU Panel Architect/Engineer Information PBU Panel UL 90 Requirements PBU Panel Product Checklist PBU Panel Attachment C. Typical Details 1. Ridge High Side Eave Hip Valley Gutter Eave Trim Rake Parapet High Side Eave Parapet Rake Corner Corner Box Base Head Jamb D. Installation Guidelines Copyright American Building Components 2004 All Rights Reserved For the most current information on our products and erection procedures, please check the ABC web site at Descriptions and specifications contained herein were in effect at the time this publication was approved for printing. In a continuing effort to refine and improve products, ABC reserves the right to discontinue products at any time or change specifications and/or designs without incurring obligation. To insure you have the latest information available, please inquire or visit our Web Site at Application details are for illustration purposes only and may not be appropriate for all environmental conditions, building designs, or panel profiles. Projects should be engineered to conform to applicable building codes, regulations, and accepted industry practices. Insulation is not shown in these details for clarity. If there is a conflict between this manual and the erection drawings, the erection drawings will take precedence. PAGE 1
3 PRODUCT INFORMATION ARCHITECT/ENGINEER INFORMATION PBR PANEL 1. PBR panel is a structural roof and wall panel. This panel can be installed directly over purlins or joists. Several different UL 90 construction numbers are available for this panel. 2. PBR panel is recommended for ¹ ₂:12 or greater roof slopes. 3. Field applied sealant is required at panel sidelaps and endlaps. 4. PBR panel is a through-fastened panel. For proper fastener application, see page The information in this manual is believed to be correct and accurate. It should not be used for any specific application without being reviewed by a registered professional engineer. GENERAL DESCRIPTION 12" 36" 1¹ ₄" Coverage Width - 36" Minimum Slope - ¹ ₂:12 Panel Attachment - See page 6 Panel Substrate - Galvalume Gauge - 26 standard - 29, 24 and 22 also available Coatings- Galvalume Plus, Signature 200* and Signature 300* PRODUCT SELECTION CHART GAUGE GALVALUME PLUS SIGNATURE 200* SIGNATURE 300* 22 gauge 24 gauge 26 gauge 29 gauge - Available in any quantity. - Minimum quantity may be required. *See Commercial/Industrial color chart for available colors. PAGE 2
4 PBR PANEL PRODUCT INFORMATION UL 90 REQUIREMENTS PBR PANEL Construction #30 26 MSG Min. Gauge PBR Panel Over Purlins at 5'- 0 ¹ ₄" O.C. 1. For Class 90 - Panel to purlin connections to be #14 Hex Head with a ⁵ ₈" O.D. washer in a in. pattern. Panel to panel connection to be 20" O.C. with faster located over each purlin. 2. Purlins - No. 14 MSG min. gauge steel, (55,000 psi min. yield strength.) Construction #79 26 MSG Min. Gauge PBR Panel Over Purlins at 5'- 0 ¹ ₄" O.C. 1. Panel Fasteners - Panel to purlin connections to be #14 Hex Head with a ⁵ ₈" O.D. washer, 6" O.C. in in. pattern. Endlap spacing to be 6 in. O.C. Spacing for panel to panel connection to be 20" O.C. 2. Purlins - No. 16 MSG min. gauge steel. (55,000 psi min. yield strength); or min. H series open web steel joists. Construction # MSG Min. Gauge PBR Panel Over Purlins at 5'- 0 ¹ ₄" O.C. 1. Panel Fasteners - Panel to purlin connections to be x 1" self-drilling Hex Head with a ⁵ ₈" O.D. washer, 12" O.C. Spacing at endlap to be in a in. patterns. Spacing for panel to panel connection to be 20" O.C. with a fastener located over each purlin. 2. Purlins - No. 16 MSG min. gauge steel. (55,000 psi min. yield strength). Construction # MSG Min. Gauge PBR Panel Over Purlins at 5'- 0 ³ ₁₆" O.C. 1. Panel Fasteners - Panel to purlin connections to be 12-14x1" self-drilling Hex Head with a ⁵ ₈" O.D. washer,12" O.C. Spacing at endlap to be in a in. pattern. Spacing for panel to panel connection to be 20" O.C. with a fastener located over each purlin. 2. Building Units - Translucent Panels. 3. Translucent Panel Rib and Purlin Reinforcement - See UL 90 light transmitting panel installation instructions. 4. Purlins - No. 16 MSG min. gauge steel. (55,000 psi min. yield strength). IMPACT RESISTANCE "PBR" panels carry a Class 4 rating under UL-2218 "Test Standard For Impact Resistance" FIRE RESISTANCE RATING 1. Deck: NC Class A Incline: Unlimited The panel qualifies for a Class A Fire Rating in compliance with Underwriters laboratories Standard UL-263 when installed over a non-combustible substrate. A Class C Fire Rating will be qualified for over combustible substrate. Look for classification marking on product. CAUTION The above listings are summaries of Construction Numbers. For UL 90 rated roof requirements and complete design information, see the Underwriters Laboratories Building Materials Directory. If you have any questions, call ABC before proceeding. PAGE 3
5 PRODUCT INFORMATION PRODUCT CHECKLIST PBR PANEL PBR Panel Ridge Cap Sculptured High Side Eave 8" 12" 36" 1¹ ₄" PBR Panel Maximum Roof Pitch 6:12 Specify Pitch FL-49 2'-6" FL-51 3'-0" Specify Roof Pitch 2" High Eave part at corner to be mitered Specify Left or Right 1³ ₄" FL-17 Flat Ridge/Hip Flashing 11¹ ₂" 11¹ ₂" FL-38 Valley Flashing SPECIFY ANGLE Standard SPECIFY ANGLE Extended 18³ ₄" 2" 11" 2" 11" 45 FL ³ ₄" 45 FL-558 Sculptured Rake 2" Rake part at corner to be mitered. Specify Left or Right 5" 1³ ₄" 1¹ ₄" 1³ ₄" FL-16 Parapet High Eave Parapet Rake Eave Trim 6" 1³ ₄" 5" 6" 3¹ ₂" 5" ⁵ ₈" 5¹ ₂" ³ ₄" Specify Roof Slope FL-874 FL-952 Specify Roof Pitch FL-19 Sculptured Hang-On Gutter 1" 90 - OF ROOF PITCH ³ ₄" DIM. A Sculptured Eave Gutter 1" 3¹ ₂" DIM. A 90 + of ROOF SLOPE Gutter Strap Gutter End FL-893 Specify Roof Slope Gutter part at corner to be mitered. Specify Left or Right OF ROOF PITCH FL of Specify Roof Slope ROOF SLOPE Gutter part at corner to be mitered. Specify Left or Right. FL-18 Specify Left or Right Specify Gutter part no. FL-18A PAGE 4
6 PBR PANEL PRODUCT CHECKLIST PRODUCT INFORMATION Inside Corner Trim Downspouts Corner Trim - Outside 4¹ ₂" ³ ₄" 3¹ ₂" 3¹ ₂" 3⁵ ₁₆" 1³ ₄" 4¹ ₂" 1³ ₄" 3⁵ ₁₆" ³ ₄" ³ ₄" 1³ ₄" FL-800 FL-31A - With Kick-Out FL-31 - Straight 1³ ₄" FL-830 ³ ₄" Base Trim (With Sheeting Notch) Base Trim (Without Sheeting Notch) Jamb Trim 3¹ ₄" 2" 1³ ₄" 2" 1³ ₄" 45 2¹ ₂" 1¹ ₄" ¹ ₂" 135 ⁵ ₈" ¹ ₂" 1¹ ₄" FL-72 FL-530 FL-23 Fasteners #17A X 1¹ ₄" Driller LTP Head Trim ¹ ₄"-14 X ⁷ ₈" Lap Tek #4A # X 1¹ ₄" Long Life Driller 1¹ ₄" 2¹ ₂" #4 ¹ ₄"-14 X ⁷ ₈" Long Life Lap Tek Non-Reinforced Fiberglass High Strength Fiberglass 1³ ₈" FL-24 Fasteners #43 ¹ ₄"-14 X 1¹ ₄" Driller with 1¹ ₈"O.D. washer Sealant ¹ ₂" x ³ ₃₂" TRI-BEAD ¹ ₂" x ³ ₃₂" HW-507 Tri-Bead HW-504 Closures Inside HW-455 #44 #14 ¹ ₄"-14 X ⁷ ₈" Lap Tek with 1¹ ₈"O.D. washer ¹ ₈ X ³ ₁₆ Stainless Steel Pop Rivet TRIPLE BEAD Triple Bead HW-502 Urethane White HW-540 TUBE SEALANT 11 OZ. Other Colors Available NOTE: 25' Per tube at ¹ ₄" bead Outside HW-456 Beveled Inside* Beveled Outside* *Special order - requires two-week lead time PAGE 5
7 PRODUCT INFORMATION ATTACHMENT PBR PANEL PBR PANEL ENDLAP ATTACHMENT (SEE DETAIL B) HIGH SIDE ATTACHMENT (6 FASTENERS PER PANEL) SLOPE A A "PBR" PANEL EAVE ATTACHMENT (6 FASTENERS PER PANEL) INTERMEDIATE PURLIN ATTACHMENT (3 FASTENERS PER PANEL) 6" 6 EACH PER PANEL 20" O.C. "PBR" PANEL ¹ ₂" X ³ ₃₂" DETAIL "A" DETAIL "B" ¹ ₂" x ³ ₃₂" Sidelap 1. ¹ ₂" X ³ ₃₂" tape sealer must be installed between weather infiltration point and fastener. 2. Install Fastener #4 (¹ ₄"-14 X ⁷ ₈ " Long Life Lap Tek) at 20" on center. 3. When possible, install panels such that sidelaps are nested away from prevailing winds. 4. Fastener #4A (¹ ₄"-14 X ⁷ ₈ " Lap Tek) are available as an alternate when long life fasteners are not desired. Endlap 1. Stack 2 continuous layers of ¹ ₂" x ³ ₃₂" tape sealer on top of each other and must be installed between weather infiltration point and fastener. 2. Install Fastener #3 (12-14 X 1¹ ₄" Long Life driller) on each side of major ribs of panel (two fasteners per foot). 3. Fastener #17A (12-14 X 1¹ ₄" driller) are available as an alternate when long life fasteners are not desired. PAGE 6
8 PBR PANEL SLOPE PRODUCT INFORMATION CONSTRUCTION NO. 542 UL 90 LIGHT TRANSMITTING PANEL INSTALLATION Install roof panels, leaving the light transmitting panel run open, except for lower light transmitting panel run panel. Install tape sealer to panel sidelaps and across panel width as normal. TRI-BEAD LOWER PANEL PURLIN ¹ ₂" x ³ ₃₂" LIGHT TRANSMITTING PANEL SLOPE TRI-BEAD PURLIN Attach light transmitting panels at the low and mid-slope connection to the purlin with nine Fastener #43 (¹ ₄ - 14 x 1¹ ₄" driller with 1¹ ₈" O.D. washer). LOWER PANEL 3 (9 PER PANEL) PAGE 7
9 PRODUCT INFORMATION PBR PANEL CONSTRUCTION NO. 542 UL 90 LIGHT TRANSMITTING PANEL INSTALLATION (Continued) Be sure the light transmitting panel sidelaps have complete run of (¹ ₂" x ³ ₃₂") tape sealer between the light transmitting panel and the "PBR" panel. See Page 6 for lap detail. SLOPE (9 PER PANEL) Fasten light transmitting panel with Fastener #44 (¹ ₄" - 14 x ⁷ ₈" Lap Tek with 1¹ ₈" O.D. washer) at 10" O.C. down each side lap. PURLIN LOWER PANEL 3 (9 PER PANEL) 4 10" O.C. LIGHT TRANSMITTING PANEL Install upper metal panel in light transmitting panel run and fasten as at a normal endlap with nine Fastener #3 (12-14 X 1¹ ₄" Long Life driller). PAGE 8
10 PBU PANEL PRODUCT INFORMATION ARCHITECT/ENGINEER INFORMATION 1. PBU panel is a structural roof and wall panel. This panel can be installed directly over purlins or joists. PBU panel is UL 90 rated per construction number PBU panel is recommended for 1:12 or greater roof slopes. 3. Field applied sealant is required at panel sidelaps and endlaps. 4. PBU panel is a through-fastened panel. For proper fastener application, see page The information in this manual is believed to be correct and accurate. It should not be used for any specific application without being reviewed by a registered professional engineer. GENERAL DESCRIPTION 36" 6" ³ ₄" Coverage Width - 36" Minimum Slope - 1:12 Panel Attachment - See page 13 Panel Substrate - Galvalume Gauge - 26 standard - 29, 24 and 22 also available Coatings - Galvalume Plus, Signature 200* and Signature 300* PRODUCT SELECTION CHART GAUGE GALVALUME PLUS SIGNATURE 200* SIGNATURE 300* 22 gauge 24 gauge 26 gauge 29 gauge - Available in any quantity. - Minimum quantity may be required. *See Commercial/Industrial color chart for available colors. PAGE 9
11 PRODUCT INFORMATION UL 90 REQUIREMENTS PBU PANEL PBU PANEL Construction #39 26 MSG Min. Gauge PBU Panel over Purlins at 5'- 0 ¹ ₄" O.C. 1. Panel Fasteners - Panel to purlin connections to be #14 self-drilling, Hex Head with a ⁵ ₈" O.D. washer, 6" O.C. Spacing at endlaps to be 6" O.C. Spacing for panel to panel connections to be 12" O.C. 2. Purlins - No. 16 MSG min gauge steel. (55,000 psi min. yield strength) IMPACT RESISTANCE "PBU" panels carry a Class 4 rating under UL-2218 "Test Standard For Impact Resistance" FIRE RESISTANCE RATING 1. Deck: NC Class A Incline: Unlimited The panel qualifies for a Class A Fire Rating in compliance with Underwriters Laboratories Standard UL-263 when installed over a non-combustible substrate. A Class C Fire Rating will be qualified for over a combustible substrate. Look for classification marking on product. CAUTION The above listings are summaries of Construction Numbers. For UL 90 rated roof requirements and complete design information, see the Underwriters Laboratories Building Materials Directory. If you have any questions, call ABC before proceeding. PAGE 10
12 ⁵ ₈" PBU PANEL PRODUCT CHECKLIST PRODUCT INFORMATION PBU Panel Ridge Cap Sculptured High Side Eave 8" 36" 6" ³ ₄" PBU Panel Maximum Roof Pitch 6:12 Specify Pitch FL '-6" FL '-0" Specify Roof Pitch 2" High Eave part at corner to be mitered Specify Left or Right 1³ ₄" FL-17 Flat Ridge/Hip Flashing Valley Flashing SPECIFY ANGLE 2" Sculptured Rake 5" 1¹ ₈" 11¹ ₂" Specify Roof Slope 11¹ ₂" FL-38 Standard SPECIFY ANGLE Extended 18³ ₄" 11" 2" 11" 45 FL ³ ₄" 45 FL-558 2" Rake part at corner to be mitered. Specify Left or Right 1⁷ ₈" 1³ ₄" FL-15 Parapet High Side Eave Parapet Rake Eave Trim 6" 2" 5" 5 ³ ₄" 3¹ ₂" 5" 5¹ ₂" ³ ₄" Specify Roof Slope FL-874 FL-954 Specify Roof Slope FL-19 Sculptured Hang-On Gutter 1" ³ ₄" 90 - of Roof Pitch 90 + of Roof Pitch DIM "A" Sculptured Eave Gutter 1" 90 + of Roof Pitch 3¹ ₂" DIM "A" Gutter Strap 1" 1" Gutter End 1" FL-893 Specify Roof Slope Gutter part at corner to be mitered. Specify Left or Right. FL-C Specify Roof Slope Gutter part at corner to be mitered. Specify Left or Right of Roof Pitch FL-512 Specify Left or Right Specify Gutter Part No. FL-18A PAGE 11
13 PRODUCT INFORMATION PRODUCT CHECKLIST PBU PANEL Inside Corner Trim 3" ³ ₄" Downspouts 3¹ ₂" 3¹ ₂" Corner Trim - Outside 3 ⁵ ₁₆" 1¹ ₈" 1¹ ₁₆" 3" 3 ⁵ ₁₆" ³ ₄" ³ ₄" 1¹ ₁₆" FL-31 - Straight 1¹ ₈" ³ ₄" FL-810 FL-31A - With Kick-Out FL-840 Base Trim (With Sheeting Notch) Base Trim (Without Sheeting Notch) Jamb Trim 3¹ ₄" 2" 1³ ₄" 2¹ ₄" 1³ ₄" 45 2¹ ₂" 1" ¹ ₂" 135 ⁵ ₈" ¹ ₂" 1¹ ₄" FL-72 FL-530 FL-21 Fasteners #17A X 1¹ ₄" Driller LTP Head Trim ¹ ₄"-14 X ⁷ ₈" Lap Tek #4A # X 1¹ ₄" Long Life Driller 1" 2¹ ₂" #4 ¹ ₄"-14 X ⁷ ₈" Long Life Lap Tek Non-Reinforced Fiberglass High Strength Fiberglass 1" FL-514A Fasteners ¹ ₄"-14 X 1¹ ₄" Driller Sealant ¹ ₂" x ³ ₃₂" HW-507 with 1¹ ₈"O.D. washer ¹ ₂" x ³ ₃₂" #43 Tri-Bead HW-504 TRI-BEAD Closures Inside HW-459 #44 #14 ¹ ₄"-14 X ⁷ ₈" Lap Tek with 1¹ ₈"O.D. washer ¹ ₈ X ³ ₁₆ Stainless Steel Pop Rivet TRIPLE BEAD Triple Bead HW-502 Urethane White HW-540 TUBE SEALANT 11 OZ. Other Colors Available NOTE: 25' Per tube at ¹ ₄" bead Outside HW-460 Beveled Inside* Beveled Outside* *Special order - requires two-week lead time PAGE 12
14 PBU PANEL ATTACHMENT PBU PANEL PRODUCT INFORMATION ENDLAP ATTACHMENT (SEE DETAIL B) HIGH SIDE ATTACHMENT (6 FASTENERS PER PANEL) SLOPE A A "PBU" PANEL EAVE ATTACHMENT (6 FASTENERS PER PANEL) 20" O.C. 6" INTERMEDIATE PURLIN ATTACHMENT (3 FASTENERS PER PANEL) 6 EACH PER PANEL ¹ ₂" X ³ ₃₂" "PBU" PANEL DETAIL "A" DETAIL "B" ¹ ₂" x ³ ₃₂" Sidelap 1. ¹ ₂" X ³ ₃₂" tape sealer must be installed between weather infiltration point and fastener. 2. Install Fastener #4 (¹ ₄"-14 X ⁷ ₈" Long Life Lap Tek) at 20" on center. 3. When possible, install panels such that sidelaps are nested away from prevailing winds. 4. Fastener #4A (¹ ₄"-14 X ⁷ ₈" Lap Tek) are available as an alternate when long life fasteners are not desired. Endlap 1. Stack 2 continuous layers of ¹ ₂" x ³ ₃₂" tape sealer on top of each other and must be installed between weather infiltration point and fastener. 2. Install Fastener #3 (12-14 X 1¹ ₄" Long Life driller) on each side of major ribs of panel (two fasteners per foot). 3. Fastener #17A (12-14 X 1¹ ₄" self-driller) are available as an alternate when long life fasteners are not desired. PAGE 13
15 PRODUCT INFORMATION TYPICAL DETAILS Ridge PBR & PBU PANELS "PBR", "PBU" RIDGE CAP 1'-0" 6" 6 EACH PER PANEL "PBR", "PBU" PANEL PEAK PURLIN ¹ ₂" X ³ ₃₂" 6 EACH PER PANEL "PBR", "PBU" RIDGE CAP (4) PER RIDGE CAP (SEE DETAIL A) "PBR", "PBU" PANEL PEAK PURLIN " X ³ ₃₂" 1. When ordering ridge caps, specify roof slope. Refer to ABC price pages for maximum slope for each ridge cap. 2. Install ¹ ₂" X ³ ₃₂" tape sealer across full with of ridge cap on both sides. Tape sealer must be installed between weather infiltration point and fasteners. 3. Install ¹ ₂" X ³ ₃₂" tape sealer to the sidelap of the ridge cap that will lap onto adjacent ridge cap. Tape sealer must be installed between weather infiltration point and fasteners. 4. Install Fastener #3 (12-14 X 1¹ ₄" Long Life driller) on both sides of major ribs (two per foot). 5. Install four Fastener #4 (¹ ₄"-14 X ⁷ ₈" Long Life Lap Tek) in each ridge cap sidelap. Place (1) one Lap Tek in high rib on each side of the ridge cap centerline and one in line with purlin fastener on each side of ridge line. PAGE 14
16 PBR & PBU PANELS TYPICAL DETAILS High Side Eave PRODUCT INFORMATION OUTSIDE EACH MAJOR RIB ¹ ₂" x ³ ₃₂" SCULPTURED HIGH SIDE EAVE "PBR", "PBU" PANEL 6 EACH PER PANEL EAVE STRUT 12" O.C. OUTSIDE EACH MAJOR RIB SCULPTURED HIGH SIDE EAVE ¹ ₂" x ³ ₃₂" OUTSIDE CLOSURE 6 EACH PER PANEL "PBR", "PBU" PANEL EAVE STRUT 1. Install outside closure, with ¹ ₂" X ³ ₃₂" tape sealer top and bottom, across width of PBR & PBU panels. 2. Install Sculptured High Side Eave to PBR & PBU panels at each major rib with Fastener #4 (¹ ₄"-14 X ⁷ ₈" Long Life Lap Tek). Sculptured high side eave trim should overhang outside closures ¹ ₂" - 1". 3. Attach front face of sculptured high side eave trim to wall with fasteners or cleat as required for wall substrate. 4. Trim laps should be approximately 3" with sufficient pop rivets to hold lap together. Apply bead of urethane sealant between trim at 3" lap. PAGE 15
17 PRODUCT INFORMATION TYPICAL DETAILS Hip PBR & PBU EACH MAJOR RIB ¹ ₂" x ³ ₃₂" HIP FLASHING BEVELED OUTSIDE CLOSURE FASTENER #12A SDS EACH PURLIN) HIP PLATE 6 EACH PER PANEL PURLIN HIP EACH MAJOR RIB "PBR" & "PBU" PANEL BEVELED OUTSIDE CLOSURE ¹ ₂" x ³ ₃₂" PURLIN FASTENER #12A SDS EACH PURLIN) HIP PLATE 1. Bevel cut and install PBR & PBU panels to follow bevel of hip. 2. Install beveled outside closures to panels, with ¹ ₂" x ³ ₃₂" tape sealer top and bottom, following bevel of hip. Beveled closures must be special ordered and require a two week lead time. 3. Install hip flashing to panel at each major rib with Fastener #4 (¹ ₄"-14 X ⁷ ₈" Long Life Lap Tek). Hip flashing should overlap outside closures ¹ ₂"-1". 4. Trim laps should overlap approximately 3" with a bead of urethane sealant in between. Install a sufficient amount of pop rivets to hold lap together. PAGE 16
18 PBR & PBU PANELS PRODUCT INFORMATION TYPICAL DETAILS Valley TRI-BEAD BEVELED INSIDE CLOSURE VALLEY FLASHING TRIPLE BEAD 6 EACH PER PANEL VALLEY PLATE 4¹ ₂" FOR STANDARD VALLEY 9" FOR EXTENDED VALLEY "PBR", "PBU" PANEL "PBR", "PBU" OR PANEL PURLIN VALLEY TRIM BEVEL CUT PANEL TO MATCH SLOPE OF VALLEY TRIM (12) PER PANEL TRIPLE BEAD TRI-BEAD INSIDE CLOSURE 1. For valleys 30' or less in length, use standard valley trim. Valleys over 30' in length require extended valley trim. 2. Apply triple bead tape sealer to valley trim parallel to the slope of the valley. Lower edge of tape sealer should be 4¹ ₂" from center of valley for standard valleys and 9" from the center of the valley for extended valleys. 3. Install high rib section of inside closure that has been field cut from standard 3'-0" straight closure. Place the cut closure square with the rib of the panel. Install Tri-Bead tape sealer to top of inside closure prior to laying panel edge down on top of the cut closure. The triple bead tape with proper fastener sequence will seal the minor ribs of the panel that are between the major ribs. 4. Bevel cut PBR & PBU panels to fit slope of valley and install to valley with Fastener #3 (12-14 X 1¹ ₄" Long Life driller) at on center. Fasteners must be installed through the closures and into triple bead tape sealer. 5. Trim laps should overlap approximately 6" with a bead of urethane sealant in between. Do not rivet valley laps together. If laps gap open, install Fastener #4 (¹ ₄"-14 X ⁷ ₈" Long Life Lap Tek) into each side of water diverter while holding lap tightly together. PAGE 17
19 PRODUCT INFORMATION INSIDE CLOSURE GUTTER STRAP TYPICAL DETAILS Gutter ¹ ₂" x ³ ₃₂" PBR & PBU PANELS "PBR" & "PBU" PANEL INSULATION SCULPTURED EAVE GUTTER WALL PANEL (6 EACH PER PANEL) FASTENER #14 POP RIVET (2 PER TRIM PIECE) EAVE STRUT DOUBLE FACED TAPE ¹ ₂" x ³ ₃₂" INSIDE CLOSURE "PBR"& "PBU" PANEL GUTTER STRAP INSULATION SCULPTURED HANG ON GUTTER WALL PANEL DOUBLE FACED TAPE 6 EACH PER PANEL FASTENER #14 POP RIVET (2 PER TRIM PIECE) ¹ ₂" x ³ ₃₂" BOX PANEL CAP TRIM EAVE STRUT Eave Gutter 1. Attach gutter to eave strut with three Fastener #14 pop rivets per section. 2. Install inside closures to top leg of gutter with ¹ ₂" x ³ ₃₂" tape sealer top and bottom. 3. Install PBR & PBU panel with Fastener #3 (12-14 X 1¹ ₄" Long Life driller) on each side of major ribs (two fasteners per foot). Fasteners must be installed up slope from inside closures. 4. Gutter laps should be approximately 3" with a bead of urethane sealant in between. Install a sufficient amount of pop rivets to hold lap together. 5. Install gutter straps 3'-0" on center with Fastener #4 (¹ ₄"-14 X ⁷ ₈" Long Life Lap Tek) fasteners at each end. Hang-on Gutter 1. Attach Box Panel Cap Trim to top of eave strut with pop rivet #14 (three per 10'-0" section). 2. Install inside closure on top of Box Panel Cap Trim with ¹ ₂" x ³ ₃₂" tape sealer top and bottom of closure. 3. Install "PBR" & "PBU" panels with Fastener #3 (12-14 X 1¹ ₄" Long Life driller)on each side of the major ribs (two fasteners per foot). Fasteners must be installed up slope from inside closures. 4. Attach gutter to roof panels with Fastener #4 (¹ ₄"-14 X ⁷ ₈" Long Life Lap Tek) at each end. 5. Gutter laps should be approximately 3" with a bead of urethane sealant in between. Install a sufficient amount of Fastener #14 (pop rivets) to hold lap together. 6. Install gutter straps 3'-0" on center with Fastener #4 (¹ ₄"-14 X ⁷ ₈" Long Life Lap Tek) at each end. PAGE 18
20 PBR & PBU PANELS ¹ ₂" X ³ ₃₂" INSIDE CLOSURE EAVE TRIM 12" O.C. OUTSIDE CLOSURE WALL PANEL TYPICAL DETAILS Eave Trim PRODUCT INFORMATION (6 EACH PER PANEL) FASTENER #14 (2 PER TRIM PIECE) EAVE STRUT "PBR" & "PBU" PANEL INSULATION DOUBLE FACED TAPE "PBR" & "PBU" PANEL SIDELAP ATTACHMENT (SEE DETAIL A) ¹ ₂ " X ³ ₃₂" (SEAL TO AT EAVE AND SIDELAP) (6 EACH PER PANEL) ¹ ₂" X ³ ₃₂" INSULATION WITH VINYL FOLDED BACK AT EAVE DOUBLE FACED TAPE FASTENER #14 (2 PER TRIM PIECE) 20" O.C. EAVE STRUT ¹ ₂ " X ³ ₃₂" INSIDE CLOSURE ¹ ₂" X ³ ₃₂" DETAIL "A" EAVE TRIM 12" O.C. 1. Install eave trim to structure with three pop rivets per section. 2. Install inside closures along top leg of eave trim with ¹ ₂" x ³ ₃₂" tape sealer top and bottom. 3. Install PBR & PBU panel with Fastener #3 (12-14 X 1¹ ₄" Long Life driller) on each side of major ribs (2 fasteners per foot) allowing panel to overhang 1¹ ₂" plus wall thickness. Fasteners must be installed up slope from inside closures. 4. Attach front face of eave trim to wall with fasteners or cleat as required for wall substrate. 5. Trim laps should overlap approximately 3" with a bead of urethane sealant in between. Install a sufficient amount of Fastener #14 pop rivets to hold lap together. PAGE 19
21 PRODUCT INFORMATION TYPICAL DETAILS Rake PBR & PBU PANELS 12" O.C. ¹ ₂" X ³ ₃₂" "PBR" & "PBU" PANEL ¹ ₂" X ³ ₃₂" 6" O.C. FIELD BEND 1" LEG FASTENER #17A EACH SUPPORT RAKE ANGLE SCULPTURED RAKE TRIM PURLIN 12" O.C. OUTSIDE CLOSURE BEGINNING ON MODULE FINISHING OFF MODULE Beginning on Module 1. Install ¹ ₂" x ³ ₃₂" tape sealer to top of PBR & PBU panel rib. 2. Install rake trim to PBR & PBU panel rib with Fastener #4 (¹ ₄"-14 X ⁷ ₈" Long Life Lap Teks) at 1'-0" on center. 3. Attach front face of rake trim to wall with fasteners or cleat as required for wall substrate. 4. Trim laps should overlap approximately 3" with a bead of urethane sealant in between. Install a sufficient amount of Fastener #14 pop rivets to hold lap together. Finishing off Module 1. Cut and field bend a 1" leg on PBR & PBU panel. 2. Install ¹ ₂" x ³ ₃₂" tape sealer to top of PBR & PBU panel. 3. Install rake trim to PBR & PBU panel with Fastener #4 (¹ ₄"-14 X ⁷ ₈" Long Life Lap Teks) at 6" on center. 4. Attach front face of rake trim to wall with fasteners or cleat as required for wall substrate. 5. Trim laps should overlap approximately 3" with a bead of urethane sealant in between. Install a sufficient amount of pop rivets to hold lap together. PAGE 20
22 PBR & PBU PANELS PRODUCT INFORMATION TYPICAL DETAILS Parapet High Side Eave PARAPET HIGH SIDE EAVE MAJOR RIB OUTSIDE CLOSURE WALL PANEL GIRT INSIDE CLOSURE ¹ ₂" X ³ ₃₂" "PBR" & "PBU" PANEL 6 EACH PER PANEL PURLIN WALL MAJOR RIB PARAPET HIGH SIDE EAVE FLASHING GIRT 6 EACH PER PANEL ¹ ₂" X ³ ₃₂" "PBR" & "PBU" PANEL OUTSIDE CLOSURE PURLIN 1. Install outside closure, with ¹ ₂" x ³ ₃₂" tape sealer top and bottom, across width of PBR & PBU panels. 2. Install parapet high side trim to PBR & PBU panels at each major rib with Fastener #4 (¹ ₄"-14 X ⁷ ₈" Long Life Lap Teks). Trim should overhang outside closures ¹ ₂" - 1". 3. Attach top leg of parapet high side trim to wall with fasteners as required for wall substrate. 4. Trim laps should overlap approximately 3" with a bead of urethane sealant in between. Install a sufficient amount of pop rivets to hold lap together. PAGE 21
23 PRODUCT INFORMATION TYPICAL DETAILS Parapet Rake PBR & PBU PANELS PARAPET RAKE TRIM 12" O.C. ¹ ₂" X ³ ₃₂" "PBR" & "PBU" PANEL 6" O.C. INSIDE CLOSURE FASTENER #14 POP RIVET (2 PER TRIM PIECE) FIELD BEND 1" LEG FASTENER EACH PURLIN 2" X ANGLE PURLIN Beginning on Module 1. Install ¹ ₂" x ³ ₃₂" tape sealer to top of PBR & PBU panel rib. 2. Install parapet rake trim to PBR PBU panel rib with Fastener #4 (¹ ₄"-14 X ⁷ ₈" Long Life Lap Teks) at 1'-0" on center. 3. Attach top leg of parapet rake trim to 2" X angle with Fastener #14 pop rivet. Elevate horizontal leg of parapet trim slightly, to provide for positive drainage of water. 4. Trim laps should overlap approximately 3" with a bead of urethane sealant in between. Install a sufficient amount of Fastener #14 pop rivets to hold lap together. Finishing off Module 1. Cut and bend a 1" leg on PBR & PBU panel. 2. Install ¹ ₂" x ³ ₃₂" tape sealer to top of PBR & PBU panel. 3. Install parapet rake trim to PBR & PBU panel with Fastener #4 (¹ ₄"-14 X ⁷ ₈" Long Life Lap Teks) at 6" on center. 4. Attach top leg of parapet rake trim to 2" X angle with pop rivets. Elevate horizontal leg of parapet trim slightly, to provide for positive drainage of water. 5. Trim laps should overlap approximately 3" with a bead of urethane sealant in between. Install a sufficient amount of Fastener #14 pop rivets to hold lap together. PAGE 22
24 PBR & PBU PANELS "PBR" & "PBU" PANEL TYPICAL DETAILS Corner PRODUCT INFORMATION OUTSIDE CORNER TRIM 2 O.C. WALL GIRT OUTSIDE CORNER DETAIL INSIDE CORNER TRIM WALL GIRT "PBR" & "PBU" PANEL 2 O.C. INSIDE CORNER DETAIL 1. Install corner trim with Fastener #4 (¹ ₄ - 14 X ⁷ ₈" Long Life Lap Tek) fastener 2'-0" O.C. PAGE 23
25 PRODUCT INFORMATION TYPICAL DETAILS Corner Box PBR & PBU PANELS GUTTER STRAPS 3'-0" O.C. "PBR" & "PBU" PANEL SCULPTURED EAVE GUTTER (MITERED) SCULPTURED RAKE TRIM (MITERED) "PBR" WALL PANEL GUTTER END CORNER TRIM SCULPTURED EAVE GUTTER (MITERED) GUTTER END SCULPTURED EAVE RAKE TRIM (MITERED) 1. Gutter and rake trim must be ordered with a left and right mitered end. To determine left or right, stand on ground and look toward eave. Roof slope must also be specified. PAGE 24
26 PBR & PBU PANELS TYPICAL DETAILS Base PRODUCT INFORMATION "PBR" & "PBU" PANEL DOUBLE-FACED TAPE INSULATION 2" x BASE ANGLE FASTENER 3'-0" O.C. ¹ ₄" MIN. "PBR" & "PBU" PANEL INSULATION 2" x BASE ANGLE FASTENER 3'-0" O.C. DOUBLE-FACED TAPE BASE TRIM 1. Wall with vinyl insulation, pull back fiberglass approximately pull over end and staple. Apply double face tape to base angle and stick insulation to it before applying panel and fastening with Fastener #3 (¹ ₄ - 14 x 1¹ ₄" Long Life Driller), six each per panel. 2. Should base trim be desired, temporarily attach trim to base angle with two Fastener #14 pop rivets until panels are installed. PAGE 25
27 PRODUCT INFORMATION TYPICAL DETAILS Head / Jamb PBR & PBU PANELS WALL GIRT FASTENER EACH GIRT DOOR EACH GIRT JAMB TRIM "PBR" & "PBU" PANEL JAMB FASTENER EACH GIRT "PBR" & "PBU" PANEL 3'-0" O.C. PURLIN FASTENER 12" O.C. HEAD TRIM FASTENER 12" O.C. DOOR HEAD HEAD 1. Install Jamb and Head Trim with pop rivets as required to support flashing during panel installation. PAGE 26
28 PBR & PBU PANELS PRODUCT INFORMATION INSTALLATION GUIDELINES I. Pre-Order II. A. Prior to ordering panels, all dimensions should be confirmed by field measurement. Job Site Storage and Handling A. Check the shipment against the shipping list. B. Damaged material must be noted on bill of lading. C. Panels should be handled carefully. A spreader bar of appropriate length is recommended for hoisting. D. Check to see that moisture has not formed inside the bundles during shipment. If moisture is present, panels should be wiped dry, then restacked and loosely covered so that air can circulate between the panels. III. Application Checklist A. Check substructure for proper alignment and uniformity to avoid panel distortion. B. Periodic check of panel alignment is crucial to proper panel installation. C. For proper appearance, ribs should line up at hips, valleys and ridges. D. Panels should be cut on ground to minimize cut filings on roof. Keep panels clean during installation. Do not allow panels to come into contact with water runoff from lead, copper or graphite. PAGE 27
29
900 SERIES WALL PANELS
 CI-DS-01-900 CI-PP-01-900 CI-PJ-01-900 CI-PJ-02-900 CI-PJ-03-900 CI-BS-01-900 CI-BS-02-900 CI-BS-03-900 CI-BS-04-900 CI-BS-05-900 CI-OC-01-900 CI-OC-02-900 CI-IC-01-900 CI-FO-01-900 CI-FO-02-900 CI-FO-03-900
Tuff-Rib Install Guide
 Install Guide bestbuymetalroof.com Page 2 of 27 Page 3 of 27 1. Page 4 2. a. Installation Guide b. Panel Squaring Pages 5, 6 Pages 7, 8 3. Pages 9, 10 4. a. Fascia (optional) b. Eave / 1.5x3.5 Angle c.
FlexLoc. Technical/Installation Information
 Technical/Installation Information IMPORTANT NOTICE READ THIS MANUAL COMPLETELY PRIOR TO BEGINNING THE INSTALLATION OF THE FLEXLOC PANELS. ALWAYS INSPECT EACH AND EVERY PANEL AND ALL ACCESSORIES BEFORE
U-PANEL. Panel Information. Detail Conditions. Flashing Profiles. Notes. Accessory Profiles. Testing Information. Design/Installation Considerations
 Table of ontents Product Page No. Product Page No. Panel Information U-Panel Profiles...PUP-2 Panel Overview...PUP-2 Flashing Profiles Eave (Direct Fasten)...PUP- leat...pup- Box Gutter...PUP- Box Gutter
900 SERIES PANEL SHEET INDEX STAGGERED ENDLAP STAGGERED MALE LEG AT ENDLAP CONTINUOUS FEMALE ENDLAP INSTALLATION SEQUENCE CI-WR
 900 SERIES PANEL CI-DS-01-900 CI-PJ-01-900 CI-PJ-02-900 CI-EL-01-900 CI-EL-02-900 CI-EL-03-900 CI-EL-04-900 CI-EL-05-900 CI-EL-06-900 CI-EL-07-900 CI-EL-08-900 CI-RD-01-900 CI-RD-02-900 CI-RD-03-900 CI-EV-01-900
REGAL. Installation Manual
 REGAL Installation Manual General Information The details shown on the following pages are suggestions or guidelines for installing the Regal system. The installation details shown here are proven methods
Tuff-Rib. Installation Manual. Nationwide supplier of quality metal roofing. Toll-Free (800) S. Lee Hwy. Cleveland, TN 37311
 S. Lee Hwy. Cleveland, TN 37311") Installation Manual Nationwide supplier of quality metal roofing. 65 S. Lee Hwy. Cleveland, TN 7.. www.bestbuymetals.com Toll-Free (800) 78-00 IMPORTANT NOTICE This manual contains suggestions and guidelines
Installation Manual Nationwide supplier of quality metal roofing. 65 S. Lee Hwy. Cleveland, TN 7.. www.bestbuymetals.com Toll-Free (800) 78-00 IMPORTANT NOTICE This manual contains suggestions and guidelines
ProSnap 100 STANDARD DETAILS
 ProSnap 100 OVER WOOD DECK STANDARD DETAILS Austin - Headquarters/Sales Office 830 Sagebrush Drive Austin, TX 78758 (512) 452-1515 (800) 428-7412 Fax (512) 833-7499 www.ctmrs.com email: info@ctmrs.com
TABLE OF CONTENTS A-1
 TABLE OF CONTENTS PAGE NUMBER: DETAIL DESCRIPTION A-1...TABLE OF CONTENTS A-2...GENERAL NOTES B-1...GENERAL INFORMATION C-1...EAVE DRIP DETAIL C-2...EAVE DRIP with GUTTER DETAIL C-3 & C-4...FIXED RIDGE
 TremLock T-138 INSTALLATION MANUAL T-138 www.tremcoroofing.com 3735 Green Road Beachwood, Ohio 44122 1.800.852.6013 50 Beth Nealson Drive Toronto, Ontario M4H 1M6 1.800.668.9879 7241 6/8/18 TABLE OF CONTENTS
400 SERIES VERTICAL INSTALLATION
 CI-DS-01-400V CI-PJ-01-400V CI-PJ-02-400V CI-PJ-03-400V CI-BS-01-400V CI-BS-02-400V CI-BS-03-400V CI-BS-04-400V CI-BS-05-400V CI-OC-01-400V CI-OC-02-400V CI-IC-01-400V CI-IC-02-400V CI-FO-01-400V CI-FO-02-400V
Table of Contents Light Gauge Metal Roof & Wall Panels
 Table of Contents Light Gauge Metal Roof & Wall Panels Installation Guide for Delta Rib, Nor-Clad, Strata Rib & 2-1/2 Corrugated Introduction Important Notice Notes: April 2008 Minimum Recommended Tools
THESE DETAILS ARE PROVIDED AS A GUIDELINE FOR PROPER PANEL AND ASSOCIATED COMPONENT INSTALLATION, AND ARE BASED ON INDUSTRY ACCEPTED PRACTICES.
 FRKPV-DS-01-MTLH FRKPV-PJ-01-MTLH FRKPV-PJ-02-MTLH FRKPV-PJ-03-MTLH FRKPV-FS-01-MTLH FRKPV-FS-02-MTLH FRKPV-BS-01-MTLH FRKPV-BS-02-MTLH FRKPV-BS-03-MTLH FRKPV-BS-04-MTLH FRKPV-OC-01-MTLH FRKPV-IC-01-MTLH
PBR Panel Installation Specifications
 4906 St. Stephens Rd. 5780 Hwy 90 W Eight Mile, Al 36613 Theodore, AL 36590 251 456 2254 251 653 1550 251 457 2254(F) 251 653 1514(F) PBR Panel Installation Specifications ROOF APPLICATION: Roof slope
MasterRib. Installation Manual. July Toll-Free (888) MTL-ROOF. PO Box 229 Fayetteville, NC Rev.
 MTL-ROOF. PO Box 229 Fayetteville, NC Rev.") MasterRib Installation Manual July 010 PO Box 9 Fayetteville, NC 80.. www.unionmetalroofing.com Toll-Free (888) MTL-ROOF Rev. 7/10 IMPORTANT NOTICE This manual contains suggestions and guidelines on how
MasterRib Installation Manual July 010 PO Box 9 Fayetteville, NC 80.. www.unionmetalroofing.com Toll-Free (888) MTL-ROOF Rev. 7/10 IMPORTANT NOTICE This manual contains suggestions and guidelines on how
DW VERTICAL INSTALLATION
 AR-PJ-01-DW5V AR-PJ-02-DW5V AR-PJ-03-DW5V AR-PJ-04-DW5V AR-BS-01-DW5V AR-BS-02-DW5V AR-OC-01-DW5V AR-OC-02-DW5V AR-OC-03-DW5V AR-IC-01-DW5V AR-IC-02-DW5V AR-IC-03-DW5V AR-FO-01-DW5V AR-FO-02-DW5V AR-FO-03-DW5V
2 ½ Corrugated Panel Installation Specifications
 2 ½ Corrugated Panel Installation Specifications ROOF APPLICATION: Roof slope must be a minimum of a 2/12 pitch to use this product. When using this product butyl lap sealant is recommended for all slopes.
Five Star Panel Installation Instructions
 Five Star Panel Installation Instructions How to Store Five Star Panels You will need to store FIVE STAR PANELS in dry place to prevent staining, deterioration and possibly void all warranties. Stand the
Steel Roofing & Siding INSTALLATION GUIDE
 Steel Roofing & Siding INSTALLATION GUIDE Your Authorized Dealer is: WASHINGTON Auburn (800) 700-7228 WASHINGTON Spokane (866) 321-5954 www.nuraymetals.com CALIFORNIA Redlands (800) 806-8729 CONTENTS BEFORE
Tuff Rib Panel Installation Specifications
 Tuff Rib Panel Installation Specifications ROOF APPLICATION: Roof slope must be a minimum of a 2/12 pitch to use this product. For slopes lower than a 3/12 pitch, lap sealant is suggested on the side laps
TIOGA Table of Contents
 Table of Contents TABLE OF CONTENTS Product Data Sheet...2 Engineering Data...3 General Information...4 Handling...5 Roof Preparation...5 Fastening Recommendations...6 Field Cutting...7 Touch-up Paint...7
Table of Contents. Notes to Designer/User Map of Typical Roof Conditions Fastener Placement Fastener Selection...
 Table of Contents Section Page Notes to Designer/User... 2-3 Map of Typical Roof Conditions... 4 Fastener Placement... 5 Fastener Selection... 6 Ridge/Hip Flashing... 7 Valley Flashing... 8 Eave Flashings...
WESTERN WAVE Panel. Horizontal Installation and Technical Information
 WESTERN WAVE Panel Horizontal Installation and Technical Information Western States Western Wave Wall and Soffit Panels Installation, Flashings & Shop Drawing Detail Guide Table of Contents Section Page
WESTERN WAVE Panel. Vertical Installation and Technical Information
 WESTERN WAVE Panel Vertical Installation and Technical Information Western States Western Wave Wall and Soffit Panels (Vertical) Installation, Flashings & Shop Drawing Detail Guide Section Notes to Designer
MINI/MAXI-BATTEN. Panel Information. Detail Conditions. Flashing Profiles
 Table of ontents Product Page No. Product Page No. Panel Information Profiles...PMB-2 Panel Overview...PMB-2 Flashing Profiles Eave...PMB- Extended Eave...PMB- leat...pmb- Offset leat...pmb- Starter...PMB-
KS SERIES - VERTICAL INSTALLATION
 CS-DS-01-KSV CS DISCLAIMER CS-PJ-01-KSV KS42SL EXPANDED PANEL JOINT CS-PJ-02-KSV KS42SL ENGAGED PANEL JOINT CS-PJ-03-KSV KS45SL EXPANDED PANEL JOINT CS-PJ-04-KSV KS45 FLAT ENGAGED PANEL JOINT CS-PJ-05-KSV
L:\Document Control\DR Drafting\Records\Royce\Facades\Plank\US BenchmarkTM By Kingspan 40% RGB Gold 2013.jpg FACADES - BRICK INDEX SHEET
 KPV-DS-01-BRH KPV-PJ-01-BRH KPV-PJ-02-BRH KPV-PJ-03-BRH KPV-BS-01-BRH KPV-BS-02-BRH KPV-BS-03-BRH KPV-OC-01-BRH KPV-IC-01-BRH KPV-FO-01-BRH KPV-FO-02-BRH KPV-FO-03-BRH KPV-SJ-01-BRH KPV-PR-01-BRH KPV-LE-01-BRH
KS42 MF SERIES - HORIZONTAL INSTALLATION
 CI-DS-01-KSMF H CI-PJ-01-KSMF H CI-PJ-02-KSMF H CI-PJ-03-KSMF H CI-PJ-04-KSMF H CI-PJ-05-KSMF H CI-PJ-06-KSMF H CI-PJ-07-KSMF H CI-PJ-08-KSMF H CI-PJ-09-KSMF H CI-PJ-10-KSMF H CI-PJ-11-KSMF H CI-PJ-12-KSMF
THESE DETAILS ARE PROVIDED AS A GUIDELINE FOR PROPER PANEL AND ASSOCIATED COMPONENT INSTALLATION, AND ARE BASED ON INDUSTRY ACCEPTED PRACTICES.
 KPV-DS-01-MTLH C & I DISCLAIMER KPV-PJ-01-MTLH EXPANDED PANEL JOINT KPV-PJ-02-MTLH ENGAGED PANEL JOINT KPV-PJ-03-MTLH INTERMEDIATE SUPPORT KPV-FS-01-MTLH MULTI-STORY FIRE STOPPING DETAIL KPV-FS-02-MTLH
MULTI-STORY FIRE STOPPING ASSEMBLY FRAMED OPENING JAMB (LOW CELL) INDEX SHEET
 INDEX SHEET") KPH-DS-01-MTLV KPH-PP-01-MTLV KPH-PP-02-MTLV KPH-PJ-01-MTLV KPH-PJ-02-MTLV KPH-PJ-03-MTLV KPH-PJ-04-MTLV KPH-PJ-05-MTLV KPH-FS-01-MTLV KPH-FS-02-MTLV KPH-FS-03-MTLV KPH-BS-01-MTLV KPH-BS-02-MTLV KPH-BS-03-MTLV
KPH-DS-01-MTLV KPH-PP-01-MTLV KPH-PP-02-MTLV KPH-PJ-01-MTLV KPH-PJ-02-MTLV KPH-PJ-03-MTLV KPH-PJ-04-MTLV KPH-PJ-05-MTLV KPH-FS-01-MTLV KPH-FS-02-MTLV KPH-FS-03-MTLV KPH-BS-01-MTLV KPH-BS-02-MTLV KPH-BS-03-MTLV
SPAN-LINE 36A. Panel Information. Flashing Profiles. Accessory Profiles. Testing Information. Design/Installation Considerations.
 Product Table of ontents Page No. Panel Information Span-Line 6A Panel Profile... PSP-2 Panel Overview... PSP-2 Flashing Profiles Span-Line 6A Inside orner... PSP- Span-Line 6A Outside orner... PSP- 1.5"
Best Buy Metals Toll Free / Phone / Fax
 DETAIL MANUAL for Vertical Seam Best Buy Metals Toll Free 1-800-728-4010 / Phone 423-479-6382 / Fax 423-728-3066 www.bestbuymetals.com Vertical Seam Roofing Panels Fig. 2 Vertical Seam Has 1-3/4" high
DW HORIZONTAL INSTALLATION
 AR-PJ-01-DW2H 2" HORIZONTAL PANEL JOINT AR-PJ-02-DW2H 2" VERTICAL PANEL JOINT AR-PJ-03-DW2H 3" HORIZONTAL PANEL JOINT AR-PJ-04-DW2H 3" VERTICAL PANEL JOINT AR-PJ-05-DW2H CUSTOM REVEAL AR-PJ-06-DW2H DW-2000S
9 x 12 BackYard Building. Installation Information
 9 x 12 BackYard Building Installation Information Product Information Building Code Disclaimer Safety First! Back Yard Building METAL DEPOTS DOES NOT WARRANT OR REPRESENT ITS BACKYARD SERIES BUILDINGS
VENTED GABLE DETAIL ROOF PANEL GABLE FLASHING 24" C/C MAX. BUTYL SEALANT TAPE ROOF PURLIN FLASH AB-1, AB-2, AB-3, OR AB-4
 ROOF PANEL GABLE FLASHING FASTENER @ 24" C/C MAX. ROOF PURLIN BUTYL SEALANT TAPE FLASH AB-1, AB-2, AB-3, OR AB-4 FASTENER @ EVERY MAJOR RIB OR 12" C/C MAX. F-J TRIM FABRAL ALUMINUM SOFFIT FASTENER 24"
GLOSSARY OF TERMS SECTION 8
 GLOSSARY OF TERMS SECTION 8 Anchor Bolt Angle Base Plate Bay Blocking CCB Centerline Chord Cladding Clip Closure Strip An A-307 steel bolt embedded in the concrete footing to anchor the base plate of the
SpeedDeck. Fixing and Handling Guide
 SpeedDeck Section 1 Delivery/Storing On Site/Handling l SpeedDeck is factory or on-site manufactured. l Straight SpeedDeck bundles are a maximum 1 tonne, sheets nestled and banded with polypropylene or
MAXIMUM PANEL ATTACHMENT FASTENER SPACING IS 24" O.C. ALL FASTENERS TO PENETRATE WOOD 3/4" MIN. AND METAL FRAMING 1/2" MIN.
 PLYWOOD SHEATHING DMI SOFFIT PANEL #10-13 GP PANCAKE HEAD (JC) - J CLOSURE (LC) - L CLOSURE #9-15 X 1 1/2" WOODZAC GP APPROVED MOISTURE BARRIER SOFFIT TO WALL PANEL WPRP-H-01-00 APPROVED MOISTURE BARRIER
The Roofing Store TRS 9 35MM 78MM 150MM 78MM PRODUCT TECHNICAL DATA
 TRS 9 35MM 78MM 150MM 78MM THICKNESS END SPAN INTERNAL SPAN MINIMUM PITCH 0.55MM 2.30M 3.20M 3 DESCRIPTION TRS 9 profile is designed for commercial and industrial roofing. The profile is suitable for low
DUTCH GABLE FREESTANDING CARPORT
 DUTCH GABLE FREESTANDING CARPORT STRATCO OUTBACK ASSEMBLY INSTRUCTIONS. Your complete guide to building a FREESTANDING Outback DUTCH GABLE CARPORT BEFORE YOU START Carefully read these instructions. If
Ensure there is reasonable access for materials and working space, ensure the shed site is level and consider the disposal of run-off water.
 INSTALLATION GUIDE TM Flat Roof Homesheds THE POTTER BEFORE YOU START It is important to check your Local Government Authority requirements before the installation of your new Stratco Potter Flat Roof
Doublelok I UltraDek Perimeter Trim Reference Northern Large Trim
 ( - Doublelok I UltraDek Perimeter Trim Reference Northern Large Trim DLOOOOS Doec '14r"l;s 0 JD "'\ GUTTER GUTTER LAP GUTTER CAP EXPANSION COVER GUTTER SUPPORT F2108 2" LAP F2109 F2110/F629 F319 or
CFDTT-01. Control Joint Study (General)
") Trim Method Classic Method Notes: Control joints are required and should be located by the designer at the following locations on the construction documents: 144 sf (13.4 sm) is the maximum overall area
Trim Method Classic Method Notes: Control joints are required and should be located by the designer at the following locations on the construction documents: 144 sf (13.4 sm) is the maximum overall area
Straight Rib Series Metal Roofing Panel Installation Guide
 D-Rib G-Rib C-Rib Straight Rib Series Metal Roofing Panel Installation Guide 7000 AIRPORT LINE R.R., BOX 7 HENSALL, ONTARIO N0M X0 EASY BUILDING PRODUCTS TEL. : 5-6-07 TOLL FREE : -888-76-777 FAX: 5-6-08
TYPICAL FRAMING AND STITCH FASTENER PATTERNS FOR MAX-RIB PANELS
 TYPICAL AND PATTERNS FOR MAX-RIB S MAX-RIB (PATTERN #1) @ 1'-8" O.C. (MAX.) ROLL TAPE SEALANT @ SEAMS MAX-RIB @ 1'-8" O.C. (MAX.) ROLL TAPE SEALANT @ SEAMS MAX-RIB TRIM (PATTERN #3) NOTE: TAPE SEALANT
or Ordering Installation and Self-Help Guide
 1-800-467-0626 or 479-787-6264 Ordering Installation and Self-Help Guide MBS Self-Storage buildings offer a wide variety of layouts Typically based on 5ft spacing. Common roof slopes 1:12 to 1/2:12 and
DETAIL MANUAL. Metal Roofing Wholesalers. Classic Rib Roofing Panels
 Metal Roofing Wholesalers Classic Rib Roofing Panels DETAIL MANUAL 1178 Topside Rd Louisville, TN 37777 The Classic Rib Roofing Panel Figure 1 House With Classic Rib Metal Roofing Installed Classic Rib
DETAIL MANUAL. For R-Panel / PBR Panel. Metal Roofing Wholesalers
 Metal Roofing Wholesalers DETAIL MANUAL For R-Panel / PBR Panel 1178 Topside Rd Louisville, TN 37777 Picture of Gulf Coast Figure 1 Metal Roofing Plant PBR/R-Panel The 26-gauge R-Panel is a strong, durable,
Finesse Profiles. Nailstrip
 Installation Details Profile and Lap Detail 265/465 38mm NAILSTRIP *other widths available CD GRADE PLYWOOD 19mm STRUCTURE SILICONE * MIN 20mm VENTILATION GAP * WHEN ROOF PITCH IS UNDER 7.5 OR TOTAL COMBINED
Hugger Installation. Roof Hugger, LLC P: P.O. Box 1027 F: Odessa, FL
 RECEIVING MATERIALS: ROOF HUGGERS are typically placed on wood pallets 3-5 wide and approximately 10 long weighing up to 5,000 lbs. ROOF HUGGERS are shipped via closed van for LTL less than truckload quantities
DETAIL MANUAL for Standing Seam / Image II
 DETAIL MANUAL for Standing Seam / Image II Best Buy Metals Toll Free 1-800-728-4010 / Phone 423-479-6382 / Fax 423-728-3066 www.bestbuymetals.com Best Buy Metals Standing Seam Roofing Panels Fig. 2 Standing
Construction details: Master-C type profiles and joints:
 Construction details: Master-C type profiles and joints: Master-C 3g 32 mm. (1 1/4 ) 1000 mm. (39 3/8 ) outer face inner face 10.5 fixing details: sealing washers shall be installed through a 2-3/8 x 1-9/16
4. Metal roof jacks at penetrations and attachments
 - - - - - - - - - - - - - - - - - - - - - - - - - - - - - - - - - - - - - - - - - - - - - - - - - - - - - - - - - - - - - - - - - - - - - - SECTION 07 61 00 METAL SHINGLE ROOFING - - - - - - - - - - -
401 SW 33rd Ave Ocala, FL
 401 SW 33rd Ave Ocala, FL 34474 352-622-1035 www.metalroofingofocala.com Table of Contents Panels...Pg.1 Ultra Rib Trim...Pg.2-4 PBR Trim...Pg.5-6 5V Trim...Pg.7-9 TCM-Lok...Pg.10-11 Insulation/Ventilation:
Installation Guide. Step 3. Valley Flashing. Step 7. Transition Flashings and Accessories. Step 6. Hip and Ridge Installation
 Step 7. Transition s and Accessories Step 3. Valley Step 6. Hip and Ridge Installation Step 2. Rake Trim Step 5. Installing the Shingles Step 1. Eave Starter Installation Step 4. Endwall s Installation
FOR FIELD USE PLEASE DISTRIBUTE TO THE ERECTION CREW
 COVER INSTRUCTIONS FOR INSTALLING WALL SHEETING FOR FIELD USE PLEASE DISTRIBUTE TO THE ERECTION CREW WATERLOO, IN 305 Industrial Parkway Waterloo, IN 46793 Phone: 260-837-7891 Fax: 260-837-7384 SWANSEA,
INSTALLATION GUIDE. Flat Roof Homesheds TM BEFORE YOU START TOOLS REQUIRED
 INSTALLATION GUIDE Flat Roof Homesheds TM BEFORE YOU START It is important to check your Local Government Authority requirements before the installation of your new Stratco Flat Roof Homeshed. Read these
Inspire Aledora Slate Application Guidelines
 July 2014 Inspire Aledora Slate Application Guidelines Only Basic Roofing Tools Required Hand fastened or fastened with a pneumatic nail gun Utility knife or a standard circular saw Tape measure, pry bar,
Thompson Architectural TM-RIB PANEL ACCESSORY DETAIL GUIDE
 TM-RIB PANEL ACCESSORY DETAIL GUIDE FL11101.1 FL11101.2 TA125 (UL580 Class 90) Certified Thompson Architectural Metal Roofing is proud to be a partner of the Energy Star Roof Products Program SINGLE SOURCE
VENTED GABLE DETAIL ROOF PANEL GABLE FLASHING 24" C/C MAX. BUTYL SEALANT TAPE ROOF PURLIN FLASH AB-1, AB-2, AB-3, OR AB-4
 GABLE FLASHING FASTENER @ 24" C/C MAX. ROOF PURLIN BUTYL SEALANT TAPE FLASH AB-1, AB-2, AB-3, OR AB-4 FASTENER @ EVERY MAJOR RIB OR 12" C/C MAX. F-J TRIM FABRAL ALUMINUM SOFFIT FASTENER 24" C/C MAX. BUTYL
BARRELL VAULT BATTENLESS
 i BARRELL VAULT BATTENLESS INSTALLATION GUIDE INSTALLATION NOTIFICATION The installation procedures demonstrated in this manual are recommended methods for the installation of the Gerard Barrel Vault battenless
Dura-Lock Roof System
 DLR-14 Dura-Lock Roof System Assembly and Installation Instructions Read the instructions before starting the job. They explain the steps required to produce a finished product that will meet factory specifications.
Light Gauge Metal Roof and Wall Panels. Installation Guide for Delta Rib, Delta Rib III, Nor-Clad, Strata Rib & Corrugated
 Light Gauge Metal Roof and Wall Panels Installation Guide for Delta Rib, Delta Rib III, Nor-Clad, Strata Rib & 2 1 2 Corrugated Light Gauge Metal Roof & Wall Panels ASC Building Products A Division of
PRODUCT EVALUATION Effective July 1, 2009 RC-204
 TEXAS DEPARTMENT OF INSURANCE Engineering Services / MC 103-3A 333 Guadalupe Street P.O. Box 149104 Austin, Texas 78714-9104 Phone No. (512) 322-2212 Fax No. (512) 463-6693 PRODUCT EVALUATION Effective
Barrel Vault Counter Batten and Batten
 Barrel Vault Counter Batten and Batten INSTALLATION GUIDE www.gerardusa.com INSTALLATION NOTIFICATION The installation procedures demonstrated in this manual are recommended methods for the installation
TABLE OF CONTENTS A-1...TABLE OF CONTENTS A-2...GENERAL NOTES B-1 & B-2...GENERAL INFORMATION (FASTENER PATTERNS)
") FW SERIES TABLE OF CONTENTS PAGE NUMBER: DETAIL DESCRIPTION A-1...TABLE OF CONTENTS A-2...GENERAL NOTES B-1 & B-2...GENERAL INFORMATION (FASTENER PATTERNS) DETAILS C-1...SIMPLE BASE DETAIL with 1 1/2"
FW SERIES TABLE OF CONTENTS PAGE NUMBER: DETAIL DESCRIPTION A-1...TABLE OF CONTENTS A-2...GENERAL NOTES B-1 & B-2...GENERAL INFORMATION (FASTENER PATTERNS) DETAILS C-1...SIMPLE BASE DETAIL with 1 1/2"
Cambridge English Application Instructions
 Cambridge English Application Instructions ROOF SLOPE: Never apply asphalt shingles to roof slopes less than 2:12. For slopes 2:12 to 4:12 (LOW SLOPE), see special underlayment requirements outlined below.
Inspire Slate Starter Piece Hip and Ridge. 13 1/2" Height: 13 ½" Width: 12" Squares/ Pallet. Bundles/ Square
 December 2017 Classic Slate Application Guidelines Only Basic Roofing Tools Required Hand fastened or fastened with a pneumatic nail gun Utility knife or a standard circular saw Tape measure, pry bar,
IMPORTANT -- SPECIAL INSTALLATION INSTRUCTIONS FOR AZTEC SHELTER
 IMPORTANT -- SPECIAL INSTALLATION INSTRUCTIONS FOR AZTEC SHELTER ** READ ALL INSTALLATION INSTRUCTIONS BEFORE STARTING!** If at any point, you have questions, call 1-800-851-0865...(The manufacturer will
Turada Hardwood Shingles and Shakes Installation instructions
 1. General 1.1 Maximum Exposure: Maximum exposure for wood shingles and shakes shall comply with Table 1 herein, unless specifically specified in the roof assemblies Product Approval. 1.2 Solid and Spaced
GIRTS ON BACK OF BUILDING
 GIRTS ON BACK OF BUILDING ALL GIRTS ARE 1 1/2 SQUARE TUBE. GIRT LENGTHS FOR 12, 20, 24, AND 30 WIDE BUILDINGS: ON 12 WIDE BUILDINGS GIRTS ARE 67 3/4 LONG ON 20 WIDE BUILDINGS GIRTS ARE 56 3/4 LONG ON 24
Safety Glasses Safety Gloves Ladders Measuring Tape Spirit Level String Line. Tin-Snips Rivet Gun Caulking Gun Silicone Socket Set
 BEFORE YOU START Carefully read these instructions and refer to them constantly during each stage of construction. If you do not have all the necessary tools or information, contact Stratco for advice.
Features 24 ga steel or 26 ga steel. Colors available on standard or premium and metallic. 16 to 24 o.c. On site factory made.
 Strip Width Base Material Thickness Min Tensible Min Yield Coatings 16.00 to 24 in Steel.0128 to.027 in 52 - ksi 50 - ski Painted / Galvalume UL CONSTRUCTION NUMBERS: TGKX539 The Nail Strip 1.5 (NS-150)
GABLE ROOF CARPORT RECOMMENDED INSTRUCTION MANUAL
 GABLE ROOF CARPORT RECOMMENDED INSTRUCTION MANUAL Table of Contents Introduction 2 Components 3 Step 1a Marking out the Perimeter of the Carport with Footing only 3 Step 2a Footing Set-Out for Concrete
STEEL BUILDINGS RECOMMENDED INSTALLATION GUIDE
 STEEL BUILDINGS RECOMMENDED INSTALLATION GUIDE 3 TO 30 METRE SPAN FRAME FIRST METHOD SUPPLIED BY: Last update 2 May 2008 2008 FBHS (Aust) Pty Limited FBHS (Aust) Pty Limited ABN 83 126 232 504 trading
Read guide from beginning to end before starting installation. Read all warnings and cautions during unit installation.
 Installation Guide for E-Series/Eagle High-Performance Mullion Windows with LVL Reinforcement and Installed Using Type B Clips Thank you for choosing Andersen. Instructions are for typical, new wood-framed
Storing, Handling, and Cutting Steel Panels
 Storing, Handling, and Cutting Steel s Storing Specifically check your quantities, colors, and lengths All materials should be used as soon as possible Steel bundles should be stored indoors with enough
important notice This manual contains suggestions and guidelines on how to install the subject Quality Metals
 ml-200 important notice This manual contains suggestions and guidelines on how to install the subject Quality Metals time without incurring any obligations. To insure you have the latest information available,
DUTCH GABLE CARPORT RECOMMENDED INSTRUCTION MANUAL
 DUTCH GABLE CARPORT RECOMMENDED INSTRUCTION MANUAL Table of Contents Introduction 2 Components 3 Step 1a Marking out the Perimeter of the Carport with Footing only 4 Step 2a Footing Set-Out for Concrete
eco-shake INSTALLATION INSTRUCTION
 1 eco-shake INSTALLATION INSTRUCTION NOTE: Shuffling the eco-shakes during installation may be necessary to obtain a uniform color throughout the roof. Due to the natural wood content in the ecoshakes,
INSTALLATION INSTRUCTIONS LS X 12-2 X 7 1/2 FRAME LOAFING SHED
 INSTALLATION INSTRUCTIONS LS-12 12 X 12-2 X 7 1/2 FRAME ACTUAL FRAME BASE SIZE: 12 X 12-2 LOAFING SHED Our unique assembly process quickly transforms the individual pieces into a finished structure that
Viva Synthetic Thatch Installation Instructions
 Viva Synthetic Thatch Installation Instructions Overview Structure This instruction manual is for the installation of VIVA on an open battened roof frame. Structure should be framed with weatherable wood
Series Sloped glazed Curtain wall. Installation Instructions
 Series 5600 Sloped glazed Curtain wall Installation Instructions Part NO. Y308 February 2013 SECTION TABLE OF CONTENTS PAGE I. General Notes & Guidelines. 3-4 II. Gutter and Mullion Assembly.. 5 III. End
Metal Roof Installation Manual. Chapter 5: Panel Attributes/Profiles
 Metal Roof Installation Manual Chapter 5: Panel Attributes/Profiles Chapter 5: Panel Attributes/Profiles Chapter Contents 5. Panel Attributes / Profiles... 5-1 5.1 Widths... 5-1 5.2 Ribs... 5-2 5.2.1 Rib
Horizon-Loc. Installation Details 16" COVERAGE C GUID_INSTL_HLOC_160606
 Horizon-Loc Installation Details ¾" 1" 4" 16" COVERAGE D C GUID_INSTL_HLOC_160606 INDEX Information in the catalog may vary by plant location. Please call your salesperson to verify product availability.
NEVADA ASSEMBLY INSTRUCTIONS
 NEVADA ASSEMBLY INSTRUCTIONS BASE SIZE: 2.700m x 1.500m NEVADA Tools Required: Battery Drill Riveter Hammer Tape Measure Ladder Skillsaw Level Screwdriver - Flat 3/8 Hex Drive bit 8mm Hex Drive bit Drill
INSTALLATION GUIDE. Flat Roof Homesheds TM. Onto Concrete BEFORE YOU START TOOLS REQUIRED
 INSTALLATION GUIDE Flat Roof Homesheds TM Onto Concrete BEFORE YOU START It is important to check your Local Government Authority requirements before the installation of your new Stratco Flat Roof Homeshed.
BARDOLINE INSTALLATION INSTRUCTIONS
 BARDOLINE INSTALLATION INSTRUCTIONS www.onduline.com CONTENTS General conditions Material requirements Terms Estimating shingle requirements Roof preparation Shingle application 9 GENERAL CONDITIONS ONDULINE
Stratco Sanctuary INSTALLATION BEFORE YOU START TOOLS REQUIRED GUIDE
 INSTALLATION GUIDE Stratco Sanctuary Verandahs, Patios and Carports BEFORE YOU START It is important to check with your Local Government Authority prior to the installation of your new Stratco Sanctuary
Metal Roof Installation Manual. Chapter 14: Fasteners
 Metal Roof Installation Manual Chapter 14: Fasteners Chapter 14: Fasteners Chapter Contents 14. Introduction... 14-1 14.1 Fastener Parts and Installation... 14-1 14.1.1 Points... 14-1 14.1.2 Heads... 14-1
Table of Contents. Installation Guide for Profile with Hidden Fasteners 3. Installation Steps 4, 5. Prestige Series Moldings 6, 7. Other Accessories 8
 1 Table of Contents Page(s) Installation Guide for Profile with Hidden Fasteners 3 Installation Steps 4, 5 Prestige Series Moldings 6, 7 Other Accessories 8 Trims & Accessories 9 Eave Starters 10 Gableboards
3-Tab Shingle Instructions DURA-SEAL 20 DURA-SEAL 25
 3-Tab Shingle Instructions DURA-SEAL 20 DURA-SEAL 25 1 Directions For Applying Malarkey 3-Tab Shingles GENERAL INSTRUCTIONS Install Malarkey 3-tab shingles according to building code and local amendments.
1 Roof Substrate (Deck) OWENS CORNING BERKSHIRE SHINGLES INSTALLATION INSTRUCTIONS
 OWENS CORNING BERKSHIRE SHINGLES INSTALLATION INSTRUCTIONS") General This Installation Instruction document for Owens Corning Berkshire roofing shingles is to be read in conjunction with the Installation information printed on each packet of shingles along with
General This Installation Instruction document for Owens Corning Berkshire roofing shingles is to be read in conjunction with the Installation information printed on each packet of shingles along with
IDAHO ASSEMBLY INSTRUCTIONS. BASE SIZE: 1.800m x 1.200m
 IDAHO ASSEMBLY INSTRUCTIONS BASE SIZE: 1.800m x 1.200m IDAHO Tools Required: Battery Drill Riveter Hammer Tape Measure Ladder Skillsaw Level Square Drive Bit No.2 3/8 Hex Drive Bit 8mm Hex Drive Bit Drill
POST FRAME CONSTRUCTION MANUAL
 POST FRAME CONSTRUCTION MANUAL www.pole-barn.info www.apbbuildings.com TABLE OF CONTENTS 3. Jobsite Preparation 4. Setting Foundation Posts 5. Setting Corner Posts 6. Sidewall & Endwall Posts 7. Grade
Design & Install Guide. The New Standard for Commercial Roof Laps. End-Lap Solution for Insulated Panel Roofing AS WEATHER RESISTANCE
 End-Lap Solution for Insulated Panel Roofing AS4046.9 WEATHER RESISTANCE The New Standard for Commercial Roof Laps SecureLap provides a solution to the troublesome sheet to sheet endlap and offers a real
ROOFING APPLICATION STANDARD (RAS) No. 115 STANDARD PROCEDURES FOR ASPHALTIC SHINGLE INSTALLATION
 No. 115 STANDARD PROCEDURES FOR ASPHALTIC SHINGLE INSTALLATION") ROOFING APPLICATION STANDARD (RAS) No. 115 STANDARD PROCEDURES FOR ASPHALTIC SHINGLE INSTALLATION 1. Scope 4. Underlayment 2. 1.1 This roofing application standard has been developed to provide a responsive
ROOFING APPLICATION STANDARD (RAS) No. 115 STANDARD PROCEDURES FOR ASPHALTIC SHINGLE INSTALLATION 1. Scope 4. Underlayment 2. 1.1 This roofing application standard has been developed to provide a responsive
ROOFING APPLICATION STANDARD (RAS) No. 130
 No. 130") ROOFING APPLICATION STANDARD (RAS) No. 130 1. Scope 1.1 This application Standard provides the minimum installation criteria for wood shingles and shakes. 2. Definitions 2.1 For definitions of terms used
ROOFING APPLICATION STANDARD (RAS) No. 130 1. Scope 1.1 This application Standard provides the minimum installation criteria for wood shingles and shakes. 2. Definitions 2.1 For definitions of terms used
ROOFING APPLICATION STANDARD (RAS) No. 115 STANDARD PROCEDURES FOR ASPHALTIC SHINGLE INSTALLATION
 No. 115 STANDARD PROCEDURES FOR ASPHALTIC SHINGLE INSTALLATION") ROOFING APPLICATION STANDARD (RAS) No. 115 STANDARD PROCEDURES FOR ASPHALTIC SHINGLE INSTALLATION 1. Scope 4. Underlayment 2. 1.1 This roofing application standard has been developed to provide a responsive
ROOFING APPLICATION STANDARD (RAS) No. 115 STANDARD PROCEDURES FOR ASPHALTIC SHINGLE INSTALLATION 1. Scope 4. Underlayment 2. 1.1 This roofing application standard has been developed to provide a responsive
ROOFING APPLICATION STANDARD (RAS) No. 130 INSTALLATION CRITERIA FOR WOOD SHINGLES AND SHAKES APPLICATION
 No. 130 INSTALLATION CRITERIA FOR WOOD SHINGLES AND SHAKES APPLICATION") ROOFING APPLICATION STANDARD (RAS) No. 130 INSTALLATION CRITERIA FOR WOOD SHINGLES AND SHAKES APPLICATION 1. 2. 3. Scope 1.1 This application standard provides the minimum installation criteria for wood
ROOFING APPLICATION STANDARD (RAS) No. 130 INSTALLATION CRITERIA FOR WOOD SHINGLES AND SHAKES APPLICATION 1. 2. 3. Scope 1.1 This application standard provides the minimum installation criteria for wood