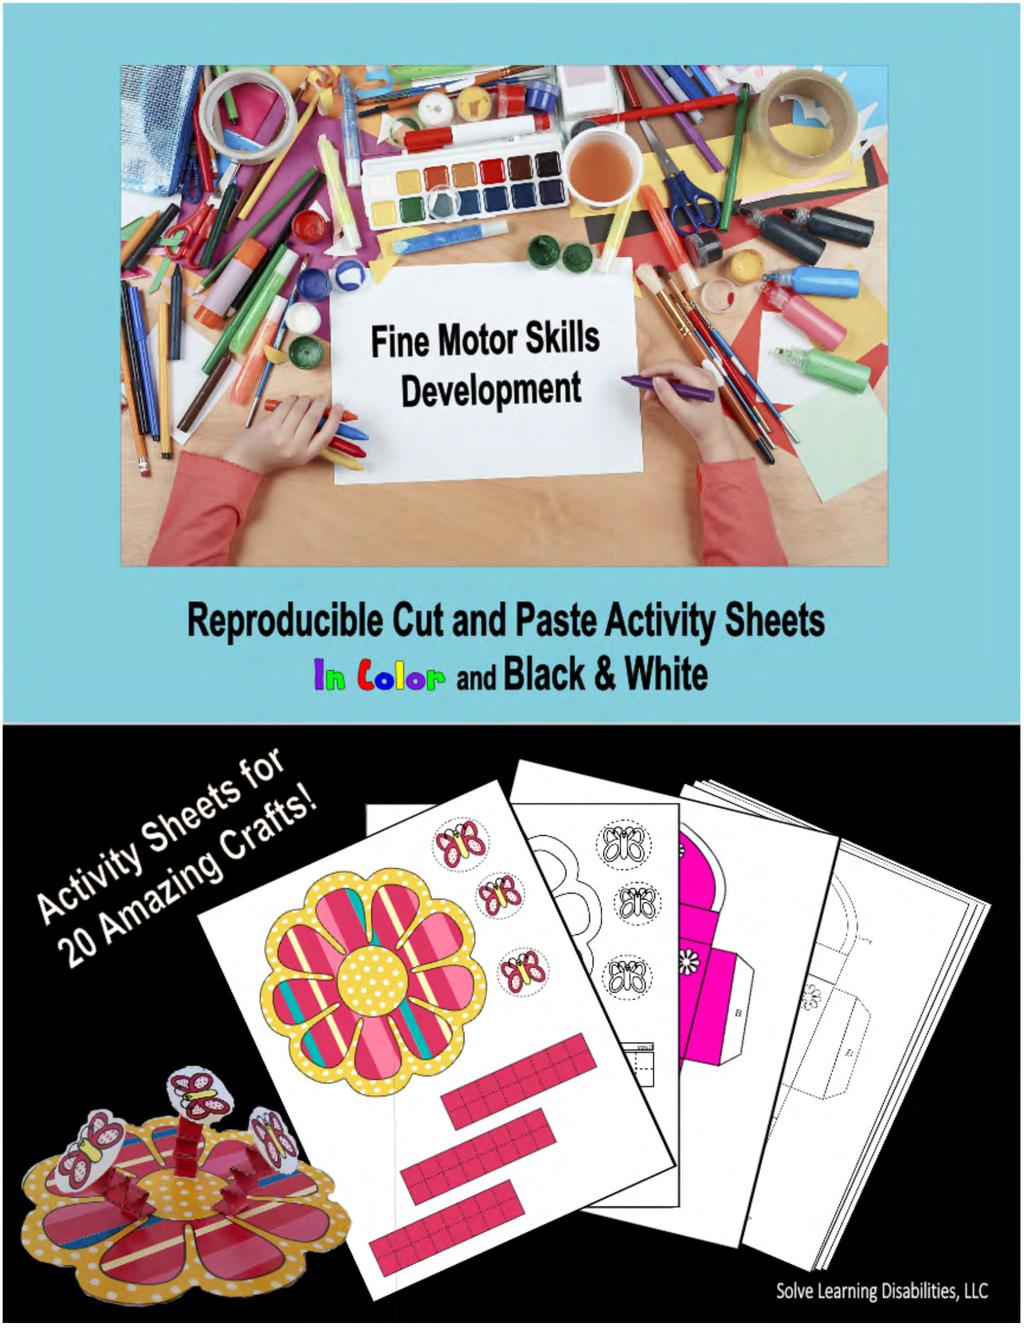
Fine Motor Skills Development Activities
|
|
|
- Angel Cooper
- 5 years ago
- Views:
Transcription
1 Level 1-2
2 Fine Motor Skills Development Activities Copyright June 2016 by Solve Learning Disabilities, LLC Project Design and Production by Barbara and Britany Boss Published by Solve Learning Disabilities, LLC P.O. Box 31 Riverton, Ut Reproduction rights: You may reproduce the individual projects and instructions by print or photocopy for your own use, the use of your students or patients. You may projects to your students or patients one or two at a time only. You may not share or transfer the full publication by electronic transmittal in any form, mechanical, digital, recording or otherwise, without the prior written permission of the publisher. We have included every project in color or black & white. Print the whole publication, or as many of the individual projects as you like. Print Black and White projects on colored paper or let the child color them. How to use it: We, at Solve Learning Disabilities, LLC have designed these projects with an emphasis on enhancing fine motor development. In addition, the use of scissors and glue also encourages hand eye coordination, motor planing, sequencing, language processing skills and scissor skills. We made the projects short and simple, so as to keep the child's interest, with engaging designs and colors. These skills are the stepping stones of development in the child's future. We have simplified the instructions with pictures to engage the child in 'next step' planning. Most projects are meant to be done together in about 15 minutes. This creates a feeling of success and triumph that adds to their self esteem. We suggest letting the child do some or all of their own scissor work, according to their age, ability and attention span. Without the scissor work, these projects will still build fine motor skill and more. If it is a little too much for them, they can learn by watching your scissor techniques as well. We also encourage letting the child help determine the next step of the assembly. Discuss what they think should be the next step and why it is important. This encourages planning, sequencing and boosts language skills. Enjoy! See more of our projects and books at
 Fold each riser long ways down the center at the dotted line so dotted lines are facing out and glue the")
.")
 Once the glued risers are dry, fold each dotted line back and forth.")
3 Bouncing Butterflies FIGURE A FIGURE B 1) Cut out the flower, butterflies, & three risers. 2) Fold each riser long ways down the center at the dotted line so dotted lines are facing out and glue the inside closed. (See figure A) 3) Glue bottom of flower to a heavier base to make it more rigid. (Ex: You can use a post card or cardboard from the side of a cereal box). Then trim off the excess around the edge of the flower. 4) Once the glued risers are dry, fold each dotted line back and forth. (See figure B) 5) Glue one end of each riser to the flower a couple of inches apart. 6) Glue butterflies to the top of each riser. (See figure C) FIGURE C


4 Risers Bouncing Butterflies
5 Risers Bouncing Butterflies

 Cut out phrases.")
6 Funky Door Hangers FIGURE A 1) Cut around edges of door hangers. 2) Cut up dotted line and cut out circle. 3) Cut out phrases. 4) Choose one phrase to glue to each white square. (See figures A and B) FIGURE B
7 Funky Door Hangers
8 A B Funky Door Hangers
 Fold handle long-way on dotted line so colored side is out. Glue closed.")
 5) Glue tab A and B to inside of bag front to form the bag. 6) Fold top flap over.")
9 Party Bag 1) Cut out around the outer edge of the entire bag, leaving it in one piece. 2) Cut out handle. 3) Fold handle long-way on dotted line so colored side is out. Glue closed. 4) Fold bag at all lines, except the top flap, so pattern is on the outside. (See figure A) 5) Glue tab A and B to inside of bag front to form the bag. 6) Fold top flap over. 7) Glue handle on the inside of the two sides of the bag. (See figure B) FIGURE A FIGURE B
10 Party Bag Bag Top Flap Handle A B Front
11 Party Bag Bag Top Flap Handle A B Front


12 Treat Sack 1. Cut out all items. 2. Roll or fold up paper stick pieces from one long side to the other to create sticks to glue flowers to. (See Figure A) Figure A 3. Glue flowers at the top of each stick and let dry. 4. Fold and crease all four sides upward to form bag. (See Figure B) 5. Fold all four tabs inward at line and glue to the inside of the sack side that is next to it, to create a sack. (See Figure C & D) 6. Put something in the sack, such as jelly beans, a treat or wrinkled up tissue paper pieces to fill the sack. (See Figure D) Figure B 7. Fill the bag with something fun. 8. Put the flower sticks in the bag and push down to the bottom of the bag, letting the contents of the bag hold them upright. (See Figure E) Figure C Figure E Figure D
13 Roll for Stems Roll for Stems Treat Sack Kids Activities - Flower - Treat
14 Roll for Stems Roll for Stems Treat Sack
 Glue the owl body to something thicker like some poster board or the cardboard from the side")
 Cut out as many rows of feathers as desired. 4) Fold feather tops back at dotted line.")
 6) Glue the feathers to the owl by applying glue to the folded back tops and")
 7) For hanging, attach a string to the dots on the ears by gluing.")
15 Owl Wall Hanger 1) Cut out eyes, beak, body and feet. 2) Glue the owl body to something thicker like some poster board or the cardboard from the side of a cereal box, then trim around the body. This will make it stronger for hanging. 3) Cut out as many rows of feathers as desired. 4) Fold feather tops back at dotted line. (See Figure A) 5) Fold beak at line. Glue Eyes, beak and feet to body. (See Figure B) 6) Glue the feathers to the owl by applying glue to the folded back tops and pressing it against the owls stomach, leaving the feather bottoms poking outward. (See Figure C) 7) For hanging, attach a string to the dots on the ears by gluing. Or, puncture a hole at the dots and tie string through the hole. Hang. (See Figure D) Figure A Figure B Figure C Figure D


16 EYES BEAK FOLD FEET FEATHERS Owl Wall Hanger


17 EYES BEAK FOLD FEET FEATHERS Owl Wall Hanger
 Glue one end of the rocks to the other end to form a circle.")
 4) Cut slits on dotted lines in the bottom of the doggie,")
 Slide the rock circle into the two fire slits to make a stand.")
18 Teepee and Friends 1) Cut out all 7 items on the page. 2) Glue one end of the rocks to the other end to form a circle. 3) Glue one side of each teepee to the other side. (See figure A) 4) Cut slits on dotted lines in the bottom of the doggie, people, and fire. 5) Slide the rock circle into the two fire slits to make a stand. 6) On the doggie & people, bend middle flap backwards and outer flaps forward to create a stand. (See figure B and C) FIGURE A FIGURE B FIGURE C
19 Glue Glue Glue Teepee and Friends
20 Glue Glue Glue Teepee and Friends

21 Bat Craft Project 1. If printed in black and white, color or paint and let dry. 2. Cut out all pieces including the moon. 3. Glue the wings to the back of the tummy. 4. Glue the tummy to the moon, but not the wings. 5. Glue the Head and Legs on. 6. Bend up the unglued part of the wings so they come up off the page to give it a little dimension.
22 Bat and Moon
23 Bat and Moon
24 Bat and Moon
25 Bat and Moon
 Glue frog to something more rigid for strength, like cardboard from a cereal or mac 'n' cheese box, then trim around body and head.")
 Glue one fly to the end of the frog s tongue. 6) Glue a string on the back of the frog. The small circle on the frog s tummy shows where the string should be glued on the back.")
26 Wiggle Frog Figure A 1) Cut out the frog s body, legs, arms, flies, and the tongue. 2) Glue frog to something more rigid for strength, like cardboard from a cereal or mac 'n' cheese box, then trim around body and head. 3) Bend the arms, legs and tongue back and forth on the dotted lines. (See Figure A) 4) Glue the legs and arms onto the frog. Glue the tongue to the mouth. 5) Glue one fly to the end of the frog s tongue. 6) Glue a string on the back of the frog. The small circle on the frog s tummy shows where the string should be glued on the back. (See Figure B) 7) Take the two other flies and glue strings to the back of them. 8) Hang the frog and the two other flies to the ceiling. (We like to make it look like the frog is chasing the flies.) Figure B
27 NOTE: It is best if the body of the frog is glued to something thicker like a piece of cardboard from a cereal box. Wiggle Frog FLIES LEGS ARMS TONGUE
28 NOTE: It is best if the body of the frog is glued to something thicker like a piece of cardboard from a cereal box. Wiggle Frog FLIES LEGS ARMS TONGUE
 4) Glue handles on book bag (See figure C) 5) Fold pages and covers in half at dotted lines. Staple or glue the center of the pages to the center of the book covers along dotted lines.")
29 Mini Book Bag FIGURE A 1) Cut out all items. 2) Fold tab A and B of the book bag backwards. 3) Fold back of bag upwards and glue to tabs A and B. (See figure A) 4) Glue handles on book bag (See figure C) 5) Fold pages and covers in half at dotted lines. Staple or glue the center of the pages to the center of the book covers along dotted lines. (See figure B) 6) When finished, put books in bag. FIGURE B FIGURE C

30 Cover 1 Cover 2 Front A B Back Mini Book Bag
31 Front A B Back Mini Book Bag
 Glue or paste onto the next page to create a jungle scene.")
32 Jungle and Safari 1) Cut out the figures below. 2) Glue or paste onto the next page to create a jungle scene. Palm Tree Leaves Tree Trunks
33
34 Jungle and Safari 1) Cut out the figures below. 2) Glue or paste onto the next page to create jungle scene. Tree Trunks Palm Tree Leaves
35


36 Fold & Glue Fold & Glue Fold & Glue Fold & Glue Tab Tab Tab My Garden Tab 1. Fold and crease around bottom of fence to make sides bend upward. 2. Cut, fold and glue garden corners to a frame like shape. 3. Cut veggies and fold tabs backward. 4. Glue to garden where desired by applying glue to tabs, but not veggies. 5. Bend veggies upward.


37 Fold & Glue Fold & Glue Fold & Glue Fold & Glue Tabs Tabs Tabs My Garden Tabs 1. Fold and crease around bottom of fence to make sides bend upward. 2. Cut, fold and glue garden corners to a frame like shape. 3. Cut veggies and fold tabs backward. 4. Glue to garden where desired by applying glue to tabs, but not veggies.


38 Envelopes Pocket SEEDS 1. Cut out, turn over and fold 1st flap in. 2. Fold 2nd flap and glue to 1st flap. 3. Fold up bottom flap and glue.
39 SEEDS
 Choose something to go on your snowman's neck and glue it on to the top of the two circles. 4) Glue the head on. 5) Choose a hat and glue it on top of the snowman's head. 6) Glue on the arms.")
40 Mr. or Mrs. Snow 1) Cut out the three body pieces, arms and desired clothing. 2) Put the bottom circle, and middle circle together to form the body. 3) Choose something to go on your snowman's neck and glue it on to the top of the two circles. 4) Glue the head on. 5) Choose a hat and glue it on top of the snowman's head. 6) Glue on the arms. Note: If you're snow man is really a snow woman, draw on some eye lashes :-)
41 Mr. or Mrs. Snow 1) Cut out the three body pieces, arms and desired clothing. 2) Put the bottom circle, and middle circle together to form the body. 3) Choose something to go on your snowman's neck and glue it on to the top of the two circles. 4) Glue the head on. 5) Choose a hat and glue it on top of the snowman's head. 6) Glue on the arms. Note: If you're snow man is really a snow woman, draw on some eye lashes :-)

42 Flower Power 1. Cut out all pieces. 2. Fold both stem sides in at the dotted line and glue. 3. Glue leaves on the stem. 4. Crease heart flowers down the center from point to V of heart. 5. Turn center over and glue heart petals to the back with points facing outward to make the flower head. (See Photo) 6. Glue head to the stem.


43 STEM PETALS LEAVES CENTER Flower Power

44 STEM PETALS LEAVES CENTER PETALS Flower Power

45 Goal Setting Caterpillar 1. Cut page to separate the caterpillar from the designed circles. 2. Cut out the designed circles. 3. As each goal is reached, let your child glue one circle on until the caterpillar is filled out. (See Below) This is great for incentive for room cleaning, brushing teeth, reading, homework and much more.


46 Cut Here Instructions on back SETTING CATERPILLAR! GOAL
47 Cut Here

48 Pillow Pocket 1. Cut out the entire figure, leaving it in one piece. 2. Fold back on both dotted lines. 3. Glue tab to the back of the opposite side. 4. After glue dries, fold yellow polkadot ends toward each other to close the ends. Tip: It helps to score along the fold before folding. Tab Glue Here Fold Fold Glue Score before creasing Then Fold in Fun Flower 1. Cut out the three flowers. 2. Glue pink flower to the orange, by putting one drop of glue in the center circle. 3. Glue green flower to the pink, by putting one drop of glue in the center circle. 4. After dry, fold petals upward a little to make the flower fluffy. Example
49 Pillow Pocket 1. Cut out the entire figure, leaving it in one piece. 2. Fold in on both dotted lines. 3. Glue tab to the back of the opposite side. 4. After glue dries, fold yellow polkadot ends toward each other to close the ends. Tip: It helps to score along the fold before folding. Tab Glue Here Fold Fold Glue Score before creasing Then Fold in Fun Flower 1. Cut out the three flowers. 2. Glue medium flower to the large one, by putting one drop of glue in the center circle. 3. Glue small flower to the medium, by putting one drop of glue in the center circle. 4. After dry, fold petals upward a little to make the flower fluffy. Example
 2.")


50 Mood Meter Best Day Ever! Pointer Figure A Figure B 1. Cut out pointer. Fold in half at green dotted line, glue closed and let dry completely. (See Figure A) 2. Cut out the meter (the entire green piece). Fold in half at the yellow dotted line and glue around edges. 3. After pointer is dry, puncture a small hole at one end of the dotted line. Slip scissors in the hole and cut along dotted line, around the three sides to the other end of the dotted line. (See Figure B) 4. Slide pointer over the edge of the left side of meter with center section of pointer in back and arrow in front. Slide up and down to display mood. (See Figure C) Absolutely Wonderful Having a Great Day Feeling Good Doing Alright Need Some Love Not Sure Could Be Better Grouchy Sad! 'Let's Talk' Figure C

51 Mood Meter Best Day Ever! Pointer Mood Meter 1. Cut out pointer. Fold in half at the big dotted line, glue closed and let dry completely. (See Figure A) 2. Cut out the meter (the entire green piece). Fold in half long ways up the center dotted line and glue around edges. 3. After pointer is dry, puncture a small hole at one end of the dotted line. Slip scissors in the hole and cut along dotted line, around the three sides to the other end of the dotted line. (See Figure B) 4. Slide pointer over the edge of the left side of meter with center section of pointer in back and arrow in front. Slide up and down to display mood. (See Figure C) Absolutely Wonderful Having a Great Day Feeling Good Doing Alright Need Some Love Not Sure Could Be Better Grouchy Sad! 'Let's Talk'


52 1 Fold Back 3 Cut 2 Fold Back Barn and Owl Bookmarks 1. Cut out the moon, sun and cloud. 2. Cut the entire rectangle of each bookmark out. 3. Fold flap 1 back on dotted line of each. 4. Fold flaps 2 back on dotted lines, and glue or tape the overlapped area of flaps 2 to flaps Cut along dotted lines Glue a sun, moon or cloud on the back of flap 1 or 2 so it shows rising behind the barn or owl. Bookmarks are finished! Place over corner of page until the page corner pokes out the top. 1 Fold Back 3 Cut 2 Fold Back

53 1 Fold Back 3 Cut 2 Fold Back Barn and Owl Bookmarks 1. Cut out the moon, sun and cloud. 1 Fold Back 3 Cut 2 Fold Back 2. Cut the entire rectangle of each bookmark out. 3. Fold flap 1 back on dotted line of each. 4. Fold flaps 2 back on dotted lines, and glue or tape the overlapped area of flaps 2 to flaps Cut along dotted lines Glue a sun, moon or cloud on the back of flap 1 or 2 so it shows rising behind the barn or owl. Bookmarks are finished! Place over corner of page until the page corner pokes out the top.

54
Puppets. Paper Bag Puppets. Rocky Raccoon* Wee Reggie puppet. Materials: Procedure: Procedure:
 Puppets Puppetry can be an effective and entertaining means for conveying simple messages. Use some of the puppets featured here to teach various activities found in the Wee Recyclers Activity Guide. Encourage
Base for Foliage Scholastic Inc. 4665
 9999311210 Spring arrow 2.indd 3 9999313302 19/1/07 10:31:10 9999311210 Spring arrow 2.indd 1 19/1/07 10:34:26 Base for Foliage Materials Cardboard boxes Green bulletin board or wrapping paper Stapler
Welcome to our Wee Work section that will provide you and your. child with a learning activity that will engage their senses and
 Welcome to our Wee Work section that will provide you and your child with a learning activity that will engage their senses and emerging skills. Scroll down the page to find the activity that meets your
Welcome to our Wee Work section that will provide you and your child. with a learning activity that will engage their senses and emerging
 Welcome to our Wee Work section that will provide you and your child with a learning activity that will engage their senses and emerging skills. Scroll down the page to find the activity that meets your
Page 1 of 5. Instructions for assembling your PacknMove boxes
 Instructions for assembling your PacknMove boxes The majority of our boxes are very easy to construct, but a couple might look like cardboard origami at first. If you are having any problems constructing
Welcome to our Wee Work section that will provide you and your child. with a learning activity that will engage their senses and emerging skills.
 Welcome to our Wee Work section that will provide you and your child with a learning activity that will engage their senses and emerging skills. Scroll down the page to find the activity that meets your
Fryer's Trebuchet Paper Kits
 Fryer's Trebuchet Paper Kits Things you will need 7 sheets of card approx. 0.3 mm or 0.01 inches thick 1 sheet of paper to print out to download. 2 x 6-7 mm dowel or pencils 1 paper clip String 6 cms (2.5
Let s paw-ty! Children love their pets. It s a day to celebrate our furry friends.
 Paw Party Required: Let s paw-ty! Children love their pets. It s a day to celebrate our furry friends. Game Suggestions: Dog Trick Balloons- Fill several balloons with a paper with a dog trick written
Halloween Party. Required:
 Halloween Party Required: This national event celebrates the fun side of this child favorite holiday. Halloween can span across every area of the center. Enjoy ghoulish games, creepy crafts and plenty
Green Kid. Feathered Friends. GreenKidCrafts.com. a create, play, and learn activity guide for kids. Issue 13 April $4.
 Green Kid a create, play, and learn activity guide for kids Feathered Friends Issue 13 April 2014 $4.95 list price GREEN KID ACTIVITY GUIDE Every month Green Kid Crafts subscribers get an exclusive, award-winning
My ABC Book of Handprints By Learn Curriculum
 My ABC Book of Handprints By 1 2 3 Learn Curriculum Handmade with love! 1 2 3 Learn Curriculum http://www.teacherspayteachers.com/store/krista-wallden My ABC Book of Handprints Using the following template
Fun Ways to Re-Use Paper at Home
 FOR FUN Fun Ways to Re-Use Paper at Home You and your family can transform your used paper into something new. Take a look at some useful ways you can re-use paper around the house. Activities Include:
Terrific Papers Creative Project Instructions
 Origami flowers You ll need: two sheets of Terrific Papers in the design of your choice, glue or a glue gun, small-diameter dowel, florist s tape, green construction paper, and scissors Note: Each flower
Mylar Moon Boots. Supplies. Cardboard. Mylar blanket. Duct tape. Craft knife. Ruler. Pen/Pencil
 Mylar Moon Boots 1. Design a custom box. Measure the length, width, and height of your foot and add an inch to each of these measurements.» Now draw a rectangle on your cardboard that has the new dimensions
The Hearse Carriage Assembly Instructions Page 1.
 The Hearse Carriage Assembly Instructions Page 1. The Hearse Carriage Assembly Instructions Page 2. WHAT YOU'LL NEED: Scissors, Elmer's glue (or a glue stick), a needle, two toothpicks, a sharpened pencil,
Happy Camper Book Fair Entrance Instructions
 Happy Camper Book Fair Entrance Instructions Supplies*: Entrance wall directions: Roll of dark blue paper Roll of purple paper Roll of brown paper Roll of dark green paper Roll of bright green paper Roll
Disclaimer: Any perceived slights of specific persons, peoples, or organizations in this book are unintentional.
 Preview Copy Homonym Butterfly Puzzles, 2nd Edition by Susan Brown Copyright 2015 by Susan Brown. All rights reserved. Warm Hearts Publishing The purchase of this material entitles the buyer to print and/or
Superhero Lollipops. Littlebitfunky.com
 Pintrest.com Superhero Lollipops Here is what you need to make them: Superhero Logos Stiff felt Hole punch 2in paper punch (or you can use scissors) Coordinating ribbon Lollipops (tootsie pops have nice
Garden Goddess Mixed Media Binder Album
 Designed by ~ Annette Green Graphic 45 Supplies: 1 each Garden Goddess 8 x 8 Paper Pad 1 pack Garden Goddess Chipboard 1 pack Garden Goddess Tags & Pockets 1 each Mixed Medium Album Kraft 1 pack G45 Staples
Trebuchet Construction Instructions
 Trebuchet Construction Instructions Follow these instructions step by step to create your trebuchet. Materials: Trebuchet Template (6 pages cardstock) Trebuchet Template (1 page paper) One unsharpened
Easter Theme PDF Download. Table of Contents
 Easter Theme PDF Download Table of Contents How to Use The Easter Theme Copyright Info Links to Craft Supplies Easter Craft Instructions Black and White Pictures Color Illustrated Pictures How to Use the
Learn to Fold. Origami Animals
 Learn to Fold Origami Animals Table of Contents Introduction... 2 Fish... 4 Hopping Frog... 9 Snake... 12 Tiger... 14 Frog... 18 Flapping Bird... 25 Elephant... 28 Dog... 36 Crane... 38 Cow... 40 Cat...
Crafts and econimic projects to make your church look "frozen". Use for fun or for the VBS. by Jennifer Sánchez
 Decoracionesde Decorations of snow Nieve Crafts and econimic projects to make your church look "frozen". Use for fun or for the VBS. by Jennifer Sánchez Transform your church into a beautiful snow scene.
Art of Ancient Times, Studio 1 5
 Art of Ancient Times, Studio 1 5 Creating a Clay Relief Sculpture and an In-the-Round Sculpture In this studio you will make a relief sculpture and an in-the-round sculpture inspired by those created by
Skull Party Favors. Instructions:
 Skull Party Favors Treat your Halloween party guests to a frightfully fantastic table! Easy to make decorations with Tulip 3D Fashion Paint, Fashion Glitter, Iron-On Crystals and Aleene s Acid-FreeTacky
A How-To From CHRYSANTHEMUMS
 A How-To From DIPPED-Tip CHRYSANTHEMUMS How-to Materials Adding Color For personal use only / Copyright THUSSFARRELL, LLC. All rights reserved. 5 - Paper to Petal How-to How-to Materials Double-sided
MOVING TO THRIVE: ACTIVITIES FOR AGES 10 TO 18 YEARS
 WHO AM I One pack of post it notes, a timer, and a pen to write. Write down any famous characters or celebrities on a post it note. Stick the post it note on one person s forehead, making sure that everyone
The 12 DOs. of Christmas. Recycled Arts and Crafts Guide. Festive. The 12 DOs of Christmas
 Festive Recycled Arts and Crafts Guide Proud partner and page sponsors 1300 733 712 1 About this Guide Whether you re celebrating Christmas, Passover or just the summer season of festivities, we hope you
4-H Family Back Pack #1
 Flying Insects 4-H Family Back Pack #1 4-H After School Program University of California Cooperative Extension How do Bugs Do What They Do? Directions: Have one person ask the questions and see if other
Resurrection Extra - Stand-up Bible Characters
 Resurrection Extra - Stand-up Bible Characters Safety Tips: Keep scissors out of reach of children. Keep all glue caps, marker caps and other small items out of reach of children age 3 or under, as they
Super Rooster. Designed by David Mitchell. This is a design from 2006 which is also sometimes known, mainly in France, as Le Grande Coq Francais.
 Super Rooster Designed by David Mitchell This is a design from 2006 which is also sometimes known, mainly in France, as Le Grande Coq Francais. Super Rooster is an accessorised version of a basic Rooster
See pages 5-6 for template and instructions. Gear up with this never land pirate hat and let the swashbuckling begin!
 Treasure crafts Ahoy ye pirates! Here be some super fun pirate crafts for you and your crew! Make all these piratey crafts by printing the pages of this Treasure Crafts kit. You will need: Scissors» Tape»
DO-IT-YOURSELF DISNEY-INSPIRED GIFT WRAP DISNEY
 DO-IT-YOURSELF DISNEY-INSPIRED GIFT WRAP YOU WILL NEED*: Printed templates Scissors Tape Glue Craft paper Various ribbon *Additional supplies may be needed for each version and are listed before Step 1.
3. Layer on top of a contrasting color of wider ribbon and tie around rolled napkin. 4. Create memories!
 January Snowflake Napkin Bands 1. Cut 4 pieces of 28 gauge wire approximately 3 times the length of teardrop-shaped beads. Thread two beads on to each wire, with the thinnest sides of the beads at the
Paper Flowers , Sonia C. Jensen
 Paper Flowers - 2016, Sonia C. Jensen These little paper flowers are so versatile! They can be used as place-markers at the table, for luncheon table centerpieces, as favours at a bridal shower using the
Activity: Walk the Plank
 Activity: Walk the Plank Cardboard, paper, or a long, flat piece of wood Lay your plank or paper on a carpeted area inside or on the grass outside (about 6 inches wide and 5 feet long). Show your toddler
Hubble Space Telescope Paper Model Directions Downloads, patterns, and other information at:
 Hubble Space Telescope Paper Model Directions Downloads, patterns, and other information at: www.hubblesite.org/go/model Materials: model pattern printed onto cardstock/coverstock instructions printed
RECYCLED CHRISTMAS TREE DECORATIONS
 RECYCLED CHRISTMAS TREE DECORATIONS A plastic bottle Strong scissors Hole punch Split pin paper fastener Sting or ribbon for hanging Decorating pens for glass or plastic./glitter Glue 20 minutes per decoration
Shopping List:- How to make a... Strictly Dancing Tri Fold Box. How to make a... Pink Peony Jar Card
 Shopping List:- Grand Calibur Die Cutting Machine : WIZGC-200 Shopping Sue Wilson Frames List:- & Tags Delicate Garden Frame Die : Grand CED4307, Calibur Noble Die Double Cutting Pierced Machine Rectangle
Sky Eagle. User Guide. Cautionary and Warning Statements
 Sky Eagle User Guide 60089 V0613 Cautionary and Warning Statements This kit is designed and intended for educational purposes only. Use only under the direct supervision of an adult who has read and understood
Gift Bag Class. You will need to make four flowers to complete all the projects in this class. Step 1
 Gift Bag Class During this class we will complete a Genie Bag, Corner Bookmark, Gift Card Holder and a Birthday Card. The instructions for most of these items can be found in many places on the internet,
THE FLOATING CANDELABRA ASSEMBLY INSTRUCTIONS page 1.
 THE FLOATING CANDELABRA ASSEMBLY INSTRUCTIONS page 1. THE FLOATING CANDELABRA ASSEMBLY INSTRUCTIONS page 2. WHAT YOU'LL NEED: Scissors, Elmer's glue (or a glue stick), a toothpick, a ruler, a needle and
contents Origami Sticky Note Square
 BE AMAZED AT WHAT YOU CAN MAKE FROM THE SEEMINGLY HUMBLE STICKY NOTE. In this fabulously innovative book, Bridget Dove shows you how to turn these colored squares into fun wall art, pretty origami, and
LANTERNS. Good & Evil. Give your room the warm enchanted glow of delicate paper lanterns. Tabletop Lanterns. Hanging Lanterns. Have an adult help you.
 Good & Evil LANTERNS Give your room the warm enchanted glow of delicate paper lanterns. USE LED LIGHTS ONLY. DO NOT USE REAL CANDLES. Tabletop Lanterns Have an adult help you. Step 1: Print out (2) of
lay it on me sketch layouts
 scrapbook s lay it on me sketch layouts featured products/ Chatterbox Happy Garden papers Scenic Route Loveland papers Crate Paper Sweet Branch papers BasicGrey painted brads Crate Paper brads and rub-ons
Mini Roses : Assembly Instructions
 is a registered trademark of Inc. Inc. Cut line Mountain fold Valley fold Slot http://www.canon.com/c-park/en/ Making the Rose Petals Glue the back of parts 5 to 14 and fold it outwards. Cut out the petals
Makes Sense SCIENCE GRADE LEVEL KINDERGARTEN FIRST MATERIALS
 MATERIALS FOR STUDENT: (one per student unless otherwise noted) FloraCraft Make It: Fun Foam Ball, 4" diameter Jar band (from a canning jar lid) (optional) Cardstock paper features (See FOR TEACHER below)
Simple Thanksgiving Day Crafts
 Simple Thanksgiving Day Crafts What a Turkey Ask each child to write what she's thankful for on a paper feather, then stick it into this cute turkey centerpiece. How to make it: Cut a 1-inch sliver off
Takeout Box. Difficulty Easy. Materials
 Jack-o-lantern What could be more fun than Halloween treats served in a jack-o-lantern tin or takeout box? This easy to create design uses glittery yellow and burnt orange cardstock to simulate the glowing
Mother s Day Crafts for Children (Instructions) p1 of 3
 p1 of 3") s DAD! This page may be printed and reproduced for offline use at one local church, preschool, or homeschool, plus your own family after purchase. Copyright Bible Kids Fun Zone 2016. All rights reserved.
s DAD! This page may be printed and reproduced for offline use at one local church, preschool, or homeschool, plus your own family after purchase. Copyright Bible Kids Fun Zone 2016. All rights reserved.
G H A B P D. CK860 Fly Fly 4.69 X 5.51 in X mm 27,261 St. L. CK858 Yummy Yummy 5.01 X 5.24 in X mm 24,563 St.
 G H A B P 12077 12 D CK857 Good & Happy 4.54 X 5.70 in. 115.32 X 144.78 mm 22,594 St. L CK858 Yummy Yummy 5.01 X 5.24 in. 127.25 X 133.10 mm 24,563 St. L CK859 Tickle My Tummy 4.68 X 5.58 in. 118.87 X
Copyright Bumblebee Linens LLC
 Crafts Instructions Included 1. Hankie Wedding Dress 2. Pillowcase Dress 3. Hankie Bonnet 4. Hankie Pin Cushion 5. Hankie Angel 6. Hankie Bunny 7. Pillowcase Reusable Grocery Bag 8. Linen Towel Drawstring
Class #7 Fold out Photos
 Class #7 Fold out Photos In this class we re going to make a fun page that holds five photos on the one page. We ll be using the washi tape for this although if you don t have any you can use regular household
Preschool Crafts Ideas and Notes
 Preschool Crafts Ideas and Notes Naaman (2Kings 5:14) Cut out 2 Naaman s (one with leprosy and the other one healed). Glue to top of craft sticks. Glue water to paper with scripture leaving two openings
Origami Nigger Mouth
 Origami Nigger Mouth Here is a great, eye-catching origami-style promotional prop that you can make yourself and leave out around for niggers and other prospective human niggermaniacs to enjoy. Make a
Beautiful Bouquet. Designed by Heidi Pridemore. Page All Rights Reserved The Whimsical Workshop
 O - 3/5/12 Designed by Heidi Pridemore #FR-032 Fabric Requirements: 1/3 yard of Green- for all 1/3 yard of Yellow- Daisy 1/3 yard of Orange- Daisy 1/4 yard of Pink- Poppy 1/4 yard of Yellow Print- Poppy
Nesting Hen. Materials (per child) Directions. Teacher Tip
 Directions. Teacher Tip") Nesting Hen Mother Hen has a surprise in her nest! Use this clever project to enhance your spring studies. yellow circle pattern (page 29) one 6 paper plate 2 small wiggle eyes orange construction paper
Nesting Hen Mother Hen has a surprise in her nest! Use this clever project to enhance your spring studies. yellow circle pattern (page 29) one 6 paper plate 2 small wiggle eyes orange construction paper
Engineering Directive
 Thing-a-ma-Jig Finishing To Finish a model means to apply paint and other decorations to complete the look of your model. Meaning to apply a finish. That is what we will discuss in this section. Applying
INSTRUCTIONS FOR NATIONAL SCHOOL LUNCH WEEK VOTE FOR SCHOOL LUNCH 2007 COSTUMES From the School Food and Nutrition of New Orleans
 INSTRUCTIONS FOR NATIONAL SCHOOL LUNCH WEEK VOTE FOR SCHOOL LUNCH 2007 COSTUMES From the School Food and Nutrition of New Orleans All Costumes Materials Needed: 10 yards of penlon (purchased from your
summer Summer has officially arrived! Let The Odd Life of Timothy Green inspire your family with our guide to summer fun. In Theaters August 15 th
 summer funkit Summer has officially arrived! Let The Odd Life of Timothy Green inspire your family with our guide to summer fun. In Theaters August 15 th cool tips Here are some easy tips to stay cool
Amazing but true, the very first pop-up books appeared more than 700 years ago. The
 Chapter 6 Making a Pop with Your Pop-up In This Chapter Adding depth to flat scenes Creating pop-ups that pop out toward you Amazing but true, the very first pop-up books appeared more than 700 years ago.
Creation Finger Play Puggles Parade to Praise CD(with rope) Creation Finger Play Toss & Say (with 1 bean bag)
 Creation Finger Play Toss & Say (with 1 bean bag)") God made everything. Genesis 1:1 John 1:3 Isaiah 42:5 Ecclesiastes 3:11 Unit 1 Lesson 1 God Made Light (Day 1) Read Gen 1:3 Flashlight 1 st Quarter Parent Letter Unit 1 Lesson 2 God Made the Sky (Day 2)
God made everything. Genesis 1:1 John 1:3 Isaiah 42:5 Ecclesiastes 3:11 Unit 1 Lesson 1 God Made Light (Day 1) Read Gen 1:3 Flashlight 1 st Quarter Parent Letter Unit 1 Lesson 2 God Made the Sky (Day 2)
CRAFTS. London Double Decker Bus Craft
 London Double Decker Bus Craft CRAFTS A double-decker bus has two levels or 'decks'. Red doubledecker buses are usually associated with London and have become a national symbol of England. This cardboard
Assembly Instructions for Shuttle Crawler Transporter (Part 1)
") 2007 Assembly Instructions for Shuttle Crawler Transporter (Part 1) Building the main crawler body Top photo has indications where other parts will be located and glued. The bottom photos show where the
2007 Assembly Instructions for Shuttle Crawler Transporter (Part 1) Building the main crawler body Top photo has indications where other parts will be located and glued. The bottom photos show where the
Shopping List:- How to make a... Square Flower Bag ~ Part 2
 How to make a... Square Flower Bag ~ Part 2 Shopping List:- Creative Expressions Singles Stamp Range ~ Garden Frame Pre Cut Stamp and Phill Martin Damask Border & Icons Stamp Ink Blending Mat, Grime Boss
Table of Contents. Shapes Next Door
 Table of Contents Shapes Next Door Corn Maze Trick-or-Treat Path Pumpkin Patch Haunted House Shapes In the Cemetery Cemetery Shapes Halloween Tangrams Witch Hat Tangram Bat Tangram Spider Tangram Ghost
Kung Fu Panda 3-D Paper Character Po ASSEMBLY INSTRUCTIONS Time to Complete: Approximately 60 minutes Level: Difficult GETTING STARTED
 Kung Fu Panda 3-D Paper Character Po ASSEMBLY INSTRUCTIONS Time to Complete: Approximately 60 minutes Level: Difficult GETTING STARTED Materials: Metal-edged ruler Butter knife Scissors or X-ACTO knife
Scraps of Wool Felt for Calico Markings on Kitty and Penny. 3/4 Yard Warm 'N Natural for Pillow Lining. 1 Pkg. Jumbo Black Rick Rack
 SUPPLIES: 3/4 Yard Homespun Fabric for Pillow, Front and Back Fat Quarter of Beige Wool Felt for Cat's Body Scraps of Wool Felt for Calico Markings on Kitty and Penny Rug Circles 1 Skein Black Perle Cotton
Origami Butterfly Instructions
 Origami Butterfly Instructions www.origami-fun.com 1. Start with your paper white side up. Fold in half, open, then fold in half the other way. 2. Now Fold the Paper in half diagonally, both ways. 3. Fold
General Instructions for Creation Pop-ups
 General Instructions for Creation Pop-ups For fun interactive Creation Bible lessons for preschoolers to go with these creation crafts, visit our other websites: http://biblekidsfunzone.com http://sunday-school-fun-zone.com
KraftyKid s Winter Holiday Projects
 KraftyKid s Winter Holiday Projects Holiday Napkin Rings Happy Hanukkah Happy Hanukkah Happy Hanukkah Happy Hanukkah Easy Gingerbread Cookie Ornament Recipe (Makes 6 ornaments not for eating!) 1/2c Applesauce
Mini 4-H Arts & Crafts
 Mini 4-H Arts & Crafts Mini 4-H is open to youth who are currently in Kindergarten, first, or second grade at the time of their enrollment on 4HOnline. Enroll in Mini 4-H through the 4HOnline website by
DOROTHY SIMPSON KRAUSE: PROJECTS
 DOROTHY SIMPSON KRAUSE: PROJECTS Gathering Memories: a paper portfolio This small portfolio of colored paper with pockets is perfect to hold and display some of the small items you ll collect on your cruise.
7 Materials for teaching
 7 Materials for teaching (1) Hat (KABUTO) Preparation: a page of a newspaper or a 50-60 cm square piece of paper How to Make Illustration 1 Fold a page of a newspaper so that one vertical (side) edge touches
Amazing Animal Art Projects 2008 by Jo Lynn Alcorn, Scholastic Teaching Resources
 This book is dedicated to my dog, Copper beloved family member and truly amazing animal. Scholastic Inc. grants teachers permission to photocopy the reproducible pages from this book for classroom use.
Paper Plate Turkey. Materials (per child)
") Paper Plate Turkey Rock this terrific little turkey right into your Thanksgiving celebrations. Invite each child to use her turkey in her play activities at school and then later as a holiday decoration
Paper Plate Turkey Rock this terrific little turkey right into your Thanksgiving celebrations. Invite each child to use her turkey in her play activities at school and then later as a holiday decoration
6 Festive DIY Projects for the Christmas Season
 6 Festive DIY Projects for the Christmas Season In this ebook, you ll learn how to make... Craft 1: Foam Christmas Wreath Craft 2: DIY Snowy Diorama Craft 3: Reindeer Buddies Craft 4: Snowman Family Craft
KS1 Topic: Celebrations Block C Carnivals & Parades Session 1. The Lion Dance
 KS1 Topic: Celebrations Block C Carnivals & Parades Session 1 The Lion Dance The lion dance seen at Chinese New Year originates from the legend of the monster known as Nian. During the performance the
How to make a... Let it Snow Box Card~ Part 1. Shopping List:-
 How to make a... Let it Snow Box Card~ Part 1 Shopping List:- Grand Calibur Die Cutting Machine : WIZCAL Spellbinders All in One Tool : WIZTOOL Sue Wilson `LET IT SNOW` Die Festive Collection : CED3004
Dog With Fleas Play Set Crochet Pattern
 Dog With Fleas Play Set Crochet Pattern By: Donna Collinsworth Of Donna s Crochet Designs All rights are held by the author. No one can reproduce in any manner without written permission from the author
Let s make a gingerbread house!
 Level A Let s make a gingerbread house! Fold here. Fold here. Fold here. Fold here. Have the children read the title and guess what they are going to make. First, have them color the picture with their
 www.adventuresofscubajack.com Trace the dotted letters. D D D D D D Dinosaurs d d d d d d d d Now try making your own. D Dd d Look carefully at the dinosaurs in each row. There is one dinosaur that doesn
Autumn Tree Colouring Sheet. Giant Autumn Leaf. All About Autumn! Autumn Leaves. Autumn Activity Book. Autumn Symbols. Owl Colouring Sheet.
 BLM All About NameAutumn These Blackline Masters can be completed in a variety of ways. The activities are designed to be stimulating, crafty and fun! They range from simple colouring to more complex artworks
How to make a... Strictly Dancing Tri Fold Box
 Shopping List Grand Calibur Die Cutting Machine : Shopping WIZGC-200 List:- Grand Sue Calibur Wilson Die New Cutting Zealand Machine Collection : WIZCAL Sue ~ Wilson Wellington Austrian Die Collection
Design 2006 Shannon Lawrence Images Stampin Up! Design 2006 Shannon Lawrence Some images Stampin Up!
 Design and instructions 2006 Shannon Lawrence. All rights reserved. Printed images may be copyrighted by the manufacturer. You may share and reuse this document in full for personal use and nonprofit purposes
WINTERTIME IS FUN TIME
 WINTERTIME IS FUN TIME Cutty s Okoboji Resort Club 1528 Highway 86 Spirit Lake, Iowa 51360 (712) 336-2226 Play Tic-Tac-Snow Here is a quick two-person game that s easy enough for little kids yet offers
Hubble Space Telescope Expert Model Interior Directions Downloads, patterns, and other information at:
 Hubble Space Telescope Expert Model Interior Directions Downloads, patterns, and other information at: Materials: Construction tips: The patterns and instructions, which can be downloaded at. The pattern
Country Commandments Stitchery
 Country Commandments Stitchery Notes 1. Read pattern through before starting. 2. Sewing Terms: RST-right sides together RSO right side(s) out 3. Thank you for purchasing my pattern! You may sell the finished
Here is my tutorial so that you can make your very own Mini Chocolate Flower Vase - enjoy!
 This Mini Chocolate Flower Vase would be a beautiful treat to make for teachers, friends & family for Valentine s Day, Mother's Day, Birthdays - any special occasion - and it is so much fun to make. It
Happy Happy New Year!!! Welcome 2016 :) It's Friday Funday!!!! Brick Wall
 It's Friday Funday!!!! Brick Wall") Happy Happy New Year!!! Welcome 2016 :) It's Friday Funday!!!! So glad you have stopped by: So. Are you ready for a Challenge? I sure Hope So! :) So here is your Challenge!!!! Brick Wall Use your score
Happy Happy New Year!!! Welcome 2016 :) It's Friday Funday!!!! So glad you have stopped by: So. Are you ready for a Challenge? I sure Hope So! :) So here is your Challenge!!!! Brick Wall Use your score
Thread Catcher Patern. withdetachable Pincushion and OptionalPosy
 Thread Catcher Patern withdetachable Pincushion and OptionalPosy andscisorstab Sew In Style Thr hread Catcher with Detachable Pincushion and Optional Posy and Scissors Tab Materials and Supplies Outside
How to make Christmas Cards and Gift Tags
 How to make Christmas Cards and Gift Tags Scented Glitter Glue Materials List... The materials for this lesson can be found at a Gold or above art centre. Go to to find the one nearest to you. MSB0037
Letter A Words. Armadillo Arrow Ax Angel. Aardvark Acorn Add Africa Airplane Alligator Alphabet Anchor Animal Ant Ape Apple Arm
 Letter A Words Aardvark Acorn Add Africa Airplane Alligator Alphabet Anchor Animal Ant Ape Apple Arm Armadillo Arrow Ax Angel 1 2 3 Learn Curriculum Graphic used: www.countryclipart.com Lacing Cards Children
August 7 th August 13 th Focus: Art, Math, History, and Science
 KinderTown Summer Camp: Master Builders August 7 th August 13 th Focus: Art, Math, History, and Science Week 9 Overview Family Activity Family Time Capsule: Preserve your family s artifacts to celebrate
Christmas Bride. HereandAbove.com. Materials needed. Doll Preparation. by Deborah K. Lauro. Abbreviations Used. Gauge
 from by Deborah K. Lauro Abbreviations Used ch dc sc sl st st(s) tr chain double crochet single crochet slip stitchst(s) stitch(es) triple crochet Gauge With F hook and worsted weight yarn - 7 dc = 2";
Cut first cork in half in the middle (the two pieces will serve for two horses). Cut 2 corks in half lengthwise for the four legs.
. Cut 2 corks in half lengthwise for the four legs.") Christmas Cork Horse Supplies: 3 1/2 corks. 4 x 4 piece red bandanna material for bandanna (cut in half diagonally makes two bandannas). White/Black yarn for mane & tail. Two black push pins for eyes.
Christmas Cork Horse Supplies: 3 1/2 corks. 4 x 4 piece red bandanna material for bandanna (cut in half diagonally makes two bandannas). White/Black yarn for mane & tail. Two black push pins for eyes.
HOW TO MAKE A COMPOSITION ZISA DOLL
 HOW TO MAKE A COMPOSITION ZISA DOLL WITH STUFFED FELT BODY AND 3D PRINTED HANDS AND HEAD A composition doll is made of different materials, in this case the body and limbs are sewn in felt and then padded,
Shopping List:- How to make a... Strictly Dancing Tri Fold Box. How to make a... Sue Wilson Delicate Garden Frame Sunken Shaker Box
 Shopping List Grand Calibur Die Cutting Machine : WIZGC-200 Shopping List:- Creative Expressions John Lockwood Christmas Shades 8 x 8 Collection Paper Pad : JLPP0003 Grand Sue Wilson Calibur Shadow Die
Wing. Gently bend the top of the wing over. With the paper removed, it should produce a nice curve.
 Fuselage Remove the paper in the four areas shown. Basically, from the trailing edge of the canard forward in the three nose segments and on the rear bottom of the fuse. Normal B fold for the sides but
Making Musical Instruments
 Page 1 of 8 Making Musical Instruments Bullroarer Castanets Cymbals and Drums Egg Shakers Guitar Jingle Bell Bracelets Jingle Bell Friends Jingle Bell Sticks Kazoo Paper Bag Maracas Paper Plate Shakers