- OUR TOP TIPS - Seam allowance is 1.5cm or 5/8 unless otherwise stated. Use the markings on the base of your machine to help you keep to this.
|
|
|
- Melvyn McDaniel
- 5 years ago
- Views:
Transcription
1
2 - OUR TOP TIPS - Always check the size chart to work out which size is best suited to you. Sew Over It patterns tend to have less ease than other patterns as most of the designs are intended to have a closer fit. When laying out your pieces ensure you correctly position the grainline on the pattern, parallel to the selvedge. To do this, measure from both ends of the grainline to the selvedge; these measurements need to be the same. When cutting, stand up as you will have better control. Take nice big confident snips with your scissors and if you keep the pattern paper to the left of your scissors (if you are right handed) then you will get a more accurate cut. Cut with the lower blade of the scissors in constant contact with the table for more control. For notches, you don t always need to cut the full triangle; a simple snip in the middle, up to the point of the notch will suffice. Make sure the snip is no longer than 5mm in case you need to let out the garment at the seams at a later date. Seam allowance is 1.5cm or 5/8 unless otherwise stated. Use the markings on the base of your machine to help you keep to this. And finally... allow plenty of time. Create a relaxed sewing environment and remember to stay refreshed with lots of cups of tea and cake! For more help with this pattern and the techniques used, see our blog : and YouTube channel : SewOverIt/
3 - GLOSSARY - Clip To help a curved seam sit flat, snip into the seam allowance at regular intervals, ensuring you don t cut into the stitching. Notch Notches are small triangular marks on the seamlines of the pattern, there to help you line fabric edges together before you pin. Slip stitch Slip stitch is a continuous hand stitch, using a single thread and is invisible from the outside. Alternate between running the needle inside the fold and then picking up a thread or two from the main fabric. Tailor s Tack Tailor s tacks are a hand sewn stitch comprised of a large, loose loop of double thread. They are used to transfer markings from a paper pattern on to fabric.

4 - Attaching the pocket welts - 1. With wrong sides facing up, centre the pocket reinforcement interfacing over the pocket markings and press in place. If you have used chalk instead of tailor s tacks, pin through from the front to transfer the markings, and then mark their position on the interfacing. 2. Interface one half of the pocket welt on the wrong side. 3. With wrong sides together, fold the pocket welts in half lengthways and press. 4. Open out the pocket welts and fold them in half lengthwise again, this time with right sides together. Pin the short ends together and stitch in place with a 1cm seam allowance.


5 5. Turn the pocket welts through to the right side, carefully push the corners out and press the short ends, rolling the seam towards the wrong side of the welt. You can tack along the open edge to hold the edges together. Press flat. 6. On the right side of the coat, draw a line in the centre of pocket markings. Stop 1.5cm from the end, and draw in arrowheads to meet the corner tack marks.


6 7. With right sides tgoether, align the raw edges of the pressed pocket welts along the chalked pocket line. The welts should align with the pocket tack marks, and the folded edge of the welt should be pointing towards the centre front. The noninterfaced side of the pocket welt should be facing upwards. 8. Stitch the pocket welt in place along the raw edge with a 1cm seam allowance. We suggest drawing in your stitch line first to help guide you. Backstitch to secure, but make sure your stitching stays on the welt and doesn t go onto the coat front.


7 - Attaching the pocket bags - 9. Take one pair of pocket bags and trim 1cm off of the straight edge. Put these to one side. 10. With right sides together, align the straight edge of the larger pocket bag with the chalked pocket line on the coat front. The welt will be on one side of the line and the pocket bag will be on the other. Pin the pocket bags in place.


8 11. Stitch in place 1cm from the chalked pocket line, starting and ending the stitching 2mm before the tailor s tacks. This is to make sure you won t be able to see the lining once your pockets are complete. The two lines of stitching should be parallel and 2cm apart. 12. With right sides together, align the smaller pocket bags with the chalk line, on top of the welt. It should meet the straight edges of the larger pocket bags. Stitch in place with a 1cm seam allowance, directly on top of the stitching on the welt. This time, the stitching doesn t need to be 2mm shorter, but make sure your stitching stays on the welt and doesn t go onto the coat front.


9 13. Turn the coat fronts over to the wrong side. Draw a chalk line down the centre of the lines of stitching, with arrowheads meeting the ends of the stitching. - Cutting open the pockets From the wrong side, starting at the centre of the line, cut very carefully along the line you just drew. Make sure you don t cut the pocket bags or the welt on the front, and just cut the main fabric of the front. Cut towards the triangles, but don t cut through them. Cut following the arrowhead lines, making sure you don t cut beyond the machine stitching as this will result in a hole on the front of the coat.


10 15. Push the pocket bags through the newly cut line to the wrong side of the coat. 16. With right sides together, align the notches on the curved edges of the pocket bags and pin.


11 17. Turn the coat fronts to the right side, and fold them back until you reach the pocket corner. There will be a small triangle of fabric at the top of the pocket. Pull the triangle until it lays flat and pin through all the layers right at the base of the triangle.


12 18. Repeat this process on the bottom edge of the pocket, folding up the hem to reveal the triangle this side and pin. - Sewing the pocket bags together and strengthening the pocket To finish the edges of the welt pocket, the triangles need to be stitched to the top and bottom of the pocket bag. Use a standard zip foot and start stitching as close as you can to the base of the triangle. The stitching needs to be strong so make sure to backstitch over this line of stitching and then continue stitching forward once more. Repeat this for the triangle at the bottom of the pocket.

13 20. Stitch the pocket bags together, starting and stopping where you stitched the triangles. 21. Repeat this for the pocket bag on the other side. 22. Swap back to a standard machine foot, and sew another row of stitches in the seam allowance of the pocket bag to reinforce it.


14 23. Lay the pocket right side up on the ironing board, with a cloth between the iron and the coat fabric. Folding the welt out of the way, press the pocket edge underneath the welt then press flat. - Finishing the welt ends- 24. Pin down the short ends of the welt through all the layers. These can be machine stitched close to the edge of the right side, or stitched by hand from the wrong side. If you hand stitch the welts, make sure the stitching is strong.


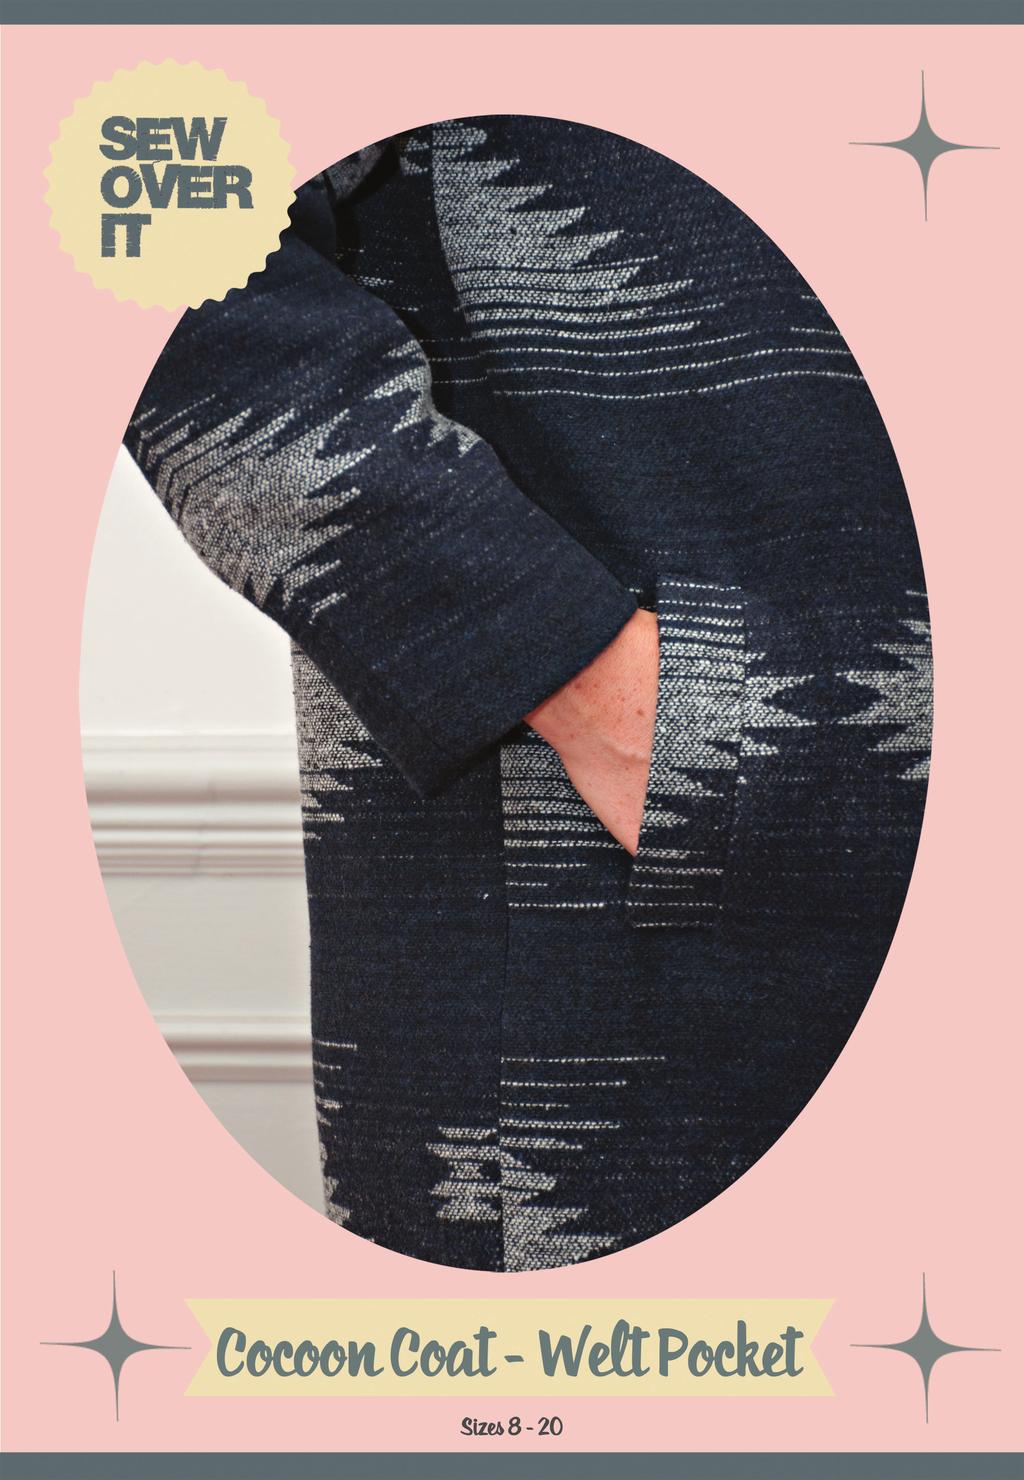
15 25. With a cloth between the iron and the coat, steam press the pocket welt. Allow the steam to dry fully before you move the coat fronts away from the ironing board. - Find the rest of the instructions to complete your Cocoon Coat in Lisa Comfort issue 1! -
Intro to Sewing Coats: Chloe Coat. Chloe Coat. sizes 8-20
 Intro to Sewing Coats: Chloe Coat Chloe Coat sizes 8-20 Chloe Coat - Instructions - Please use these instructions alongside our online videos to help you sew your Chloe Coat. All the seam allowances are
The Jeans Collection
 The Jeans Collection Video 8 - Creating the front fly zipper - gents The tools that you will need: 1. Sewing threads - standard sewing thread and top stitching thread. 2. Small sharp scissors for cutting
Practicing Basic Machine Operation Sample #1
 Practicing Basic Machine Operation Sample #1 Listed below are various tasks required in basic sewing machine operation. Demonstrate your ability to perform each task by creating a sample. The samples that
10/2011 Plus size Long A-line Coat
 10/2011 Plus size Long A-line Coat By: burda style magazine http://www.burdastyle.com/projects/102011-plus-size-long-a-line-co Long coat burda style magazine patterns FAQ 1 Materials Twill weave wool Step
Bon Voyage - bag pattern -
 ~~~ Bon Voyage Bag Pattern ~~~ 2014 Geta Grama; www.romanianquiltstudio.com Bon Voyage - bag pattern - Size: 18 wide at top; 21 wide at bottom; 15'' tall (without straps); 5'' deep; two interior pockets;
36" (90cm) wide. selvedges. fold. 45" (115cm) wide selvedges. fold. right side out and press well. Slip-stitch the opening closed.
 wide. selvedges. fold. 45 (115cm) wide selvedges. fold. right side out and press well. Slip-stitch the opening closed.") Baby dungarees These gorgeous dungarees are also really baby-friendly, with shoulder straps that button up at the front and snap fastenings at the inside leg Project: VANESSA MOONCIE - www.lovesewingmag.com
Baby dungarees These gorgeous dungarees are also really baby-friendly, with shoulder straps that button up at the front and snap fastenings at the inside leg Project: VANESSA MOONCIE - www.lovesewingmag.com
Clothing Construction I Samples Packet
 Clothing Construction I Samples Packet Name Objectives: 1. To identify how to use and care for the sewing machine and tools. (#1 & #2) 2. Demonstrate how to use a variety of stitches and presser feet.
Frilly Jelly Bag. Bag Dimensions are 12 inches wide x 15 inches high (to base of handle), and 4 ½ inches deep.
, and 4 ½ inches deep.") Frilly Jelly Bag This frilly fun bag is another great one to use up some favourite left-over Jelly Roll Strips (or a bag worth buying a bright new jelly roll for!) Aside from the gathered jelly roll strips,
Frilly Jelly Bag This frilly fun bag is another great one to use up some favourite left-over Jelly Roll Strips (or a bag worth buying a bright new jelly roll for!) Aside from the gathered jelly roll strips,
Pockets; Seam Finishes
 Lessons 4, 5 Complete the sentences. 4. A zipper should be applied a facing has been applied, but a band has been applied to a garment. 5. Coil zippers are made of or. One advantage of them is the ease
EC How to Make Slipcovers
 University of Nebraska - Lincoln DigitalCommons@University of Nebraska - Lincoln Historical Materials from University of Nebraska- Lincoln Extension Extension 1984 EC84-410 How to Make Slipcovers Margaret
NOTES 1. Please wash, dry & iron your fabric before beginning. 2. Use a 1/4 seam allowance throughout. 3. All seams are sewn Right Sides together.
 OTHER TOOLS & SUPPLIES - fiber stuffing or fabric scraps - paper printer - 24 contrasting embroidery floss & an embroidery hoop, for eyes - 2 yds of ribbon, for hanging (optional) - basic sewing supplies:
How To Make A Quillow
 How To Make A Quillow A quillow is a quilt which folds into a built-in pocket, to form a pillow. Sizing: The measurements and fabric are for a 44" x 72" lap quilt which will fold into an 18" square. To
SEW-IN INTERFACING A (Hair Canvas) PIECES: 1,2,6 & 8. LINING #1 A (Lt.wt. Satin) PIECES: 3,5,7,10 & 11
 PIECES: 1,2,6 & 8. LINING #1 A (Lt.wt. Satin) PIECES: 3,5,7,10 & 11") 3 ENGLISH 3 Page ( pages) ADDITIONAL INFORMATION MULTI-SIZED FOR CUSTOM FIT SIZE (S M) L XL) WIDTHS Lower edge Vest B, C 3 0 LENGTHS Finished back from base of your neck Jacket A 3 3 / / Vest B, C / 3/
3 ENGLISH 3 Page ( pages) ADDITIONAL INFORMATION MULTI-SIZED FOR CUSTOM FIT SIZE (S M) L XL) WIDTHS Lower edge Vest B, C 3 0 LENGTHS Finished back from base of your neck Jacket A 3 3 / / Vest B, C / 3/
CHAIR COVER AND PILLOW A. 1 Front. 2 Side. 3 Arm Front. 4 Skirt Front. 5 Back. 6 Pillow CUTTING LAYOUTS CHAIR COVER AND PILLOW A
 ## PATTERN PIECES 4069 McCALL'S CRAFTS CHAIR COVER AND PILLOW A 1 Front 2 Side CHAIR COVER C,D 7 Guide PAGE 1 of 6 3 Arm Front 4 Skirt Front 5 Back 6 Pillow CUTTING LAYOUTS Cut other pieces first, allowing
Quilt-Along-With-Me! Geo Dreams Quilt
 Quilt-Along-With-Me! Geo Dreams Quilt Pattern & Series by Amanda from 3and3quarters.net FINAL QUILT SIZE 145cm x 145cm (57 x 57 ) 1 The Geo Dreams quilt is a generously sized lap quilt made up of four
Waistline. Groin Seam. Outside Seam. Pajama Front: Right Side. Inseam
 Other Supplies - 1 yard of 2 wide elastic - paper printer - a buddy for hemming - basic sewing supplies - sewing machine - fabric shears & scissors - needle & coordinating thread - straight pins - fabric
SINGER PROJECTS Sewing Machine Mat with Pockets PROJECT SKILL LEVEL:
 SINGER PROJECTS Sewing Machine Mat with Pockets This handy sewing machine mat with pockets not only helps protect your table surface, it keeps your go-to notions right at your fingertips. The four pockets
Basic Sewing Portfolio. Name
 Basic Sewing Portfolio Name Back stitching Whip stitch Starting in the corner of a sample begin stitching diagonally. 3-4 stitches Hold up the back stitching lever and backstitch to the beginning. Release
Carry Sew Table and Hoop Bag Created by Joy Harvey
 www.bernina.com.au Carry Sew Table and Hoop Bag Created by Joy Harvey Materials List What to do with all those leftover cords, ribbon, braids, pearls and sequins? Your answer, foot #12C my favourite presser
THE FOLD LINE PRESENTS TRIBE PATTERNS. hello sailor top
 THE FOLD LINE PRESENTS TRIBE PATTERNS hello sailor top contents fabric and pattern pieces 2 layplans 3 Instructions 4-18 glossary 19 sizes 20 Fabric and pattern pieces fabrics We recommend light weight
WIDE LEG PANTS ISSUE 38 SKILL LEVEL
 SKILL LEVEL WIDE LEG PANTS ISSUE 8 ABOUT IN THE FOLDS PATTERNS GARMENT OVERVIEW (INCLUDING FABRIC SUGGESTIONS AND NOTIONS) SIZING + GARMENT MEASUREMENTS (INCLUDING FABRIC REQUIREMENTS) CONTENTS ABOUT IN
CAMELOT FABRICS. 3. Draw a vertical line on the pointed end of each Strap, a tiny bit longer than the diameter of your buttons.
 Other Supplies - 2 buttons in coordinating color - paper printer - basic sewing supplies - sewing machine with buttonhole foot - iron & pressing surface - scissors & fabric shears - measuring tape - fabric
Sewing Roll. Base Fabric. Base Fabric. Third Fabric. Second Fabric (Bottom Pockets) Pockets)
 Pockets)") You will need Brother Creative Sewing Pack (Free Motion Foot, Braiding Foot, Narrow Hem Foot, Piping Foot and Concealed Zipper Foot) Base fabric 1 x fat ¼ (50cm square) cut in half Second fabric 50cm x
You will need Brother Creative Sewing Pack (Free Motion Foot, Braiding Foot, Narrow Hem Foot, Piping Foot and Concealed Zipper Foot) Base fabric 1 x fat ¼ (50cm square) cut in half Second fabric 50cm x
Cut 1 lightweight interfacing
 1 2 A note on interfacing for this bag: This pattern is intended to produce a slouchy bag, so you will want to look carefully at your fabrics before you decide on which interfacing and stabilisers to use.
Freya tunic 300min. For a novice, add approx 195 min STITCH DICTIONARY
 tternfreepatternfreepatternfreepatternfreepatternfreepatternfreepatternfreepatternfreepatternf YourFREE Dress &Tunic Pattern Freya tunic 300min For a novice, add approx 195 min Your FREE downloadable pattern
pattern BONUS Ruffled Halter By LiesL Gibson {from page 41}
 ruffled halter This adorable halter has a simple pull-on style that s easy and fun for summer, featuring a casing formed by the first ruffle for a clean, uncluttered finish. For other fun looks, try making
Arrowhead stitch/arrow- Triangular stitch used as decoration when stitched loosely or to reinforce strain areas of a garment when stitched tightly
 Dictionary of Sewing Terms A Armscye- armhole Arrowhead stitch/arrow- Triangular stitch used as decoration when stitched loosely or to reinforce strain areas of a garment when stitched tightly Awl-hand-held
Weighted Pincushion Organizer
 Weighted Pincushion Organizer from Sew, Mama, Sew! This sturdy pincushion has plenty of space to store pins and a wool felt strip for your needles. The hanging pocket is a perfect place for storing easily-misplaced
FOUNDATION ~ HAND & MACHINE STITCHES
 FOUNDATION ~ HAND & MACHINE STITCHES AIM ~ To show some of the many hand and machine stitches and their uses. ~ To show the necessity of some of the stitches when sewing seams. 3. SEAMS ~ Straight open
patterns MN2206 // VERONIKA
 patterns MN2206 // VERONIKA SIZES XS - XL SKILL www.megannielsen.com VERONIKA // Basic full circle skirt for woven or stretch fabrics. Pattern features include optional roomy scalloped pockets and two
World s Easiest Tote Bag!!!
 World s Easiest Tote Bag!!! Tutorial by Shruti Dandekar Finished Size : 12 x 4 x 18 An easy and quick to make Tote Bag with instructions on making the handles and a zip pocket. World s Easiest Tote Bag
HOW TO MAKE A SLIPCOVER INSTRUCTIONS Instructions are for slipcovering a wing-back chair. The principle is the same for an arm chair or sofa.
 HOW TO MAKE A SLIPCOVER INSTRUCTIONS Instructions are for slipcovering a wing-back chair. The principle is the same for an arm chair or sofa. YOU WILL NEED: Slipcover fabric Piping cord Zipper Thread Ruler
Copy Paper with DinA4 Print: Cut the pattern pieces for your size. Lengthening or Shortening the Pattern How to: To lengthen: To shorten:
 Copy Paper with DinA4 Print: The pattern pieces are printed with a narrow border onto 24 pages. Wait until all pages are printed. Arrange the pages as depicted in the page with instructions on how to put
Machine Stitched Cathedral Window Tutorial
 Machine Stitched Cathedral Window Tutorial 1. Here's a picture showing a row that I have already done to give you an idea of where we're going with this. For manageability, it's easiest to work on short
Patterna Patterns. Easy Fit Tee Shirt. Intermediate level. This tee shirt is a basic wardrobe staple. You can make it out of any stretch fabric.
 Patterna Patterns Easy Fit Tee Shirt Intermediate level This tee shirt is a basic wardrobe staple. You can make it out of any stretch fabric. Each step is beginner to intermediate. This pattern has a crew
Beginning Level (9-11 Years)
") OKLAHOMA COOPERATIVE EXTENSION SERVICE 4-H Fabrics & Fashions Construction Items Beginning Level (9-11 Years) Division of Agricultural Sciences and Natural Resources Oklahoma State University OKLAHOMA
OKLAHOMA COOPERATIVE EXTENSION SERVICE 4-H Fabrics & Fashions Construction Items Beginning Level (9-11 Years) Division of Agricultural Sciences and Natural Resources Oklahoma State University OKLAHOMA
Feeding Bib. A sewing pattern from Willow & Stitch. Designer: Jessica Wright Web:
 Feeding Bib A sewing pattern from Willow & Stitch Designer: Jessica Wright Web: www.willowandstitch.com Questions? Please feel free to email me at: willowandstitchdesign@gmail.com Terms of use: This pattern
SPRING SHORTS # 1403
 PATTERN RUNWAY SPRING SHORTS # 1403 Launch into spring with these super cute and easy to wear elastic waist shorts. With a Paper-Bag waist and front side pockets, these little sweeties are sure to be a
Leather Vest (Plus Size) 04/2012
 04/2012") Leather Vest (Plus Size) 04/2012 By: burda style magazine http://www.burdastyle.com/projects/leather-vest-plus-size-042012 Leather Vest Sewing Pattern. Materials Kid suede leather. To make this style in
Leather Vest (Plus Size) 04/2012 By: burda style magazine http://www.burdastyle.com/projects/leather-vest-plus-size-042012 Leather Vest Sewing Pattern. Materials Kid suede leather. To make this style in
FACINGS. Facings are sections of material that finish the edge without protruding; a binding extends beyond the edge.
 Facings defined FACINGS Facings are sections of material that finish the edge without protruding; a binding extends beyond the edge. A facing can be made either wide or narrow and can be made on the wrong
Carissa is the perfect clutch for every day, not too big, not too small. Six card sl
 Carissa Clutch Carissa is the perfect clutch for every day, not too big, not too small. Six card slots, zippered pocket, wristlet strap and an optional hand strap. Finished size of bag is: Height 7 inch
Jodie s Sewing Studio
 Jodie s Sewing Studio Friday s Kuspuk Pattern How to Use a Jodie s Sewing Studio Pattern For best results, study the pattern pieces first and read the notes in the margins and the terms on each piece.
w h a t y o u n e e d
 PROJECT BAG TUTORIAL Melissa Goodwin Frugal and Thriving 2011 I made these bags for all the craft projects I have on the go. The idea is to fill them with everything you need to work on your project and
Note: Yardage and supplies listed are for all three bags.
 Stash Pouches Finished sizes: Large 10" (25.4 cm) wide x 81/2" (21.6 cm) tall x 31/2" (8.9 cm) deep Medium 9" (22.9 cm) wide x 7" (17.8 cm) tall x 3" (7.6 cm) deep Small 8" (20.3 cm) wide x 6" (15.2 cm)
Slipper Sole. Cut 1 in Main Cut 1 in lining Cut 1 in wadding PER SLIPPER
 Slipper Sole Cut 1 in Main Cut 1 in lining Cut 1 in wadding PER SLIPPER Slipper Top Cut 1 in Main Cut 1 in lining Cut 1 in wadding PER SLIPPER Sorbetto Top with Tucks: 1 Getting Started Body Measurements
Embroidered Scrap Bag Carol A. Brown
 Embroidered Scrap Bag Carol A. Brown Materials: 1. Outer fabric (sturdy fabric such as poplin): at least 12 1/2 wide by 22 high. 2. Medium weight fusible interfacing: same size as for fabric. 3. Lining
Diana Hobo. Please do not sell any items made from this pattern or claim as your own design! ***All seam allowances ½ unless otherwise noted.
 Diana Hobo Materials Needed: 1.5 Yards Exterior Fabric - 44 /45 width 1 Yard Interior Fabric 44/45 width 1.5 Yard Canvas - at least 24 width (or iron on heavy weight interfacing) 1 Magnetic Snap ***All
~~~ Little Wonders Pouch Patterns ~~~ 2014 Geta Grama; Boxy Pouch
 Boxy Pouch Pouch size: 6 wide at bottom; 9 wide at top; 7½ tall; 3 deep ~ Please read all the instructions carefully before starting to make the pouch ~ Page 1 1. Materials List Main fabric: 10 x 20 (I
BUTTON-UP DRESS ISSUE 39 SKILL LEVEL
 BUTTON-UP DRESS ISSUE 9 SKILL LEVEL ABOUT IN THE FOLDS PATTERNS GARMENT OVERVIEW (INCLUDING FABRIC SUGGESTIONS AND NOTIONS) SIZING + GARMENT MEASUREMENTS (INCLUDING FABRIC REQUIREMENTS) CONTENTS ABOUT
2016 Courtesy of Art Gallery Quilts LLC. All Rights Reserved.
 ST YL E NAME 2016 Courtesy of Art Gallery Quilts LLC. All Rights Reserved. CONSTRUCTION Sew all rights sides together with ¼"seam allowance. Arrange the triangles together in rows. QUILT DESIGNED BY AGF
Chinese lantern cushion
 Chinese lantern cushion Fabric requirements 3 fat quarters printed fabric for the 3 layers of the lantern 1 fat quarter cream/solid for the background 2 pieces 16 x 12 printed fabric - for the cushion
Summer Sewing ~ Classic Tote Tutorial
 Summer Sewing ~ Classic Tote Tutorial Classic Tote Tutorial by Irene www.sewmamasew.com Let s get started! Supplies: 1 yard of home décor cotton fabric (1½ yards for fabric with nap or if you d like to
Making Double Fold Straight of Grain Quilt Binding
 Making Double Fold Straight of Grain Quilt Binding Tools and Supplies: Cutting mat, rotary cutter with a sharp blade, walking foot, 6x24 ruler, seam allowance guide, pencil, quilting gloves Be sure your
Frou Frou Bag Intermediate
 Frou Frou Bag Intermediate Sewn By Sara Lawson http://www.sewsweetness.com This bag features ruffled flaps, snap closure and an adjustable strap. The small front pockets are 3-dimensional. Beautiful detailing
Binding Basics. will help you get perfect corners on your binding. 2 Quilting Celebrations Winter
 inding asics 1. egin stitching the binding to the quilt approximately 6" 8" from the beginning of the binding strip, using a ¼ seam allowance (Photo ). I have a little binding trick that I teach my students,
11/2011 Brocade wrap trousers
 11/2011 Brocade wrap trousers By: burda style magazine http://www.burdastyle.com/projects/112011-brocade-wrap-trousers Brocade wrap trousers burda style magazine patterns FAQ 1 Materials Brocade Step 1
Venn Diagram Placemats (D-031)
") OTHER TOOLS & SUPPLIES For (4) Mats - (2) Large, (2) Mini - 1/4 yd quilt batting (60 wide) - 5 yds extra-wide double-fold bias binding - Basic sewing supplies; - sewing machine - needle & coordinating
OTHER TOOLS & SUPPLIES For (4) Mats - (2) Large, (2) Mini - 1/4 yd quilt batting (60 wide) - 5 yds extra-wide double-fold bias binding - Basic sewing supplies; - sewing machine - needle & coordinating
Football Cornhole Bags
 Football Cornhole Bags Skill level - Beginner/Easy By Lucy Fazely Technique: Applique Brand: Dual Duty XP Crafting time: An Evening Materials Dual Duty XP general purpose, colors #3690 Purple and #7540
Pattern By Nemiha Studebaker for Sarah Jane Studios. Sizes 2-6
 Pattern By Nemiha Studebaker for Sarah Jane Studios Sizes 2-6 General Instructions 1. Carefully read through all instructions before you begin. 2. Wash, dry, and iron your fabric before starting. 3. Seam
Below is an updated Materials List followed by instructions for the added option of interfacing the Tote and Handbag with Timtex!.
 Chelsea Bags New! Instructions for interfacing the Chelsea Bags with Timtex!. Below is an updated Materials List followed by instructions for the added option of interfacing the Tote and Handbag with Timtex!.
Ariel Hand Bag Pattern
 Ariel Hand Bag Pattern By Aimee Larsen for HomeSpun-Threads Materials: 1 Yard inside fabric 1 Yards Outside Fabric ¼ Yard for Straps and Flap 1 Yard Heavy Fusible Interfacing 1 D-Ring & Clip Cut & Iron
Little Dresses for Haiti - Revised
 Little Dresses for Haiti - Revised Now that the team has been to Haiti, we have discovered that the Haitians are a very modest people. It is not acceptable for girls over the age of 6 to have their shoulders
Decorated calico bag. Calico Bag suggested production plan and management. Name:
 Name: Decorated calico bag The objectives of this project are to follow the production plan to produce, decorate and evaluate a calico bag. Throughout this project, you will be required to: follow the
raw edge selvage length of tunic
 If you know your way around a sewing machine, and have a passing familiarity with scissors, you can do this. The style fits, and looks good on just about everyone, saves fabric and prevents fighter's tear.
How to Make Twirly Shorts By Stacy at thelandofka.com
 How to Make Twirly Shorts By Stacy at thelandofka.com Description: This tutorial is for making a skirt/short combo. It will be a drop waist twirly skirt with attached shorts underneath. You can add the
The Beth An in-the-hoop project
 The Beth An in-the-hoop project A classic wristlet. Tab on front pocket snaps closed to keep your phone safe. The back zipper opens to reveal 6 credit card slots and room to hold other necessities. Comes
Ashbury Heights Apron by Shelly Pagliai
 Ashbury Heights Apron by Shelly Pagliai Here I am again, with an apron tutorial for you. I made this apron using the Ashbury Heights line by Doohikey Designs for Riley Blake. I m in love with the telephone
POCKET POTHOLDERS VERY SHANNON PATTERNS FOR THE MODERN KNITTER + SEWER
 POCKET POTHOLDERS VERY SHANNON PATTERNS FOR THE MODERN KNITTER + SEWER FABRIC REQUIREMENTS, SUPPLIES & TOOLS RECOMMENDED FABRIC Cotton Quilting Cotton Lightweight Canvas Linen *Do not use synthetic fabrics
Name: Class: Monster Doll. Grading Rubric
 Name: Class: Monster Doll Grading Rubric Grade yourself on the skills listed below. (0 being the lowest, and 5 being the highest.) Once you have graded yourself in each area, pin your grading sheet to
Seeing Double Fabric Magic Pocket Pillows Skill Level: Beginner
 Seeing Double Fabric Magic Pocket Pillows Skill Level: Beginner Designed By Alexandra Henry Sewn By Alexandra Henry Pellon Fabric Magic shrinks up to 30% creating texture on any project. Use it to make
A. Preparing the fabric (not shown):
:") INSERTING ZIPPERS - CENTER INSERTION The zipper can be snapped on to the right or to the left side of the needle so that you can sew close to the zipper. When sewing on the right side of the zipper, attach
INSERTING ZIPPERS - CENTER INSERTION The zipper can be snapped on to the right or to the left side of the needle so that you can sew close to the zipper. When sewing on the right side of the zipper, attach
HOMESPUN TWIST. Finished Size: 45" x 63" Designed by Annis Clapp P111
 HOMESPUN TWIST Finished Size: 45" x 63" Designed by Annis Clapp P111 P111 HOMESPUN TWIST Read all instructions carefully before starting. Press fabrics. Do not prewash. CUTTING Trim the selvage edges from
twiddletails Magical Pillowcase Tutorial
 1 twiddletails Magical Pillowcase Tutorial Notes: The pillowcase in this tutorial uses three fabrics - a main fabric, a cuff/contrast fabric, and a trim fabric. You can of course make the pillowcase using
Bee #2 - Tea Cozy. ** All seam allowances are ¼. ** To avoid dull or broken needles, always remove pins while sewing.
 How do you keep your last cup of tea as piping hot as the first? Follow these instructions to make a decorative and practical tea cozy. This Bee includes all of the instructions, supply list and 4 beautiful
We are Engineers! Movement Improvement. Preparation. 1. Prepare the patterns (make multiple out of regular paper).
.") LINED LOPSIDED Satchel Leader Guide WITH THIS ACTIVITY MODULE Handout We are Engineers! Movement Improvement Marvelous Materials Smart Clothing Patternmaking Tools n Tech Big Picture Young designers will
LINED LOPSIDED Satchel Leader Guide WITH THIS ACTIVITY MODULE Handout We are Engineers! Movement Improvement Marvelous Materials Smart Clothing Patternmaking Tools n Tech Big Picture Young designers will
6050 Fashion and Fabrics November 2008
 www.onlineexamhelp.com 6050 Fashion and Fabrics November 2008 FASHION AND FABRICS Paper 6050/01 Written General Comments In general the scripts were well presented and handwriting was legible. Many candidates
Award Ceremony Quilt a free pattern from Anna Maria Horner
 Award Ceremony Quilt a free pattern from Anna Maria Horner Award Ceremony Quilt by Anna Maria Horner My Honor Roll fabric collection is inspired by the idea of being good. The prints themselves took cues
A NOTE FROM Susie...
 BARCELONA NIGHTS A NOTE FROM Susie..... Please read thru the whole pattern, instructions, etc; before cutting fabric or sewing blocks. I have tried to use the simplest and easiest methods to cut and piece
Martha s A-Line Skirt with Darts
 Martha s A-Line Skirt with Darts Add a tailored look to a basic skirt with darts, a zipper, and a waist facing made of fabric or ribbon. The waist is flat with no band, and the skirt lies smoothly over
Vanity Bag. 1m Main Fabric (Pockets & Backing) 40cm Contrast Fabric (1) For Lining. 20cm Clear Vinyl. 30cm Contrast Fabric for Piping and Binding (2)
 40cm Contrast Fabric (1) For Lining. 20cm Clear Vinyl. 30cm Contrast Fabric for Piping and Binding (2)") Vanity Bag 1m Main Fabric (Pockets & Backing) 40cm Contrast Fabric (1) For Lining 20cm Clear Vinyl 30cm Contrast Fabric for Piping and Binding (2) 3 x Zippers 40cm 1 x Zipper 45/50cm 40cm Velcro 2.2m Piping
Vanity Bag 1m Main Fabric (Pockets & Backing) 40cm Contrast Fabric (1) For Lining 20cm Clear Vinyl 30cm Contrast Fabric for Piping and Binding (2) 3 x Zippers 40cm 1 x Zipper 45/50cm 40cm Velcro 2.2m Piping
Homeless Coat: Construction. The Back. wrong side
 Homeless Coat: Construction Permission is given to duplicate these patterns and instructions as long as the attribution to me is kept, and as long as no profit is made selling them or the coats made from
The Allie An in-the-hoop project
 The Allie An in-the-hoop project A wallet/coin purse for the 5x7 hoop. The Allie has 3 credit card slots in the front section which features a large flap with a snap closure. You can carry coins or other
Scallop Button Up Skirt
 Scallop Button Up Skirt By: nettevivante http://www.burdastyle.com/projects/scallop-button-up-skirt 1 2 Oh, I tried myself on pattern making for a garment for the very first time. I was inspired by Megan
waterproof pocket variation
 waterproof pocket variation DESCRIPTION Keep your phone, wallet and dog treats dry with this waterproof pocket for our Kelly Anorak. A separate external flap keeps the pocket bag closed and prevents water
gothic lolita satchel
 gothic lolita satchel a sewing pattern by gothic lolita satchel sewing tutorial gothic lolita satchel This satchel was inspired by the Gothic Lolita style so popular amongst Harajuku fashionistas in Japan.
18 ½ INCH CABBAGE PATCH KIDS BLOUSE
 18 ½ INCH CABBAGE PATCH KIDS BLOUSE Make Your Outfit Instructions 1. Preview of Completed Outfit Play this video and check out this great outfit that YOU will make! 2. Tools and Resources Required 1) Paper
onstage tutu skirt a free pattern from not for resale
 a free pattern from not for resale onstage tutu skirt This very quick and easy-to-make tutu skirt is great for parties and special occasions, but it s equally appropriate for everyday wear. The pull-on
Waist Finishing BOUND BUTTONHOLES
 Make samples Waist Finishing BOUND BUTTONHOLES Buttonholes are easy if made according to professional methods. They offer an excellent trimming for many dresses and often give that center of interest so
One Step Quilts - handbag and pouch
 One Step Quilts - handbag and pouch A sweet handbag and pouch pattern sewn from one yard of pre-printed fabric from Lecien. Fabric and notions: 1 yard of the One Step Quilts handbag and pouch fabric 1
Festival Bracelet. 1, 2, 3... let s go! Zweigart & Sawitzki GmbH & Co. KG Fronäckerstraße Sindelfingen. - more than 3 hours -
 arben Festival Bracelet - more than 3 hours - 1, 2, 3... let s go! Zweigart & Sawitzki GmbH & Co. KG Fronäckerstraße 50 71063 Sindelfingen Preparation: Arrange your material and print out the embroidery
MARKING SEWING LINES
 MARKING SEWING LINES Press mark seams Stitching a straight seam without a line to follow not only requires perfect cutting but also an accurate eye for gauging the correct distance between the cut edge
Simple Leggings Two girls. Same name. One mission. Teach the world to sew.
 Simple Simon and Company Simple Leggings Two girls. Same name. One mission. Teach the world to sew. Simple Leggings Sewing with knits is made easy with this simple leggings pattern. Once you are finished
Adam. By: burdastyle.
 Adam By: burdastyle http://www.burdastyle.com/projects/adam Here we are in deep winter, and we know the guys need to stay just as warm and toasty as the girls. This double-breasted winter coat is modern
Summer Picnic Blanket
 Technique: Machine sewing Summer Picnic Blanket Brand: Crafting time: Size 56 x 70 Dual Duty XP An Evening Skill level - Beginner/Easy Materials Coats and Clark Dual Duty XP Heavy thread in a coordinating
Jodie s Sewing Studio
 Jodie s Sewing Studio Children s Kuspuk Pattern How to Use a Jodie s Sewing Studio Pattern For best results, study the pattern pieces first and read the notes and terms on each piece. Pieces are labeled
The Sunshine An in-the-hoop project
 The Sunshine An in-the-hoop project All the music I walk to is on my phone, but my new iphone 6+ is too big to fit in my pocket. This case is the perfect solution. That s my iphone 6+ peeking out of it
Make Your Own Symington Corset
 How-to guide: Make Your Own Symington Corset 3Reproduction from the original 1890s pattern made from drab coutil How-To Guide: 1890 s Symington Corset 2 Introduction The Symington Archive covers the period
My Color Notes. Finished Dimensions: 7" square cube, 6" square cube, 5" square cube, 4" square cube, 3" square cube, 2" square cube
 Nesting Cubes H Light- to medium-weight woven cotton fabric: 10 squares of fabric measuring 8" 8" 10 squares of fabric measuring 7" 7" 10 squares of fabric measuring 6" 6" 10 squares of fabric measuring
The Sleepy Fish Toy. Introduction
 The Sleepy Fish Toy Introduction I made my fish with leftover layer cake pieces but it is a great project for any scraps.the scales in the pattern only require about an inch square so don t throw away
Embroidered Scrap Bag and Bed Caddy Carol A. Brown
 Embroidered Scrap Bag and Bed Caddy Carol A. Brown Materials: 1. Outer fabric for Scrap Bag (sturdy fabric such as poplin): at least 12-1/2 wide by 22 high. 2. Outer fabric for Bed Caddy (sturdy fabric