CNC Applications. History and Terminology
|
|
|
- Clara Fox
- 5 years ago
- Views:
Transcription

1 CNC Applications History and Terminology
2 Background & Definitions (Chapter 1) Requirements for a skilled machinist Serve a 4 year apprenticeship including classes in algebra, trigonometry, print reading, and drafting along with 8,000 hours of on-the-job-training. The machinist must purchase several thousand dollars worth of precision tools. Machinists often make a lower hourly wage than other skilled trades such as electricians and plumbers. Production operations often require a very skilled person to perform the same operations over and over which most machinists find boring.
3 Background & Definitions (continued) During the 1930 s and 1940 s, there was much labor unrest between machinists and management at large companies. Work stoppages and strikes angered management. At the same time, World War II increased the complexity of parts required for common products. The most complicated product at the time was the jet aircraft which required large quantities of complex, highprecision components.
4 Background & Definitions (continued) The combination of labor problems and more complicated components precipitated the introduction of automatic machines that could be programmed to produce different parts. Automatic machines had been available since the US Civil War ( ), but the machines could only produce one part and required large amounts of time to set up to produce a different part. An electronically controlled machine that could be easily changed to produce a different part was required.
5 Background & Definitions (continued) NC Numerical Control The first successful electronically programmed automatic machine was a joint project between Massachusetts Institute of Technology (MIT) and the US Air Force in the mid 1950 s. It was a three axis milling machine controlled by a room full of vacuum tube electronics. Even though it was unreliable, it set the stage for modern machines. The controller was called Numerical Control, or NC. The Electronics Industry Association (EIA) defines NC as "a system in which actions are controlled by the direct insertion of numerical data at some point. NC machines were controlled electronically, without the use of a computer.
6 Background & Definitions (continued) CNC Computer Numerical Control CNC machines use a computer to assist and improve functionality of number and code control. In the 1960 s, CNC machines became available with timesharing on mainframe computers. True NC machines continued to be built. By the 1970 s, specialized computers were being manufactured for CNC controls. By the late 1970 s, no true NC machines were being made, only CNC. During the 1980 s, many machine manufactures took advantage of PC technology to increase the reliability and decrease the cost of CNC controls. Today, all machines are CNC although the term NC is still used, but not in its original definition.
7 Machine Control Systems Stepper Motor Control The stepper motor takes voltage pulses and converts them to rotary motion. If the machine resolution (smallest motion) is and you want to move 3, the computer sends 30,000 (30,000x =3.0 ) pulses to the motor and the machine moves 3. Problem: stepper motors have limited torque, and if excess pressure is applied, the motor will slip and the machine loses its position. Then, the operator must restart the machine. The machine does not know where it actually is, only where it should have moved. This method works fine unless the motor slips.
8 Machine Control Systems (continued) Servo Motor Control The servo motor has a feedback loop to check the machine s actual position. If the program tells the computer to move 3, the servo motor starts turning and does not stop until the feedback loop tells the computer that the machine has actually moved 3 Advantage: servo motors have high torque capabilities to take heavy cuts at high speeds. It stops and gives an alarm when the motor is overtorqued. Advantage: the machine always knows its actual position.
9 Modern CNC Machine Characteristics Massive, usually four times heavier than an equivalent conventional (manual) machine. Large motors with high speed capabilities to take advantage of modern cutting tools. Horsepower and spindle speeds are generally four to ten times faster than conventional machines. Automatic tool changers that hold from eight to hundreds of cutting tools that are quickly changed under program control. High accuracies. The minimum resolution of most machines is or 0.001mm, and some machines are capable of manufacturing parts to that accuracy, depending on the process. Ball screws practically eliminate backlash (slop) in the movement screws.

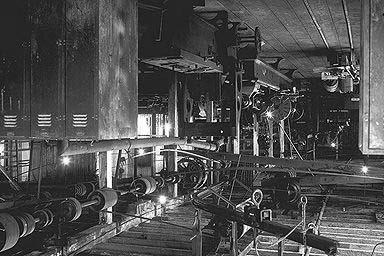
10 Modern CNC Machine Accuracy Accuracy of CNC machines depends on their rigid construction, care in manufacturing, and the use of ball screws to almost eliminate slop in the screws used to move portions of the machine. These pictures show the precision balls which re-circulate in the nut. Photo courtesy Thompson Ball Screw. Graphic courtesy BSA Co.
11 CNC Applications Introduction to Turning Centers Headstock +X Direction Cross Slide with Turret Saddle Chuck Cutter +Z Direction Tailstock Bed
12 Turning Centers A Turning Center is simply a CNC lathe with a multi-station turret and an enclosure. Headstock +X Direction Cross Slide with Turret Notice the turret attached to the cross slide. Chuck Cutter Saddle +Z Direction Note: the CNC control and the enclosure are not shown. Tailstock Bed
13 Characteristics of Turning Centers Turret is on the far side to ease part loading and unloading. Heavy for increased rigidity. High spindle speeds to effectively use hard cutters. Powerful motors. Communication capabilities.

14 Haas SL-20 A Typical Turning Center The Haas SL-20 turning center has a 20 HP motor, RPM spindle, ten tools in the turret, 8" cutting diameter and 20" between centers. It weighs 9000 lbs.
15 Turning Center Coordinate System Z is the length of the part. X is the diameter of the part. The partially shaded circle represents the origin. The programmer chooses the location of the origin on the part, usually the back, center or front, center. We will always use the back, center since it simplifies machine set-up. Program to move the tool, not the work.
16 The Coordinate System Problem Machine Coordinate System Origin Programmed Tip of the Cutter Work Coordinate System Origin Top View of the Turning Center The machine operates from the Machine Coordinate System (MCS). Note that all MCS movements are in the negative X and Z directions. We program from the Work Coordinate System (WCS). The tip of the cutter is offset from the MCS and is different for each cutter.
17 The Solution We can easily measure the distance from the MCS to the WCS and enter it into the machine control. This is called a Fixture Offset. We can easily measure the distance from the MCS to the tip of the each cutter and enter the values in the machine control. These values are called Tool Offsets.
18 Separating the Programmer from the Machine The programmer chooses the WCS on the centerline of the part, generally at the back, and then programs the cutter movement from there. The programmer calls the correct fixture offset and tool offset numbers in the program (we ll cover these codes later). So, the programmer does not have to be concerned with any machine specific measurements.
19 Incremental vs. Absolute Programming Suppose we want to move from the origin through points A, B, C, D, and E. We can move: Incremental Absolute incrementally distance from previous point, Point Z X Z X or absolutely new distance from the origin. Origin A E B C A C B D D E
20 Incremental vs. Absolute Programming (continued) Notice in the previous table that each move in incremental mode is the distance from the previous point, while each move in absolute is the distance from the origin, regardless of the previous point. Most programmers initially think incremental programming is easier. However, editing for program changes is much easier in absolute mode. About 95% of all programming is done in absolute mode. The remaining 5% is for special cases such as repetitive features where incremental can be a real time saver.

21 CNC Applications Speed and Feed Calculations Photo courtesy ISCAR Metals.
22 Turning Center Cutters What types of cutters are used on CNC turning Centers? Carbide (and other hard materials) insert turning and boring tools High Speed Steel (HSS) drills and taps Where do I find information for calculating RPM and feed rates? Cutting tool manufacturer (first choice) Machining Data Handbook Machinery s Handbook (we ll use this option)
23 Standard Insert Shapes V used for profiling, weakest insert, 2 edges per side. D somewhat stronger, used for profiling when the angle allows it, 2 edges per side. T commonly used for turning because it has 3 edges per side. C popular insert because the same holder can be used for turning and facing. 2 edges per side. W newest shape. Can turn and face like the C, but 3 edges per side. S Very strong, but mostly used for chamfering because it won t cut a square shoulder. 4 edges per side. R strongest insert but least commonly used. See the Tooling thumb tab in the Machinery s Handbook.

24 Typical Turning, Threading, and Parting Tools

25 Tool Holder Hand For most CNC turning centers, the cutter is on the back side of the part and is upside down. Right Hand tool then turns towards the chuck. Left Hand tool then turns towards the tailstock. If the cutter is symmetrical with the shank, it is called NEUTRAL HAND. See the Tooling thumb tab in the Machinery s handbook for more information. Left Hand Right Hand Single Point Indexable Insert Holders
26 Tooling Considerations Tooling choices depend on the type of workpiece, the machine, and the desired surface finish. Harder workpieces require harder cutters. Modern cutters require the turning center to have high spindle speeds and powerful motors.
27 Cutting Speed What is cutting speed? Not RPM Relative speed of the work and cutter Units in feet/minute (fpm) Usually designated as V, cs, or S Tabulated in the book based on material, cutter type, and type of cut (roughing or finishing) Needed to calculate RPM
28 Calculating Turning RPM The formula for calculating RPM is given on page 1016 as: 12 V N = RPM = π D Where V = cutting speed to be looked up in the handbook p = 3.14 D = diameter being cut When punching buttons on your calculator, do this: 12 V π D Note the difference between this and the actual formula. To use this formula, we must first find V in the handbook See page 1022 for a list of the tables. =
29 Types of Cuts Roughing primary considerations: Just removing metal, surface finish does not matter. Requires a strong cutter. Generally have deep depth of cuts and fast feed rates. The cutting speed is generally adjusted slower to keep heat down.
30 Types of Cuts (continued) Finishing primary considerations: Must meet required surface finish and size specifications. Requires a hard cutter to hold its shape well. Generally have small depth of cuts and slow feed rates. The cutting speed is generally adjusted upward to give a better surface finish.
31 Surface Finish Requirements The surface finish depends on the feed rate and on the cutter nose radius. Generally, a large nose radius and a slow feed rate coupled with high cutting speed gives the best finish. However, too large of a nose radius induces chatter ruining the finish and the size. Most inserts use a 1/32 nose radius as a good compromise. Nose Radius h 2 f = 8 r and Insert Feed h = height of marks f = feed rate r = nose radius h roughness 2 f = 32 r Actual roughness in inches, usually report in microinches.
32 General Feed and Depth of Cut Recommendations Roughing: 0.1 to 0.25 depth of cut (radial) inches per revolution (ipr) to ipr feed rate Finishing: 0.03 to 0.05 depth of cut (radial) ipr to ipr feed rate Note 1: the depth of cut should not be less than the tool nose radius unless special finishing inserts are being used. Note 2: smaller feed rates can be used if special finishing inserts are being used.
33 Calculating RPM for Turning Operations with Hard Cutters Use this procedure for carbide, ceramic, and cermet inserts. We will adjust the cutting speed based on the desired depth of cut and feed rate.
34 Calculating Turning RPM (continued) Six step process: 1. Select depth of cut - as deep as possible. 2. Select feed - appropriate for roughing or finishing. 3. Find the original cutting speed in the tables. (See the listing on page 1022 for the appropriate table.) 4. Find the feed and depth of cut factors in Table 5a, page Modify the original cutting speed based on step Calculate the RPM. Note: All data will be found in the Machining thumb tab in the Machinery s Handbook.
35 Calculating Turning RPM (continued) Example: Take depth of cut, feed in quenched and tempered 8620 steel with a Brinell hardness of 300, hard coated carbide cutter, 2.5 diameter part. Step 1: Depth of cut given at Step 2: Feed rate given as ipr.

36 Calculating Turning RPM (continued) Step 3: From Table 1, page 1029, locate cutting parameters for this material Material Hardness Cutting Parameters
37 Calculating Turning RPM (continued) Step 3 (continued): From Table 1, page 1029, we find V opt = 585 fpm ipr V avg = 790 fpm F opt = Note that the table lists cutting speed as S rather than V as used everywhere else. Note that the feed rates are given in ipr, so the 17 listed for F opt is actually ipr.
38 Calculating Turning RPM (continued) Step 4: Once we have located the optimum and average cutting speeds and the optimum feed, we finish our calculation using the data and process described in Table 5A, page 1035.

39 Calculating Turning RPM (continued) First, calculate the ratio of the feeds. Second, calculate the ratio of the cutting speeds Fourth, determine the nearest depth of cut and lead angle column Fifth, find the depth of cut factor where the step 1row crosses the step 4 column. Third, find the feed factor where the step 1 row and step 2 column cross. Sixth, calculate the final cutting speed.
40 Calculating Turning RPM (continued) Step 4: For this example following the steps in 5a: Calculate the following ratios: F F opt = = 0.7 And V V avg opt = 790 = From Table 5a, page 1035, find F f = 1.22 and F d = 0.87
41 Calculating Turning RPM (continued) Step 5: As shown at the bottom of Table 5a, V = V opt F f F d Where V = cutting speed to be used (fpm) V opt = optimum cutting speed from the table based on material hardness and type of cutter F f = feed factor from Table 5a F d = depth of cut factor from Table 5a For this example, V = (585)(1.22)(0.87) = 621 fpm
42 Calculating Turning RPM (continued) Step 6: Finally, calculate the RPM with N = RPM 12 V = π D For this example: RPM = 12 x 621 p 2.5 = 949 RPM

43 CNC Applications Programming Turning Centers
44 Planning and Programming To program a CNC machine tool to create a part, you must follow a series of steps to be successful: 1.Examine the part drawing thoroughly and get a rough idea of how you want to proceed. 2.Figure out how to hold the raw material so you can perform as much machining as possible in one setup. 3.Decide what cutters are necessary to perform the various operations. 4.Write down the exact sequence of operations necessary to machine the part, one cutter at a time. 5.Convert your sequence of operations into a program and simulate the program if possible.
45 What is a block? The machine reads the program one line at a time. Each line is called a block. Blocks do not extend past one line. The order of information on a block does not matter: G0 X3.0 Z1.75 is the same as Z1.75 G0 X3.0 However, most programmers use the following order: N G X Y Z I J K U V W A B C P Q R F S T M H We ll go over the meaning of each letter as the course progresses.
46 G and M Codes The machine operation is divided into two basic types: G codes also called preparatory codes tell the machine what type of movement or function should be performed. For example, rapid moves, linear feed moves, arc feed moves, thread cutting, etc. M codes also called miscellaneous functions turn the spindle on and off, coolant on and off, etc.
47 Common Codes Preparatory G Code Action Miscellaneous M Function Action G0 Linear rapid traverse positioning move M3 Spindle forward G1 Linear feed move M4 Spindle reverse G2 CW arc M5 Spindle off G3 CCW arc M8/M9 Coolant on/off G28 Go home M30 End of program
48 Other Codes Preparatory G Code Action Other Functions Action G20 Inches O Program number G40 Cancel nose radius compensation X, Z Absolute position G99 IPR feed mode U, W Incremental position G54 First fixture offset T S Tool number Spindle Speed
49 Modal Most codes are modal they stay in effect until something changes them. We only program what changes, nothing extra. For example: G0 Z3.0 X2.0 G1 Z1.5 F0.012 X2.5 Preferred Easy to read and change! Works, but poor style G0 Z3.0 G0 X2.0 Z3.0 G1 X2.0 Z1.5 F0.012 G1 X2.5 Z1.5 F0.012 Difficult to follow, and changes require considerable effort.
50 Notes on Turning Center G & M Codes Most machines only allow one M code per block. The capital Oh for the program number is the only Oh in the program. All others are zeros (0). Be sure you do not mistype. The tool code (T) is four digits the first two for the tool number, the second two for the offset number. They are usually the same. All alpha characters must be in uppercase.
51 Notes on Number Formats All numbers except zero require a decimal point, otherwise the machine defaults to its resolution. For example: X3.0 works fine X3. works fine X3 the machines interprets as X Z0 works fine Z0. works fine
52 Special Notes for Sending a Turning Center Home The G28 code is used to send the machine home. G28 requires a move through an intermediate point. We generally position the tool clear of the part before sending it home, so the intermediate point is not used. To give it a point, we incrementally program a 0 movement like this: G28 U0 which means go home in X incrementally through a point 0 distance from the current location G28 W0 means the same for the Z direction
53 Program Functions Fall into just Four (4) Categories 1. Program Start 2. Tool Change 3. Program End 4. Machining Functions The first 3 are generally the same for all programs for a given machine. Note that they will be different for different machines. You must know your machine by reading the machine manual!
54 Program Functions for the Haas SL-20 Turning Center The CNC language is not 100% standard across all machine and control manufacturers. Haas machines use fairly generic programming that is similar to most Fanuc compatible machines. Fanuc is probably the most common machine controller. Again, you must know your machine by reading the machine manual!
55 Haas SL-20 Program Start Program % O999 G20 G40 G99 G28 U0 G28 W0 T0202 G54 S4000 M3 G0 Zzzz Xxxx M8... Explanation Starting character for file transfer Program number set to 999, note the capital Oh Initial conditions Go home in the X direction Go home in the Z direction Load tool 2 with offset 2 Load the first fixture offset Set the spindle to 4000 RPM in the forward direction Rapid to the first Z location, zzz is the numerical value Rapid to the first X location (G0 is modal), turn the coolant on, xxx is the numerical value Machining moves follow
56 Haas SL-20 Tool Change Program M9 G28 U0 G28 W0 T0303 G54 S3500 M3 G0 Zzzz Xxxx M8... Explanation Turn the coolant off Go home in the X direction Go home in the Z direction Load the next tool and offset Load the fixture offset Set the spindle speed and direction Rapid to the first Z location, zzz is the numerical value Rapid to the first X location (G0 is modal), turn the coolant on, xxx is the numerical value Machining moves follow
57 Haas SL-20 Program End Program M9 M5 G28 U0 G28 W0 M30 % Explanation Turn the coolant off Turn the spindle off Go home in the X direction Go home in the Z direction End of program M code End of file character for file transfer
58 A Simple Turning Center Program Problem Statement: Material: 1117 CD Steel 175HB Face up to 1/8 (0.125 ) off the end of a diameter 1117 CD steel bar that is 175 Hb using a hard, coated carbide C shaped insert at ipr feed.
59 Follow Planning and Programming Steps (1-3) 1. Examine drawing 2. How will we hold the raw material in a collet. 3. Decide what cutters to use given hard, coated carbide C shaped insert. Since f<f avg, use V avg =1410 fpm giving N = RPM 12 V = π D = π 1.25 = 4480 Since the machine only goes 4500RPM, we ll use 4000RPM to stay a little under the maximum.
60 Follow Planning and Programming Steps (4) 4. Write down the exact sequence of operations: A. Rapid position the cutter in Z B. Rapid position the cutter 0.1 away from the part in X C. Face to X0. at F0.004 D. Move away in Z E. Rapid position 0.1 away from the part in X F. Program end.
61 Follow Planning and Programming Steps (5) 5. Convert the sequence of operations to a program: Program Start Facing Program End
62 The Actual Program Program Codes % O999 G20 G40 G99 G28 U0 G28 W0 T0202 G54 S4000 M3 G0 Z2.25 X1.350 M8 G1 X0 F.006 Z2.3 G0 X1.350 M9 M5 G28 U0 G28 W0 M30 % Action Program Start A. Rapid to position in Z B. Rapid 0.1 away from part (0.2 on diameter) C. Feed to X is 0 (center of the part) D. Feed away from the face E. Rapid back to 0.1 away from part in X F. Rapid home in X G. Rapid home in Z Program End
63 What the Machine Does Cutter at Home Position (Program Start) A B Cutter in Position to Cut D Small Clearance Move C Facing Cut G Rapid Move Clear of Part F Rapid Home First in X Then in Z E

64 An Animation of the Machine s Movement Select this link to start the animation. Notes on the animation: 1. The isometric view orientation is the same as the earlier views of the complete machine with the tailstock to the right. 2. The animation shows the motion of the cutter, but it does not differentiate between rapid and feed moves. 3. The cutter is upside-down because the spindle is going forward (CCW is this view) and the cutter is on the back side of the part. 4. Sorry, I can t make the part rotate or chips fly!
65 Running a Program for the First Time 1.Install all cutters in the proper holders. 2. Install the fixture or chuck on the machine and establish the WCS. 3. Set the cutter offsets. 4. Simulate the program on the machine. 5. Slow rapid traverse down as low as possible. 6. Initiate the single step cycle with your hand on the E-stop button at all times. 7. Carefully watch the operations, press the feed hold button to take notes for any corrections. 8. Install a part and go to step 5.

66 CNC Applications Introduction to Machining Centers
67 Machining Centers A machining center is simply a CNC milling machine with an automatic tool changer and an enclosure. There are a number of different types of machining centers differentiated by the number of programmable axes.
68 Three Axis Machining Center Column Head Table Spindle Motor Z Cutting Tool Y Saddle With three axes, we can machine one surface of a cube with the end of the cutter and four additional surfaces with the side of the cutter. X A three axis machining center has programmable X and Y axes in the plane of the table and a Z axis in the spindle s direction. This is the most basic type of machining center, and they start at about $30,000. Typically, three axis machines are in the vertical configuration shown here. Note: tool changer, control, and enclosure not shown.
69 Horizontal Three Axis Machine Column Head Spindle Cutter Table Saddle The illustration depicts a three axis horizontal machining center. Note the different orientation of the X, Y, and Z axes. This type of machine starts at about $90,000. Again, the tool changer, control, and enclosure are not shown. We can still only machine one surface of a cube with the end of the cutter and four additional surfaces with the side of the cutter.
70 Four Axis Machining Center Four axis machining centers are generally horizontal, and the table rotates to create the forth axis. True four axis machines start around $100,000 We can also do this by adding a CNC controlled rotary table to a three axis vertical machine, and this is commonly done for small parts. We can machine four surfaces of a cube with the end of the cutter and two additional surfaces with the side of the cutter. Frequently, a fixture called a tombstone (see sketch later) is mounted on the table and many small parts machined at once on a large machine.
71 Five Axis Machining Center Be prepared to spend about $250,000 for a true five axis machine. Notice that it is very similar to the four axis machine except the spindle rotates from horizontal to vertical. These machines are used to machine complex parts and molds in the aerospace and automotive industries. We can machine five sides of a cube with the end of the cutter and six sides with the side of the cutter. Besides complex geometry, we can often machine a part in one setup on a five axis machine that would require two or more setups in a simpler machine. This results in a more accurate part.
72 Machining Center with Pallet Changer First Pallet with tombstone in place for machining. Second pallet waiting to be swapped into position. Most machining centers can be fitted with a pallet changer to increase productivity. On a plain machine, it sits idle while the operator removes the completed parts and loads the fixture with new ones. With a pallet changer, the operator unloads and reloads one pallet while the machine works on the other. This way, the machine continuously cuts parts.
73 Machining Center Coordinate System Machine Coordinate System (MCS) at the center, end of the spindle when head is in its uppermost position, saddle is all the way towards the operator, and the table is all the way left. Work Coordinate System (WCS)

74 The Haas VF-1 We will be using a Haas VF-1 three axis machining center with the following specifications: 20hp, 7500 RPM, 710ipm rapid, 300ipm feed, 20 CAT40 tools, 20 x16 x20 travel, 7100lbs!
75 Milling Machine Coordinate System Concerns Regardless of the machine design, you always program as if you are moving the tool. On most machining centers, the head moves the cutter up and down, so a move in the +Z direction moves the cutter and head up. However, most machines move the table in the XY directions. So, a +X move actually moves the table to the left, but the cutter moves in the +X direction relative to the part. Don t be concerned with this as it is an operation issue, not a programming issue. Remember, always program as if you are moving the tool.
76 Milling Machine Coordinate System Concerns (continued) Read the Turning Centers Introduction if you have not already done so. As with the lathe, a fixture offset is entered into the machine controller which includes the distance the machine moves from the MCS 0,0,0 to the WCS 0,0,0 position on the part. As with the lathe, the programmer picks the WCS on the part. This is more complicated because of the extra Y axis. The length of each tool is also entered into the machine control, so the machine compensates for the WCS and the length of the cutter.
77 Separating the Programmer from the Machine As with the lathe, the programmer chooses the WCS on the part, and then programs the cutter movement from there. The programmer calls the correct fixture offset and tool length offset numbers in the program (we ll cover these codes later). So, once again, the programmer does not have to be too concerned with any machine specific measurements.
78 Incremental and Absolute Programming on Machining Centers Just as with turning centers, machining centers can be programmed with absolute or incremental coordinates, but machining centers use a different format: Turning Centers G0 X3. Z2. Absolute 0,0 start X3.5 Incremental 0,0 start G0 U3. W2. U0.5 Notice the use of X,Z for absolute and U,W for incremental. G90 G0 X3. Y2.0 X3.5 Machining Centers Absolute 0,0,0 start Incremental 0,0,0 start G91 G0 X3. Y2. X0.5 Notice that G90 signifies absolute coordinates and G91 signifies incremental, and both use X,Y,Z.
79 Incremental vs. Absolute Programming As with turning centers, most machining center programming will be done in absolute mode. Editing for program changes is much easier in absolute mode, and absolute programs are much easier to follow. Certain repetitive operations such as drilling multiple holes lend themselves to incremental programming, and we will cover this later in the course.
80 CNC Applications Tooling for Machining Centers

81 Cutting Tools Most machining centers use some form of HSS or carbide insert endmill as the basic cutting tool. Insert endmills cut many times faster than HSS, but the HSS endmills leave a better finish when side cutting. Photo courtesy ISCAR.

82 Cutting Tools (continued) Facemills flatten large surfaces quickly and with an excellent finish. Notice the engine block being finished in one pass with a large cutter. Photo courtesy ISCAR.
 are used for a variety of profiling operations such")

83 Cutting Tools (continued) Ball endmills (both HSS and insert) are used for a variety of profiling operations such as the mold shown in the picture. Slitting and side cutters are used when deep, narrow slots must be cut. Photos courtesy ISCAR.
84 Milling Feed Direction Remember, all CNC machines are equipped with ball screws to minimize slop when changing feed directions. The other advantage to ball screws is they allow climb milling instead of conventional milling as done on most manual machines. Climb milling has many advantages including better surface finish, longer tool life, and the cutter deflects away from the work rather than into it. Always climb mill on a CNC machining center!
85 Drills, Taps, and Reamers Common HSS tools such as drills, taps, and reamers are commonly used on CNC machining centers. Note that a spot drill is used instead of a centerdrill. Also, spiral point or gun taps are used for through holes and spiral flute for blind holes. Rarely are hand taps used on a machining center. Drawings courtesy Precision Twist Drill.

86 Tool Holders All cutting tools must be held in a holder that fits in the spindle. These include end mill holders (shown), collet holders, face mill adapters, etc. Most machines in the USA use a CAT taper which is a modified NST 30, 40, or 50 taper that uses a pull stud and a groove in the flange. The machine pulls on the pull stud to hold the holder in the spindle, and the groove in the flange gives the automatic tool changer something to hold onto. HSK tool holders were designed a number of years ago as an improvement to CAT tapers, but they are gaining acceptance slowly. Photo courtesy Fitz-Rite The gage length shown in the drawing is entered in the machine control as the tool length. The machine then compensates for the length.


87 Fixtures Fixtures include anything that holds the work on the machining center table. Holding parts on a machining center tends to be much more difficult than on a turning center. The simplest fixture is just a vise as shown in the top photo. The next photo shows a double vise with machinable jaws to hold odd shaped pieces. The tombstone shown in the lower photo has a double vise on each face for use on a four or five axis machining center. Photos courtesy Kurt Manufacturing.

88 More Fixtures When parts can t be held in a vise, a custom fixture must be used. Fixtures for high production parts are often custom designed and manufactured at great expense. For small runs of odd-shaped parts, many manufacturers have turned to modular fixturing. As shown in the upper drawing, modular fixturing consists of many precision ground pieces that fit together to hold all sorts of parts as shown in the lower photo. Drawing and photo courtesy Bluco.

89 CNC Applications Speed and Feed Calculations for Milling
90 Calculating RPM for Milling Operations with HSS Cutters We use the same basic formula as for turning, except D is now the cutter diameter: N = RPM 12 V = π D Tables 10 through 16 list milling data. Table 6 must be used for copper alloys.
91 Example Milling RPM Calculation Mill 4140 steel with a Brinell hardness of 200 with a ½ HSS endmill. From Table 11, page 1047, we find V = 75 fpm, so: RPM = π 0.5 = 573
92 Feed Rates for Milling Feed for milling cutters is usually tabulated as inches per tooth (ipt), but feed rates on milling machines are programmed in inches per minute (ipm). The equation on page 1041 in the Handbook is given as f m = f t n t N Where f m is the feed rate in ipm we want to set the mill at. f t is the feed rate in inches per tooth, ipt. n t is the number of teeth on the cutter we are going to use. N is the RPM we already calculated. See Table 15a, pages , for values of f t with HSS cutters.
93 Example Milling Feed Rate Calculation Mill 4140 steel with a Brinell hardness of 200 with a ½ 4 flute HSS endmill and a ¼ depth of cut. We already calculated the RPM at 573, From Table 15a, f t = f m = x 4 x 573 = 2.3 IPM
94 Feed Rate Concerns Feed rates for facemill and slotting cutters vary widely. Slow feed rates give a better finish, but sometimes this actually dulls the cutter faster than a more rapid feed rate. Data for carbide insert milling cutters should be obtained from the insert manufacturer. Unlike lathe cutters which are fairly standard, milling cutters vary widely between manufacturers, so use your manufacturer s data.
95 Calculating RPM for Drilling Operations with HSS Cutters The RPM formula for drilling is the same as for turning and milling, except D is now the drill diameter. Tables lists data for drilling, reaming, and threading. Note: deeper holes require slower cutting speeds because the coolant cannot reach the cutting edge effectively. Feed rates for drilling are given in a paragraph on page Note that the values are given in inches/revolution (ipr). If you need ipm, multiply ipr by RPM.
96 Drilling RPM and Feed Calculation Example Drill cold drawn free cutting brass, C36000, with a 1 drill. From Table 23, page 1072, we find V = 175 fpm, so: RPM = π 1 = 668 From page 1060, the feed would be between and ipr. To find ipm, use ipm = Feed x RPM = x 668 = 10 ipm

97 CNC Applications Programming Machining Centers
98 Planning and Programming Just as with the turning center, you must follow a series of steps to create a successful program: 1. Examine the part drawing thoroughly and get a rough idea of how you want to proceed. 2. Figure out how to hold the raw material so you can perform as much machining as possible in one setup. 3. Decide what cutters are necessary to perform the various operations. This is more critical on machining centers because the holder and fixture can interfere with the work. 4. Write down the exact sequence of operations necessary to machine the part, one cutter at a time. 5. Convert your sequence of operations into a program and simulate the program if possible.
99 G and M Codes Just as with turning centers, machining centers have two basic types of codes: G codes also called preparatory codes tell the machine what type of movement or function should be performed. For example, rapid moves, linear feed moves, arc feed moves, thread cutting, etc. M codes also called miscellaneous functions turn the spindle on and off, coolant on and off, etc. We already noted the G90/G91 for absolute and incremental programming. Another code unique to machining centers is M6 tool change.
100 Common Codes Preparatory G Code Action Miscellaneous M Function Action G0 Linear rapid traverse positioning move M3/M4 Spindle forward/spindle reverse G1 Linear feed move M5 Spindle off G2 CW arc M0 Program stop G3 CCW arc M8/M9 Coolant on/off G28 Go home M30 End of program G90/G91 Abs./Incr. Programming M6 Tool Change
101 Other Codes Preparatory G Code Action Other Functions Action G20 Inches O Program number G40 Cancel nose radius compensation X, Y, Z Absolute position G99 IPR feed mode I, J Arc Vectors G54 First fixture offset T, H Tool Number, Length Offset G80 Cancel hole cycle S Spindle Speed
102 Modal Most codes are still modal they stay in effect until something changes them. We only program what changes, nothing extra. For example: Preferred G1 Z-.8 F20.0 Y2.4 G0 Z0.1 Y-0.4 Easy to read and change! Works, but poor style G1 Z-.8 F20.0 G1 Y2.4 Z-0.8 G0 Y2.4 Z0.1 G0 Z0.1 Y-0.4 Difficult to follow, and changes require considerable effort.
103 Notes on Machining Center G & M Codes Most machines only allow one M code per block. The capital Oh for the program number is the only Oh in the program. All others are zeros (0). Be sure you do not mistype. Unlike the lathe, the tool code (T) is two digits, we ll cover how to handle the length offset shortly. All alpha characters must be in uppercase. Don t forget to put decimal points on all numbers except 0 s! Remember, the machine thinks X3 really is X
104 Special Notes for Sending a Machining Center Home Just as with the lathe, the G28 code is used to send the machine home. G28 still requires a move through an intermediate point. We generally position the tool clear of the part before sending it home, so the intermediate point is not used. To give it a point, we incrementally program a 0 movement like this: G91 G28 Z0 which means go home in Z incrementally through a point 0 distance from the current location G91 G28 X0 means the same for the X direction G91 G28 Y0 means the same for the Y direction Often, with a machining center, we only send it home in Z or in Z and Y.
105 Handling Tools on a Machining Center Code Ttt M6 G43 Function Call up tool number tt Do the tool change Load the length offset Changing tools is very machine specific, so be sure you know your machine! Generally, the five codes shown in the table load the tool and the length offset as we ll demonstrate on the next few slides. Htt Offset number tt G49 Cancel length offset
106 Cutter Length Offset on a Machining Center (1) Recall that in the Z direction, the MCS is at the end of the spindle, and the fixture offset measures the distance from the MCS to the WCS so the machine can compensate for the location of the part. End of Spindle with Drive Key MCS 0 WCS 0 Z Without length compensation, a move to Z0 on the part would bury the drive keys into the part causing a crash. Workpiece X
107 Cutter Length Offset on a Machining Center (2) Length compensation subtracts the tool length from the distance between the MCS and WCS in the Z direction, so now the programmer is programming the center, end of the cutter. Tool Length With Length Compensation, You are Programming this Point. WCS 0 Z Now, a move to Z0 on the part brings the end of the cutter to the part. Workpiece X
108 Cutter Length Offset on a Machining Center (3) Tool 3 in the Spindle With proper length compensation as shown, the programmer can safely program in the WCS with little regard to the cutter except to insure that the flutes are long enough and the toolholder does not interfere with the workpiece or with the fixture. WCS 0 Z Workpiece G0 G90 G43 H3 Z0 Brings the cutter down to the top of the part. X
109 Program Functions fall into just four (4) Categories 1. Program Start 2. Toolchange 3. Program End 4. Machining Functions The first 3 are generally the same for all programs for a given machine. Note that they will be different for different machines. You must know your machine by reading the machine manual!
110 Program Functions for the Haas VF-1 Machining Center Remember, the CNC language is not 100% standard across all machine and control manufacturers. Haas machines use fairly generic programming that is similar to most Fanuc compatible machines. Be especially careful of tool changes and sending the machine home! Again, you must know your machine by reading the machine manual!
111 Haas VF-1 Program Start Program % O999 G20 G40 G49 G80 G99 G91 G28 Z0 G90 T1M6 S3000 M3 G0 G90 G54 X-0.4 Y-0.4 G43 H1 Z0.1 M8 Explanation Starting character for file transfer Program number set to 999, note the capital Oh Initial conditions Incrementally go home in the Z direction Absolute positioning Call Tool 1 and do the toolchange Set the spindle to 3000 RPM, forward direction Go to first X,Y position in the WCS Load the length offset, move to Z0.1, coolant on... Machining moves follow
112 Haas VF-1 Program Toolchange Program M9 M5 G49 G91 G28 Z0 G90 T2M6 S4500 M3 G0 G90 G54 X0.75 Y1.0 G43 H2 Z0.1 M8 Explanation Turn the coolant off Turn the spindle off Cancel tool length compensation Incrementally go home in the Z direction Absolute positioning Call Tool 2 and do the toolchange Set the spindle to 4500 RPM, forward direction Go to first X,Y position in the WCS Load the length offset, move to Z0.1, coolant on... Machining moves follow
113 Haas VF-1 Program End Program M9 M5 G49 G91 G28 Z0 G28 Y0 G90 M30 % Explanation Turn the coolant off Turn the spindle off Cancel tool length compensation Incrementally go home in the Z direction Home in the Y direction to make unloading the part easier Absolute positioning End of program M code End of file character for file transfer

114 CNC Applications Machining Center Example #1
115 Problem Statement Machine the length and thickness of the part shown below. The part is made from ¾ x CD aluminum which is saw cut to approximately 3 1/8 length. Perform all machining with a 2 flute, ¾ diameter, HSS endmill which is tool 1 on the machine
116 Planning and Programming (1) 1. Examine the part drawing thoroughly and get a rough idea of how you want to proceed. A. Pick the WCS in the lower left corner of the part on the finished upper surface: B. Machine one end with the part against a stop. C. Program stop, flip the part, and machine the 3 length. D. Machine off the top of the part leaving the final thickness.
117 Planning and Programming (2-3) 2. How will we hold the part? In a 6 vise up on 1/8 wide parallels that hold the part only 3/8 into the vise jaws. A stop on the right positions the part. 3. Decide what cutters to use given a ¾ diameter 2 flute HSS endmill. From the Machinery s Handbook, we note that this endmill has 1 5/16 of useable flute length.
118 Planning and Programming (3 cont.) 3. For the endmill, we find from Table 10 that V=600fpm and from Table 15a f t =0.004ipt: N = RPM = 12 V π D = π 0.75 = 3056 f m = f t n t N = x 2 x 3056 = 24 ipm
119 Planning and Programming (4) 4. Write down the exact sequence of operations: A. Rapid position cutter 1/16 to the left and clear in Y B. Feed to depth, face left end of the part, rapid up C. Move home in Y,Z and then flip the part D. Repeat A and B except for final X position E. Face the extra off the top of the part F. Program end.
120 Planning and Programming (5) 5. Convert the sequence of operations to a program: Program Start Machine Left End Flip Part Machine to Length Machine Thickness Program End
121 An Overview of the Process Notes: 1. Both ends of the part are saw cut. We will make one cut leaving 1/16 excess stock and then flip the part and remove the excess length. 2. We will initially position at Z0.1, but realize that we chose the Z=0 plane on the top of the FINISHED part, so we will only have clearance as the detail view shows. Excess Material from Saw Cut Z Y 0.050" Initial Clearance 0.050" Material to Remove X 3. Remember, program as if the cutter moves in all 3 directions, even though the part moves in the X,Y directions Remember, we are programming the center of the cutter. All cuts must be offset by the cutter radius,
122 The First Portion of the Program Program Codes % O999 G20 G40 G49 G80 G99 G91 G28 Z0 G90 T1 M6 S3056 M3 G0 G90 G54 X Y-0.4 G43 H1 Z0.1 M8 Action Program Start Load tool 1, ¾ HSS endmill Set the spindle RPM and direction Go to initial position in the WCS using fixture offset G54 Rapid to clearance with length compensation, coolant on Start of Machining G1 Z-0.8 F24. Y2.1 G0 Z0.1 M9 M5 G91 G28 Z0 G28 Y0 G90 M0 Feed to depth below part so a large burr is not left Cut the end of the part until clear in Y Rapid to clearance plane Coolant off Spindle off Go home in Z first to avoid hitting anything that sticks up Then, go home in Y Absolute positioning again to cancel the G91 Program stop

123 What the Machine Does Select this link to start the animation.

124 Continue with Second Length Cut Program Codes M3 G0 X Y-0.4 Z0.1 M8 G1 Z-0.8 Y2.1 G0 Z0 Action Turn the spindle on, it will use 3056RPM Locate for the second cut to length Rapid down to clearance plane Feed below the part Machine the end, it will use 24IPM Rapid to finished height Select this link to start the animation.

125 Face the Top Program Codes Action Y1.75 G1 X3.4 G0 Y1.125 G1 X-0.4 G0 Y0.5 G1 X3.4 G0 Y0 G1 X-0.4 M9 M5 G49 G91 G28 Z0 G28 Y0 G90 M30 % Position for first pass Repeat passes... Coolant off Spindle off Cancel length compensation Go home in Z first Then go home in Y Absolute mode End of program End of file Select this link to Start the animation.
 for Turning")
126 CNC Applications Constant Cutting Speed (CSS) for Turning Centers
127 Constant Cutting Speed (CSS) From our previous lessons, we know to calculate RPM with this formula: N = RPM = 12 V Using some simple algebra, we can rearrange that equation and solve for cutting speed (V): π D V = sfm = π D 12 N
 at the maximum diameter and towards the center at 0.")
128 Compare Cutting Speed when Facing We ll face a 4 diameter part starting with V=600fpm. We calculate RPM as: N = = 573RPM π 4 Now, we ll work backwards and calculate the cutting speed (V) at the maximum diameter and towards the center at 0.25 diameter given a constant RPM= V = π = 600 fpm V = π = fpm 12 12
129 What does this mean? Any particular cutting speed is valid at only one RPM and diameter. As we decrease diameter at a constant RPM, cutting speed falls until it is zero when the cutter is at the part centerline. This decrease in cutting speed results in poor surface finish and shorter cutter life since hard cutters generally perform better at higher cutting speeds.
130 How do we fix the problem? Use a function called Constant Cutting Speed (CSS). CSS causes the machine to adjust RPM based on the cutter s X diameter to hold a particular cutting speed. Only uses three new G codes: Code G96 G97 G50 Function Sets the cutting speed to the value specified by S. Sets the RPM to the value specified by S. Limits the RPM to the value specified by S. Used with G96.
131 A Sample CSS Program Program Codes % O999 G20 G40 G99 G28 U0 G28 W0 T0202 G54 G50 S4000 G96 S600 M3... G97 S G96. Action Program Start Limit the RPM to 4000 (slightly less than the machine max). Change to CSS, 600 fpm, machine sets RPM based on cutter position. Machining Set the RPM to 1800 constant (won t change with cutter position). More machining Change to CSS, 600 fpm (modal), machine sets RPM.
132 CSS Comments Most machines default to G97, RPM mode, but both G96 and G97 are modal. However, it is a good idea to put the correct one in your program at each tool change. Use CSS for turning, facing, and boring, NOT threading or drilling. When facing or turning small diameters, you will always reach the RPM limit at some diameter. This is easily calculated by rearranging our RPM formula like this: D = Diameter 12 V = π N
133 Example of Cutting Speed Diameter Limit From our previous program, we used 600 fpm. At an RPM limit of 4000RPM and 600fpm cutting speed, we can calculate the diameter as: D = Diameter = 12 V π N = π 4000 = 0.573" So, any X value less than means the cutting speed will be less than 600fpm with the corresponding poorer surface finish and shorter cutter life.

134 CNC Applications Rectangular Cycles for Turning Centers

135 A Common Task Select this link to start the animation. This is a common turning task rapid to depth, feed to length, feed clear of the diameter, rapid back to the starting point. This cut takes four blocks to program, a rapid, two feeds, and another rapid.
136 What is a Cycle? Normally, we only perform one positioning or cutting task in each block. However, tasks such as the four block turning sequence just provided are so common that control designers have incorporated CYCLES to reduce programming time. A cycle combines multiple moves into a single programmed block.
137 The Rectangular Turning Cycle 4 Cycle Start Point 3 1 New Z Position 2 To use the rectangular turning cycle, you must first position the cutter at the Cycle Start Point. The cutter will also end up at the cycle start point at the end of the cycle. The program looks like this: G90 Xnewx Znewz Fnewf New X Position The cutter rapids to the newx diameter, feeds to the newz length, feeds to the starting X value, and then rapids back to the starting Z value. You get four blocks for just one programmed!
138 Additional G90 Notes The rectangular turning cycle (G90) is modal which is handy for repeat cuts. You can change newx and newz in succeeding cuts, and you can add a feed rate on any cut or just use the previous one. G90 only works in the direction shown. There are additional cycles for facing, boring, and turning towards the tailstock. What does G90 do on a machining center? (Hint: it has nothing to do with cycles.)
139 A G90 Turning Example Ø4.000 Ø3.000 Ø We will turn the and diameter steps on this part at 800fpm using the 80 degree C shaped insert in tool 2.
140 Follow Planning and Programming Steps (1-5) 1. Examine drawing 2. How will we hold the raw material in a 3 jaw chuck. 3. Decide what cutters to use given hard, coated carbide C shaped insert, and the cutting speed is also given (800fpm). We ll use constant cutting speed (css) and let the machine calculate and adjust the RPM based on the X position of the cutter. 4. Write down the exact sequence of operations: A. Rapid position the cutter in Z 0.25 away from the face. B. Rapid position the cutter away from the part in X (radial). C. Take radial cuts (0.25 from diameter) using the G90 turning cycle. Note: we are not taking finishing cuts in this example. D. Program end. 5. Convert the sequence of operations to a program: Program Start Turn the Steps Program End
141 The Program Program Codes % O999 G20 G40 G99 G28 U0 G28 W0 T0202 G54 G50 S4000 G96 S800 M3 G0 Z2.5 X4.25 M8 G90 X3.75 Z0.5 F.012 X3.5 X3.25 Z1.5 X3.0 M9 M5 G28 U0 G28 W0 M30 % Action Program Start Cap the RPM Set the cutting speed to 800fpm, forward direction. Rapid 0.25 away from part in Z. Rapid radial distance from the part in X, coolant on. First rectangular cycle cut removing 0.25 from diameter. Finish the larger step, G90 is still active. First cut on the second step, notice new Z value. Final cut on the second step. Program End

142 The Animation Select this link to start the animation. Remember, the animation does not show the difference between rapid and feed moves. When actually run on the machine, the rapid moves are much faster than the feed moves.

143 CNC Applications Threading on Turning Centers
144 Conventional vs. CNC Threading Conventional Accuracy is dependant on the lead screw and gears. CNC Accuracy is dependant on the Z axis ballscrew and the electronics. Manually synchronize multiple cuts with a threading dial Electronically synchronize multiple cuts. Cutting speed is limited by the operator s ability to engage the half nuts. Takes about 10 minutes for an experienced operator to thread a ¾-16 UNF 2A 1 long. Cutting speed is limited by how accurately the machine can synchronize the feed with the spindle RPM. Takes less than 1 minute for a good turning center to thread a ¾- 16 UNF 2A 1 long.
145 Notes on CNC Threading Threading on a turning center is much faster than conventional threading because: The machine can synchronize the feed and spindle RPM much faster than a person can engage the half nuts. Faster synchronization means higher cutting speeds are used on CNC equipment resulting in faster production, better thread finishes, and more accurate threads. The high rapid traverse rates re-position the cutter for subsequent cuts much more quickly than a person can. A CNC machine can cut any thread English or Metric without special equipment.
146 Threading Tool Offsets You can set the tool offset for a threading tool at the tip or at the side. The X value is the same in either case, only the Z value differs. As noted below, setting at the side helps prevent running into shoulders but may not have enough threads, while setting at the tip gives the correct thread length with increased risk of hitting a shoulder. Be aware of the method being used. Tool offset at the side of the cutter. You might have to adjust Z to get enough threads. Tool offset at the tip of the cutter. Be careful when threading near shoulders.

147 Insuring Thread Accuracy 0.1 Clearance Enough room to synchronize. Be sure you have enough room to move around a live center or tailstock if one is being used! While CNC machines are fast, they are not infallible. You must have enough clearance between the end of the part and the cutter s start point for the feed motors to synchronize with the spindle. Most machine manuals have a formula for this distance which depends on RPM and thread pitch. If you cut a thread that has the correct pitch diameter but still won t fit a GO gage, increase this distance.

148 Right Hand or Left Hand? Right Hand Thread spindle is going forward (M3) and the cut is towards the headstock. Left Hand Thread spindle is going reverse (M4) and the cut is towards the headstock. To complicate things further, we can reverse the spindle rotations, cutter hands, and cut directions shown above and end up with the same thing. However, the two pictures shown above are the most common methods of threading, so be sure you understand them.
149 G Codes for Threading G Code G32 G92 G76 Application Requires four blocks per cut, mostly obsolete now. Works similarly to the G90 turning cycle with one block per cut required. The whole thread is cut with one block. This is the most common form of threading.
150 A Threading Example We ll do this program twice once with G92 and again with G76. In both cases, we ll assume that the profile is already turned, and we will do the threading at 400fpm. 3/4-16 UNF 2A
151 The G92 Rectangular Threading Cycle 4 Cycle Start Point 3 1 New Z Position 2 New X Position G92 works the same as G90 except for the synchronization between spindle and cutter to create the threads. Start the cutter at the Cycle Start Point. The cutter will also end up at the cycle start point at the end of the cycle. Each block looks like this: G92 Xnewx Znewz Flead Note that lead is actual pitch calculated as 1/tpi for single start threads. Also, many turning centers use E instead of F on threading cycles. Know your machine!
152 Follow Planning and Programming Steps (1-3) 1. Examine the drawing. We have to find some data from the Machinery s Handbook for a ¾-16 UNF 2A thread: Major Diameter Range: Minor Diameter (Maximum): Lead = Pitch = 1/tpi = 1/16 = How will we hold the raw material in a collet chuck. 3. Decide what cutters to use given a tough, coated carbide threading insert, and the cutting speed is also given (400fpm). We have to calculate the RPM since CSS should not be used when threading: N = RPM = 12 V π D = π 0.75 = 2037
153 Follow Planning and Programming Steps (4-5) 4. Write down the exact sequence of operations: A. Rapid position the cutter in Z 0.25 away from the face. B. Rapid position the cutter 0.1 away from the part in X (radial). C. Based on the Machinery s Handbook data, we ll assume the blank is diameter to start, and we ll take 6 passes at the following X values: D. Program end. 5. Convert the sequence of operations to a program: Program Start Make the Threading Passes Program End Note: on our machine, the threading tool offset is taken from the side, not the point, of the cutter, so our threads will be somewhat short which we can adjust for in the program if we need to.
154 The Program with G92 Program Codes % O999 G20 G40 G99 G28 U0 G28 W0 T0505 G54 G97 S2037 M3 G0 Z2.25 X0.945 M8 G92 X0.720 Z1.0 F X0.705 X0.690 X0.680 X0.677 X0.674 M9 M5 G28 U0 G28 W0 M30 % Action Program Start Load the threading tool Set the RPM, forward direction. Rapid 0.25 away from part in Z. Rapid 0.1 radial distance from the part in X, coolant on. First threading cycle cut removing from diameter. Second threading cut, G92 is still active. Final threading cut, just a light pass. Program End

155 Threading Animation Select this link to start the animation. Note: the animation does not show the cutter moving to the start point or to home after machining the thread. It only shows the G92 cycle blocks. Again, this is just an animation. The machine would cut the thread much faster than the animation shows.
156 G76 Threading Cycle Cutting threads is so common, the CNC designers have created the G76 cycle to cut the entire thread in one pass. The format looks like this: G76 Xrootx Zendz Itaper Kheight Dpass1 Flead Aangle Where: rootx = minor diameter of the thread (required) endz = the ending Z value of the thread (required) taper = amount of taper when cutting a tapered thread (optional) height = radial height of the thread (required) pass1 = depth of the first pass (Note, most machines do not allow a decimal point on D, so an integer must be used.) (required) lead = pitch for a single start thread which is 1/tpi (required) angle = angle to enter the thread (optional)
157 General Comments about G76 If you leave I off, the cycle produces a straight thread which is most common. If you leave A off, the cutter feeds straight in (see the next two slides for a more detailed description of A). The cycle works for both ID and OD threads based on the cycle start point and the values of X and Z. The cycle automatically decides how many passes to take depending on the value of K and D. Each pass is smaller than the previous pass. Some machines have more control over the number of passes and the depth of the final pass. Know your machine!
158 The K and D Codes K is the height of the thread and is easily calculated with the following formula. K = Thread Height= Major Diameter Minor Diameter 2 When looking in the Machinery s Handbook for thread specifications, remember that the major diameter for an external thread is given as a range, so use the high side of the range. For our ¾-16 UNF 2A: K = Thread Height = = D is the depth of the first pass, usually in integer form. If you want a deep first pass, set D to Remember the resolution of most machines is , so 0120=
159 Deciphering the A Code As shown in the diagram below, a thread has an included angle. The most common angles are 60 o for both metric and inch V threads and 29 o for ACME threads. By changing the value of A, we can change the infeed angle of the threading cutter. The infeed angle is always ½ the value of A specified in the G76 cycle. Thread Included Angle 1/2 of A Notes: 1. Some machines will not accept a decimal point on A! 2. Some machines limit A to common thread angles, others allow any value.

160 Threading Feed Angle A20 the machine actually feeds at 10 o. Most cutting takes place on the leading flank, but some takes place on the trailing flank. A good compromise since it is fairly easy on the cutter, leaves a good finish, and tends to minimize chatter. A20 A0 A60 A0 the default. The cutter feeds straight in, and the insert cuts equally on both flanks. This is hard on the cutter, but both flanks usually have a good finish. A60 the machine actually feeds at 30 o, or down the trailing flank. All cutting takes place on the insert s leading edge, which is easiest on the cutter. The trailing flank usually has a poor finish. This is how most conventional (manual) threading is done.
161 The Program with G76 Program Codes % O999 G20 G40 G99 G28 U0 G28 W0 T0505 G54 G97 S2037 M3 G0 Z2.25 X0.945 M8 G76 X0.674 Z1.0 D0120 K0.037 A20 F M9 M5 G28 U0 G28 W0 M30 % Action Program Start Load the threading tool Set the RPM, forward direction. Rapid 0.25 away from part in Z. Rapid 0.1 radial distance from the part. Cuts the entire thread in one block! Program End


162 Cutting Multiple Lead Threads For single start threads (the most common), the lead is equal to the pitch. Or, in threading terms, the amount of advancement for one turn is equal to the distance between the threads. Occasionally, we have to cut multiple start threads where the lead is an even multiple of the pitch. For example, to cut a ¾-16 double lead thread, we would cut a ¾-8 thread half-way deep like this: Then, we move the start point of the threading cycle over by the pitch ( ) and cut another thread in between those we just cut like this:
163 Cutting a Double Lead Thread with G76 Program Codes % O999 G20 G40 G99 G28 U0 G28 W0 T0505 G54 G97 S2037 M3 G0 Z2.25 X0.945 M8 G76 X0.674 Z1.0 D0120 K0.037 A20 F0.125 G0 Z G76 X0.674 Z1.0 D0120 K0.037 A20 F0.125 M9 M5 G28 U0 G28 W0 M30 % Action Program Start Load the threading tool Set the RPM, forward direction. Rapid 0.25 away from part in Z. Rapid 0.1 radial distance from the part. Cuts the first thread, note the lead. Re-position the starting point. Cut the second thread. Program End
164 CNC Applications Programming Arcs
165 Why Program Arcs? Many components have radius features which require machining. Arc programming on turning centers eliminates the need for form tools and results in a better finish. For machining centers, we can easily cut arcs which would otherwise require a complicated setup on a rotary table. For machining centers, internal radii such as the corner of pockets always machine better with an arc move rather than depending on the cutter to leave the radius. We have much more flexibility in choosing cutters on both machining and turning centers.
166 Arc Overview To program an arc, you must know the coordinates of the following three points: 1. Arc Start Point 2. Arc End Point 3. Arc Center Point Notes: On machining centers, you are programming the center of the cutter, so you must account for the radius of the cutter. The cutter must be tangent to the arc at the start point and at the end point. G02 Clock Wise Arc Arc Start Point Cutter Path J Arc End Point Arc Center Point Arc End Point Arc Start Point I Arc Center Point Cutter Path G03 Counter Clock Wise Arc
167 General Format for Arc Blocks on Machining Centers G2 Xendx Yendy Ivectorx Jvectory Fnewf G3 Xendx Yendy Ivectorx Jvectory Fnewf Where: endx,endy are the coordinates of the Arc End Point. vectorx,vectory are the X and Y distances from the Arc Start Point to the Arc Center Point. newf is a new feed rate, if desired. If Fnewf is left off, the last active feedrate will be used (F is modal). Refer to the picture on the previous page for definitions.
168 I and J for Machining Centers Many people have trouble understanding I and J when they are really quite simple. I and J are signed X,Y directions from the Arc Start Point to the Arc Center point. The illustration shows an arc of <90 degrees which has both I and J values. 0, 90, 180, and 270 degree arcs always have either I or J as zero. Note for this example that I is a positive number while J is a negative number. Arc Start Point Tangent Point I Programmed Path Arc End Point Tangent Point J Arc Center Point
169 I and J (continued) Mathematically, you can calculate I and J as: I = X ArcCenterPoint -X ArcStartPoint J= Y ArcCenterPoint -Y ArcStartPoint You can describe I and J as: I=Distance from the Arc Start Point to the Arc Center point in X J=Distance from the Arc Start Point to the Arc Center point in Y Notice the difference between the mathematical definition and the written description of I and J. You can use either method to find I and J, but be sure you get the sign correct!
170 An Example With Numbers We ll mill the programmed path with a 1 diameter (0.5 radius) cutter. After finding the coordinates of the three points as shown, we calculate I and J as: I = = 0 J = = -1.5 And the program segment would look like this: G0 X-0.75 Y4.5 G1 Z-0.25 X3 G2 X4.5 Y3.0 J-1.5 G1 Y Programmed Path R J -1.5 Arc Start Point (3.0, 4.5) Arc End Point (4.5, 3.0) Arc Center Point (3.0, 3.0) Note that G2 and G3 are modal. A common mistake is to forget a G1 when a linear move follows an arc as in this example.
171 General Format for Arc Blocks on Turning Centers G2 Xendx Zendz Ivectorx Kvectorz Fnewf G3 Xendx Zendz Ivectorx Kvectorz Fnewf Where: endx,endz are the coordinates of the Arc End Point. vectorx,vectorz are the X and z distances from the Arc Start Point to the Arc Center Point. newf is a new feed rate, if desired. If Fnewf is left off, the last active feedrate will be used (F is modal). Note the only difference from machining centers is Y and J are replaced with Z and K.
172 I and K for Turning Centers Note that the values for I are RADIAL even though we program X as diameter! Arc End Point I K Arc Start Point Arc Center Point For turning centers, calculate I and K like this: I = (X ArcCenterPoint X ArcStartPoint )/2 and K = Z ArcCenterPoint Z ArcStartPoint
173 Special Notes for Arcs on Turning Centers Machining center arc programming must allow for the radius of the cutter, turning center arc programming generally does not. The insert nose radius for a turning cutter does cause some inaccuracy in the arc formation which we will address later in the course. For now, ignore the insert nose radius and just remember it is a problem we will solve shortly.
174 A Turning Center Example R0.750 We ll take a finish pass across the 1 diameter, the radius, and the 2.5 diameter Ø2.500 using a 55 degree (shape D) carbide insert cutter. Ø
175 How the Machine Moves Program Codes % O999 G20 G40 G99 G28 U0 G28 W0 T0303 G54 S2800 M3 G0 Z3.25 X1.0 M8 G1 Z1.75 F.006 G2 X2.5 Z1.0 I0.75 G1 Z-0.25 X2.75 M9 M5 G28 U0 G28 W0 M30 % Action Program Start A. Rapid to position in Z and X, coolant B. Feed to Arc Start C. Form arc D. Feed clear in Z and X Arc End Point X=2.5, Z=1.0 D C I 0.75 I = ( )/2 = 0.75 K = = 0 B Arc Center Point X=2.5, Z=1.75 A Arc Start Point X=1.0, Z=1.75

176 CNC Applications Machining Center Example #2
177 Problem Statement R Machine this part from ¾ x CD aluminum saw cut to 3 1/8 length using a ¾ 2 flute HSS endmill (tool 1). Accuracy requirements on the profile are high, so a rough cut away followed by a finish cut are required on the profile only.
178 Planning and Programming (1) 1. Examine the part drawing thoroughly and get a rough idea of how you want to proceed. A. Pick the WCS in the lower left corner of the part on the finished upper surface before machining the profile: B. Machine one end with the part against a stop. C. Program stop, flip the part, and machine the 3 length. D. Machine off the top of the part leaving the final thickness. E. Rough and finish the profile. F. Remove remaining tails in the corners.
179 Planning and Programming (2-3) 2. How will we hold the part? In a 6 vise up on 1/8 wide parallels that hold the part only 3/8 into the vise jaws. A stop on the right positions the part. 3. Decide what cutters to use given a ¾ diameter 2 flute HSS endmill. From the Machinery s Handbook, we note that this endmill has 1 5/16 of useable flute length.
180 Planning and Programming (3 continued) 3. For the endmill, we find from Table 10 that V=600fpm and from Table 15a f t =0.004ipt: N = RPM = 12 V π D = π 0.75 = 3056 f m = f t n t N = x 2 x 3056 = 24 ipm
181 Planning and Programming (4) 4. Write down the exact sequence of operations: A. Rapid position cutter 1/16 to the left and clear in Y B. Feed to depth, face left end of the part, rapid up C. Move home in Y,Z and then flip the part D. Repeat A and B except for final X position E. Face the extra off the top of the part F. Rough machine the profile leaving G. Finish machine the profile. H. Machine off excess material left in the corners nearest the radius. I. Program end.
182 Planning and Programming (5) 5. Convert the sequence of operations to a program: Program Start Machine Left End Flip Part Machine to Length Machine Thickness Rough Profile Finish Profile Machine Corners Program End
183 Don t Redo Work Notice that the machine-to-length and machine-tothickness operations required for this part are exactly the same as in Machining Center Example 1. We will simply copy the first program and add additional blocks to create this program. This is easily done by doing Save As in Notepad or other editor and then adding to the new file.
184 The Length and Thickness Program Program Codes (1) % O999 G20 G40 G49 G80 G99 G91 G28 Z0 G90 T1M6 S3056 M3 G0 G90 G54 X Y-0.4 G43 H1 Z0.1 M8 G1 Z-0.8 F24. Y2.1 G0 Z0.1 M9 M5 G91 G28 Z0 G28 Y0 G90 M0 Program Codes (2) M3 G0 X Y-0.4 Z0.1 M8 G1 Z-0.8 Y2.1 G0 Z0 Y1.75 G1 X3.4 G0 Y1.125 G1 X-0.4 G0 Y0.5 G1 X3.4 G0 Y0 G1 X-0.4 Add the profile and corner machining here.
185 Overview of the First Profiling Pass B. Second point. X=0.110 Y= =1.885 I = = 0 J = = C. Arc Start Point. X=2.0, Y=1.885 Corners not cleared in arc move. A. First profile pass start point. X= =0.110 Y=-0.4, Z=-0.2 E. First profile pass end point and start of finish pass. X= =0.125 Y is still unchanged at Arc Center Point. X=2.0, Y=1.0 D. Arc End Point X=2.0 Y= =0.110 We will rapid position to point A and then follow points B-E to perform the first rough pass. Note the calculations for I and J, and that material is left in the two rightmost corners that will have to be removed later.

186 The Blocks for the First Profile Pass Program Codes Action G0 Y-0.4 X0.110 Z-0.2 G1 Y1.885 X2.0 G2 Y0.110 J G1 X Position at point A.. Feed to point B. Feed to point C. Machine arc to point D. Feed to point E. Select this link to start the animation.
187 Overview of the Finish Profiling Pass F. Second point. X=0.125 Y= =1.875 I = = 0 J = = G. Arc Start Point. X=2.0, Y=1.875 E. First profile pass end point and start of finish pass. X= =0.125 Y is still unchanged at Arc Center Point. X=2.0, Y=1.0 H. Arc End Point X=2.0 Y= =0.125 We will continue feeding without pause after the roughing pass to points F-H. Then, we will feed completely off the part to the left in preparation for machining the excess corner material. Notice that J has changed from the rough pass.

188 The Blocks for the Finish Profile Pass Program Codes Y1.875 X 2.0 G2 Y0.125 J G1 X-0.4 Action Feed to point F. Feed to point G. Arc to point H. Feed off the part. Select this link to start the animation.
189 Overview of Machining Corners Must lift to Z0.25 before making this move. I. End of finish profile pass. X = -0.4, Y = 0.125, Z = -0.2 J. Start point for machining corners. X = 3.0, Y = 2.4, Z = -0.2 K. End point for machining corners. X = 3.0, Y = -0.4, Z = -0.2 After finishing the second profile pass, we ll rapid up to Z0.25 to clear the part and then move over to point J. We will then go back down to Z-0.2 and feed across the corners. The program ends by lifting up and then going home in Z and Y.

190 Machine the Corners Program Codes Action G0 Z0.25 X3.0 Y2.4 Z-0.2 G1 Y-0.4 G0 Z0.25 M9 M5 G49 G91 G28 Z0 G28 Y0 G90 M30 % Lift above the part. Rapid to point I. Go back down to depth. Feed to point J. Lift above the part. Program end..... Select this link to start the animation.
191 The Final Program % O999 G20 G40 G49 G80 G99 G91 G28 Z0 G90 T1M6 S3056 M3 G0 G90 G54 X Y-0.4 G43 H1 Z0.1 M8 G1 Z-0.8 F24. Y2.1 G0 Z0.1 M9 M5 G91 G28 Z0 G28 Y0 G90 M0 Program Codes M3 G0 X Y-0.4 Z0.1 M8 G1 Z-0.8 Y2.1 G0 Z0 Y1.75 G1 X3.4 G0 Y1.125 G1 X-0.4 G0 Y0.5 G1 X3.4 G0 Y0 G1 X-0.4 G0 Y-0.4 X0.110 Z-0.2 G1 Y1.885 X2.0 G2 Y0.110 J G1 X0.125 G0 Z0.25 X3.0 Y2.4 Z-0.2 G1 Y-0.4 G0 Z0.25 M9 M5 G49 G91 G28 Z0 G28 Y0 G90 M30 %

192 CNC Applications Hole Cycles
193 Why so Many Hole Cycles? Creating holes is the most common machining operation since nearly all machined parts have at least one hole. Machining centers have many hole cycles including drilling, deep hole drilling, peck drilling, tapping, boring, etc. Turning centers usually have fewer hole cycles than machining centers, but they still have generally drilling, peck drilling, and tapping. Hole cycles for machining and turning centers are usually very similar.
194 Codes for Hole Cycles G Code G81 G83 G84 G80 Application Simple drilling feeds to depth and rapids out of the hole. Peck drilling feeds in a specified distance, rapids out to clear chips, rapids back in, and repeats. Right hand tapping feeds to depth at correct pitch, automatically reverses, and feeds out. Cancels any hole cycle.
195 A Simple Example 4x Ø0.25 x /16-18 UNC - 2B x0.50 w Ø0.50 X 90 We will learn the basics of hole cycles by programming a machining center to create the holes in this part. We will start with spot drilling, continue with peck drilling, and finish with tapping
196 Planning and Programming (1) 1. Examine the part drawing thoroughly and get a rough idea of how you want to proceed. A. Pick the WCS in the lower left corner of the part on the upper surface: B. Assume length and thickness are already finished. C. Spot drill all holes deep enough for the countersink. D. Drill all the holes with a ¼ drill. E. Tap all the holes with a spiral flute tap since the holes are blind.
197 Planning and Programming (2-3) 2. How will we hold the part? In a 6 vise up on 1/8 wide parallels. These thin parallels will not interfere with the holes, even if they went through the part. A stop on the right positions the part. 3. Decide what cutters to use a 5/8 diameter spot drill (T12), a jobber s length ¼ drill (T19), and a 5/16-18 spiral flute drill (T20). Spot drill RPM = 12x600 / (p x0.625) = 3667 RPM ¼ drill RPM = 12x600 / (p x0.25) = 9167 RPM, use 7000RPM Tap RPM = choose 1500 RPM, machine will not tap at full RPM
198 Planning and Programming (4-5) 4. Write down the exact sequence of operations: A. Rapid cutters 0.1 above the part over the lower, left hole. B. Perform the spot drilling, then do the other three holes. C. Tool change, repeat A-B for the ¼ drill. D. Tool change, repeat A-B for the 5/16-18 tap. E. Program end. 5. Convert the sequence of operations to a program: Program Start Spot Drill Holes Peck Drill Holes Tap Holes Program End

199 Spot Drilling When drilling holes on a machining center, a spot drill locates the hole prior to actual drilling. On conventional machines, centerdrills are generally used for the same function, but the spot drill has three advantages over the centerdrill: 1. The spot drill does not have a small diameter point to break off and ruin the part. 2. By programming the spot depth carefully, we can generally eliminate countersinking. 3. Spot drills are commonly available with a 90 o point angle which generates a 45 o chamfer, and other angles are available if desired. The primary application of a centerdrill is to provide a location for a live center point when turning. People generally use them to spot holes, but spot drills work better.
200 Spot Drill Givens When programming a spot drill, we know the spot diameter and the spot angle, but we have to program the spot depth. Spot Drill Spot Angle Cross Section of the Part Through the Hole. Spot Ø Spot Depth
201 Calculating Spot Drill Depth Calculating spot depth with a 90 o spot drill is quite easy as shown in these three steps. As you can see, spot depth is simply ½ of spot diameter. Actually, your spot will be somewhat larger than calculated since spot drills are not ground to a sharp point. If your countersink has tight tolerances, you will have to adjust for it in the program. Spot Depth 3. Look at one triangle: 1. Spot 2. Split into 2 equal triangles. 1/2 Spot Diameter Remember, Spot Depth = ½ Spot Diameter
202 The G81 Drilling Cycle To use the drilling cycle, follow these programming steps: 1. Load the tool. 2. Position over the first hole. 3. Move to a Z distance above the part while turning on tool length offset. 4. Call the cycle with: G81 Xnewx Ynewy Zdepth Ffeed Where newx and newy are the hole position, depth is the Z location at the bottom of the hole, and feed is the desired feed rate.
203 The G81 Drilling Cycle (continued) 5. Move to each succeeding hole and drill it. Note: All hole cycles are modal, so only the X,Y location of the next hole is needed and the machine will move there and repeat the cycle. G80 or G0 may be used to cancel the cycle.
204 The Spot Drilling Portion of the Program Program Codes % O999 G20 G40 G49 G80 G99 G91 G28 Z0 G90 T12M6 S3667 M3 G0 G90 G54 X1.0 Y1.0 G43 H12 Z0.1 M8 G81 Z-0.25 F15. Y3.0 X3.0 Y1.0 G80... Action Program Start Load tool 12, 5/8 HSS spot drill. Set the spindle RPM and direction. Locate over the first hole in the WCS, set fixture offset. Rapid to clearance with length compensation, coolant on. Drill the hole. The cycle will retract to the initial Z0.1 Move to the next hole and drill it, G81 is modal. Move to the next hole and drill it. Move to the next hole and drill it. Cancel the drilling cycle.. The remainder of the program follows..

205 Spot Drilling Animation Select this link to start the animation. Note: The animation shows the spot drill in its initial position over the first hole and at the initial Z0.1 height. The animation ends at the G80.
206 Drilling Concerns Prints generally give hole depth to the full diameter and do not account for the drill point: We must program the depth to the point of the drill. We can calculate the additional depth as follows: Programmed Depth Additional Depth Print Depth (180-Point Angle)/2 Drill Radius Additional 180 Depth = TAN PointAngle 2 x Drill Radius For our example with a 0.25 drill and a 118 o point angle, the additional depth comes out to 0.075
207 The G83 Peck Drilling Cycle This cycle works much the same as the G81 except for Q, the peck depth: G83 Xnewx Ynewy Zdepth Qpeckdepth Ffeed Where newx and newy are the hole position, depth is the Z location at the bottom of the hole, peckdepth is the amount the drill feeds before backing out of the hole to clear chips, and feed is the desired feed rate. For our example, we will use Q0.25, so it will make four pecks.
208 Look at G83 Peck 1 First Pass 0.25 deep from the initial Z0.1, stops at Z-0.15, then rapids back out to Z0.1.
209 Look at G83 Peck 2 Second Pass. Rapids just short of previous depth, feeds another 0.25 deep to Z-0.4, then rapids back out to Z0.1.
210 Look at G83 Peck 3 Third Pass. Rapids just short of previous depth, feeds another 0.25 deep to Z-0.65, then rapids back out to Z0.1.
211 Look at G83 Peck 4 Final Pass. Rapids just short of previous depth, feeds to final depth of Z-0.825, then rapids back out to Z0.1.
212 The Peck Drilling Portion of the Program Program Codes M9 M5 G91 G28 Z0 G90 T19M6 S7000 M3 G0 G90 G54 X1.0 Y1.0 G43 H19 Z0.1 M8 G83 Z-0.75 Q0.25 F15. Y3.0 X3.0 Y1.0 G80... Action Tool Change. Load tool 19, 1/4 HSS drill. Set the spindle RPM and direction. Locate over the first hole in the WCS, set fixture offset. Rapid to clearance with length compensation, coolant on. Drill the hole. The cycle will retract to the initial Z0.1 Move to the next hole and drill it, G83 is modal. Move to the next hole and drill it. Move to the next hole and drill it. Cancel the drilling cycle.. The remainder of the program follows..
213 Peck Drilling Animation Select this link to start the animation. Note: The animation only shows drilling the first hole to save time. The program will then move the drill to the following holes and it will repeat the drilling cycle. The drill will stop over the last hole at the initial Z0.1 height.
214 The G84 Right Hand Tapping Cycle This cycle works much the same as the G81 except the feed must be calculated properly or the threads will strip: G84 Xnewx Ynewy Zdepth Ffeed For tapping, the feed rate is calculated with: Feed = RPM Threads per Inch For our example, Feed = 1500/18 = Note: be sure to carry three decimal places on Feed when tapping.
215 Tapping Concerns Plug taps are the most common taps used on CNC equipment and they always have 3-4 threads chamfered. If the tap length is set for the end of the tap, this extra distance must be programmed. It is easy to calculate as: Extra distance = 3/tpi For our example, this comes to which we will round to Be careful of pointed taps! If the tap length is set from the point, then the program must account for this extra depth as well. Always be sure the tap will not hit the hole bottom! 3-4 Threads Chamfered Watch pointed taps!
216 Tapping Portion of the Program Program Codes M9 M5 G91 G28 Z0 G90 T20M6 S1500 M3 G0 G90 G54 X1.0 Y1.0 G43 H19 Z0.1 M8 G84 Z-0.67 F Y3.0 X3.0 Y1.0 G80 M9 M5 G49 G91 G28 Z0 G28 Y0 G90 M30 % Action Tool Change. Load tool 20, 5/16-18 tap. Set the spindle RPM and direction. Locate over the first hole in the WCS, set fixture offset. Rapid to clearance with length compensation, coolant on. Tap the hole. The cycle will retract to the initial Z0.1 Move to the next hole and tap it, G84 is modal. Move to the next hole and tap it. Move to the next hole and tap it. Cancel the cycle.. Program End..

217 Tapping Animation Select this link to start the animation. Click here to start the animation. Note: The animation shows the tap in its initial position over the first hole and at the initial Z0.1 height. The animation ends at the G80. Note that the G84 cycle automatically reverses the spindle and feeds the tap out.

218 CNC Applications Hole with a Retract Plane
219 A Common Problem When drilling these holes, we have to stay clear of the boss, but we don t want the drill to start feeding above the part. There is an easy solution to this problem use an R plane x Ø0.25 x /16-18 UNC - 2B x0.50 w Ø0.3 X


220 The Initial or I Plane 0.1 Clearance The I Plane is the Z location we first bring the tool down to before initiating a hole cycle. We generally use 0.1 above the part. We normally use a G0 to position the cutter in this position. For our examples, it is these blocks: G0 G90 G57 X1.0 Y0.75 G43 H12 Z0.1 M8

221 The Rapid or R Plane 0.1 Clearance The R Plane is the Z location we rapid the tool down to in the hole cycle before feeding starts. We generally use 0.1 above the surface the hole is at, Z-0.9 for this example.
222 Programming the R Plane To add an R plane to any hole cycle, we just add R with the Z value to the cycle. For this example: G81 Z-1.15 R-0.9 F15. This works for all cycles as follows: G83 Z-1.75 Q0.25 R-0.9 F15. G84 Z-1.67 R-0.9 F The only problem is that holes on the same side of an obstruction cause wasted time because the cutter rapids up and down from the R plane. To solve this problem, we use G98 and G99. G Code G98 G99 Application After drilling this hole, return to the I plane. This is usually the default. After drilling this hole, return to the R plane.
223 The Spot Drilling Portion of the Program with R Plane Program Codes % O999 G20 G40 G49 G80 G99 G91 G28 Z0 G90 T12M6 S3667 M3 G0 G90 G57 X1.0 Y0.75 G43 H12 Z0.1 M8 G81 Z-1.15 R-0.9 F15. G99 X3.0 G98 Y3.25 G99 X1.0 G98 G80... Action Program Start Load tool 12, 5/8 HSS spot drill Set the spindle RPM and direction Locate over the first hole in the WCS, set fixture offset. Rapid to the I plane with length compensation, coolant on Drill the hole. The cycle will retract to the R plane Z=-0.9 Drill the next hole, retract to I plane Z=0.1 to clear part. Retract to the R plane Z=-0.9 Retract to the I plane Z=-0.1 Cancel the drilling cycle.. The remainder of the program follows..
224 Spot Drilling Animation with R Plane Select this link to start the animation. The animation starts with the spot drill at Z0.1 and ends with the G80. Notice how the drill only retracts to Z-0.9 between holes on the same side of the obstruction.
225 The Peck Drilling Portion of the Program with R Plane Program Codes M9 M5 G91 G28 Z0 G90 T19M6 S7000 M3 G0 G90 G57 X1.0 Y0.75 G43 H19 Z0.1 M8 G83 Z-1.75 Q0.25 R-0.9 F15. G99 X3.0 G98 Y3.25 G99 X1.0 G98 G80... Action Tool Change. Load tool 19, 1/4 HSS drill Set the spindle RPM and direction Locate over the first hole, set fixture offset. Rapid to the I plane with length compensation The cycle will retract to the R plane, Z=-0.9 The cycle will retract to the I plane, Z0.1 Retracts to R plane Retracts to I plane Cancel the drilling cycle.. The remainder of the program follows..
226 Tapping Portion of the Program Program Codes M9 M5 G91 G28 Z0 G90 T20M6 S1500 M3 G0 G90 G57 X1.0 Y0.75 G43 H19 Z0.1 M8 G84 Z-1.67 R-0.9 F G99 X3.0 G98 Y3.25 G99 X1.0 G98 G80 M9 M5 G49 G91 G28 Z0 G28 Y0 G90 M30 % Action Tool Change. Load tool 20, 5/16-18 tap. Set the spindle RPM and direction. Locate over the first hole in the WCS. Rapid to clearance with length compensation. Tap the hole. The cycle will retract to the R plane, Z-0.9 Move to the next hole and tap it, retracts to I plane, Z0.1 Retracts to R plane, Z-0.9 Retracts to I plane, Z0.1 Cancel the cycle.. Program End..

227 CNC Applications Tool Nose Radius Compensation on Turning Centers

228 Facing and Straight Turning When facing or straight turning, the tool nose radius has no effect on the part other than leaving a radius on inside corners. This tangent point finishes faces. Theoretical sharp point is what we program. This tangent point finishes diameters.


229 The Problem When turning tapers or radii, the tool nose radius leaves excess material as shown here: Excess Material Here
230 The Solution 1. Manually program the exact tangent points. This is time consuming since it requires trig calculations or accurate CAD drawings to locate the tangent points. 2. Use tool nose radius compensation. The tool nose radius is entered into the machine controller, and the program turns on compensation for finish cuts only, and then turns it off. The machine calculates the tangent points so we can continue programming as if the cutter has a sharp point.
231 Tool Nose Radius G Codes G Code G40 G41 G42 Application Cancel tool nose radius compensation. Compensate for tool nose radius to the LEFT of the programmed path. Compensate for tool nose radius to the RIGHT of the programmed path.


232 G41 & G42 G41 the cutter is to the left of the work when looking in the direction of the cut. G42 the cutter is to the right of the work when looking in the direction of the cut.
233 Turning Nose Radius Compensation On To turn compensation on, the machine must move at least the distance of the nose radius in X and Z. For easy calculations, back away from the start point 0.1 in Z and 0.2 in X. Remember X is diameter based, so 0.2 in X is actually 0.1 radially. Turn Nose Radious Compensation on in This Move. Compensation Point, 0.1 Away From Start Point in Z, 0.2 in X. Start Point of Finish Pass with Compenation On, 0.1 Away in Z.
234 Turning Nose Radius Compensation Off To turn compensation off, we feed the cutter completely off the work and then make a move larger than the nose radius while calling G40. Note: Do not reverse the Z direction with nose radius compensation on! The machine may get confused, and then later cuts may be off by some multiple of the nose radius. Always call G40 BEFORE reversing the Z direction! Feed Moves Clear of the Part. Feed Move to Turn Nose Radius Compensation Off.
235 A G42 Example We will program ONLY the finish pass on this part using G42 right tool nose radius compensation. We are given 800fpm cutting speed and 0.006ipr feed. R x45 Ø2.500 Ø1.500 Ø
236 The Finish Pass Program Codes % O999 G20 G40 G99 G28 U0 G28 W0 T0303 G54 G50 S4000 G96 S800 M3 G0 Z2.2 X1.0 M8 G42 G1 X0.8 Z2.1 F0.006 X1.5 Z1.75 Z1.0 X1.75 Z0.625 G2 X2.5 Z0.25 I0.375 Z-0.15 X2.875 G40 X3.075 Z-0.25 M9 M5 G28 U0 G28 W0 M30 % Action Program Start Load the V insert tool. Cap the RPM. Set the cutting speed to 800fpm, forward direction. Rapid to the G42 start point in Z. Rapid to the G42 start point in X, coolant on. Move to turn nose radius compensation on, beginning of chamfer. Machine the chamfer. Machine the straight 1.0 diameter. Machine the taper. Machine the radius. Feed clear in Z leaving room for the parting tool. Feed clear in X. Move to turn off nose radius compensation. Program End

237 The Final Pass Select this link to start the animation.

238 CNC Applications Tool Radius Compensation for Machining Centers
239 Why Cutter Diameter Compensation? When machining finished surfaces with the side of a milling cutter (generally called profiling), the accuracy of the finished surface depends on the cutter accuracy and how closely the cutter diameter matches the programmed size. Cutters wear causing size changes in profiled surfaces. Reground endmills are always smaller than nominal size. Note: this feature is also frequently called Cutter Radius Compensation. We use Diameter Compensation to avoid confusion with turning center operation.
240 How Does Cutter Diameter Compensation work? The programmer programs for a nominal size cutter (0.750 for our T1, for example) for rough cuts. The programmer calls cutter diameter compensation for THE FINISH PASS ONLY, and programs as if the cutter has zero diameter. The set-up person enters the nominal size in the machine controller. Parts are measured as they are manufactured, and the operator enters small deviations to keep the parts on size (generally called wear offsets). The machine automatically adjusts for the wear offsets.
241 Cutter Diameter Compensation Codes Code G40 G41 G42 Dtt Application Cancel cutter diameter compensation. Compensate for the cutter to the LEFT of the programmed path. Compensate for the cutter to the RIGHT of the programmed path. tt is the tool number. D tells the controller where to find the cutter s diameter.

242 Determining G41 or G42 G41: the cutter is to the left of the part when looking in the direction of the cut. G42: the cutter is to the right of the part when looking in the direction of the cut. Climb milling features: use G41. Conventional milling features: use G42. Since we normally climb mill, we will generally use G41 on a machining center. G41 G42
243 Turning Cutter Diameter Compensation On Prior to compensation, you must take into account the cutter s radius and locate the cutter offset by its radius. In the move turning compensation on, try to make the move as perpendicular to the following move as possible, and try to turn compensation on with the cutter off the part. Note: the D code should be in the same block as the G41 or G42. The move to turn compensation on should be equal or greater than the cutter s radius. Once compensation is on, ignore the cutter s size and program as if the cutter has 0 diameter. This usually simplifies programming, especially arc programming.
244 Turning Cutter Diameter Compensation Off When performing cutter compensation, the machine looks ahead in your program several blocks so it can calculate tangent points. In the move prior to turning compensation off, the machine moves the cutter to the center point in the direction of this move, and then to the cutter s center point in the direction of the G40 move. If possible, turn compensation off with the cutter off the part. If that is not possible, try to select the end point in a clear area of the part such as the center of a pocket.
245 A Graphical Look at Cutter Diameter Compensation Compensated moves. Program the part dimensions directly ignoring the cutter's size. Final position of the cutter. Compensation is off, program the cutter's center. Move to turn compensation off. Choose the destination point taking into account that you are now programming the center of the cutter. Initial position of the cutter prior to the G41. You must program the center of the cutter at this point. Part In the move prior to the G40, the machine looks ahead and sees that the next block contains the G40. Hence, it stops the center of the cutter at the coordinate given in this move. At the end of the G41 move, program as if the cutter has 0 diameter. So, program the part size directly. The machine offsets the cutter the correct amount. Move to turn on compensation. It should be as perpendicular to the following move as possible.
246 A Compensation Example We ll program this part with a ¾ endmill, T1. We ll assume the length and thickness are already machined. So, we will take one roughing pass leaving on the profile, and then we will finish the profile with tool diameter compensation
247 Follow Planning and Programming Steps (1-5) 1. Examine drawing. 2. How will we hold the raw material in a vise up on parallels. 3. Decide what cutters to use given a ¾ HSS endmill. We previously calculated 3056RPM and 24IPM. 4. Write down the exact sequence of operations: A. Rapid position the cutter clear in Y. B. Rough machine the profile leaving material. C. Position the cutter clear of the part. D. Turn on compensation, finish machine the profile. E. Turn off compensation. F. Program end. 5. Convert the sequence of operations to a program: Program Start Rough Machining Finish Machining with Compensation Program End
248 The Program Program Codes % O999 G20 G40 G49 G80 G99 G91 G28 Z0 G90 T1M6 S3056 M3 G0 G90 G54 X-0.01 Y-0.4 G43 H1 Z-0.2 M8 G1 Y2.01 F24. X3.01 Y-0.01 X-0.4 G0 Y-0.4 G41 X0.375 D1 G1 Y1.625 X2.625 Y0.375 X-0.4 G0 G40 Y-0.4 Z0.1 M9 M5 G49 G91 G28 Z0 G28 Y0 G90 M30 % Action Program Start Load tool 1, ¾ HSS endmill. Set the spindle RPM and direction. Go to initial position in the WCS using fixture offset G54. Rapid to depth with length compensation, coolant on. Feed machining the left step. Machine top step. Machine right step. Machine lower step and feed off the part. Position move. Move to turn compensation on. Note the D code. Left edge. Top edge. Right edge. Lower edge. Since G40 is in the next block, center of the cutter ends at X-0.4 Turn compensation off. Center of cutter now at X-0.4 Y-0.4 Lift above the part. Program end.

249 Program Animation Select this link to start the animation. The animation starts with the cutter in its initial XY location and Z depth after the G43 line. The animation ends with the G0 Z0.1

250 CNC Applications Parting on Turning Centers
251 The Parting Operation Parting and grooving are very similar except parting removes the part from the end of a bar while grooving adds a groove to the part s profile. Parting of small parts can be done with a G1 to feed in and a G0 to rapid out. Larger parts should use the G75 parting cycle which pecks the cut so the chips break up. Be careful of parting parts completely off unless the machine has a parts catcher. Flying parts can damage tooling!

252 Setting the Parting tool When programming and setting up a parting tool, you must decide where the tool offset will be taken from either the leading or trailing edge. Then, program accordingly. In our examples, we set the parting tool offset on the leading edge of a wide insert, so our Z value is Z when cutting the part off to the origin. Leading Edge Trailing Edge
253 A Simple Parting Example We will assume all turning is done on this part, and we will just part it off with T05 at 600fpm and 0.004ipr. We ll stop at X0.050 to prevent the part from flying off the bar since our machine does not have a parts catcher. The operator will then have to wiggle the part to break it off. Ø1.000 R
254 Parting Program Codes % O999 G20 G40 G99 G28 U0 G28 W0 T0505 G54 G50 S4000 G96 S600 M3 G0 Z X1.1 G1 X0.050 F0.004 G0 X1.1 M9 M5 G28 U0 G28 W0 M30 % Action Program Start Load the parting tool. Cap the RPM. Set the cutting speed to 600fpm, forward direction. Rapid to the starting point for parting in Z and in X. Feed in. Rapid out to the initial point. Program end.
255 The G75 Parting Cycle Small parts may be parted off by simply feeding the cutter straight into the part and then rapiding away, but larger parts require the G75 peck cycle to break the chips up and prevent them from clogging the cutter. The format is as follows: G75 Xendx Qpeckdepth Ffeed Where endx = X diameter at the bottom, generally 0 or slightly more than 0 peckdepth = how much to advance at a time feed = feed rate for the parting cycle Like all cycles, you must position the cutter at the cycle start point using G0 blocks. Then, at the end of the cycle, the cutter will return to its cycle start point. The next program shows the parting cycle being used to cut off our same example part.
256 Parting with G75 Program Codes % O999 G20 G40 G99 G28 U0 G28 W0 T0505 G54 G50 S4000 G96 S600 M3 G0 Z X1.1 G75 X0.050 Q0.25 F0.004 M9 M5 G28 U0 G28 W0 M30 % Action Program Start Load the parting tool. Cap the RPM. Set the cutting speed to 600fpm, forward direction. Rapid to the cycle starting point for parting in Z and in X. Parting peck cycle with 0.25 pecks. Returns to X1.1 Program end.

257 CNC Applications Roughing and Finishing Cycles for Turning Centers

258 The Problem In turning, we frequently encounter parts similar to the examples we have been using with multiple diameters, tapers, chamfers, and radii. These features pose problems for roughing.

259 Roughing with G90 If we use the G90 rectangular turning cycle to rough the part, the excess material remains as shown with varying amounts of material in different locations. This presents problems for the finishing cutter since the nonuniform depth of cut does not give predictable results when finishing. Excess Material
CNC Applications. Programming Machining Centers
 CNC Applications Programming Machining Centers Planning and Programming Just as with the turning center, you must follow a series of steps to create a successful program: 1. Examine the part drawing thoroughly
Chapter 22 MACHINING OPERATIONS AND MACHINE TOOLS
 Chapter 22 MACHINING OPERATIONS AND MACHINE TOOLS Turning and Related Operations Drilling and Related Operations Milling Machining Centers and Turning Centers Other Machining Operations High Speed Machining
External Turning. Outline Review of Turning. Cutters for Turning Centers
 Outline Review of Turning External Turning 3 External Turning Parameters Cutting Tools Inserts Toolholders Machining Operations Roughing Finishing General Recommendations Turning Calculations Machining
Table of Contents. Table of Contents. Preface 11 Prerequisites... 12
 Table of Contents Preface 11 Prerequisites... 12 Basic machining practice experience... 12 Controls covered... 12 Limitations... 13 The need for hands -on practice... 13 Instruction method... 13 Scope...
Turning and Lathe Basics
 Training Objectives After watching the video and reviewing this printed material, the viewer will gain knowledge and understanding of lathe principles and be able to identify the basic tools and techniques
11/15/2009. There are three factors that make up the cutting conditions: cutting speed depth of cut feed rate
 s Geometry & Milling Processes There are three factors that make up the cutting conditions: cutting speed depth of cut feed rate All three of these will be discussed in later lessons What is a cutting
Computer Numeric Control
 Computer Numeric Control TA202A 2017-18(2 nd ) Semester Prof. J. Ramkumar Department of Mechanical Engineering IIT Kanpur Computer Numeric Control A system in which actions are controlled by the direct
Figure 1: NC Lathe menu
 Click To See: How to Use Online Documents SURFCAM Online Documents 685)&$0Ã5HIHUHQFHÃ0DQXDO 5 /$7+( 5.1 INTRODUCTION The lathe mode is used to perform operations on 2D geometry, turned on two axis lathes.
Motion Manipulation Techniques
 Motion Manipulation Techniques You ve already been exposed to some advanced techniques with basic motion types (lesson six) and you seen several special motion types (lesson seven) In this lesson, we ll
Table of Contents. Preface 9 Prerequisites 9. Key Concept 1: Know Your Machine From A Programmer s Viewpoint 13. Table of Contents
 Preface 9 Prerequisites 9 Basic machining practice experience 9 Controls covered 10 Limitations 10 Programming method 10 The need for hands -on practice 10 Instruction method 11 Scope 11 Key Concepts approach
Prof. Steven S. Saliterman Introductory Medical Device Prototyping
 Introductory Medical Device Prototyping Department of Biomedical Engineering, University of Minnesota http://saliterman.umn.edu/ You must complete safety instruction before using tools and equipment in
SHOP NOTES. GPocket Guide and Reference Charts. for CNC Machinists. Made in the U.S.A.
 SHOP NOTES GPocket Guide and Reference Charts for CNC Machinists Made in the U.S.A. WHAT S INSIDE THIS BOOKLET? Decimal Equivalent Chart / Millimeter to Inch Chart Haas Mill G-Codes / Haas Mill M-Codes
Lesson 2 Understanding Turning Center Speeds and Feeds
 Lesson 2 Understanding Turning Center Speeds and Feeds Speed and feed selection is one of the most important basic-machining-practice-skills a programmer must possess. Poor selection of spindle speed and
Typical Parts Made with These Processes
 Turning Typical Parts Made with These Processes Machine Components Engine Blocks and Heads Parts with Complex Shapes Parts with Close Tolerances Externally and Internally Threaded Parts Products and Parts
Basic NC and CNC. Dr. J. Ramkumar Professor, Department of Mechanical Engineering Micro machining Lab, I.I.T. Kanpur
 Basic NC and CNC Dr. J. Ramkumar Professor, Department of Mechanical Engineering Micro machining Lab, I.I.T. Kanpur Micro machining Lab, I.I.T. Kanpur Outline 1. Introduction to CNC machine 2. Component
PROGRAMMING January 2005
 PROGRAMMING January 2005 CANNED CYCLES FOR DRILLING TAPPING AND BORING A canned cycle is used to simplify programming of a part. Canned cycles are defined for the most common Z-axis repetitive operation
Milling. Chapter 24. Veljko Samardzic. ME-215 Engineering Materials and Processes
 Milling Chapter 24 24.1 Introduction Milling is the basic process of progressive chip removal to produce a surface. Mill cutters have single or multiple teeth that rotate about an axis, removing material.
Chapter 23 Drilling and Hole Making Processes. Materials Processing. Hole Making Processes. MET Manufacturing Processes
 MET 33800 Manufacturing Processes Chapter 23 Drilling and Hole Making Processes Before you begin: Turn on the sound on your computer. There is audio to accompany this presentation. Materials Processing
What Does A CNC Machining Center Do?
 Lesson 2 What Does A CNC Machining Center Do? A CNC machining center is the most popular type of metal cutting CNC machine because it is designed to perform some of the most common types of machining operations.
Preview Sample. Date: September 1, 2010 Author: Matthew Manton and Duane Weidinger ISBN:
 Computer Numerical Control Workbook Generic Lathe Published by CamInstructor Incorporated 330 Chandos Crt. Kitchener, Ontario N2A 3C2 www.caminstructor.com Date: September 1, 2010 Author: Matthew Manton
LinuxCNC Help for the Sherline Machine CNC System
 WEAR YOUR SAFETY GLASSES FORESIGHT IS BETTER THAN NO SIGHT READ INSTRUCTIONS BEFORE OPERATING LinuxCNC Help for the Sherline Machine CNC System LinuxCNC Help for Programming and Running 1. Here is a link
CAD/CAM/CAE Computer Aided Design/Computer Aided Manufacturing/Computer Aided Manufacturing. Part-10 CNC Milling Programming
 CAD/CAM/CAE Computer Aided Design/Computer Aided Manufacturing/Computer Aided Manufacturing Part-10 CNC Milling Programming To maximize the power of modern CNC milling machines, a programmer has to master
Lathe. A Lathe. Photo by Curt Newton
 Lathe Photo by Curt Newton A Lathe Labeled Photograph Description Choosing a Cutting Tool Installing a Cutting Tool Positioning the Tool Feed, Speed, and Depth of Cut Turning Facing Parting Drilling Boring
Introduction to Machining: Lathe Operation
 Introduction to Machining: Lathe Operation Lathe Operation Lathe The purpose of a lathe is to rotate a part against a tool whose position it controls. It is useful for fabricating parts and/or features
Lathe Series Training Manual. Haas CNC Lathe Programming
 Haas Factory Outlet A Division of Productivity Inc Lathe Series Training Manual Haas CNC Lathe Programming Revised 050914; Rev3-1/29/15; Rev4-31017 This Manual is the Property of Productivity Inc The document
Cross Peen Hammer. Introduction. Lesson Objectives. Assumptions
 Introduction In this activity plan students will develop various machining and metalworking skills by building a two-piece steel hammer. This project will introduce basic operations for initial familiarization
When the machine makes a movement based on the Absolute Coordinates or Machine Coordinates, instead of movements based on work offsets.
 Absolute Coordinates: Also known as Machine Coordinates. The coordinates of the spindle on the machine based on the home position of the static object (machine). See Machine Coordinates Absolute Move:
Metal Cutting - 5. Content. Milling Characteristics. Parts made by milling Example of Part Produced on a CNC Milling Machine 7.
 Content Metal Cutting - 5 Assoc Prof Zainal Abidin Ahmad Dept. of Manufacturing & Industrial Engineering Faculty of Mechanical Engineering Universiti Teknologi Malaysia 7. MILLING Introduction Horizontal
CNC Applications. Tool Nose Radius Compensation on Turning Centers
 CNC Applications Tool Nose Radius Compensation on Turning Centers Facing and Straight Turning When facing or straight turning, the tool nose radius has no effect on the part other than leaving a radius
Techniques With Motion Types
 Techniques With Motion Types The vast majority of CNC programs require but three motion types: rapid, straight line, and circular interpolation. And these motion types are well discussed in basic courses.
Chapter 23: Machining Processes: Turning and Hole Making
 Manufacturing Engineering Technology in SI Units, 6 th Edition Chapter 23: Machining Processes: Turning and Hole Making Chapter Outline 1. Introduction 2. The Turning Process 3. Lathes and Lathe Operations
NZX NLX
 NZX2500 4000 6000 NLX1500 2000 2500 Table of contents: 1. Introduction...1 2. Required add-ins...1 2.1. How to load an add-in ESPRIT...1 2.2. AutoSubStock (optional) (for NLX configuration only)...3 2.3.
Processing and Quality Assurance Equipment
 Processing and Quality Assurance Equipment The machine tool, the wash station, and the coordinate measuring machine (CMM) are the principal processing equipment. These machines provide the essential capability
Mach4 CNC Controller Lathe Programming Guide Version 1.0
 Mach4 CNC Controller Lathe Programming Guide Version 1.0 1 Copyright 2014 Newfangled Solutions, Artsoft USA, All Rights Reserved The following are registered trademarks of Microsoft Corporation: Microsoft,
Chapter 24. Machining Processes Used to Produce Various Shapes: Milling
 Chapter 24 Machining Processes Used to Produce Various Shapes: Milling Parts Made with Machining Processes of Chapter 24 Figure 24.1 Typical parts and shapes that can be produced with the machining processes
Lathes. CADD SPHERE Place for innovation Introduction
 Lathes Introduction Lathe is one of the most versatile and widely used machine tools all over the world. It is commonly known as the mother of all other machine tool. The main function of a lathe is to
Chapter 23: Machining Processes: Hole Making Part A (Lathe Operations, Boring, Reaming, Tapping)
") 1 Manufacturing Processes (2), IE-352 Ahmed M El-Sherbeeny, PhD Spring 2017 Manufacturing Engineering Technology in SI Units, 6 th Edition Chapter 23: Machining Processes: Hole Making Part A (Lathe Operations,
1 Manufacturing Processes (2), IE-352 Ahmed M El-Sherbeeny, PhD Spring 2017 Manufacturing Engineering Technology in SI Units, 6 th Edition Chapter 23: Machining Processes: Hole Making Part A (Lathe Operations,
CNC LATHE TURNING CENTER PL-20A
 CNC LATHE TURNING CENTER PL-20A CNC LATHE TURNING CENTER For High Precision, High Speed and High Productivity MAIN FEATURE Introducing the latest and strongest CNC Lathe PL20A that has satisfied the requirements
HAAS AUTOMATION, INC.
 PROGRAMMING WORKBOOK HAAS AUTOMATION, INC. 2800 Sturgis Rd. Oxnard, CA 93030 JANUARY 2005 . JANUARY 2005 PROGRAMMING HAAS AUTOMATION INC. 2800 Sturgis Road Oxnard, California 93030 Phone: 805-278-1800
CHAPTER 6 EXPERIMENTAL VALIDATION AND RESULTS AND DISCUSSIONS
 119 CHAPTER 6 EXPERIMENTAL VALIDATION AND RESULTS AND DISCUSSIONS 6.1 CNC INTRODUCTION The CNC systems were first commercially introduced around 1970, and they applied the soft-wired controller approach
CNC Chucker Lathe P/N 6600, 6610, and 6620
 WEAR YOUR SAFETY GLASSES FORESIGHT IS BETTER THAN NO SIGHT READ INSTRUCTIONS BEFORE OPERATING PRODUCT DESCRIPTION 6600 CNC Chucker w/3c headstock, ball screws, high-torque stepper motors & PC w/4-axis
NUMERICAL CONTROL.
 NUMERICAL CONTROL http://www.toolingu.com/definition-300200-12690-tool-offset.html NC &CNC Numeric Control (NC) and Computer Numeric Control (CNC) are means by which machine centers are used to produce
Block Delete techniques (also called optional block skip)
") Block Delete techniques (also called optional block skip) Many basic courses do at least acquaint novice programmers with the block delete function As you probably know, when the control sees a slash code
Block Delete techniques (also called optional block skip) Many basic courses do at least acquaint novice programmers with the block delete function As you probably know, when the control sees a slash code
MANUFACTURING PROCESSES
 1 MANUFACTURING PROCESSES - AMEM 201 Lecture 5: Milling Processes DR. SOTIRIS L. OMIROU Milling Machining - Definition Milling machining is one of the very common manufacturing processes used in machinery
MACHINING PROCESSES: TURNING AND HOLE MAKING. Dr. Mohammad Abuhaiba 1
 MACHINING PROCESSES: TURNING AND HOLE MAKING Dr. Mohammad Abuhaiba 1 HoweWork Assignment Due Wensday 7/7/2010 1. Estimate the machining time required to rough cut a 0.5 m long annealed copper alloy round
no mm no Dividers with scriber 150 mm NEW Square wedge-shaped knife edges on the length side
 Summer Promotion valid until 30.06.2013 all quoted prices are incl. VAT for deliveries to EU countries to customers with valid VAT-no. and for deliveries in non EU member countries the VAT is not applicable
Multi-axis milling/turning system IMTA 320 T2 320 T3. Interaction Milling Turning Application
 Multi-axis milling/turning system IMTA 320 T2 320 T3 Interaction Milling Turning Application T e c h n i c a l D a t a s h e e t The consistent 75 step bed design allows the near rectangular arrangement
Lecture 15. Chapter 23 Machining Processes Used to Produce Round Shapes. Turning
 Lecture 15 Chapter 23 Machining Processes Used to Produce Round Shapes Turning Turning part is rotating while it is being machined Typically performed on a lathe Turning produces straight, conical, curved,
CHAPTER 23 Machining Processes Used to Produce Various Shapes Kalpakjian Schmid Manufacturing Engineering and Technology 2001 Prentice-Hall Page 23-1
 CHAPTER 23 Machining Processes Used to Produce Various Shapes Manufacturing Engineering and Technology 2001 Prentice-Hall Page 23-1 Examples of Parts Produced Using the Machining Processes in the Chapter
Chapter 24 Machining Processes Used to Produce Various Shapes.
 Chapter 24 Machining Processes Used to Produce Various Shapes. 24.1 Introduction In addition to parts with various external or internal round profiles, machining operations can produce many other parts
Lathe Accessories. Work-holding, -supporting, and driving devices
 46-1 Lathe Accessories Divided into two categories Work-holding, -supporting, and driving devices Lathe centers, chucks, faceplates Mandrels, steady and follower rests Lathe dogs, drive plates Cutting-tool-holding
Rotary Engraving Fact Sheet
 Rotary Engraving Fact Sheet Description Rotary engraving is the term used to describe engraving done with a rotating cutting tool in a motorized spindle. The tool, or cutter, cuts into the surface of the
EMCOMAT E-200 MC for the m cycle-controlled m
 EMCOMAT E-200 MC for the m cycle-controlled m 1 HEADSTOCK Solid cast-iron construction Powerful Siemens drive system Short taper spindle nose with CAMLOCK adaptor Spindle bore diameter ø 53 (50) mm 2 2
Multipurpose Milling Machine Servomill 700. Conventional Multipurpose Milling Machine.
 Multipurpose Milling Machine Conventional Multipurpose Milling Machine For workshop application, single parts production and training purposes Servo motors and preloaded ball screws on all axes Infinitely
Turning. MECH Dr Ghassan Al-Kindi - Lecture 10 1
 Turning Single point cutting tool removes material from a rotating workpiece to generate a cylinder Performed on a machine tool called a lathe Variations of turning performed on a lathe: Facing Contour
CNC Machinery. Module 4: CNC Programming "Turning" IAT Curriculum Unit PREPARED BY. August 2009
 CNC Machinery Module 4: CNC Programming "Turning" PREPARED BY IAT Curriculum Unit August 2009 Institute of Applied Technology, 2009 2 Module 4: CNC Programming "Turning" Module 4: CNC Programming "Turning"
THE PROCESS OF PRODUCING P-5678 SPRING PINS FOR NORTHLAND TRUCKS
 THE PROCESS OF PRODUCING P-5678 SPRING PINS FOR NORTHLAND TRUCKS Prepared For Don Klepp, English 132 Instructor Okanagan University College By Richard Pelletier Mechanical Engineering Technology 1 Okanagan
Trade of Toolmaking. Module 6: Introduction to CNC Unit 2: Part Programming Phase 2. Published by. Trade of Toolmaking Phase 2 Module 6 Unit 2
 Trade of Toolmaking Module 6: Introduction to CNC Unit 2: Part Programming Phase 2 Published by SOLAS 2014 Unit 2 1 Table of Contents Document Release History... 3 Unit Objective... 4 Introduction... 4
Machining Processes Used to Produce Various Shapes. Dr. Mohammad Abuhaiba
 Machining Processes Used to Produce Various Shapes 1 Homework Assignment Due Wensday 28/4/2010 1. Show that the distance lc in slab milling is approximately equal to for situations where D>>d. (see Figure
CNC Programming Guide MILLING
 CNC Programming Guide MILLING Foreword The purpose of this guide is to help faculty teach CNC programming without tears. Most books currently available on CNC programming are not only inadequate, but also
INDIAN INSTITUTE OF TECHNOLOGY KHARAGPUR NPTEL ONLINE CERTIFICATION COURSE. On Industrial Automation and Control
 INDIAN INSTITUTE OF TECHNOLOGY KHARAGPUR NPTEL ONLINE CERTIFICATION COURSE On Industrial Automation and Control By Prof. S. Mukhopadhyay Department of Electrical Engineering IIT Kharagpur Topic Lecture
Summer Junior Fellowship Experience at LUMS. Maliha Manzoor 13 June 15 July, 2011 LUMS Summer Internship
 Summer Junior Fellowship Experience at LUMS Maliha Manzoor 13 June 15 July, 2011 LUMS Summer Internship Internship Schedule June 13-17: 2D and 3D drawings in AutoCAD June 20-24: 2D and 3D drawings in AutoCAD
1640DCL Digital Control Lathe
 1640DCL Digital Control Lathe MACHINE SPECIFICATIONS Multiple Function CNC Lathe 1. Manual Hand wheel Operation 2. CNC G-Code Operation 16.1 swing over bed, 8.6 swing over cross-slide 2.05 diameter hole
TURNING BORING TURNING:
 TURNING BORING TURNING: FACING: Machining external cylindrical and conical surfaces. Work spins and the single cutting tool does the cutting. Done in Lathe. Single point tool, longitudinal feed. Single
UNIT 4: (iii) Illustrate the general kinematic system of drilling machine and explain its working principle
 Illustrate the general kinematic system of drilling machine and explain its working principle") UNIT 4: Drilling machines: Classification, constructional features, drilling & related operations, types of drill & drill bit nomenclature, drill materials. Instructional Objectives At the end of this
UNIT 4: Drilling machines: Classification, constructional features, drilling & related operations, types of drill & drill bit nomenclature, drill materials. Instructional Objectives At the end of this
Optimized flute design Better chip evacuation. Carbide substrate Higher heat resistance, higher speed.
 Thread Mills Available for the first time, our solid thread mills are designed to be the highest quality thread milling solution. WIDIA-GTD Cut up to 63 HRC. Improved overall thread quality. Optimized
Application and Technical Information Thread Milling System (TMS) Minimum Bore Diameters for Thread Milling
 Minimum Bore Diameters for Thread Milling") Inserts Application and Technical Information Minimum Bore iameters for Thread Milling UN-ISO-BSW tpi 48 3 4 0 16 1 10 8 7 6 5 4.5 4 Technical ata Accessories Vintage Cutters Widia Cutters Thread Milling
Inserts Application and Technical Information Minimum Bore iameters for Thread Milling UN-ISO-BSW tpi 48 3 4 0 16 1 10 8 7 6 5 4.5 4 Technical ata Accessories Vintage Cutters Widia Cutters Thread Milling
STATE UNIVERSITY OF NEW YORK SCHOOL OF TECHNOLOGY CANTON, NEW YORK
 STATE UNIVERSITY OF NEW YORK SCHOOL OF TECHNOLOGY CANTON, NEW YORK COURSE OUTLINE MECH 121 - MANUFACTURING PROCESSES I Prepared By: Daniel Miller Updated By: Daniel Miller (April 2015) CANINO SCHOOL OF
527F CNC Control. User Manual Calmotion LLC, All rights reserved
 527F CNC Control User Manual 2006-2016 Calmotion LLC, All rights reserved Calmotion LLC 21720 Marilla St. Chatsworth, CA 91311 Phone: (818) 357-5826 www.calmotion.com NC Word Summary NC Word Summary A
Travis Bishop. Submitted to: Dr. John Davis. Date: 3 December Course: ETME 310 Section: 004. Lab Topic: Milling Project (Vise)
") Travis Bishop Submitted to: Dr. John Davis Date: 3 December 2012 Course: ETME 310 Section: 004 Lab Topic: Milling Project (Vise) Introduction: Purpose of Experiment: This experiment was conducted to teach
Travis Bishop Submitted to: Dr. John Davis Date: 3 December 2012 Course: ETME 310 Section: 004 Lab Topic: Milling Project (Vise) Introduction: Purpose of Experiment: This experiment was conducted to teach
Getting Started. Terminology. CNC 1 Training
 CNC 1 Training Getting Started What You Need for This Training Program This manual 6 x 4 x 3 HDPE 8 3/8, two flute, bottom cutting end mill, 1 Length of Cut (LOC). #3 Center Drill 1/4 drill bit and drill
Lathe Series Training Manual. Live Tool for Haas Lathe (including DS)
") Haas Factory Outlet A Division of Productivity Inc Lathe Series Training Manual Live Tool for Haas Lathe (including DS) Created 020112-Rev 121012, Rev2-091014 This Manual is the Property of Productivity
Haas Factory Outlet A Division of Productivity Inc Lathe Series Training Manual Live Tool for Haas Lathe (including DS) Created 020112-Rev 121012, Rev2-091014 This Manual is the Property of Productivity
Chapter 22: Turning and Boring Processes. DeGarmo s Materials and Processes in Manufacturing
 Chapter 22: Turning and Boring Processes DeGarmo s Materials and Processes in Manufacturing 22.1 Introduction Turning is the process of machining external cylindrical and conical surfaces. Boring is a
Prof. Steven S. Saliterman Introductory Medical Device Prototyping
 Introductory Medical Device Prototyping Department of Biomedical Engineering, University of Minnesota http://saliterman.umn.edu/ Images courtesy of Haas You must complete safety instruction before using
Miyano Evolution Line
 Evolution Line CNC Turning center with 2 spindles, 2 turrets and 1 -axis slide BNJ-34/42/51 "Evolution and Innovation" is the Future What could not be done can be done. -axis movement is added to the traditional
Datuming And Tool Setting Instructions for Renishaw Tool Touch Probe
 Datuming And Tool Setting Instructions for Renishaw Tool Touch Probe Used on the Hardinge CONQUEST T42 CNC Chucker and Bar Machines Equipped with a GE Fanuc 18T Control Unit Hardinge Inc. One Hardinge
CNC Cooltool - Milling Machine
 CNC Cooltool - Milling Machine Module 1: Introduction to CNC Machining 1 Prepared By: Tareq Al Sawafta Module Objectives: 1. Define machining. 2. Know the milling machine parts 3. Understand safety rules
Projects. 5 For each component, produce a drawing showing the intersection BO.O. C'BORE 18 DIA x 5 DEEP FROM SECTION ON A - A
 Projects ~ Figure Pl Project 1 If you have worked systematically through the assignments in this workbook, you should now be able to tackle the following milling and turning projects. It is suggested that
Ahsanullah University of Science and Technology (AUST) Department of Mechanical and Production Engineering
 Department of Mechanical and Production Engineering") Ahsanullah University of Science and Technology (AUST) Department of Mechanical and Production Engineering LABORATORY MANUAL For the students of Department of Mechanical and Production Engineering 1 st
Ahsanullah University of Science and Technology (AUST) Department of Mechanical and Production Engineering LABORATORY MANUAL For the students of Department of Mechanical and Production Engineering 1 st
DUGARD EAGLE. Mega Slant and Mega Turn Heavy Duty CNC Lathes
 DUGARD EAGLE Mega Slant and Mega Turn Heavy Duty CNC Lathes Dugard Eagle SS and SA Series Machine Features 60 for SA-Series, 45 for SS-Series slant bed construction ensures maximum stability and convenient
Machining. Module 6: Lathe Setup and Operations. (Part 2) Curriculum Development Unit PREPARED BY. August 2013
 Curriculum Development Unit PREPARED BY. August 2013") Machining Module 6: Lathe Setup and Operations (Part 2) PREPARED BY Curriculum Development Unit August 2013 Applied Technology High Schools, 2013 Module 6: Lathe Setup and Operations (Part 2) Module Objectives
Machining Module 6: Lathe Setup and Operations (Part 2) PREPARED BY Curriculum Development Unit August 2013 Applied Technology High Schools, 2013 Module 6: Lathe Setup and Operations (Part 2) Module Objectives
PERFORMANCE RACING AND ENGINE REBUILDING MACHINERY AND EQUIPMENT
 PERFORMANCE RACING AND ENGINE REBUILDING MACHINERY AND EQUIPMENT F8A F8A with Big Block Merlin Features The F Series Boring Machines are unlike anything else available to the automotive and diesel engine
Precision made in Germany. As per DIN The heart of a system, versatile and expandable.
 1 Precision made in Germany. As per DIN 8606. The heart of a system, versatile and expandable. Main switch with auto-start protection and emergency off. Precision lathe chuck as per DIN 6386 (Ø 100mm).
This just may be the Rotary Transfer machine you ve been waiting for.
 This just may be the Rotary Transfer machine you ve been waiting for. A Machine Like No Other T he new Eclipse 12-100 is a ground-up redesign of the famous Hydromat concept with all new components. It
Multiplex W-200 S E R I E S W-200 W-200Y
 Multiplex W-200 S E R I E S W-200 W-200Y Advanced features of the MAZATROL SmoothG CNC Z1 Y1 (W-200Y) Y2 (W-200Y) Z2 Touch screen operation Operate similar to your smart phone / tablet X1 X2 PC with Windows
Performance. CNC Turning & Milling Machine. Conversational CAM 3.11 Instruction Manual
 Performance CNC Turning & Milling Machine Conversational CAM 3.11 Instruction Manual Legacy Woodworking Machinery 435 W. 1000 N. Springville, UT 84663 Performance Axis CNC Machine 2 Content Warranty and
 VALLIAMMAI ENGINEERING COLLEGE DEPARTMENT OF MECHANICAL ENGINEERING QUESTION BANK ME6402 MANUFACTURING TECHNOLOGY II UNIT-I PART A 1. List the various metal removal processes? (BT1) 2. Explain how chip
TAPPING CHUCKS & COLLETS
 TAPPING CHUCKS & COLLETS CAT er Tension/Compression Holders 86 CAT er Rigid Holders 86 BT er Tension/Compression Holders 87 BT er Rigid Holders 87 HSK Tension/Compression & Rigid Holders 88 NMTB er Tension/Compression
Servomill. Multipurpose Milling Machine Servomill. Conventional Multipurpose Milling Machine.
 Multipurpose Milling Machine Conventional Multipurpose Milling Machine for workshop applications, single parts production and training purposes Servo motors and preloaded ball screws on all axes infinitely
Prof. Steven S. Saliterman Introductory Medical Device Prototyping
 Introductory Medical Device Prototyping Department of Biomedical Engineering, University of Minnesota http://saliterman.umn.edu/ You must complete safety instruction before using tools and equipment in
The new generation with system accessories. Made in Germany!
 1 The new generation with system accessories. Made in Germany! For face, longitudinal and taper turning, thread-cutting. For machining steel, brass, aluminium and plastic. Mounting flange for fastening
A H M 531 The Civil Engineering Center
 Title Page Introduction 2 Objectives 2 Theory 2 Fitting 3 Turning 5 Shaping and Grinding 7 Milling 8 Conclusion 11 Reference 11 1 Introduction Machining Machining is a manufacturing process in which a
Various other types of drilling machines are available for specialized jobs. These may be portable, bench type, multiple spindle, gang, multiple
 Drilling The process of making holes is known as drilling and generally drilling machines are used to produce the holes. Drilling is an extensively used process by which blind or though holes are originated
Safety And Operation Instructions RSR50 VMC Right Angle Self-Reversing Tapping Units
 Safety And Operation Instructions To Avoid Serious Injury And Ensure Best Results For Your Tapping Operation, Please! Read Carefully All operator and safety instructions provided for this tapping attachment
COFA. Consistent deburring through holes on Even & Uneven surfaces in any material HEULE. Case Study - Automotive. Study Details
 Case Study - Automotive COFA Consistent deburring through holes on Even & Uneven surfaces in any material BEFORE AFTER COFA Tool ION 1,400 parts / day (2 holes per part) CNC Machining Center Low Carbon
GANESH GBM-4020 Heavy-Duty CNC Bed Mill With Class-7 Super-Precision Spindle Bearings and Box Ways
 20869 Plummer St. Chatsworth, CA 91311 Toll Free: 888-542-6374 (US only) Phone: 818-349-9166 I Fax: 818-349-7286 www.ganeshmachinery.com GANESH GBM-4020 Heavy-Duty CNC Bed Mill With Class-7 Super-Precision
Lathe is a machine, which removes the metal from a piece of work to the required shape & size HENRY MAUDSLAY
 TURNING MACHINES LATHE Introduction Lathe is a machine, which removes the metal from a piece of work to the required shape & size HENRY MAUDSLAY - 1797 Types of Lathe Engine Lathe The most common form
Reamer Basics. Fixed Reamers The reamer size is fixed and any size reduction due to wear or sharpening cannot be reclaimed
 1 Reamer Basics Reamers are available in a variety of types, materials, flute styles and sizes The typical reamer is a rotary cutting tools designed to machine a previously formed hole to an exact diameter
GANESH GBM-2616 CNC Bed Mill With Class-7 Super-Precision Spindle Bearings and Box Ways
 20869 Plummer St. Chatsworth, CA 91311 Toll Free: 888-542-6374 (US only) Phone: 818-349-9166 I Fax: 818-349-7286 www.ganeshmachinery.com GANESH GBM-2616 CNC Bed Mill With Class-7 Super-Precision Spindle
Care and Maintenance of Milling Cutters
 The Milling Machine Care and Maintenance of Milling Cutters The life of a milling cutter can be greatly prolonged by intelligent use and proper storage. Take care to operate the machine at the proper speed