5V Installation Manual
|
|
|
- Mervin McLaughlin
- 5 years ago
- Views:
Transcription


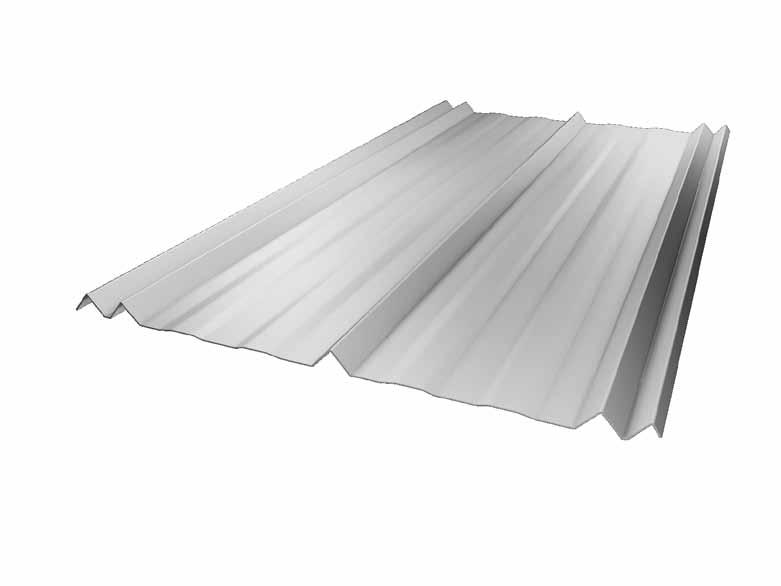

1 Flat 1/ Striated 5V Installation Manual
2 Table of Contents Important Notice/Safety/Storage/Tools...1 Product Information/Product Approvals...2 Roofing Anatomy/ Trim...3 Measuring Your Roof...4 Roofing Installation/Felt/Cutting Panels...5 Double Bubble Installation...6 Purlin Installation...7 Drip Edge Installation...8 W Valley Installation...9 Fastening Schedule/Proper Screw Installation...10 Pre-drilling Panels/Overlapping Panels...11 Squaring Panels...12 Transition Flashing Installation...13 Endwall Installation...14 Sidewall Installation...15 Gable Trim Installation...16 Ridge Cap Installation...17 Roof Boot Installation...18 Special Trim Information...19 Care and Maintenance...20 Policies...21 Order Form...22

3 Important Notice/Safety/Storage Pg.1 Tools Recommended Variable speed drill or screw gun, Snips, Magnetic Bit, Extension Ladder Turbo shears, Tape Measure, Hand bending tools, Chalk line String line, Drill bits, Tool belt, Utility Knife Important Notice This manual is to aid the installer with the installation of the 5V panel. Due to the different complexities of roofs and roofing situations, it is difficult to create a manual that covers every situation that the installer may encounter. This manual is to serve as a guideline to properly installing the 5V panel. Check with local building codes prior to installing metal roofing. Any questions you may have regarding proper installation of the 5V panel should be directed to a Tri County Metals representative. Safety Roofing can result in serious injury or death. Extreme caution should be used at all times when installing metal roofing. The information in this manual is to show the correct placement of the metal roofing parts. It is the responsibility of the erector to perform the placement of these parts in a safe manner. Refer to OSHA guidelines for applicable safety requirements. Never walk on a wet metal roof. Never walk on an unfastened roof panel. Storage/Handling Moisture trapped between stacked sheets may cause water stains or white rust to form under the paint, which can affect the life and service of the metal. If metal is not used immediately, store in a well ventilated dry location. Any outdoor storage is at the customer s own risk! If outdoor storage cannot be avoided the likelihood of damage may be reduced by protecting the metal using a canvas of waterproof paper. Break the shipping bands on the metal, store the metal on end or on an incline of at least 8 inches with a supporting board underneath the middle of the metal to prevent sagging. Fan sheets lightly at the bottom to allow for air circulation. Keep the sheets off the ground by using an insulator such as wood. Never cover the metal with plastic as this will cause condensation to form.
4 5v PRODUCT INFORMATION Pg.2 3/ Coverage Width - 24 Minimum Slope - 2/12 Gauges - 26 Coating - Galvalume Warranty - 25 years (Galvalume) Gauge Substrate Approval # Min /2 Plywood R /2 Plywood R2 Min 26 nailed or screwed 1x


5 Pg.3 Roofing Anatomy Ridge Cap 17 Pg. 17 W- Valley 9 Pg. 9 Gable Trim 16 Pg. 16 Sidewall Trim 15 Pg. 15 Transition Flashing Pg Drip Edge Pg. 8 Endwall Pg
6 Measuring your Roof for an Estimate Pg.4 > Start by sketching a birds eye view of your roof. This can be aided by using Google Earth or similar online programs. > Identify each part of your roof similar to the drawing below. > Once you have drawn your roof and identified each part, measure each line and include it on the drawing. > Include on the drawing the location of plumbing stacks (if any) and the diameter of the pipe.
7 Pg.5 Roofing Installation The order that items appear in this manual corresponds to the order that they should be installed. Please read carefully and if you have any questions regarding what you read in this manual, please feel free to call us. Important: This manual should only serve as a guide to how the metal roofing should be installed. The installer must check with local building codes before any installation of the roof begins. underlayment Installation > Starting at the eave, run the underlayment horizontally at the eave. Fasten underlayment every 6 at the edges and stagger one row of fasteners every 12 through the middle of the underlayment. > Endlaps should be staggered every 6 > Overlap each row of underlayment 4 > See Florida building codes for specific installation. Field Cutting Panels and Trim > Trim pieces can be cut with a quality pair of snips. > Metal panels can be cut using tin snips, Turboshears, or scoring the panel with a utility knife. The use of a metal cutting blade can be used but the panel must be cut facing down to avoid hot particles from the Skill saw shavings landing on the panel and damaging the finish.

8 Double Bubble Installation Pg.6 Note : SILVER SIDE UP 1. Fasten double bubble to roof using plastic caps every 12 on center on the edges and one row through the center every 12 on center ( the purpose of fastening the double bubble is to hold the double bubble in place prior to installing purlins. 2. Starting at the eave, run the double bubble up and over the ridge to the other side. If you are venting the ridge it is easier to cut the double bubble back along the entire ridge after you have installed the entire roof and 1 x 4 s (if applicable). 3. Tape all seem edges with Double Bubble tape. (Optional) 4. Once double bubble has been installed over the entire roof, then you are ready for purlins. 5. A 3/4 air space is required with the use of Double Bubble for it to work effectively. One roll of double bubble = 500 sq. ft. (4 wide x 125 long)

9 Pg.7 Purlin Spacing 16 OC 16 OC 16 OC Ridge Ridge 16 OC 16 OC 16 OC 16 OC 16 OC DO NOT USE PRESSURE TREATED PURLINS. PRESSURE TREATED PURLINS ARE CORROSIVE TO METAL ROOFING > The purpose of the purlins is to provide a solid foundation for the metal roofing panels and trim to be screwed to. Therefore, good judgment should be used in order for there to be a solid surface that can be screwed to. > Purlins must be attached to the truss using either 2 #8 x 3 deck screws spaced every 2 feet or 1 8d x 2 3/8 ring shank nail staggered every 4 on center. > Purlin spacing is 16 on center. > Purlins must be installed to support the entire width and length of the ridge, eave, hip, valley, transition, sidewall, endwall and gable ends. > You will also need to install purlins around penetrations such as plumbing pipes, electrical pipes and skylights. (see page 20 for roof boot installation) * Please read ahead in this book for purlin placement on trim detail pages. One purlin = 1 x 4 x 12

 Woodgrip fastener in the flat adjacent to each rib. (See fastener pattern on page 10) 6.")
10 Drip Edge Pg.8 Panel Trim Nail Inside Closures Woodgrip Screw Eave Drip Fascia Notes: 1. Attach eave trim flashing to roof deck or purlins with 1 1/4 galvanized roofing nail 24 on center. 2. Install inside closures on the top edge of the drip edge flashing. 3. Overlap drip edge flashing a minimum of 3 4. Allow drip edge to run past corner of roof 3 so it can be folded to ensure maximum weather tightness. 5. Attach roofing panel at eave with a minimum #9 x 1 1/2 (1/4 magnetic bit) Woodgrip fastener in the flat adjacent to each rib. (See fastener pattern on page 10) 6. Panel ends should hang past the eave 2-3 or 1 for gutters. * Purlin placement should be directly above fascia board along the eave line. RECOMMENDED ACCESSORIES: Inside Closures (1 closure = 2 of coverage) Trim Nails (1 box = 300 nails)

11 Pg.9 W-Valley Trim Nail Panel W Valley Panel Trim Nail Expanding Foam Expanding Foam Woodgrip Screw Woodgrip Screw Note: 1. Starting at the bottom, fasten W Valley trim flashing to purlins or substrate using 1 1/4 roofing nails 1 from trim edge every 24 on center. 2. Allow W Valley trim flashing to overhang roof edge so it can be trimmed back flush with roof overhang. (If your panels are going to overhang the eave by 2 then you will want your W Valleys to overhang at least 2 ) 3. Cut roofing panels so they stop 3 from the diverter in the center of the W Valley trim flashing. 4. Apply expanding foam tape to the top of the W Valley Flashing 1 from the bottom edge of the roofing panel. 5. Fasten roofing panel ends to roof using #9 x 1 1/2 woodgrip screws. 6. Screws should be installed on each side of every rib, 3 from panel end. * Purlins should be spaced 1 & 6 from center of valley on both sides. RECOMMENDED ACCESSORIES: Expanding Foam (1 roll = 20 of coverage)

12 Fastening Schedule Pg.10 Screw placement: Both sides of ribs at Eaves, Ridges, Valley Ends, Hip Ends, Transition Ends Purlin bearing rib side: Intermediate rows, 16 on-center Middle Screw Placement Bottom Edge Screw Placement Proper Screw Installation Too Tight Washer deformed, Sealing material extrudes beyond edge of washer. Too Loose Sealing material isn t visible. Not enough Compression. Correct Sealing Material is slightly visible at edge of washer. Assembly is weather tight.

13 Pg.11 Predrilling Panels The placement of screws and ease of installation can be aided by predrilling the roofing panels on the ground using a 3/16 drill bit. You will also benefit from predrilling the panels on the ground by not having metal filings on the roof or unsightly shavings sticking out from under the screws that will rust. Predrilling holes for the screws will make the roof look better when viewed from the ground. Although screws can be installed on the roof, the tendency is to have wavy rows of screws. When predrilling panels, it is recommended to only predrill 10 panels of 29 gauge and 7 panels of 26 gauge. Overlapping Panels Tacky Tape Notice the purlin bearing leg is installed underneath the overlapping panel. ATTENTION: Roofs with less than a 3/12 pitch requires tacky tape to be installed the entire length of the panel overlap.
14 Squaring Panels Pg.12 both The triangle method will work on a larger scale as well. For example if your roof panels are 16 long then you can multiply the by 4 so you will be measuring Just make sure that you multiply all measurements by the same number. The next step will be making a chalk line going from your point A to point C. You will want this line to be as close to the edge of the gable as possible so your first panel will be about an 1/8 from the edge of the roof. You will want to measure 8 6 from your chalk line at the A and C points and make another chalk line. This will help you as you start installing your panels to make sure they are still square with your eave. It is a good idea to continue this process for the entire project and on both sides of your roof. Note: If your roof length is a few inches over an even multiple of 2 you will want to take that into consideration when you start installing your panel so that you are not short on the other end of the house. For instance, if your house is 42 4 wide you can get away with 21 panels. You will just make sure you start your first panel 2 away from the gable end.
 of the transition flashing lies flat on the upper roof. 3.")
15 Pg.13 Transition Flashing Panel Outside Closures Transition Flashing Inside Closures Panel Woodgrip Screws Notes: 1. Install bottom roofing panels first. 2. After bottom roofing panels have been installed, set one piece of transition flashing down where the top portion (non-hemmed) of the transition flashing lies flat on the upper roof. 3. Measure 1 1/2 from bottom edge of transition flashing. 4. Repeat step 3 on the opposite end of the roof transition. 5. Remove transition flashing and pop a chalk line on line previous marked indicating where outside closures are going to be placed. 6. Install outside closures. 7. After outside closures are installed, install the transition flashing over the outside closures. 8. Fasten transition flashing using #9 x 2 Woodgrip fasteners through each major rib of the roofing panel. 9. When overlapping transition flashings, flashings should be attached immediately adjacent to a major rib and not in between two major ribs. 10. Once the bottom half of the transition flashing has been installed completely, install the upper roofing panels next overtop the top part of the transition flashing. 11. Hold roofing panels back two inches from the centerline of the transition flashing. 12. Leave bottom row of screws uninstalled so inside closures can be installed later. 13. Once upper roof panels have been installed (except for bottom row of screws), insert inside closures 1 from edge of roofing panel the entire length. 14. Install bottom row of screws into the metal panel catching the inside closures to hold them into place. 15. Bottom row of screws should be placed adjacent to both sides of every major rib. RECOMMENDED ACCESSORIES: Outside Closures, Inside Closures (1 closure = 2 of coverage)

16 Endwall Flashing Pg.14 Trim Nail Endwall Flashing Woodgrip Screws Outside Closures Panel Notes: 1. Install outside closures where the flat of the endwall flashing will be fastened to the roofing panels. 2. Attach endwall flashing to roofing panels using #9 x 2 woodgrip fasteners 12 on-center to prevent dimpling of endwall flashing 3. Overlap endwall flashings a minimum of 3 if more than one endwall flashing is required. Two endwall flashing pieces should be attached immediately above a major rib on the roofing panel and not between ribs. 4. It is recommended that the top edge of the endwall flashing be tucked underneath the house siding to provide maximum weather tightness. 5. A counter flashing can be added to the top edge of the endwall flashing to allow the endwall flashing to be inserted into the adjacent wall. 6. As a last resort when the previous two methods can not be performed, a caulk edge can be added to the endwall flashing and then a bead of caulk can be used. * Purlin placement should be approximately 2 from the wall. RECOMMENDED ACCESSORIES: Outside Closures (1 closure = 2 of coverage) Caulking (1 tube = 31 linear feet (1/4 bead))

17 Pg.15 Sidewall Flashing Side Wall Flashing Woodgrip Screws Panel Tacky Tape Notes: 1. Install tacky tape the entire length along the bottom edge of the sidewall flashing trim where it s its on the roofing panels. 2. Allow 1 at the bottom of the sidewall flashing to be cut and folded in for a finished look. 3. When using sidewall flashing around a dormer, allow 1 at the bottom to be wrapped around the endwall flashing. 4. It is recommended that the top leg of sidewall flashing be installed behind the wall siding. If this cannot be done, then using a countersinking method is preferred. 5. Overlap each piece of sidewall flashing at least 3 or in line with the previous row of roofing panel screws to give it a well finished look. 6. Attach sidewall flashing to roofing panels using #9 x 1 1/2 (1/4 magnetic bit) Woodgrip Screws every 16. * Purlin placement should be approximately 2 from the wall. RECOMMENDED ACCESSORIES: Tacky Tape (1 roll = 50 of coverage)

18 Gable Trim Pg.16 Gable Flashing Panel Tacky Tape Woodgrip Screws Notes: 1. Install tacky tape to the bottom of the 1 flat on the gable trim the entire length. 2. Starting at the eave, attach gable trim flashing to roofing panel with #9 x 1 1/2 woodgrip fastener every Overlap gable trim flashing a minimum of Allow gable trim to overhang eave by 1 so gable trim can be folded down to give gable trim a finished look. * Purlin placement should be approximately 1 from the gable end running parallel with it. RECOMMENDED ACCESSORIES Tacky Tape (1 roll = 50 of coverage)

19 Pg.17 Ridge Cap Ridge Cap Outside Closures FlexoVent Woodgrip Screws Notes: 1. Stop panels 2 from center line of ridge for vented ridge installation. 2. Install outside closures or FlexoVent the entire length of the ridge 5 from center line of ridge for a standard ridge cap installation. 3. Attach ridge cap flashing with minimum #9 x 2 (1/4 magnetic bit) Woodgrip fastener 12 on center. Install fasteners at each rib to avoid dimpling the ridge cap flashing. 4. Overlap ridge cap pieces a minimum of Allow ridge cap to hang over gable ends approximately 6 so they can be folded down to give ridge a finished look. * Purlin placement should be approximately 3 from the center of the ridge line on both sides for the small ridge cap. Recommended Accessories: Outside Closures (1 closure = 2 of coveage) Profile Vent ( sold by the 1 piece) Flexo-Vent (1 box = 20 of coverage)


 Apply sealant between base and roof.")
20 Roof Boot Installation Pg Choose appropriate Master Flash with opening at least 20% smaller than pipe diameter. If necessary trim opening to 20% smaller than pipe diameter. Slide Master Flash down over pipe. (A nonpetroleum base lubricant will ease installation.) Apply sealant between base and roof. 3 4 Use fasteners to complete sealing. Space screws no more than 3 apart around the pipe.
21 Pg.19 Special Trim Information Tri County Metals can manufacture special trim designs separate from those designs included in the manual. If your project requires special trim, please provide us with the following information: 1. A drawing of the trim design. 2. Clearly marked dimensions of each leg of the drawing. 3. Clearly marked degrees of each angle. 4. Clearly indicate the color side. 3 Color 110 o Trim Manufacturing Specifications 6 > Hem size must be 1/2 or larger. > Bends on hemmed legs need to be greater than 1/2 or else the hem obstructs the break. > Smashed parts need to be at least 1 1/4. > Maximum bend break can do is 135 degrees. > When bending angles opposite of one another, like that of a Z Flashing, the middle part of the Z must be at least 1/2 or larger. > When bending two 90 degree bends on the same side, one leg has to be equal to or less than the length of the material between the two bends. > Pieces with more than two bends on the same side are difficult to do unless the bends are large enough. Please talk with a Tri County Metals representative for assistance. > For trim pieces that have to slide over another piece where the inside dimensions are critical, please indicate CRITICAL measurement.
 One cup of Simple Green, or other non-toxic")
22 Care and Maintenance Pg.20 To maintain the original finish of the metal roofing panels, the only regular maintenance necessary is that of annual washing. Mild solutions of biodegradable cleaner or household ammonia will aid in the removal of most dirt, and the following are recommended levels: 1) One cup of Simple Green, or other non-toxic biodegradable cleaner, which contain less than 0.5% phosphate, dissolved into two gallons of warm water. NOTE: The use of detergents containing greater than 0.5% phosphate is not recommended for use in general cleaning of building panels. NEVER BLEND CLEANSERS OR DETERGENTS WITH BLEACH. 2.) One cup of household ammonia dissolved into five gallons of water (room temperature). Working from the bottom to the top of the metal roofing panels, the panels may be washed with either solution. The use of a well soaked cloth, sponge, brush (with very soft bristles), or a low pressure spray washer is advised. We do not recommend the use of scouring powders or industrial solvents, since these agents may damage the film. Solvent containing cleaners such as Fantastic, however, are very effective and can be used without concern. If mildew or other fungal growth is a problem and cannot be removed as outlined above, household bleach, mixed at a concentration of one cup of bleach to five gallons of water, along with one cup of a mild soap (e.g., Ivory) to aid wetting, is recommended. Once the metal roofing panels is washed, thorough rinsing with clear water is necessary to eliminate the possibility of residue. Failure to remove all residues from these cleaning steps may damage the film.
23 Pg.21 Policies RETURN POLICY: All Tri County Metals trim is manufactured from either our 25 year (Galvalume ) or our 40 year (Painted) warranty metal and is returnable as long as it is deemed by our Company s Production Manager as being in good, clean and resalable condition, free from scratches, mars and other damages. Tri County Metals reserves the right to charge a 20% restocking fee. The same general principle applies also to the return of other accessories such as screws, boots, closures, etc. Trim that is custom made (different than the stated specifications in this manual, including L Flashing and Fascia are not returnable, and is considered the property of the customer once it has been made, whether paid for or not. This Policy also pertains to metal roofing and siding panels, which cannot be returned. Payment: Tri County Metals accepts cash, check, Visa, Mastercard, Discover Card and America Express. Personal checks require the check writers drivers license # and date of birth. Returned checks will be assessed a $35 dollar return check fee. DELIVERY POLICY: Delivery charges apply to all orders where delivery is requested. Please call for details. SALES TAX: All orders picked up at Tri County Metals, and all orders delivered within the State of Florida, are subject to State Sales Tax. Tax Exemptions should be verified prior to delivery or customer pick up. Orders delivered out of state are tax exempt. WARRANTEED PRODUCTS: Galvalume products carry a 25 1/2 year warranty, and painted products carry a 40 year warranty. (Ask for details) INDEMNITY: All prices and designs are subject to change without notice. DISCLAIMER: While we have made every attempt at accuracy in this manual, we are not responsible for typographic, printing or technical errors. The success of Tri County Metals has been, and will continue to be, because of our valued customers. We strive to be a company where contractors as well as home owners are welcome. We will assist you in calculating the materials needed to complete your project and at a price you can afford. We understand that our customer s time is important and we make every effort to get you in and out as quickly and efficiently as possible. Quality, price, service and availability are the mainstays of our business and we don t plan on changing it.
24 ESTIMATE/ ORDER FORM Name: Phone: Address: Job Name: Panel Profile: Panel Color: Panel Gauge: Pickup Location: Delivery Location: INSULATION/VENTILATION Double Bubble Insulation Double Bubble Tape Flex-o-Vent Profile Vent Vent Clips QTY FLASHINGS QTY Roof Boots #3: 1/4-5 Color: brown, Standard High Temp white, gray, blue, red green and black #5: 4 1/4-7 1/2 Standard High Temp Enter Panel Sizes Quantity Feet Inches SEALANTS Peel and Seal Titebond Expanding Foam Tacky Tape Inside Closures Outside Closures QTY #7: 6-11 Standard High Temp #9: 9-19 Standard High Temp Electric Pipe Boot Standard High Temp TRIM Eave Drip Ridge Cap Hip Cap Gable Rake Valley Sidewall Endwall Transition Flashing Chimney Flashing Panel Starter Z-Flashing Eave Cleat Specialty Trim (Drawing 1 - please attach drawing) Specialty Trim (Drawing 2 - please attach drawing) Specialty Trim (Drawing 3 - please attach drawing) Specialty Trim (Drawing 4 - please attach drawing) (All trim is bent to a 4/12 pitch, please specify if different) UNDERLAYMENTS/PURLINS Peel & Stick Underlayment QTY QTY Touch-Up Paint Brush On Style Touch-Up Paint Spray Style Gooseneck Vents 4" 6" 10" FASTENERS 1 1 1/ /2" Pancakes Tek Screws Lap Screws FASTENERS Stainless Rivets Painted Rivets Purlin Screws #9 x 3 Collated Nails Stick Nails Trim Nails 1-1/4 Felt Nails 1 1/4 Stinger Nails Woodgrip Screw QTY QTY WoodZac QTY Woodgrip XG QTY Synthetic Underlayment 1 x 4 x 12 SYP Trenton 301 SE 16th St Trenton, FL Office # (352) Fax # (352) Live Oak th Trail Live Oak, FL Office # (386) Fax # (386) Ocala 3021 Northwest Blitchton Rd. Ocala, FL Office # (352) Fax # (352) Tallahassee 3708 Northwest Passage Tallahassee, FL Office # (850) Fax # (850)
Ultra-Rib Installation Manual
 www.tricountymetals.com Ultra-Rib Installation Manual Table of Contents Important Notice/Safety/Storage/Tools...1 Product Information/Product Approvals...,...2 Roofing Anatomy/Side Trim...3 Measuring Your
Tuff-Rib Install Guide
 Install Guide bestbuymetalroof.com Page 2 of 27 Page 3 of 27 1. Page 4 2. a. Installation Guide b. Panel Squaring Pages 5, 6 Pages 7, 8 3. Pages 9, 10 4. a. Fascia (optional) b. Eave / 1.5x3.5 Angle c.
401 SW 33rd Ave Ocala, FL
 401 SW 33rd Ave Ocala, FL 34474 352-622-1035 www.metalroofingofocala.com Table of Contents Panels...Pg.1 Ultra Rib Trim...Pg.2-4 PBR Trim...Pg.5-6 5V Trim...Pg.7-9 TCM-Lok...Pg.10-11 Insulation/Ventilation:
Best Buy Metals Toll Free / Phone / Fax
 DETAIL MANUAL for Vertical Seam Best Buy Metals Toll Free 1-800-728-4010 / Phone 423-479-6382 / Fax 423-728-3066 www.bestbuymetals.com Vertical Seam Roofing Panels Fig. 2 Vertical Seam Has 1-3/4" high
DETAIL MANUAL for Standing Seam / Image II
 DETAIL MANUAL for Standing Seam / Image II Best Buy Metals Toll Free 1-800-728-4010 / Phone 423-479-6382 / Fax 423-728-3066 www.bestbuymetals.com Best Buy Metals Standing Seam Roofing Panels Fig. 2 Standing
Toll Free: S.E. 16th Street Trenton, Florida Tel: SW 90th Trail Live Oak, Florida Tel:
 Toll Free: 877-766-3309 301 S.E. 16th Street Trenton, Florida 32693 Tel: 352-463-8400 10142 SW 90th Trail Live Oak, Florida 32060 Tel: 386-330-0101 3021 N.W. Blitchton Road Ocala, Florida 34475 Tel: 352-622-5500
DETAIL MANUAL. Metal Roofing Wholesalers. Classic Rib Roofing Panels
 Metal Roofing Wholesalers Classic Rib Roofing Panels DETAIL MANUAL 1178 Topside Rd Louisville, TN 37777 The Classic Rib Roofing Panel Figure 1 House With Classic Rib Metal Roofing Installed Classic Rib
Tuff-Rib. Installation Manual. Nationwide supplier of quality metal roofing. Toll-Free (800) S. Lee Hwy. Cleveland, TN 37311
 S. Lee Hwy. Cleveland, TN 37311") Installation Manual Nationwide supplier of quality metal roofing. 65 S. Lee Hwy. Cleveland, TN 7.. www.bestbuymetals.com Toll-Free (800) 78-00 IMPORTANT NOTICE This manual contains suggestions and guidelines
Installation Manual Nationwide supplier of quality metal roofing. 65 S. Lee Hwy. Cleveland, TN 7.. www.bestbuymetals.com Toll-Free (800) 78-00 IMPORTANT NOTICE This manual contains suggestions and guidelines
Phone (662) Fax (662) DETAIL MANUAL. and guide to Reed s Metals products
 Fax (662) DETAIL MANUAL. and guide to Reed s Metals products") Phone (662) 869-7797 www.reedsmetals.com Fax (662) 869-7799 DETAIL MANUAL and guide to Reed s Metals products Perma-Loc & Secure-Seam Standing Seam Roofing Panels & Accessories -1- Reed s Metals Standing
Phone (662) 869-7797 www.reedsmetals.com Fax (662) 869-7799 DETAIL MANUAL and guide to Reed s Metals products Perma-Loc & Secure-Seam Standing Seam Roofing Panels & Accessories -1- Reed s Metals Standing
REGAL. Installation Manual
 REGAL Installation Manual General Information The details shown on the following pages are suggestions or guidelines for installing the Regal system. The installation details shown here are proven methods
MANUAL. Perma-Loc & Secure-Seam. Standing Seam Roofing Panels & Accessories. and guide to Town and Country Metals products
 DETAIL MANUAL and guide to Town and Country Metals products Perma-Loc & Secure-Seam Standing Seam Roofing Panels & Accessories Town & Country Metals, LLC 10 Progress Parkway Union, MO 63084 Town and Country
Table of Contents Light Gauge Metal Roof & Wall Panels
 Table of Contents Light Gauge Metal Roof & Wall Panels Installation Guide for Delta Rib, Nor-Clad, Strata Rib & 2-1/2 Corrugated Introduction Important Notice Notes: April 2008 Minimum Recommended Tools
Steel Roofing & Siding INSTALLATION GUIDE
 Steel Roofing & Siding INSTALLATION GUIDE Your Authorized Dealer is: WASHINGTON Auburn (800) 700-7228 WASHINGTON Spokane (866) 321-5954 www.nuraymetals.com CALIFORNIA Redlands (800) 806-8729 CONTENTS BEFORE
BARRELL VAULT BATTENLESS
 i BARRELL VAULT BATTENLESS INSTALLATION GUIDE INSTALLATION NOTIFICATION The installation procedures demonstrated in this manual are recommended methods for the installation of the Gerard Barrel Vault battenless
Barrel Vault Counter Batten and Batten
 Barrel Vault Counter Batten and Batten INSTALLATION GUIDE www.gerardusa.com INSTALLATION NOTIFICATION The installation procedures demonstrated in this manual are recommended methods for the installation
TIOGA Table of Contents
 Table of Contents TABLE OF CONTENTS Product Data Sheet...2 Engineering Data...3 General Information...4 Handling...5 Roof Preparation...5 Fastening Recommendations...6 Field Cutting...7 Touch-up Paint...7
CertainTeed. Shake / Slate Installation Guide
 CertainTeed Shake / Slate Installation Guide Table of Contents System Components... 2 General Conditions, Safety and Roof Preparations... 3... 4 Eave/Drip Edge... 5 Inner Gable... 6 Outer Gable... 7 Open
DETAIL MANUAL. For R-Panel / PBR Panel. Metal Roofing Wholesalers
 Metal Roofing Wholesalers DETAIL MANUAL For R-Panel / PBR Panel 1178 Topside Rd Louisville, TN 37777 Picture of Gulf Coast Figure 1 Metal Roofing Plant PBR/R-Panel The 26-gauge R-Panel is a strong, durable,
Straight Rib Series Metal Roofing Panel Installation Guide
 D-Rib G-Rib C-Rib Straight Rib Series Metal Roofing Panel Installation Guide 7000 AIRPORT LINE R.R., BOX 7 HENSALL, ONTARIO N0M X0 EASY BUILDING PRODUCTS TEL. : 5-6-07 TOLL FREE : -888-76-777 FAX: 5-6-08
Ekoroof LiteTile Dimensions
 Ekoroof LiteTile Dimensions 7 3 3.5 Height 40 Width 20 Length Weight per Panel: 3 kg / 6.61 lbs 2 2 Area per panel 800 in / 5.55 ft 2 Panels per Square: 20 (including overlap, for a 100 ft covered area)
METAL ROOFING INSTALLATION GUIDE
 METAL ROOFING INSTALLATION GUIDE STANDING SEAM ROOFING PANELS Horizon 16 and Climaguard 16 Regardless of whether your roofing project is a new installation or a re-roof, and whether your building is residential,
installation guide 7 8 Corrugated corrugated metal panel
 installation guide / 7 8 Corrugated corrugated metal panel Table of Contents General Notes Handling and Storage 1-3 Tools and Equipment, Field Cutting Panels 4 Safety 5 Preparing to Install your New Roofing
installation guide Villa
 installation guide Villa Table of Contents Introduction............................. 2 Safety................................... 2 Tools.................................... 2 Codes & Requirements....................
Five Star Panel Installation Instructions
 Five Star Panel Installation Instructions How to Store Five Star Panels You will need to store FIVE STAR PANELS in dry place to prevent staining, deterioration and possibly void all warranties. Stand the
TABLE OF CONTENTS A-1
 TABLE OF CONTENTS PAGE NUMBER: DETAIL DESCRIPTION A-1...TABLE OF CONTENTS A-2...GENERAL NOTES B-1...GENERAL INFORMATION C-1...EAVE DRIP DETAIL C-2...EAVE DRIP with GUTTER DETAIL C-3 & C-4...FIXED RIDGE
Table of Contents. Installation Guide for Profile with Hidden Fasteners 3. Installation Steps 4, 5. Prestige Series Moldings 6, 7. Other Accessories 8
 1 Table of Contents Page(s) Installation Guide for Profile with Hidden Fasteners 3 Installation Steps 4, 5 Prestige Series Moldings 6, 7 Other Accessories 8 Trims & Accessories 9 Eave Starters 10 Gableboards
Installation Guide. Step 3. Valley Flashing. Step 7. Transition Flashings and Accessories. Step 6. Hip and Ridge Installation
 Step 7. Transition s and Accessories Step 3. Valley Step 6. Hip and Ridge Installation Step 2. Rake Trim Step 5. Installing the Shingles Step 1. Eave Starter Installation Step 4. Endwall s Installation
MasterRib. Installation Manual. July Toll-Free (888) MTL-ROOF. PO Box 229 Fayetteville, NC Rev.
 MTL-ROOF. PO Box 229 Fayetteville, NC Rev.") MasterRib Installation Manual July 010 PO Box 9 Fayetteville, NC 80.. www.unionmetalroofing.com Toll-Free (888) MTL-ROOF Rev. 7/10 IMPORTANT NOTICE This manual contains suggestions and guidelines on how
MasterRib Installation Manual July 010 PO Box 9 Fayetteville, NC 80.. www.unionmetalroofing.com Toll-Free (888) MTL-ROOF Rev. 7/10 IMPORTANT NOTICE This manual contains suggestions and guidelines on how
IRONSTONE SLATE & FLASHING SPECIFICATIONS IRONSTONE SLATE
 8 5/8" A) 1 5/8" 5/8" 1 10" 10 1 5 50" 9 7/8" IRONSTONE SLATE & FLASHING SPECIFICATIONS IRONSTONE SLATE 1/8" 1 B) 3/8" 2 7/8" 1 3/8" 3/8" 3/8" 3/8" 1" 1 5/8" 1 5/8" 1 2 1 8.3" 3/4" Overall Length 52 Length
TABLE OF CONTENTS A. PBR
 TABLE OF CONTENTS A. PBR Panel 1. PBR Panel Architect/Engineer Information....................................... 2 2. PBR Panel UL 90 Requirements............................................... 3 3. PBR
Installation Manual. Future Roof Shingle / Slate Products
 Installation Manual Future Roof Shingle / Slate Products REVISED 14/09/2010 Future Roof Shingle Installation Manual is a component of Future Roof, Inc. and as such is intended to be used with Future Roof
Inspire Slate Starter Piece Hip and Ridge. 13 1/2" Height: 13 ½" Width: 12" Squares/ Pallet. Bundles/ Square
 December 2017 Classic Slate Application Guidelines Only Basic Roofing Tools Required Hand fastened or fastened with a pneumatic nail gun Utility knife or a standard circular saw Tape measure, pry bar,
Storing, Handling, and Cutting Steel Panels
 Storing, Handling, and Cutting Steel s Storing Specifically check your quantities, colors, and lengths All materials should be used as soon as possible Steel bundles should be stored indoors with enough
Inspire Aledora Slate Application Guidelines
 July 2014 Inspire Aledora Slate Application Guidelines Only Basic Roofing Tools Required Hand fastened or fastened with a pneumatic nail gun Utility knife or a standard circular saw Tape measure, pry bar,
Roofing Training - Basics. Sandy Wesch
 Roofing Training - Basics Sandy Wesch Tools Hammer Measuring Tape Chalk Line & Chalk Speed Square Framing Square Utility Knife Metal Snips Extension Ladder(s) 2 Safety Any tools or material up on the roof
Installation Instructions
 Installation Instructions ROLL VENT STANDARD / METRIC Page Installation Considerations 3 Roll Vent Standard General Installation 4 Roll Vent Metric General Installation 5 Steep Pitch Guidelines 6 Asphalt
E-Z BUILD STEEL BARN 12' 12' 12' 16' 12' 20'
 E-Z BUILD STEEL BARN 12' 12' 12' 16' 12' 20' BUILD You can construct your own E-Z frame barn with the help of this step by step guide. North American softwood dimensional lumber sizes: Nominal Actual in
SLATE & SHINGLE INSTALLATION
 EAVE EDGE Apply a small strip of roofing paper to the bottom of eave. Eave flashing is attached to substrate with roofing nails every 9". Install underlayment over entire roof. (See Fig. 1) PAGE 1 Bend
IRONWOOD SHAKE & FLASHING SPECIFICATIONS
 3 1-51 3-3/4 1 IRONWOOD SHAKE & FLASHING SPECIFICATIONS 6 1-13- 1-1-1/4 2-1.5 Drip Edge 2.5 Drip Edge 2-7/8 1-1-1/4 3/4 1 2-1 IRONWOOD SHAKE Overall Length 51 Length of Coverage 48 Width of Coverage 1
 TremLock T-138 INSTALLATION MANUAL T-138 www.tremcoroofing.com 3735 Green Road Beachwood, Ohio 44122 1.800.852.6013 50 Beth Nealson Drive Toronto, Ontario M4H 1M6 1.800.668.9879 7241 6/8/18 TABLE OF CONTENTS
Installation Manual. Future Shingle Products
 Installation Manual Future Shingle Products TITLE REVISED 7/4/2011 Future Shingle Installation Manual is a component of Future Roof, Inc. and as such is intended to be used with Future Roof products only.
Terrabella Shake & Shingle Znap Ver. 2.0
 Terrabella Shake Znap Actual length = 52.6 Actual Width = 16.33 Coverage length = 49.7 Coverage width = 14 Terrabella Shingle Znap Actual Length = 52.375 Actual Width = 15.25 Coverage Length = 49.375 Coverage
2 ½ Corrugated Panel Installation Specifications
 2 ½ Corrugated Panel Installation Specifications ROOF APPLICATION: Roof slope must be a minimum of a 2/12 pitch to use this product. When using this product butyl lap sealant is recommended for all slopes.
Table of Contents. Important Notices 3. Residential Roofing Application 4. Trims & Accessories 5. Trim Glossary 6, 7, 8. Estimating Material 9
 Table of Contents Page(s) Important Notices 3 Residential Roofing Application 4 Trims & Accessories 5 Trim Glossary 6, 7, 8 Estimating Material 9 Eave Trim Installation 10 Connecting Eavestarters 10 Gable
Tuff Rib Panel Installation Specifications
 Tuff Rib Panel Installation Specifications ROOF APPLICATION: Roof slope must be a minimum of a 2/12 pitch to use this product. For slopes lower than a 3/12 pitch, lap sealant is suggested on the side laps
SmartVent Eave Edge Installation Instructions
 SmartVent Eave Edge Installation Instructions STEP 1: Cut a slit 1 wide (or a series of 1 ¾ holes at 3 on center) into the roof decking 6 to 7 up from the drip edge. SmartVent is rated 9NFA. Ensure drip
ONDUVILLA. The Attractive Alternative to Shingles I N S T A L L A T I O N I N S T R U C T I O N S
 ONDUVILLA The Attractive Alternative to Shingles I N S T A L L A T I O N I N S T R U C T I O N S 1 INSTALLATION INSTRUCTIONS Even though ONDUVILLA is easy to install, it is important to read through these
Installation Manual. For Gerard Shingle Products
 Installation Manual For Gerard Shingle Products Gerard Shingle Installation Manual is a component of Gerard roofing products and as such is intended to be used with Gerard products only. All information
westmansteel.com Installation Guide Proudly Canadian. Family Owned. Cambridge (ON) TF. (855) F. (855)
 TF. (855) F. (855)") MEMBER COMPANY Proudly Canadian. Family Owned. Cambridge (ON) TF. (8) 620-2720 F. (8) 97-829 Winnipeg \ Brandon (MB) TF. (800) 661.282 F. (800) 661.90 Swift Current \ Regina \ Saskatoon (SK) TF. (800)
MEMBER COMPANY Proudly Canadian. Family Owned. Cambridge (ON) TF. (8) 620-2720 F. (8) 97-829 Winnipeg \ Brandon (MB) TF. (800) 661.282 F. (800) 661.90 Swift Current \ Regina \ Saskatoon (SK) TF. (800)
INSTALLATION GUIDE LEARN MORE AT DECRA.COM
 Villa Tile INSTALLATION GUIDE LEARN MORE AT DECRA.COM Table of Contents DECRA Villa Tile Roof Overview... 2 Introduction... 3 Safety... 3 Tools.... 3 Estimating Sheet... 3 Codes & Requirements... 3 Roof
PBR Panel Installation Specifications
 4906 St. Stephens Rd. 5780 Hwy 90 W Eight Mile, Al 36613 Theodore, AL 36590 251 456 2254 251 653 1550 251 457 2254(F) 251 653 1514(F) PBR Panel Installation Specifications ROOF APPLICATION: Roof slope
Chapter 16: Roof Steel
 Chapter 16: Roof Steel Most Common Mistakes: 1. Roof purlins not checked for alignment. 2. Failure to properly square roof. 3. Reversing steel laps. 4. Using not enough or too many screws. 5. Over or under
MetroCOTTAGE Shingle
 Batten-less Installation Sept. 14, 2017 INSTALLATION WARNING! These install details are provided to demonstrate a recommended installation method for Metro Roof panels and accessories. used in the United
Table of Contents. Roof to Head Wall w/ Side Flashing DECRA Shake XD Roof Overview Roof Penetration - Pipes & Vents...
 Table of Contents DECRA Shake XD Roof Overview.... 2 DECRA Shingle XD Roof Overview.... 3 Introduction... 4 Safety... 4 Tools.... 4 Estimating Sheet... 4 Codes & Requirements... 4 Roof Slope... 4 Underlayment...
b) Symphony comes pre-packaged in color and width blends. There is no need to mix Symphony at the job site. Currently Symphony is available in the
 Symphony comes pre-packaged in color and width blends. There is no need to mix Symphony at the job site. Currently Symphony is available in the") PART 1 GENERAL 1) DESCRIPTION a) CertainTeed Symphony TM composite slate is an innovative roofing product that simulates the appearance, texture, and contours of traditional natural slate. It is a carefully
PART 1 GENERAL 1) DESCRIPTION a) CertainTeed Symphony TM composite slate is an innovative roofing product that simulates the appearance, texture, and contours of traditional natural slate. It is a carefully
Corrugated Installation and Technical Guide
 Corrugated Installation and Technical Guide AmeriLux International, in partnership with Menards, offers high quality polycarbonate, pvc and fiberglass panels which feature the latest in product technology.
4. Metal roof jacks at penetrations and attachments
 - - - - - - - - - - - - - - - - - - - - - - - - - - - - - - - - - - - - - - - - - - - - - - - - - - - - - - - - - - - - - - - - - - - - - - SECTION 07 61 00 METAL SHINGLE ROOFING - - - - - - - - - - -
Installation Instructions
 Installation Instructions RAPID RIDGE STANDARD / 7 / METRIC Page Installation Considerations 3 Rapid Ridge Standard General Installation 4 Rapid Ridge Metric General Installation 5 Rapid Ridge 7 General
Table of Contents. Notes to Designer/User Map of Typical Roof Conditions Fastener Placement Fastener Selection...
 Table of Contents Section Page Notes to Designer/User... 2-3 Map of Typical Roof Conditions... 4 Fastener Placement... 5 Fastener Selection... 6 Ridge/Hip Flashing... 7 Valley Flashing... 8 Eave Flashings...
Table of Contents. Important Notices 3. Residential Roofing Application 4. Trims & Accessories 5. Trim Glossary 6, 7, 8, 9
 1 Table of Contents Page(s) Important Notices 3 Residential Roofing Application 4 Trims & Accessories 5 Trim Glossary 6, 7, 8, 9 General Installation Recommendations 10 Installation Guidelines Roof Preparation
F-WAVE REVIA SYNTHETIC ROOFING SHINGLES
 F-WAVE REVIA SYNTHETIC ROOFING SHINGLES Installation Manual for Steep-Slope Residential Installations For support with all other Steep-Slope Installations, please call F-Wave Technical Support at 888-GO-FWAVE.
INSTALLATION DETAILS
 INSTALLATION DETAILS Front Issued January 23rd, 2005 These install details are provided to demonstrate the recommended installation method for Metro Roof products and accessories. The details and information
ROOFING APPLICATION STANDARD (RAS) No. 115 STANDARD PROCEDURES FOR ASPHALTIC SHINGLE INSTALLATION
 No. 115 STANDARD PROCEDURES FOR ASPHALTIC SHINGLE INSTALLATION") ROOFING APPLICATION STANDARD (RAS) No. 115 STANDARD PROCEDURES FOR ASPHALTIC SHINGLE INSTALLATION 1. Scope 4. Underlayment 2. 1.1 This roofing application standard has been developed to provide a responsive
ROOFING APPLICATION STANDARD (RAS) No. 115 STANDARD PROCEDURES FOR ASPHALTIC SHINGLE INSTALLATION 1. Scope 4. Underlayment 2. 1.1 This roofing application standard has been developed to provide a responsive
ASC Building Products. Table of Contents
 Table of Contents Section Page(s) Introduction........................................1 Minimum Recommended Tools & Equipment.............2 Delivery, Handling and Storage.........................3 Safety
Granite Ridge Shingle Guardian Shingle
 Allmet Installation Manual Shingle Profiles Granite Ridge Shingle Guardian Shingle March 2017 This Installation Manual is designed as an instructional tool to clearly depict to the contractor, installer,
GLOSSARY OF TERMS SECTION 8
 GLOSSARY OF TERMS SECTION 8 Anchor Bolt Angle Base Plate Bay Blocking CCB Centerline Chord Cladding Clip Closure Strip An A-307 steel bolt embedded in the concrete footing to anchor the base plate of the
ProSnap 100 STANDARD DETAILS
 ProSnap 100 OVER WOOD DECK STANDARD DETAILS Austin - Headquarters/Sales Office 830 Sagebrush Drive Austin, TX 78758 (512) 452-1515 (800) 428-7412 Fax (512) 833-7499 www.ctmrs.com email: info@ctmrs.com
Viva Synthetic Thatch Installation Instructions
 Viva Synthetic Thatch Installation Instructions Overview Structure This instruction manual is for the installation of VIVA on an open battened roof frame. Structure should be framed with weatherable wood
900 SERIES WALL PANELS
 CI-DS-01-900 CI-PP-01-900 CI-PJ-01-900 CI-PJ-02-900 CI-PJ-03-900 CI-BS-01-900 CI-BS-02-900 CI-BS-03-900 CI-BS-04-900 CI-BS-05-900 CI-OC-01-900 CI-OC-02-900 CI-IC-01-900 CI-FO-01-900 CI-FO-02-900 CI-FO-03-900
Stone coated steel roof tile INSTALLATION GUIDE
 Stone coated steel roof tile INSTALLATION GUIDE Ⅰ. Introduction These installation details are provided to demonstrate recommended installation methods for KD One roof products and accessories. Consult
WESTERN WAVE Panel. Vertical Installation and Technical Information
 WESTERN WAVE Panel Vertical Installation and Technical Information Western States Western Wave Wall and Soffit Panels (Vertical) Installation, Flashings & Shop Drawing Detail Guide Section Notes to Designer
Gerard Installation Manual Shingle Profiles
 Gerard Installation Manual Shingle Profiles Granite Ridge Shingle Guardian Shingle March 2017 This Installation Manual is designed as an instructional tool to clearly depict to the contractor, installer,
eco-shake INSTALLATION INSTRUCTION
 1 eco-shake INSTALLATION INSTRUCTION NOTE: Shuffling the eco-shakes during installation may be necessary to obtain a uniform color throughout the roof. Due to the natural wood content in the ecoshakes,
or Ordering Installation and Self-Help Guide
 1-800-467-0626 or 479-787-6264 Ordering Installation and Self-Help Guide MBS Self-Storage buildings offer a wide variety of layouts Typically based on 5ft spacing. Common roof slopes 1:12 to 1/2:12 and
Cambridge English Application Instructions
 Cambridge English Application Instructions ROOF SLOPE: Never apply asphalt shingles to roof slopes less than 2:12. For slopes 2:12 to 4:12 (LOW SLOPE), see special underlayment requirements outlined below.
ROOF FRAMING INFORMATION BATTEN INSTALLATION CORONA SHAKE INSTALLATION ACCESSORY INSTALLATION ESTIMATING DATA GENERAL INFORMATION
 ROOF FRAMING INFORMATION BATTEN INSTALLATION CORONA SHAKE INSTALLATION ACCESSORY INSTALLATION ESTIMATING DATA GENERAL INFORMATION ROOF FRAMING INFORMATION It is the responsibility or roofers, building
StormMaster Slate General Instructions 1.) GENERAL INSTRUCTIONS 2.) ROOF DECK VENTILATION 3.) ROOF DECK
 GENERAL INSTRUCTIONS 2.) ROOF DECK VENTILATION 3.) ROOF DECK") StormMaster Slate General Instructions IMPORTANT: THE STATEMENTS EXPRESSED ON THIS PAGE ARE THE RECOMMENDATIONS FOR THE APPLICATION OF THE ROOFING PRODUCTS AS OUTLINED AND ILLUSTRATED. ANY DEVIATION FROM
StormMaster Slate General Instructions IMPORTANT: THE STATEMENTS EXPRESSED ON THIS PAGE ARE THE RECOMMENDATIONS FOR THE APPLICATION OF THE ROOFING PRODUCTS AS OUTLINED AND ILLUSTRATED. ANY DEVIATION FROM
Installation Guide. Cedar Shake. Distributed by: BEST MATERIALS LLC, Phoenx AZ
 RPM ROOFING Installation Guide Cedar Shake Distributed by: BEST MATERIALS LLC, Phoenx AZ 602-272-8128 800-474-7570 www.bestmaterials.com Table of Contents OVERVIEW... 1 CAUTION... 1 DISCLAIMER... 1 PRODUCT
Hatteras Shingles. CertainTeed Shingle Applicator s Manual. YOUR OBJECTIVE: To learn the correct procedures for installing Hatteras shingles
 CertainTeed Applicator s Manual Hatteras s 14 YOUR OBJECTIVE: To learn the correct procedures for installing Hatteras shingles HATTERAS SHINGLES Hatteras shingles are a premium oversize (18" x 36") roofing
Table of Contents. Fasteners... 4 Venting Preparation Installation with Battens - DECRA Tile & DECRA Shake 1
 Table of Contents DECRA Tile & Shake Roof Overview... 2 Introduction... 3 Safety... 3 Tools.... 3 Estimating Sheets... 4 Codes & Requirements... 4 Roof Slope... 4 Underlayment... 4 Deck Preparation....
Installation Instructions
 Installation Instructions XTRACTOR VENT X18 / X18 XTRA / XLP Page Installation Considerations 3 X18 and X18 Xtra General Installation 4 XLP General Installation 5 Steep Pitch Guidelines 6 Asphalt Shingles
Sun Windows General Information New Construction Hinged Door Installation Instructions
 A G H F H H A. Apply Weather Resistive Barrier B. Apply Bottom Flashing Tape C. Install Sill Pan End Caps & Pan D. Caulk Sides & Top Nailing Surface, Set Door, Fasten E. Apply Side Flashing Tape F. Apply
Light Gauge Metal Roof and Wall Panels. Installation Guide for Delta Rib, Delta Rib III, Nor-Clad, Strata Rib & Corrugated
 Light Gauge Metal Roof and Wall Panels Installation Guide for Delta Rib, Delta Rib III, Nor-Clad, Strata Rib & 2 1 2 Corrugated Light Gauge Metal Roof & Wall Panels ASC Building Products A Division of
Brava Old World Slate Installation Guide
 Brava Old World Slate Installation Guide Brava Roof Tile Phone: 844-290-4196 www.bravarooftile.com This document includes the recommended and suggested installation procedures for Brava Old World Slate
Installation Catalog
 PREMIUM ROOFING. LEGENDARY SERVICE. www.marcometals.com Installation Catalog 1 MARCO METALS, LLC Premium roofing. Legendary service. Marco Metals, LLC is a family-owned and operated company with its origin
Shingle Installation Guide
 Installation Guide Roof Framing Information Installation Installation Accessory Installation Estimating Data General Information Roof Framing Information It is the responsibility or roofers, building contractors
Installation Instructions
 Installation Instructions Building Design and Construction To ensure adequate performance and longevity, protect metal panels from potentially corrosive situations and materials. When treated lumber will
RIDGEMASTER PLUS CAUTION INSTALLATION INSTRUCTIONS ALWAYS WEAR SAFETY GLASSES TOOLS NEEDED GENERAL GUIDELINES FOR RIDGEMASTER PLUS AND HIPMASTER
 INSTALLATION INSTRUCTIONS RIDGEMASTER PLUS CAUTION Before beginning installation read all general guidelines, special notes and installation steps thoroughly and be sure to check and follow all your local
1 Roof Substrate (Deck) OWENS CORNING BERKSHIRE SHINGLES INSTALLATION INSTRUCTIONS
 OWENS CORNING BERKSHIRE SHINGLES INSTALLATION INSTRUCTIONS") General This Installation Instruction document for Owens Corning Berkshire roofing shingles is to be read in conjunction with the Installation information printed on each packet of shingles along with
General This Installation Instruction document for Owens Corning Berkshire roofing shingles is to be read in conjunction with the Installation information printed on each packet of shingles along with
Roof Only Lean-to Instruction Manual
 Roof Only Lean-to Instruction Manual for 10 x 20 2 x 8 /10 6 covers Our unique assembly process quickly transforms the individual pieces into a finished structure that will give you a lifetime of service.
C e r t a i n T e e d S h i n g l e A p p l i c a t o r s M a n u a l. and Carriage House STEEP. Slope Application. (over 21/12)
") C e r t a i n T e e d S h i n g l e A p p l i c a t o r s M a n u a l Grand Manor 16 and Carriage House YOUR OBJECTIVE: To learn the correct method of installing each of these roofing products. These shingles
C e r t a i n T e e d S h i n g l e A p p l i c a t o r s M a n u a l Grand Manor 16 and Carriage House YOUR OBJECTIVE: To learn the correct method of installing each of these roofing products. These shingles
DaVinci SlateTM INSTALLATION
 DaVinci SlateTM INSTALLATION GUIDE DaVinci Slate is a synthetic slate carefully engineered to provide the authentic look and durability of natural slate... at a fraction of the cost and weight. Special
INSTALLATION GIUDE.
 INSTALLATION GIUDE INTRODUCTION The instructions and drawings included here are intended only as a guide for the installation of ECO Roofing Systems Spanish and Modern profiles. The materials and methods
Skyline Roofing. Installation, Flashings and Details Guide
 Skyline Roofing Installation, Flashings and Details Guide Table of Contents Section Page Introduction...2 Delivery, Handling and Storage...3 Safety Considerations...3 Equipment......................................4
WESTERN WAVE Panel. Horizontal Installation and Technical Information
 WESTERN WAVE Panel Horizontal Installation and Technical Information Western States Western Wave Wall and Soffit Panels Installation, Flashings & Shop Drawing Detail Guide Table of Contents Section Page
Slate Shingle Specifications
 Slate Shingle Specifications California Slate is a proud member of the Slate Roofing Contractors Association of North America, Inc. (SRCA) which publishes Section 07310 Slate Shingles setting forth architectural
Horizon-Loc. Installation Details 16" COVERAGE C GUID_INSTL_HLOC_160606
 Horizon-Loc Installation Details ¾" 1" 4" 16" COVERAGE D C GUID_INSTL_HLOC_160606 INDEX Information in the catalog may vary by plant location. Please call your salesperson to verify product availability.
VENTED GABLE DETAIL ROOF PANEL GABLE FLASHING 24" C/C MAX. BUTYL SEALANT TAPE ROOF PURLIN FLASH AB-1, AB-2, AB-3, OR AB-4
 GABLE FLASHING FASTENER @ 24" C/C MAX. ROOF PURLIN BUTYL SEALANT TAPE FLASH AB-1, AB-2, AB-3, OR AB-4 FASTENER @ EVERY MAJOR RIB OR 12" C/C MAX. F-J TRIM FABRAL ALUMINUM SOFFIT FASTENER 24" C/C MAX. BUTYL
KS SERIES - VERTICAL INSTALLATION
 CS-DS-01-KSV CS DISCLAIMER CS-PJ-01-KSV KS42SL EXPANDED PANEL JOINT CS-PJ-02-KSV KS42SL ENGAGED PANEL JOINT CS-PJ-03-KSV KS45SL EXPANDED PANEL JOINT CS-PJ-04-KSV KS45 FLAT ENGAGED PANEL JOINT CS-PJ-05-KSV