DJI GO 4 Manual: The Pilot s Handbook
|
|
|
- Austen Golden
- 5 years ago
- Views:
Transcription

1 DJI GO 4 Manual: The Pilot s Handbook DJI GO 4 Manual Contents February 5, 2018: 1 Introduction and Camera View 2 DJI GO 4 General Settings 3 Main Controller Settings 4 Visual Navigation Settings 5 Remote Controller Settings 6 Image Transmission, Battery, Wi-Fi, and Virtual Joystick Settings 7 Gimbal Settings 8 Camera Settings 9 Intelligent Flight Modes 10 Miscellaneous 1. Introduction: This DJI GO 4 manual will cover the various settings and functions within the DJI GO 4 app for drone operation which can be used as a standalone remote controller for the Spark and Mavic Pro or in conjunction with a remote controller for the Phantom 4 Series, Inspire 2, Spark and Mavic Pro. Overall, the app is the gateway to your drone s settings, so it s important to understand how the settings work and what they do. Please note that this DJI GO 4 manual is focused on the Phantom 4 Pro, Mavic, Spark, and Inspire 2. Due to different functions of the aircraft, some of the screenshots of DJI GO 4 show settings that are available to only specific drones. For ease of use, any aircraft-dependent settings are tagged with the aircraft s name.

2 Camera View: You will spend most of your time here when flying your drone as this is your drone s view of the area in front of it. The icons around the side of the screen will take you to different settings when tapped. 1. System Status: This icon indicates aircraft flight status and displays various warning messages. 2. Obstacle Detection Status: Red bars are displayed when an obstacle is close to the aircraft. Orange bars are shown when obstacles are in detection range. 3. Battery Level Indicator: The battery level indicator provides a dynamic display of the battery level. The colored zones on the battery level indicator represent the power levels needed to carry out different functions. 4. Flight Mode: The text next to this icon indicated the current flight mode. Tap to configure the Main Controller Settings. These settings allow you to modify flight limits and set gain values 5. GPS Signal Strength: Show the current number of connected GPS satellites. The white bar indicates adequate GPS signal. 6. 3D Sensing System Status: Tap this icon to enable or disable features provided by the 3D Sensing System 7. Wi-Fi Settings: Tap to enter Wi-Fi settings. 8. Battery Level: This icon shows the current battery level. Tap to view the battery information menu, set the various battery warnings threshold, and view the battery warning history 9. General Settings: Tap to enter the general settings menu for settings, metrics, enabling live streaming, and displaying flight routes and so on 10. Gimbal Slide: Displays the pitch of the gimbal 11. Photo/Video Toggle: Tap to switch between photo and video recording modes. 12. Shoot/Record Button: Tap to start shooting photos or recording video. 13. Camera Settings: Tap to enter camera settings menu 14. Playback: Tap to enter the Playback page and preview the photos and videos as soon as they are captured. 15. Flight Telemetry: This area displays flight information such as flying speed 16. Virtual Joystick: Tap this to display the virtual joysticks to control the aircraft via the touchscreen on your mobile device 17. Intelligent Flight Mode: Tap to select Intelligent Flight mode 18. Smart RTH: Initiate RTH procedure. Tap to have the aircraft return to the last recorded home point 19. Auto Take Off/ Landing: Tap to initiate auto take-off or landing 20. Back: Tap this icon to return to the main menu.

3 System Status: When you enter camera mode, this bar will be one of three colors: red, yellow or green. If the bar is green, then it means you have a strong GPS connection, and it is safe to fly. If it is yellow, then it means to fly with caution as the drone may be in ATTI mode meaning it doesn t have enough GPS signal to maintain a stable position. Finally, if the bar is red, it means the drone can t fly, and it will prompt you to take action to fix this situation. If you tap on the status bar you ll see an overview of the aircraft systems as follows: Compass: This lets the drone know where it is and sometimes needs to be recalibrated when you fly from a new location. Pay attention to this as the compass can very easily be disrupted by electromagnetic interference. IMU (Inertia Measurement Unit): Basically this is a barometer and a gyroscope used by the drone to see its attitude and angle when flying. If DJI GO 4 prompts you to recalibrate it, follow the onscreen instructions. ESC (Electronic Speed Control) Status: This will tell you if there is a problem with your motors. If you see a warning, try resetting your drone, if the warning won t go away then you ll need to send your drone in for repair. Vision Sensors: These are the sensors that check for obstacles when you re flying. It is strongly recommended that you keep these turned on at all times. Obstacle Detection Status: This is a visual warning that pops up on your screen when your drone detects that it is close to an obstacle.
4 Battery Level Indicator: This shows you how much power your battery has left. The line gets shorter as the battery power is depleted. The first dot on the left is when the drone will automatically land due to low power. The second dot is when the app will try to activate RTH unless you stop it. The yellow H represent your home point and moves along the line to show how much power you will need to get your drone back home. Flight Mode: There are three flight modes that can be displayed in the DJI GO 4 app: Positioning mode (P-mode): P Mode is when all the drones sensors are active, so the drone should always be stable. This is the safest mode to the fly the drone in as if you take your hands off the control sticks then the drone will automatically brake and then hover in position. Attitude or ATTI mode (A-mode): The aircraft will switch to ATTI mode if there is no GPS signal or it is weak, and it is too dark for the Vision Systems to work. The aircraft will only maintain its altitude, but it will drift. Sport mode (S-mode): In Sport Mode, your drone can fly at full speed while using GPS for positioning. However, the forward and downward vision systems will be disabled, so they aircraft won t be able to sense and avoid obstacles. Last but not least Ground Station and Intelligent Flight functions are not available.

5 2. DJI GO 4 General Settings: This is where you can adjust the general settings. Measurement Units: Here, you can choose how your parameters are displayed in DJI GO 4, and you have a choice of in m/s, km/h, or Imperial units. ⒐ћ Long Press Action: This can be set to either Gimbal Control or Focus. If set to Gimbal Control then when you long press the screen you will be able to move the gimbal up and down by dragging your finger. If set to Focus, then when you long press the screen a green box comes up showing the focus of the composition. Live Streaming: Here, you can enable live streaming to Facebook or other popular social media platforms. To enable it all you have to do is choose your preferred platform and log into your account, then follow the onscreen prompts.


6 Map: In the Map settings you toggle on and off Show Flight Route and Cache the Map in the Background which means that DJI GO 4 will store the local map, so it doesn t need to download it every time. Keep the Calibrate Map Coordinates turned OFF unless you live in Mainland China. (For China Mainland) Video Cache: If this is enabled, then DJI GO 4 will save videos to your phone as well as your Micro SD card. If enabled you can set the maximum amount of space you want to use for video cache as well as setting it up to automatically clear space once a certain amount of disk space is used. The last setting is Record Audio with the Video Cache. If this enabled, it means your mobile device will record the audio around you when you take a video.


7 3. Main Controller Settings: Home Point Settings: Here you can set either the takeoff spot or the controller s position as the home point. RTH Altitude: Here you set the altitude that the aircraft will go to once RTH is triggered. To learn more about RTH checkout the How to use RTH Safely article. Beginner Mode: This is the default mode that drones come in. In this mode, the drone will only take off if it has a good GPS signal, and its flight distance, height, and speed will be limited. Beginner mode lets firsttime users get familiar with the controls safely. Once you feel comfortable flying the drone, you can toggle it off.


8 Advanced Controller Settings: DJI GO 4 Manual Main Controller Settings These settings control how fast the stick inputs are translated into movement by the drone. The higher the value, the more responsive the drone will be to stick movements. EXP (Exponential Curve): EXP values reflect the logical relationship between the control stick movements you make and the feedback from the aircraft. The X-axis represents how much the control stick is being pushed, and the Y- axis represents the amount that the aircraft responds based on the adjusted EXP value. (Not available on Spark)

9 Sensitivity: You can adjust the sensitivity of your controls in this part of the app: Attitude: How fast your drone will react and level out. Brake: This controls how fast your drone will brake in GPS mode. The higher the value, the more abrupt the braking rate. Yaw Point End: This controls the speed of the yaw. The higher the value, the faster your aircraft will yaw. Gain: These settings control how fast the aircraft reacts to external forces such as wind. It is recommended not to change them unless you re a proficient pilot. Changing these settings will change the way your aircraft flies, and if you set them up wrong, then it may result in your drone being unstable in flight. The EXP changes the controlling feedback by adjusting the curve of the remote controller. The sensitivity implements this by adjusting the reaction speed of the craft during flight.


10 4. Visual Navigation Settings: This is where you can control which sensors are on. It is recommended that all the sensors are kept on at all times. Enable Obstacle Avoidance: With this setting enabled your aircraft will detect obstacles in front of it, and it will limit the max speed to 10 m/s, so the aircraft has time to break when it detects something. Obstacle avoidance may not work in low light situations (300 lux or below), and it will struggle to detect thin obstacles such as wires. Enabled Horizontal Obstacle Avoidance in Tapfly: If this is activated your aircraft will fly around obstacles in TapFly mode. Enable Backward Flying: If this is toggled, then the drone will fly backward when an approaching subject is being tracked. Please note that DJI drones with the exception of the Phantom 4 Pro do not have any rear obstacle sensors so that it may crash into anything behind it. Enable Obstacle Avoidance in Active Track: If enabled the aircraft will avoid obstacles in ActiveTrack. If disabled, the aircraft will just come to a stop. Display Radar Chart: If this enabled then the app will display a small radar chart on the bottom left of the flight view, which shows your orientation when flying.

11 Advanced Sensor Settings: Enabled Vision Positioning: If this toggled then the downwards sensors will be turned on which will help to keep the aircraft in a fixed position when hovering. When turned off your aircraft will drift when it hovers if the GPS signal is too weak. Landing Protection: When enabled, the aircraft will check its landing area for suitability before it touches down. Precision Landing: If this is turned on then the aircraft will try to land in the exact spot it took off from when RTH is triggered. RTH Obstacle Check: If enabled the aircraft will automatically ascend to avoid any obstacle if it detects an obstacle during RTH. For Spark, if the distance is over 100 meters, then the aircraft won t avoid an obstacle as it will be traveling too fast.


12 5. Remote Controller Settings: Here you can configure your remote controller s settings. Remote Controller Calibration: Here you can calibrate your remote controller s sticks and toggle wheels. You can only calibrate the RC when the aircraft is turned off. To calibrate, just follow the onscreen instructions. Stick Mode: This is where you can choose the stick mode for how to fly your aircraft. Mode 2 is the default for both the remote controller and the virtual joysticks. Set to Fixed-Wing Mode: Here you can toggle fixed-wing mode on and off. In this mode, the drone will fly forward automatically at a certain speed after entering Fixed-Wing Mode. Push the left stick up to ascend and down to descend. Push either stick left or right to rotate the aircraft.

13 Remote Controller LCD Screen Introduction: This screen will give a brief overview of what you are seeing when you look at the Remote Controllers screen. (This is currently available for the Mavic Pro only)

14 Button Customization: You can set what the C1 & C2 buttons do when pressed. You have a choice of: Turn on/off Front LEDs turns the aircraft s front LEDs on or off, so you can avoid any glare when taking photos. Centre-weighted Metering tells the camera to evaluate the light in the middle of the frame. AF Lock/Unlock locks or unlocks the autofocus. Advanced camera settings for quick access to ISO, Shutter, and EV settings. Camera Forward/Down will switch camera direction from facing forward to 90 down. Gimbal follow/fpv mode. Follow mode (Phantom 3 series only) is the one we usually use for video shooting, which supports 3-axis stabilization. FPV mode locks Roll axis stabilization, so the pilot can see the camera s horizontal tilt while turning or going sideways. Toggle map/live view brings the map to the full screen. Clear flight route function clears the past route line on a map. Battery info shows voltage and capacity left in the battery. Playback shows you your photos or videos. Centre Auto Focus makes the camera focus on the center of the frame Right Dial ISO/Shutter Control alternates what the right dial controls.

15 5D Button Customization: This lets you control what the 5D Joystick button does. (Mavic Pro only) You have a choice of: Camera Forward/Down will switch camera direction from facing forward to 90 down. Zoom In makes the camera zoom in. Zoom Out makes the camera zoom out. Portrait Mode makes the camera rotate into a vertical position. Focusing/Metering switches between focus and metering when in manual focus. AE Lock locks the focus and exposure values when taking a photo. Other Settings: Remote Controller Type: Here, you can set a controller as Master or Slave if you are using dual remote controllers. Linking Remote Controller: To link the remote controller to the aircraft.


16 6. Image Transmission Settings: This controls the signal between the aircraft and the remote controller. The signal can be set to Auto or Manual. You can also choose transmission mode for streaming to your mobile device. You can choose your image transmission settings, which affects the quality of the image you see in your camera view. You have the following options: Smooth mode: 720p 60fps; Normal mode: 720p 30fps; HD: 1080p 30fps Please note that using Smooth mode and HD mode will increase the bandwidth needed to send the transmission stream, thus reducing the wireless range. Furthermore, you can t record in 4K when using HD Mode, and you can t record in 4K or 2.7K in Smooth mode. (Mavic Pro, Inspire 2, and Phantom 4 Series only)


17 Battery Level: Shows your battery s health. You can adjust Critically Low Battery Warnings and Low Battery Warning percentages here, and this will change when the app sends you a warning about the battery level. Read this article to learn more about your intelligent battery and how to care for it. Wi-Fi Settings: The Wi-Fi settings screen will show you the strength of the Wi-Fi signal, and if there is any interference, also you can use it to switch it from 2.4 GHz to 5.8 GHz. You can also reset the Wi-Fi settings and change the username and password. (Mavic, Spark only)

18 Virtual Joystick Switch: This is where you can choose the stick mode for how to fly your aircraft; the default joystick mode is 2 for both the remote controller and the virtual joysticks. At present, only the Mavic and Spark support virtual joysticks.

19 7. Gimbal Settings: Here you can adjust how your gimbal moves. Gimbal Mode: There are two choices Follow and First Person View (FPV). Follow: In this mode, the camera will remain stable and maintain the horizon FPV: This orients the gimbal with the movement of the drone. So when you change the orientation of the drone, the camera view will move with it. Centring Camera: If you tap this then the camera will move into center place horizontally or straight down. Adjust Gimbal Roll: You can use this to adjust the tilt of the gimbal if it is misaligned. You can do this when flying rather than having to bring your drone back to fix it. Gimbal Auto Calibration: The drone will automatically try to center the gimbal; this must be done when the drone is on a level surface.

20 Advanced Settings: Here you can set gimbal functions. Gimbal Pitch Speed: This controls the speed at which the gimbal tilts. A higher value means a fastermoving gimbal and lower value means a slower gimbal. Enable Upwards Gimbal Tilt Limit to 30 Degree: Turning this off will allow the camera to tilt up beyond 30, but you ll be able to see the propellers in any shots you take, unless you are flying backwards. Gimbal Pitch Smoothness: This controls how quickly the gimbal will come to a complete stop after you move it. A lower value means a quick stop and a higher value means a slower stop. Enable Synchronized Gimbal Pan Follow: Enabling this makes the camera move with the yaw stick. This helps videos to be smoother when you move the yaw stick.
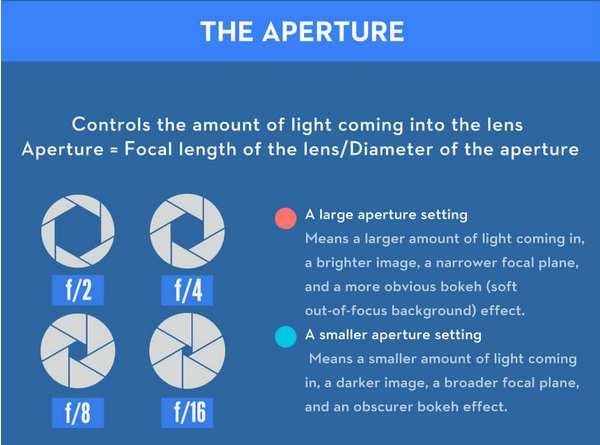
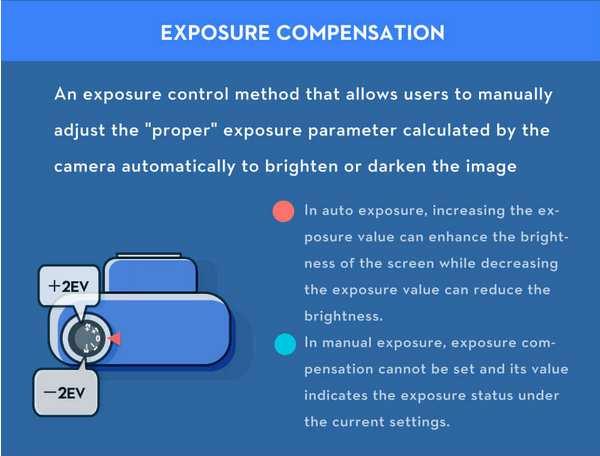
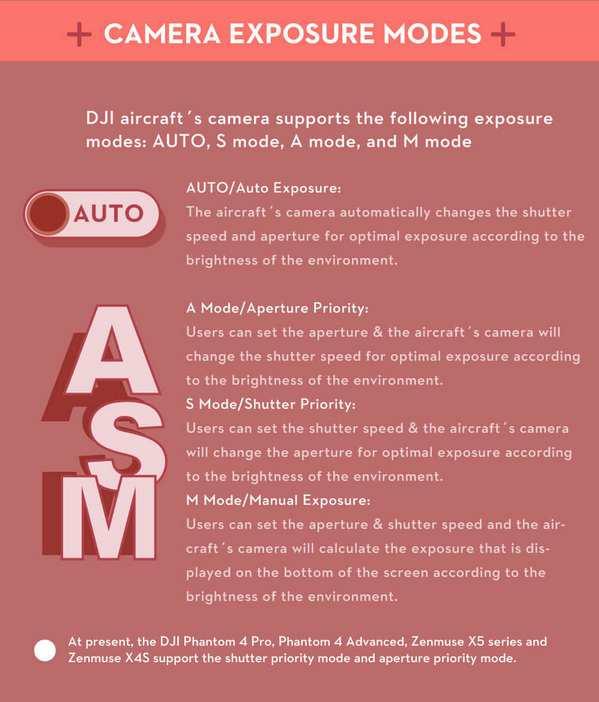
21 8. Camera Settings: This is where you can adjust the following camera settings: Auto: The camera decides what it thinks are the optimal settings for your photo or video. Aperture (A) This controls how much light gets through when you take a picture. This is measured in fstops. A smaller f-stop number means a bigger aperture and so more light comes through, and a bigger f- stop number means a smaller aperture, so less light comes through. In A mode, you can set the Aperture, but other settings will still be set automatically to match exposure. Shutter (S) The Shutter controls for how long light is let into the lenses. To simplify the shutter, a low shutter speed lets more light in and is good for taking pictures in dim lighting while a high shutter speed lets in more light and is good for taking crisp shots of moving objects or people. In S mode, you can set the shutter speed, but other settings will be set automatically to match exposure Manual (M) You can set both Aperture and Shutter manually for maximum control. EV (Exposure Compensation Value): This dial shows you how far away from the recommended settings you are before you take a photo with manual settings. Ideally, you want the EV to read 0 as if it s +2 then your whites will be far too bright and if it s -2 then your picture will be very dark. There are some situations where you might want a high or low EV for example if you are trying to take a picture in a dark environment with a slow shutter speed then you will want a higher EV setting. To learn more Aperture, Shutters & EV check out Drone Camera Settings: All You Need to Know.


22 Drone Camera Settings: All You Need to Know Unfortunately, there s more to a drone s camera than just point and shoot, which of course you can do if you want and for sure you ll get some pretty good photos. But to push on to taking truly spectacular photos and even perhaps reach the heady heights of Ansel Adams or Annie Leibovitz of the photography world. Well then first you have to learn how the myriad of drone camera settings work and what all their strange coded names actually mean. It s a little intimidating at first, but with a bit of study and practice it ll soon become 2 nd nature to you, and you ll be setting your camera up effortlessly to take your prize winning photo with, of course, the help of our drone camera settings tutorial info graphic.
23
24
25

26


27 Now that the arcane mysteries of exposure, aperture, shutter speed, etc. have been unlocked for you, do what any aspiring drone photographer does and practice, practice, practice! Don t forget to share your pictures on SkyPixel or DJI Facebook owners groups and receive some constructive criticism from the photography professionals that frequent those web pages. More drone photography articles: 2017 Best Camera Drones Buying Guide How to Shoot Horizontal Panoramas with your drone Time-Lapse Photography Turn Photos into Hyper-Fast Video Top 10 Aerial Photography Tips 6 Quick Easy Picture Editing Steps to Make Your Photos Look Fantastic

28 Photo Settings: Here you can adjust the way your camera takes pictures.
: If this option is selected then the camera will take three images of the same scene.")
29 Photo: Here you can select the mode for how the pictures are taken. Single Shot: The standard mode, it takes a 1 picture every time you tap the shoot button. HDR Shot (High Dynamic Range): If this option is selected then the camera will take three images of the same scene. One will be underexposed, another overexposed and the last will be properly exposed then it will combine the three images to create a more dynamic JPEG. Multiple: With this mode, the camera will take multiple pictures when you press the shoot button. You might want to use this mode if you are trying to get a shot of a moving subject. AEB (Automatic Exposure Bracketing): This can be set to 3 or 5 shots and works similarly to HDR Shots taking overexposed, underexposed and properly exposed photos. However, in AEB the images are in RAW and not combined as this is up to the user to combine them with image editing software. (Not Spark) Timed Shot: This allows you to set a countdown timer before the shot is taken, it s useful for taking selfies. Pano: Capture a panoramic image quickly. Read this article for more details about Pano mode. Pano has another mode attached to it called Sphere mode; this is where the drone will take multiple shots and stitch them together to make a sphere shaped image. For more details, check out this article. ShallowFocus: This mode allows you to create a depth of field effect in your photo.
30 Image Size: You can choose the size of your picture 4:3 this is the old standard 35mm size that used to be common during the SD era of TVs. 16:9 this is the common size for HD capable devices and 3:2 is the traditional size for printed photos (3:2 P4P). Image Format: In this area, you can choose between taking photos in RAW, JPEG and RAW + JPEG. (NOTE Spark can only take pictures in JPEG) Read this article for a more in-depth look at RAW vs. JPEG.

31 White Balance: This is the process of removing unrealistic color casts so that objects which appear white in person are rendered white in your photo. It is measured in Kelvins. If you have Auto selected, then the camera will decide what the best setting is. You can also choose from a selection of profiles or set it yourself. Colour Temperature Light Source K Candlelight K Tungsten Bulb K Sunrise/Sunset (clear sky) K Fluorescent Lamps K Electronic Flash K Daylight with Clear Sky K Moderately Overcast Sky K Shade or Heavily Overcast Sky
 Contrast controls the strength of the lights and the darks in the picture. (Rectangle) Saturation of colors low saturation makes the photos look dull, and high saturation make the colors pop.")
32 Style: This is where you can configure the sharpness, contrast, and saturation of the images or videos that your drone s camera takes. (Triangle) Digital Sharpness this makes the picture sharper. (Circle) Contrast controls the strength of the lights and the darks in the picture. (Rectangle) Saturation of colors low saturation makes the photos look dull, and high saturation make the colors pop. These can be set in a range of -3 to +3. Color: Here you can set the camera color profile. These settings affect the colors in your photo. D Cinelike and D Log are both designed for taking photos that will be post-processed later on. The rest of the color profiles are ready to go with no post-processing required.

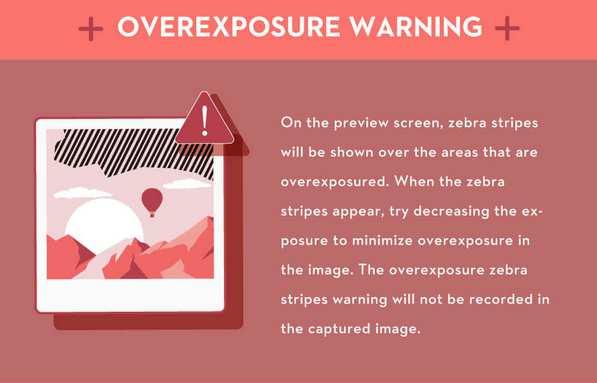
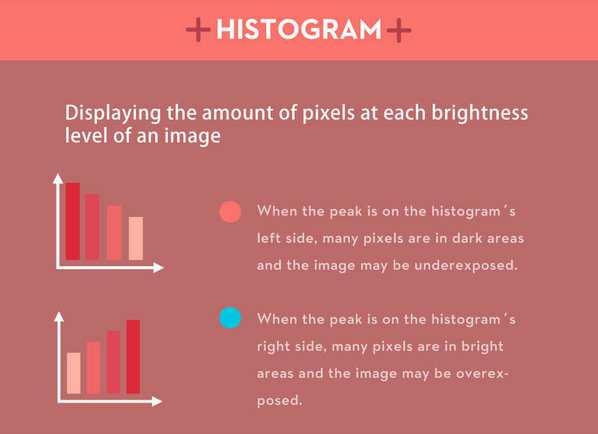
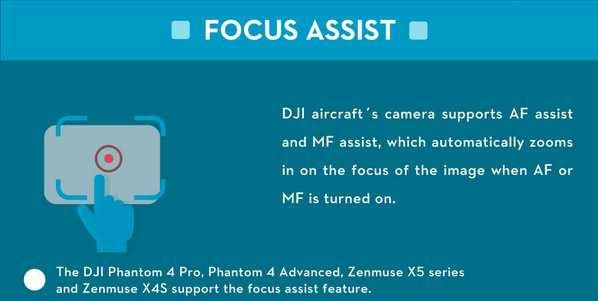
33 Other Camera Options: Here you can turn on and off a variety of settings. The options available are drone dependent. The screenshots used in this section are from the Mavic Pro. Histogram: Turning this on will make a little histogram box appear on the screen. This box will show the exposure of the picture you are going to take. The left side of the graph represents the blacks or shadows, the right-side represents the highlights or the bright areas, and the middle section is the mid tones. For a more in-depth look at this histogram click here. Front LEDs Auto Turn off: If this switch is toggled it means your Front LEDs will turn off when you start recording. Lock Gimbal When Capture: If this is toggled on then the gimbal will try to keep the camera pointing in the same direction when you take a photo. If it is turned off, then the gimbal will follow the movement of the aircraft. Enabled AFC Mode: AFC stands for Auto Focus Continuous, and if this is toggled on then the camera will automatically focus when you start recording. MF Focus Assistant (P4P): If this is toggled it helps you to focus when shooting in the manual camera mode. Mechanical Shutter (P4P + Inspire 2): If this is enabled then it will prevent getting jelly images when taking a photo of a fast movie subject. Portrait Capture (Mavic): Enabling this spins the gimbal into portrait mode. Over Exposure Warning: If you turn this on then the app will tell you when your photo is overexposed. (MAVIC/ Phantom 4 / Inspire 2) Auto Sync HD Photos: If this setting is enabled then the aircraft will stream full resolution pictures taken from the drone to the mobile device during flight.
 that contains information about Altitudes, GPS, ISO, Shutter, Barometer, Home Point")
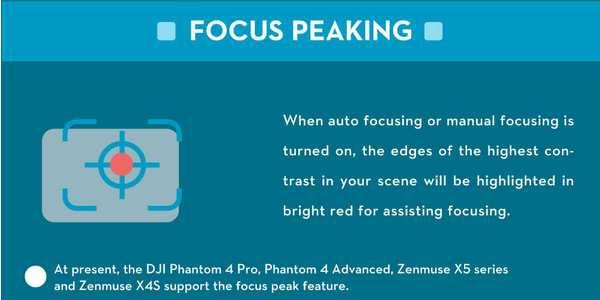
34 Long Exposure Preview: If this is toggled a preview of a long exposure shot will pop up before you take the shot. Video Caption: If this is toggled on then when you take a video the app will make a text-based subtitle file (SRT) that contains information about Altitudes, GPS, ISO, Shutter, Barometer, Home Point GPS coordinates, etc. Grid: Turning this one will bring up a guidelines grid to help you frame your pictures better following the rule of thirds. You can also turn on diagonals to help find your leading lines. Centre Points: Here you can choose the visual style of your center point in the live view. Anti-Flicker: This prevents flicker when recording and it has two options 50 Hz and 60 Hz. These options are region based with Europe being 50 Hz and the US is 60 Hz. File Index Mode: This controls the file numbers assigned to videos and photo you make with your drone. If you set it to continuous, then the number will just keep on going up with every picture or video you take. If it is reset, then the number will start again at 001. Peak Focus Threshold: This adds red lines around edges to indicate focus. You can switch between off/low/normal/high these setting control when the effect activates. Format SD Card: This wipes your SD card s information. Reset Camera Settings: This will reset camera s settings to default if activated.


35 Video Settings: Here you can configure how drone takes videos. Video Size: Here you can choose from a range of resolutions and frames per second. The options you ll see here will depend on what drone you re flying or which camera you have attached to your Inspire 2. Video Format: Here you can choose what file type your video is in. Again, the options you ll see, here, depends on what drone you are flying or which camera you have attached to your Inspire 2.

36 NTSC/PAL: These are formats used for displaying videos. To put it basically, if you re in the Americas, then you ll want it set to NTSC, and the rest of the world uses PAL.

37 9. Intelligent Flight Modes: These modes help you to effortlessly create professional aerial shots that would require practice and training with their help to achieve the same shot. TapFly: With the TapFly feature, you can tap on your mobile device s screen to fly in the designated direction without using the remote controller. The aircraft will automatically avoid obstacles it sees or brake and hover provided the light is sufficient. Make sure the aircraft is at least 6ft (2m) above the ground then In DJI GO 4 select TapFly, read the prompts and then tap once on the target direction and wait for the (GO) icon to appear. Tap again to confirm the selection, and the aircraft will fly in that direction. ActiveTrack: This mode allows you to mark and track a moving object on your mobile device screen. The aircraft will automatically avoid obstacles in its flight path. Make sure the aircraft is at least 6ft (2m) above the ground then In DJI GO 4 select ActiveTrack and then tap once on the subject you want to track then tap Confirm. If the subject is not automatically recognized, drag a box around it. The box will turn green when tracking is in progress. If the box turns red, the object could not be identified, and you should try again. Cinematic Mode: In DJI GO 4 select Cinematic Mode. In Cinematic mode, the braking distance for the aircraft is extended. The aircraft will slow down gently until it stops, keeping footage smooth and stable even if the control inputs are choppy. QuickShot: These are autopilot flight modes that take a 10-second video of a subject that can be viewed, edited, or shared to social media from the playback menu. (Spark & Mavic) Dronie: Fly backward and upward, with the camera locked on your subject. How to use Dronie. Circle: Circle around your subject. How to use Circle. Helix: Fly upward, spiraling around your subject. How to use Helix. Rocket: Ascend with the camera pointing downwards. How to use Rocket. Gesture: If this is enabled, you can use certain gestures to control your aircraft. Please consult your aircraft s manual for more details.
38 How to use Dronie: - You must have a MicroSD memory card installed in the aircraft with sufficient free space, sufficient battery power, a strong GPS signal, and no obstructions. - Select the P-mode. - Take off and hover at least 1.5m high with the desired subject in the camera frame. - Tap the Intelligent Flight Mode / Flight Controller icon. - Tap the QuickShot icon. (Circle with 4 dots icon) - Using one finger, drag a rectangle around your subject. - Tap on the Dronie flight path icon. (45-degree angle icon) - Tap on the Dronie flight path icon, again, to set the flight path distance. (Default: 40m) - When ready, tap on Go. - The aircraft will fly for 10 seconds, backwards, first, then ascend backwards at an angle at no more than 3m/S, then return to its original hover position. The percentage of the flight completed will be shown at the right edge of the display. Tap on the X icon to cancel the flight path have it hover at its current position. How to use Circle: - You must have a MicroSD memory card installed in the aircraft with sufficient free space, sufficient battery power, a strong GPS signal, and no obstructions. - Select the P-mode. - Take off and hover at least 1.5m high with the desired subject in the camera frame. - Tap the Intelligent Flight Mode / Flight Controller icon. - Tap the QuickShot icon. (Circle with 4 dots icon) - Using one finger, drag a rectangle around your subject. - Tap on the Cirle flight path icon. (3/4 clockwise circle icon) - Tap on the Circle flight path icon, again, to set the flight path direction. (Default: Counter- Clockwise) - When ready, tap on Go. - The aircraft will fly in a circle in the direction selected for 360 degrees at no more than 6m/S, then return to its original hover position. The percentage of the flight completed will be shown at the right edge of the display. Tap on the X icon to cancel the flight path have it hover at its current position. How to use Helix: - You must have a MicroSD memory card installed in the aircraft with sufficient free space, sufficient battery power, a strong GPS signal, and no obstructions. - Select the P-mode. - Take off and hover at least 1.5m high with the desired subject in the camera frame. - Tap the Intelligent Flight Mode / Flight Controller icon. - Tap the QuickShot icon. (Circle with 4 dots icon) - Using one finger, drag a rectangle around your subject. - Tap on the Helix flight path icon. (Counter-clockwise corkscrew icon) - Tap on the selected Helix flight path icon, again, to set the flight path distance and direction. (Default: 40m & Counter-clockwise) - When ready, tap on Go. - The aircraft will fly in a rising corkscrew in the direction selected for 10 seconds at no more than 6m/S, then return to its original hover position. The percentage of the flight completed will be shown at the right edge of the display. Tap on the X icon to cancel the flight path have it hover at its current position.
39 How to use Rocket: - You must have a MicroSD memory card installed in the aircraft with sufficient free space, sufficient battery power, a strong GPS signal, and no obstructions. - Select the P-mode. - Take off and hover at least 1.5m high with the desired subject in the camera frame. - Tap the Intelligent Flight Mode / Flight Controller icon. - Tap the QuickShot icon. (Circle with 4 dots icon) - Using one finger, drag a rectangle around your subject. - Tap on the Rocket flight path icon. (Vertical line icon) - Tap on the Rocket flight path icon, again, to set the flight path distance. (Default: 40m) - When ready, tap on Go. - The aircraft will fly at an ascending angle to position itself directly above the subject, then fly straight up accelerating for 10 seconds at no more than 2m/S, then return to its original hover position. The percentage of the flight completed will be shown at the right edge of the display. Tap on the X icon to cancel the flight path have it hover at its current position. How to use Gesture on Phantom 4 Pro: - You must have a MicroSD memory card installed in the aircraft with sufficient free space, sufficient battery power, a strong GPS signal, and no obstructions. - Select the P-mode. - Set the Camera to Photo Mode. - Take off and hover at least 2m high with the camera framed as desired. - Tap the Intelligent Flight Mode / Flight Controller icon. - Tap the Gesture icon. (Frame around a person icon) - Move into the view of the camera. The front, 고ј red LEDs should be flashing slowly. - Raise both arms and wave them back and forth to allow the camera to set the focal point. The front, red LEDs will flash twice. - Starting with your arms well apart, bring both hands together to form a camera frame in front of your face. The front, red LEDs should be flashing rapidly. - The camera will take a still picture in 3 seconds. - Tap on the X icon to cancel the flight path have it hover at its current position.

40 Tripod Mode: In Tripod Mode, the maximum flight speed is limited to 2.2 mph (3.6 kph). Responsiveness to stick movements is also reduced for smoother more controlled movements. This mode can only be used when lighting conditions are good, and the drone has a strong GPS signal. Waypoints: Record a flight path, then the aircraft will fly along the same path repeatedly while you control the camera and orientation. The flight path can be saved and reused in the future. (Not available on Spark) Follow Me: A virtual tether is created between the aircraft and the mobile device so that the aircraft can track your movement as you move. Note that Follow Me performance is subject to GPS accuracy on the mobile device. (Not available on Spark) ⒐ј Home Lock: If this is enabled then when you pull the pitch stick backward the aircraft will move towards its recorded Home Point. (Not available on Spark) Course Lock: If this is enabled it will lock the current nose direction as the aircrafts forward direction. The aircraft will move in the locked direction regardless of its orientation (yaw angle). (Not available on Spark) Draw: In this mode, the aircraft will fly along a flight path drawn on-screen. As it flies, it will automatically brake and hover when it sees obstacles provided that the lighting is adequate no darker than 300 lux nor brighter than 10,000 lux. To use this mode make sure the aircraft is at least 2m (6ft) above the ground, select the mode, next draw a line on the screen to create a path. Finally, Tap GO and the aircraft will fly along the path. (Phantom 4 Pro/A & Inspire 2) Terrain Follow Mode: In this mode, the aircraft uses its Downward Vision System to maintain height above ground between 1 and 10 meters. This mode is designed for use on grassland sloped ay no more than 20. When this mode is turned on the aircraft will record its current height and maintain it as it ascends the slopes. NOTE: the aircraft will not descend on downwards slopes. To use this mode, tap (Intelligent Flight Icon) (Phantom 4 Pro/A & Mavic & Inspire 2 ) Spotlight Pro: In this mode allows a single pilot to capture complex, dramatic images. The gimbal will automatically adjust to keep the camera pointing at the subject. Quick Mode: use your finger to draw a square around the object to begin tracking Composition Mode: Use your finger to draw a square. When the subject enters the square, press the C2 button to begin tracking. Press the C2 button again to stop tracking. In Free Mode: you can control the aircraft s heading independently of the camera. In Follow Mode: the aircraft heading will be the same as that of the camera. (Inspire 2)

41 10. Miscellaneous: Editor: An intelligent editor is built into DJI Go 4. After recording several video clips and downloading them to your mobile device, go to the editor screen on your home screen. You can then select a template and a specified number of clips which are automatically combined to create a short film that can be shared immediately. SkyPixel: View and share photos and videos on DJI s SkyPixel website the webs largest platform for drone media sharing. Me: If you already have a DJI account, you will be able to participate in forum discussions, and share your creations with the community. For more DJI tips and tutorials, find us on: DJI Facebook Support DJI Twitter Support
Drive Mode. Details for each of these Drive Mode settings are discussed below.
 Chapter 4: Shooting Menu 67 When you highlight this option and press the Center button, a menu appears at the left of the screen as shown in Figure 4-20, with 9 choices represented by icons: Single Shooting,
Mapping with the Phantom 4 Advanced & Pix4Dcapture Jerry Davis, Institute for Geographic Information Science, San Francisco State University
 Mapping with the Phantom 4 Advanced & Pix4Dcapture Jerry Davis, Institute for Geographic Information Science, San Francisco State University The DJI Phantom 4 is a popular, easy to fly UAS that integrates
Free Flight Mapping: Pix4Dcapture & dji Spark Jerry Davis, SFSU Institute for Geographic Information Science
 Free Flight Mapping: Pix4Dcapture & dji Spark Jerry Davis, SFSU Institute for Geographic Information Science The best way to do mapping is using a GPS guided grid pattern programmed by an app like Tower
E-520. Built-in image stabiliser for all lenses. Comfortable Live View thanks to high speed contrast AF** 100% D-SLR quality
 E-520 Built-in image stabiliser for all lenses Excellent dust reduction system Professional functions 10 Megapixel Live MOS sensor Comfortable Live View thanks to high speed contrast AF** 100% D-SLR quality
Impact With Smartphone Photography. Smartphone Camera Handling. A Smartphone for Serious Photography?
 A Smartphone for Serious Photography? DSLR technically superior but photo quality depends on technical skill, creative vision Smartphone cameras can produce remarkable pictures always at ready After all
AF Area Mode. Face Priority
 Chapter 4: The Shooting Menu 71 AF Area Mode This next option on the second screen of the Shooting menu gives you several options for controlling how the autofocus frame is set up when the camera is in
LITCHI for ios TABLE OF CONTENTS
 LITCHI for ios Litchi is a feature-rich control program for the DJI Phantom 3 Advanced & Professional, Phantom 4, and Inspire 1. Litchi offers a variety of unique capabilities to help you get the most
E-420. Exceptional ease of use. 100% D-SLR quality. 10 Megapixel Live MOS sensor Shadow Adjustment Technology
 E-420 World's most compact D- SLR* Comfortable viewing with Autofocus Live View 6.9cm / 2.7'' HyperCrystal II LCD Face Detection for perfectly focused and exposed faces Exceptional ease of use 100% D-SLR
First Things First 1) Charge the Battery
 Charge the Battery") 1 First Things First 1) Charge the Battery 2) Turn Off Notification Sounds Recommended: Canon BP-828 Optional 3-4hr Battery Touch FUNC Touch MENU Touch Wrench Folder Scroll to Notification Sounds & Touch
1 First Things First 1) Charge the Battery 2) Turn Off Notification Sounds Recommended: Canon BP-828 Optional 3-4hr Battery Touch FUNC Touch MENU Touch Wrench Folder Scroll to Notification Sounds & Touch
Aperture & Shutter Speed Review
 Aperture & Shutter Speed Review Light Meters Your camera s light meter measures the available light in a scene. It does so by averaging all of the reflected light in the image to find 18% gray. By metering
E-420. Exceptional ease of use. 100% D-SLR quality. 10 Megapixel Live MOS sensor Shadow Adjustment Technology
 E-420 World's most compact D- SLR* Comfortable viewing with Autofocus Live View 6.9cm / 2.7'' HyperCrystal II LCD Face Detection for perfectly focused and exposed faces Exceptional ease of use 100% D-SLR
Dust reduction filter. Live View
 E P1 14-42mm Kit Art Filters, Multi Exposure, Multi aspect High performance built in image stabiliser Real time effect monitoring Multiple exposure function with LCD monitor display of current view on
PARROT SKYCONTROLLER 2 PARROT COCKPITGLASSES 2 2 POWER BATTERIES
 F P V P A C K L I M I T L E S S F R E E D O M PARROT SKYCONTROLLER 2 PARROT COCKPITGLASSES 2 2 POWER BATTERIES PARROT BEBOP 2 POWER Parrot BEBOP 2 POWER is a compact drone equipped with cutting-edge technology,
The Essential Guide To Advanced EOS Features. Written by Nina Bailey. Especially for Canon EOS cameras
 The Essential Guide To Advanced EOS Features Written by Nina Bailey Especially for Canon EOS cameras Introduction 2 Written, designed and images by Nina Bailey www.eos-magazine.com/ebooks/es/ Produced
Dust reduction filter. Live View
 E P2 Art Filters, Multi Exposure, Multi aspect Tiltable, high contrast and high resolution electronic viewfinder* Accessory Port High Speed 12.3 Megapixel Live MOS sensor High performance built in Real
Aperture & Shutter Speed. Review
 Aperture & Shutter Speed Review Light Meters Your camera s light meter measures the available light in a scene. It does so by averaging all of the reflected light in the image to find 18% gray. By metering
FOCUS, EXPOSURE (& METERING) BVCC May 2018
 BVCC May 2018") FOCUS, EXPOSURE (& METERING) BVCC May 2018 SUMMARY Metering in digital cameras. Metering modes. Exposure, quick recap. Exposure settings and modes. Focus system(s) and camera controls. Challenges & Experiments.
FOCUS, EXPOSURE (& METERING) BVCC May 2018 SUMMARY Metering in digital cameras. Metering modes. Exposure, quick recap. Exposure settings and modes. Focus system(s) and camera controls. Challenges & Experiments.
Aperture & Shutter Speed Review
 Aperture & Shutter Speed Review Light Meters Your camera s light meter measures the available light in a scene. It does so by averaging all of the reflected light in the image to find 18% gray. By metering
BASIC IMAGE RECORDING
 BASIC IMAGE RECORDING BASIC IMAGE RECORDING This section describes the basic procedure for recording an image. Recording a Simple Snapshot The camera s Program AE Mode (P Mode) is for simple snapshots.
Case Air Wireless TETHERING AND CAMERA CONTROL SYSTEM
 Case Air Wireless TETHERING AND CAMERA CONTROL SYSTEM PRODUCT MANUAL CAWTS03 v3.16 Apple ios ABOUT CASE AIR TABLE OF CONTENTS FEATURES ACCESSORIES The Case Air Wireless Tethering System connects and transfers
L I F E L O N G L E A R N I N G C O L L A B O R AT I V E - FA L L S N A P I X : P H O T O G R A P H Y
 L I F E L O N G L E A R N I N G C O L L A B O R AT I V E - F A L L 2 0 1 8 SNAPIX: PHOTOGRAPHY SNAPIX OVERVIEW Introductions Course Overview 2 classes on technical training 3 photo shoots Other classes
These aren t just cameras
 Roger Easley 2016 These aren t just cameras These are computers. Your camera is a specialized computer Creates files of data Has memory Has a screen display Has menus of options for you to navigate Your
The Pro Masterpiece with world's fastest AF* and built-in IS.
 E-30 Art Filters, Multi Exposure, Wireless flash, Multiaspect Fully biaxial high-speed 11 point AF system High Speed 12.3 Megapixel Live MOS sensor Live View with multi-angle LCD 5fps sequential shooting
CELL PHONE PHOTOGRAPHY
 CELL PHONE PHOTOGRAPHY Understanding of how current phone cameras are different due to advanced technology What this presentation will provide What features are available for control of your phone photography
<Motion Panorama> 180 Vertical : 2160 x 9600 Horizontal : 9600 x Vertical : 2160 x 6400 Horizontal : 6400 x 1440
 FUJIFILM X-T10 Spec Sheet Model name FUJIFILM X-T10 Number of effective pixels 16.3 million pixels Image sensor 23.6mm x 15.6mm (APS-C) X-Trans CMOS II with primary color filter Total number of pixels:
Art Filters, Multi Exposure, Wireless flash, Multiaspect
 E-620 The world s smallest and lightest D-SLR* with Builtin Image Stabilisation and a portable creative studio! High Speed 12.3 Megapixel Live MOS sensor 7 point AF system High-performance built-in image
BASIC IMAGE RECORDING
 BASIC IMAGE RECORDING BASIC IMAGE RECORDING This section describes the basic procedure for recording an image. Recording an Image Aiming the Camera Use both hands to hold the camera still when shooting
Digital camera modes explained: choose the best shooting mode for your subject
 Digital camera modes explained: choose the best shooting mode for your subject On most DSLRs, the Mode dial is split into three sections: Scene modes (for doing point-and-shoot photography in specific
A Beginner s Guide To Exposure
 A Beginner s Guide To Exposure What is exposure? A Beginner s Guide to Exposure What is exposure? According to Wikipedia: In photography, exposure is the amount of light per unit area (the image plane
CamFi TM. CamFi User Guide. CamFi Remote Camera Controller. CamFi Limited Copyright 2015 CamFi. All Rights Reserved.
 CamFi TM CamFi User Guide CamFi Remote Camera Controller CamFi Limited Copyright 2015 CamFi. All Rights Reserved. Contents Chapter 1:CamFi at glance 1 Packaging List 1 CamFi Overview 1 Chapter 2:Getting
Digital Director Troubleshooting
 Digital Director Troubleshooting Please find below the most common FAQs to assist in the understanding and use of the product. For details related to each specific camera model, refer to the Compatibility
Art Filters, Multi Exposure, Wireless flash, Multiaspect. Filter
 E-620 The world s smallest and lightest D-SLR* with Builtin Image Stabilisation and a portable creative studio! High Speed 12.3 Megapixel Live MOS sensor 7 point AF system High-performance built-in image
OTHER RECORDING FUNCTIONS
 OTHER RECORDING FUNCTIONS This chapter describes the other powerful features and functions that are available for recording. Exposure Compensation (EV Shift) Exposure compensation lets you change the exposure
Owner s Manual BL
 Owner s Manual BL00004854-200 Introduction ii About This Manual This manual contains instructions for the EF-X500, a powerful, multi-functional flash unit from FUJIFILM. When using the flash, refer to
Basic Camera Craft. Roy Killen, GMAPS, EFIAP, MPSA. (c) 2016 Roy Killen Basic Camera Craft, Page 1
 2016 Roy Killen Basic Camera Craft, Page 1") Basic Camera Craft Roy Killen, GMAPS, EFIAP, MPSA (c) 2016 Roy Killen Basic Camera Craft, Page 1 Basic Camera Craft Whether you use a camera that cost $100 or one that cost $10,000, you need to be able
Basic Camera Craft Roy Killen, GMAPS, EFIAP, MPSA (c) 2016 Roy Killen Basic Camera Craft, Page 1 Basic Camera Craft Whether you use a camera that cost $100 or one that cost $10,000, you need to be able
Sony A6000. Custom Setup Suggestions A professional s perspective
 Sony A6000 Custom Setup Suggestions A professional s perspective Community Support Facebook Google+ Flickr Contents Meet the Author Why customise your A6000 camera? Getting Started Camera Settings Drive
gfm-app.com User Manual
 gfm-app.com User Manual 03.07.16 CONTENTS 1. MAIN CONTROLS Main interface 3 Control panel 3 Gesture controls 3-6 2. CAMERA FUNCTIONS Exposure 7 Focus 8 White balance 9 Zoom 10 Memory 11 3. AUTOMATED SEQUENCES
èõ Changing Recording Modes Text Mode Continuous Shooting Mode Changing Flash Modes Flash Off Mode Auto Mode...
 3 ADVANCED SHOOTING Chapter ëêå@å@ èõ Changing Recording Modes... 52 Text Mode... 52 Continuous Shooting Mode... 53 Changing Flash Modes... 55 Flash Off Mode... 56 Auto Mode... 57 Forced Flash Mode...
Camera Exposure Modes
 What is Exposure? Exposure refers to how bright or dark your photo is. This is affected by the amount of light that is recorded by your camera s sensor. A properly exposed photo should typically resemble
OTHER RECORDING FUNCTIONS
 OTHER RECORDING FUNCTIONS This chapter describes the other powerful features and functions that are available for recording. Exposure Compensation (EV Shift) Exposure compensation lets you change the exposure
ISO 200 1/640 sec. f/ mm lens
 4 ISO 200 1/640 sec. f/6.3 70 200mm lens Moving Target The Tricks to Shooting Sports and More Now that you have a solid understanding of the Basic and Creative zones, it is time to put all of that knowledge
Case Air Wireless TETHERING AND CAMERA CONTROL SYSTEM
 Case Air Wireless TETHERING AND CAMERA CONTROL SYSTEM PRODUCT MANUAL CAWTS03 v3.14 Windows ABOUT CASE AIR The Case Air Wireless Tethering System connects and transfers images instantly from your camera
Mavic 2. Mavic 2 & Accessories Announcement. See the Bigger Picture. Dear dealers, 31 min flight time 2. 8 km 1080p Video Transmission 1
 Mavic 2 & Accessories Announcement Dear dealers, With pleasure, we are launching Mavic 2 and its accessories. Our dream has always been to make a drone that exists where engineering, technology, and the
system* 5fps sequential shooting with 17 image RAW buffer High Speed 10.1 Megapixel Live MOS sensor Excellent variety of digital lenses Live View
 E-3 Professional working tool Fully biaxial high-speed 11 point AF system High-performance built-in image stabiliser Qualified image processing with new TruePic III World's fastest auto focus system* 5fps
Winston C Hall Tuner Photography
 D4s Custom Banks Settings Shooting and Custom Setting Menus Created by: Winston C Hall Tuner Photography 714 D4s Shooting and Custom Settings Banks This guide is an outline of my recommendations for the
TG 870 White. The advanced outdoor hero
 TG 870 White Waterproof to 15m**, shockproof to 2.1m***, crushproof to 100kg**** and freezeproof to 10 C 16 Megapixel backlit CMOS 7.6cm/3.0" 920,000 dot tilting LCD Hybrid (Lens Shift + Digital) 5 Axis
Introduction... 1 Part I: Fast Track to Super Snaps Part II: Taking Creative Control Part III: After the Shot
 Contents at a Glance Introduction... 1 Part I: Fast Track to Super Snaps... 5 Chapter 1: Getting Up and Running...7 Chapter 2: Reviewing Five Essential Picture-Taking Options...39 Part II: Taking Creative
Unbox your professional photography with Galaxy S8 & S8+ camera
 Unbox your professional photography with Galaxy S8 & S8+ camera Duration : 2 Hours To save the environment by reducing paper wastage, physical handouts will not be provided You can download at this link
TG 5 Red. Harshest conditions. Exceptional shots.
 TG 5 Red Waterproof to 15m**, shockproof to 2.1m***, crushproof to 100kg**** and freezeproof to 10 C Super bright 1:2.0 4.9 wide aperture high speed lens for shooting with fast shutter speeds TruePic VIII
Photography Help Sheets
 Photography Help Sheets Phone: 01233 771915 Web: www.bigcatsanctuary.org Using your Digital SLR What is Exposure? Exposure is basically the process of recording light onto your digital sensor (or film).
Photoshop Elements Hints by Steve Miller
 2015 Elements 13 A brief tutorial for basic photo file processing To begin, click on the Elements 13 icon, click on Photo Editor in the first box that appears. We will not be discussing the Organizer portion
OUTDOOR PORTRAITURE WORKSHOP
 OUTDOOR PORTRAITURE WORKSHOP SECOND EDITION Copyright Bryan A. Thompson, 2012 bryan@rollaphoto.com Goals The goals of this workshop are to present various techniques for creating portraits in an outdoor
ONE OF THE MOST IMPORTANT SETTINGS ON YOUR CAMERA!
 Chapter 4-Exposure ONE OF THE MOST IMPORTANT SETTINGS ON YOUR CAMERA! Exposure Basics The amount of light reaching the film or digital sensor. Each digital image requires a specific amount of light to
CHAPTER 7 - HISTOGRAMS
 CHAPTER 7 - HISTOGRAMS In the field, the histogram is the single most important tool you use to evaluate image exposure. With the histogram, you can be certain that your image has no important areas that
Produce stunning. Pro photographer Chris Humphreys guides you through HDR and how to create captivating natural-looking images
 Masterclass: In association with Produce stunning HDR images Pro photographer Chris Humphreys guides you through HDR and how to create captivating natural-looking images 8 digital photographer 45 masterclass4produce
Name Digital Imaging I Chapters 9 12 Review Material
 Name Digital Imaging I Chapters 9 12 Review Material Chapter 9 Filters A filter is a glass or plastic lens attachment that you put on the front of your lens to protect the lens or alter the image as you
Sony PXW-FS7 Guide. October 2016 v4
 Sony PXW-FS7 Guide 1 Contents Page 3 Layout and Buttons (Left) Page 4 Layout back and lens Page 5 Layout and Buttons (Viewfinder, grip remote control and eye piece) Page 6 Attaching the Eye Piece Page
New Features Guide. Version 3.00
 New Features Guide Version 3.00 Features added or changed as a result of firmware updates may no longer match the descriptions in the documentation supplied with this product. Visit our website for information
D-Movie Setting Guide
 D-Movie Setting Guide En Table of Contents Workflow Making Movies: Workflow...4 Buttons and Icons Frequently-Used Controls...6 The Live View Display...7 The Live View Display... 7 The Information Display:
Photography Basics. Exposure
 Photography Basics Exposure Impact Voice Transformation Creativity Narrative Composition Use of colour / tonality Depth of Field Use of Light Basics Focus Technical Exposure Courtesy of Bob Ryan Depth
Exploring the Nikon D5300
 CHAPTER 1 Exploring the Nikon D5300 Nikon s 5000 series of cameras occupy a special niche within the Nikon line of cameras. The D5300 is the only camera in Nikon s current lineup to feature the articulating
Case Air Wireless TETHERING AND CAMERA CONTROL SYSTEM
 Case Air Wireless TETHERING AND CAMERA CONTROL SYSTEM PRODUCT MANUAL CAWTS03 v3.13 Android ABOUT CASE AIR The Case Air Wireless Tethering System connects and transfers images instantly from your camera
! 1! Digital Photography! 2! 1!
 ! 1! Digital Photography! 2! 1! Summary of results! Field of view at a distance of 5 meters Focal length! 20mm! 55mm! 200mm! Field of view! 6 meters! 2.2 meters! 0.6 meters! 3! 4! 2! ! 5! Which Lens?!
Until now, I have discussed the basics of setting
 Chapter 3: Shooting Modes for Still Images Until now, I have discussed the basics of setting up the camera for quick shots, using Intelligent Auto mode to take pictures with settings controlled mostly
Aperture Priority Mode
 Chapter 3: Shooting Modes for Still Images 23 The Program Shift function is available only in Program mode; it works as follows. Once you have aimed the camera at your subject, the camera displays its
Creating Stitched Panoramas
 Creating Stitched Panoramas Here are the topics that we ll cover 1. What is a stitched panorama? 2. What equipment will I need? 3. What settings & techniques do I use? 4. How do I stitch my images together
TAKING GREAT PICTURES. A Modest Introduction
 TAKING GREAT PICTURES A Modest Introduction HOW TO CHOOSE THE RIGHT CAMERA EQUIPMENT WE ARE NOW LIVING THROUGH THE GOLDEN AGE OF PHOTOGRAPHY Rapid innovation gives us much better cameras and photo software...
D750 Settings
 D750 Settings 12.04.14 PLAYBACK MENU Delete Playback folder ALL Hide image Playback display options > Additional photo info > Highlights Shooting data Overview Copy images(s) Image review - OFF After delete
D850 Settings
 D850 Settings 10.03.17 PLAYBACK MENU Delete Playback folder ALL Hide image Playback display options > Additional photo info > None Highlights Shooting data Overview Copy images(s) Image review - OFF After
Acknowledgments 13 Introduction 14 Chapter 1: Preliminary Setup Chapter 2: Basic Operations Chapter 3: Th e Shooting Modes
 Contents Acknowledgments 13 Introduction 14 Chapter 1: Preliminary Setup 17 Setting Up the Camera 17 Charging and Inserting the Battery 17 Inserting the Memory Card 19 Setting the Language, Date, and Time
Make the Most of Your ipad s Camera Class Handouts
 Make the Most of Your ipad s Camera Class Handouts Presented by: Ashlee Tominey Adult Services Librarian atominey@clpl.org (815) 526-5152 Not sure of your ipad model? You can identify your ipad model at
CAMERA BASICS. Stops of light
 CAMERA BASICS Stops of light A stop of light isn t a quantifiable measurement it s a relative measurement. A stop of light is defined as a doubling or halving of any quantity of light. The word stop is
Dust reduction filter. Excellent variety of digital lenses. Live View
 E-5 Professional working tool Fully biaxial high-speed 11 point AF system High Speed 12.3 Megapixel Live MOS sensor High-performance built-in image stabiliser Splashproof magnesium alloy body Unique dust
Case Air Wireless TETHERING AND CAMERA CONTROL SYSTEM
 Case Air Wireless TETHERING AND CAMERA CONTROL SYSTEM PRODUCT MANUAL CAWTS03 v3.13 Apple ios ABOUT CASE AIR The Case Air Wireless Tethering System connects and transfers images instantly from your camera
DIGITAL PHOTOGRAPHY CAMERA MANUAL
 DIGITAL PHOTOGRAPHY CAMERA MANUAL TABLE OF CONTENTS KNOW YOUR CAMERA...1 SETTINGS SHUTTER SPEED...2 WHITE BALANCE...3 ISO SPEED...4 APERTURE...5 DEPTH OF FIELD...6 WORKING WITH LIGHT CAMERA SETUP...7 LIGHTING
Photomatix Light 1.0 User Manual
 Photomatix Light 1.0 User Manual Table of Contents Introduction... iii Section 1: HDR...1 1.1 Taking Photos for HDR...2 1.1.1 Setting Up Your Camera...2 1.1.2 Taking the Photos...3 Section 2: Using Photomatix
One Week to Better Photography
 One Week to Better Photography Glossary Adobe Bridge Useful application packaged with Adobe Photoshop that previews, organizes and renames digital image files and creates digital contact sheets Adobe Photoshop
A3 Pro INSTRUCTION MANUAL. Oct 25, 2017 Revision IMPORTANT NOTES
 A3 Pro INSTRUCTION MANUAL Oct 25, 2017 Revision IMPORTANT NOTES 1. Radio controlled (R/C) models are not toys! The propellers rotate at high speed and pose potential risk. They may cause severe injury
How to combine images in Photoshop
 How to combine images in Photoshop In Photoshop, you can use multiple layers to combine images, but there are two other ways to create a single image from mulitple images. Create a panoramic image with
DSLR Essentials: Class Notes
 DSLR Essentials: Class Notes The digital SLR has seen a surge in popularity in recent years. Many are enjoying the superior photographic experiences provided by these feature packed cameras. Interchangeable
Photography Basics. The Media Co-op. An introduction to taking great photographs - print edition
 Photography Basics An introduction to taking great photographs - print edition For anyone who has little or no photographic experience and wants to take photographs for journalistic, activist or documentary
Aperture. The lens opening that allows more, or less light onto the sensor formed by a diaphragm inside the actual lens.
 PHOTOGRAPHY TERMS: AE - Auto Exposure. When the camera is set to this mode, it will automatically set all the required modes for the light conditions. I.e. Shutter speed, aperture and white balance. The
Specifications for Fujifilm FinePix F850EXR 16MP Digital Camera
 Specifications for Fujifilm FinePix F850EXR 16MP Digital Camera Model name FinePix F850EXR Number of effective pixels 16.0 million pixels Image sensor 1/2-inch EXR CMOS with primary color filter Storage
Detrum GAVIN-8C Transmitter
 Motion RC Supplemental Guide for the Detrum GAVIN-8C Transmitter Version 1.0 Contents Review the Transmitter s Controls... 1 Review the Home Screen... 2 Power the Transmitter... 3 Calibrate the Transmitter...
High Dynamic Range Photography
 JUNE 13, 2018 ADVANCED High Dynamic Range Photography Featuring TONY SWEET Tony Sweet D3, AF-S NIKKOR 14-24mm f/2.8g ED. f/22, ISO 200, aperture priority, Matrix metering. Basically there are two reasons
Photo Editing in Mac and ipad and iphone
 Page 1 Photo Editing in Mac and ipad and iphone Switching to Edit mode in Photos for Mac To edit a photo you ll first need to double-click its thumbnail to open it for viewing, and then click the Edit
f= mm, mm (35mm format equivalent) Full-aperture F1.8 (Wide) - F4.9 (Telephoto) Constitution
 Full-aperture F1.8 (Wide) - F4.9 (Telephoto) Constitution") Specications Model name FUJIFILM XQ2 Number of effective pixels 12.0 million pixels Image sensor 2/3-inch X-Trans CMOS Ⅱ with primary color filter Total number of Storage media Internal memory (approx.
Specications Model name FUJIFILM XQ2 Number of effective pixels 12.0 million pixels Image sensor 2/3-inch X-Trans CMOS Ⅱ with primary color filter Total number of Storage media Internal memory (approx.
Photographing the Night Sky
 JANUARY 20, 2018 ADVANCED Photographing the Night Sky Featuring STEVE HEINER, DIANA ROBINSON, PETE SALOUTOS & DEBORAH SANDIDGE Deborah Sandidge Nikon D3, 16mm lens, 30 sec., f/2.8. Image is one of a series
Case Air Wireless TETHERING AND CAMERA CONTROL SYSTEM
 Case Air Wireless TETHERING AND CAMERA CONTROL SYSTEM PRODUCT MANUAL CAWTS03 v3.13 Mac OS ABOUT CASE AIR The Case Air Wireless Tethering System connects and transfers images instantly from your camera
Specifications for Fujifilm FinePix S MP Digital Camera
 Specifications for Fujifilm FinePix S8200 16.2MP Digital Camera Model name FinePix S8200, S8300 Number of effective pixels *1 16.2 million pixels Image sensor 1/2.3-inch CMOS with primary color filter
Photographing Waterfalls
 Photographing Waterfalls Developed and presented by Harry O Connor oconnorhj@yahoo.com July 26, 2017* All photos by Harry O Connor * Based on May 2012 topic Introduction Waterfall photographs are landscapes
PTZOptics Camera Settings Guide Now includes Color Correction & Low Light Setup Guides. Updated: July 2018
 PTZOptics Camera Settings Guide Now includes Color Correction & Low Light Setup Guides Updated: July 2018 The shutter speed, aperture and gain (ISO) are commonly referred to as the most important camera
230 Photographer s Guide to the Nikon Coolpix P610. GPS log creating Grid displaying in shooting mode 114,
 Index A AC adapter Nikon model EH-67A 218 219 Active D-Lighting menu option 99 100 incompatibility with other settings 101 Adobe Bridge CC software reading location data with 164 Adobe Photoshop Elements
Capturing Realistic HDR Images. Dave Curtin Nassau County Camera Club February 24 th, 2016
 Capturing Realistic HDR Images Dave Curtin Nassau County Camera Club February 24 th, 2016 Capturing Realistic HDR Images Topics: What is HDR? In Camera. Post-Processing. Sample Workflow. Q & A. Capturing
Nikon Z6 / Z7 Settings
 Nikon Z6 / Z7 Settings 11.22.2018 PLAYBACK MENU Delete Playback folder ALL Playback display options > Additional photo info > Highlights Shooting data Overview None Image review - OFF After delete > Continue
PHOTOGRAPHER S GUIDE TO THE PANASONIC LUMIX LX7
 PHOTOGRAPHER S GUIDE TO THE PANASONIC LUMIX LX7 In Intelligent Auto, Creative Control, and Scene shooting modes, ISO is set to Auto and the ISO button has no effect for controlling this setting. You also
THE DIFFERENCE MAKER COMPARISON GUIDE
 THE DIFFERENCE MAKER D850 vs D810 Feature Set D850 Resolution 45.7 Megapixels D810 ISO Range 99 Cross Type AF Points Cross type AF points +++++++++++++++++++++++++++++++++++ +++++++++++++++++++++++++++++++++++
With, you have chosen the finest, quietest, and most portable flying 4K HDR camera, you can use everywhere on the go, anytime.
 With, you have chosen the finest, quietest, and most portable flying 4K HDR camera, you can use everywhere on the go, anytime. We strongly recommend you read the following information and instructions
Interchangeable Lens Digital Camera
 4-183-855-14(1) Interchangeable Lens Digital Camera α Handbook Menu Index 2010 Sony Corporation GB NEX-3/NEX-5/NEX-5C Notes on using the camera How to use this handbook Click on a button at upper right
Mastering the EOS 800D
 Especially written for Canon EOS users A simple, modern approach to mastering all the advanced features on your Canon EOS 800D camera which allows you to take even better images Mastering the EOS 800D