Fly Elise-ng Grasstrook HG Eindhoven The Netherlands Web: elise-ng.net Tel: +31 (0)
|
|
|
- Baldwin Montgomery
- 6 years ago
- Views:
Transcription
40 7114293 Fly Elise-ng Immersive Calibration PRO Step-By Single Camera Copyright 2012/2017 Fly Elise-ng, All")
1 Fly Elise-ng Grasstrook HG Eindhoven The Netherlands Web: elise-ng.net Tel: +31 (0) Fly Elise-ng Immersive Calibration PRO Step-By Single Camera Copyright 2012/2017 Fly Elise-ng, All Rights Reserved 1
2 1 Introduction Configure the PC displays Start and configure the projectors setup Camera selection Camera position and camera properties Camera masking Projector scanning configuration Warp setup Blend setup Load and use calibration results
3 1 Introduction This is a 10 minutes step-by-step guide for setting-up a seamless immersive projection using any type of continuous projection screen surface with one or more overlapping projectors. The calibration produces perfectly aligned and geometrically correct image by taking into account the projector positions and the screen surface. At the end of the calibration, Immersive Calibration PRO exports the warping and blending configuration that can be loaded and used in Immersive Display PRO for warping and blending the PC output image to get one seamless display. For this calibration one web cam is needed. The camera needs to be positioned so that the camera can capture and see the complete projection screen including the projectors images on the screen. Because of this, this Single Camera calibration method is most suitable for calibration of multi-projector setups where the angle (field of view) of the projection screen does not exceed 160 degrees and the complete screen can be seed in the camera view. The Single Camera calibration is usable for creating: - Game setups with single game camera view - Video shows and presentations - Windows 7/8/10 Desktop presentations - Power Point and other interactive presentations - Touch display walls and interactive floors. - Etc For the purpose of this step-by-step guide we will use a cylindrical projection screen with the following parameters: horizontal angle 120 degrees, height 1.5 meters and radius 2.0 meters (diameter 40 meters). The 3 BenQ 1024x768 projectors are positioned in such a way that the complete projection screen is covered by a projection images from projectors and that the projector images overlap by about 15%. A Logitech Webcam PRO 9000 HD camera is positioned in front of the projection screen and can capture the complete screen. 3

4 Note: For the best calibration results with this Single Camera calibration method it is important that the projectors are positioned in such a way that the complete projector image overshoots the screen edges. This Single Camera calibration method does not require the projection screen edges to be marked. During the calibration process the software will make sure that the projected images is combined as one seamless image and this image is projected on the projection screen as one single wallpaper. 4
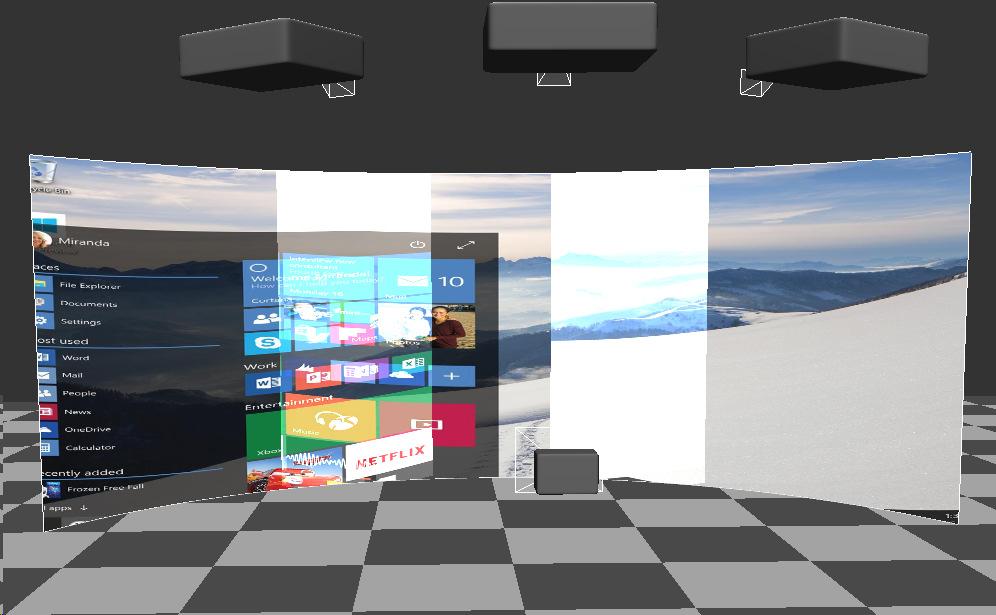
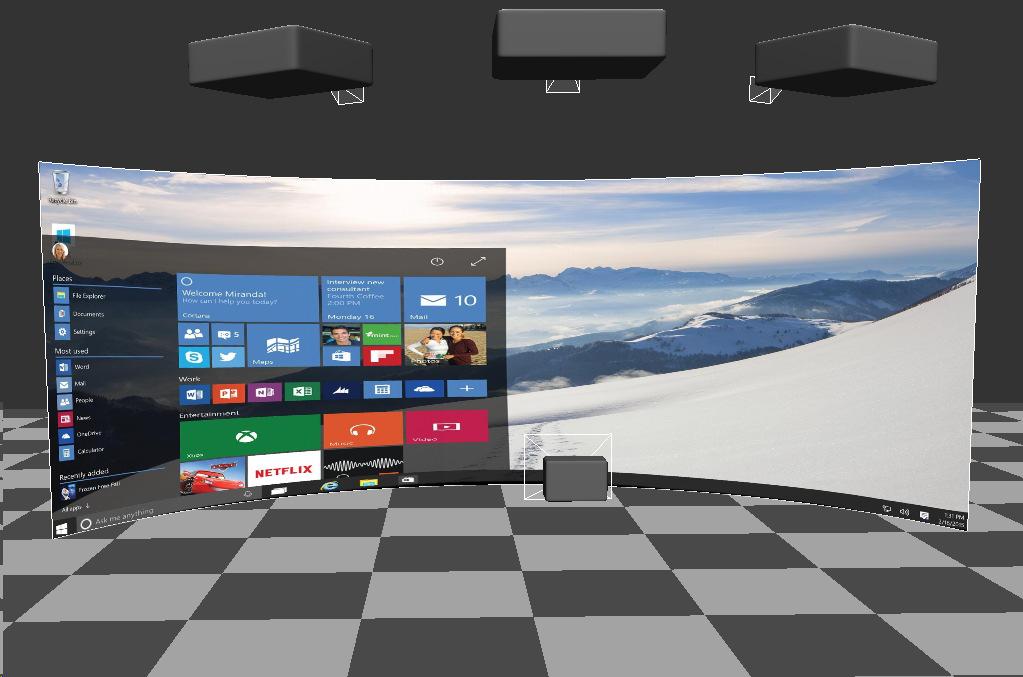
5 Before calibration After calibration 5
 created either by using Matrox TripleHead 2 Go or ATI Display Group or NVidia SLI Surround or NVidia Mosaic mode.")
6 2 Configure the PC displays We will use single PC to perform the calibration: The PC has at least 3 outputs connected to the 3 projectors. The displays must be configured as one wide display (3x1) created either by using Matrox TripleHead 2 Go or ATI Display Group or NVidia SLI Surround or NVidia Mosaic mode. Desktop and all other software will be stretched on this large extended display. 3x1 grouped display configuration 6

7 3 Start and configure the projectors setup Use the Single.exe program to start Single Camera calibration. A window will open to select the projectors configuration on the detected PC displays. Because we have one large display connected to 3 projectors, we can set the projector configuration to 3x1. The projectors identity images will be shown on the display and the projectors. Right-click on the display that is connected to the projectors and select projector configuration 3x1 from the popup menu. 7
8 The displays will be configured in 3x1 mode and the projector numbers will be shown on the projectors. 8

9 Press the Select camera button on the lower right part of the window to go to the camera selection window 9
10 4 Camera selection In the camera selection window all the connected webcams on the PC will be listed. If the camera is not listed, make sure that the camera is plugged in the USB port or try another USB port and restart the software. Select the camera to be used for calibration and select the highest resolution available from the camera. Although the software can be successfully used with standard definition webcams, it is highly recommended to use HD web cam. The cameras from Logitech and Microsoft are very good HD webcams. Press the Camera position button on the lower right part of the window to go to the camera position and preview window. 10
11 5 Camera position and camera properties p Position the camera so that the camera can capture the complete projection screen and the projection screens occupies a large portion of the camera image. Note: The camera has to be fixes and should not be moved during the rest of the calibration. For successful calibration it is important that all automatic camera features (auto-focus, auto-zoom, white balance, etc.) have to be turned off. Press the camera properties button to open the camera properties widow. This window is provided by the camera drivers and can look differently for different cameras. 11
12 No Auto focus No Auto Gain and Auto White Balance 12

13 Use the camera controls to adjust the camera image for the best projector scanning and calibration results. The primary control of the camera image is the Exposure control. Use the Exposure to get the most natural looking camera image. The camera image should look natural and should not be too dark, too bright or saturated. The black and darker colors and the white and brighter colors should utilize the complete camera colors range. In order to help and facilitate the adjustments of the camera properties, the software comes with a tool called Histogram to evaluate and calculate the used camera dynamic range. Select the Histogram button and press on the calculate button. The software will project a number of patterns on the projection screen and will calculate the range between the dark colors and the bright colors as well as the middle distance. 13
 to change the camera properties in such a way that the two peeks are as far as possible and that there orange line lies in")
14 Camera histogram The camera histogram shows two peeks. The left peek is for the dark colors and the right peek is for the bright colors. Camera histogram peeks Use the camera properties (primarily the Exposure) to change the camera properties in such a way that the two peeks are as far as possible and that there orange line lies in the middle between those peeks. Note: Make sure that you recalculate the Histogram each time the camera parameters have been changed. Press the Camera mask button on the lower right part of the window to go to the camera masking window 14

15 6 Camera masking The camera masking is necessary to ensure that the calibration process will only focus on scanning of the projectors and calibrating of the screen projection surface. Using the masking grid points ensure that the grid mask is aligned with the edges of the projection screen. Use the grid properties function to add or remove grid control along the horizontal or vertical edges of the mask grid or to reset the masking grid. Once the masking grid is aligned with the screen it can be saved to a file and used later for a new calibration or recalibration. 15

16 Aligned masking grid Press the Configure projector1 button on the lower right part of the window to go to the projectors scanning configuration window. 16

17 7 Projector scanning configuration In the projector scanning configuration configures the size and the number of the white circles that will be used for scanning the projectors and calculating the calibration. Projector scanning configuration This can be configured for a single projector or for the all projectors at once. The default values for Circle size, Distance and Max ratio should be good to successful projector scanning. Press the Recognize circles button to pre-scan the projectors and recognize the while circles. After the circles recognition, the recognized circles will be marked with green color and the not recognized circles will be marked with red color. 17
18 Use the Circle size, Distance and Max ratio to increase or decrease the number and the size of the circles to ensure that as much as possible whole circles are recognized and marked as green. If there are still unrecognized red circles the software will reconstruct them during the scanning. Press the Configure projector2 button on the lower right part of the window to go to the projectors scanning configuration window for the next projector. Repeat the same steps for all projectors and press on the Scan projectors button to start the scanning and calibration process. After the calibration is finished the software will create a combined rectangular projector image with minimal size to fit the screen. 18

19 Finished calibration 19
20 8 Warp setup In the warp setup window use the warping grid to map the combined projector image on the projection screen. When the masking grid has been used to mask the projection scanning, the masking grid can be used to automatically map the projection image to the screen. Press the Take mask button to take the mask grid and use it for screen mapping. When the combined projection image is mapped to the projection screen use the grid control points to fine tune the mapping. Add additional control points in horizontal or vertical direction to get more control on the mapping. Use the mouse of keyboard to move the grid control points. 20
21 The projection screen will show the combined warped and blended test image. Press the Blend setup button on the lower right part of the window to go to the blending configuration window. 21
22 9 Blend setup In the blend setup window the soft-edge blending parameters can be adjusted to fine tune soft-edge blending regions and to make sure the images from multiple projectors are perfectly blended. The default blending parameters have been chosen to fit most of the projectors and projection screen. However, if the overlapped regions after the scanning are brighter or darker, it is only needed to use slightly change the Gamma parameters in order to achieve the perfect blending. The Gain and the Slope parameters can be used in more advanced blending configurations. This is the last step in the automatic multi-projector calibration. The output of the projectors is warped and edge-blended so that when the projectors project on the projection screen they will produce one single projected image. 22

 to ensure")
23 Projected images from the projectors Projection on the screen Press the Save config button on the lower right part of the window save the calibration results as *.procalib file that can be loaded in Immersive Display PRO. Note: If running on Windows 8 or higher, make sure that you save the *.procalib file in the Immersive Display PRO installation folder (<Program Files>/Immersive Display PRO/) to ensure that the desktop warping will be able to find the saved file. 23

24 10 Load and use calibration results Start Immersive Display PRO, and click on the display that has been used to calibrate. Select External calibration and select the just saved *.procalib file. Press the Save button and enabled the desktop warping. The complete windows desktop will be warped and blended on the projection screen. All applications started on the desktop will be automatically edge-blended. 24


25 Windows desktop warping Movie player 25

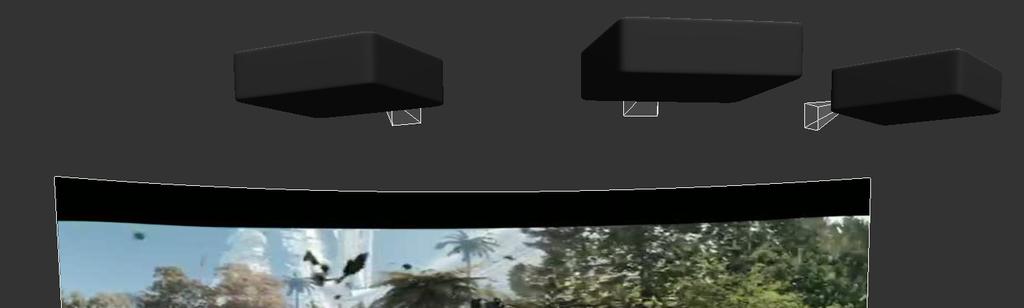
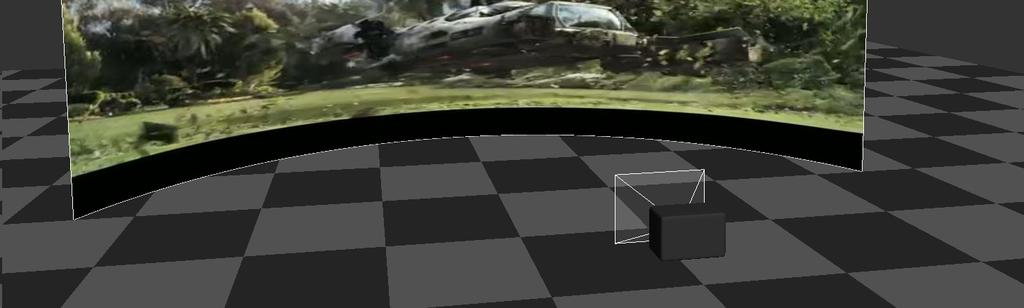
26 Racing game 26
Edge Blender Controller
 Edge Blender Controller Calibration Manual Version 2017 V1 Contents Contents INTRODUCTION 1 FEATURES 1 OS AND HARDWARE 1 INSTALLATION 2 INSTALLATION 2 UNINSTALLATION 4 INTERFACE 6 COMMUNICATION 7 CONFIG
inphoto ID PS Automatic ID photography With Canon PowerShot camera User Guide
 inphoto ID PS Automatic ID photography With Canon PowerShot camera User Guide 2018 Akond company Phone/fax: +7(812)384-6430 Cell: +7(921)757-8319 e-mail: info@akond.net akondsales@gmail.com http://www.akond.net
inphoto ID SLR Automatic ID photography With Canon SLR camera User Guide
 inphoto ID SLR Automatic ID photography With Canon SLR camera User Guide 2014 Akond company Phone/fax: +7(812)384-6430 Cell: +7(921)757-8319 e-mail: info@akond.net akondsales@gmail.com http://www.akond.net
User Guide for TWAIN / DirectX interface for GRYPHAX USB 3.0 cameras
 User Guide for TWAIN / DirectX interface for GRYPHAX USB 3.0 cameras The TWAIN & DirectX driver for PROGRES GRYPHAX USB 3.0 cameras enables user to operate with TWAIN and DirectX supported 3 rd party software
All projected images must be visible from the camera point of view. The content exists in 2D - an "unwrapped" view of the content in the aspect ratio
 How do I calibrate 360 panoramas? You can calibrate cylindrical panoramas using Vioso technology just with one single camera. This can be done by placing the camera with fisheye lens in the center of the
ISCapture User Guide. advanced CCD imaging. Opticstar
 advanced CCD imaging Opticstar I We always check the accuracy of the information in our promotional material. However, due to the continuous process of product development and improvement it is possible
How to combine images in Photoshop
 How to combine images in Photoshop In Photoshop, you can use multiple layers to combine images, but there are two other ways to create a single image from mulitple images. Create a panoramic image with
KoPa Scanner. User's Manual A99. Ver 1.0. SHENZHEN OSTEC OPTO-ELECTRONIC TECHNOLOGY CO.,LTD.
 KoPa Scanner A99 User's Manual Ver 1.0 SHENZHEN OSTEC OPTO-ELECTRONIC TECHNOLOGY CO.,LTD. http://www.ostec.com.cn Content Chapter 1 Start... 1 1.1 Safety Warnings and Precautions... 1 1.2 Installation
Visioneer OneTouch Scanner. Installation Guide FOR WINDOWS
 Visioneer OneTouch Scanner Installation Guide FOR WINDOWS TABLE OF CONTENTS i TABLE OF CONTENTS Getting Started with your new Scanner....................... 1 Step 1: Installing the Scanner Software.......................
Contents Technical background II. RUMBA technical specifications III. Hardware connection IV. Set-up of the instrument Laboratory set-up
 RUMBA User Manual Contents I. Technical background... 3 II. RUMBA technical specifications... 3 III. Hardware connection... 3 IV. Set-up of the instrument... 4 1. Laboratory set-up... 4 2. In-vivo set-up...
QImaging. All rights reserved. QUICK START GUIDE
 QUICK START GUIDE The QCapture Suite PLUS installer package is available for download on the QImaging website: http://www.qimaging.com/support/downloads/ Once downloaded, the installer folder will be stored
DAVID SLS-1. Getting Started Guide
 DAVID SLS-1 Getting Started Guide Version 3.7 DAVID Vision Systems GmbH Rudolf-Diesel-Str. 2a D-56070 Koblenz Germany Phone: +49(0)261 983 497-70 Fax: +49(0)261 983 497-77 Mail: service@david-vision-systems.de
NanEye in Awaiba Viewer
 NanEye in Awaiba Viewer Table of Contents 1 Introduction...3 2 NanEye in Awaiba Viewer...4 2.1 NanEye Sensor control...5 2.1.1 Manual Control Tab...5 2.1.2 Supply Voltage...6 2.1.3 Automatic Control...6
Mighty Scope 5M. Instruction Manual. aveninc.com
 Mighty Scope 5M Instruction Manual aveninc.com Contents Features 2 Specifications 2 Contents 2 PC System Requirements 3 Driver Installation Procedure 3 Getting Started 3 Software Installation (PC) 4 Mighty
User Guide of ISCapture
 User Guide of ISCapture For Windows2000/XP/Vista(32bit/64bit)/Win7(32bit/64bit) Xintu Photonics Co., Ltd. Version: 2.6 I All the users of Xintu please kindly note that the information and references in
Motic Live Imaging Module. Windows OS User Manual
 Motic Live Imaging Module Windows OS User Manual Motic Live Imaging Module Windows OS User Manual CONTENTS (Linked) Introduction 05 Menus, bars and tools 06 Title bar 06 Menu bar 06 Status bar 07 FPS 07
Movie 7. Merge to HDR Pro
 Movie 7 Merge to HDR Pro 1 Merge to HDR Pro When shooting photographs with the intention of using Merge to HDR Pro to merge them I suggest you choose an easy subject to shoot first and follow the advice
ID Photo Processor. Batch photo processing. User Guide
 ID Photo Processor Batch photo processing User Guide 2015 Akond company 197342, Russia, St.-Petersburg, Serdobolskaya, 65a Phone/fax: +7(812)384-6430 Cell: +7(921)757-8319 e-mail: info@akond.net http://www.akond.net
We recommend downloading the latest core installer for our software from our website. This can be found at:
 Dusk Getting Started Installing the Software We recommend downloading the latest core installer for our software from our website. This can be found at: https://www.atik-cameras.com/downloads/ Locate and
CHAPTER1: QUICK START...3 CAMERA INSTALLATION... 3 SOFTWARE AND DRIVER INSTALLATION... 3 START TCAPTURE...4 TCAPTURE PARAMETER SETTINGS... 5 CHAPTER2:
 Image acquisition, managing and processing software TCapture Instruction Manual Key to the Instruction Manual TC is shortened name used for TCapture. Help Refer to [Help] >> [About TCapture] menu for software
inphoto ID Canon and Olympus camera control software Automatic ID photography User Guide
 inphoto ID Canon and Olympus camera control software Automatic ID photography User Guide 2006 Akond company 197342, Russia, St.-Petersburg, Serdobolskaya, 65a Phone/fax: +7(812)600-6918 Cell: +7(921)757-8319
DigiScope II v3 TM Aperture Scope User s Manual
 DigiScope II v3 TM Aperture Scope User s Manual Welcome Thank you for choosing DigiScope II v3 TM Aperture scope! The DigiScope II v3 TM Aperture Scope is an exciting new device to Capture and record the
1 VIOSO CALIBRATOR manual english VIOSO CALIBRATOR. Autocalibration Software. english version
 1 VIOSO CALIBRATOR manual english VIOSO CALIBRATOR Autocalibration Software english version 2 VIOSO CALIBRATOR manual english Table Of Contents 1. Camera-based Multi Display Setup... 4 1.1. Hardware setup
The ideal K-12 science microscope solution. User Guide. for use with the Nova5000
 The ideal K-12 science microscope solution User Guide for use with the Nova5000 NovaScope User Guide Information in this document is subject to change without notice. 2009 Fourier Systems Ltd. All rights
G-700 multiple Channel 4K Curve Edge Blending Processor
 G-700 multiple Channel 4K Curve Edge Blending Processor G-700 is a curved screen edge blending processor with the ability to provide multiple processing modules to control from 1 to 4 projectors based
Digital Microscope. User Manual
 Digital Microscope User Manual Features The digital microscope provides 10~200X adjustable magnification range. The build-in high-performance white LED can illuminate the object without using any auxiliary
CobraCam USB III Portable Inspection Camera with USB Interface Instruction Manual
 CobraCam USB III Portable Inspection Camera with USB Interface Instruction Manual 07/13 Test Equipment Depot - 800.517.8431 99 Washington Street, Melrose, MA 02176 TestEquipmentDepot.com CobraCam USB 3
ImagesPlus Basic Interface Operation
 ImagesPlus Basic Interface Operation The basic interface operation menu options are located on the File, View, Open Images, Open Operators, and Help main menus. File Menu New The New command creates a
Optika ISview. Image acquisition and processing software. Instruction Manual
 Optika ISview Image acquisition and processing software Instruction Manual Key to the Instruction Manual IS is shortened name used for OptikaISview Square brackets are used to indicate items such as menu
User Manual for VIOSO BlackBox 2.0
 User Manual for VIOSO BlackBox 2.0 Table of Contents 1 IN A NUTSHELL: BEST PRACTISE FOR MULTIPLE PROJECTOR SETUPS... 1 1.1 INITIAL OPERATION OF THE PROJECTORS ON THE PC... 1 1.2 ALIGNING PROJECTORS ON
GXCapture 8.1 Instruction Manual
 GT Vision image acquisition, managing and processing software GXCapture 8.1 Instruction Manual Contents of the Instruction Manual GXC is the shortened name used for GXCapture Square brackets are used to
Adobe Photoshop. Levels
 How to correct color Once you ve opened an image in Photoshop, you may want to adjust color quality or light levels, convert it to black and white, or correct color or lens distortions. This can improve
CONTENTS. Chapter I Introduction Package Includes Appearance System Requirements... 1
 User Manual CONTENTS Chapter I Introduction... 1 1.1 Package Includes... 1 1.2 Appearance... 1 1.3 System Requirements... 1 1.4 Main Functions and Features... 2 Chapter II System Installation... 3 2.1
Extending the Dynamic Range of Film
 Written by Jonathan Sachs Copyright 1999-2003 Digital Light & Color Introduction Limited dynamic range is a common problem, especially with today s fine-grained slide films. When photographing contrasty
HP Advanced Profiling Solution Quick Start Guide
 HP Advanced Profiling Solution Quick Start Guide Welcome to the! You have just successfully installed HP APS on your computer and clicked on the Quick Start Guide button in your HP APS Control Center.
Photoshop Elements Hints by Steve Miller
 2015 Elements 13 A brief tutorial for basic photo file processing To begin, click on the Elements 13 icon, click on Photo Editor in the first box that appears. We will not be discussing the Organizer portion
Basic Tutorials Series: Import A Photograph. RenoWorks Support Team Document #HWPRO0003
 Basic Tutorials Series: Import A Photograph RenoWorks Support Team Document #HWPRO0003 Import A Photograph 2 1 Import Your Own Photograph The Photo Import Wizard The Photo Import Wizard is the first tool
ROTATING SYSTEM T-12, T-20, T-50, T- 150 USER MANUAL
 ROTATING SYSTEM T-12, T-20, T-50, T- 150 USER MANUAL v. 1.11 released 12.02.2016 Table of contents Introduction to the Rotating System device 3 Device components 4 Technical characteristics 4 Compatibility
DIGITAL-MICROSCOPY CAMERA SOLUTIONS USB 3.0
 DIGITAL-MICROSCOPY CAMERA SOLUTIONS USB 3.0 PixeLINK for Microscopy Applications PixeLINK will work with you to choose and integrate the optimal USB 3.0 camera for your microscopy project. Ideal for use
Reference Guide. Color Image Scanner
 Color Image Scanner All rights reserved. No part of this publication may be reproduced, stored in a retrieval system, or transmitted in any form or by any means, electronic, mechanical, photocopying, recording,
Input of Precise Geometric Data
 Chapter Seven Input of Precise Geometric Data INTRODUCTION PLAY VIDEO A very useful feature of MicroStation V8i for precise technical drawing is key-in of coordinate data. Whenever MicroStation V8i calls
G-302 Dual Projector Edge Blender Quick User Guide
 G-302 Dual Projector Edge Blender Quick User Guide Outlook and Functions Procedures for 2 projector edge blending System configuration 1. To use the same projectors and install with the same settings.
CALIBRATION MANUAL. Version Author: Robbie Dowling Lloyd Laney
 Version 1.0-1012 Author: Robbie Dowling Lloyd Laney 2012 by VirTra Inc. All Rights Reserved. VirTra, the VirTra logo are either registered trademarks or trademarks of VirTra in the United States and/or
inphoto ID Canon camera control software Automatic ID photography User Guide
 inphoto ID Canon camera control software Automatic ID photography User Guide 2008 Akond company 197342, Russia, St.-Petersburg, Serdobolskaya, 65A Phone/fax: +7(812)600-6918 Cell: +7(921)757-8319 e-mail:
Geometric Functions. The color channel toolbar buttons are disabled.
 Introduction to Geometric Transformations Geometric Functions The geometric transformation commands are used to shift, rotate, scale, and align images. For quick rotation by 90 or mirroring of an image,
1. Setup Output mode. 2. Using a Fixed tile size
 Tutorial Tiling Software version: Asanti 1.0 Document version: February 17, 2014 This tutorial demonstrates how to use tiling with Asanti. Tiling can only be executed on a system where Acrobat Pro X or
Apple Photos Quick Start Guide
 Apple Photos Quick Start Guide Photos is Apple s replacement for iphoto. It is a photograph organizational tool that allows users to view and make basic changes to photos, create slideshows, albums, photo
Advanced Diploma in. Photoshop. Summary Notes
 Advanced Diploma in Photoshop Summary Notes Suggested Set Up Workspace: Essentials or Custom Recommended: Ctrl Shift U Ctrl + T Menu Ctrl + I Ctrl + J Desaturate Free Transform Filter options Invert Duplicate
Marshall Electronics. Full-HD (3G/HD-SDI) Mini-Broadcast POV Cameras. CV343, CV502, CV345, CV505 models. Operation Manual
 Mini-Broadcast POV Cameras. CV343, CV502, CV345, CV505 models. Operation Manual") Marshall Electronics Full-HD (3G/HD-SDI) Mini-Broadcast POV Cameras CV343, CV502, CV345, CV505 models Operation Manual STRUCTURE SETUP WB CTROL SUB DC IRIS ATW PUSH BRIGHTNESS AGC LIMIT AE CTROL (EXPOSURE)
Marshall Electronics Full-HD (3G/HD-SDI) Mini-Broadcast POV Cameras CV343, CV502, CV345, CV505 models Operation Manual STRUCTURE SETUP WB CTROL SUB DC IRIS ATW PUSH BRIGHTNESS AGC LIMIT AE CTROL (EXPOSURE)
Digital Portable Overhead Document Camera LV-1010
 Digital Portable Overhead Document Camera LV-1010 Instruction Manual 1 Content I Product Introduction 1.1 Product appearance..3 1.2 Main functions and features of the product.3 1.3 Production specifications.4
ToupSky Cameras Quick-guide
 ToupSky Cameras Quick-guide ToupSky is a capture and processing software offered by Touptek, the original manufacturer of the Toupcamera series. These are video cameras that offer live image capture for
Micro-Image Capture 8 Installation Instructions & User Guide
 Micro-Image Capture 8 Installation Instructions & User Guide Software installation: Micro-Image Capture Software 1. Load Micro-Image Capture software CD onto host PC. Auto Run should start driver/software
Manual. ios App. Ver2.2. v Mall Drive, Commack, NY (P) (F)
 (F)") Manual Ver2.2 ios App v1.6 73 Mall Drive, Commack, NY 11725 631-864-1000 (P) 631-543-8900 (F) www.accu-scope.com info@accu-scope.com Contents CHAPTER 1: SYSTEM REQUIREMENT & SOFTWARE -------------------------------------
Manual Ver2.2 ios App v1.6 73 Mall Drive, Commack, NY 11725 631-864-1000 (P) 631-543-8900 (F) www.accu-scope.com info@accu-scope.com Contents CHAPTER 1: SYSTEM REQUIREMENT & SOFTWARE -------------------------------------
Digital Imaging - Photoshop
 Digital Imaging - Photoshop A digital image is a computer representation of a photograph. It is composed of a grid of tiny squares called pixels (picture elements). Each pixel has a position on the grid
EinScan-SE. Desktop 3D Scanner. User Manual
 EinScan-SE Desktop 3D Scanner User Manual Catalog 1. 2. 3. 4. 5. 6. 7. 8. 1.1. 1.2. 1.3. 1.1. 1.2. 1.1. 1.2. 1.3. 1.1. 1.2. Device List and Specification... 2 Device List... 3 Specification Parameter...
REV.C. SmartScope 5M
 REV.C SmartScope 5M The 200X digital microscope provides a 10~200X adjustable magnification range, and the 500X microscope provides 500X magnification. The built-in high-performance LEDs can illuminate
VSCO FILM 01 MANUAL FOR: LIGHTROOM 4 & ADOBE CAMERA RAW 7
 VSCO FILM 01 MANUAL FOR: LIGHTROOM 4 & ADOBE CAMERA RAW 7 VSCO FILM MANUAL INTRODUCTION VSCO Film Pro is a brand new way to emulate film and speed up your workflow in Adobe Lightroom 4 and Camera Raw 7.
Photoshop CC: Essentials
 Photoshop CC: Essentials Summary Workspace Overview... 2 Exercise Files... 2 Selection Tools... 3 Select All, Deselect, And Reselect... 3 Adding, Subtracting, and Intersecting... 3 Working with Layers...
MEASUREMENT CAMERA USER GUIDE
 How to use your Aven camera s imaging and measurement tools Part 1 of this guide identifies software icons for on-screen functions, camera settings and measurement tools. Part 2 provides step-by-step operating
PHOTOSHOP LIGHTROOM 5
 PHOTOSHOP LIGHTROOM 5 INTRODUCTION This material is primarily targetted at the new and intermediate photographers in our club. You have captured an image and used the various factors when taking this image:
User Manual Of Einscan-Pro. Brief Introduction
 User Manual Of Einscan-Pro Brief Introduction 1. PC Configuration 2. Software interface 3. Calibration 4. Fix Scan 5. Handheld HD Scan 6. Handheld Rapid Scan 7.FAQ PC Configuration System Requirement:Before
Visioneer OneTouch 7300 Scanner FOR USB CONNECTION. Installation Guide
 Visioneer OneTouch 7300 Scanner FOR USB CONNECTION Installation Guide COPYRIGHT INFORMATION Copyright 2003 Visioneer, Inc. Reproduction, adaptation, or translation without prior written permission is prohibited,
PC System Requirement For Dual Microscope
 REV.F The 200X digital microscope provides a 10~200X adjustable magnification range, and the 500X microscope provides 500X magnification. The built-in high-performance LEDs can illuminate an object without
For customers in USA This device complies with Part 15 of the FCC rules. Operation is subject to the following two conditions:
 User manual For customers in North and South America For customers in USA This device complies with Part 15 of the FCC rules. Operation is subject to the following two conditions: (1) This device may not
Stacking Correction Tool
 NEC Projector User Supportware Stacking Correction Tool User s Manual Introduction Thank you for using the Stacking Correction Tool. Please read this User's Manual carefully to aid in the proper use of
μscope Microscopy Software
 μscope Microscopy Software Pixelink μscope Essentials (ES) Software is an easy-to-use robust image capture tool optimized for productivity. Pixelink μscope Standard (SE) Software had added features, making
INSTRUCTION MANUAL MM-A209
 E INSTRUCTION MANUAL 9222-7300-11 MM-A209 2 BEFORE YOU BEGIN Before installing the DiMAGE Viewer software, read the data-transfer section in the camera manual. This section details how to connect the camera
Operation Manual Full-HD Miniature POV Camera
 Operation Manual Full-HD Miniature POV Camera CV502-WPM/WPMB CV502-M/MB CV225-M/MB CV505-M/MB, CV565-MGB CV343-CS/CSB, CV345-CS/CSB, CV365-CGB STRUCTURE SETUP WB CTROL SUB DC IRIS ATW PUSH SUB BRIGHTNESS
Training Guide for Carl Zeiss AxioZoom V16 Stereo Microscope
 Training Guide for Carl Zeiss AxioZoom V16 Stereo Microscope ZEN 2012 Optical Imaging & Vital Microscopy Core Baylor College of Medicine (2017) Power ON Routine 1 2 If you require fluorescence imaging,
AreaSketch Pro Overview for ClickForms Users
 AreaSketch Pro Overview for ClickForms Users Designed for Real Property Specialist Designed specifically for field professionals required to draw an accurate sketch and calculate the area and perimeter
Movie Merchandising. Movie Poster. Open the Poster Background.psd file. Open the Cloud.jpg file.
 Movie Poster Open the Poster Background.psd file. Open the Cloud.jpg file. Movie Merchandising Choose Image>Adjustments>Desaturate to make it a grayscale image. Select the Move tool in the Toolbar and
Installation & User Manual Micro-Image Capture 7
 Installation & User Manual Micro-Image Capture 7 Ver1.2016 Product Warranty Quality Assurance Every Micro-Image Capture system passes quality assurance tests including focus, resolution quality and mechanical
SCD-0017 Firegrab Documentation
 SCD-0017 Firegrab Documentation Release XI Tordivel AS January 04, 2017 Contents 1 User Guide 3 2 Fire-I Camera Properties 9 3 Raw Color Mode 13 4 Examples 15 5 Release notes 17 i ii SCD-0017 Firegrab
ScanGear CS-U 6.0. for CanoScan D646U Color Scanner. User s Guide
 ScanGear CS-U 6.0 for CanoScan D646U Color Scanner User s Guide Copyright Notice Copyright 2000 Canon Inc. This manual is copyrighted with all rights reserved. Under the copyright laws, this manual may
CHROMACAL User Guide (v 1.1) User Guide
 User Guide") CHROMACAL User Guide (v 1.1) User Guide User Guide Notice Hello and welcome to the User Guide for the Datacolor CHROMACAL Color Calibration System for Optical Microscopy, a cross-platform solution that
CHROMACAL User Guide (v 1.1) User Guide User Guide Notice Hello and welcome to the User Guide for the Datacolor CHROMACAL Color Calibration System for Optical Microscopy, a cross-platform solution that
Leica DMi8A Quick Guide
 Leica DMi8A Quick Guide 1 Optical Microscope Quick Start Guide The following instructions are provided as a Quick Start Guide for powering up, running measurements, and shutting down Leica s DMi8A Inverted
Getting Started. with Easy Blue Print
 Getting Started with Easy Blue Print User Interface Overview Easy Blue Print is a simple drawing program that will allow you to create professional-looking 2D floor plan drawings. This guide covers the
Color Management User Guide
 Color Management User Guide Edition July 2001 Phase One A/S Roskildevej 39 DK-2000 Frederiksberg Denmark Tel +45 36 46 01 11 Fax +45 36 46 02 22 Phase One U.S. 24 Woodbine Ave Northport, New York 11768
Veterinary Digital X-Ray System Quick Start Guide
 1 Veterinary Digital X-Ray System Quick Start Guide 2 SOPIX² X-Ray Sensors Quick Start Guide ***PERFORM THIS STEP BEFORE PLUGGING IN THE SENSOR*** Step 1 Load the CD: If you have already plugged in the
Operating Rausch ScanCam within POSM.
 Operating Rausch ScanCam within POSM. POSM (Pipeline Observation System Management) // posmsoftware.com // info@posmsoftware.com // 859-274-0041 RAUSCH USA // www.rauschusa.com // reusa@rauschusa.com //
Alignment of the camera
 Related topics Detector Alignment, Rotation axis, tilt, Principle Alignment of the detector and the rotation stage is very important to get optimal quality images of a CT scan. In this experiment, the
Sense. 3D scanning application for Intel RealSense 3D Cameras. Capture your world in 3D. User Guide. Original Instructions
 Sense 3D scanning application for Intel RealSense 3D Cameras Capture your world in 3D User Guide Original Instructions TABLE OF CONTENTS 1 INTRODUCTION.... 3 COPYRIGHT.... 3 2 SENSE SOFTWARE SETUP....
Enhanced Eyes. Here's the image I'll be working with (glamour eyes photo from Shutterstock): Here's what the eyes will look like when we're done:
: Here's what the eyes will look like when we're done:") Enhanced Eyes Here's the image I'll be working with (glamour eyes photo from Shutterstock): The original image. Here's what the eyes will look like when we're done: The final effect. Here's a close-up
Enhanced Eyes Here's the image I'll be working with (glamour eyes photo from Shutterstock): The original image. Here's what the eyes will look like when we're done: The final effect. Here's a close-up
USB Line Camera 8M. Coptonix GmbH
 USB Line Camera 8M Coptonix GmbH Luxemburger Str. 31 D 13353 Berlin Phone: +49 (0)30 61 74 12 48 Fax: +49 (0)30 61 74 12 47 www.coptonix.com support@coptonix.com 2 The USB Line Camera 8M is an easy to
Stacking Correction Tool
 NEC Projector User Supportware Stacking Correction Tool User s Manual Introduction Thank you for using the Stacking Correction Tool. Please read this User's Manual carefully to aid in the proper use of
FEATURES Industry windows paperless solutions High speed portable document scanner is well-suited for a wide variety of Window industry
 BD-S-520 High-Speed Portable HD Document Scanner FEATURES Industry windows paperless solutions High speed portable document scanner is well-suited for a wide variety of Window industry Fast scan: One second
What is real? What is art?
 HDCC208N Fall 2018 We ll fix it in post The Digital Darkroom What is real? What is art? We have been discussing this pair of questions at various points this semester, with drawings, paintings, the camera
Reference and User Manual May, 2015 revision - 3
 Reference and User Manual May, 2015 revision - 3 Innovations Foresight 2015 - Powered by Alcor System 1 For any improvement and suggestions, please contact customerservice@innovationsforesight.com Some
M a c i n t o s h. Canon Plug-in Module CS-U 3.9 for CanoScan D660U Color Image Scanner. User's Guide
 f o r M a c i n t o s h Canon Plug-in Module CS-U 3.9 for CanoScan D660U Color Image Scanner User's Guide How to Make Best Use of the Manuals When you open the box Printed Manual CanoScan D660U Getting
Minolta Scanner Plugin
 Minolta Scanner Plugin For a list of Minolta digitizers and Geomagic software products with which this plugin is compatible, see Release Notes for Geomagic Minolta Plugin 7.6.0.3. Copyright 2005, Raindrop
SPECTRALIS Training Guide
 SPECTRALIS Training Guide SPECTRALIS Diagram 1 SPECTRALIS Training Guide Table of Contents 1. Entering Patient Information & Aligning the Patient a. Start Up/Shut Down the System... 4 b. Examine a New
Manual Stitching of Multiple Images to Produce a Panorama
 Manual Stitching of Multiple Images to Produce a Panorama Covered in this PS CC tutorial: The purpose of this tutorial goes beyond manual stitching. The techniques used can be used to incorporate a cut
HD-01e High Definition Easy Scope
 HD-01e High Definition Easy Scope Easy SKIN & HAIR ANALYSER USER S MANUAL Version 2, April of 2017 0 USER S MANUAL Congratulations on your purchase of this High Definition UVC (USB Video Class) Easy Scope
Camera Overview. Digital Microscope Cameras for Material Science: Clear Images, Precise Analysis. Digital Cameras for Microscopy
 Digital Cameras for Microscopy Camera Overview For Materials Science Microscopes Digital Microscope Cameras for Material Science: Clear Images, Precise Analysis Passionate about Imaging: Olympus Digital
Chlorophyll Fluorescence Imaging System
 Quick Start Guide Chlorophyll Fluorescence Imaging System Quick Start Guide for Technologica FluorImager software for use with Technlogica CFImager hardware Copyright 2006 2015 TECHNOLOGICA LIMITED. All
ScanGear CS-U 5.6. for CanoScan FB1210U Color Scanner. User s Guide
 ScanGear CS-U 5.6 for CanoScan FB1210U Color Scanner User s Guide Copyright Notice Copyright 2000 Canon Inc. This manual is copyrighted with all rights reserved. Under the copyright laws, this manual may
Before you start, make sure that you have a properly calibrated system to obtain high-quality images.
 CONTENT Step 1: Optimizing your Workspace for Acquisition... 1 Step 2: Tracing the Region of Interest... 2 Step 3: Camera (& Multichannel) Settings... 3 Step 4: Acquiring a Background Image (Brightfield)...
Magic Wand Portable Scanner with Auto-Feed Dock. PDSDK-ST470-VP-BX2 User Manual
 Magic Wand Portable Scanner with Auto-Feed Dock PDSDK-ST470-VP-BX2 User Manual Table of Contents 1. KEY FEATURES... 2 2. FUNCTIONAL PARTS... 2 3. EXPLANATION OF THE STATUS ICONS... 4 4. GETTING STARTED...
Introduction to: Microsoft Photo Story 3. for Windows. Brevard County, Florida
 Introduction to: Microsoft Photo Story 3 for Windows Brevard County, Florida 1 Table of Contents Introduction... 3 Downloading Photo Story 3... 4 Adding Pictures to Your PC... 7 Launching Photo Story 3...
Watec USB Camera. User s Manual
 Watec USB Camera User s Manual Rev. 3.02 Watec Co., Ltd. September 5, 2018 Revision Record Rev. Date Changes Remarks 1.00 August 28, 2013 - Initial Release 2.00 - - 3.00 August 29, 2016 Correction to Watec