The ideal K-12 science microscope solution. User Guide. for use with the Nova5000
|
|
|
- Winfred Carr
- 6 years ago
- Views:
Transcription

1 The ideal K-12 science microscope solution User Guide for use with the Nova5000

2 NovaScope User Guide
3 Information in this document is subject to change without notice Fourier Systems Ltd. All rights reserved. Reproduction of this document in any manner without the prior written consent of Fourier Systems Ltd. is strictly forbidden. Trademarks used in this text include: Nova5000 and NovaScope ActiveSync, Microsoft, and Windows are either registered trademarks or trademarks of the Microsoft Corporation in the United States and/or other countries. August 2009 P/N BK137 Rev: A
4
5 Table of Contents Chapter 1: Product Overview Microscope Features Overview Software Overview Microscope Design Technical Support... 3 Chapter 2: Getting Started Assembling the Microscope Installing and Uninstalling NovaScope Connecting the Microscope to the Nova Chapter 3: Working with NovaScope Starting NovaScope Understanding the NovaScope User Interface Understanding the Microscope Magnification Setting the Magnification on the NovaScope Microscope Focusing the Microscope Understanding the NovaScope Working Modes Setting the Camera Resolution Setting a Folder for Storing Image and Video Files Enabling and Disabling the Capture Sound Achieving Best Results with the NovaScope System Chapter 4: Capturing Microscope Images Capturing Still Images Capturing Video Chapter 5: Viewing Images Chapter 6: Using the Ruler Tool Configuring the Ruler Configuring Ruler Settings Calibrating the Ruler Measuring Between Points...20 Chapter 7: Annotating Images Chapter 8: Copying Images to Other Applications Chapter 9: Saving and Deleting Files Creating a Copy of a File Resetting Image Index Deleting Files... 27
6 Chapter 10: Troubleshooting Installing and Uninstalling NovaScope Starting NovaScope Lack of Response from the NovaScope Application Ruler Measurements Appendix A. Microscope Technical Specifications Appendix B. Toolbar Reference... 32
7
8 Chapter 1: Product Overview The NovaScope system enables you to connect the NovaScope microscope to your Nova5000 learning appliance. Once connected, you can use the Nova5000 to work with microscope images. The NovaScope system contains the following components: USB microscope, which is connected to the Nova5000 NovaScope software application After you install NovaScope on your Nova5000 learning appliance, you can use the Nova5000 to examine specimens, capture images, record videos, and view images previously captured using NovaScope. This document explains the capabilities and operations of the NovaScope software application. The following sections also contain general information about the microscope and the NovaScope application Microscope Features Overview The microscope features: Magnification ratio: 50x and 200x Image sensor: 2.0 mega pixels Still image and video capture resolution: 640 x 480, 320 x 240 Light control USB connection Adjustable angle of the microscope tube NovaScope software application for working with microscope images 1.2. Software Overview To enable you to preview specimens under the microscope and work with images captured from the microscope, the NovaScope system includes NovaScope, an easy-to-use software application. This application enables you to perform the following actions: View microscope images Capture microscope images as still graphics and video Annotate captured graphics to mark an element of an image or provide textual notes - 1 -

9 Measure the distance between elements on an image Calibrate distance measurements Work with image and/or video files generated by NovaScope 1.3. Microscope Design The microscope includes the following components: Light adjustment control Magnification knob Microscope holder USB connection Light adjustment Magnification knob Currently not in use Microscope holder USB Figure 1: NovaScope Microscope - 2 -
10 1.4. Technical Support Fourier Systems is always ready to provide you with any technical support you might need. Contact us as follows: Technical support: Tel: (USA) NOVA. Toll free within USA only Web form: General inquiries: NovaScope software updates: Nova download center:


11 Chapter 2: Getting Started This chapter describes the basic functions required to begin working with the microscope and the NovaScope application, including a basic overview of the NovaScope user interface. These sections include: Assembling the microscope Installing and uninstalling NovaScope Connecting the microscope to the Nova Assembling the Microscope Before connecting the microscope to the Nova5000, you must first assemble the microscope. This procedure is explained in the following figures: 1. Grasp the side holders. 2. Enclose the small ball on the prop with the bottom parts of the side holders


12 3. Insert the small ball on the microscope's dowel between the top parts of the side holders. 4. Tighten the screw Installing and Uninstalling NovaScope In addition to assembling the microscope, you must also install the NovaScope application on the Nova5000. The installation file, NovaScope.cab, is provided on the CD that you received as a part of the NovaScope package. You must first copy this file onto your PC and then copy the file to the Nova5000 using an SD memory card or a USB memory stick. Alternatively, you can copy the installation file from the PC to the Nova5000 using the ActiveSync USB connection. (For more information about configuring and using ActiveSync, see the Nova5000 User Guide available on the Nova5000 Download Center.) To install NovaScope: 1. Verify that the microscope is not connected to the Nova Run NovaScope.cab. The Install Fourier Systems NovaScope dialog box is displayed. 3. Select a folder into which you wish to install NovaScope, or accept the default location and tap OK. Once you have successfully installed the application, NovaScope appears in the Windows Programs menu. NOTE: After the installation is complete, NovaScope removes the NovaScope.cab file from the Nova5000 storage
13 To uninstall NovaScope: 1. From the Windows Start menu, select Settings > Control Panel. The Control Panel window is displayed. 2. Double tap the Remove Programs icon. The Remove Programs dialog box is displayed. 3. In the Programs list, select Fourier Systems NovaScope and tap Remove. 4. In the confirmation window, tap Yes. NovaScope is removed from your Nova Connecting the Microscope to the Nova5000 You must plug the microscope into the Nova5000 before running the NovaScope application. If the microscope is not plugged in, the following error message is displayed: "Can't find microscope." To correct the error, connect the microscope to the Nova5000 using the USB connection, and restart NovaScope
14 Chapter 3: Working with NovaScope The NovaScope application is an easy-to-use program that is provided with the microscope. This chapter contains information on the following operations: Starting NovaScope Understanding the NovaScope user interface Understanding the microscope magnification Understanding the NovaScope working modes Setting the camera resolution Setting a folder for storing image and video files Enabling and disabling the capture sound Achieving best results with the NovaScope system 3.1. Starting NovaScope To begin working with the microscope images, you must first open the NovaScope application. To start NovaScope: 1. Verify that the microscope is plugged in to the Nova From the Windows Start menu, select Programs > NovaScope. The main application window is displayed. NOTE: To speed up your work, it is highly recommended that you close all other applications and do not use other USB ports when working with the NovaScope system Understanding the NovaScope User Interface The NovaScope window contains the following elements: User Interface Element Menu bar Toolbar Description Contains commands for configuring the microscope and managing images. Contains tools for managing images
15 User Interface Element Thumbnail pane Image area Capture tools Description Displays automatically generated thumbnails of captured images and videos. Displays one of the following: Preview of the microscope image Captured images Captured videos Enables you to select a capture mode (still image or video) and capture a microscope image. Menu bar Toolbar Thumbnail Image area Figure 2: NovaScope User Interface Capture tools 3.3. Understanding the Microscope Magnification A microscope magnification shows how many times a specimen is magnified by the lenses of the microscope. A magnification is presented by a number followed by the multiplication sign X. For example, if you want to see a specimen 50 times larger than the specimen's actual size, the magnification is 50X

16 Setting the Magnification on the NovaScope Microscope The NovaScope microscope offers two magnifications: 50X 200X These magnifications are marked on the microscope's Magnification knob. Figure 3: Magnification Knob You can set the magnification by rotating the Magnification knob on the microscope. Changing the magnification leads to enlarging or decreasing of the specimen's size in the Image area on your screen as shown on the figures below: - 9 -

17 Figure 4: 50X Magnification Figure 5: 200X Magnification Focusing the Microscope Focusing the microscope properly enables you to see the fine details of a specimen. Although NovaScope does not provide manual focus adjustment capabilities, there are some techniques that can help you maximize your focus results. To focus the microscope: 1. Verify that the microscope tube touches the specimen. 2. Set the Magnification knob to the stop: On the right, when you want to set the magnification to 50X. On the left, when you want to set the magnification to 200X

18 3. Slowly rotate the Magnification knob until the specimen appears in focus. 4. If the specimen is still not focused, vertically move the microscope tube to find the best position such that the specimen is in focus Understanding the NovaScope Working Modes NovaScope can work in the following modes: Mode Preview Captured image or video view Annotation Description Displays the specimen currently under the microscope. Displays the image of a specimen that you previously captured as an image or video file. In this mode, the size of the displayed image fits the Image area on your screen. Enables you to draw on an image and add graphical and textual annotations. In this mode, the full size image is displayed Setting the Camera Resolution You can adjust the microscope's camera resolution to achieve higher clarity and readability. To set the camera resolution: 1. From the Microscope menu, select Microscope Settings. The Camera Settings dialog box is displayed. Figure 6: Camera Settings 2. In the Image Size drop-down list, select the resolution you need

19 NOTE: A higher resolution provides the higher quality of an image. At the same time, a higher resolution leads to a bigger size of a captured file. 3. Tap OK. The microscope captures images with the defined resolution Setting a Folder for Storing Image and Video Files NovaScope enables you to capture microscope images and save these images as still graphics or video files. You can specify the folder in which these files are stored. To specify a folder for storing image and video files: 1. From the Microscope menu, select Capture Settings. The Capture Settings dialog box is displayed. Figure 7: Capture Settings 2. Tap Change Folder. The Browse for Folder dialog box is displayed. 3. Select the folder in which you want to store images and tap OK. 4. In the Capture Settings dialog box, tap OK. NovaScope now stores image and video files in the specified folder. You can also specify whether you want NovaScope to play a capture sound each time an image is saved to the file by enabling the Play Capture Sound check box. For more information, see Enabling and Disabling the Capture Sound Enabling and Disabling the Capture Sound When NovaScope successfully captures an image from the microscope as a still graphic, the application can imitate the sound of a photo camera shutter. This is an option that can be enabled or disabled
20 To enable the capture sound: 1. From the Microscope menu, select Capture Settings. The Capture Settings dialog box is displayed. Figure 8: Capture Settings 2. Enable the Play Capture Sound check box. If the checkbox is already enabled and you wish to disable the option, clear the checkbox. 3. Tap OK Achieving Best Results with the NovaScope System The microscope is connected to the USB port. However, the current version of the Nova5000 supports USB 1.1 only. This can slow down your Nova5000, especially when other applications are open while working with the NovaScope system. To achieve optimal performance, follow these recommendations: Before starting the NovaScope application, close all other applications. Do not open any other application while working with NovaScope. Do not use other Nova5000's USB ports for connecting devices other than the NovaScope microscope (for example, a USB mouse or a keyboard) while working with NovaScope
21 Chapter 4: Capturing Microscope Images You can capture microscope images and save them as image or video files. The following sections describe how you can capture images from the microscope Capturing Still Images NovaScope enables you to capture a microscope image and save it as an image file in the JPEG format. To capture an image: 1. Place a specimen on a tabletop or other flat, clean, steady surface. 2. Adjust the microscope tube so the tube touches the surface on which the specimen is placed. 3. On the microscope, set the optimal magnification using the Magnification knob. You can continue to adjust the picture until it appears correctly in the Image area on your screen. (For more information about magnification, see Understanding the Microscope Magnification.) 4. When the image previews correctly, tap Image Capture Mode. 5. Tap Capture, to capture a still image. When this is the first capture in the current session, the Set Magnification dialog box is displayed. In the Zoom drop-down list, select the magnification you are currently using and tap OK. NovaScope captures the image, and the image thumbnail is displayed in the Thumbnail pane. When this is not the first capture in the current session, NovaScope immediately captures the image, and the thumbnail is displayed in the Thumbnail pane. For images, NovaScope creates a JPEG file. By default, file names have the following format: IMG_nn.jpg, where nn is a sequential number, increasing automatically with each image file stored in the file folder. The captured image is displayed in the Image area. 6. To return to the Preview mode, tap Capturing Video NovaScope enables you to capture a microscope image as a video file in AVI format
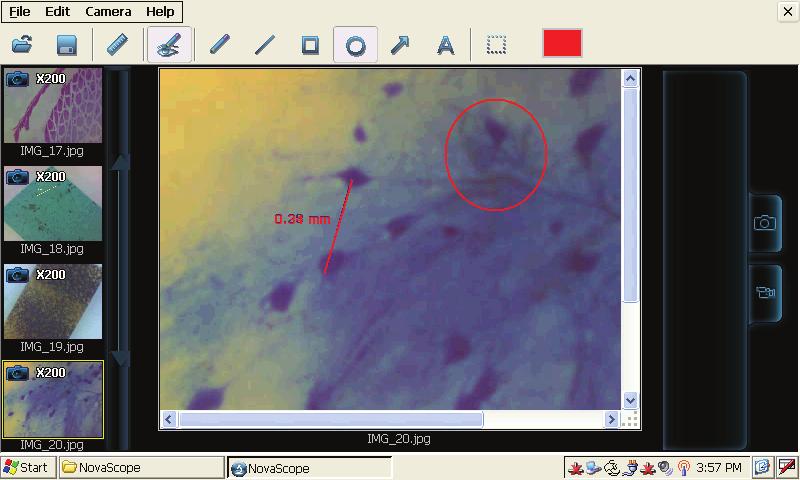
22 To capture a video: 1. Place a specimen on a tabletop or other flat, clean, steady surface. 2. Adjust the microscope tube so the tube touches the surface on which the specimen is placed. 3. On the microscope, set the optimal magnification using the Magnification knob. You can continue to adjust the picture until it appears correctly in the Image area. (For more information about magnification, see Understanding the Microscope Magnification.) 4. When the image previews correctly, tap Video Capture Mode. 5. Tap Record to capture a video. The Stop button replaces the Record button and the video begins recording. In addition, the red circle is displayed on the top left corner of the image to further indicate that NovaScope is capturing content and storing it in a video file. Figure 9: Capturing a Video 6. When you want to stop recording, tap Stop. A thumbnail is displayed in the Thumbnail pane indicating the video has been captured successfully. For videos, NovaScope creates an AVI file. By default, file names have the following format: VID_nn.avi, where nn is a sequential number, increasing automatically with each video file stored in the file directory
23 Chapter 5: Viewing Images NovaScope enables you to view images and videos captured during the current session as well as during previous sessions. To view a still image or video captured during the current session: In the Thumbnails pane, double tap a thumbnail or a video you want to view. If the thumbnail represents an image file, the image is displayed in the Image area. If the thumbnail represents a video file, the video is displayed. To view a still image or video captured during a previous session: 1. On the toolbar, tap Open. The Open dialog box is displayed. 2. Locate the file you want to open and tap OK. The thumbnail of the image or video is displayed in the Thumbnail pane. 3. To view the image or play the video, in the Thumbnail pane, double tap the thumbnail. If the thumbnail represents an image file, the image is displayed in the Image area. If the thumbnail represents a video file, the video is displayed
24 Chapter 6: Using the Ruler Tool NovaScope enables you to measure the distance between two points in both Preview and Captured Image View modes. To perform this measurement, NovaScope provides the Ruler tool. The following sections explain how to configure the Ruler tool to optimize accuracy and how to work with the tool to measure the distance between two points Configuring the Ruler The accuracy of measuring the distance between two points depends on the following parameters: The magnification you are using. The NovaScope application does not automatically detect the current magnification. Instead, you need to specify the magnification manually. The distance between the microscope lens and the surface on which a specimen is placed. To adjust results of the measurement, NovaScope uses a parameter known as Factor. The Factor is the value by which the result of distance measurement is multiplied. When the NovaScope application performs the measurement, the program assumes that the microscope tube touches the surface on which a specimen is placed. In this case, the Factor is set to 1, which is the default value. However, in some cases the microscope tube cannot be adjusted in this way (for example, when a specimen is put on a slide). Because the distance between the microscope lens and the specimen is longer in this case, accuracy of the measurement is affected. In this case, you can manually specify another factor. The following sections explain how to specify these parameters along with other settings, such as measurement units and ruler color Configuring Ruler Settings To ensure accuracy of measuring, NovaScope enables you to specify the following parameters: Magnification Measurement units Factor Ruler color

25 To configure ruler settings: 1. From the Microscope menu, select Ruler Settings. The Ruler Settings dialog box is displayed. Figure 10: Ruler Settings 2. In the Zoom drop-down list, select the current zoom. 3. In the Unit drop-down list, select measurement units. 4. In the Factor field, enter a new factor, if necessary. By default, the factor is Tap on the Color field and select a color for the ruler. 6. Tap OK. The Ruler tool now measures the distance between two points as defined Calibrating the Ruler When the NovaScope application performs the measurement, the program assumes that the microscope tube touches the surface on which a specimen is placed. You only need to calibrate the ruler when the microscope tube does not touch the surface on which the specimen is placed. In some cases the microscope tube cannot be adjusted in this way (for example, when a specimen is put on a slide). Because the distance between the microscope lens and specimen is longer in this case, the accuracy of the measurement is affected. To enable you to adjust the measurement, NovaScope enables you to manually specify the distance. This operation is known as ruler calibration

26 To calibrate the ruler: 1. Measure the distance between two points as described in Measuring Between Points. The ruler indicating the distance between two selected points is displayed. Figure 11: Ruler Measurement 2. From the Microscope menu, select Ruler Calibration. The Ruler Calibration dialog box is displayed. Figure 12: Ruler Calibration The Ruler Calibration dialog box displays the result of the current measurement. Because the program assumes that the microscope tube touches the specimen, the measurement result and the value in the Real Object Size field are the same. 3. To adjust the measurement, in the Real Object Size field, enter a new size
27 Figure 13: Updated Real Object Size 4. Tap OK. The Ruler tool now measures the distance between two points as defined. Figure 14: Calibrated Ruler Measurement As a result of the calibration, the factor is changed accordingly. You can check the new factor by opening the Ruler Settings dialog box as described in Configuring Ruler Settings. NOTE: After you change the position of the microscope tube, you need to recalibrate the ruler Measuring Between Points NovaScope enables you to measure the distance between two points on a microscope image. The behavior of the Ruler tool differs depending on the mode in which you use the ruler

28 The following table describes these differences: Mode Preview Captured image view Annotation Description The ruler is displayed over an image. The ruler does not become a part of the image. The ruler disappears when you do another measurement. You cannot add multiple rulers on an image. Once added, the ruler becomes a part of the image. You cannot remove the ruler from the image. You can add multiple rulers on an image. For more information about annotations, see Annotating Images. To measure between two points: 1. On the toolbar, tap Ruler. 2. In the Image area, click on the location where you wish to begin measuring and then move the stylus between the starting point and the point you wish to measure. The connecting line is displayed. In addition, the distance is displayed in the measurement units as defined. Figure 15: Using the Ruler Tool NOTE: You can change a color of the ruler as described in Configuring Ruler Settings
29 Chapter 7: Annotating Images NovaScope enables you to annotate images by drawing on the image. This is especially useful when you want to graphically highlight a specific element on the image and provide notes about this element. Once an annotation is added, it becomes a part of the image and cannot be removed from the image. To keep your original image intact, it is recommended that you keep an original image without annotations and the image with annotations in two separate files. To annotate an image: 1. Open the image as described in Viewing Images. 2. On the toolbar, tap Annotations Mode. The annotations toolbar is enabled. In addition, the full size image is now displayed in the Image area. You can use the horizontal and vertical scrollbars to locate the area on the image you want to annotate. Figure 16: Full Size Image in the Annotation Mode 3. To select a color for the annotations, tap the color palette and select the color. NOTE: The color of an annotation that has already been added to the image cannot be changed. 4. On the toolbar, tap one of the following annotation tools:

30 Icon Tool Effect Pencil Draws a freeform line. Line Rectangle Circle Arrow Text Region Ruler Draws a straight line. Draws a square or rectangle. Draws an ellipse or circle. Draws an arrow. Draws an area in which you can enter a text. Enables you to select a region on an image. You can copy a part of the image within this region to other applications. Draws a straight line and indicates the distance between two points. In the Annotation model, the ruler is used as an annotation tool. This means the rule is added as part of the image. 5. In the Image area, add an annotation. You can add as many annotations as you want. 6. To finish annotating the image, tap Annotations Mode. The image size fits the Image area again. Figure 17: Image Annotations
31 7. To complete the process, you should now do one of the following: To leave the original image intact and save a copy of the original image with annotations, tap Save and enter a new file name. A new file is saved, leaving the original file as it was originally. To save annotations as a part of the original image, tap Save. The file is updated
32 Chapter 8: Copying Images to Other Applications You can copy images or parts of images to other applications. This feature enables you to forward images or further process these images using additional graphics tools. For example, you can capture an image and then edit this image in a third-party image editor. To copy an image: 1. Open an image as described in Viewing Images. 2. On the toolbar, tap Annotations Mode. 3. To copy an entire image, from the Edit menu, select Copy. The image has been stored in the clipboard and can now be pasted elsewhere, as detailed below. If you want to copy a region, skip this step. 4. To copy a particular region of an image, tap Region. 5. In the Image area, drag the stylus diagonally in the direction you need. The selected region is marked with the dot line on the image. Figure 18: Region Selection 6. From the Edit menu, select Copy. The copied image is now copied into the Windows clipboard. Paste it to another application using standard Windows functionality (for example, Ctrl+V)
33 Chapter 9: Saving and Deleting Files After a microscope image is captured, you can create a copy of this file for further processing (for example, for annotating an image while preserving the original image intact). You can also change the extension of the image file (for example, you can save a JPEG file as a BMP file). In addition, you can reset the automatic enumeration of file names Creating a Copy of a File NovaScope includes the ability to copy files by saving them under a different name. The original file continues to be stored in your file system and a new file, using the new name, is stored as well. While saving a copy of the file, you can also change the graphic format. To create a copy of a file: 1. Open an image as described in Viewing Images. 2. From the File menu, select Save Capture As. The Save As dialog box is displayed. 3. Enter a new name and select a new type, if necessary. 4. Tap OK. A copy of the file is created in the Nova5000 storage Resetting Image Index When NovaScope creates an image or video file, the file receives an automatically generated name that consists of IMG_ (for images) or VID_ (for) videos followed by a number. This number automatically increases by one every time a new file is created. This number is known as index. In some cases, you may want to reset index. To reset index: 1. From the Microscope menu, select Capture Settings. The Capture Settings dialog box is displayed. 2. Select the Reset Image Index check box. 3. Tap OK
34 9.3. Deleting Files NovaScope enables you to easily delete files that have been stored on the Nova5000 memory card. You have the option of deleting an individual file, or all files from a selected folder. The same process is followed regardless of whether the file is an image file or a video file. To delete individual files: 1. In the Thumbnail pane, double tap the image you want to delete. 2. From the File menu, select Delete File. The confirmation window is displayed. 3. Click Yes to confirm your selection. The file is permanently deleted from the Nova5000 storage. To delete all files in the folder: 1. From the Microscope menu, select Capture Settings. 2. Click Empty Folder. The confirmation window is displayed. 3. Click Yes to confirm your selection. All files stored in the folder are permanently deleted from the Nova5000 storage
35 Chapter 10: Troubleshooting Installing and Uninstalling NovaScope Problem When installing NovaScope the following message is displayed: "The file '\Windows\zc030x.dll' is in use or in ROM. If the file is not in ROM, please close the application using the file. Possible Cause The microscope must be disconnected from the Nova5000 when installing NovaScope. Solution 1. Disconnect the microscope from the Nova Run the installation file again Starting NovaScope Problem When starting the NovaScope application, the following message is displayed: "Microscope cannot be found." Possible Cause The microscope is not connected to the Nova5000. Solution 1. Connect the microscope to the Nova Start NovaScope again Lack of Response from the NovaScope Application Problem In the Preview mode, the image of a specimen is frozen. Movements of the specimen or changing the magnification are not reflected on the screen
36 Possible Causes Cause #1 The Nova5000 processes images received from the microscope too slowly. The current version of the Nova5000 supports USB 1.1 only. In some cases, this can significantly slow down the Nova5000 and even cause hanging. Solution 1. Exit from the NovaScope application. 2. Start NovaScope again. Cause #2 After you captured an image, the Image area displays the captured image rather than the live preview of a specimen under the microscope. Therefore, any movements of the specimen or changes in the magnification are not reflected. Solution To return to the Preview mode, tap. Problem Overall performance of the Nova5000 has slowed down. Possible Cause The current version of the Nova5000 supports USB 1.1 only. In some cases, this can significantly slow down the Nova5000 and even cause hanging. Solution 1. Close all other applications. 2. Unplug any devices other than the NovaScope microscope (such as USB keyboard and mouse) from all Nova5000 USB ports Ruler Measurements Problem The results of the measurement done with the Ruler tool are not accurate. Possible Cause When the NovaScope application performs the measurement, the program assumes that the microscope tube touches the surface on which a specimen is placed. However, in some cases the microscope tube cannot be adjusted in this way (for example, when a specimen is put on a slide). Because the distance between the microscope lens and specimen is longer in this case, accuracy of the measurement is affected
37 Solution 1. Verify that the microscope tube touches the specimen. If the microscope tube cannot be adjusted in this way (for example, when a specimen is put on a slide): 2. Perform the measurement using the Ruler tool. 3. From the Microscope menu, select Ruler Settings. 4. In the Ruler Settings dialog box, in the Factor field, enter a new value and tap OK. NovaScope multiples the result of the measurement by this value
38 Appendix A. Microscope Technical Specifications Parameter Image sensor Video capture resolution Still image capture resolution Color Description 2.0 Mega Pixels (XP only: 1600 x 1200, 1280 x 1024), 640 x 480, 320 x 240 (XP only: 1600 x 1200, 1280 x 1024), 640 x 480, 320 x bit RGB Lens Dual axis 27X & 100X, Microscope Lens Focus Range Manual Focus From 10mm To Infinite Flicker Frequency 50Hz/60Hz Frame Rate Max.15/s under 600 lus brightness Magnification Ratio 50X to 200X Shutter Speed 1 sec to 1/1000 sec. Video Format AVI format White Balance Auto
39 Appendix B. Toolbar Reference The following table explains the toolbar icons: Icon Opens a file. Saves a file. Enables the ruler. Description Enables the annotation mode. Pencil Draws a freeform line. Line Draws a straight line. Rectangle Draws a square or rectangle. Circle Draws an ellipse or circle. Arrow Draws an arrow. Text Draws an area in which you can enter a text. Region Enables you to select a region on an image. You can copy a part of the image within this region to other applications. Color palette Enables you to select a color for the ruler or annotation tools. The color palette displays the currently used color
Welcome 1. Precaution
 Table of Contents EN Precaution....2 Preparation.. 4 Standard accessories....4 Parts Names & Functions...5 Computer System requirements.... 6 Technical Specifications 7 Install the software.. 7 Start Microscope.8
Mighty Scope 5M. Instruction Manual. aveninc.com
 Mighty Scope 5M Instruction Manual aveninc.com Contents Features 2 Specifications 2 Contents 2 PC System Requirements 3 Driver Installation Procedure 3 Getting Started 3 Software Installation (PC) 4 Mighty
CHROMACAL User Guide (v 1.1) User Guide
 User Guide") CHROMACAL User Guide (v 1.1) User Guide User Guide Notice Hello and welcome to the User Guide for the Datacolor CHROMACAL Color Calibration System for Optical Microscopy, a cross-platform solution that
CHROMACAL User Guide (v 1.1) User Guide User Guide Notice Hello and welcome to the User Guide for the Datacolor CHROMACAL Color Calibration System for Optical Microscopy, a cross-platform solution that
23070 / Digital Camera Owner s Manual
 23070 / 23072 Digital Camera Owner s Manual 2007 Sakar International, Inc. All rights reserved. 2007 Crayola Windows and the Windows logo are registered trademarks of Microsoft Corporation. All other trademarks
DigiScope II v3 TM Aperture Scope User s Manual
 DigiScope II v3 TM Aperture Scope User s Manual Welcome Thank you for choosing DigiScope II v3 TM Aperture scope! The DigiScope II v3 TM Aperture Scope is an exciting new device to Capture and record the
OPERATION MANUAL MIMAKI ENGINEERING CO., LTD.
 OPERATION MANUAL MIMAKI ENGINEERING CO., LTD. http://www.mimaki.co.jp/ E-mail:traiding@mimaki.co.jp D200674 About FineCut for CorelDRAW Thank you very much for purchasing a product of Mimaki. FineCut,
User Manual. Copyright 2010 Lumos. All rights reserved
 User Manual The contents of this document may not be copied nor duplicated in any form, in whole or in part, without prior written consent from Lumos. Lumos makes no warranties as to the accuracy of the
ISCapture User Guide. advanced CCD imaging. Opticstar
 advanced CCD imaging Opticstar I We always check the accuracy of the information in our promotional material. However, due to the continuous process of product development and improvement it is possible
Digital Microscope. User Manual
 Digital Microscope User Manual Features The digital microscope provides 10~200X adjustable magnification range. The build-in high-performance white LED can illuminate the object without using any auxiliary
MEASUREMENT CAMERA USER GUIDE
 How to use your Aven camera s imaging and measurement tools Part 1 of this guide identifies software icons for on-screen functions, camera settings and measurement tools. Part 2 provides step-by-step operating
PC System Requirement For Dual Microscope
 REV.F The 200X digital microscope provides a 10~200X adjustable magnification range, and the 500X microscope provides 500X magnification. The built-in high-performance LEDs can illuminate an object without
Scanner Utility for Microsoft Windows Version 9.6. User's Guide
 P3PC-E892-03EN Scanner Utility for Microsoft Windows Version 9.6 User's Guide For Use with Microsoft Windows 98, Windows Me, Windows 2000 and Windows XP Introduction Thank you for purchasing the "Scanner
Apple Photos Quick Start Guide
 Apple Photos Quick Start Guide Photos is Apple s replacement for iphoto. It is a photograph organizational tool that allows users to view and make basic changes to photos, create slideshows, albums, photo
ScanGear CS-U 5.6. for CanoScan FB1210U Color Scanner. User s Guide
 ScanGear CS-U 5.6 for CanoScan FB1210U Color Scanner User s Guide Copyright Notice Copyright 2000 Canon Inc. This manual is copyrighted with all rights reserved. Under the copyright laws, this manual may
Copyright Notice. Trademarks
 Copyright Notice All rights reserved. No part of this publication may be reproduced, stored in a retrieval system, or transmitted in any form or by any means, electronic, mechanical, photocopying, recording,
USB Color Camera User Manual. Sentech USB Camera Viewing Software StCamSWare (ver.0.0.8)
") USB Color Camera User Manual Sentech USB Camera Viewing Software Quick Start Reference Guide Installation of Software 1. Uninstall any previous version of StCamSWare software before installing the latest
USB Color Camera User Manual Sentech USB Camera Viewing Software Quick Start Reference Guide Installation of Software 1. Uninstall any previous version of StCamSWare software before installing the latest
REV.C. SmartScope 5M
 REV.C SmartScope 5M The 200X digital microscope provides a 10~200X adjustable magnification range, and the 500X microscope provides 500X magnification. The built-in high-performance LEDs can illuminate
Nikon View DX for Macintosh
 Contents Browser Software for Nikon D1 Digital Cameras Nikon View DX for Macintosh Reference Manual Overview Setting up the Camera as a Drive Mounting the Camera Camera Drive Settings Unmounting the Camera
Getting Started. with Easy Blue Print
 Getting Started with Easy Blue Print User Interface Overview Easy Blue Print is a simple drawing program that will allow you to create professional-looking 2D floor plan drawings. This guide covers the
Sentech USB Camera User Manual. Sentech USB Camera Viewing Software StCamSWare
 Sentech USB Camera User Manual Sentech USB Camera Viewing Software StCamSWare Safety Precautions CAUTION CAUTION RISK OF RISK ELECTRIC OF ELECTRIC SHOCK SHOCK RISK DO OF NOT ELECTRIC DO OPEN NOT SHOCK
Start Here. Installing your Microtek ScanMaker 9800XL Plus PC:
 Start Here Installing your Microtek ScanMaker 98XL Plus Step : Unpack Contents. Optional package items depend on the scanner configuration that you purchased. Unpack your scanner package and check for
CHAPTER1: QUICK START...3 CAMERA INSTALLATION... 3 SOFTWARE AND DRIVER INSTALLATION... 3 START TCAPTURE...4 TCAPTURE PARAMETER SETTINGS... 5 CHAPTER2:
 Image acquisition, managing and processing software TCapture Instruction Manual Key to the Instruction Manual TC is shortened name used for TCapture. Help Refer to [Help] >> [About TCapture] menu for software
DOCUMENT SCANNER INSTRUCTIONS. Space. Backup. Count Only. New File. Scanner. Feeding Option Manual Auto Semi-Auto
 E FILM F Scanner A Space Count Only New File Feeding Option Manual Auto Semi-Auto Backup DOCUMENT SCANNER INSTRUCTIONS NOTICE q Copyright 2001 by CANON ELECTRONICS INC. All rights reserved. No part of
Windows INSTRUCTION MANUAL
 Windows E INSTRUCTION MANUAL Contents About This Manual... 3 Main Features and Structure... 4 Operation Flow... 5 System Requirements... 8 Supported Image Formats... 8 1 Installing the Software... 1-1
DIGITAL-MICROSCOPY CAMERA SOLUTIONS USB 3.0
 DIGITAL-MICROSCOPY CAMERA SOLUTIONS USB 3.0 PixeLINK for Microscopy Applications PixeLINK will work with you to choose and integrate the optimal USB 3.0 camera for your microscopy project. Ideal for use
Standard Operating Procedure
 CENTER FOR NANOSCALE SCIENCE AND ENGINEERING Standard Operating Procedure Microscope Software Brian Wajdyk Page 1 of 6 Important Images are not to be saved to the computer. They will be deleted without
KoPa Scanner. User's Manual A99. Ver 1.0. SHENZHEN OSTEC OPTO-ELECTRONIC TECHNOLOGY CO.,LTD.
 KoPa Scanner A99 User's Manual Ver 1.0 SHENZHEN OSTEC OPTO-ELECTRONIC TECHNOLOGY CO.,LTD. http://www.ostec.com.cn Content Chapter 1 Start... 1 1.1 Safety Warnings and Precautions... 1 1.2 Installation
Visioneer OneTouch Scanner. Installation Guide FOR WINDOWS
 Visioneer OneTouch Scanner Installation Guide FOR WINDOWS TABLE OF CONTENTS i TABLE OF CONTENTS Getting Started with your new Scanner....................... 1 Step 1: Installing the Scanner Software.......................
FUJITSU TWAIN 32 Scanner Driver. Scanner Utility for Microsoft Windows Version User's Guide
 P3PC- E417-02EN FUJITSU TWAIN 32 Scanner Driver Scanner Utility for Microsoft Windows Version 9.10 User's Guide For Use with Microsoft Windows 98, Windows Me, Windows 2000 and Windows XP Introduction
Digital Portable Overhead Document Camera LV-1010
 Digital Portable Overhead Document Camera LV-1010 Instruction Manual 1 Content I Product Introduction 1.1 Product appearance..3 1.2 Main functions and features of the product.3 1.3 Production specifications.4
NAOMI SYSTEM User Guide
 NAOMI SYSTEM User Guide WM_0810-04 FDA 510(k) Number K062376 This document includes the important information to ensure the safe usage of the item. Before using the system, read through this User Guide
INSTRUCTION MANUAL MM-A209
 E INSTRUCTION MANUAL 9222-7300-11 MM-A209 2 BEFORE YOU BEGIN Before installing the DiMAGE Viewer software, read the data-transfer section in the camera manual. This section details how to connect the camera
Combo Scanner. User Manual
 Combo Scanner User Manual I. Unpack the Combo Scanner Backlight Holder Combo Scanner Business card Fixture Photo/Business Card Holder User Manual Quick Installation Guide Note This Combo Scanner supports
Introduction. Introduction
 Introduction Introduction Thank you for purchasing this Canon Microfilm Scanner 800II. These instructions describe how to use the Scanning Utility 800 utility software to import an image projected on the
ScanGear CS-U 5.3 for CanoScan FB630U/FB636U Color Image Scanner User s Guide
 ScanGear CS-U 5.3 for CanoScan FB630U/FB636U Color Image Scanner User s Guide Copyright Notice 1999 Canon Inc. This manual is copyrighted with all rights reserved. Under the copyright laws, this manual
SKF TKTI. Thermal Camera Software. Instructions for use
 SKF TKTI Thermal Camera Software Instructions for use Table of contents 1. Introduction...4 1.1 Installing and starting the Software... 5 2. Usage Notes...6 3. Image Properties...7 3.1 Loading images
1 ImageBrowser Software User Guide 5.1
 1 ImageBrowser Software User Guide 5.1 Table of Contents (1/2) Chapter 1 What is ImageBrowser? Chapter 2 What Can ImageBrowser Do?... 5 Guide to the ImageBrowser Windows... 6 Downloading and Printing Images
User Manual Microscope Application Program Operates Manual MLTC 2011/12/29 Update Ver.2.6A
 MICROLINKS TECHNOLOGY CO.,LTD User Manual Microscope Application Program Operates Manual MLTC 2011/12/29 Update Ver.2.6A Contents 1. Application Program Interface Introduction... 6 1.1 Main Toolbars...
Introduction to: Microsoft Photo Story 3. for Windows. Brevard County, Florida
 Introduction to: Microsoft Photo Story 3 for Windows Brevard County, Florida 1 Table of Contents Introduction... 3 Downloading Photo Story 3... 4 Adding Pictures to Your PC... 7 Launching Photo Story 3...
FLIR Tools for PC 7/21/2016
 FLIR Tools for PC 7/21/2016 1 2 Tools+ is an upgrade that adds the ability to create Microsoft Word templates and reports, create radiometric panorama images, and record sequences from compatible USB and
User s Manual Microscope Application Program Operates Manual MLTC 2012/03/22 Update Ver.2.7A
 MICROLINKS TECHNOLOGY CO.,LTD User s Manual Microscope Application Program Operates Manual MLTC 2012/03/22 Update Ver.2.7A CONTENT 1. Application Program Interface Introduction... 5 2. Main Toolbars...
User Guide of ISCapture
 User Guide of ISCapture For Windows2000/XP/Vista(32bit/64bit)/Win7(32bit/64bit) Xintu Photonics Co., Ltd. Version: 2.6 I All the users of Xintu please kindly note that the information and references in
ScanGear CS-U 6.0. for CanoScan D646U Color Scanner. User s Guide
 ScanGear CS-U 6.0 for CanoScan D646U Color Scanner User s Guide Copyright Notice Copyright 2000 Canon Inc. This manual is copyrighted with all rights reserved. Under the copyright laws, this manual may
GlobiScope Analysis Software for the Globisens QX7 Digital Microscope. Quick Start Guide
 GlobiScope Analysis Software for the Globisens QX7 Digital Microscope Quick Start Guide Contents GlobiScope Overview... 1 Overview of home screen... 2 General Settings... 2 Measurements... 3 Movie capture...
reference guide reference guide reference guide
 hp photosmart 240 series reference guide reference guide reference guide contents 1 welcome..................................... 1 find more information.............................. 1 what s in the box.................................
Table of Contents 1. Image processing Measurements System Tools...10
 Introduction Table of Contents 1 An Overview of ScopeImage Advanced...2 Features:...2 Function introduction...3 1. Image processing...3 1.1 Image Import and Export...3 1.1.1 Open image file...3 1.1.2 Import
Chapter 14 Inserting Bitmapped Images
 Chapter 14 Inserting Bitmapped Images Introduction This chapter explains how to insert and size bitmapped images in R&R reports. This information is presented in the following sections: Importing an Image
W i n d o w s. ScanGear CS-S 4.3 for CanoScan FB1200S Color Image Scanner. User's Guide
 f o r W i n d o w s ScanGear CS-S 4.3 for CanoScan FB1200S Color Image Scanner User's Guide How to Make Best Use of the Manuals 2 When you open the box Printed Manual CanoScan FB1200S Quick Start Guide
Version 4.2 For WINDOWS
 SIGMA Photo Pro User Guide Companion Processing Software for SIGMA Digital Cameras Version 4.2 For WINDOWS I M P O R T A N T : Please Read Before You Start Thank you very much for purchasing this SIGMA
RICOH Stereo Camera Software R-Stereo-GigE-Calibration
 RICOH Stereo Camera Software R-Stereo-GigE-Calibration User's Guide RICOH Industrial Solutions Inc. 1/18 Contents 1. FUNCTION OVERVIEW... 3 1.1 Operating Environment... 3 2. OPERATING PROCEDURES... 4 3.
Toothbrush Holder. A drawing of the sheet metal part will also be created.
 Prerequisite Knowledge Previous knowledge of the following commands is required to complete this lesson; Sketch (Line, Centerline, Circle, Add Relations, Smart Dimension,), Extrude Boss/Base, and Edit
Image Pro Ultra. Tel:
 Image Pro Ultra www.ysctech.com info@ysctech.com Tel: 510.226.0889 Instructions for installing YSC VIC-USB and IPU For software and manual download, please go to below links. http://ysctech.com/support/ysc_imageproultra_20111010.zip
User s Manual Microscope Application Program Operates Manual MLTC 2011/04/15 Update Ver.2.5A
 MICROLINKS TECHNOLOGY CO.,LTD User s Manual Microscope Application Program Operates Manual MLTC 2011/04/15 Update Ver.2.5A Microscope Application Program Operates Manual Contents 1. Main Toolbars... 7
User Guide for TWAIN / DirectX interface for GRYPHAX USB 3.0 cameras
 User Guide for TWAIN / DirectX interface for GRYPHAX USB 3.0 cameras The TWAIN & DirectX driver for PROGRES GRYPHAX USB 3.0 cameras enables user to operate with TWAIN and DirectX supported 3 rd party software
Introduction to Autodesk Inventor for F1 in Schools (Australian Version)
") Introduction to Autodesk Inventor for F1 in Schools (Australian Version) F1 in Schools race car In this course you will be introduced to Autodesk Inventor, which is the centerpiece of Autodesk s Digital
Introduction to Autodesk Inventor for F1 in Schools (Australian Version) F1 in Schools race car In this course you will be introduced to Autodesk Inventor, which is the centerpiece of Autodesk s Digital
Start Here. Installing your Microtek ScanMaker i280
 Start Here Installing your Microtek ScanMaker i280 Step 1: Unpack Contents Unpack your scanner package and check for major components. 1. ScanMaker i280 scanner 2. Hi-Speed USB cable 3. Software CDs/DVDs
Scanning Electron Microscope FEI INSPECT F50. Step by step operation manual
 Scanning Electron Microscope FEI INSPECT F50 Step by step operation manual Scanning Electron Microscope, FEI Inspect F50 FE-SEM-F Observation Flow Saving Data And Analysis Specimen preparation Error check
μscope Microscopy Software
 μscope Microscopy Software Pixelink μscope Essentials (ES) Software is an easy-to-use robust image capture tool optimized for productivity. Pixelink μscope Standard (SE) Software had added features, making
WinDIAS 3. Quick Start Guide version 3.2. Delta-T Devices Ltd. Image Analysis System
 WinDIAS 3 Image Analysis System Quick Start Guide version 3.2 Delta-T Devices Ltd Overview Note: Not all TWAIN devices will work Page 2 Video Camera Operations 1 Connect camera to PC 2 PC detects camera,
Ihara U.S., Inc Corporate Place, Suite A107 Monterey Park, California Users Manual
 Ihara U.S., Inc. 2530 Corporate Place, Suite A107 Monterey Park, California 91754 www.ihara-us.com Users Manual VT-300 Application Program Operation Manual 2012/06/01 Update Ver.2.8I Contents 1. Application
EinScan-SE. Desktop 3D Scanner. User Manual
 EinScan-SE Desktop 3D Scanner User Manual Catalog 1. 2. 3. 4. 5. 6. 7. 8. 1.1. 1.2. 1.3. 1.1. 1.2. 1.1. 1.2. 1.3. 1.1. 1.2. Device List and Specification... 2 Device List... 3 Specification Parameter...
Optika ISview. Image acquisition and processing software. Instruction Manual
 Optika ISview Image acquisition and processing software Instruction Manual Key to the Instruction Manual IS is shortened name used for OptikaISview Square brackets are used to indicate items such as menu
Contents STARTUP MICROSCOPE CONTROLS CAMERA CONTROLS SOFTWARE CONTROLS EXPOSURE AND CONTRAST MONOCHROME IMAGE HANDLING
 Operations Guide Contents STARTUP MICROSCOPE CONTROLS CAMERA CONTROLS SOFTWARE CONTROLS EXPOSURE AND CONTRAST MONOCHROME IMAGE HANDLING Nikon Eclipse 90i Operations Guide STARTUP Startup Powering Up Fluorescence
ScanGear CS-U 5.8. for CanoScan D660U Color Scanner. User s Guide
 ScanGear CS-U 5.8 for CanoScan D660U Color Scanner User s Guide Copyright Notice Copyright 2000 Canon Inc. This manual is copyrighted with all rights reserved. Under the copyright laws, this manual may
For customers in Canada This Class B digital apparatus meets all requirements of the Canadian Interference-Causing Equipment Regulations.
 User manual For customers in North and South America For customers in USA This device complies with Part 15 of the FCC rules. Operation is subject to the following two conditions: (1) This device may not
Brightness and Contrast Control Reference Guide
 innovation Series Scanners Brightness and Contrast Control Reference Guide A-61506 Part No. 9E3722 CAT No. 137 0337 Using the Brightness and Contrast Control This Reference Guide provides information and
Contents. Nikon Scan for Windows. Scanner Control Software and TWAIN Source. Reference Manual. Overview Before You Begin.
 Contents Overview Before You Begin System Requirements Software Installation Basic Operations Scanner Control Software and TWAIN Source Nikon Scan for Windows Reference Manual The Scan Window Opening the
HP Photosmart R740 series Digital Camera. User Guide
 HP Photosmart R740 series Digital Camera User Guide Legal and notice information Copyright 2007 Hewlett-Packard Development Company, L.P. The information contained herein is subject to change without notice.
Introduction to Parametric Modeling AEROPLANE. Design & Communication Graphics 1
 AEROPLANE Design & Communication Graphics 1 Object Analysis sheet Design & Communication Graphics 2 Aeroplane Assembly The part files for this assembly are saved in the folder titled Aeroplane. Open an
1. What is SENSE Batch
 1. What is SENSE Batch 1.1. Introduction SENSE Batch is processing software for thermal images and sequences. It is a modern software which automates repetitive tasks with thermal images. The most important
COMPUTING CURRICULUM TOOLKIT
 COMPUTING CURRICULUM TOOLKIT Pong Tutorial Beginners Guide to Fusion 2.5 Learn the basics of Logic and Loops Use Graphics Library to add existing Objects to a game Add Scores and Lives to a game Use Collisions
Olympus Digital Microscope Camera (DP70) checklist
 checklist") Smith College - July 2005 Olympus Digital Microscope Camera (DP70) checklist CONTENT, page no. Camera Information, 1 Startup, 1 Retrieve an Image, 2 Microscope Setup, 2 Capture, 3 Preview. 3 Color Balans,
Smith College - July 2005 Olympus Digital Microscope Camera (DP70) checklist CONTENT, page no. Camera Information, 1 Startup, 1 Retrieve an Image, 2 Microscope Setup, 2 Capture, 3 Preview. 3 Color Balans,
MC3 Motion Control System Shutter Stream Quickstart
 MC3 Motion Control System Shutter Stream Quickstart Revised 7/6/2016 Carousel USA 6370 N. Irwindale Rd. Irwindale, CA 91702 www.carousel-usa.com Proprietary Information Carousel USA has proprietary rights
User Manual Veterinary
 Veterinary Acquisition and diagnostic software Doc No.: Rev 1.0.1 Aug 2013 Part No.: CR-FPM-04-022-EN-S 3DISC, FireCR, Quantor and the 3D Cube are trademarks of 3D Imaging & Simulations Corp, South Korea,
The CO2 Sensor Calibration Kit
 The CO2 Sensor Kit For use with all BAPI CO 2 Sensors Instruction Manual CO 2 Kit Product Identification and Overview BAPI s CO 2 Sensor Kit is designed to calibrate and verify the operation of all BAPI
HP Photosmart Mz60 series Digital Camera. User Guide
 HP Photosmart Mz60 series Digital Camera User Guide Legal and notice information Copyright 2007 Hewlett-Packard Development Company, L.P. The information contained herein is subject to change without notice.
Engineering Technology
 Engineering Technology Introduction to Parametric Modelling Engineering Technology 1 See Saw Exercise Part 1 Base Commands used New Part This lesson includes Sketching, Extruded Boss/Base, Hole Wizard,
Start Here. Unpack Contents. Install Software. Installing your Microtek Bio-5000 Plus
 Start Here Installing your Microtek Bio-5000 Plus Unpack Contents Unpack your scanner package and check for major components. 1. Bio-5000 Plus scanner 2. Hi-Speed USB cable LEAK-FREE GLASS HOLDER This
Kigamo Scanback which fits in your view camera in place of conventional film.
 What's included Kigamo Scanback which fits in your view camera in place of conventional film. SCSI Cable to connect your Scanback to the host computer. A 3-meter SCSI cable is standard. Kigamo also has
AxioVision 4.5 Brightfield Image Capture Procedure
 AxioVision 4.5 Brightfield Image Capture Procedure 1. STARTING-UP PROCEDURE: Remove blue dust cover and place on shelf under microscope. Turn on the halogen lamp by pushing the switch at the back right
AEROPLANE. Create a New Folder in your chosen location called Aeroplane. The four parts that make up the project will be saved here.
 AEROPLANE Prerequisite Knowledge Previous knowledge of the following commands is required to complete this lesson. Sketching (Line, Rectangle, Arc, Add Relations, Dimensioning), Extrude, Assemblies and
User Guide. Version 1.2. Copyright Favor Software. Revised:
 User Guide Version 1.2 Copyright 2009-2010 Favor Software Revised: 2010.05.18 Table of Contents Introduction...4 Installation on Windows...5 Installation on Macintosh...6 Registering Intwined Pattern Studio...7
User Guide. Version 1.4. Copyright Favor Software. Revised:
 User Guide Version 1.4 Copyright 2009-2012 Favor Software Revised: 2012.02.06 Table of Contents Introduction... 4 Installation on Windows... 5 Installation on Macintosh... 6 Registering Intwined Pattern
Magic Wand Portable Scanner with Auto-Feed Dock. PDSDK-ST470-VP-BX2 User Manual
 Magic Wand Portable Scanner with Auto-Feed Dock PDSDK-ST470-VP-BX2 User Manual Table of Contents 1. KEY FEATURES... 2 2. FUNCTIONAL PARTS... 2 3. EXPLANATION OF THE STATUS ICONS... 4 4. GETTING STARTED...
ID Photo Processor. Batch photo processing. User Guide
 ID Photo Processor Batch photo processing User Guide 2015 Akond company 197342, Russia, St.-Petersburg, Serdobolskaya, 65a Phone/fax: +7(812)384-6430 Cell: +7(921)757-8319 e-mail: info@akond.net http://www.akond.net
Operating Manual. (Version 3.10)
") Operating Manual (Version 3.10) Thank you for purchasing this PENTAX Digital Camera. This is the manual for PENTAX PHOTO Browser 3 and PENTAX PHOTO Laboratory 3 software for your Windows PC or Macintosh
Operating Manual (Version 3.10) Thank you for purchasing this PENTAX Digital Camera. This is the manual for PENTAX PHOTO Browser 3 and PENTAX PHOTO Laboratory 3 software for your Windows PC or Macintosh
AP Art History Flashcards Program
 AP Art History Flashcards Program 1 AP Art History Flashcards Tutorial... 3 Getting to know the toolbar:... 4 Getting to know your editing toolbar:... 4 Adding a new card group... 5 What is the difference
Guidance on Using Scanning Software: Part 5. Epson Scan
 Guidance on Using Scanning Software: Part 5. Epson Scan Version of 4/29/2012 Epson Scan comes with Epson scanners and has simple manual adjustments, but requires vigilance to control the default settings
User Manual for PROGRES GRYPHAX software
 User Manual for PROGRES GRYPHAX software PROGRES GRYPHAX software JENOPTIK l Healthcare & Industry JENOPTIK Optical Systems GmbH Göschwitzer Straße 25 07745 Jena, Germany Dear user, Please read the instructions
Operating Instructions Pocket Pictor For use with Pocket Pc s
 Introduction Operating Instructions Pocket Pictor For use with Pocket Pc s The compact size and low power consumption of Pocket PC s make them ideal for use in the field. Pocket Pictor is designed for
Contents Technical background II. RUMBA technical specifications III. Hardware connection IV. Set-up of the instrument Laboratory set-up
 RUMBA User Manual Contents I. Technical background... 3 II. RUMBA technical specifications... 3 III. Hardware connection... 3 IV. Set-up of the instrument... 4 1. Laboratory set-up... 4 2. In-vivo set-up...
Adobe Photoshop CC 2018 Tutorial
 Adobe Photoshop CC 2018 Tutorial GETTING STARTED Adobe Photoshop CC 2018 is a popular image editing software that provides a work environment consistent with Adobe Illustrator, Adobe InDesign, Adobe Photoshop,
First English edition for Ulead COOL 360 version 1.0, February 1999.
 First English edition for Ulead COOL 360 version 1.0, February 1999. 1992-1999 Ulead Systems, Inc. All rights reserved. No part of this publication may be reproduced or transmitted in any form or by any
CAUTION: March, 2001 Designed and manufactured by SCALAR Corporation , Yoyogi, Shibuya-ku, TOKYO JAPAN
 USB Digital Scale User s Guidebook CAUTION: (1) This book and USB Digital Scale are copyrighted works of SCALAR Corporation. (the Company ). (2) Use or reproduction in whole or in part of this book or
Copyright 2014 SOTA Imaging. All rights reserved. The CLIOSOFT software includes the following parts copyrighted by other parties:
 2.0 User Manual Copyright 2014 SOTA Imaging. All rights reserved. This manual and the software described herein are protected by copyright laws and international copyright treaties, as well as other intellectual
ET-413 2MP USB PEN MICROSCOPE
 ET-413 2MP USB PEN MICROSCOPE USER S MANUAL INTRODUCTION FUNCTIONS AND APPLICATIONS The ET-413 2 Mega-Pixel USB PEN MICROSCOPE is a new electronic product for micro observations. It is a tubular imaging
Using the AmScope Microscope Cameras
 Using the AmScope Microscope Cameras Part 1 Setup. In order to use the camera, you will need: a) the camera system; b) a computer running the camera software. The camera system is contained in a Pelican
GXCapture 8.1 Instruction Manual
 GT Vision image acquisition, managing and processing software GXCapture 8.1 Instruction Manual Contents of the Instruction Manual GXC is the shortened name used for GXCapture Square brackets are used to
GlassSpection User Guide
 i GlassSpection User Guide GlassSpection User Guide v1.1a January2011 ii Support: Support for GlassSpection is available from Pyramid Imaging. Send any questions or test images you want us to evaluate
ArcSoft PhotoImpression Table of Contents:
 ArcSoft PhotoImpression Table of Contents: 1. Welcome to PhotoImpression 2. Highlights of PhotoImpression 3. System Requirements 4. Installing PhotoImpression 5. Working with PhotoImpression Getting Started