Chlorophyll Fluorescence Imaging System
|
|
|
- Noreen Horn
- 5 years ago
- Views:
Transcription


1 Quick Start Guide
2 Chlorophyll Fluorescence Imaging System Quick Start Guide for Technologica FluorImager software for use with Technlogica CFImager hardware Copyright TECHNOLOGICA LIMITED. All Rights Reserved Published in UK Version
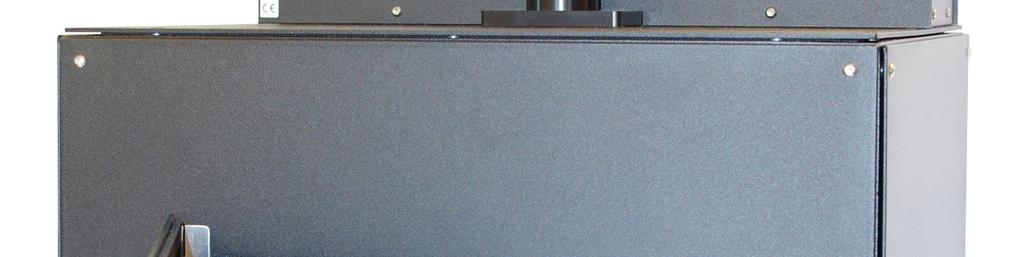
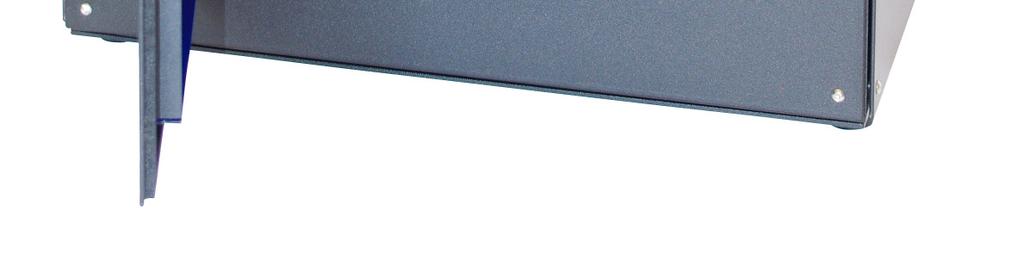
3 Before you start The following information is for instrument use and assumes the user has installed the supplied hardware and software. The instrument exterior is designed to virtually exclude all external light, thus preventing background light influencing the sample or fluorescence measurements. If the instrument is being used in a dark room, all side and front panels can be easy removed by releasing the four corner screws of each panel, (using the finger screws and 2mm driver). This feature can also be useful for examining leaves that are still attached. The base of the instrument can be removed for in-situ measurements. The front user access door of the instrument is detachable by gently lifting upwards off its hinges. This allows increased access which can be particularly useful when aligning samples. Cams on the central sample stage enable a variety of well plates to be accurately located. If required the sample stage can be removed from the base plate using the 3mm socket driver supplied. Your instrument is factory set for light and camera calibrations, which are unique to your instrument, with the data held on the installation CD. In the unlikely event that you need to recalibrate the camera or the lights refer to Appendix I. This may be necessary if the camera is replaced or the lights require readjustment. It is also important to note that these factory default setting refers to a calibrated sample stage height between 130mm and 140 mm above the base of the instruments (0 on the fixed scale aligned with 30 on the moving scale of the sample stage rack and pinion). It is important that all measurements are made using this reference height because light intensity, alignment and area measurements are all calibrated at this height, therefore the imaged surface of samples should be at this height. After adjustment the sample stage can be locked into position using the small lever at the rear of its rack and pinion mechanism. Version
4 Contents Quick Start Guide Page # Quick start I Manual capture of Fv/Fm 4 Quick start II Set up/run protocol for screening a 96 well plate 6 Version
. Step 2 establish connection with the camera and light system a) Press the Connect to camera button on the button bar.")

5 Quick Start I Manual capture of Fv/Fm Step 1 set up the sample Adjust the height of the sample so that it is at the correct distance from the lights (the zero of the fixed scale should be aligned with 30 on the movable scale of the sample stage rack and pinion mechanism). Step 2 establish connection with the camera and light system a) Press the Connect to camera button on the button bar. green when selected b) Press the Focus button c) Adjust the camera focus (release locking screw and rotate upper ring on camera lens, labelled Focus). Step 3 take the map image. Taking a map image is the first step in selecting those pixels within the camera field of view that you wish to remain active for the measurement of fluorescence parameters. Press the Map image button The camera is set to give a short exposure. In most situations, this keeps the exposure within the dynamic range of the camera. If this is not the case the user is prompted to open or close the aperture to adjust the peak signal. To alter the aperture, release the locking screw on the aperture ring on the camera (labelled Aperture). Turn clockwise to close and anticlockwise to open the aperture, press Yes on the prompt message to continue. The message will be repeated if the aperture still requires adjustment. If No is selected, an image will be taken with the selected aperture. Cancel aborts the operation. Before proceeding the map image should be processed so that only the areas (pixels) of interest remain in the image. There are several methods for processing the image. Step 4 process the map image Processing the map image defines the active pixels within an image, there are several user options outlined below. Version
6 Option 1 Automated isolation of active areas Select Image(s) Apply isolation. Although this method works well with most materials, highly heterogeneous well plate samples can result in too many/too few pixels being removed. Samples contained within highly reflective vessels (clear or light coloured well plates, for example) can also cause problems, due to scattered fluorescence. The automated isolation process can be reversed using Image(s) Undo isolation and Option 2 used instead. Option 2 The Modify image dialog tools Accessed by double clicking the left mouse button over the current image or a thumbnail image or through Image(s) Modify this dialog provides a wide range of tools for editing an image and adding/deleting zone lines. The slide controls below the data histogram control the mapping of pixel values to the palette histogram. The sliders below the palette histogram are low cut and high cut filters, which can be used in combination with the Delete low and high cuts command (selected from a popup menu, by right clicking within the image dialog box), to zero the relevant pixels within the selected area of the image. Step 6 Capturing images of Fo, Fm and Fv/Fm Press the Fo&Fm or F &Fm button A Fo and Fm fluorescence image will be captured and placed sequentially in the thumbnails. FluorImager will automatically build an image of Fv/Fm, the image thumbnail will be placed as the next image in the sequence (ensure that the Fv/Fm and Fq /Fm image check box is selected in the Auto build options which can be accessed through Image(s) Auto build options). If the built image is not displayed in the thumbnails, check that Fv/Fm and Fq /Fm check box is ticked (in the Thumbnail image options accessed through View Thumbnail options...). Step 7 Save the file Select File Save as Enter an appropriate file name and destination drive and press save. Step 8 copy and paste the results into Excel The fluorescence parameter data can be copied and pasted into Excel or other spreadsheet-based applications. This is done most conveniently by right clicking on the selected image and selecting from the COPY options of the pop-up menu. Having right clicked on a chosen image, selecting Copy Zone Data to the Clipboard allows data for each zone within the image to be copied into Excel. If zones have not been selected, average values for that image will be copied to the clipboard. If Include header info is selected under COPY on the popup menu, all experimental details and user information will be copied with the data to the spreadsheet. For more options see sections below: Edit Clipboard copy Current image and Edit Clipboard copy All images. Version
7 Quick Start II Set up and run a protocol to screen a 96 well plate (example using zone lines and protocol) Step 1 set up the sample Adjust the height of the sample so that it is at the correct distance from the lights (the zero of the fixed scale should be aligned with 30 on the movable scale of the sample stage rack and pinion mechanism). Step 2 establish connection with the camera and light system a) Press the Connect to camera button on the button bar. turns green when selected b) Press the Focus button c) Adjust the camera focus (release locking screw and rotate upper ring on camera lens, labelled Focus). Step 3 take a reflected light map image of an empty well plate A reflected light image of an empty well plate is preferred to a fluorescence image of a full well plate, simply because the wells are much easier to locate. Also, this allows the sample to be maintained in darkness prior to measurement of Fv/Fm. Press the Reflected button Step 4 adjust the contrast of the reflected image Double click within the current image area to launch the Modify image dialog. Obtain the best contrast possible using the Equalise and Gamma controls. Version


8 Step 5 add the horizontal zone lines With the cursor over the image, click the right mouse button. From the popup menu that is launched, select Shift + left button... Adds a horizontal zone line. This automatically assigns Deletes a horizontal zone line to the Ctrl + left button... option. There is no need to add lines above the top row of wells or below the bottom row of wells. Once the horizontal lines have all been added (a maximum of 7), click the right mouse button and, from the popup menu that is launched, select Shift + left button... Adds a vertical zone line. This automatically assigns Deletes a vertical zone line to the Ctrl + left button... option. There is no need to add lines to the left and right of the outermost wells. Once all the vertical zone lines have been added (a maximum of 11), press the OK button to save the changes and close the dialog. The file can be saved at this point and used as a template, which, when retrieved, can be used to copy zone lines to a new file. Version

9 Step 6 take the map image. Press the Map image button The camera is set to give a short exposure. In most situations, this keeps the exposure within the dynamic range of the camera. If this is not the case the user is prompted to open or close the aperture to adjust the peak signal. To alter the aperture, release the locking screw of the aperture ring on the camera (labelled Aperture) and turn clockwise to close and anticlockwise to open the aperture. Press Yes on the prompt message to continue. The message will be repeated if the aperture still requires adjustment. If No is selected an image will be taken with the selected aperture. Cancel aborts the operation. Before proceeding the map image should be processed so that only the areas (pixels) of interest remain in the image. Step 7 define the active pixels within the map image a) Select Images Apply isolation b) If the isolation is satisfactory, proceed to Step 8 c) If too many pixels were deleted, select Images Undo isolation d) Select Image(s) Modify, or double click the left mouse button over the main image, to launch the Modify image dialog box e) Move the low-cut slider (just under the lower histogram) until the unwanted low value pixels are all changed to blue f) Click the right mouse button while the cursor is over the image g) From the popup menu, select Delete low and high cuts h) Press the OK button to close the dialog box Version

10 Step 8 copy the zone lines and paste them onto the map image a) With the reflected light image as the current image, copy the zone lines using Edit Copy zone lines b) Select the map image and paste the zone lines using Edit Paste zone lines The zone lines on the map image are applied to all future images. See also Show / hide zone lines. Step 9 Set up the protocol: A protocol can be set up at any time and does not necessarily need to be applied as Step 9 of this procedure. It has been included for demonstration purposes. The protocol described below is an example protocol only. You should choose a protocol that will provide the experimental data you wish to collect. The following is an example of a light response protocol. a) Select Settings Protocol... from the menu bar or press Alt + P. b) Type 5 in the After a delay of: box c) Select the s check box d) Select the Apply pulse check box e) Leave This number of times (cycles): set to 1 f) Leave the Details settings as they are g) Leave the Take F' and Fm' images with pulse check box selected h) Press the update button (this will update the 1 st line to the details selected). i) Select the Change actinic check box j) Type 50 in the Actinic PPFD box k) Press the Add button or click the right mouse button while the cursor is within the output region of the protocol window and select Add line (this will place a new, updated protocol line in the protocol sequence). Version
 Type 5 in the After a delay of: box q) Select the min check box and press Update.")
11 l) Use the mouse to select Step 1 of the protocol m) Press Copy n) Use the mouse to select Step 2 of the protocol o) Press Paste a second apply pulse line will appear as Step 3. p) Type 5 in the After a delay of: box q) Select the min check box and press Update. r) Use the mouse to select Step 2 of the protocol s) Press Copy t) Use the mouse to select Step 3 of the protocol u) Press Paste a second change actinic line will appear as Step 4. v) Type 100 in the Actinic PPFD box and press update. w) The copy and paste steps outlined above can be repeated and the Actinic PPFD changed and updated until a series of actinic changes take place followed by 5 min delay before a saturating pulse is applied. Version
 Press the Close button aa) Select Settings Protocol Save.")
12 x) Step 22 has been set to change the actinic PPFD to 0. y) To look for recovery of Fv/Fm, Step 23 has a series of 3 pulses (cycle set to 3) 5 min apart. z) Press the Close button aa) Select Settings Protocol Save.pcl file bb) Save the file with a name of your choice It is also possible to copy and paste using a right mouse click while the cursor is within the output region of the protocol window and selecting copy and paste from the popup menu. Step 10 start recording the fluorescence trace Press the Trace on/off button. Since the actinic PPFD is zero, the Fo level of fluorescence will be recorded within the trace. Step 11 run the protocol After a few seconds, press the Run protocol button. This will launch the Protocol dialog. The time remaining is shown below the last line of the protocol. remains depressed whilst protocol is running Step 12 copy and paste the results into Excel Once the protocol has finished, the fluorescence traces and/or parameter data can be copied and pasted into Excel or other spreadsheet-based applications. This is done most conveniently by right clicking on the selected image, or on the fluorescence trace(s) and selecting from the COPY options of the pop-up menu. Having right clicked on a chosen image, selecting Copy zone data to the Clipboard allows data for each zone within the image to be copied into Excel. If no zones are selected the average value for the image will be copied. After right clicking on the fluorescence trace, selecting All trace points data under copy to clipboard will allow you to copy all the data points for regions into Excel. Version
 will be shown.")
13 Selecting All pulse/ transient data under copy to clipboard will allow you to copy data for all measured parameters into Excel. For a 96 well plate only the average values for the entire plate will be shown. However, if working with Region Images, values for each region (e.g. each leaf) will be shown. If Include header info is selected on the popup menu, all experimental details and user information will be copied with the data to the spreadsheet. For more options see sections below: Edit Clipboard copy Current image and Edit Clipboard copy All images. Note One advantage of using zone lines is that data can be group according to treatment. This approach has been using below examining glyphosate sensitivity. Treatment are arranged in columns, vertical zone lines allow calculation of the average data for each vertical zone. Data were collected 24 h after exposure to glyphosate at the levels indicated. Glyphosate (mm) Glyphosate + Tween Control Water Tween Control Water Tween Fv/Fm Version
Chlorophyll Fluorescence Imaging System
 USER MANUAL Chlorophyll Fluorescence Imaging System Version 2.2 1 User manual for Technologica FluorImager software for use with Technlogica cf Imager hardware Copyright 2006 TECHNOLOGICA LIMITED. All
We recommend downloading the latest core installer for our software from our website. This can be found at:
 Dusk Getting Started Installing the Software We recommend downloading the latest core installer for our software from our website. This can be found at: https://www.atik-cameras.com/downloads/ Locate and
ISCapture User Guide. advanced CCD imaging. Opticstar
 advanced CCD imaging Opticstar I We always check the accuracy of the information in our promotional material. However, due to the continuous process of product development and improvement it is possible
MRI Grid. The MRI Grid is a tool in MRI Cell Image Analyzer, that can be used to associate measurements with labeled positions on a board.
 Abstract The is a tool in MRI Cell Image Analyzer, that can be used to associate measurements with labeled positions on a board. Illustration 2: A grid on a binary image. Illustration 1: The interface
GXCapture 8.1 Instruction Manual
 GT Vision image acquisition, managing and processing software GXCapture 8.1 Instruction Manual Contents of the Instruction Manual GXC is the shortened name used for GXCapture Square brackets are used to
Getting Started. with Easy Blue Print
 Getting Started with Easy Blue Print User Interface Overview Easy Blue Print is a simple drawing program that will allow you to create professional-looking 2D floor plan drawings. This guide covers the
SARG: The Graphical User Interface Manual
 1/28 SARG: The Graphical User Interface Manual Document: TNG-SARG-001 Issue: 1.0 Prepared by : Name: S. Scuderi Institute: INAF-Osservatorio Astrofisico di Catania Date : Approved by : Name: R. Cosentino
ImagesPlus Basic Interface Operation
 ImagesPlus Basic Interface Operation The basic interface operation menu options are located on the File, View, Open Images, Open Operators, and Help main menus. File Menu New The New command creates a
Instruction Manual for HyperScan Spectrometer
 August 2006 Version 1.1 Table of Contents Section Page 1 Hardware... 1 2 Mounting Procedure... 2 3 CCD Alignment... 6 4 Software... 7 5 Wiring Diagram... 19 1 HARDWARE While it is not necessary to have
CHAPTER1: QUICK START...3 CAMERA INSTALLATION... 3 SOFTWARE AND DRIVER INSTALLATION... 3 START TCAPTURE...4 TCAPTURE PARAMETER SETTINGS... 5 CHAPTER2:
 Image acquisition, managing and processing software TCapture Instruction Manual Key to the Instruction Manual TC is shortened name used for TCapture. Help Refer to [Help] >> [About TCapture] menu for software
1/31/2010 Google's Picture Perfect Picasa
 The Picasa software lets you organize, edit, and upload your photos in quick, easy steps. Download Picasa at http://picasa.google.com You'll be prompted to accept the terms of agreement. Click I Agree.
ThermaViz. Operating Manual. The Innovative Two-Wavelength Imaging Pyrometer
 ThermaViz The Innovative Two-Wavelength Imaging Pyrometer Operating Manual The integration of advanced optical diagnostics and intelligent materials processing for temperature measurement and process control.
Micro-Image Capture 8 Installation Instructions & User Guide
 Micro-Image Capture 8 Installation Instructions & User Guide Software installation: Micro-Image Capture Software 1. Load Micro-Image Capture software CD onto host PC. Auto Run should start driver/software
User Guide of ISCapture
 User Guide of ISCapture For Windows2000/XP/Vista(32bit/64bit)/Win7(32bit/64bit) Xintu Photonics Co., Ltd. Version: 2.6 I All the users of Xintu please kindly note that the information and references in
Photo Editing in Mac and ipad and iphone
 Page 1 Photo Editing in Mac and ipad and iphone Switching to Edit mode in Photos for Mac To edit a photo you ll first need to double-click its thumbnail to open it for viewing, and then click the Edit
Color and More. Color basics
 Color and More In this lesson, you'll evaluate an image in terms of its overall tonal range (lightness, darkness, and contrast), its overall balance of color, and its overall appearance for areas that
Imaging Features Available in HTML5. it just makes sense
 Imaging Features Available in HTML5 it just makes sense August, 2018 Imaging Features Available in HTML5 As part of the 5.2 SP1 release, the Images functionality is now available in HTML5 and provides
4) Click on Load Point Cloud to load the.czp file from Scene. Open Intersection_Demo.czp
 Click on Load Point Cloud to load the.czp file from Scene. Open Intersection_Demo.czp") Intersection 2D Demo 1) Open the Crash Zone or Crime Zone diagram program. 2) Click on to open the CZ Point Cloud tool. 3) Click on 3D/Cloud Preferences. a) Set the Cloud File Units (Feet or Meters). b)
Intersection 2D Demo 1) Open the Crash Zone or Crime Zone diagram program. 2) Click on to open the CZ Point Cloud tool. 3) Click on 3D/Cloud Preferences. a) Set the Cloud File Units (Feet or Meters). b)
Copyright Notice. Trademarks
 Copyright Notice All rights reserved. No part of this publication may be reproduced, stored in a retrieval system, or transmitted in any form or by any means, electronic, mechanical, photocopying, recording,
7.0 - MAKING A PEN FIXTURE FOR ENGRAVING PENS
 7.0 - MAKING A PEN FIXTURE FOR ENGRAVING PENS Material required: Acrylic, 9 by 9 by ¼ Difficulty Level: Advanced Engraving wood (or painted metal) pens is a task particularly well suited for laser engraving.
ScanArray Overview. Principle of Operation. Instrument Components
 ScanArray Overview The GSI Lumonics ScanArrayÒ Microarray Analysis System is a scanning laser confocal fluorescence microscope that is used to determine the fluorescence intensity of a two-dimensional
MEASUREMENT CAMERA USER GUIDE
 How to use your Aven camera s imaging and measurement tools Part 1 of this guide identifies software icons for on-screen functions, camera settings and measurement tools. Part 2 provides step-by-step operating
House Design Tutorial
 Chapter 2: House Design Tutorial This House Design Tutorial shows you how to get started on a design project. The tutorials that follow continue with the same plan. When we are finished, we will have created
A guide to SalsaJ. This guide gives step-by-step instructions on how to use SalsaJ to carry out basic data analysis on astronomical data files.
 A guide to SalsaJ SalsaJ is free, student-friendly software developed originally for the European Hands- On Universe (EU-HOU) project. It is designed to be easy to install and use. It allows students to
Photoshop CS2. Step by Step Instructions Using Layers. Adobe. About Layers:
 About Layers: Layers allow you to work on one element of an image without disturbing the others. Think of layers as sheets of acetate stacked one on top of the other. You can see through transparent areas
House Design Tutorial
 House Design Tutorial This House Design Tutorial shows you how to get started on a design project. The tutorials that follow continue with the same plan. When you are finished, you will have created a
Digital Portable Overhead Document Camera LV-1010
 Digital Portable Overhead Document Camera LV-1010 Instruction Manual 1 Content I Product Introduction 1.1 Product appearance..3 1.2 Main functions and features of the product.3 1.3 Production specifications.4
DigiScope II v3 TM Aperture Scope User s Manual
 DigiScope II v3 TM Aperture Scope User s Manual Welcome Thank you for choosing DigiScope II v3 TM Aperture scope! The DigiScope II v3 TM Aperture Scope is an exciting new device to Capture and record the
Photoshop CC Editing Images
 Photoshop CC Editing Images Rotate a Canvas A canvas can be rotated 90 degrees Clockwise, 90 degrees Counter Clockwise, or rotated 180 degrees. Navigate to the Image Menu, select Image Rotation and then
Photoshop Elements Hints by Steve Miller
 2015 Elements 13 A brief tutorial for basic photo file processing To begin, click on the Elements 13 icon, click on Photo Editor in the first box that appears. We will not be discussing the Organizer portion
Windows INSTRUCTION MANUAL
 Windows E INSTRUCTION MANUAL Contents About This Manual... 3 Main Features and Structure... 4 Operation Flow... 5 System Requirements... 8 Supported Image Formats... 8 1 Installing the Software... 1-1
House Design Tutorial
 House Design Tutorial This House Design Tutorial shows you how to get started on a design project. The tutorials that follow continue with the same plan. When you are finished, you will have created a
House Design Tutorial
 Chapter 2: House Design Tutorial This House Design Tutorial shows you how to get started on a design project. The tutorials that follow continue with the same plan. When you are finished, you will have
Universal Scale 4.0 Instruction Manual
 Universal Scale 4.0 Instruction Manual Field Precision LLC 2D/3D finite-element software for electrostatics magnet design, microwave and pulsed-power systems, charged particle devices, thermal transport
Contents Technical background II. RUMBA technical specifications III. Hardware connection IV. Set-up of the instrument Laboratory set-up
 RUMBA User Manual Contents I. Technical background... 3 II. RUMBA technical specifications... 3 III. Hardware connection... 3 IV. Set-up of the instrument... 4 1. Laboratory set-up... 4 2. In-vivo set-up...
Digital Photography 1
 Digital Photography 1 Photoshop Lesson 1 Photoshop Workspace & Layers Name Date Default Photoshop workspace A. Document window B. Dock of panels collapsed to icons C. Panel title bar D. Menu bar E. Options
Key Terms. Where is it Located Start > All Programs > Adobe Design Premium CS5> Adobe Photoshop CS5. Description
 Adobe Adobe Creative Suite (CS) is collection of video editing, graphic design, and web developing applications made by Adobe Systems. It includes Photoshop, InDesign, and Acrobat among other programs.
The ideal K-12 science microscope solution. User Guide. for use with the Nova5000
 The ideal K-12 science microscope solution User Guide for use with the Nova5000 NovaScope User Guide Information in this document is subject to change without notice. 2009 Fourier Systems Ltd. All rights
Optika ISview. Image acquisition and processing software. Instruction Manual
 Optika ISview Image acquisition and processing software Instruction Manual Key to the Instruction Manual IS is shortened name used for OptikaISview Square brackets are used to indicate items such as menu
VIDEO FEAR CONDITIONING
 instrumentation and software for research VIDEO FEAR CONDITIONING SOF-843 VIDEO FREEZE USER S MANUAL DOC-019 Rev 4.1 Copyright 2015 All Rights Reserved Med Associates Inc. P.O. Box 319 St. Albans, Vermont
DPM Kit DK-1. Using the DPM Kit
 DPM Kit DK-1 Using the DPM Kit To ensure safe usage with a full understanding of this product's performance, please be sure to read through this manual completely. Store this manual in a safe place where
Kitchen and Bath Design Tutorial
 Kitchen and Bath Design Tutorial This tutorial continues where the Interior Design Tutorial left off. You should save this tutorial using a new name to archive your previous work. The tools and techniques
Geometric Functions. The color channel toolbar buttons are disabled.
 Introduction to Geometric Transformations Geometric Functions The geometric transformation commands are used to shift, rotate, scale, and align images. For quick rotation by 90 or mirroring of an image,
Certified SOLIDWORKS Professional Advanced Preparation Materials
 Includes Preparation for Five Advanced Certification Exams Certified SOLIDWORKS Professional Advanced Preparation Materials Sheet Metal, Weldments, Surfacing, Mold Tools and Drawing Tools SOLIDWORKS 2016
Kigamo Scanback which fits in your view camera in place of conventional film.
 What's included Kigamo Scanback which fits in your view camera in place of conventional film. SCSI Cable to connect your Scanback to the host computer. A 3-meter SCSI cable is standard. Kigamo also has
TECHNOTravel. For Microsoft Word & PowerPoint 2010 Student Workbook. TECHNOeBooks Project-based Computer Curriculum ebooks.
 TECHNOTravel For Microsoft Word & PowerPoint 2010 Student Workbook TECHNOeBooks Project-based Computer Curriculum ebooks www.bepublishing.com Copyright 1993 2010. TechnoKids Inc. in partnership with B.E.
Roof Tutorial Wall Specification
 Roof Tutorial The majority of Roof Tutorial describes some common roof styles that can be created using settings in the Wall Specification dialog and can be completed independent of the other tutorials.
House Design Tutorial
 Chapter 2: House Design Tutorial This House Design Tutorial shows you how to get started on a design project. The tutorials that follow continue with the same plan. When you are finished, you will have
Digital Photography 1
 Digital Photography 1 Photoshop Lesson 3 Resizing and transforming images Name Date Create a new image 1. Choose File > New. 2. In the New dialog box, type a name for the image. 3. Choose document size
Contents. Nikon Scan for Windows. Scanner Control Software and TWAIN Source. Reference Manual. Overview Before You Begin.
 Contents Overview Before You Begin System Requirements Software Installation Basic Operations Scanner Control Software and TWAIN Source Nikon Scan for Windows Reference Manual The Scan Window Opening the
User Manual for HoloStudio M4 2.5 with HoloMonitor M4. Phase Holographic Imaging
 User Manual for HoloStudio M4 2.5 with HoloMonitor M4 Phase Holographic Imaging 1 2 HoloStudio M4 2.5 Software instruction manual 2013 Phase Holographic Imaging AB 3 Contact us: Phase Holographic Imaging
Using Adobe Photoshop
 Using Adobe Photoshop 6 One of the most useful features of applications like Photoshop is the ability to work with layers. allow you to have several pieces of images in the same file, which can be arranged
Contents Chapter One- Introduction
 Contents Chapter One- Introduction... 1 1.1 Applications supported... 1 1.2 Hardware... 1 1.2.1 Specifications... 1 1.2.2 System Components... 2 1.2.2.1 Darkroom... 2 1.2.2.2 UV transilluminator... 1.2.2.
Managing images with NewZapp
 Managing images with NewZapp This guide is for anyone using the NewZapp Fixed editor as opposed to the Drag and Drop editor. The Image Manager is where images are uploaded and stored in your NewZapp account
QuiltCAD will be used to create an entire quilt layout. It can be used for single patterns, pantographs, borders, or sashings. There are some options
 QuiltCAD will be used to create an entire quilt layout. It can be used for single patterns, pantographs, borders, or sashings. There are some options that only QuiltCAD can do when compared to other portions
Luma User s Guide. Mosaic Imaging 873 Great Road P.O. Box 299 Stow, MA
 Luma User s Guide Mosaic Imaging 873 Great Road P.O. Box 299 Stow, MA 01775-0299 978-461-0110 www.mosaicimaging.com Luma User s Guide Luma Studio Software V1.7 Notice of Rights All rights reserved. This
Sensors and Scatterplots Activity Excel Worksheet
 Name: Date: Sensors and Scatterplots Activity Excel Worksheet Directions Using our class datasheets, we will analyze additional scatterplots, using Microsoft Excel to make those plots. To get started,
Photoshop: a Beginner s course. by: Charina Ong Centre for Development of Teaching and Learning National University of Singapore
 Photoshop: a Beginner s course by: Charina Ong Centre for Development of Teaching and Learning National University of Singapore Table of Contents About the Workshop... 1 Prerequisites... 1 Workshop Objectives...
JIGSAW PUZZLES User guide JIGSAW PUZZLES. Photoshop Elements actions. For PSE 2019, 2018, 15, 14, 13, 12, 11. User Guide
 JIGSAW PUZZLES Photoshop Elements actions For PSE 2019, 2018, 15, 14, 13, 12, 11 User Guide CONTENTS 1. THE BASICS...1 1.1. About the actions... 1 1.2. How the actions are organized... 1 1.3. The Classic
The Magazine for Photographers November 2016
 The Magazine for Photographers The Magazine for Photographers CONTENTS NOVEMBER 4 Panning and Zooming in Lightroom 16 Photoshop Tool Presets 23 Step by Step: Pencil Shading Effect 32 Batch Renaming 46
4.5.1 Mirroring Gain/Offset Registers GPIO CMV Snapshot Control... 14
 Thank you for choosing the MityCAM-C8000 from Critical Link. The MityCAM-C8000 MityViewer Quick Start Guide will guide you through the software installation process and the steps to acquire your first
Using Adobe Photoshop to enhance the image quality. Assistant course web site:
 Using Adobe Photoshop to enhance the image quality Assistant course web site: http://www.arches.uga.edu/~skwang/edit6170/course.htm Content Introduction 2 Unit1: Scan images 3 Lesson 1-1: Preparations
Index of Command Functions
 Index of Command Functions version 2.3 Command description [keyboard shortcut]:description including special instructions. Keyboard short for a Windows PC: the Control key AND the shortcut key. For a MacIntosh:
Image Pro Ultra. Tel:
 Image Pro Ultra www.ysctech.com info@ysctech.com Tel: 510.226.0889 Instructions for installing YSC VIC-USB and IPU For software and manual download, please go to below links. http://ysctech.com/support/ysc_imageproultra_20111010.zip
For customers in USA This device complies with Part 15 of the FCC rules. Operation is subject to the following two conditions:
 User manual For customers in North and South America For customers in USA This device complies with Part 15 of the FCC rules. Operation is subject to the following two conditions: (1) This device may not
Before you start, make sure that you have a properly calibrated system to obtain high-quality images.
 CONTENT Step 1: Optimizing your Workspace for Acquisition... 1 Step 2: Tracing the Region of Interest... 2 Step 3: Camera (& Multichannel) Settings... 3 Step 4: Acquiring a Background Image (Brightfield)...
Use of the built-in Camera Raw plug-in to take your RAW/JPEG/TIFF file and apply basic changes
 There are a lot of different software packages available to process an image for this tutorial we are working with Adobe Photoshop CS5 on a Windows based PC. A lot of what is covered is also available
BIM - ARCHITECTUAL IMPORTING A SCANNED PLAN
 BIM - ARCHITECTUAL IMPORTING A SCANNED PLAN INTRODUCTION In this section, we will demonstrate importing a plan created in another application. One of the most common starting points for a project is from
Photo/Image Controls
 Table of Contents Introduction... 2 Using Image Controls... 2 Using the Image Editor... 3 19 July 2017 TIP-2017-092 1 Introduction The Edge s photo controls now include image editing options. This document
CHROMACAL User Guide (v 1.1) User Guide
 User Guide") CHROMACAL User Guide (v 1.1) User Guide User Guide Notice Hello and welcome to the User Guide for the Datacolor CHROMACAL Color Calibration System for Optical Microscopy, a cross-platform solution that
CHROMACAL User Guide (v 1.1) User Guide User Guide Notice Hello and welcome to the User Guide for the Datacolor CHROMACAL Color Calibration System for Optical Microscopy, a cross-platform solution that
Image Processing Tutorial Basic Concepts
 Image Processing Tutorial Basic Concepts CCDWare Publishing http://www.ccdware.com 2005 CCDWare Publishing Table of Contents Introduction... 3 Starting CCDStack... 4 Creating Calibration Frames... 5 Create
Creative Cut-Outs. 1Go to File>New>Blank File to create a new document and enter. Projects EXTRAS: GET MORE ONLINE!
 ALL IMAGES MIKE RODRIGUEZ Creative Cut-Outs By Mike Rodriguez Are you interested in applying some of your rapidly developing layer skills? In the May/June issue, we covered the basics of layers (Layers
Version 4.2 For WINDOWS
 SIGMA Photo Pro User Guide Companion Processing Software for SIGMA Digital Cameras Version 4.2 For WINDOWS I M P O R T A N T : Please Read Before You Start Thank you very much for purchasing this SIGMA
IRISYS ISI Series Imager Report Writing Software
 IRISYS ISI 4604 4000 Series Imager Report Writing Software User Manual InfraRed Integrated Systems Ltd Park Circle, Tithe Barn Way Swan Valley Northampton NN4 9BG Tel: (0) 1604 594200 Fax: (0) 1604 594210
Which equipment is necessary? How is the panorama created?
 Congratulations! By purchasing your Panorama-VR-System you have acquired a tool, which enables you - together with a digital or analog camera, a tripod and a personal computer - to generate high quality
User Manual Veterinary
 Veterinary Acquisition and diagnostic software Doc No.: Rev 1.0.1 Aug 2013 Part No.: CR-FPM-04-022-EN-S 3DISC, FireCR, Quantor and the 3D Cube are trademarks of 3D Imaging & Simulations Corp, South Korea,
1. What is SENSE Batch
 1. What is SENSE Batch 1.1. Introduction SENSE Batch is processing software for thermal images and sequences. It is a modern software which automates repetitive tasks with thermal images. The most important
ISONIC PA AUT Spiral Scan Inspection of Tubular Parts Operating Manual and Inspection Procedure Rev 1.00 Sonotron NDT
 ISONIC PA AUT Spiral Scan Inspection of Tubular Parts Operating Manual and Inspection Procedure Rev 1.00 Sonotron NDT General ISONIC PA AUT Spiral Scan Inspection Application was designed on the platform
EinScan-SE. Desktop 3D Scanner. User Manual
 EinScan-SE Desktop 3D Scanner User Manual Catalog 1. 2. 3. 4. 5. 6. 7. 8. 1.1. 1.2. 1.3. 1.1. 1.2. 1.1. 1.2. 1.3. 1.1. 1.2. Device List and Specification... 2 Device List... 3 Specification Parameter...
Digital Design and Communication Teaching (DiDACT) University of Sheffield Department of Landscape. Adobe Photoshop CS5 INTRODUCTION WORKSHOPS
 University of Sheffield Department of Landscape. Adobe Photoshop CS5 INTRODUCTION WORKSHOPS") Adobe INTRODUCTION WORKSHOPS WORKSHOP 1 - what is Photoshop + what does it do? Outcomes: What is Photoshop? Opening, importing and creating images. Basic knowledge of Photoshop tools. Examples of work.
Adobe INTRODUCTION WORKSHOPS WORKSHOP 1 - what is Photoshop + what does it do? Outcomes: What is Photoshop? Opening, importing and creating images. Basic knowledge of Photoshop tools. Examples of work.
MicroLab 500-series Getting Started
 MicroLab 500-series Getting Started 2 Contents CHAPTER 1: Getting Started Connecting the Hardware....6 Installing the USB driver......6 Installing the Software.....8 Starting a new Experiment...8 CHAPTER
Contents STARTUP MICROSCOPE CONTROLS CAMERA CONTROLS SOFTWARE CONTROLS EXPOSURE AND CONTRAST MONOCHROME IMAGE HANDLING
 Operations Guide Contents STARTUP MICROSCOPE CONTROLS CAMERA CONTROLS SOFTWARE CONTROLS EXPOSURE AND CONTRAST MONOCHROME IMAGE HANDLING Nikon Eclipse 90i Operations Guide STARTUP Startup Powering Up Fluorescence
ARTRAY Camera / Converter Viewer Software. ART-VIEWER v1370. Manual
 ARTRAY Camera / Converter Viewer Software ART-VIEWER v1370 Manual Table of Contents TABLE OF CONTENTS... 2 1. SUMMARY... 4 2. INSTRUCTIONS FOR CAMERAS... 5 2.1. USB2.0 CAMERA ARTCNVIIDEVICE DRIVER INSTALLATION...
Use the and buttons on the right to go line by line, or move the slider bar in the middle for a quick canning.
 How To Use The IntelliQuilter Help System The user manual is at your fingertips at all times. Extensive help messages will explain what to do on each screen. If a help message does not fit fully in the
FLIR Tools for PC 7/21/2016
 FLIR Tools for PC 7/21/2016 1 2 Tools+ is an upgrade that adds the ability to create Microsoft Word templates and reports, create radiometric panorama images, and record sequences from compatible USB and
User Manual. cellsens 1.16 LIFE SCIENCE IMAGING SOFTWARE
 User Manual cellsens 1.16 LIFE SCIENCE IMAGING SOFTWARE Any copyrights relating to this manual shall belong to OLYMPUS CORPORATION. We at OLYMPUS CORPORATION have tried to make the information contained
AMEEL Digitization Manual: Part 5, Phase Two Processing in Photoshop 1
 AMEEL Digitization Manual: Part 5, Phase Two Processing in Photoshop 1 Phase Two Processing: Photoshop The Phase One processing in BCS-2 produces a series of page images tightly cropped to include only
ToupSky Cameras Quick-guide
 ToupSky Cameras Quick-guide ToupSky is a capture and processing software offered by Touptek, the original manufacturer of the Toupcamera series. These are video cameras that offer live image capture for
Stitching MetroPro Application
 OMP-0375F Stitching MetroPro Application Stitch.app This booklet is a quick reference; it assumes that you are familiar with MetroPro and the instrument. Information on MetroPro is provided in Getting
Excel Module 2: Working with Formulas and Functions
 1. An Excel complex formula uses more than one arithmetic operator. a. True b. False True QUESTION TYPE: True / False LEARNING OBJECTIVES: ENHE.REDI.16.018 - Create a complex formula by pointing 2. According
ArcSoft PhotoImpression Table of Contents:
 ArcSoft PhotoImpression Table of Contents: 1. Welcome to PhotoImpression 2. Highlights of PhotoImpression 3. System Requirements 4. Installing PhotoImpression 5. Working with PhotoImpression Getting Started
Adobe Photoshop CS5 Layers and Masks
 Adobe Photoshop CS5 Layers and Masks Email: training@health.ufl.edu Web Page: http://training.health.ufl.edu Adobe Photoshop CS5: Layers and Masks 2.0 Hours The workshop will cover creating and manipulating
CLICK Pro User Manual. User Manual. CLICK Pro. CLICK Pro - User Manual v 1.0 (October 2005) v. 1.0
 v. 1.0") User Manual User Manual CLICK Pro CLICK Pro - User Manual v 1.0 (October 2005) 2 CONTENTS OF THE MANUAL 1 FUNCTIONAL DESCRIPTION 1.1 General Description 1.2 Product target 1.3 Handling the system 1.4 Image
User Manual User Manual CLICK Pro CLICK Pro - User Manual v 1.0 (October 2005) 2 CONTENTS OF THE MANUAL 1 FUNCTIONAL DESCRIPTION 1.1 General Description 1.2 Product target 1.3 Handling the system 1.4 Image
BASIC IMAGE RECORDING
 BASIC IMAGE RECORDING BASIC IMAGE RECORDING This section describes the basic procedure for recording an image. Recording a Simple Snapshot The camera s Program AE Mode (P Mode) is for simple snapshots.
Kitchen and Bath Design Tutorial
 Kitchen and Bath Design Tutorial This tutorial continues where the Interior Design Tutorial left off. You should save this tutorial using a new name to archive your previous work. The tools and techniques
How to combine images in Photoshop
 How to combine images in Photoshop In Photoshop, you can use multiple layers to combine images, but there are two other ways to create a single image from mulitple images. Create a panoramic image with
This document describes the new features of MTpro version as compared to MTpro
 New features in MTpro 3.6 This document describes the new features of MTpro version 3.6.0.0 as compared to MTpro 3.5.0.0. Table of contents 1 General... 2 2 New contents... 3 2.1 New CAD models... 3 2.2
Extreme Makeovers: Photoshop Retouching Techniques
 Extreme Makeovers: Table of Contents About the Workshop... 1 Workshop Objectives... 1 Getting Started... 1 Photoshop Workspace... 1 Retouching Tools... 2 General Steps... 2 Resolution and image size...
Vinyl Cutter Instruction Manual
 Vinyl Cutter Instruction Manual 1 Product Inventory Inventory Here is a list of items you will receive with your vinyl cutter: Product components (Fig.1-4): 1x Cutter head unit complete with motor, plastic