Braiding. for Show & Maintenance
|
|
|
- Lilian Wiggins
- 6 years ago
- Views:
Transcription


1 Braiding for Show & Maintenance
2 Table of Contents Braiding Basics... 4 Braiding Tools...6 Finishing Braids...7 Tying a Braiding Square Knot...8 Braiding Manes Banded Mane and Forelock Button Braids Button Braids (Mane Buns) Continental Braid (Diamond Braid) Draft Horse Mane Roll Dutch Braided Mane Eventing Mane Knots French-Braided or Running Braid Hunter Braids Mane Loops with Rubber Bands Scalloped Braids Three-Ribbon Mane Braid Braiding Forelocks Forelock Buns Braiding - Page 2
3 Forelock Knots Four-Strand Forelock Braid French Forelock Braid Hunter Forelock Braids Three-Ribbon Forelock Braid Braiding Tails Draft Horse Tail Bun Dutch Braided Tail Fishtail Braid French-Braided Tail Maintenance Braids Mud Knot Maintenance Braids for Long Manes Index Braiding - Page 3


4 Braiding - Page 4
5 Table of Contents Braiding - Page 5

6 Braiding Tools Most of the tools used for braiding are simple items you can find at your tack or craft store. A pull-through, for example, can be purchased; you can make one by bending and twisting a thin coat hanger; or you can substitute a rug hook. In addition, you will need a stool that is sturdy enough to hold your weight but light enough to move around easily as needed. Spray Bottle Sponge Ribbon Hair Clip Thinning Shears Rubber Bands Pull-Through Scissors Tape Pulling Comb Razor Comb Comb Clipper Blade Seam Ripper Rug Hook Yarn A spray bottle can be used in addition to a sponge to dampen hair, making braiding easier. A medium-sized sponge is used for dampening hair to make it easier to braid. Regular ribbon is used for Saddlebred & Tennessee Walking Horse braids & the four-strand forelock braid. A small human hair clip works well to hold extra hair out of the way while braiding. These shears to not cut every hair, but can be used to thin & shorten the mane on a horse that will not tolerate pulling. Small, commercially available rubber bands are used to secure the end of a braid. They are available in a variety of colors to match the color of your horse s hair. This important tool is used to pull the ends of yarn through the braid. On example is created from a twisted wire coat hanger & the other is custom-made from a metal rod. Regular scissors are used for cutting yarn & trimming the ends of the yarn after you tie a braiding square knot. Commercial braiding tape is used to hold locks of hair together when making the diamond braid. This comb has short teeth, so it is easy to wrap airs around it when shortening the mane. A razor comb is used for shortening the mane by making blunt cuts in the longest hairs. A standard comb is used for detangling & combing manes & tails. A clipper blade is used for shortening the mane by cutting the longest hairs instead of pulling them out. A seam ripper is used to cut the yarn that ties up braids so that they can be taken out of the horse s mane or tail. A rug hook can be used instead of a pull-through to bring the ends of the yarn back through a braid. Regular yarn is used to tie off braids. It can be purchased in a variety of colors to match your horse s mane. Braiding - Page 6


7 Finishing Braids There are two ways to secure the end of your braid, whether on the mane or on the tail. One is to wind an elastic band around the end of the braid. The other is to braid a length of string or yarn into the bottom portion of the braid, then use it to tie off the braid. Finishing with a Rubber Band Once you have braided to within 1-2 of the end of the hair, pinch the braid with the thumb and forefinger. Wrap the rubber band around the bottom of the braid until it is wound tightly around the hair. Finishing with Yarn or String To prepare 2 lengths of yarn ahead of time, hold one end of the yarn in your hand. Wrap the rest around your elbow and up and over your thumb for as many revolutions as you need lengths of yarn, then cut it near your hand. Some braiders prefer to separate both ends of the yarn from the tail hairs and use them both at the same time to tie the knot described below. 1 2 Begin incorporating the yarn into the side sections when you are 2-3 away from the desired end. Fold the yarn in half and place the fold behind the last two turns you made in the braid. Add one end of the yarn to the left section of the braid and the other to the right sections. Continue braiding, incorporating the string with each turn. Pinch the end of the braid with one hand and use the other to separate one piece of yarn from the hair. Loop the yarn over the top of the braid at a right angle. Pass the loose end of the yarn behind the braid and pull it through the loop in the yarn. Pull the yarn tight so that it creates a know similar to a half hitch. Repeat this step to tie a second knot. Braiding - Page 7


8 Tying a Braiding Square Knot The braiding square knot is similar to a traditional square knot, with one extra step to ensure that the knot stays tight. Square knots are used when tying braids close to the crest of the neck and when completing some of the tail braids. Tip for Success bbpractice with a piece of yarn or string around a pole to get the hand of tying a square knot. bbto keep the knot from slipping and becoming loose, make a second wrap of yarn or string after the initial base knot is started. 1 Hold one of the two strings, A and B, in each hand. Loosely cross the strings over one another and wrap one end of the string around the other as you would when tying shoelaces. This will make a loop around the braid. 2 Pull the loose end of A through the loop to make a second twist in the knot. Pull the strings to tighten the knot against the pole or braid. 3 Now cross the strings loosely once again with A wrapping first under, then over the top of B. Braiding - Page 8

9 4 Pull the two loose ends tightly against the pole or braid. Braiding - Page 9


10 Braiding - Page 10
11 able of Contents D E Braiding - Page 11


12 Banded Mane and Forelock For some Western classes, such as halter, showmanship, pleasure, trail, horsemanship, and Western riding, banding the mane is a nice finishing touch that makes the neck look slimmer. It requires a well-prepared mane that is very evenly pulled. Commercial braiding rubber bands are available in a variety of colors to match different manes Tips for Success bb To visually lengthen a short neck, band smaller sections of hair; this will create more bands and make the neck look longer. bb The forelock is not always banded; however, if you decide to band it, make sure that it lies flat. 1 Start with a dampened, pulled mane. Use the comb to separate a portion of mane about 1/2 wide. 2 Use the hair clip to hold back the remainder of the mane. Wind a rubber band tightly around the separated lock of hair about 1 from the crest of the neck. If the bands are too close to the crest of the neck, the hair will stick out instead of lying flat. Repeat the process down the length of the neck, adjusting the rubber bands so that they are in a straight line. Braiding - Page 12


13 Button Braids Preparation bbget several packs of tapestry needles - they are about 2 long and metal. Plastic needles work too, but I find that the metal ones are thinner and don t undo the tightness as much as plastic ones do. They also don t stick to a wrist magnet, which you ll find is super handy. But, if you re braiding IN a stall...plastic ones are way easier to find if you drop them. bbcut braiding thread or embroidery floss to about 18 lengths. bbknot each end as you would with normal thread before hand sewing something. Then thread each needle that you ll need. I prep around 20, normally. bbto keep them from tangling up, stick the needles back in the little cardboard form that they come in, and drop them in your apron pocket or tray in my braiding box. bbmake sure the mane is approximately 5 long, and even all the way down. Start the Braid 1. Take up sections of mane approximately 3 wide, 2. Wet em down well with water and Spritz them with Quik-Braid 3. Braid normally, making sure the top of the braid lays flat and stays tight all the way down. Tension is incredibly important. The top *will* loosen up a little, and that s okay. Make the Button When you get to the end of the braid, pull out a knotted needle and go like this: 1. Holding the end of the braid tight, bring the needle UP through the end of the braid, just above your thumb and forefinger. Loop it around to the left and back UP through the middle. Then, loop it around to the right, and go all the way around and back DOWN through the middle. Your needle will now be on the neck side and ready for the next step. 2. Bring the needle up through the center of the braid AT the crest. Pull the end of the braid up to tuck it in at the crest, and as you do this pinch the braid loop down flat between your thumb and forefingers. 3. Take the needle DOWN through the two layers of braid, about 1/3 of the way down from the crest. Then bring the needle UP through the two layers, another 1/3 of the way down the braid, then DOWN through the tip of the braid (about 1/2 from the end). The needle is now on the neck side and ready Braiding - Page 13
14 for the big pull up. 4. Bring the needle UP through the center of the braid at the crest (no skewering!!) and it should start looking like a little ball as you pull it in tighter. 5. To secure this little ball, bring your needle to the right - now imagine this little ball as a little cube for a minute... take your needle and enter in the right corner and push it sort of diagonally up through the center no-skewer zone. What this does, is bring that little corner in tight to make more of a secure ball. 6. Now that you re up through the top of the braid, go to the left and do the same thing. 7. Find the corner, go IN there, and bring the needle up through the no-skewer zone again. NOW you have a tight little ball. Yay! 8. To wind this thing up and move on, you ll want to make a loop around the base of the braid (go to the right, in this scenario) when you get back to the center of the top - loop the needle under one of the diagonal stitches and tie it off with a double or surgical (my preference) knot. Tips for Success bbthe most common oops is if you let the tail of the thread get sewn into the braid as you go - keep an eye on that, and you can just slide the needle OFF the thread when you re done, rather than having to CUT it off. bbkeep a magnet in your pocket. When you finish with a needle, drop the needle onto it. The magnet will keep it from straying, and this is really important. I have a wrist magnet too, but a lot of times, I use that for the pre-threaded needles because unthreaded needles sometimes get bumped off and onto the ground - and hard to find without string attached. b b Prep is KEY to making it go well. The reward, of course, is awesome braids, that stay IN overnight. Very durable (but always use jammies or a sleazy to protect them overnight, of course). It takes ME as long to do these, as it does to do regular hunter braids, on a braid by braid basis...so timewise, it actually takes less time, since you get fewer braids out of it. Braiding - Page 14


15 B utton Braids (Mane Buns) This is a convenient mane braid for dressage because the braids lie flat against the horse s neck for a neat look. It is easier if the mane is pulled a little bit longer than for a hunter braid, about 4.5 in length. As these are dressage braids, you want to end up with between 19 and 21 braids evenly spaced down the neck. Prep Work Start with a dampened, combed mane. 1 Part off a section of mane about 2.5 in length, and hold the remaining hair back with a hair clip. Start a tight three-strand braid and tie it with yarn. 2 Push the pull-through down next to the crest of the neck, and pass the two ends of the yarn through the pull-through. 3 Pull the pull-through with the ends of the yarn and braid back through, so that the braid is sticking up above the crest of the neck. Braiding - Page 15


16 4 Push the pull-through back up through the base of the braid, close to the crest of the neck. 5 Pull the braid up, then wrap it tightly around itself from the right and down under the loop of the braid. 6 Pass the two ends of yarn through the pull-through from back to front. 7 Pull the ends of the yarn and any remaining braid down through the braid with the pull-through. Keep tension on the braid. 8 Separate the ends of the yarn and pull them up above the crest of the neck on either side of the braid. Hold the braid down with your thumb as you tie a braiding square knot, so that the braid lies flat against the neck. Cut off excess yarn. Braiding - Page 16


17 Continental Braid (Diamond Braid) This elegant braid is best for a long, thick mane. Although it looks complicated, it is easy to do once you get the hang of it. Do not leave this braid in overnight because the tape can become hard to remove. 1 Use the comb to separate a portion of mane about 2 wide near the poll. 2 Use a piece of tape to gather the hairs together near the crest of the neck or wind a rubber band around that section. Twist the locks of hair together as you tape them to make a tighter bundle. 3 Continue separating out 2 sections of hair and banding or taping them until you reach the withers, then return to the head. Braiding - Page 17


18 4 Part each lock in half and connect the two nearest sections about 3 down with tape or a rubber band. 5 Continue parting sections in half and connecting those nearest each other, all the way to the withers, with tape or rubber bands. 6 Return to the horse s head and part each lock of hair in half, and connect each half lock to the nearest half with tape or a rubber band in a straight line. 7 Repeat the process of parting and connecting the sections nearest to each other, all the way to the withers, with tape or rubber bands in a line parallel ot the crest. You should have 3-5 rows of tape. Match the Mane For a black mane, you can use black electrical tape. For light manes, you can use white athletic tape or commercial braiding tape. Use scissors to cut pieces with even ends. Braiding - Page 18


19 Draft Horse Mane Roll Once the mane is braided, the horse will not be able to lower his neck, so keep him tied until you are ready to show. While rosettes are traditional and preferred, there is no regulation requiring them. You may use commercially available silk flowers or ribbons that can be wired around the braid. 1 Lay the piece of cloth over the crest of the neck where the bridle path meets the mane so that it hangs at the same length on both sides. 2 From the top of the mane, near the crest, separate a section of hair about the same width as the piece of cloth. 3 Cross one side of the cloth around the section of hair and over to the other side of the horse. Do the same for the other side of the cloth. Braiding - Page 19


20 4 Separate another section of hair from the crest of the neck. 5 Twist the two pieces of hair across each other, with the section closest to the ears crossing dow under the other. 6 Cross the piece of cloth that is hanging on the side of the neck closest to you over and between the two sections of hair, and let the cloth hang over the opposite side of the neck, on the same side as the other end. 7 Cross the piece of cloth that was originally on the far side over the first piece, so it hangs over the side of the neck nearest you. 8 Hold both strands of hair in the hand closest to the horse s ears and pull each end of cloth so that the braid is tight against the crest of the neck. Braiding - Page 20


21 9 Use the other hand to separate a new piece of hair from the crest of the neck. 10 Add this new strand of hair of the section of hair closest to it. 11 Twist the two strands together once, the same as with the initial sections of hair. Repeat steps 6-11, crossing the first end of the cloth under one section of hair and then over and between the two sections. 12 When you reach the area of the neck where the collar will rest, make a four-strand braid by twisting the two strands of hair together. 13 Cross the two pieces of cloth at right angles against the two strands of hair. Braiding - Page 21


22 14 Twist the two strands of mane hair together again. 15 Cross the two pieces of cloth at a right angle against the two strands of hair again. Continue this braid for several turns. 16 Use one piece of cloth to tie a knot around the bottom of the braid, as if finishing with yarn. Allow the remaining pieces of cloth to hang down. Finishing Wire the first rosette at the top, the second one at the bottom, and the third one in the middle of the braid. Then space the two remaining rosettes evenly in between. Tip for Success Remember this basic sequence: Add a new section of hair, twist the 2 strands together, cross one side of the cloth over the intersection, then cross the other side over. Tighten the cloth. Crossing Colors If using two colors, each piece of cloth (commercially available) or bunting should be 5.5 long and sewn together at one end so that the colors will alternate. Braiding - Page 22


23 Dutch Braided Mane A The Dutch running braid is similar to the French running braid, except that it is braided underhand, pulling the new pieces of mane into the underside of the braid instead of over the top. The braid will appear on top of the mane instead of underneath. (Note: The instructions below are for a horse with a mane that hangs on the right. If your horse s mane falls left use your hands in the opposite sequence.) 1 Start an underhanded three-strand braid. With the first turn, you will bring the right section under the middle section to create a new middle section. 2 Twist the left section under the middle section to create a new middle section. 3 Twist the right section under the middle section to create a new middle section. Braiding - Page 23


24 4 As you twist the next left section under the middle section, separate a piece of mane from the left and add it to the middle section, as shown. Twist the right section under the middle section to create a new middle. 5 Each time that you twist under the left section, add a portion of mane form the left to the middle. 6 Continue braiding in this underhand manner. Keep the braid parallel to and as close to the crest as possible. When you reach the withers, make an underhand three-strand braid with the remaining hair. 7 Fold the ends of the hair over and fasten with a rubber band, or finish the braid with yarn. 8 Fold up the braid in the same manner that you would for a mane loop and fasten with a second rubber band. Or tie it up as described for making a mane bun. Braiding - Page 24


25 Eventing Mane Knots As you create this knot, keep in mind that ultimately there should be braids evenly spaced down the horse s neck. To begin, pull your horse s mane to long. 1 Starting at the bridle path, part off a section of mane 1 1/2-2 wide and use the hair clip to hold back the rest of the mane. Start a tight three-strand braid, and tie it with yarn. 2 Tie the braid in a knot by turning it up on top of itself so that it forms a circle. Bring the loose ends of hair and yarn around behind and then through the opening. 3 Pull the knot of braided hair tight to the crest of the neck. Braiding - Page 25


26 4 Push the pull-through down from the crest of the neck close to the skin and pass the ends of the yarn through the loop. 5 Pull the pull-through up through the braid and the ends of the yarn out the top of the braid. Separate the ends of the yarn and tie a braiding square knot tightly under the braid between the knot and the neck. 6 Tie a braiding square knot on the top of the braid. 7 Cut the ends of the yarn on either side of the knot near the crest of the neck. Continue down the mane, repeating these steps until you reach the withers. Braiding - Page 26


27 French-Braided or Running Braid This is a braid for a dressage horse with a long mane. The braid will slop over time, so make it immediately before your class and take it out soon after. This braid is based on an overhand braid with additional pieces of mane added as you work your way to the withers. Hair Gel Use hair gel to smooth down any ends that stick up from the crest of the mane. Prep Work Start with a dampened, combed mane. 1 Part off a portion of mane about wide. Separate the hair into three sections and start a three-strand braid. With the first turn, cross section C over section B. Cross section A over section C. 2 Separate another small portion of mane (section D). Add it to section A. Braiding - Page 27


28 3 Continue braiding for one turn: Cross the right section over the middle (as shown), cross the left section over the new middle, and add hair to the middle section. Keep the braid parallel to the crest. 4 Keep adding hair to the middle section at every other turn of the braid, and continue braiding until you have reached the withers. Then finish with a three-strand braid. 5 At the end of the braid, fold the remaining hairs over and wind a rubber band tightly around the end, or finish with yarn. Then fold the braid up on itself and use a second rubber band to secure the loop, or finish in a bun. Finishing the Forelock With the French braided mane, you can braid the forelock in a loop and secure the braid with rubber bands. Or you can create a bun for the forelock. Braiding - Page 28


29 Hunter Braids Some shows require hunter braids in the mane. These are small, neat loops that are close together along the crest of the neck. Professional braiders can complete approximately 36 braids in 45 minutes, but you should allow more time, at least at first. Prep Work It s helpful to have a spray bottle filled with water or commercial braiding spray to keep the hair moist and manageable. If a spray bottle is not available, a damp sponge can be used. Select a yarn color that matches or complements your horse s mane. Tips for Success bbhang the lengths of yarn through your belt loops or through the ring on the horse s halter so they are easily accessible. bbcount the number of teeth in the comb that you use for the first section of hair and place a piece of tape on the comb at the appropriate spot. This will ensure that the sections are all uniform in size. bbbraids and knots must be neat and tight. bbwhen unbraiding, use a seam ripper to cut the yarn and the knots. 1 Start with a dampened mane pulled long. Use the comb to separate a portion of mane about 3/4 wide. Use the hair clip to hold the rest of the mane. Start a three-strand braid. 2 Halfway down the braid, insert a piece of yarn to finish the braid. Braiding - Page 29


30 3 Push the pull-through down from the top of the braid next to the crest and feed the loose ends of the yarn 4 Pull the pull-through back through the braid along with the two ends of the yarn. 5 Tie the yarn together under the braid in a braiding square knot. 6 Bring the loose ends up to the front of the braid and make a tight braiding square knot parallel to the crest of the neck, so that a small bump forms near the crest. Use scissors to trim extra yarn. Repeat these steps for the entire length of the neck. Braiding - Page 30


31 Mane Loops with Rubber Bands With practice, mane loops with rubber bands can be put in faster than those tied with yarn. However, they usually to be rebraided daily. They come out much more quickly than braids tied with yarn. Rubber Bands Braiding rubber bands are commercially available in a variety of colors. Use white rubber bands for a contrasting look, or bands that match the mane for a complementary look. Tips for Success bbkeep the rubber bands in a pocket of your pants or your apron so that they are easily accessible. bbfold and band the braids as you go, or do all the braids first, then go back and band them. Prep Work Start with a dampened, combed mane pulled to about 4. 1 Part off a section of mane that is approximately 2.5 wide, and hold the remaining hair back with a hair clip. Create a three-strand braid that is tight against the crest of the neck. 2 Braid as far down the hair as possible and fold over the ends of the hair before fastening them with a rubber band. Braiding - Page 31


32 3 Fold the bottom third of the braid up underneath itself. 4 Fold the braid under again so that it touches the underside of the braid where it meets the crest of the neck. 5 Hold this folded loop with one hand as you wind a second rubber band around the folded loop, so that the band is horizontal, or parallel to the crest of the neck. Continue down the mane, braiding and banding until you reach the withers. Braiding - Page 32


33 Scalloped Braids This braid requires a mane that is pulled to about 4 long. This fashionable braid for English hunter horses is not traditionally use due to its complexity; however, it can add a special touch for a championship class. Prep Work Separate a section of pulled, dampened mane about 2.5 wide. Complete a three-strand braid finished with yarn. Complete three-strand braids for the entire mane. 1 Push the pull-through down through the third braid. Place the ends of the yarn from the first braid through pull-through and pull them through the third braid, making sure the first braid lies flat against the neck. 2 Separate the ends of the yarn and tie a braiding square knot underneath the braid that you have pulled the ends of the yarn through. 3 Then tie a braiding square knot in front, slightly below the crest of the neck. Pull the knot tight so that the braid is close to the neck, then cut off the tails of the yarn. Repeat steps 1-3 down the mane. Braiding - Page 33


34 4 When you reach the last two braids, push the pull-through down through the last braid (this will be the second time that you are using the last braid, as the third-to-last braid is already tied to it.) 5 Put ends of the yarn of the second-to-last braid through the loop in the pull-through and pull the ends of the yarn up through the top of the braid. 6 Tie a braiding square knot underneath the last braid. Tie a braiding square knot in front of the last braid, slightly below the crest of the neck, and pull the knot tight. Cut off the tails of the yarn, just as you did above. 7 Push the pull-through down through the last braid for the third time, and put the ends of the yarn of that same braid through the loop of the pull-through. Pull the braid up through the top of the last braid, and tie off the loop just as you would loop for a hunter braid. Finishing the Forelock The forelock can be braided as a simple or a French forelock. Braiding - Page 34


35 Three-Ribbon Mane Braid The mane braid needs to be slightly longer than the forelock braid when the horse s head is held high. Using Ribbons It is customary to use two different colors of ribbon, usually one dark and one light, but one color can also be used. You will need a helper to hold the ribbons and to remind the horse to hold his head down. Prep Work bbseparate a section of hair about 1/2 wide at the end of the bridle path. bbstack and alternate three ribbons: dark, light, dark. bbhave your helper stand on the far side of the horse, with one hand on the halter. bbwith three fingers of the other hand, the helper should hold back the remainder of the horse s mane and with the thumb and forefinger she should hold the tops of the ribbon tightly about 3 above the crest of the neck. 1 With your helper holding the tops of the ribbons, divide the section of the mane into two parts. These two parts will be the first and third sections of a three-strand braid. 2 Using the first and third pieces of ribbon, wrap the sections of hair. Allow the second ribbon to hand down as the middle section. Braiding - Page 35


36 3 Start a three-strand braid with the two ribbon-wrapped strands and single piece of ribbon. 4 Continue braiding until the braid hangs past the jawline, so that it will be slightly longer than the forelock braid, when the horse s head is up, and the braid is tucked under the halter. 5 Fold one of the darker ribbons over and tie a square knot as. 6 At the top of the braid, use one of the darker ribbons to tie another knot. To finish, cut the ends of the ribbons in a V at both the top and bottom of the braids. Braiding - Page 36


37 Braiding - Page 37
38 Braiding - Page 38 able of Contents


39 Forelock Buns The classy mane and forelock buns last well overnight, so by spending a little more time putting them in, you may be able to save time getting ready later. You can create either a simple or a French forelock bun. Simple Forelock Bun 1 Start with a simple forelock braid tied with yarn. 2 Push the pull-through down next to the scalp at the start of the braid and pass the two ends of yarn through the pull-through. 3 Pull the pull-through with the ends of the yarn and the braid back through, so that the braid is sticking up above the forelock. Braiding - Page 39


40 4 Push the pull-through back up through the base of the braid, close to the skin. Pull the braid up, then wrap it tightly around itself from the right and down under the loop of the braid. 5 Pull the yarn and braid through the pull-through from back to front. Pull the ends of the yarn and any remaining braid down through the braid, keeping the tension on the braid. 6 Separate the ends of the yarn and pull them up above the braid with one end of the yarn on either side. Tie a square knot toward the top of the braid, so that the braid lies flat against the forehead. French Forelock Bun 1 Start with the French forelock braid finished with yarn. Then repeat steps 1-5 of the Simple Forelock Bun. Braiding - Page 40


41 Forelock Knots Eventing horses must be braided for dressage. They can be braided for stadium jumping, but they are generally left unbraided for the cross-country phase. You can create the forelock knot with either a simple or a French forelock braid. Simple Forelock Knot 1 Start with a simple forelock braid tied with yarn. Tie the braid in a knot by turning it up on top of itself so that it forms a circle, with the loose ends parallel to the poll. Push the ends of the yarn through the circle. Pull the knot tightly to the forehead. 2 Push the pull-through down from the top of the braid, close to the skin, and put the end of the yarn through the loop. Pull the pull-through up through the braid, and the end of the yarn out the top of the braid. 3 Separate the ends of the yarn and tie a braiding square knot tightly under the braid, between the knot and the forehead. Braiding - Page 41


42 4 Tie a braiding square knot on top of the braid and cut off the excess yarn on either side of the knot. French Forelock Bun 1 Start with the French forelock braid finished with yarn. Then repeat steps 1-4 of the Simple Forelock Knot. Braiding - Page 42


43 Four-Strand Forelock Braid This four-strand braid is similar to the technique used to finish the mane roll, but it is done with ribbon instead of cloth. Matching Up The ribbon should be the same color as the cloth used for the mane roll. Tip for Success If your horse is in a hitch, you may want to braid the forelock to the outside so that it will show when the horses are hitched up. 1 Wind a rubber band on the forelock to hold it together and pull it to the side, or let it hand down the middle. 2 Stack the two ribbons on top of each other, tie them together at the top, and then tie them in a loose knot similar to the first step of a braiding square knot. Braiding - Page 43


44 3 Divide the forelock in half at the rubber band. Slip one strand of hair inside the loose knot and pull it tight. 4 Twist the two pieces of hair together once. 5 Cross the two pieces of ribbon at a right angle against the two strands of hair. 6 Twist the two strands of mane hair together again. Braiding - Page 44


45 7 Cross the two pieces of ribbon at a right angle against the two strands of hair again. Continue making this four-strand braid for several turns. 8 Use one of the pieces of ribbon to tie a knot around the bottom of the braid. 9 Allow the ends of the ribbon to hang down. Trim the top and bottom of the ribbons at an angle to finish. Braiding - Page 45


46 French Forelock Braid bbfollowing steps 1-4, French braid the top of the forelock. bbcontinue adding sections from each side until you reach the end of the scalp. bbuse the remaining long hairs to complete a three-strand braid. Braid in yarn and tie off or finish with a rubber band. The French forelock braid is described in the English Hunter Braids, Eventing Knots and Dressage Braid pages Braiding - Page 46


47 Hunter Forelock Braids These braids are left in overnight, so be sure to make them tight. The hunter forelock braid is tie in the same way as the hunter mane braid. Hunter Forelock Braid Choices Horses with hunter braids have a couple of choices for braiding the forelock - the simple forelock braid or the the French forelock braid. The directions here are for the Simple Forelock Braid. Prep Work Dampen the forelock with spray bottle or a sponge before proceeding. Use caution when spraying the forelock, as it can startle the horse. 1 Create a three-strand braid finished with yarn. Push the pull-through down through the top of the braid as high up and close to the skin as possible. 2 Free the two ends of the yarn through the loop and pull up the pull-through, bringing the yarn with it. Braiding - Page 47


48 3 Separate the ends of the yarn and bring them own under the braid, one on each side, and tie a tight braiing square knot. 4 Bring the two ends of the yarn to the front of the braid, one on each side, and tie them with a braiding square knot that holds the braid close to the forehead. Use scissors to cut off the tails of the yarn. Braiding - Page 48


49 Three-Ribbon Forelock Braid Braids for Saddlebreds and Tennessee Walking Horses are very similar, although Walking Horse braids are a few inches longer. The length of the mane braid is determine by the length of the forelock braid, so do the forelock braid first. Prep Work Have your helper stand on the left side of the horse facing the left ear, with one hand on the halter. Stack the ribbons: dark, light, dark. Have your helper hold the ribbons on the horse s poll, with about 3 of ribbon sticking up above the poll 1 Stand facing the horse s forehead and divide the forelock into three sections with a ribbon hanging down over each. 2 Wrap one ribbon around each section of hair, about 4 down the strand. This will create three wrapped pieces of hair. Braiding - Page 49


50 3 Start a three-strand braid with the ribbon-wrapped hair. Keep braiding until you reach the nostrils. 4 Fold one of the darker ribbons over and tie a square knot. 5 At the top of the braid, use one of the dark ribbons to tie another know like the one you made at the bottom of the braid. Pull the knot tightly against the forehead. 6 To finish, cut the ends of the ribbon at the top and bottom of the braid in a V. Braiding - Page 50

51 Pull the forelock braid to the side and slip it through the side of the halter so that it stays out of the horse s eyes and mouth. Braiding - Page 51


52 Braiding - Page 52
53 able of Contents Braiding- Page 53


54 Draft Horse Tail Bun A neat tail bun with decorations that match the mane roll will give a colorful balance and continuity to the draft horse that is ready for show. 1 Separate two sections of hair from each side of the top of the tailbone. 2 Comb the hair in the middle upward as high as it will go between the two side sections. 3 Cross the two side sections in front of the combed-up section. Braiding - Page 54


55 4 Bring the combed up section down on top of the two crossed sections as the middle section. Start a three-strand braid. 5 Braid as close to the bottom as possible. Finish with the shoelace as if finishing with yarn. 6 Bend the braid under and push the loose end of the braid from the bottom up through the base of the braid, between the braid and the tailbone. Pull the braid through as far as possible. 7 se one hand to firmly hold the braid up. Use the other hand to grip the sides of the tail and slide down the tailbone, bringing all of the loose hairs down and in toward the base of the braid. Braiding- Page 55


56 8 Keep holding the base of the braid, and with the other hand wrap the long part of the braid tightly around the bottom of the braid to form a bun. Continue wrapping the braid until all of the hair is wrapped around the base of the tail. 9 Twist the two ends of the shoelace together several times. 10 Separate the shoelace ends and wrap one over the top of the bun and the other under it. Tie a braiding square knot. Cut off the long ends, leaving a small amount on either side so that the knot does not come untied. Finishing with Rosettes Commercial tail decorations that attach with elastic are available to match the material used for the mane roll. Secure the elastic of the tail decoration around the bun. Tips for Success bbthe middle section of hair from the bottom of the tail will be bigger than the two side sections, so as soon as you start braiding, borrow hair from the larger section and add it to the smaller sections until they are about the same width. b b In step 6, you can also use a pull-through at the top of the braid and place the loose ends of the shoelace through the loop, then pull the entire braid and shoelace through. Braiding - Page 56


.")
57 Dutch Braided Tail Dutch and French braided tails for horses with long manes are very similar to hunter-braided tails. The difference is that these are braided only halfway down the tailbone with a very simple finishing braid. Tip for Success Remember to cross the side section under the middle section BE- FORE you add your new piece of hair to that new middle section. Prep Work 1. Start with a dampened, combed tail. 2. Start a Dutch braid as described in the Dutch braid pages 1 Separate a small piece of hair (A) from the farthest left side of the top of the tail and cross it under a small piece from the right (B). Take a third piece (C) from the right and cross it under to become the middle piece. 2 Twist the left section (B) underneath the middle section (C), so that it becomes the new middle. Separate a piece of hair from the left (D) and twist it under the left to add it to the new middle section. Braiding - Page 57


58 3 Twist the right section (A) underneath the middle section (B), so that it becomes the new middle. Separate a piece of hair form the right (E) and twist it under the right to add it to the new middle section. 4 Continue making an underhanded braid down the tailbone, adding pieces to the bottom of the new middle section from alternating sides. 5 About one-third of the way down the tailbone, using the end hairs from the Dutch braid, begin an underhanded three-strand braid and continue down the length of the tail. 6 Finish the braid with yarn. Braiding - Page 58


59 7 Tie a braiding square knot around the base of the braid. 8 Cut off the ends of the yarn, allowing the loose hairs to blend in with the remainder of the tail. Braiding- Page 59


 and right (B) sides, then cross the left")
 of the")
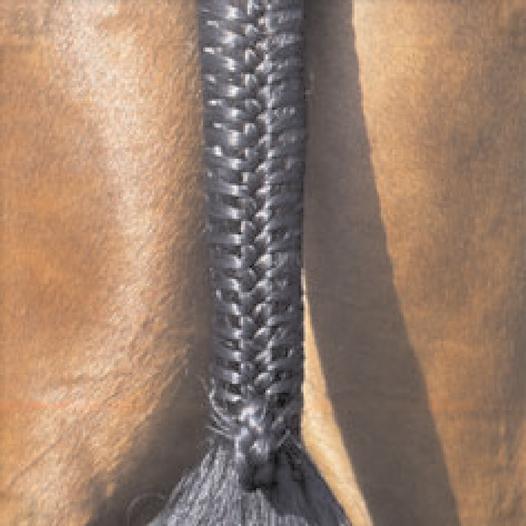
60 Fishtail Braid The fishtail braid is not used for shows, but it is a fun braid for just showing off. Prep Work Comb out and dampen the tail hairs, especially the ones at the top and sides of the tail. 1 At the top of the tail, separate two small sections of hair from the left (A) and right (B) sides, then cross the left piece over the right. 2 Hold these pieces in your left hand. Separate another small section from the right side (C) of the tail, cross it over (A) and add it to (B). Braiding - Page 60
 from the left side and add it to (A).")

61 3 Hold the two pieces in your right hand. Separate another small section (D) from the left side and add it to (A). Continue in this manner until you are about three-quarters of the way down the tailbone. 4 Pull a piece of hair from underneath the right side, pull over the top of the braid, and add it to the section in your left hand. Continue braiding until you reach the end of the hair. Secure it with a rubber band. Braiding- Page 61


 and one from the right (B), then cross the right over the")

62 French-Braided Tail The French braid is similar the threestrand braid, but the altered technique creates a unique look. This overhand braid is used for English and dressage shows. Prep Work Start with a dampened, combed tail. 1 At the top of the tail, separate a small portion of tail hair from the left (A) and one from the right (B), then cross the right over the left in the middle of the tail. 2 Hold these two pieces in your right hand. Take another small portion from the left (C ) and cross it over the middle (B) so that there are three pieces. Braiding - Page 62
 and add it to the middle.")
 over the middle (A), so that the left becomes the new middle.")

63 3 Twist the right section (A) over the middle (C), so that the right becomes the new middle. Separate another portion from the right (D) and add it to the middle. Pull all braid pieces very tightly. 4 Twist the left piece (B) over the middle (A), so that the left becomes the new middle. Add another portion from the left (E) to the middle. Continue braiding, adding hair from alternate sides. 5 About one-third of the way down the tailbone, make a regular three-strand braid with the end hairs from the French braid. Finish with yarn or a rubber band. Braiding- Page 63


64 Braiding - Page 64
65 Table of Contents Braiding - Page 65


66 Mud Knot Try this easy method for keeping your horse s tail free of dirt using nothing more than his own hair. Mud knots range from intricate braids secured with yarn to quick loops tied at the end of the tail. The method described here requires no rubber bands or bandages, but, if done properly, will stay in place for most activities. Note, however, that the tail must be a little dirty for this technique to work Freshly cleaned hairs will be too slick to hold together as needed. 1 Divide the tail into three sections, but leave a small portion of loose hair that extends 3-4 below the tailbone this will secure the knot later. 2 Braid the tail snugly, stopping about 8 above the end. Braiding - Page 66


67 3 With two of the loose sections in one hand, and the third in the other, fold the braided tail up under itself until it reaches about halfway up the tailbone. Bring the ends forward around each side of the bone and tightly wrap them around it two or three times. 4 Twist the two end sections together to make a stiff rope of hair. 5 Bend the twisted rope in half and hold the loop in one hand. Braiding - Page 67


68 6 With your free hand, grasp the extra unbraided strand of hair and wind it around the twisted loop, starting near the tail bone and moving out to cover the entire section. 7 Gently pull downward to secure the whole braid. Braiding - Page 68


69 Maintenance Braids for Long Manes Ideally, you want to start with a mane that is washed, conditioned, detangled, and dry. 1 Gather the mane in about a 3 inch width on the top of the crest and separate to begin braiding. Braid the mane in a normal straight braid until you re about 2/3 of the way down the mane. Be careful to braid LOOSELY at the crest of the mane. This is for two reasons: 2 You do NOT want to put stress on the mane hair or the crest. As this is a maintenance braid and will be in your horse s mane for a month or longer, you don t want it pulling on the roots or it will pull the mane right out in day-to-day wear. That s the rule with any style maintenance braid, whether a running French braid or otherwise! You will be running the tail of the braid and vetwrap through the top, so you want to leave room without putting any stress on the hair to loop hair or vetwrap through the top. A loose top of the braid will allow you to simply lift a strand aside and pull your braid through. You can braid tightly after about 2-3 crossovers. It s just the TOP that needs to be loose. 3 Take a two foot long piece of yarn and add it to the braid. Tips: I usually cut my yarn lengths ahead of time, fold them in half and drape them over the horse s back/withers so I can grab them easily and quickly as I need them. Two feet it relative. If you re trying to get a shorter mane to grow out, you probably only need about 1 foot to 18 inches. If your horse s mane is very THICK or LONG, you may want more length. I use a lot of yarn because I tie multiple times around the wrapped finished braid to keep them secure under the vetwrap. I want something that is NOT going to come out for a month or more, as I don t have a lot of time to maintenance braid a barn full of long manes!! Braiding - Page 69
 take a bit longer, mostly due to dry time.")


70 4 It usually takes me about an hour to do a mane and tail (that includes washing, conditioning and allowing to dry etc. Longer manes (3 +) take a bit longer, mostly due to dry time. And no, your horse s mane does not have to be sparkling clean to do this. This filly I didn t have time to wash and it was 35 degrees, so I just braided it up with just conditioner only in it. 5 Add the yarn to into 2 of the 3 strands of the braid. It s easiest to grab the yarn in the center and then lay it along the back of the braid and add to the two outside strands as you re braiding. If you ve ever done hunter braids, it s just like doing the world s longest hunter braid! 6 The reason for the yarn is two-fold: To reduce breakage when tying off the end of the braid. Rubber bands can damage the hair and/or pull on it when you re taking them out, no matter how careful you might be. It secures the string for tying the mane/braid up when finishing. There s no way a string braided 1/3 of the way into the mane is going to pull out! 7 More views of how to add the yarn to 2 strands of the braid... (you can see a finished one next to it...) 8 About an inch or so from the end (or when you run out of 3 strands) you will separate the hair from the yarn and tie it off. Pull the hair down and hold the yarn out separate. Braiding - Page 70


71 9 Wrap the yarn around the end of the braid once in each direction and then tie off with a square knot. I usually tie twice to secure the knot. You should have long tails of yarn still from your braid. If you don t you need a longer piece of yarn OR you started braiding the yarn in too soon and need to start adding the yarn in further down the mane. 10 Next, pull the tail of the braid through beginning of the braid at the crest of the neck. This is where it s important that you braided LOOSELY at the top. If you have trouble getting the tail through, you didn t braid loose enough and it s likely to have breakage later from being too tight across the crest. 11 You want to pull it about 2/3 of the way through, enough to leave a loop of mane at the top about 3-6 inches long. Longer manes will need longer loops. I have one mare I have to double up and make the loops longer due to the length and thickness of her mane. Overall, you don t want the loop to be too long, as it will get heavy and put extra weight/stress on the hair and roots. 12 Pull the tail down and thread through the bottom of the loop you created. The tail should now be to the inside of the loop. I m holding it aside in this picture, just for illustration. Braiding - Page 71


72 13 Tuck the tail and the end of the braid inside the loop. Again, if you are dealing with a particularly long or thick mane, you may need to curl up the tail of the mane a couple times underneath the main loop just to take up the length. 14 Pull out the yarn from the tail of the mane and use it to wrap around the loop to secure it. This is why I like long tails of yarn. I wrap around a LOT to really secure the braid together. Tie off the wrapped yarn and cut the remaining tail of yarn off. Notice the stray hairs sticking out the left side of the bottom? Just tuck any stray tails of hair into the loop to secure them. 15 More pics of the progression of braiding the mane. Notice the tied off the loops to the left of the one I m working on. Notice how loose the top of the braids are. Notice where the yarn starts on the braid I am finishing up and about to tie off the bottom of. Notice I have a LOT of hair left at the bottom of the braid, but I m cutting it off there, as I know I don t need to braid all the way to the end into tiny little braids that are mostly taken up by yarn. I know I can just tuck the stray hairs into the mane loop and they will be protected. No need to put more effort into this than necessary!!! 16 Showing more of the braiding process... Braiding - Page 72


73 17 Another view of how to pull the tail of the braid through the crest Another view of the tucking of the tail of the braid inside the mane loop 19 Again showing the wrapping of the yarn around the mane loop, securing and finishing off the braid. 20 Finished the braids, now we re ready for the vetwrap!! 21 Thread the end of the vet wrap through the crest of the braid (where you threaded the end of the braid through). I usually only use 1 to 1/2 rolls of vetwrap on a whole mane. You do NOT want to wrap the vetwrap around a bunch of times and make the mane too heavy. I usually only wrap 2-3 times around the mane, just enough to make it secure and cover the bottom of the braid up so no dust, dirt etc get into the braid. Braiding - Page 73


74 22 Again, you don t want stress the hair, roots, or crest by adding weight to the braid. You can add vetwrap later if one of the braids looks like the vetwrap is wearing thin. When starting the vetwrap, fold the threaded end of the vetwrap down and wrap the vetwrap around the braid. By folding the tail of the vetwrap down, you secure the vetwrap so it doesn t just fall down off the braid a week later. 23 Tips: Leave room at the top of the vetwrap when you fold over the tail and start wrapping. Later, when you go to take it down, you can just cut the top of the wrap off. You ll notice little yarn loops I put at the top of the vetwrap. I find it s easier to just pull on that loop and use a seam ripper to just snip off the vetwrap and pull the whole wrap off the braid. The yarn and the looseness of the vetwrap tail is to ensure you don t accidentally snip off any hair in the process of taking it down! BIG OOPS! I ve done it before! 24 Wrapping the mane...note the angle of the wrap. I angle down so that I also wrap the bottom of the mane so no dirt, dust etc get into the vet wrap. Finishing the wrap. I ve wrapped around about 3 times. Again, don t overwrap as this will add weight to the braid. Remember weight stresses the hair, the roots, and the crest. 25 The finished product. One last tip: Switch sides that you wrap the mane up on. Keeping the same side will put stress on heavy crests (especially stallions) and will affect a horse s topline or cause a fallen crest later in life. This kind of mane finishing can also be done if you re doing smaller running French braids up a mane too! You can also braid up and wrap the tail like this too, leaving wisps down on the outside for fly whisks. Word to the wise, I use an EN- TIRE roll of vetwrap for one tail. And, if the horse has a thick, thick, thick tail you need to divide the tail up and create several wraps. I have one friesian whose tail is SO thick it won t hold a regular tailwrap or even one of these wraps. I have to divide her tail up into 3 braids and then wrap them separately. She looks like a cat-o-nine tails by the time I m done, but it works! Happy Braiding!! Braiding - Page 74
Beautiful Braids Are Within Your Reach
 Beautiful Braids Are Within Your Reach Just remember the simple mantra practice makes perfect and you re on the right track. Molly Sorge (Photos by Sara Lieser) You might have had the nightmare. You sit
Table of Contents. Pom-Pom Bookmark Yarn covered Pencil Holder Yarn Hangers... Yarn Hair Bows
 1 Table of Contents Pom-Pom Bookmark... 3-5 Yarn covered Pencil Holder... 6-8 Yarn Hangers... 9-11 Yarn Hair Bows... 12-14 Tassel Necklace or Gift Wrapping... 15-17 No Knit Infinity Scarf... 18-20 Braided
For a flat or four-sided reticule:
 Page 1 of 8 DRAWSTRINGS When purchasing, one fabric store meter is the minimum to make two drawstrings of a nice length for one reticule in most designs. If you like longer drawstrings, increase the length.
You will need. Equipment
 1 KITE MOBILE Here s how to make a colourful kite to fly in your bedroom whatever the weather! You can use the kite tail to display favourite photos, postcards or trinkets. Just attach them with coloured
Page 1. Jumblenut. The Head. Design by Barbara Allen
 Page 1 Needle felting Needle felting is quite different from creating felt by shrinking wet wool. There s no water involved, it requires very little space and creates no mess at all. It s a craft that
Beginning Level (9-11 Years)
") OKLAHOMA COOPERATIVE EXTENSION SERVICE 4-H Fabrics & Fashions Construction Items Beginning Level (9-11 Years) Division of Agricultural Sciences and Natural Resources Oklahoma State University OKLAHOMA
OKLAHOMA COOPERATIVE EXTENSION SERVICE 4-H Fabrics & Fashions Construction Items Beginning Level (9-11 Years) Division of Agricultural Sciences and Natural Resources Oklahoma State University OKLAHOMA
Binding a Limp-bound Book which make great site tokens or personal largess
 Binding a Limp-bound Book which make great site tokens or personal largess As presented by THLady Jorhildr Hrafnkelsdottir version 1.2 2 Miniature Bookbinding - THLady Jorhildr Hrafnkelsdottir Larger books
Owyhee County 4-H. Cloverbud. Activity Book
 Owyhee County 4-H Cloverbud Activity Book Name Age Year in 4-H 20 Club Name Member s Signature Parent/Guardian s Signature Leader s Signature Projects or activities I worked on this year were: I attended
SUPPLIES. OTHER SUPPLIES Marking pen Masking tape Aleene s Stop Fraying Toothpick Basic sewing supplies (See Tools link at
 SUPPLIES 30 x 9 piece of 5/8 curly matted mohair 7 x 6 piece of wool felt or ultrasuede 8 mm black glass eyes (1 pair) 6-1 fiberboard discs (neck & front legs) 4-1 ¼ fiberboard discs (rear legs) 5 Cotterpins
Truly Hooked Bath Puff Pattern.
 Truly Hooked Bath Puff Pattern. You will need: A 4mm crochet hook A tapestry needle for darning in ends Scissors No more than 50g of a cotton or bamboo based DK yarn I use King Cole Bamboo cotton, which
Faux Cabled Headband. ...craftable... by Stephanie White of You Can Knit!
 ...craftable... Faux Cabled Headband by Stephanie White of You Can Knit! INSTRUCTIONS Stephanie White, 2015 PHOTOGRAPHY F+W, a Content + ecommerce Company, Inc. 2015 All rights reserved. materials 1 skein
Mini 4-H SEWING. An Introduction to 4-H For Youth in Grades K - 2. Credit to Elkhart County Mini 4-H
 Mini 4-H SEWING An Introduction to 4-H For Youth in Grades K - 2 Credit to Elkhart County Mini 4-H Purdue University is an equal access/equal opportunity institution. Leaders Anita Kelley 229-6383 radgal12@hotmail.com
SUPPLIES OTHER SUPPLIES Carson 10 Teddy Bear Pattern
 SUPPLIES Fat 1/8 yd of 5/8 faux fur or mohair (sample is faux fur) 5 x 5 piece of wool felt for paw pads 11mm black glass eyes (1 pair) Small piece white felt (optional) eye whites 2 1 1/8 Joint discs
Triangle Earrings. Another important step is to use split or jump rings on the hooks. They help the earrings dangle more freely.
 Triangle Earrings Description: The Triangle Earrings are based on the Celtic Triangle knot, which is an artistic design called the Triquetra. This Celtic symbol represents the Trinity as well as Body,
EC How to Make Braided Rugs
 University of Nebraska - Lincoln DigitalCommons@University of Nebraska - Lincoln Historical Materials from University of Nebraska- Lincoln Extension Extension 1962 EC62-1156 How to Make Braided Rugs Magdalene
Mountain Girl Bracelet
 Mountain Girl Bracelet by Regina Payne Supply List: 1 50-65mm Marquise Stone 2 12-16mm Cabochons or buttons 2 10-14mm Cabochons or buttons 6-8 DiscDuo beads 12 16 Tila Beads 26 32 Half Tila Beads 10 inches
the LACIS TAPESTRY TABLE LOOM
 LF11 the LACIS TAPESTRY TABLE LOOM Front Frame Bar Heddles Heddle Rod Back Frame Bar Rod Support Elastic Leg Bar Side Frame Bar Rod The LACIS TAPESTRY TABLE LOOM incorporates a novel shed changing device
Pajama Sock Monkey 2009 Cutest Creations
 Materials needed: Pajama Sock Monkey 2009 Cutest Creations 1 pair of size Large Brown Red-Heel socks can be purchased from my online store www.ohboyorgirl.com Black embroidery thread Other color embroidery
Designed by Melissa DiRenzo thesweetescape.ca
 instructions Designed by Melissa DiRenzo thesweetescape.ca YOU WILL NEED 3 -diameter foam ball Christmas sweater Hot glue gun and glue sticks 3/8 -wide satin ribbon Elastic thread: metallic Note: A child
FLIP RIGID HEDDLE LOOM
 FLIP RIGID HEDDLE LOOM SL2013, SL2014 SL2015, SL2016 Warping and Weaving Instructions Flip Loom shown with optional accessories Trestle Floor Stand and Flip Trap Find out more at schachtspindle.com Schacht
Tying your own Tzitzit in one of the Jewish styles
 4/9/2017 Page 1 of 7 Tying your own Tzitzit in one of the Jewish styles According to the Scriptures, there is no right way to tie tzitzit or tassels. I choose to tie them this way sort of like I wear a
Dollytime. Tiny Topsy the tooth fairy. who are new to the craft. She measures 12cm (5 in) and is a topsy turvy or upside and added lots of pictures.
 and is a topsy turvy or upside and added lots of pictures.") Dollytime Tiny Topsy the tooth fairy As I d like to encourage e more people to knit I ve designed Tiny Topsy for knitters who are new to the craft. She measures 12cm (5 in) and is a topsy turvy or upside
Dollytime Tiny Topsy the tooth fairy As I d like to encourage e more people to knit I ve designed Tiny Topsy for knitters who are new to the craft. She measures 12cm (5 in) and is a topsy turvy or upside
Jamie - 11 Soccer Bear
 Jamie - 11 Soccer Bear Artist Designed Bear with Flexlimb by Laura Matthews of TeddiesbyLauraLynn.com and FreeTeddyBearPatterns.NET This is not intended to be a child s toy due to the glass eyes and pellets.
SUPPLIES OTHER SUPPLIES Marco 12 Teddy Bear Pattern
 SUPPLIES Fat ¼ yd of 1 sparse, straight mohair 4 x 4 piece of wool felt or ultrasuede 10mm black glass eyes (1 pair) 2 1 ¼ Joint discs 4 1 ½ Joint discs 4 1 ¾ Joint discs Jointing hardware of choice (5
Practicing Basic Machine Operation Sample #1
 Practicing Basic Machine Operation Sample #1 Listed below are various tasks required in basic sewing machine operation. Demonstrate your ability to perform each task by creating a sample. The samples that
Written By: Sherri Haab
 Macramé 101 Written By: Sherri Haab PARTS: Cotton yarn (1) 4-ply worsted weight. Corrugated cardboard (1) Binder clip (1) Wooden beads (1) Hem sealant (1) or fabric glue. Needle (1) Thread (1) Button (1)
How to Make Gathers by Machine
 Published on Sew4Home How to Make Gathers by Machine Editor: Liz Johnson Thursday, 08 December 2016 1:00 We love to gather with friends and family to share good food and conversation. We enjoy gathering
Dancing Rain Dolls. Knot Doll. Created By. Amy Prentice
 Dancing Rain Dolls Knot Doll Created By Amy Prentice Copyright 2007 1 Dear Friends, This pattern is the easiest of all dolls to make. This doll will take about 2 hours to complete and is the perfect doll
assembly instructions
 THE LILLI LOOM assembly instructions Find out more at schachtspindle.com Schacht Spindle Company 6101 Ben Place Boulder, CO 80301 p. 303.442.3212 800.228.2553 f. 303.447.9273 2017 Schacht Spindle Company,
Getting to Know: A-LINE SERIES Model BL450A. Baby Lock Consumer Helpline:
 Getting to Know: A-LINE SERIES Model BL450A Baby Lock Consumer Helpline: 800-313-4110 www.babylock.com Model BL450A Introducing Lauren, the easy-to-use serger from the Baby Lock A-Line series of sewing
CHAPTER 1. Easy Patterns For Kids to Crochet
 CHAPTER 1 Easy Patterns For Kids to Crochet EASY PATTERNS FOR KIDS TO CROCHET SECTION 1 Belt Pouches Materials for 2 pouches: About 2 ounces of Red Heart Super Saver Camouflage yarn (or any color you like)
Crewel Embroidery Instructions Design: Motley Mums (Version 1, 2, 3, & 4)
") Crewel Embroidery Instructions Design: Motley Mums (Version,,, & 4) What you ll need: 9" x 9" Linen (Version : Sky Blue plain weave; Version : Natural plain weave; Version : Oyster White twill, Version
Crewel Embroidery Instructions Design: Motley Mums (Version,,, & 4) What you ll need: 9" x 9" Linen (Version : Sky Blue plain weave; Version : Natural plain weave; Version : Oyster White twill, Version
Sunrise Deck Assembly Instructions for Kingston Left
 Sunrise Deck Assembly Instructions for Kingston Left It s easiest to build the deck frame first like it will be lying on its back and then after all 4 legs and horizontals are in place, tip the deck toward
ch chain slst slip stitch inc increase
 Getting Started This is a crochet depiction of Ellie, as seen in the Last of Us Part II teaser trailer shown at the Playstation Experience in December 2016. It s a moderate-to-advanced amigurumi pattern,
Intro to Sewing Coats: Chloe Coat. Chloe Coat. sizes 8-20
 Intro to Sewing Coats: Chloe Coat Chloe Coat sizes 8-20 Chloe Coat - Instructions - Please use these instructions alongside our online videos to help you sew your Chloe Coat. All the seam allowances are
Materials. 1 Cut out the pattern pieces for the doll. Cut out the pattern for the arms and legs twice in mirror image.
 Making the doll All the dolls are made from the same pattern (see Doll Template). The body and head are the same, only the facial expressions and the hair change. Carefully follow the instructions below,
shaver to get rid of pills. If the item doesn t contain a pipe cleaner or glue, you could even run it through the washing machine.
 shaver to get rid of pills. If the item doesn t contain a pipe cleaner or glue, you could even run it through the washing machine. Wool felt will wear better and last longer. If you re creating something
sugar skull kit ty plush a sewing pattern by
 sugar skull kit ty plush a sewing pattern by sugar skull kit ty plush This pattern pays homage to the beautiful calaveras seen in Dia de Muertos art. It s a simple kitty plush with button jointed limbs
NOTES 1. Please wash, dry & iron your fabric before beginning. 2. Use a 1/4 seam allowance throughout. 3. All seams are sewn Right Sides together.
 OTHER TOOLS & SUPPLIES - fiber stuffing or fabric scraps - paper printer - 24 contrasting embroidery floss & an embroidery hoop, for eyes - 2 yds of ribbon, for hanging (optional) - basic sewing supplies:
Introduction to weaving: Make a wall hanging
 Introduction to weaving: Make a wall hanging By Leni Collin from SomethingBoHo Introduction In this tutorial, I give you the basic skills and tips to make a wall hanging using different weaving techniques.
SCARVES & COWL. crochet pattern US terminology v1.1
 WARM HEART SCARVES & COWL crochet pattern US terminology v1.1 welcome Hello and welcome to the Warm Heart Scarves and Cowl crochet pattern! I m so glad you ve decided to make this pattern. It s lovely
Construction Cards Beginning Level (9-11 Years)
") Beginning Level (9-11 Years) Division of Agricultural Sciences and Natural Resources Oklahoma State University Beginning Level (9-11 Years) No. 801 Seam Finishes Seam finishes make clothes look neat on
Beginning Level (9-11 Years) Division of Agricultural Sciences and Natural Resources Oklahoma State University Beginning Level (9-11 Years) No. 801 Seam Finishes Seam finishes make clothes look neat on
CBK Needlepoint Collection Stitch Guide
 Three Friends CBK Needlepoint Collection Stitch Guide Beth Cope Three Friends BC-PL 05 Stitch Guide by Janet M. Perry Material List 1 skein each Paternayan Persian Wool 721 (auburn) 263 (white) 220 (black)
PRACTICAL STITCHES. Threading. Thread knotting
 Threading PRACTICAL STITCHES As sewing is based on needlework, the first lesson should be in threading and handling the needle. Thread dark thread into the needle against a light background and light thread
Original Recipe. Let s Go Trippin by Polly Monica
 Original Recipe Let s Go Trippin by Polly Monica Hello again! I m Polly from Aunt Polly s Porch blog {auntpollysporch.blogspot.com} and I m so happy to be sharing my designs again on the Moda Bake Shop!
Basic Bearmaking Instructions
 Laying out the Pattern Basic Bearmaking Instructions We recommend that you read the instructions right through before commencing. This will help you to understand the steps you need to take. Copying your
UNIT 6 HAND CONSTRUCTION WITH STONEWARE
 Refer to requirements Unit 6 on page 2 Requirements: Basic Information: Hand Construction with Stoneware: (1) Stoneware is more or less vitreous depending on the temperature to which it is fired. (2) Hobbyist
Copyright Bumblebee Linens LLC
 Crafts Instructions Included 1. Hankie Wedding Dress 2. Pillowcase Dress 3. Hankie Bonnet 4. Hankie Pin Cushion 5. Hankie Angel 6. Hankie Bunny 7. Pillowcase Reusable Grocery Bag 8. Linen Towel Drawstring
Elara NanoEdge Fixed Frame Screen User Guide
 Elara NanoEdge Fixed Frame Screen User Guide INTRODUCTION INTRODUCTION WARNING This product may contain sharp edges, please handle with care. Protective gloves are recommended. A minimum of two people
Weaving Your 1st Scarf
 Weaving Your 1st Scarf My First Woven Scarf See part 1 How to Warp the Kromski Harp Forte to get started. Supplies: Kromski Harp Forte Loom at least 8 wide 155 yards size 3 Crochet Thread or 8/2 Weaving
Emilia. The Folding Rigid Heddle Loom. Learning to weave on your Emilia loom by Joanne Hall
 Emilia The Folding Rigid Heddle Loom Learning to weave on your Emilia loom by Joanne Hall Heddle Handle Heddle Bracket Rigid Heddle Warping peg The Emilia Loom and Accessories Warp beam Texsolv cord Folding
Monster Marionette ART GRADE LEVEL FOURTH FIFTH MATERIALS
 MATERIALS FOR STUDENT: (one per student unless otherwise noted) FloraCraft Make It: Fun Foam: Rectangular pieces (arms & legs) cut from large Foam Block: Four 1" x 3" x 1" thick, Four 1" x 2 1/2" x 1"
Arno Haft's Vogeldrachen (Bird Kite)
") Arno Haft's Vogeldrachen (Bird Kite) Bob and Charmayne Umbowers 31 March 2007 www.2kiters.com The Arno Haft Bird Kite Arno Haft's bird kite is from the 1950's. The original kite was made from cotton canvas
Arno Haft's Vogeldrachen (Bird Kite) Bob and Charmayne Umbowers 31 March 2007 www.2kiters.com The Arno Haft Bird Kite Arno Haft's bird kite is from the 1950's. The original kite was made from cotton canvas
Products We Love: Clover Quick Yo-Yo Makers
 Published on Sew4Home Products We Love: Clover Quick Yo-Yo Makers Editor: Liz Johnson Friday, 10 February 2017 1:00 There s no research confirming a link between the classic yo-yo string toy and the fabric
A. Preparing the fabric (not shown):
:") INSERTING ZIPPERS - CENTER INSERTION The zipper can be snapped on to the right or to the left side of the needle so that you can sew close to the zipper. When sewing on the right side of the zipper, attach
INSERTING ZIPPERS - CENTER INSERTION The zipper can be snapped on to the right or to the left side of the needle so that you can sew close to the zipper. When sewing on the right side of the zipper, attach
6 th to 12 th grade. 20 minutes prep, 30 minutes activity
 Build a Water Bottle Membranophone 6 th to 12 th grade 20 minutes prep, 30 minutes activity A clean empty water bottle, any size (bottles with ridges are best) Scissors Latex, rubber, or vinyl gloves Rubber
cut & sew owl plush a sewing pattern by
 cut & sew owl plush a sewing pattern by 2 cut & sew owl plush If you re reading this, then you likely purchased some of my Cut & Sew Owl Plush fabric from Spoonflower. So thank you! This pattern is for
Pot Belly Babies. Troll Set. Pattern set includes patterns for troll, bib and mopsie.
 Pot Belly Babies Troll Set Pattern set includes patterns for troll, bib and mopsie. When crocheted with yarns and hook sizes specified, troll measures 16 inches standing height, 17 inches around belly;
Finishing a Kite Ornament
 Finishing a Kite Ornament These instructions have been written to aid in finishing the kite ornament shown in Needlepoint Now, September/October 2017, Volume XIX, No..5 Materials Stitched kite ornament
INSTRUCTIONS BFC716 QIH LEOPARD BAG
 INSTRUCTIONS BFC716 QIH LEOPARD BAG This bag can be done in many ways! You can stitch it as I did the medium size bag shown at the end of this document (with the Orange trim). For this bag I embroidered
How to Sew On a Button by Hand
 Published on Sew4Home How to Sew On a Button by Hand Editor: Liz Johnson Wednesday, 16 March 2016 1:00 Picking out buttons for your sewing projects is fun! But, let's be frank... sewing on those buttons
TOASTY HEART TEAPOT COSY. beginner crochet pattern US terminology v1.0. access the online class here > homelealass.com/toasty-heart-tea-cosy-class/
 TOASTY HEART TEAPOT COSY beginner crochet pattern US terminology v1.0 access the online class here > homelealass.com/toasty-heart-tea-cosy-class/ 1 A HOMELEA LASS CROCHET PATTERN homelea lass 2018 #homelealass
dragon & unicorn hooded cowl a free sewing pattern by
 dragon & unicorn hooded cowl a free sewing pattern by 2 hooded cowl When you re ready to break out a scarf or hat for chilly weather, try putting on this cozy cowl! It s a hood and scarf in one with cute
19" emily, Jenny, & Portrait Dolls. By Dianna effner. Body Pattern and Construction. Strip
 Original Designs for the Doll Industry, Inc. PO BOX 174 JAMESTOWN, MISSOURI 65046 19" emily, Jenny, & Portrait Dolls Copyright 2001 By Dianna effner Body Pattern and Construction ArmATure ConSTruCTIon
Mini 4-H SEWING PROJECT
 Mini 4-H SEWING PROJECT Each Mini 4-H'er can take only one of the projects offered. All Mini 4-H Projects are entered on the Wednesday before the fair. Mini 4-H is open to 4-H'ers who are currently in
Emilia. The Folding Rigid Heddle Loom. Learning to weave on your Emilia loom by Joanne Hall
 Emilia The Folding Rigid Heddle Loom Learning to weave on your Emilia loom by Joanne Hall Heddle Handle Heddle Bracket Rigid Heddle Warping peg The Emilia Loom and Accessories Warp beam Texsolv cord Folding
Night fury. plush. a sewing pattern by
 Night fury plush a sewing pattern by 2 Night Fury Plush skills used: Get ready for your own dragon-riding adventure with this fun night fury plush! This pattern will show you how to make this cute dragon
CHAPTER 1. Kid Stuff
 CHAPTER 1 Kid Stuff KID STUFF SECTION 1 Child s Necklace, Bracelet & Pin Set CHILD S NECKLACE, BRACELET AND PIN SET Designed by Priscilla Hewitt Copyright 2001 Priscilla s Crochet Materials: Hot glue or
Sewing Roll. Base Fabric. Base Fabric. Third Fabric. Second Fabric (Bottom Pockets) Pockets)
 Pockets)") You will need Brother Creative Sewing Pack (Free Motion Foot, Braiding Foot, Narrow Hem Foot, Piping Foot and Concealed Zipper Foot) Base fabric 1 x fat ¼ (50cm square) cut in half Second fabric 50cm x
You will need Brother Creative Sewing Pack (Free Motion Foot, Braiding Foot, Narrow Hem Foot, Piping Foot and Concealed Zipper Foot) Base fabric 1 x fat ¼ (50cm square) cut in half Second fabric 50cm x
Stretchy Headbands: Pleated & Turban Styles
 Published on Sew4Home Stretchy Headbands: Pleated & Turban Styles Editor: Liz Johnson Tuesday, 15 March 2016 1:00 You've seen these awesome headbands everywhere. They're a go-to solution for yoga class,
I always run my thread or floss over a piece of beeswax to strengthen it. [In a pinch, a piece of beeswax candle works just fine.]
![I always run my thread or floss over a piece of beeswax to strengthen it. [In a pinch, a piece of beeswax candle works just fine.]](/thumbs/75/72453046.jpg "I always run my thread or floss over a piece of beeswax to strengthen it. [In a pinch, a piece of beeswax candle works just fine.]") Sewing the Binding to the Back of a Quilt a tutorial written and photographed by Dora Scheer for the Victory Quilt Ministry at Mountainside United Methodist Church Cedar Crest, New Mexico, USA This tutorial
Sewing the Binding to the Back of a Quilt a tutorial written and photographed by Dora Scheer for the Victory Quilt Ministry at Mountainside United Methodist Church Cedar Crest, New Mexico, USA This tutorial
Free crochet pattern in three sizes
 Free crochet pattern in three sizes Designed by Andrea Bede @ http://gradinacufluturi.ro/en The summer is near and it's time to take out those lovely crochet tops, to get a tan and the glow of the sun
Little Dresses for Haiti - Revised
 Little Dresses for Haiti - Revised Now that the team has been to Haiti, we have discovered that the Haitians are a very modest people. It is not acceptable for girls over the age of 6 to have their shoulders
a lot of fuchsia and a little yellow make red red and yellow make orange yellow and turquoise make green turquoise plus fuchsia makes purple
 Additional Dyes at the end of each lab Bench Black, Orange, and Azure Blue Safari Gray (Camo), Moss Green (Camo), Bronze (Camo) Lab Bench #1 Station A Turquoise Fuchsia Red Bright Green Station D Fire
Contents. Fast & Easy. Moving On. Mastering Micro-Macramé. Specialty Knotting. Projects. Introduction 6. Getting Started 7. Acknowledgments 110
 Contents Introduction 6 Getting Started 7 Materials & Tools 8 Basic Knotting Techniques & Terms 10 Projects Fast & Easy Delicious Arm Candy Bracelets 21 Double Rainbow of Color Necklace 28 Curvy Mother-of-Pearl
By Laurie Pessetto. Create your pattern. The decorative fabric will be on the edges of the circle layers.
 By Laurie Pessetto Create an elegant, soft, travel pouch to protect jewelry from damage and keep it organized even when your suitcase gets tossed into a plane or trunk! Skill Level Good sewing skills,
SUPPLIES TOOLS Mini Teddy Bear Pattern
 SUPPLIES TOOLS 7 X 9 piece of 1/2 ultra sparse mohair 2 x 2 piece of felt (footpads) 5 Mini T cotterpins 6 ½ joint discs 4 3/8 joint discs 5mm black glass eyes (1 pair) Artificial sinew (or strong waxed
Beaded Pumpkins Tutorial with Sparkle by Monica
 with Sparkle by Monica You can make these lovely pumpkins out of several base beads such as wood, glass pearls, acrylic, ceramic and more. The primary concern is that the inner bead hole needs to be large
Merida the Brave. Abbreviations:
 Merida the Brave This doll model was made by Jo Merriman based on Fairy Doll Pattern by AmigurumiBB 2013-2014 Abbreviations: St(s) stitch(es) Sc - single crochet Sl st slip stitch Ch chain Hdc half double
Cut first cork in half in the middle (the two pieces will serve for two horses). Cut 2 corks in half lengthwise for the four legs.
. Cut 2 corks in half lengthwise for the four legs.") Christmas Cork Horse Supplies: 3 1/2 corks. 4 x 4 piece red bandanna material for bandanna (cut in half diagonally makes two bandannas). White/Black yarn for mane & tail. Two black push pins for eyes.
Christmas Cork Horse Supplies: 3 1/2 corks. 4 x 4 piece red bandanna material for bandanna (cut in half diagonally makes two bandannas). White/Black yarn for mane & tail. Two black push pins for eyes.
Bound and Determined:
 Think You Don t Have Time to Create Beautiful Quilts? From quick-quilt adaptations of classic patterns to fun, fresh novelty designs, McCall s Quick Quilts provides you with a treasury of time- and effort-saving
Impulse. 1/4 yard each very dark green (A), dark green (B),
, dark green (B),") design by LUCY A. FAZELY & MICHAEL L. BURNS Purple/Blue Impulse 12" x 12" Block Make 12 Blue/Green Impulse 12" x 12" Block Make 12 Orange/Red/Green Impulse 12" x 12" Block Make 12 Red/Purple Impulse 12"
design by LUCY A. FAZELY & MICHAEL L. BURNS Purple/Blue Impulse 12" x 12" Block Make 12 Blue/Green Impulse 12" x 12" Block Make 12 Orange/Red/Green Impulse 12" x 12" Block Make 12 Red/Purple Impulse 12"
Learn to weave. on the Knitters Loom
 Learn to weave on the Knitters Loom Welcome to the wonderful world of weaving... YOUR FIRST PROJECT A SCARF You will need: A pair of sharp scissors A measuring tape Cardboard strips 20cm (8ins) wide Two
4. A spool of red Coats and Clark All-purpose thread
 Decorative Thread Amber wants to use the fancy stitches on her sewing machine to decorate her denim vest and skirt. She will need to purchase some thread that will look nice and work best for the sewing
 Supplies WARM AND NATURAL COTTON BATTING FIBER FILL STUFFING COTTON PRINT FABRIC FOR DRESS OLD LIGHT WEIGHT SWEATER TO CUT UP SMALL PIECE OF MUSLIN FOR CANDY RABBIT PLAID-APPLE BARREL NUTMEG BROWN CRAFT
Linda Brown, Sue Dittler, Sandy Miller, Lucy Ricardo, and Carole Thommen
 Linda Brown, Sue Dittler, Sandy Miller, Lucy Ricardo, and Carole Thommen Edited by: Sharon Reilly Teena Livsey YO-YO s especially ornament balls By: Lucy Ricardo Supply list: Scraps of fabric 1 ½ circle
squid amigurumi free crochet pattern
 squid amigurumi free crochet pattern - squid amigurumi - 2 - introduction - squid amigurumi This angry little squid is ready to rage! The fun conical shape is adorned with two triangular fins and 8 cute
Ornament Finishing Techniques
 Ornament Finishing Techniques by Anne Gale The back of the ornament should enhance, not detract from the quality of the finished ornament. There are many ways to finish ornaments depending on type, shape
DOROTHY SIMPSON KRAUSE: PROJECTS
 DOROTHY SIMPSON KRAUSE: PROJECTS Gathering Memories: a paper portfolio This small portfolio of colored paper with pockets is perfect to hold and display some of the small items you ll collect on your cruise.
Woodkirk Academy Summer Challenge Project Textiles Technology
 Woodkirk Academy Summer Challenge Project Textiles Technology Upcycling craft has become popular in society over the last few years. There are many different ways of recycling, upcycling and re-using old
From the Office of the Northwest Territory Alliance Patternmaster Full Gaiters # Northwest Territory Alliance FULL GAITERS - #212
 FULL GAITERS - #212 ased on those in Making a ontinental Marine Uniform. Washington, D, US. Marine orps, 1975. ILL OF MATERIALS: 1 1/4 yards sturdy linen or cotton. Medium weight canvas is suitable in
Copyright 2017 Deb Moffett-Hall, all rights reserved.
 The BEADSMITH tm Tile and Rizo Stretch Bangle for the Endless Loom Deb Moffett-Hall Materials: Tile TM beads in two colors: light and dark, seed beads size 8 use the dark seeds for the Orchid and light
Little Uns. Mermaid. When crocheted with yarns and hooks specified, mermaid measures 16 ½ inches L and 11 inches around belly.
 Little Uns Mermaid When crocheted with yarns and hooks specified, mermaid measures 16 ½ inches L and 11 inches around belly. Except for the tail section, this pattern is crocheted in the amigurumi style
Bonus: Crochet # BONUS! Online Tutorials!
 Crochet #807366 Bonus: Learn to crochet your first project, featuring Pom-Pom Mitts & Scarf! Clear diagrams show how to use right & left hands! Original publications: Book 75491 Learn to Crochet and Book
Quilt Instructions for the Beginner
 Quilt Instructions for the Beginner By Terry White Part 4 Editor Robyn Rex Reed TABLE OF CONTENTS The Quilting Design Pg. 3 Quilt Sandwich & Baste. Pg. 7 Machine Set Up & Quilt.. Pg. 12 Binding Your Quilt
Learn to weave on the. Inklette Loom
 Learn to weave on the Inklette Loom THE ASHFORD INKLETTE LOOM top rear peg Inkle bands are strong and useful braids. Create colourful belts, bracelets, ties, guitar straps, shoe laces or trims for weaving.
Hand-Painted Rayon Bouclé Scarf Warp
 Hand-Painted Rayon Bouclé Scarf Warp Instructions / Suggestions You will need a Rigid Heddle Loom with a 10 dent heddle bar that weaves at least 9 wide, or a floor or table loomwith a 10 dent reed. Or
Designed By Patty Peterson Featuring Kreinik Metallic Machine Sewing Threads
 Elegant Table Runner Designed By Patty Peterson Featuring Kreinik Metallic Machine Sewing Threads Finished size 11.5" X 40.75" H ave you ever wondered how you can use the decorative stitches on your sewing
Table of Contents. Fun Halloween Tree page 03. Chenille Spider with Rhinestone Eyes page 06. Inexpensive Fall Decoration page 09
 Table of Contents Fun Halloween Tree page 03 Chenille Spider with Rhinestone Eyes page 06 Inexpensive Fall Decoration page 09 Festive Fall Wreath page 12 Primitive Country Ribbon Turkey page 15 Dog Toy
just going to sew your squares together and make a row. And let me show you what that looks like. Ok, so here we have this. And here is this row that
 Hey everybody! It s Rob from Man Sewing. And this is April and we have a very special project for you today. That s right April is National Autism Awareness Month and we have built this really fun, cuddly