USS. Build the CONSTITUTION. The world s oldest commissioned naval vessel afloat
|
|
|
- Avice Clarke
- 5 years ago
- Views:
Transcription
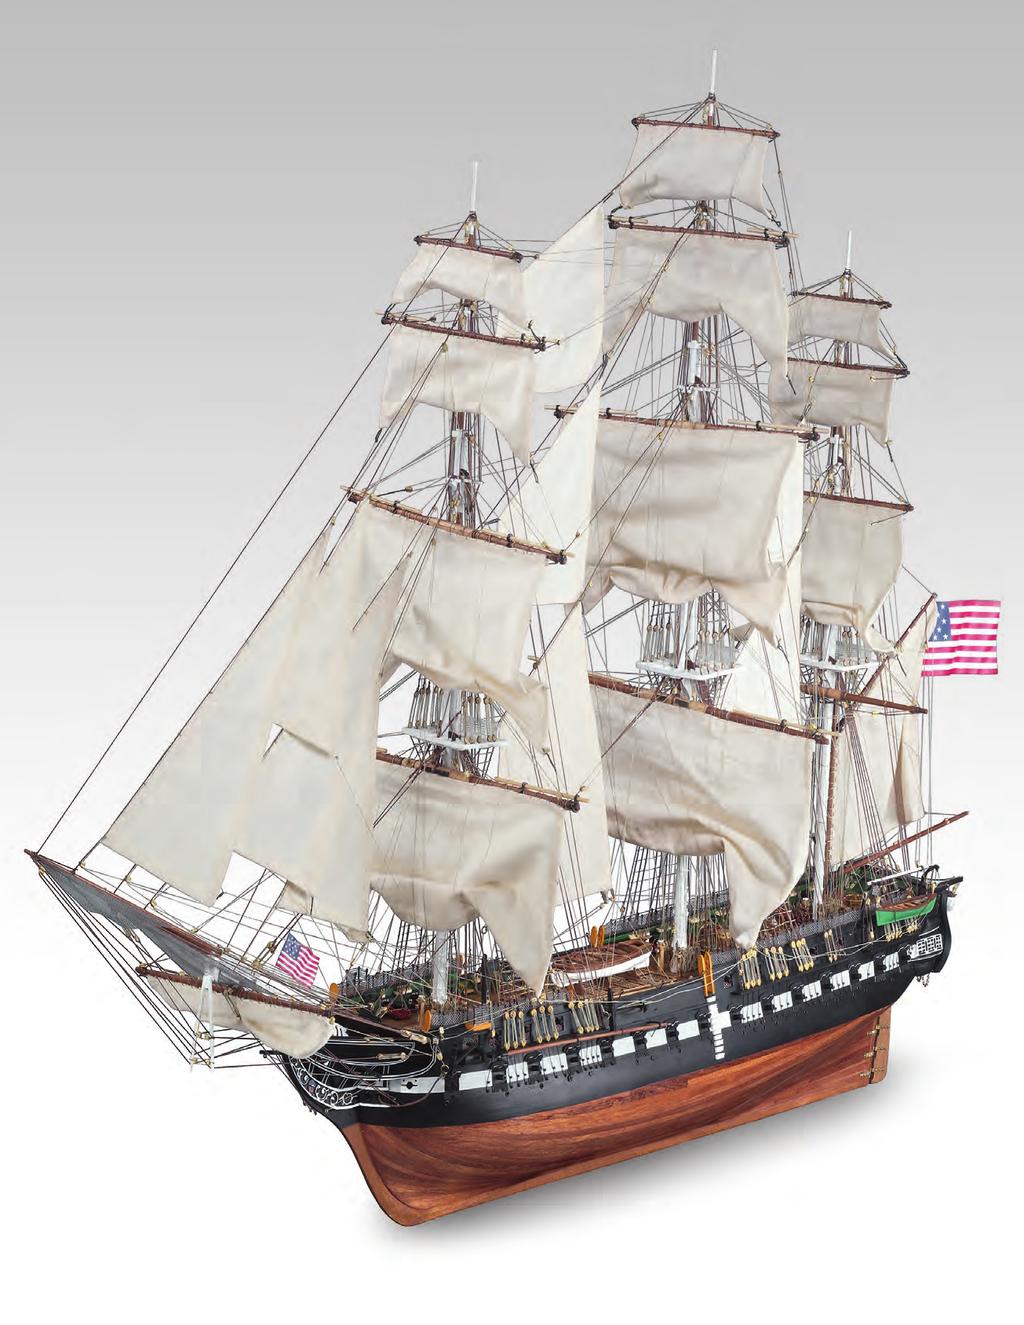


1 USS CONSTITUTION Build the The world s oldest commissioned naval vessel afloat 04


2 Build the USS STAGE CONSTITUTION Contents PAGE Wooden strips and a ladder 63 9 Wooden strips and nails 6 30 Wooden strips and nails 6 3 Wooden strips, grating strips, a cannon and fittings 69 3 Wooden strips and nails 33 Wooden strips and nails 3 34 Wooden strips and a ladder 3 Grating strips, wooden strips and a ladder 36 Wooden strips and nails 9 3 Wooden strips and nails 3 Bow frames 3 Editorial and design by Continuo Creative, 39-4 North Road, London N 9DP. Published in the UK by De Agostini UK Ltd, Battersea Studios, Silverthorne Road, London SW 3HE. Published in the USA by De Agostini Publishing USA, Inc., E. Calhoun Street, Woodstock, IL 6009 All rights reserved 0 Warning: Not suitable for children under the age of 4. This product is not a toy and is not designed or intended for use in play. Items may vary from those shown.


3 STAGE: Wooden strips and a ladder C. x x 300mm wooden strips. x 4 x 00mm ramin strips 3. Ladder sides C Glue two of the mm lengths into the slots at either end of one of the ladder sides. D 3 A Take the ladder sides and A 3 cut away a section at the end of each so that only six slots remain, as shown. D Glue the other upright onto the free ends of the two end lengths. E B B Cut six mm lengths of x 4mm ramin strip. E Glue the remaining four mm lengths into the other slots in the ladder sides. 63


4 F When the ladder is F G Remove the section of G I complete and the glue has dried, apply a coat of stain to it and leave to dry. I Insert the ladder into the beam that is obstructing the opening forward of the mizzenmast hole. opening next to the grating, and apply a little glue to secure it there. J Here you can see how the grating and ladder should look when in place. J H H Take the grating assembly K K This stage is now (Stage ) and glue it onto the deck, positioning the larger section over the opening indicated in the previous step, as shown. complete. Store any materials that you haven t used, because they will be needed in future stages. 64

5 STAGE: 9 Wooden strips and nails C 9. x x 300mm wooden strips. Nails 9C Fit another two strips in the same row, one from frame to, and the second from frame to 9. D 4 9A Shape one of the strips A to fit from frame forward to frame. Glue and nail the strip into place. 9D Start a new row, ftting the first strip from frame to frame 4. 9E Fit a second strip to the row, from frame 4 to frame. 9B When the glue has dried, B cut away the excess of the strip extending forward past frame. 6 E 4


6 F 9F Fit a third strip to frame I H, continuing aft to frame. This will create a gap (arrowed), which will be filled at a later stage. 9I Fit another strip from frame to frame, continuing on from the strip in the previous step. 9J Complete the row aft to frame. Repeat Steps A to J on the other side of the hull. G 9H Now start a new row, fitting the first strip from frame to frame. 9G Cut the section of the strip K J 9K This stage is now extending past frame. complete. Store any materials that you haven t used, because they will be needed in future stages. 66

7 STAGE: 30 Wooden strips and nails C. x x 300mm wooden strips. Nails 30C To complete the row, apply another continuation strip to the previous one. After fixing it with the nails, cut it flush with frame. D 4 A 30A Shape one of the strips to fit from frame forward to frame. Glue and nail the strip into place. 30D Start a new row, fitting a strip from frame 4 forward to frame. E 4 B 6 30B Continue the row aft, fitting a strip from frame to frame. 30E Fit two more strips in the same row, from frame 4 to 6, then 6 to. 6


8 30F Fit a final strip to F complete the row, from frame aft to frame. 30I Complete the row by fitting a third strip from frame to frame. 30G Start a new row, the first strip from frame to, the second from frame to. G I J H 30H Cut any excess from the K 30J As with the bow, cut any excess strip away at the stern, flush with frame. 30K This stage is now front of the row, flush with frame. complete. Store any materials that you haven t used, because they will be needed in future stages. 6


9 STAGE: 3 Wooden strips, grating strips, a cannon and fittings. Grating strips. x x 300mm ramin strips 3. Cannon 4. Cannon wedge C. Carriage base 6. Carriage. Double blocks 3C Cut two more lengths of x 3mm walnut strip to fit along the longer sides, and glue into place. 6 A 3D Glue two lengths of x mm ramin strip along the longer sides of the assembly. 4 D 3 3A Remove a 4 x -square section of the grating. Smooth the sides with sandpaper. E B 3B Cut two lengths of x 3mm walnut strip to fit the shorter sides of the grating piece. Glue into place. mm 3E Cut 4 lengths of x mm ramin strip, each mm long. Glue them to one of the strips fitted in the previous step, as shown. 69


10 H 3H Cut three lengths of x mm ramin strip to close the three remaining sides of the assembly. 3F Continue gluing the mm strips to the side until it is covered, as shown. F I 3I Smooth the piece with sandpaper, rounding the edges slightly. Then apply clear lacquer and stain, as with previous pieces. G J 0mm 3G Once the strips have K 3J Glue the piece 0mm forward of the central opening, as shown. dried in place, smooth the side so that they are flush with the walnut. 3K This stage is now complete. Store any materials that you haven t used, because they will be needed in future stages. 0


11 STAGE: 3 Wooden strips and nails C 3. x x 300mm wooden strips. Nails 3C Start another row, fitting a strip from frame to frame 3. Fitting this strip will create a gap, as shown. D A 3A The line of the frames will now begin to curve more, resulting in wider gaps between the strips. This is not a problem, as they will be filled at a later stage, so do not force any strips to fit. Fix a strip from frame to frame, as shown. 3D Fit the next strip from frame to frame. E 3B Continue aft, fitting a B strip from frame to frame. Don t force the strip to fit the curve of the frames. This may create a gap between it and the previous row, but all gaps will be filled later. 3E Fit a strip from frame to frame. This will create another gap at the bow (arrowed).


12 3F Continuing aft from the F 3G Complete the row with a strip from frame to frame. G previous step, fit a strip from frame to frame. I 3I Continue the row from frame to frame. 3J Complete the row with a strip from frame to frame. Repeat Steps A to J on the other side of the hull. H J 3H Place the next strip from K 3K This stage is now frame forward to frame. complete. Store any materials that you haven t used, because they will be needed in future stages.


13 STAGE: 33 Wooden strips and nails C 6 9. x x 300mm wooden strips. Nails 33C Continue the row aft, fitting a strip from frame 6 to frame 9. D 3 A 33A Cut a strip to fit from frame to frame. Glue and nail into place. 33D Fit another strip from frame to frame 3. You should notice that there are now a few gaps forming between the rows. E B B Now cut another strip to fit underneath the one from the previous step, from frame 4 to frame 6, as shown. 33E Continue the row aft, fitting a strip from frame to frame 0. 3


14 F H 33H Complete the row with a strip from frame to frame, as shown. 33I Now place two strips, the first from frame to frame 4 and the second from frame 4 to frame. I 33F Start another row by placing a strip from frame to frame. 4 33J Complete the row with a strip from frame to frame. Repeat steps A to J on the other side of the hull. G 33G Continue the row aft, J K 33K This stage is now fitting a strip from frame to frame. complete. Store any materials that you haven t used, because they will be needed in future stages. 4


15 STAGE: 34 Wooden strips and a ladder C. Ladder sides. x 4 x 00mm ramin strips 3. x x 300mm wooden strips 34C Create a frame around the assembly with x 3mm walnut strips, as shown. 34D Now frame the rest of the assembly with x mm ramin strip. Prepare the grating assembly in the same way as the others. D 3 A 34A Remove two 3 x 3 sections of the grating. Then smooth the sides of the pieces with sandpaper E 34B Cut a piece of x 3mm B walnut strip twice the length of the grating piece. Glue the two grating pieces on either side of the strip, aligned along the centre. 34E Then test-fit the grating over the opening, as shown above.
, then file it away. When the fit is correct, glue the frame in position.")


16 34F If any part of the opening F it obstructing the spaces in the frame where the ladders will fit (Step J), then file it away. When the fit is correct, glue the frame in position. 34I Glue the other ladder side onto the free ends of the steps. When dry, stain the assembly in the same way as the previous ladders. I G 34G Cut away the ends of the two ladder sides so that there are only six slots remaining in each. 34J Insert the ladder into the opening in the frame, as shown, and secure it with glue. 34H This is a different way H J to make the ladders from the method shown in Stage. Cut six 6mm lengths of x 4mm ramin strip, and glue them into the slots in one of the ladder sides. 6mm K 34K This stage is now complete. Store any materials that you haven t used, because they will be needed in future stages. 6


17 STAGE: 3 Grating strips, wooden strips and a ladder 3C Glue the remaining 6mm strips into the remaining slots in the ladder sides. Stain the ladder in the same way as the others. C. Grating strips. x 4 x 300mm ramin strip 3. x 3 x 300mm walnut strip 4. Ladder sides. x 4 x 00mm ramin strips 3 3D When the ladder is complete, glue it into the remaining opening in the grating frame. D 4 A 3A Prepare the ladder sides and cut one of the x 4mm ramin strip into six 6mm lengths. E B 3B Glue a 6mm strip into the end slots of one of the ladder sides, then glue the other side onto the free ends, as shown. 3E Assemble the grating strips, and fix them together with glue.


18 3F When the grating is F 3I When the assembly has dried, stain it in the same way as the previous pieces. complete, remove two 3 x 3 sections. Smooth the sides with sandpaper. I 3G Cut a piece of x 3mm walnut strip twice the length of the grating piece. Glue the two grating pieces to either side of the strip, aligned along the centre, as shown. G 3J Test-fit and glue the grating frame over the next opening, just aft of the mainmast hole. H 3H Frame around the J K 3K This stage is now assembly with x 3mm walnut strip, then frame the rest of the assembly with x mm ramin strip. complete. Store any materials that you haven t used, because they will be needed in future stages.


19 STAGE: 36 Wooden strips and nails 36C Complete the row by fitting two more strips, from frame to frame and then from frame aft. C. x x 300mm wooden strips. Nails D A 36A Fit a strip up against the false keel, from halfway across frame forward, as shown. Make sure to secure it with nails. 36D When the row has dried, cut the end of it flush with the reinforcements and the bottom of the frames at the stern. E 36B When dry, cut the forward 6 B end of the strip flush with the false keel. 36E Fit another strip from frame 6 forward. When dry, shape the front of the strip flush with the false keel. 9

. Any gaps will be filled later.")

20 36F Place another strip from frame 6 aft. When dry, cut the end flush with the line of the reinforcements and frames. F 36I Here is a close-up view 6 36G Start a new row, placing I of the row at the bow. As you can see, gaps have appeared between the strips at the bow. Cut all the strips flush with the false keel and frame. G a strip from frame forward. When fitting it to the hull, you may find that it creates a gap (arrowed). Any gaps will be filled later. H J 36J Here you can see the strips at the stern. As with the bow, there will be gaps between them. Cut them all flush with the line of the reinforcements and frames, and the edge of frame. 36H Complete the row, fitting one strip from frame to frame, then another from frame aft. Then complete two more rows. K 36K This stage is now complete. Store any materials that you haven t used, because they will be needed in future stages. 0


21 STAGE: 3 Wooden strips and nails 3C Start a new row with two strips, from frame to frame, and frame to frame. C. x x 300mm wooden strips. Nails 3D Complete the row, fitting a strip from frame to frame. D A 3A Fit a strip from frame 4 4 forward to frame. Remember to secure the strip with nails. E 3B Complete the row with two more strips, one from frame 4 to frame, the second from frame to frame. B E Fit two new rows into the space indicated above. One row from frame to, then to, and the second row from frame 4 to 6, then 6 to. Repeat Steps A to E on the other side of the hull.


22 3F Fit another row from F frame 6 to frame 4, and frame 4 to frame. Repeat on the other side of the hull. You will now start to fill in the gaps in the hull. 3G To fill the gaps, hold a strip next to one of them, and mark the length of the gap on it. I 4 6 G 3I Test-fit the wedge in place. If it fits the gap, then glue it into place; if it doesn t, proceed to the next step. 3J If the wedge doesn t fit the gap, adjust the shape slightly with sandpaper until the fit is correct, then glue into place. H 3H Using a knife, cut the J K 3K This stage is now strip from the line marked in the previous step to the end, shaping it into a long wedge. complete. Store any materials that you haven t used, because they will be needed in future stages.


23 STAGE: 3 Bow frames 3C Using the same technique, fill the larger holes toward the stern with wedges. C. Bow frames 3D Use a sanding block to shape the wedges, running the wedges along the length of the block. D A 3A Mark a line on some wooden strip to fit the gap indicated. Cut the wedge from the strip. E 3B Test-fit the wedge into the B gap. If the fit is correct, then glue it into place. If not, adjust with sandpaper, then repeat. 3E Create wedges to fill the gaps at the bow, as shown. You may need to shape them to fit the curve. Do this in the same way as you shaped the strips. 3


24 3F Fill the smaller gaps at F the bow with thinner wedges, as shown. 3I Once all the gaps are filled, remove the two projections from the false keel, as indicated here. 3G When the glue on the wedges has dried, cut away any excess extending past frame or the false keel. G I H 3H Fill the smaller gaps J 3J Use sandpaper to smooth the areas of the false keel from which the projections were removed. K 3K This stage is now toward the stern in the same way as those at the bow. complete. Store any materials that you haven t used, because they will be needed in future stages. 4
USS. Build the CONSTITUTION. The world s oldest commissioned naval vessel afloat
 USS CONSTITUTION Build the The world s oldest commissioned naval vessel afloat 05 Build the USS STAGE CONSTITUTION Contents PAGE 39 Bow frames 87 40 Stern frames 89 4 Grating strips, wooden strips and
USS. Build the CONSTITUTION. The world s oldest commissioned naval vessel afloat
 USS CONSTITUTION Build the The world s oldest commissioned naval vessel afloat 08 Build the USS STAGE CONSTITUTION Contents PAGE 7 Gun port lids, wooden strips and guns 7 7 Gun port lids, wooden strip
San Felipe: Step by Step Pack 3
 Pack 3 Your parts Bulwarks Gun port covers x 2 Tools and equipment Wood glue Sandpaper Brushes Wood stain Hammer Pin pusher/nails Razor saw a Remove the longer bulwark and test-fit it in place at the bow
SAN FELIPE: Step by Step Pack 2
 Pack 2 Your parts Stern reinforcement Bulkheads The poop deck Bulkhead planks Planks Tools and equipment Knife Pencil Wood glue Sandpaper File a Using leftover 5 x 5-mm wooden strips, measure and cut beams
Build the Spitfire: Step-By-step. Pack 3 Stages 21-30
 Pack Stages 2-0 Contents Stage Page Number 2 72-74 22 75-78 2 79-8 24 82-84 25 85-88 26 89-9 27 92-94 28 95-97 29 98-00 0 0-05 Editorial and design by Continuo Creative, 9-4 North Road, London N7 9DP All
Contents. Build the Spitfire: Step-By-step
 Pack 2 Stages -20 Contents Stage Page Number 8-0 2 - - 7 8-50 5 5-5 6 5-57 7 58-60 8 6-6 9 6-67 20 68-7 Editorial and design by Continuo Creative, 9- North Road, London N7 9DP All rights reserved 20 De
San Felipe: Step by Step Pack 6
 Pack 6 Your parts Framing Tools and equipment Glue Knife Sandpaper Superglue Tweezers Clear varnish a Retrieve the grating that you assembled on Page 100. Cut two pieces of 2 x 3 mm wooden strip to fit
Build the Spitfire: Step-By-step. Pack 4 Stages 31-40
 Pack 4 Stages 31-40 1 Contents Stage Page Number 31 106-108 32 109-111 33 112-115 34 116-118 35 119-122 36 123-125 37 126-128 38 129-132 39 133-136 40 137-139 Editorial and design by Continuo Creative,
BUILD THE. Soleil Royal. Pack 1. The flagship of King Louis XIV.
 BUILD THE Soleil Royal The flagship of King Louis XIV www.model-space.com Pack 1 Stage 1 Assembly Guide Hull frame, false keel and first deck half A 4 2 5 1 6 7 1A Smooth the surfaces of all the pieces
BUILD AND DRIVE THE RADIO-CONTROLLED MODEL SCALE 1:16
 BUILD AND DRIVE THE RADIO-CONTROLLED MODEL 4 SCALE 1:16 CONTENTS STAGE PAGE 17 The air outlet and track 41 18 The external fuel tanks 43 19 The track and air inlets 45 20 The track and engine access panel
BUILD AND DRIVE THE RADIO-CONTROLLED MODEL SCALE 1:16
 BUILD AND DRIVE THE RADIO-CONTROLLED MODEL 7 SCALE 1:16 CONTENTS STAGE PAGE 34 The fourth stowage pannier 81 35 The gun, mantlet cover and track 83 36 The recoil mechanism 85 37 The infrared receiver 87
STAGE PAGE. 6 The left front door interior The right front wheel The right front seat back The right front wheel 37
 Pack 2 STAGE PAGE 6 The left front door interior 25 7 The right front wheel 29 8 The right front seat back 33 9 The right front wheel 37 10 The right front door 41 11 The right front door window 45 12
Build the Spitfire: Step-By-step. Pack 7 Stages 61-71
 Pack 7 Stages 61-71 1 Stage Contents Page Number 61 212-215 62 216-218 63 219-221 64 222-224 65 225-228 66 229-231 67 232-235 68 236-238 69 239-241 70 242-245 71 246-249 Editorial and design by Continuo
Build the. Steam Locomotive. Pack 06
 Build the Steam Locomotive Pack 06 Build the Steam Locomotive Contents Step by step Stage 38: The boiler band Stage 39: Sand spreader pipe main cocks Stage 40: Building up the dome Stage 41: The sand spreader
BUILD AND DRIVE THE RADIO-CONTROLLED MODEL SCALE 1:16
 BUILD AND DRIVE THE RADIO-CONTROLLED MODEL 6 SCALE 1:16 CONTENTS STAGE PAGE 28 The second stowage pannier and track 67 29 The right skirt 69 30 The third stowage pannier and track 71 31 The smoke mortars
Build the. Steam Locomotive. Pack 05
 Build the Steam Locomotive Pack 05 Build the Steam Locomotive Contents Step by step Stage 29: The leading truck 3 Stage 30: The leading truck 4 Stage 31: The headlamp Stage 32: The smokebox door lock Stage
3Position the hull of the ship as
 Yamato: Step-by-step 25 The hull and stern deck c b d a b d c e e f a Rear frame b Stern deck x 2 c Stern deck x 2 d Side wall x 2 Wood glue Sandpaper (no. 400 grain) Craft knife Pliers d Side wall x 2
BUILD YOUR OWN. Pack 12
 BUILD YOUR OWN TM Pack 12 177 CONTENTS Assembly Guide 179 Stage 38: The right crankcase half Stage 39: The IR sensor board Stage 40: The left crankcase half Editorial and design by Continuo Creative, 39-41
3Insert the second rod no. 4
 Yamato: Step-by-step 37 The stern block and searchlight control towers a b c d e f Recommended tools and materials Wood glue Sandpaper (no. 800 grain) Metal file Putty Craft knife For metal: Super Glue
BUILD YOUR OWN. Pack 01
 BUILD YOUR OWN TM Pack 01 01 CONTENTS Assembly Guide 03 Stage 1: The fuel tank Stage 2: The cylinder head cover and breather Stage 3: The front wheel and the instruments Stage 4: The handlebars Editorial
5If the protruding part is. 6Place 1 as is shown in the. 7Place what was assembled
 Yamato: Step-by-step 49 The base of the bridge and strakes a c b d a Base of the bridge b Base of the bridge c Base of the bridge d Strakes x 10 THE BASE OF THE BRIDGE 1Smooth 1 to 3, first using the metal
BUILD YOUR OWN. Pack 22
 BUILD YOUR OWN TM Pack 22 01 CONTENTS Assembly Guide 339 Stage 70: The front brake lever Stage 71: The oil hose and the twistgrip Stage 72: Fitting the front fork assembly Editorial and design by Continuo
1Take the keel (3) and
 and") 1 The hull and the bridge 1Take the keel (3) and apply PVA wood glue in the second slot from the left: a toothpick may make it easier. Take care: the left end is the one that has a projection. THE HULL
1 The hull and the bridge 1Take the keel (3) and apply PVA wood glue in the second slot from the left: a toothpick may make it easier. Take care: the left end is the one that has a projection. THE HULL
BUILD YOUR OWN. Pack 02
 BUILD YOUR OWN TM Pack 02 17 CONTENTS Assembly Guide 19 Stage 5: The headlight case Stage 6: The left fork Stage 7: The right fork Editorial and design by Continuo Creative, 39-41 North Road, London N7
1Smooth pieces 4, 5 and 6, using
 Yamato: Step-by-step 109 Machine-guns, anti-aircraft guns and decking h e f a b c g d e f a Anti-aircraft gun base x 2 b Anti-aircraft gun (bottom) x 2 c Anti-aircraft gun (top) x 2 d Machine-gun base
The Lansdowne One Car Garage Assembly Instruction by Laser Dollhouse Designs
 The Lansdowne One Car Garage Assembly Instruction by Laser Dollhouse Designs NOTE 1: Please do a dry assembly using only tape to hold house together. This will get you familiar with parts, location, and
The Hamlin Assembly Instruction By Laser Dollhouse Designs
 The Hamlin Assembly Instruction By Laser Dollhouse Designs NOTE 1: Please do a dry assembly using only tape to hold house together. This will get you familiar with parts, location, and fit. This also gives
Build your own. Stages 47-50: Continue building up Robi s left leg
 Build your own Pack 13 Stages 47-50: Continue building up Robi s left leg Build your own All rights reserved 2016 CONTENTS Published in the UK by De Agostini UK Ltd, Battersea Studios 2, 82 Silverthorne
Building Instructions Diva cabin boat
 Building Instructions Diva cabin boat Order no. 3093/00 aero-naut Modellbau Stuttgarterstr. 18-22 D-72766 Reutlingen / Germany http://www.aero-naut.com 1 For pictured building instructions please see the
Introduction: The model should be assembled following the sequence of the stages of construction described in these instructions.
 Victoria Bestell-Nr. 3082/00 Introduction: The model should be assembled following the sequence of the stages of construction described in these instructions. The laser-cut components are individually
Vivian Mansion Assembly Instruction By Laser Dollhouse Designs
 Vivian Mansion Assembly Instruction By Laser Dollhouse Designs NOTE 1: Please do a dry assembly using only tape to hold house together. This will get you familiar with parts, location, and fit. This also
4Wrap piece 7 around a rod. 5Remove piece 7 from the. 6Close up the join in both
 Yamato: Step-by-step 193 Parts of the command bridge and sides a b c d g e a Bow fairlead b Anchor x 2 c Machine-gun firing control mechanism x 2 d Base of machine-gun fire control mechanism x 2 e Launch
1Use the metal file to smooth
 Yamato: Step-by-step 85 Parts of the bridge and the hull a b c d e f a Part of the bridge b Part of the bridge c Part of the bridge d Radar x 2 e Part of the bridge x 2 f Wire Recommended tools and materials
Installing your SHOE KEEL
 Installing your SHOE KEEL The shoe keel is there solely to protect the bottom of the hull. On a windy day, it will offer some resistance to a side or quartering wind and will help to avoid being blown
Build your own. Pack. Stages 19-22: Continue building Robi s left arm
 Build your own Pack 06 Stages 19-22: Continue building Robi s left arm Build your own All rights reserved 2015 Published in the UK by De Agostini UK Ltd, Battersea Studios 2, 82 Silverthorne Road, London
3D PRINTER. Pack 11. Anything you can imagine, you can make! 3D technology is now available for you at home! BUILD YOUR OWN
 BUILD YOUR OWN Pack 11 Anything you can imagine, you can make! 3D PRINTER Compatible with Windows 7 & 8 Mac OS X 3D technology is now available for you at home! BUILD YOUR OWN 3D PRINTER CONTENTS PACK
Hull Modifications. General Introduction
 Hull Modifications General Introduction The living quarters for the Captain consisted of the Great Cabin, used for daily activities; Stateroom, used as sleeping quarters and the Coach Cabin, which in larger
Build your own. Stages 7-10: See Robi s head move for the first time
 Build your own Pack 03 Stages 7-10: See Robi s head move for the first time Build your own All rights reserved 2015 Published in the UK by De Agostini UK Ltd, Battersea Studios 2, 82 Silverthorne Road,
Craftman One Car Garage Assembly Instruction by Laser Dollhouse Designs
 Craftman One Car Garage Assembly Instruction by Laser Dollhouse Designs NOTE 1: Please do a dry assembly using only tape to hold house together. This will get you familiar with parts, location, and fit.
Bluenose II Part 2. Planking the Hull
 Planking the Hull Planking is time consuming and requires care, but it can be very satisfying to watch your creation take shape. It is also the point at which many would-be ship modelers throw up their
4 Column Display Row Corner
 4 Column Display Row Corner Page 1 IMPORTANT! If you purchased a 2 Column Display Row Corner Kit, your package will contain the following parts: END LADDER ASSEMBLIES - x4 1 COLUMN SCREWLESS CONNECTORS
Adjustable Hammered Dulcimer Stand
 Adjustable Hammered Dulcimer Stand Musicmaker s Kits (Hwy 36 behind Joseph s Restaurant) P.O. Box 2117 Stillwater MN 55082 651 439 9120 www.harpkit.com PARTS LIST: 1 Set of Assembly Instructions A. 2 front
Chapter Six. Getting started inboard. Installing the false deck
 A close look at the thinning down of the bulkhead extensions. They are just 1/16 thick after fairing them. Chapter Six Getting started inboard This next step is one of the last remaining messy tasks to
USS Enterprise Instructions
 USS Enterprise Instructions If things don t fit right, double check the placement. Because all lasers are different, you may have to sand or file for a perfect fit. Clamp these pieces together and glue
Building small wooden boats in Myanmar
 19 12 ft & 18 ft Fit remaining floors The remaining floors can now be cut to size by taking measurements at the boat. The timber required is given in step 1. See step 10, 11 and 20 for installation procedures.
Siding Systems NOVIKSTONETM FS FIELDSTONE INSTALLATION GUIDE
 Siding Systems NOVIKSTONETM FS FIELDSTONE GENERAL INFORMATION CAUTION: REMEMBER THAT POLYMER UNDERGOES EXPANSION/CONTRACTION DUE TO VARIATIONS IN TEMPERATURE. THE FOLLOWING INSTRUCTIONS WILL ALLOW FOR
176 S. New Holland Road Gordonville, PA Tel: Fax: Summit Tower
 176 S. New Holland Road Gordonville, PA 17529 Tel: 717-768-0066 Fax: 717-768-8569 A S S E M B LY M A N U A L Summit Tower Summit Tower Assembly Manual revised 9/07/05 Dear Customer, Thank you for your
Little Briana Cottage Dollhouse assembly instructions
 Little Briana Cottage Dollhouse assembly instructions NOTE 1: Please do a dry assembly using only tape to hold house together. This will get you familiar with parts, location, and fit. This also gives
Building without Staples
 Building without Staples Equipment List Photo #1 32-40 L or U-shaped jigs (see instructions below) 32-40 1 and 2 inch C-clamps 4 6 12 inch F-clamps or QuickGrips 4-6 6 inch QuickGrips 5-10 bungies cords
Assembly Manual - Flamenco Guitar Kit
 Assembly Manual - Flamenco Guitar Kit Index Contents (pg. 3) Soundboard assembly (pg. 4) Neck to top assembly (pg. 5) Preparation of the sides (pg. 6) Preparation of the back (pg. 7) Body assembly (pg.
Kentucky 4H Wood Science Plans Notebook. Plans Level 1
 Kentucky 4H Wood Science Plans Notebook Plans Level 1 MATERIALS NEEDED: 1 piece wood 3/4" x 2 x 2 1 piece wood 3/4" x 3 x 3 1/2" 1 wooden spring-type clothespin 2-1 1/2" nails 1-1/2 woodscrew Wood Glue
woodworkersjournal.com MATERIAL LIST
 MATERIAL LIST T x W x L 1 Legs (2) 1 1 2" x 3 1 2" x 36 7 16" 2 End Uprights (2) 1 1 2" x 3 1 2" x 32 1 2" 3 Stringers (4) 1 1 2" x 3 1 2" x 42" 4 Top Cladding, Long (2) 3/4" x 7 1 4" x 65 3 4" 5 Side
INSTRUCTIONS TRAMP STEAMER
 Preparation Once you clear some table space you will need a hobby knife and glue (PVA, wood glue, hobby glue) and a file or small piece of sandpaper to be used for cleaning up any tiny imperfections. It
Copyright 2010 Springbok Publishing All Rights Reserved- Page 1
 Copyright 2010 Springbok Publishing All Rights Reserved- www.woodensaddlerackplans.com Page 1 Legal Information All contents copyright 2010 by Springbok Publishing. All rights reserved. No part of this
Sweet Pea Garden Bunk Bed Roof and Pergola [1]
![Sweet Pea Garden Bunk Bed Roof and Pergola [1]](/thumbs/79/78822758.jpg "Sweet Pea Garden Bunk Bed Roof and Pergola [1]") [1] Submitted by Ana White [2] on Wed, 2012-09-26 15:34 Page 1 of 22 [1] Page 2 of 22 Hello Sweet Pea Bunk Bed Builders! To add maximum cuteness to the Sweet Pea Bunk Bed [3], one must of course add a
[1] Submitted by Ana White [2] on Wed, 2012-09-26 15:34 Page 1 of 22 [1] Page 2 of 22 Hello Sweet Pea Bunk Bed Builders! To add maximum cuteness to the Sweet Pea Bunk Bed [3], one must of course add a
Build your own. Pack. Stages 23-26: Begin assembling Robi s right foot
 Build your own Pack 07 Stages 23-26: Begin assembling Robi s right foot Build your own All rights reserved 2015 Published in the UK by De Agostini UK Ltd, Battersea Studios 2, 82 Silverthorne Road, London
Bluenose II Part 3. Dia. 1: Plank layout on stern post
 The Final Planking The race is nearly won now. Just 6 more planks and we re through. Instead of placing another batten, we re going to place a full-width plank all along the edge of the keel. This plank
Assembly Instructions for Busted Bricks Marble Machine #1
 Assembly Instructions for Busted Bricks Marble Machine #1 Ver. 2 instructions Page number 1 Required for assembly: Wood glue (PVA or aliphatic resin recommended) and/or Cyanoacrylate (CA) glue Clamps or
176 S. New Holland Road Gordonville, PA Tel: Fax: Eagles Nest
 176 S. New Holland Road Gordonville, PA 17529 Tel: 717-768-0066 Fax: 717-768-8569 A S S E M B LY M A N U A L Eagles Nest Eagles Nest Assembly Manual revised 9/2/05 Dear Customer, Thank you for your purchase
EXTREME LOAD no. TWO
 1602 - EXTREME LOAD no. TWO Kit Features: 22' 4 " x 14' x 3'-6 Oversize Load 49mm (1.9") actual height Bolt Head Details Welded Load Mounting Fins Painting Handles Tools Required: Hobby Knife Tweezers
Hubble Space Telescope Paper Model Directions Downloads, patterns, and other information at:
 Hubble Space Telescope Paper Model Directions Downloads, patterns, and other information at: www.hubblesite.org/go/model Materials: model pattern printed onto cardstock/coverstock instructions printed
Seascape Bungalow Assembly instructions. Laser Dollhouse Designs
 Seascape Bungalow Assembly instructions Laser Dollhouse Designs NOTE: Please do a dry assembly using only tape to hold house together. This will get you familiar with parts, location, and fit. This also
Easy Jewelry Box. Easy Jewelry Box 1
 This easy to build dresser style jewelry box is designed to use standard board sizes you may already have on hand. Drawers are lined in felt and have felt covered bottoms to glide smoothly on the shelves
Continue gluing the remaining top parts ensuring the angled piece is glued well. Set aside and let dry. See photo below
 Radiator rev 1.1 The SE5a s radiator is one of the most recognized radiators in WW1. It is one of the components that defines the SE5a. The original SE5a has seen multiple radiator designs used during
PROJECT PLANS WOODEN GIFT BOX
 PROJECT PLANS WOODEN GIFT BOX Make the gifts you give even more special by presenting them in this one-of-a-kind gift box. In fact, the box may be valued more than whatever it contains. The box is sized
A Day House. A View of One Way to Finish the Exterior of The Day House. Read these instructions all the way through before beginning this project.
 A Day House A View of One Way to Finish the Exterior of The Day House Read these instructions all the way through before beginning this project. General Comments For the purposes of this project, the standard
176 S. New Holland Road Gordonville, PA Tel: Fax: Castle Loft
 176 S. New Holland Road Gordonville, PA 17529 Tel: 717-768-0066 Fax: 717-768-8569 A S S E M B LY M A N U A L Castle Loft Castle Loft Assembly Manual revised 08/31/05 Dear Customer, Thank you for your purchase
GENERAL NOTES: Page 1 of 9
 Laminating A Zia Into A Turning Blank by W. H. Kloepping, Jan. 2009 This describes how a zia (the New Mexico state symbol) can be laminated into a turning blank. Materials needed: Square Turning Block
Assembly Instructions: Golden Star Art. 769 GOLDEN STAR. English Brig of the 17th and 18 th Centuries. Art ASSEMBLY INSTRUCTIONS English Version
 GOLDEN STAR English Brig of the 17th and 18 th Centuries Art. 769 ASSEMBLY INSTRUCTIONS English Version Newly translated and improved by Peter H. Morris August 2001 For the Mantua Model Group, S. Lucia
Wooden Ship Model Kit by Corel (No. SM59)
") SPECIAL ISSUE # 9 JUNE 2018 All photographs and articles published remain the copyright property of the contributor and SMSC unless released. Corel s HMS Greyhound 20 - gun British Ship Wooden Ship Model
SPECIAL ISSUE # 9 JUNE 2018 All photographs and articles published remain the copyright property of the contributor and SMSC unless released. Corel s HMS Greyhound 20 - gun British Ship Wooden Ship Model
Building small wooden boats in Myanmar
 39 12 ft & 18 ft Prepare bottom Before fitting the keel, there are several steps to complete: 1) Cut frame ends and transom to length (level with bottom). 2) Bevel bottom edge of lower side planks; this
Siding Systems NOVIKSTONETM DS DRY STACK STONE INSTALLATION GUIDE
 Siding Systems NOVIKSTONETM DS DRY STACK STONE GENERAL INFORMATION CAUTION: REMEMBER THAT POLYMER UNDERGOES EXPANSION/CONTRACTION DUE TO VARIATIONS IN TEMPERATURE. THE FOLLOWING INSTRUCTIONS WILL ALLOW
Building instructions ARTEMIS Sailing Canoe Day Five Version 1.0 Brian Pearson & Dr. Axel Schmid Day Five. Assembly of Planks and Frames
 Building instructions ARTEMIS Sailing Canoe Version 1.0 Brian Pearson & Dr. Axel Schmid 2016 Assembly of Planks and Frames Steps: Assembling hull plansk with wire Install frames Align and check keel rocker
Triple Bunk Staggered Beds [1]
![Triple Bunk Staggered Beds [1]](/thumbs/93/113176199.jpg "Triple Bunk Staggered Beds [1]") Triple Bunk Staggered Beds [1] Submitted by jgbreeden [2] on Sun, 2013-06-23 21:38 [1] Summary: This Triple Bunk Bed, based on the Classic Bunk Beds, uses a staggered design to fit under common 8' ceilings
Triple Bunk Staggered Beds [1] Submitted by jgbreeden [2] on Sun, 2013-06-23 21:38 [1] Summary: This Triple Bunk Bed, based on the Classic Bunk Beds, uses a staggered design to fit under common 8' ceilings
Instructions for Real Good Toys 32 Miniatures Showcase. Kit #MS /10
 Instructions for Real Good Toys 32 Miniatures Showcase Kit #MS-600 04/10 Measure, identify, and label the parts Parts: (Measurements are approximate and are for identification purposes only) 2 Side 1/4
Heartland Pergola. Assembly Manual
 Heartland Pergola Assembly Manual Pergola Assembly Manual Thank you for your purchase of this Pergola This manual is designed to simplify the assembly process, however we recommend having an experienced
Roof Contour By Bob Parrish
 Roof Contour By Bob Parrish This text will show you how to shape the roof contour on Labelle passenger and trolley kits. The height of the clerestory on the two types of kits is different. Passenger kits
WRIGHT FLYER 1 INSTRUCTIONS FOR THE D10LC KIT
 WRIGHT FLYER 1 INSTRUCTIONS FOR THE D10LC KIT Manufactured in the USA by Easy Built Models PO Box 681744, Prattville, AL 36068-1744 Visit us at www.easybuiltmodels.com Easy Built Models GLUE METHODS Always
Jet-ski with motor boat engine
 117.178 Tools required: Vice with bending support Wood glue (water resistant) Scissors Ruler Pencil Round file ø2 ø3 ø4 Drills Jigsaw Sandpaper Super glue Please Note The OPITEC range of projects is not
INSTRUCTIONS Tyres. Construction Slot the parts together as shown by the pictures below, applying glue wherever there is a connection.
 INSTRUCTIONS Tyres Preparation Once you clear some table space you will need a pair of side cutters and glue (PVA, wood glue, hobby glue). A file or small piece of sandpaper can be used to clean along
Wayside Cottage Assembly Instructions By Laser Dollhouse Designs
 Wayside Cottage Assembly Instructions By Laser Dollhouse Designs Parts for assembly Base Floor marked 1A thru 1L 13 post and 11 fences With one gate Walls 1A thru 1L and Alcove roof panels 3 lg and 1 sm
Authors: Max Guzman, Donna Delahanty Guzman, Steve Hottinger. Teak & Aspen Sole Installation
 Forward Authors: Max Guzman, Donna Delahanty Guzman, Steve Hottinger Teak & Aspen Sole Installation The original teak plywood floor on our 1976 T34C needed an extreme makeover. The dark stained areas refused
Empire Dresser Plans
 1 Empire Dresser Plans Materials 1 sheet 3/4" plywood (cabinet grade 4' x 8') 1 sheet 5 mm (3/16") underlayment plywood 4'x 8', buy another 1/2 sheet if you want to put a back on the dresser. 1-2" x 4"
ALAN CARTER STUDIO 7 Cane Creek Circle, Fairview, NC
 ALAN CARTER STUDIO 7 Cane Creek Circle, Fairview, NC 28730 630-390-8821 apcarter@sbcglobal.net www.alancarterstudio.com TURNING SMALL GOBLETS As a follow up to my thin stem article, here s a how-to on
Above are the offsets for the plywood panels.
 DinkyDink Plans Bottom Panel Half Station X Y X2 Y2 1 1/4 3/4 0 11 5/16 2 4 9/16 4 12 9/16 3 11 11/16 1/4 11 7/16 14 1/2 4 18 5/8 1/16 18 5/8 15 11/16 5 25 3/4 0 25 3/4 16 5/16 6 32 13/16 0 32 13/16 16
Southern Pacific C-30-4/6 Bay Window Caboose N-Scale & HO-Scale
 Southern Pacific C-30-4/6 Bay Window Caboose N-Scale & HO-Scale Before Starting PREPARING BRASS The easiest way to remove the brass parts from the sheet they are produced on, is to use rail nippers. The
Ben Franklin 5&10 Store
 Ben Franklin 5&10 Store RIVER LEAF MODELS, LLC RIVER LEAF MODELS, LLC Thank you for purchasing the Ben Franklin 5&10 structure kit. Your kit includes everything you need to assemble the final product.
How To Create An Entertainment Unit
 How To Create An Entertainment Unit Materials required: 2 x Pine Panels - 1800mm x 450mm x 18mm 4 x Pine Panels - 310mm x 450mm x 18mm 1 x Pine Panels - 650mm x 450mm x 18mm 6 x Bun feet (your choice of
TANDY WALKER'S A 2nd CLASS BOMBER 10 to 20. FW:10 Class A Bomber LG. FW:11 Class A Bomber Pylon Primary Sructure
 TANDY WALKER'S A 2nd CLASS BOMBER 10 to 20 FW:10 Class A Bomber LG I finished up the landing gear (LG) this morning and shot a couple of pictures for you to see. The first picture shows the LG with 3/32"
How to Make a Richmond Arsenal Musket Ammunition Crate By Austin Williams, 5 th Virginia Co. A
 How to Make a Richmond Arsenal Musket Ammunition Crate By Austin Williams, 5 th Virginia Co. A There are many sources from which one can purchase a Federal arsenal musket ammunition crate and there are
HOW TO REPAIR A NAIL A Lesson with Siobhan Armstrong Prepared for the website of the Wire Branch of the Clarsach Society
 HOW TO REPAIR A NAIL A Lesson with Siobhan Armstrong Prepared for www.clarsach.net the website of the Wire Branch of the Clarsach Society The repaired nail beside a natural one This lesson shows how you
129 KITCHEN BASE CABINET 480
 129 KITCHEN BASE CABINET 480 There are two sorts of kitchen cabinets: base cabinets, which sit on the floor, and wall cabinets. Base cabinets provide both storage space and work surfaces. They often house
Assembly instructions for the Simple Marble Machine
 Assembly instructions for the Simple Marble Machine Page number 1 Parts layout Page number 2 Please note: All the assembly can be done with PVA glue. Don't apply it from the bottle or tube but put a blob
Scissor Stool. Written By: Feitan
 Scissor Stool If the stool is going to be kept indoors simply rub all the pieces with a Minwax WipeOn Poly before assembling the stool. If it is going to go outdoors use Minwax SparUrathane and coat all
#P6-18 Floral Shelf Graceful vines flow and swirl to create the elegant brackets on this Victorian style shelf. 15 wide.
 Floral Shelf Graceful vines flow and swirl to create the elegant brackets on this Victorian style shelf. 15 wide. Cut on dashed line for Back Cut on solid line for Frame only. Stock: 1/8-1/4, cut 1 each
Part 2 Lining off and planking
 Part 2 Lining off and planking Lining off the hull for planking Those of you who have built one of my projects in the past probably know how I have always stressed the importance of lining of your hull.
Wooden Rectangle Pergola Assembly Manual
 Wooden Rectangle Pergola Assembly Manual Pergola Assembly Manual Thank you for your purchase of this Pergola This manual is designed to simplify the assembly process, however we recommend having an experienced
Building Tips This model can be built using the following types of adhesives:
 Page 1 Building Tips This model can be built using the following types of adhesives: Epoxy (with or without microballons) Odorless cyanoacrylate (CA) with accelerator UHU Creativ for Styrofoam (or UHU
Central New York Rocket Team Challenge 2018 Rocket Assembly Instructions
 Central New York Rocket Team Challenge 2018 Rocket Assembly Instructions Note: These instructions vary from those provided by the manufacturer of the rocket kits. There is also considerable varying discussion
Copyright WilkerDos.com Dining Table. Project Designed By April Wilkerson - Plan Created By Jay Bates (jayscustomcreations.
 Copyright WilkerDos.com 2017 Project Designed By April Wilkerson - Plan Created By Jay Bates (jayscustomcreations.com) Layout & Shopping List Page 2 of 12 Layout & Shopping List Item Quantity Description