Presentation by Vic Buxton Valley Wood Turners Meeting April 10, 2012
|
|
|
- Myron Anthony
- 6 years ago
- Views:
Transcription

1 Presentation by Vic Buxton Valley Wood Turners Meeting April 10,
2 Segmented wood turning is much more than gluing together pieces of wood. It is about creating exciting objects that challenge you and stimulate the interest and enjoyment of others Malcolm Tibbetts The wood turning world we have created to date is a result of thinking and experience thus far. Change and innovation requires new designs and challenges. Segmented turning offers one such pathway Vic Buxton 2
3 Presentation Outline Why segmented turning; Types of construction; Tools & Jigs I use; Understanding the terminology Moisture Content & Grain Orientation Calculations involved; Vase design and Number of segments/rings needed; Creating and Securing the Vase Base Creating the feature Ring Calculating how much stock needed; Selecting and preparing the stock; Tools & Jigs for cutting the angles; 3
4 Presentation Outline Continued Wedge sanding, gluing and clamping; What to do if the pieces do not form a tight ring Sanding, flattening, correcting each ring; Gluing consecutive rings and rectifying surfaces; Beginning the turning process; Sanding and finishing en route; One or two piece construction approach; Sanding and finishing the outside; Options for completing & finishing the vase bottom; References 4
5 Why Segmented Turning? Segmented turning allows you to incorporate design into your wood via the placement of segments and the use of contrasting woods; Segmented turning allows for creating much larger vases than hollowing with normal tools can tolerate; Vase height and diameter is only limited by the capacity of your lathe; Segmented turning allows for both closed segments and open segments designs; 5
6 Types of Construction There are three basic types of closed seg. Construction: 1) The lamination of wood layers; 2) The assembly of staves; 3) The creation of objects via segmented rings (samples provided) The rest of my presentation will be about #3 but the stave construction will require the calculation of miter angles and these are described in Malcolm Tibbetts book. 6
7 Tools & Jigs I Use for Closed Segmented Turnings Steb center and live tail center to cut a tenon on base; OneWay Stronghold or other robust chuck to secure base; Standard bowl gouges and parting tools; Thickness planer for preparing stock; Home made sanding discs for ring problems (sample); Several jigs for cutting the segment angles (samples); Hose clamps for gluing the rings (samples); Flat master for flattening rings (sample); 2-way vice jig for rectifying surfaces (sample); Assorted grit sandpaper & powers sanding equipment; 2 steady rests for supporting very large vases; Jumbo jaws for finishing the vase bottom; 7

8 Understanding the Terminology 8
9 Moisture Content & Grain Orientation Too high moisture content can cause glue joint failure. Try to work with only kiln dried woods; Segment grain orientation is also very important. Most failures are from grain mis-orientation. Wood movement is almost always perpendicular to the grain. (Remember a board moves sideways not lengthwise); Proper grain orientation results in movement up and down and in and out and not from end to end. Such movement will split the ring. 9
10 Calculations Involved The formula for determining segment angle is very simple: 360 degrees / No. of Segments / 2 For example, if you wanted a ring comprised of 12 segments the segment or wedge angle you must use is 360/ 12 /2 = 15 degrees. The width of the segment is determined by the stock thickness you have available. Length of Segment Calculation I use: Diameter desired times (pi) = Circumference required divided by no. of segments = segment length; For example, suppose I wanted a 16 diam. Ring, then: 16 x = divided by 12 = 4.19 seg length. This is wedge length that I would cut on my table saw. Precise Calculation of Segment Length = tangent of angle X diameter (where X is 15 degrees = times the work diameter for the slice. For a 16 inch diameter ring this would be (tangent of 15 degrees) x 16 =
11 Vase Design & # of Segs/Rings Needed Spend time on the design! The design needs to include a consideration of the pattern you wish which will in turn determine the number of segments per ring you require to create that pattern (show example); Create a concept design first then move to the detailed design. Start off with graph paper with blocks relating to the thickness of the stock you wish to use and identifying where a larger stock may be needed to accommodate sharp curves. In a given ring, different woods to be used must be the same thickness. You will need to decide on the wall thickness Convert your conceptual design to a detailed design which will dictate how many rings needed and the required finished diameter of each ring. Plan a turning well within the capacity of your lathe (example, vase length and widest diameter). For large vases I uses 1.5 wide stock although the finished wall thickness will only be ½ inches. This is needed for two reasons: to accommodate segment slope angle (consistent with your design); and most importantly, my incompetence (I need lots of final adjustments room). For sharp slopes I sometimes use stock of 2 or 2.5 inch width 11
12 Creating & Securing the Vase Base I typically start with a block of walnut shaped on the band saw; I start by placing the block on the lathe held by a steb center at the headstock and a Oneway live center at the tailstock; I then create a tenon to fit my stronghold chuck; I then secure the base in the stonghold chuck and make it round and dead flat on the front; The base must be at least one inch bigger than your finished dimension to allow it to be parted off the chuck at the end; I usually cut in a little at the onset so I know where my final parting will occur. 12
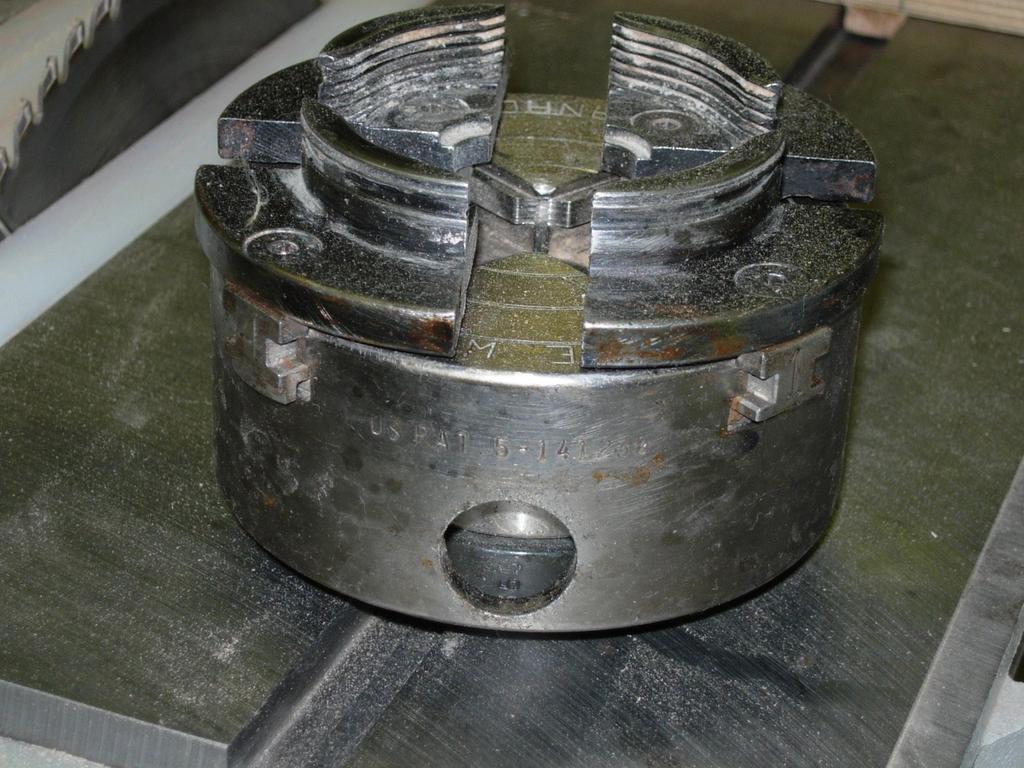
13 Stronghold Chuck 13

14 Base Block with tenon Cut 14

15 Steb Center 15

16 Oneway Lathe Live Center 16
17 Creating the Feature ring The feature ring is, or can be, the highlight of your design (point to examples); I often spend as much time designing and creating the feature ring as I do the rest of the vase. In a feature ring, all pieces (sometimes 36 or more) are cut, sanded, glued to form a repeating block. The 12 0r more blocks are then cut to the desired angle, and the wedges are then glued together and clamped via hose clamps and then sanded as per all of the other rings. Once the blocks have been created and the wedges cut, the ring is assembled just like all other rings; 17

18 An example of my feature ring 18

19 Pyrographic Feature Ring 19

20 Another of My feature rings 20
21 Calculating How Much Stock is Needed There are basically two ways to cut a board into segments: cutting a segment and flipping the stock to cut the next segment which will result in an uneven but nonetheless, often vey interesting grain pattern; or, cutting all wedges from the same side of the board (draw on the flip chart); The number of feet of stock you will need will be a function of how much of your stock you are prepared to waste in order to achieve consistency in grain orientation; If you are frugal like me, for each type of wood to be used, the stock required is a simple calculation of seg length plus saw cut thickness times number of segs for each ring. Add up the amounts of each wood needed for each ring. 21
22 Selecting and Preparing the Stock In Malcolm Tibbetts book (page 22) he outlines three types of woods: woods of limited use (too soft or too oily); OK woods (they work but based on his experience do not inspire enthusiasm; his personal choices. Personal choices will obviously be limited to wood availability and cost considerations. In my case, my open and closed segmented turnings use locally available and reasonably cheap woods such as: maple, dark walnut, butternut and birch. I buy mostly flat stock about ¾ inches, cut it on the table saw to 1.5 inches in width and run the boards through a thickness planer to about 5/8 inches. I then cut the segments from these boards and no presanding is needed. 22
23 Tools & Jigs for Cutting the Angles There are many tools and jigs that can be used to create the angles. These include: A miter / chop saw; A table saw; A radial arm saw. A band saw My vases were created mostly by using the two jigs on the table saw but I have also used the radial arm saw on occasion. My table saw sled jig is preset for 12 segment cutting. The other jig purchased from Lee Valley, I use for all other rings other than 12 segments.(show jigs) 23

24 12 Segment Cutting Sled 24
25 Wedge Sanding, Gluing & Clamping Once you have cut your wedges using whatever tool you have you need to remove the saw burr from all edges (light sanding); Next you need to assemble them into a ring on top of wax paper, place a hose clamp over them and tighten to see if you can produce a tight ring. If you can, then you can proceed to gluing if not then further guidance will follow. Next I glue each segment edge with original Titebond white glue. Position and tighten the hose clamp. Tap with a rubber mallet to flatten the wedges and wipe the surface with a wet cloth. I then hang the rings on a rail to set overnight. Avoid over tightening the hose clamp as this bulges the ring in the center. I will often make 4-6 rings at a time. 25

26 Wedge Sanding, Gluing & Clamping 26
27 What to do if the pieces do Not form a tight Ring? If the wedges you have cut do not form a perfect ring (light showing between the segments) then you can rectify by first gluing / creating half rings by inserting two small pieces of dowel so the two halves are glued separately; Next you must sand the edges parallel on each of the two sections. I created a sanding disc and special tool rest for this purpose (see samples). Then glue the two sections together; To avoid this unnecessary step, it is best to spend time making sure the angles are precise and sanding off any burrs before gluing the wedge; 27

28 Tool Rest and Sanding Disc 28

29 Wedge Sanding, Gluing & Clamping 29

30 Wedge Sanding, Gluing & Clamping 30

31 Wedge Sanding, Gluing & Clamping 31

32 Wedge Sanding, Gluing & Clamping 32
33 Sanding, Flattening, Correcting Each Ring Once the rings have cured overnight (I usually create 4-6 rings at a time) they need to be sanded / flattened on one side then glued to the previous ring and then corrected to ensure the ring stack remains parallel. I begin by scribbling pencil around one side of the ring. Next I use my Flatmaster sander fitted with about 100 grit sandpaper (This machine is almost dust free due centrifugal force lifting the sandpaper off the Velcro on the roller); I continuously rotate the ring while sanding until the pencil is gone; I then flip the ring and do the same thing on the other sides; Now both sides are flat but not likely exactly parallel; Every 2-3 rows, I use a two-way vice mounted with a shim to fit my lathe to true up the ring outer surface (make it parallel). 33

34 Flatmaster Sanding Machine 34
 35")
35 Jig for Correcting (insuring a parallel stacking of rings) 35
 36")
36 Jig for Correcting (insuring a parallel stacking of rings) 36
37 Gluing Consecutive Rings & Rectifying the Surfaces I use pretty simple techniques for aligning the segments as will be seen; I simply remove the ring stack (base of vase that is growing with each ring) still held in the stronghold chuck; I simply glue both surface and let the weight of the base and chuck be the gluing pressure; Not much pressure is needed but you must be careful during the first 20 minutes to ensure that the ring does not slide. If the surface used to support the stack is perfectly level in all directions sliding will not occur. If the ring slides and cures out of place you will need to cut /part it off and start that ring again; I sometimes glue 2 or 3 rings together before adding them to the main stack; Once glued you will need to use the jig I showed you to ensure the ring is parallel. 37

38 Gluing the Rings 38
39 Gluing the Rings 39

40 Gluing the Rings 40

41 Gluing the Rings 41

42 Shaping the Outside 42
43 Sanding & Finishing the Inside en Route Experience has taught me to turn the inside of the vase as I go along; I usually target for about a ½ to 5/8 inch wall thickness; After each 2-3 rows, I turn the inside to create a smooth inner surface; I then turn the outside wall to a little larger than the final desired diameter; The reason for this is to allow for shape adjustments as needed at the final stages of turning; Unless you plan to hand sand and have long arms, it will be best to sand (and seal with Tung oil) the inside as you go along as well. I do not sand or finish the outside wall until the entire vase has been constructed 43
44 Sanding & Finishing the Inside en Route I sometimes ignore turning the tight inside curves at the neck because of the dangerous torque this will create on a very large vase ( I have had very large vases break the tenon as a result of this torque); I sand the inside every 2-3 rows to about 400 grit then apply 2-3 coats of Tung oil; It is also much easier to sand the inside every 3-4 rows then to use an extended reach for sanding; I stop the Tung oil application 1-2 rows from the top (the most recently added rings) to allow for overlap of sanding; Finer grits for inside sanding are not necessary other than the upper neck where folks tend to stick their hands in to feel the surface; Sometimes when there are very sharp curves I neglect the sanding (where the under-edge can not be seen) and just proceed to sealing with Tung oil. 44

45 Sanding and Finishing the Rings 45

46 Jumbo Jaws 46

47 Jumbo Jaws 47

48 Oneway Steady Supports 48
49 Sanding and Finishing the Outside The final turning consists of turning to the final dimensions; This is not the time to redesign the shape of you vase as your final shape can only be altered slightly or you will run out of gluing edge. Next, I power sand up to about 1000 grit; Next I apply about 3-4 coats of Tung oil or sometimes Wipe On Polyurethane; After the finish has cured, I part off the base (I take it down to about 1 inch then finish parting with a Japanese saw). 49
50 Options for Completing - Finishing The Vase Bottom There several ways of finishing the vase bottom but my preference is to hold the vase cap using jumbo jaws; I then use the live center positioned to the center point of the base; I then use the parting tool to indent the base about ½ inch from the edge and ½ inch deep; I then turn the bottom and remove the final small knob with a chisel and then finish via hand sanding and oiling. The final step is buffing using the Beal System. 50

51 Finishing Using the Beal System 51
52 One or Two Piece Construction Approach With very large vases it will be necessary to either provide external support or create the vase in two sections (top and bottom halves) then glue these two together. I have used both techniques; With vases of up to 28 inches in height I had in past found that by using two Oneway Steady supports I can do it all with just the base secured in the stronghold chuck; After a large tenon break, now if over 24 inches then I now create the vase in two sections. I will start building from the base then stop at the feature ring; I will create the vase cap using a block in a chuck then part it off and switch to holding it with jumbo jaws and begin adding rings from the top down; I will conclude by joining the two sections together and jam chucking the live center end for the final outside wall sanding and finishing. 52
53 References 1) Book: Segmented Wood Turning, a step-by-step guide Malcolm Tibbetts; 2) Sled design and other helpful info: x.html#jigs 3) Flatmaster was sold historically at the Ottawa Wood Show each year by Stockroom Supply. You may contact them at : 4) Plans for cutting wedges = 5) Graph Paper: 6) 7) 8) / 53

54 A SAMPLE DRAWING from: 54
Perhaps the best thing about. Three bowls slightly rearranged Twisted Possibilities
 Three bowls slightly rearranged Twisted Possibilities By Malcolm Tibbetts Lacewood Ribbon, 13 7½" Perhaps the best thing about segmented turning is the total lack of restrictions; there is no end to the
Segmented Bowl Making Presentation (Polychromatic Stave-Type Bowl Making) by Jay Helland Lee s Summit, Missouri
 by Jay Helland Lee s Summit, Missouri") Segmented Bowl Making Presentation (Polychromatic Stave-Type Bowl Making) by Jay Helland Lee s Summit, Missouri In Remembrance of George Sonnie Sharrar Oct. 2, 1914-Dec. 25,2007 (Patternmaker, Master Bowl
Segmented Bowl Making Presentation (Polychromatic Stave-Type Bowl Making) by Jay Helland Lee s Summit, Missouri In Remembrance of George Sonnie Sharrar Oct. 2, 1914-Dec. 25,2007 (Patternmaker, Master Bowl
Christmas Bell Ornament
 Christmas Bell Ornament This is an easy Christmas ornament idea I cabbaged from a friend and skilled turner, Curt Fuller, from Utah. I kind of adapted it to my style but I still got the idea from him.
Crafting a Dizzy Bowl
 Crafting a Dizzy Bowl Visit Youtube.com Visit Youtube.com In the search section type dizzy bowl and you will find dozens of videos about turning dizzy bowls. Visit Youtube.com In the search section type
Segmented Bowl Making Presentation (Polychromatic Stave-Type Bowl Making) by Jay Helland
 by Jay Helland") Segmented Bowl Making Presentation (Polychromatic Stave-Type Bowl Making) by Jay Helland More Woodworker than Wood Turner George Sonnie Sharrar About Your Safety Working with wood is inherently dangerous!
Segmented Bowl Making Presentation (Polychromatic Stave-Type Bowl Making) by Jay Helland More Woodworker than Wood Turner George Sonnie Sharrar About Your Safety Working with wood is inherently dangerous!
SEGMENTED TURNING. Segmenting 101
 SEGMENTED TURNING Segmenting 101 The greatest difference between segmented turning and traditional turning is the turner must decide what final form the turning will take even before the first cut is made.
How to Make a Hat Bending Jig
 How to Make a Hat Bending Jig MATERIALS One 2" x 8" x 11" long (Base Block) exact measurements are 7 ½" x 1 ½" x 11" (Pine is OK to use, I have used scrap Walnut for my benders) Four pieces of Oak 1" x
Grade 11 Woods Lift Lid Coffee Table. Based on Under the big Top from Popular Mechanics Website
 Grade 11 Woods Lift Lid Coffee Table Based on Under the big Top from Popular Mechanics Website TABLE TOP 1. Select enough lumber to construct a top that is between 22 ½ and 24 wide after jointing. Ensure
FLAT TO FABULOUS Make a Bowl from a Single Flat Board - Or How to Eat Salad off of Scrap Wood
 FLAT TO FABULOUS Make a Bowl from a Single Flat Board - Or How to Eat Salad off of Scrap Wood Let s face it: Woodworkers are frugal people. In fact, if you are anything like me, you have a hard time throwing
Denise M. DeRose Handled Clamshell Handbag
 Denise M. DeRose Handled Clamshell Handbag Materials: Wood 2 discs between 6 and 9 in diameter -- 4/4, 6/4 or 8/4 1 piece of thin hardwood ¼ inch thick and 4 x 10 Wood for waste blocks Supplies Small piece
Jimmy Clewes Masterclass - Cheam Woodturners 10th November 2013
 This demonstration was the first time in 6 years that Jimmy has demonstrated in the UK. He pointed out that the techniques he uses are his alone, that it is important to enjoy woodturning and do whatever
e) Attach the faceplate/backing plate assembly to the spindle. PROCESS
 Attach the faceplate/backing plate assembly to the spindle. PROCESS") BOARD TURNING This is an exercise in turning which can open up new vistas and potentials for any turner. A form of segmented turning best described as "STACK LAMINATE TURNING", this is unique in that it
BOARD TURNING This is an exercise in turning which can open up new vistas and potentials for any turner. A form of segmented turning best described as "STACK LAMINATE TURNING", this is unique in that it
WEST ISLAND WOODTURNERS
 WEST ISLAND WOODTURNERS March 25th 2014 DEMO Laminated Salt & Pepper Shakers 4130 Papineau Trois-Rivières, Qc G8Y 1P5 819 374-1404 www.davepott.com Cut blank on saw set at 2.1 wide X 2.1 high X 5.1
Wooden Faceplates. Tapping on the Lathe
 Wooden Faceplates There are lots of turning jobs where spending some time on set-up makes the turning go quicker and easier. Making Wooden Faceplates is one way to make set-ups and jigs for turning. As
How to Make a 400 BC Greek Oenochoe Style Wine Pourer
 How to Make a 400 BC Greek Oenochoe Style Wine Pourer The purpose of the demonstration is to show how to make a hollow form wine pourer in the style of ancient Greek pottery. Live demonstration on the
Notes for Making Wood Rings With Stainless Steel Insert Centers
 Notes for Making Wood Rings With Stainless Steel Insert Centers Background These notes describe how to make a ring with a stainless steel (SS) insert and a wood exterior band. They also include information
How to Construct the 8-Point Star by Jay S. Helland
 How to Construct the 8-Point Star by Jay S. Helland 1-5-2013 The photos in these instructions were not taken in consequential order but provide the reader the general idea of the processed used. The process
Instructions for Turning Laminated Bracelets
 Instructions for Turning Laminated Bracelets 1. Start with Design 1. Make a paper template circle for the bracelet. Use this to check the fit on the person you are making the bracelet for. After checking
Instructables Butcher Block Top
 Instructables Butcher Block Top Project Overview: This project requires basic woodworking skills and access to woodworking machines. Woodworking machines have sharp cutting edges and are NOT forgiving.
Fig2: The Sliding Glue Block from the back.
 Ornament Stand Introduction It was one of those forehead smacking moments. I was taking the #2 jaws off my Stronghold chuck, to put on my homemade wooden two jaw chuck set-up. For some reason instead of
A candle stick addresses transferring and reproducing dimensions from a plan and breaking the project into steps.
 Activities Discussion These projects allow more skill development including making items to match a drawing, sizing projects to specific dimensions, and just trying fun stuff for the first time! A candle
Turning a Five Sided Bowl
 Turning a Five Sided Bowl Cut and prepare the blank. This must be square and parallel to each side. The blank must also be small enough to fit the swing of your lathe, when turning off centre. First find
This computer software described in this document facilitates the calculation of the segment length of each ring.
 SEGMENTED TURNING What is it? Segmented turning is the creation of a bowl, vase or similar object by the assembly of small wooden segments. The segments are assembled into rings and the number of segments
Project 13586EZ: Writing Desk. Writing Desk Materials List
 Project 13586EZ: Writing Desk This writing desk will make a handsome addition to just about any room in the house. The one shown is made of cherry, a logical choice for a piece like this, but mahogany
Design Considerations
 Alan N. Leland Miniature Stool Design Considerations The seat of the stool is the most visible part of the stool therefore; using a figured wood will enhance the overall appeal of the finished stool. The
Lidded box double axis
 Lidded box double axis The Wood: Avoid the pith or take a chance. Select an interesting grain pattern or decorate the plain grain. Turn a cylinder with grain parallel to the axis. See the graphic below
A Shaker Sewing Stand
 America s leading woodworking authority Step by Step construction instruction. A Shaker Sewing Stand A complete bill of materials. Exploded view and elevation drawings. How-to photos with instructive captions.
Making a snap lid box By Jeffrey A Lavine
 Making a snap lid box By Jeffrey A Lavine Some call them boxes, some call them lidded bowls, others call them vessels or containers but whatever you call them they are both enjoyable and a challenge to
Odd Wobbler Instructions By: Don Geiger
 Odd Wobbler Instructions By: Don Geiger Stock Size Calculations and Reference Table When preparing stock material for turning an Odd Wobbler, you will need two pieces of dry wood that is about one inch
Biomass Briquette Mold
 Biomass Briquette Mold Drawings and Assembly Compendium Round, Square, Stick, Cube & Chunk By Lee Hite and Dr. Zan Smith Published March 2012 Updated 8/3/2017 All Rights Reserved www.leehite.org Page 1
Turning a Fast Joint dovetailed vase on a lathe
 Turning a Fast Joint dovetailed vase on a lathe Contributed by customer Brian H from Knoxville TN The MLCS Fast Joint precision joinery system offers a broad range of dovetail patterns that can be created
GENERAL NOTES: Page 1 of 9
 Laminating A Zia Into A Turning Blank by W. H. Kloepping, Jan. 2009 This describes how a zia (the New Mexico state symbol) can be laminated into a turning blank. Materials needed: Square Turning Block
Kitchen Step Stool. Premium Plan. In this plan you ll find: America s leading woodworking authority
 America s leading woodworking authority Premium Plan In this plan you ll find: Step-by-step construction instruction. A complete bill of materials. Construction drawings and related photos. Tips to help
Join Neck and Body Wednesday, January 16, :08 PM
 ASL Breakdown Page 1 Join Neck and Body Wednesday, January 16, 2013 10:08 PM 1. 2. 3. 4. Charles did the following steps to speed things up: Lightly sanded the top of the lower bout with an orbital sander.
O nament. Birdhouse. Birdhouse Christmas ornaments have become very
 Birdhouse O nament Photo by Al Parrish Dale Nish, one of the principal architects of the turning revival, shares some turning techniques. Birdhouse Christmas ornaments have become very popular the last
MATERIALS & TOOLS REQUIRED INTRODUCTION. Before you start turning, read and understand this entire procedure.
 INTRODUCTION This set of instructions shows one method to turn mills.there are many other possible variations and techniques. NOTE: These instructions are specific to 'Chef Specialties' mechanism. For
Silverware Chest Plan
 Silverware Chest Plan 05L14.01 Introduction 1. Measure the space required for your cutlery before beginning this project to be sure that it will fit in the drawers and top compartment. The best way to
WOODWORKING GUIDE: BASIC JOINERY
 WOODWORKING GUIDE: BASIC JOINERY Close isn't really good enough. A perfect fit is what counts. When building furniture, there are many ways to construct joints. The simplest are those that use mechanical
OFFSET TURNINGS. By using an eccentric chuck, SHOPMADE CHUCK BUILD A FOR. David Mueller FEATURE. Build the chuck body
 FEATURE BUILD A SHOPMADE CHUCK FOR OFFSET TURNINGS David Mueller By using an eccentric chuck, you can add interest to turnings such as pendants and box lids. The workpiece is mounted out of alignment with
The finished ornaments.
 Introduction I like to make different Christmas Ornaments every year to give to my relatives. This article describes the rnaments that I m making this year. The ornaments use a split turning of either
Pro-Doweling Kit USER S MANUAL #840. Visit us at
 Pro-Doweling Kit USER S MANUAL #840 99 Washington Street Melrose, MA 02176 Phone 781-665-1400 Toll Free 1-800-517-8431 Visit us at www.testequipmentdepot.com Please read this manual carefully and thoroughly
Build A Cedar Chair And Ottoman
 Build A Cedar Chair And Ottoman If you've ever dreamed of extending the comfort of your living room to your deck, patio or yard, our porch chair-and-ottoman combination is a great place to start making
Kendama. Earlier in my life, I was a juggling. A Toy. Arnold Ward. Dimensions
 Kendama A Toy Arnold Ward Earlier in my life, I was a juggling fanatic. I traveled to different cities that hosted juggling festivals where people shared tricks, bought props, took classes, and participated
COFFEE TABLE WITH RECESSED TRAY
 COFFEE TABLE WITH RECESSED TRAY Why not treat your guests to a tray laid with delicacies and then remove it from sight in your new coffee table. There's no easier way to show that you are a thoughtful
Carved Feet Made Simple. Richard Morris
 Carved Feet Made Simple Richard Morris rlmorris3@aol.com www.richardmorrisart.com 812-989-9079 Photo 1 Leave 3/4 for the feet to be carved Photo 2 Reverse turn centering tool Would you like to add a little
Butcher Block Countertop
 A friend asked if I would be willing and able to construct a new countertop for an existing island in his kitchen. He had priced countertops of granite and many other materials, but his wife was partial
Woodturning Fundamentals American Association of Woodturners, January 2013
 Woodturning Fundamentals American Association of Woodturners, January 2013 Methods and Jigs for Reverse Turning Bowls By John Lucas There are many ways to hold bowls and hollow vessels so that you can
ALAN CARTER STUDIO 5332 RIVERVIEW DR., LISLE, IL
 ALAN CARTER STUDIO 5332 RIVERVIEW DR., LISLE, IL 60532 630-971-0690 apcarter@sbcglobal.net www.alancarterstudio.com SPLITTING THE DIFFERENCE This is for all you slackers out there. Sometimes half measures
Chief s Shop: Simple Woodworking Bench
 Chief s Shop: Simple Woodworking Bench Be sure to read the instructions and review the illustrations and accompanying video for this project BEFORE you start. Follow ALL SAFETY GUIDELINES AND RECOMMENDATIONS
Windsor Chair Online. Assembly Instructions
 Windsor Chair Online Assembly Instructions Date: 1/4/2007 Other Chairs Offered Philadelphia Arm Chair New England Comb Back Sackback d Arm Chair Bow Back Side Chair Fan Back Side Chair Page 1 Table of
Tilt-Top Table Elegant project builds hand-tool and machine skills
 Tilt-Top Table Elegant project builds hand-tool and machine skills BY M A R I O R O D R I G U E Z As a woodworking instructor, I m always looking for interesting and challenging projects to present in
Classic Kitchen Island
 America s leading woodworking authority Step by Step construction instruction. A complete bill of materials. Classic Kitchen Island Exploded view and elevation drawings. How-to photos with instructive
Caution: Always use safety glasses or a full face shield when turning anything on a lathe.
 May 26, 2009 Making a 6 Peppermill Page 1 Acknowledgment is given to Jackie Johnson from Nashville, TN for providing the original instructions and method for this article. The design of this mill can be
Contents. pages 20-24: Installing Edge sinks into. custom laminate countertops page 8: Installing Edge sinks into postform laminate countertops
 Contents pages 2-8: Installing Edge sinks into custom laminate countertops page 8: Installing Edge sinks into postform laminate countertops pages 9-14: Installing Acrylic sinks into custom laminate countertops
Bowl Turning by Eugen Schlaak, Niagara Falls, Ontario Canada
 Bowl Turning by Eugen Schlaak, Niagara Falls, Ontario Canada The following article describes the production of simple open type bowls, which are easy to produce. Not much thinking, as far as design and
Domed Cove Box. Materials: Dry stable hardwood, straight grained with pronounced end grain, about 3+ square and 3+ long Sandpaper Finish of choice
 Domed Cove Box Michael G. Stafford I don t know who first turned a box where the sides were curved in to form a waist or as we like to say in woodturning, coved. I started gradually turning boxes with
1. Mount between centers round cut tenons on both ends (same diameter).
.") LONG NECK HOLLOWFORM Jim Terry Piedmont Triad Woodturners Association Turning this hollow form presents some interesting challenges in mounting and holding a turning. Both top and bottom are completely
LONG NECK HOLLOWFORM Jim Terry Piedmont Triad Woodturners Association Turning this hollow form presents some interesting challenges in mounting and holding a turning. Both top and bottom are completely
Making Beads of Courage boxes (using flat wood stock and thin-walled 6 inch white PVC sewer pipe.)
") Making Beads of Courage boxes (using flat wood stock and thin-walled 6 inch white PVC sewer pipe.) Johnny W. Tolly 16212 Crystal Hills Dr. Austin TX 78737 512-922-1242 Acknowledgments: Please note that
Making Beads of Courage boxes (using flat wood stock and thin-walled 6 inch white PVC sewer pipe.) Johnny W. Tolly 16212 Crystal Hills Dr. Austin TX 78737 512-922-1242 Acknowledgments: Please note that
Project 17884EZ: Shaker End Table
 Project 17884EZ: Shaker End Table With its clean, simple lines, this piece is unmistakably Shaker style. Ours is made from cherry, a wood commonly used by Shaker craftsman, but we ve also seen this piece
BUILDING A STORM DOOR
 BUILDING A STORM DOOR BY NEAL BARRETT Illustrations by George Retseck If you're in the market for a storm door, you probably know that there are many styles and models available. However, most of them
Handle Hardware Kit for Router Plane 05P38.10
 Handle Hardware Kit for Router Plane 05P38.10 Introduction With this kit, you can make a set of replacement handles for the Veritas Router Plane. The following instructions describe how to make one handle
This book, or portions of it, may not be duplicated, resold, or redistributed in any way, without the expressed written consent of Stay Tooned, Inc.
 Copyright 2006 - Stay Tooned, Inc. All rights reserved worldwide. This book, or portions of it, may not be duplicated, resold, or redistributed in any way, without the expressed written consent of Stay
Learning Objectives To be able to state the different safety precautions associated with the lathe. To be able to identify and state the function of t
 Learning Objectives To be able to state the different safety precautions associated with the lathe. To be able to identify and state the function of the different parts of the lathe. To be able to identify
Jimmy s 2 nd demonstration was what he called an African Drum style box made from Iroko with a cocobolo insert in the lid with inlaid sterling silver.
 Jimmy s 2 nd demonstration was what he called an African Drum style box made from Iroko with a cocobolo insert in the lid with inlaid sterling silver. He started by roughing out the block with a roughing
Face Once you've tapped the hole, cut the circles out on your band saw.
 Introduction An earlier article in More Woodturning on turning wine stoppers got me thinking about collet chucks. I wondered if I could make one entirely out of wood. I thought this would be just an exercise
Sweetheart Clock. About this project. Project Sponsor: INCRA Precision Tools. Woodturner PRO, LLC. Lloyd Johnson, artist
 Woodturner PRO, LLC Sweetheart Clock Lloyd Johnson, artist Special points of interest: - Cutting thin strips safely AND with consistent results - Design considerations to improve results - Registration
VASE FLYING-WING A BARK-EDGED. Kevin Felderhoff. Wood selection. 36 American Woodturner August 2017
 A BARK-EDGED FLYING-WING VASE Kevin Felderhoff I enjoy turning endgrain pieces and have found that the most dramatic wood grain comes from logs or branches with irregular shapes far from round. The flying-wing
Cape Cod Woodturners Minutes and News October 7, 2015
 Cape Cod Woodturners Minutes and News October 7, 2015 Vice president Jim Silva welcomed 23 members and guests to the meeting. End grain sealer, sandpaper, and CA glue is available from the club for purchase.
The York Woodworkers Association
 The York Woodworkers Association Newsletter for February 4, 2019 Turning A Bowl From A Log Greetings all and welcome to the February 2019 club newsletter. If you have suggestions for improvements, please
Turning a Christmas Angel
 Turning a Christmas Angel Introduction I was at work one day and a co-worker asked if I had ever turned an angel. I said no. She said I picked one up at craft fair while on vacation. Would you like to
DOCUMENT CHEST. Curly Maple, White Pine
 25 DOCUMENT CHEST Curly Maple, White Pine 100 MAKING THE DOCUMENT CHEST After the stock has been thicknessed, ripped to width, and cut to length, plough a 1/4" X 3 /8" groove on the inside faces of the
Making a Windsor Stool
 Brian Clifford A Windsor Stool - page 1 Making a Windsor Stool The Windsor style The Windsor style is the name of a particular type of traditional English chair. Within this style there are a variety of
Turning a CrushGrind shaft grinder without using glue
 Turning a CrushGrind shaft grinder without using glue A step-by-step approach to removing the apprehension 1 Chris West Content Introduction 3 Robert Sorby CrushGrind Recess Cutting Tool 4 Required tools
Demonstration Bob Rosand October 20, 2007 by Bob Gunther
 Demonstration Bob Rosand October 20, 2007 by Bob Gunther Overview: Bob Rosand has been a woodturner for more than 25 years. He teaches, demonstrates and writes articles on many topics pertaining to woodturning.
A New Tool For An Age Old Craft. Craft Carver. Owner s Manual & Project Guide.
 A New Tool For An Age Old Craft 1 Craft Carver Owner s Manual & Project Guide www.flexcut.com 2 Thank You for Choosing Flexcut Tools We have put great effort into manufacturing innovative, quality carving
Al & Gary's Illusionist Heart
 Al & Gary's Illusionist Heart Plans and Instructions by: Albert Herwig and Gary A. Emerich Al & Gary's Illusionist Heart As Al Would Say: It's a pendant Now it's a heart Our pictures are in there My children'
ALAN CARTER STUDIO 7 Cane Creek Circle, Fairview, NC
 ALAN CARTER STUDIO 7 Cane Creek Circle, Fairview, NC 28730 630-390-8821 apcarter@sbcglobal.net www.alancarterstudio.com TURNING SMALL GOBLETS As a follow up to my thin stem article, here s a how-to on
Dovetail Saw Guides. Figure 1: Dovetail saw guide, exploded view. Guide Block. UHMW Friction Pad. Sliding Clamp. Rare-Earth Magnet
 Dovetail Saw Guides U.S. Pat. No. 6,607,016 Dovetail joints have traditionally been the hallmark of a cabinetmaker who had acquired an expert level of skill. They are also a mark of quality and attention
Procedure for Longworth Chuck construction
 Procedure for Longworth Chuck construction Overall construction The Longworth chuck is composed of three major components. Connected to the lathe spindle is some device that fastens to the first of two
Scissor Stool. Written By: Feitan
 Scissor Stool If the stool is going to be kept indoors simply rub all the pieces with a Minwax WipeOn Poly before assembling the stool. If it is going to go outdoors use Minwax SparUrathane and coat all
About.com :
 http://woodworking.about.com/gi/dynamic/offsite.htm?sit...//www.popularwoodworking.com/features/fea.asp%3fid=1088 (1 of 8)1/28/2004 12:05:01 AM Modern Storage Tower The last thing I want to do when starting
Extendable Large Dovetail Jig
 Extendable Large Dovetail Jig Instruction Manual Part # 3458 CAUTION: Please read, understand, and follow all manufacturers instructions, guidelines and owners manuals that come with your power tools.
PART 11 HOW TO TURN AN ARC TYPE AND A CIRCULAR TYPE SPINDLE
 PART 11 HOW TO TURN AN ARC TYPE AND A CIRCULAR TYPE SPINDLE In the previous chapter, a conceptual model was described that helps one think about what to expect when turning a multi axis spindle. In a nut
COPYRIGHT 2011 by The Taunton Press, Inc. Copying and distribution of this article is not permitted.
 30 FINE woodworking Shaker Side Table 1 2 in. Build a delicate version of this iconic round stand Subtop, 3 4 in. thick by 7 in. dia. Top, 1 2 in. thick by 16 1 8 in. dia. top edge Profile 3 4 in. BY CHRISTIAN
Inside the Bowl. Parallel Surfaces
 Inside the Bowl The ease of a finishing the inside of a bowl begins with the shape of the outside. The interior of a shallow bowl is much easier to finish properly than is a steep-walled bowl. As the wall
Two Jaw Chuck. Introduction
 Two Jaw Chuck Introduction Multi-center or Eccentric Woodturning can open up a whole new world of woodturning design for you to explore. There are several special purpose (and rather expensive)
Turning an End Grain Lidded Box
 Turning an End Grain Lidded Box by Michael Stafford Copyright 2006 All Rights Reserved 1 Turning an End Grain Lidded Box Turning an end grain lidded box differs from face grain bowl turning primarily in
Making Boxes with Threaded Lids Using a Threading Jig
 My Way of Making Boxes with Threaded Lids Using a Threading Jig Smoky Mountains Woodturners March 18, 2014 Jared Bruckner Introduction Included in this Demo My procedure for preparing box blanks from wet
3D END GRAIN CUTTING BOARD N3
 3D END GRAIN CUTTING BOARD N3 mtmwood 2014 This pattern shows a 3D optical illusion of the zigzag wall lit by the sun. I used hard maple, black walnut and black cherry for this project. You may use other
15 Dovetail Jig. Instruction Manual. Part # 3452
 15 Dovetail Jig Instruction Manual Part # 3452 CAUTION: Please read, understand, and follow all manufacturers instructions, guidelines and owners manuals that come with your power tools. Peachtree Woodworking
Square Edge Jig SE-77 (SE-76)
") Square Edge Jig SE-77 (SE-76) PLANE IRONS WOOD CHISELS Max width 77 mm (3") Max thickness 9 mm (⅜") SE-77 is a further development of SE-76. The jig now has an adjustable side. Positioning of Machine Grinding
Square Edge Jig SE-77 (SE-76) PLANE IRONS WOOD CHISELS Max width 77 mm (3") Max thickness 9 mm (⅜") SE-77 is a further development of SE-76. The jig now has an adjustable side. Positioning of Machine Grinding
Slicing Jig For Pen Inlays
 Slicing Jig For Pen Inlays By Randall Smith (randyrls) May 2008 This article has been downloaded from the library of the International Association of Penturners. www.penturners.org You are welcome to reproduce
CUSTOM SHUTTERS IN-A-BOX
 CUSTOM SHUTTERS IN-A-BOX SHUTTER ASSEMBLE INSTRUCTIONS & INSTALLATION INSTRUCTIONS 1. Inspect the contents of your package. Do not discard the shutter packaging box until you have started painting your
craftsman rocker Classic style meets comfort in this sturdy oak rocking chair BY MICHAEL PEKOVICH 34 FiNE woodworking
 craftsman rocker Classic style meets comfort in this sturdy oak rocking chair BY MICHAEL PEKOVICH 34 FiNE woodworking photo, this page: Michael pekovich shape the rear legs designing a chair can be a tough
For Barrel Tapers. Installation and Operating Instructions For use with small combination belt & disk sanders. Assembled Taper Tool
 Tim s Taper Tool For Barrel Tapers Installation and Operating Instructions For use with small combination belt & disk sanders Assembled Taper Tool Your taper tool is capable of making barrel tapered shafts.
Robert Bosch GmbH. Lounge light fixture
 Lounge light fixture Nice and relaxing Lounge light fixture Light has an important effect on mood. This cool light fixture is perfect for creating a cosy lounge atmosphere. 1 Introduction This cool light
Assembly. Insert stem and then fix/lock using the grub screw as in picture.
 Assembly Parts list: (Boxed set) Body inc hinge plate x1 M33 x 3.5 16 tpi + depth stop collar x1 1 stem + collar x1 HSS cutter x1 Bristol handle x1 Twist handle x1 4mm Allen key x1 3mm Allen key x 1 Instruction
Complete Dovetail Jig Instructions
 Complete Dovetail Jig Instructions 15 18 4 3 1 12 13 8 19 17 16 6 14 5 9 11 10 2 9 PARTS LIST - Complete Dovetail Jig Introduction Your new dovetail jig will cut Full Through Dovetails and three varieties
By Larry Brown & Charles Webb
 By Larry Brown & Charles Webb Page 1 of 16 SAFETY: Wood turning can be Hazardous so you should take precautions to minimize the risk of an accident. I always wear safety glasses when turning. On large
George Hatfield Demonstrates for CMW April 10, 2010 By Bob Gunther Photographs by Tina Collison
 George Hatfield Demonstrates for CMW April 10, 2010 By Bob Gunther Photographs by Tina Collison Overview: George Hatfield is from Sidney, Australia. He entered the woodturning field as an apprentice and