BEYOND TOYS. Wireless sensor extension pack. Tom Frissen s
|
|
|
- Rolf Waters
- 5 years ago
- Views:
Transcription

1 LEGO BEYOND TOYS Wireless sensor extension pack Tom Frissen s December 2008 Faculty of Industrial Design Eindhoven University of Technology 1
2 2 TABLE OF CONTENT CLASS INTRODUCTION PAGE 3 IDEA INTRODUCTION PAGE 4 WIRELESS TECHNOLOGY PAGE 5 LEARNING XBEE PAGE 6 USING XBEE PAGE 7 SENSOR DESIGN AND MECHANICS PAGE 12
3 3 This master class was done in eight weeks, spread over one semester. The over-all theme was LEGO beyond toys, which meant looking beyond the play factor of LEGO and see how the NXT platform could be used to apply theories like reinforcement learning and pattern recognition for example. Besides the software possibilities, attention was paid to hardware by looking closely to some mechanical principles and specific LEGO properties. Next to these lectures the over-all assignment was to create an extension for the LEGO Mindstorms set. This report will focus on the development of this extension pack. CLASS INTRODUCTION
4 IDEA INTRODUCTION My LEGO Mindstorms extension idea came from a couple directions, first I wanted to make something which would be plug and play, so you would not need any difficult settings and programming for it to be useable. Secondly it should fit the current LEGO designs, meaning it shares the visual properties and mechanical construction as the already existing Mindstorm sensors. Finally I looked at interesting hardware I was still unexperienced with and which offers great possibilities for future use. Putting these goals and ideas together, I was going to look at possibilities on how to create an extension pack which would create a wireless bridge between sensors and the NXT. Such extension could have a wide field of application, for example an awareness system. For such system I imagined a distance or light sensor which would detect if a door opens, so a robot can react on this. Other possibilities can be seen in moveable objects of which the NXT is not part, because of its weight for example. Putting it in an other way, a wireless sensors cannot be done with the current hardware available. With the many imaginable possibilities, developing such extension would be a valuable contribution to the LEGO MIndstorms community and would offer great learning experiences. Below is the scheme I made during the start of this project and shows where my extension should be put and how it should be connected. Sensor NXT XBee Battery 4 XBee


5 5 Building a wireless bridge between sensors and the NXT would at first need some insights in how the NXT and the different sensors work. For this I used the hardware developer kit, which is available from the LEGO Mindstorms website. This developer kit features in-depth information and instructions about how each different sensor works, which connections are required and what components are used. From this I learned that there are three kind of sensors: active sensors; these sensors are the old sensors supplied with the RCX and through a special timing scheme, the NXT enables backward compatibility with these sensors. passive sensors; these sensors do not need special power/measurement timing and are the new Mindstorms sensors supplied with the NXT. digital sensors; These sensors use I2C communication and an external microcontroller built in the sensor. Looking at how these different sensors work I was able to learn that I would need to wireless transfer up to two analog signals. The NXT already features Bluetooth, the first solution in making sensors wireless was therefore seen in developing a brick which connects to the NXT through this Bluetooth connection. This would require the use of a microcontroller, since Bluetooth modules do not enable direct input and output. The biggest problem with using Bluetooth was that it would limit the range of the sensor to a maximum of ten meters. Looking at the possibilities, this would not be the optimal solution since there will be projects in which larger distances are preferred. WIRELESS TECHNOLOGY An other solution could be seen in the use of XBee modules, these small RF transceivers enable direct input and output pins, which enables a 1 on 1 mapping between the transmitter input and the receiver output pins. This in combination with a range of up to 1.6 kilometers if you use the PRO version looked perfect for my application. Because I was able to get easy access to XBee modules, I could immediately start experimenting without any long delivery dates and therefore the decision was made to use XBee modules for the wireless communication.

6 6 LEARNING XBEE An XBEE module features 20 pins of which nine can be used for digital input or output, seven for analog input and two for PWM output. Before using the XBee, the modules have to be programmed in such a way that they accept data from each other and that they are communicating on the same channel. This is done by using special software which is provided by the manufacturer. It took me some time to figure everything out, but for a first demonstrator I was able to control a led by using either a digital input pin with a switch or an analog pin with a potentiometer to fade the led. Basically the following configurations were made to the XBee modules: Input module: ATID (channel ID) ATMY - 2 (own identification number) ATDL - 1 (destination number) ATD0-2 (analog input) ATD1-3 (digital input) ATIR - 14 (20 milliseconds sample rate) ATIT - 5 (5 samples before transmitting) Output module: ATID (channel ID) ATMY - 1 (own identification number) ATDL - 2 (destination number) ATP0-2 (pwm output enabled) ATD1-5 (digital output high) ATIU - 1 (enable i/o output) ATIA - 2 (i/o input address is 2)

7 7 Further developments featured connecting the NXT sensors to the XBee modules in order to read and send data. Before I was able to do this I needed some more detailed information in how to power each specific sensor and what signal they would output. Using the hardware developer kit, I was able to make the following list: - Light Sensor; pin 1 should be the 9 Volt supply power, pin 2 and 3 are the ground connections, pin 4 is the 5 Volt supply power, pin 5 is the analog output value between 0 and 5 Volt, pin 6 remains unconnected - Touch Sensor; pin 1 is the 9 Volt supply, which is connected to the ground pins 2 and 3 when pressed. USING XBEE - Sound Sensor; pin 1 is the 9 Volt supply, and pin 2 and 3 are the ground pins again. Pin 4 is the 5 Volt supply and pin 5 and 6 are analog pins which give a value between 0 and 5 Volt. - Ultrasonic Sensor; pin 1 is the 9 Volt supply, pin 2 and 3 are ground pins and pin 4 is the 5 Volt supply pin. pin 5 and 6 are two analog pins, which are used for I2C connection and pin 5 is therefore the data line and pin 6 the clock line of this connection. Based on this information I was able to get the touch sensor working with my previous scheme which switched a led based on input on an other XBee. A problem I had to overcome was that the LEGO sensors operate on 9 and 5 Volt and that they output 0 to 5 Volt, while the XBee operates on 3.3 Volt. Using a 9 Volt power supply and two voltage resistors solved the power supply problem. The output power problem was a little more complicated, since the sensors would give an output voltage from 0 to 5 Volt and the XBee only accepts 0 to 3.3 Volt analog input. Looking for solutions I came across a simple electronic scheme called a voltage divider (displayed on the left). R 2 With the formula V out = V in I was able to R 1 - R 2 calculate that I would need to set R1 to 5.1K Ohm if I would set R2 to 10K Ohm. A bigger problem I ran into when trying to forward the received sensor data from the receiver XBee to the NXT was that the XBee outputs a PWM signal with a maximum of 3.3 Volt. A DC to DC circuit was needed, but because I had an Arduino mini laying around which is already able to output a voltage between 0 and 5 Volts I would be able to build this in to get my system working and even enable I2C sensors to be connected.

8 8 After the decision was made to implement Arduino in my extension, I was able to easily read sensor data from all the passive sensors, even without any voltage divider circuits because the Arduino accepts inputs up to 5 Volts. The way the XBee was used changed since I would use the RX and TX ports to Receive and Transmit data between both Arduinos. Since I was already able to read the passive sensors I started with the active sensor which is implemented in the Mindstorms set, the ultrasonic sound sensor. Up to this point I neglected the Ultrasonic sensor since it used I2C and research learned that an XBee is not able to transmit this signal since it requires two lines which have to work parallel. An XBee sends data in one array, meaning that the signal would not be received simultaneous and would therefore be useless. Arduinos are able to communicate with I2C sensors with a special library called Wire.h. Looking for ways to read the sensor data from the ultrasonic sound sensor using I2C I learned that there are a couple of commands you are able to send. From the JAVA library I was able to find out the way the JAVA code requests data from the ultrasonic sound sensor: /** * Return distance of object. * distance or 255 if no object in range */ public int getdistance() { int ret = getdata(0x42, buf, 1); } return (ret == 0? (buf[0] & 0xff) : 255); Tracking this code further lead to an other JAVA class called I2CSensor, which used the following code to get the actual data:
9 9 /** * Executes an I2C read transaction and waits for the result. * register I2C register, e.g 0x41 buf Buffer to return data len Length of the return data status zero=success, non-zero=failure */ public int getdata(int register, byte [] buf, int len) { int ret = port.i2cstart(address, register, len, buf, len, 0); if (ret!= 0) return ret; while (port.i2cbusy()!= 0) { Thread.yield(); } } return 0; Translating both findings to Arduino code should look something like this: #include <Wire.h> void setup() { Serial.start(9600); //initialize a serial port to read data } void loop() { Wire.beginTransmission(0x02); //begin transmission on address 1 Wire.requestFrom(0x42,1); //request one byte on address Serial.println(int(Wire.receive())); //print the received data Wire.endTransmission(); //end the transmission } Unfortunately I was not able to read any sensor data this way and although I have tried many other possibilities I was not able to get this working before the deadline of this report. This part of my development has therefore be considered as work in progress and should be working during the exhibition which will take place in January.
10 10 Previously I told that I introduced an Arduino because of the communication with the NXT and because I would be able to read I2C sensors. I already explained my findings of how to read sensor signals from the ultrasonic I2C sensor. I will now briefly go into the part which communicates with the NXT. My thanks here goes out to an other participant of the Techno Class, Martijn ten Bhomer. He developed a protocol to enable the communication between the NXT and an Arduino. Basically the JAVA code for communicating with the Arduino uses a six step process: - Step 1: start an I2C connection with the Arduino, for this you have to define an address, which I set in my case to Step 2: This is where the actual protocol begins and at this step there are readings done every 10 milliseconds to decide what kind of data there is going to be send. - Step 3: pause 30 milliseconds to indicate to the Arduino that the datatype has been transmitted - Step 4: read the sensor to receive a confirmation of the datatype - Step 5: read the sensor to receive byte 35 (character #) to indicate that the data transfer starts - Step 6: receive a byte array with the actual data

11 11 Next to reading sensor values I have been experimenting with driving motors using XBee. For this I used the L293D motor driver IC and I was quickly able to control the motor speed using an Arduino with which I simulated the 0 to 3.3 output voltage from the XBee. Difficulty with this circuit was again that I was only able to apply voltage up to 3.3 Volt to the motor driver IC and therefore the motors would never be able to run at full speed. Just like discussed previously, this scheme would require a DC to DC circuit. I solved this problem by implementing an Arduino, which enables full 0 to 5 Volt PWM output. A new problem occurred at the sender side of the communication, because the NXT changes the current (amperage) to regulate the motor speed. To measure the current and transform it to a signal I could use as analog input for the XBee, a current to voltage circuit had to be made. With the formula V = I x R I was easily able to calculate that I would need a 5 Ohm resistor to measure the current changes which in the NXT go from 0 to a maximum of 1 Amps. The theory for driving motors wireless was all there, but because making the sensors wireless would offer more possibilities I focused on making the I2C sensors work.

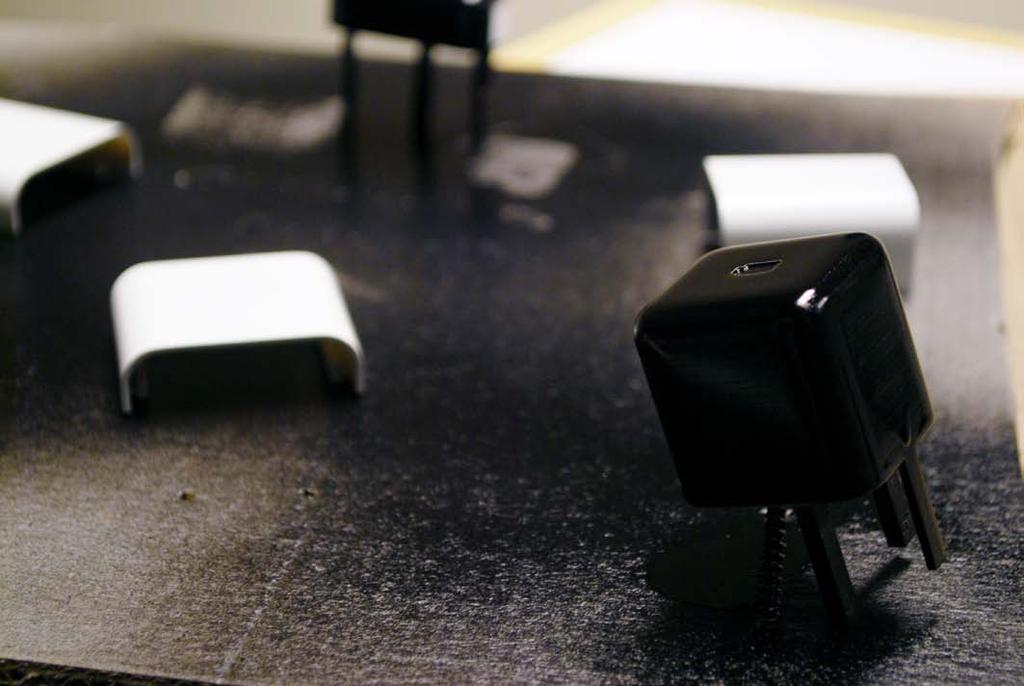
12 12 DESIGN & MECHANICS Simultaneous to my electronic developments, I worked on the design of my sensor. I wanted it to look as finished as possible, meaning I was going to 3D print the parts. Because I was very interested in how the sensor of the Mindstorms set were mechanically put together, I forced one open to learn from it and to enable myself to design my own sensor in the same way. Interesting to see was the way the electronics can easily be slid into the base casing and how the top cover locks it into place. The sensor casing is closed using snaps in three places, one on the bottom and two on the sides. Since the top cover covers these side snaps, it is very hard to open the sensor. Based on these observations I started modeling my own casings, starting with the base. The base featured the LEGO connector holes, which after careful measurements were reproduced. After the 3D print was finished, I cleaned and sanded the parts after which they were spraypainted. The final results are very nice casings which match the current sensors, but because I used the exact measurements of the LEGO holes, the pins require some force to stick them in and get them out again. This has to do with the tolerances and material properties of LEGO. LEGO is made of a special ABS which has some flexibility, but the fact that I spray painted my casings meant I added a very small extra layer to the inside of the holes causing them to be smaller and thus make the fitting even more tight. What I should have done is make the holes a little bit bigger to enable an extra layer of paint, but still enable the pins to go in and out smoothly. Pictures of the process and technical drawings are displayed on the next pages.

13
14
15 , ,55
16 16 REFERENCES index.html nxt/ultrasonicsensor.java
Training Schedule. Robotic System Design using Arduino Platform
 Training Schedule Robotic System Design using Arduino Platform Session - 1 Embedded System Design Basics : Scope : To introduce Embedded Systems hardware design fundamentals to students. Processor Selection
Developing Novel Extensions to Support Prototyping for Interactive Social Robots
 Developing Novel Extensions to Support Prototyping for Interactive Social Robots Martijn ten Bhömer, Christoph Bartneck, Jun Hu, Rene Ahn, Karl Tuyls, Frank Delbressine, and Loe Feijs Department of Industrial
Multi-Agent Robotics with GPS Navigation
 Jay Joshi Edison High School 50 Boulevard of the Eagles Edison, NJ 08817 Multi-Agent Robotics with GPS Navigation Abstract The GPS Navigation project is a multi-agent robotics project. A GPS Navigation
EE-110 Introduction to Engineering & Laboratory Experience Saeid Rahimi, Ph.D. Labs Introduction to Arduino
 EE-110 Introduction to Engineering & Laboratory Experience Saeid Rahimi, Ph.D. Labs 10-11 Introduction to Arduino In this lab we will introduce the idea of using a microcontroller as a tool for controlling
Project Proposal. Underwater Fish 02/16/2007 Nathan Smith,
 Project Proposal Underwater Fish 02/16/2007 Nathan Smith, rahteski@gwu.edu Abstract The purpose of this project is to build a mechanical, underwater fish that can be controlled by a joystick. The fish
For this exercise, you will need a partner, an Arduino kit (in the plastic tub), and a laptop with the Arduino programming environment.
, and a laptop with the Arduino programming environment.") Physics 222 Name: Exercise 6: Mr. Blinky This exercise is designed to help you wire a simple circuit based on the Arduino microprocessor, which is a particular brand of microprocessor that also includes
Physics 222 Name: Exercise 6: Mr. Blinky This exercise is designed to help you wire a simple circuit based on the Arduino microprocessor, which is a particular brand of microprocessor that also includes
Advanced Mechatronics 1 st Mini Project. Remote Control Car. Jose Antonio De Gracia Gómez, Amartya Barua March, 25 th 2014
 Advanced Mechatronics 1 st Mini Project Remote Control Car Jose Antonio De Gracia Gómez, Amartya Barua March, 25 th 2014 Remote Control Car Manual Control with the remote and direction buttons Automatic
Name & SID 1 : Name & SID 2:
 EE40 Final Project-1 Smart Car Name & SID 1 : Name & SID 2: Introduction The final project is to create an intelligent vehicle, better known as a robot. You will be provided with a chassis(motorized base),
Application Note AN 102: Arduino I2C Interface to K 30 Sensor
 Application Note AN 102: Arduino I2C Interface to K 30 Sensor Introduction The Arduino UNO, MEGA 1280 or MEGA 2560 are ideal microcontrollers for operating SenseAir s K 30 CO2 sensor. The connection to
EARTH PEOPLE TECHNOLOGY. EPT-200TMP-TS-U2 Temperature Sensor Docking Board User Manual
 EARTH PEOPLE TECHNOLOGY EPT-200TMP-TS-U2 Temperature Sensor Docking Board User Manual The EPT-200TMP-TS-U2 is a temperature sensor mounted on a docking board. The board is designed to fit onto the Arduino
FABO ACADEMY X ELECTRONIC DESIGN
 ELECTRONIC DESIGN MAKE A DEVICE WITH INPUT & OUTPUT The Shanghaino can be programmed to use many input and output devices (a motor, a light sensor, etc) uploading an instruction code (a program) to it
Mechatronics Engineering and Automation Faculty of Engineering, Ain Shams University MCT-151, Spring 2015 Lab-4: Electric Actuators
 Mechatronics Engineering and Automation Faculty of Engineering, Ain Shams University MCT-151, Spring 2015 Lab-4: Electric Actuators Ahmed Okasha, Assistant Lecturer okasha1st@gmail.com Objective Have a
Intelligent Systems Design in a Non Engineering Curriculum. Embedded Systems Without Major Hardware Engineering
 Intelligent Systems Design in a Non Engineering Curriculum Embedded Systems Without Major Hardware Engineering Emily A. Brand Dept. of Computer Science Loyola University Chicago eabrand@gmail.com William
Robot Rangers. Low Level Design Document. Ben Andersen Jennifer Berry Graham Boechler Andrew Setter
 Robot Rangers Low Level Design Document Ben Andersen Jennifer Berry Graham Boechler Andrew Setter 2/17/2011 1 Table of Contents Introduction 3 Problem Statement and Proposed Solution 3 System Description
Lecture 4: Basic Electronics. Lecture 4 Brief Introduction to Electronics and the Arduino
 Lecture 4: Basic Electronics Lecture 4 Page: 1 Brief Introduction to Electronics and the Arduino colintan@nus.edu.sg Lecture 4: Basic Electronics Page: 2 Objectives of this Lecture By the end of today
PCB & Circuit Designing (Summer Training Program) 6 Weeks/ 45 Days PRESENTED BY
 6 Weeks/ 45 Days PRESENTED BY") PCB & Circuit Designing (Summer Training Program) 6 Weeks/ 45 Days PRESENTED BY RoboSpecies Technologies Pvt. Ltd. Office: D-66, First Floor, Sector- 07, Noida, UP Contact us: Email: stp@robospecies.com
PCB & Circuit Designing (Summer Training Program) 6 Weeks/ 45 Days PRESENTED BY RoboSpecies Technologies Pvt. Ltd. Office: D-66, First Floor, Sector- 07, Noida, UP Contact us: Email: stp@robospecies.com
Arduino Control of Tetrix Prizm Robotics. Motors and Servos Introduction to Robotics and Engineering Marist School
 Arduino Control of Tetrix Prizm Robotics Motors and Servos Introduction to Robotics and Engineering Marist School Motor or Servo? Motor Faster revolution but less Power Tetrix 12 Volt DC motors have a
Megamark Arduino Library Documentation
 Megamark Arduino Library Documentation The Choitek Megamark is an advanced full-size multipurpose mobile manipulator robotics platform for students, artists, educators and researchers alike. In our mission
Master Op-Doc/Test Plan
 Power Supply Master Op-Doc/Test Plan Define Engineering Specs Establish battery life Establish battery technology Establish battery size Establish number of batteries Establish weight of batteries Establish
HAND GESTURE CONTROLLED ROBOT USING ARDUINO
 HAND GESTURE CONTROLLED ROBOT USING ARDUINO Vrushab Sakpal 1, Omkar Patil 2, Sagar Bhagat 3, Badar Shaikh 4, Prof.Poonam Patil 5 1,2,3,4,5 Department of Instrumentation Bharati Vidyapeeth C.O.E,Kharghar,Navi
EE 314 Spring 2003 Microprocessor Systems
 EE 314 Spring 2003 Microprocessor Systems Laboratory Project #9 Closed Loop Control Overview and Introduction This project will bring together several pieces of software and draw on knowledge gained in
Robotics & Embedded Systems (Summer Training Program) 4 Weeks/30 Days
 4 Weeks/30 Days") (Summer Training Program) 4 Weeks/30 Days PRESENTED BY RoboSpecies Technologies Pvt. Ltd. Office: D-66, First Floor, Sector- 07, Noida, UP Contact us: Email: stp@robospecies.com Website: www.robospecies.com
(Summer Training Program) 4 Weeks/30 Days PRESENTED BY RoboSpecies Technologies Pvt. Ltd. Office: D-66, First Floor, Sector- 07, Noida, UP Contact us: Email: stp@robospecies.com Website: www.robospecies.com
Group 4. Michael Cooke David Griffen Whitney Keith
 Group 4 Michael Cooke David Griffen Whitney Keith Edward Romero (EE) (CpE) (EE) (EE/CpE) One television s audio is broadcasted within a restaurant/gymnasium leaving all other televisions muted. Customers
SAE Formula Car Data Acquisition & Display System. Joseph Groe, Michelle Ohlson, & Miles Homler Advisor: Professor Gutschlag
 SAE Formula Car Data Acquisition & Display System Joseph Groe, Michelle Ohlson, & Miles Homler Advisor: Professor Gutschlag Agenda Problem Background Problem Statement System Diagram Project Functional
Introduction to the EXPANSION HUB
 Introduction to the EXPANSION HUB REV ROBOTICS - EXPANSION HUB revrobotics.com ANOTHER CONTROLLER CHOICE MODERN ROBOTICS REV ROBOTICS The Expansion hub does not replace the Modern Robotics System. It is
In this lecture, we will look at how different electronic modules communicate with each other. We will consider the following topics:
 In this lecture, we will look at how different electronic modules communicate with each other. We will consider the following topics: Links between Digital and Analogue Serial vs Parallel links Flow control
Touch Potentiometer Hookup Guide
 Page 1 of 14 Touch Potentiometer Hookup Guide Introduction The Touch Potentiometer, or Touch Pot for short, is an intelligent, linear capacitive touch sensor that implements potentiometer functionality
Embedded Systems & Robotics (Winter Training Program) 6 Weeks/45 Days
 6 Weeks/45 Days") Embedded Systems & Robotics (Winter Training Program) 6 Weeks/45 Days PRESENTED BY RoboSpecies Technologies Pvt. Ltd. Office: W-53G, Sector-11, Noida-201301, U.P. Contact us: Email: stp@robospecies.com
Embedded Systems & Robotics (Winter Training Program) 6 Weeks/45 Days PRESENTED BY RoboSpecies Technologies Pvt. Ltd. Office: W-53G, Sector-11, Noida-201301, U.P. Contact us: Email: stp@robospecies.com
Deriving Consistency from LEGOs
 Deriving Consistency from LEGOs What we have learned in 6 years of FLL and 7 years of Lego Robotics by Austin and Travis Schuh 1 2006 Austin and Travis Schuh, all rights reserved Objectives Basic Building
Serial Servo Controller
 Document : Datasheet Model # : ROB - 1185 Date : 16-Mar -07 Serial Servo Controller - USART/I 2 C with ADC Rhydo Technologies (P) Ltd. (An ISO 9001:2008 Certified R&D Company) Golden Plaza, Chitoor Road,
Computational Crafting with Arduino. Christopher Michaud Marist School ECEP Programs, Georgia Tech
 Computational Crafting with Arduino Christopher Michaud Marist School ECEP Programs, Georgia Tech Introduction What do you want to learn and do today? Goals with Arduino / Computational Crafting Purpose
RFID Door Unlocking System
 RFID Door Unlocking System Evan VanMersbergen Project Description ETEC 471 Professor Todd Morton December 7, 2005-1- Introduction In this age of rapid technological advancement, radio frequency (or RF)
2D Floor-Mapping Car
 CDA 4630 Embedded Systems Final Report Group 4: Camilo Moreno, Ahmed Awada ------------------------------------------------------------------------------------------------------------------------------------------
PWM CONTROL USING ARDUINO. Learn to Control DC Motor Speed and LED Brightness
 PWM CONTROL USING ARDUINO Learn to Control DC Motor Speed and LED Brightness In this article we explain how to do PWM (Pulse Width Modulation) control using arduino. If you are new to electronics, we have
SV613 USB Interface Wireless Module SV613
 USB Interface Wireless Module SV613 1. Description SV613 is highly-integrated RF module, which adopts high performance Si4432 from Silicon Labs. It comes with USB Interface. SV613 has high sensitivity
B RoboClaw 2 Channel 30A Motor Controller Data Sheet
 B0098 - RoboClaw 2 Channel 30A Motor Controller (c) 2010 BasicMicro. All Rights Reserved. Feature Overview: 2 Channel at 30Amp, Peak 60Amp Battery Elimination Circuit (BEC) Switching Mode BEC Hobby RC
Lego Nxt in Physical Etoys
 Lego Nxt in Physical Etoys Physical Etoys is a software Project which let us control, in real time, Lego Mindstorms Nxt s Robots using a Bluetooth connection. SqueakNxt is a module of the Physical Etoys
The Making of a Kinect-based Control Car and Its Application in Engineering Education
 The Making of a Kinect-based Control Car and Its Application in Engineering Education Ke-Yu Lee Department of Computer Science and Information Engineering, Cheng-Shiu University, Taiwan Chun-Chung Lee
1Getting Started SIK BINDER //3
 SIK BINDER //1 SIK BINDER //2 1Getting Started SIK BINDER //3 Sparkfun Inventor s Kit Teacher s Helper These worksheets and handouts are supplemental material intended to make the educator s job a little
BASIC-Tiger Application Note No. 059 Rev Motor control with H bridges. Gunther Zielosko. 1. Introduction
 Motor control with H bridges Gunther Zielosko 1. Introduction Controlling rather small DC motors using micro controllers as e.g. BASIC-Tiger are one of the more common applications of those useful helpers.
Robotics will be very important for the humanity in the next 10 years and this ebook is an effort to help in this way.
 1.- Introduction 1.1.- Goals Many developers around the world choose lejos, Java for Lego Mindstorm, as the main platform to develop robots with NXT Lego Mindstorm. I consider that this ebook will help
Mindstorms NXT. mindstorms.lego.com
 Mindstorms NXT mindstorms.lego.com A3B99RO Robots: course organization At the beginning of the semester the students are divided into small teams (2 to 3 students). Each team uses the basic set of the
Parts List. Robotic Arm segments ¼ inch screws Cable XBEE module or Wifi module
 Robotic Arm 1 Legal Stuff Stensat Group LLC assumes no responsibility and/or liability for the use of the kit and documentation. There is a 90 day warranty for the Sten-Bot kit against component defects.
Workshop 9: First steps in electronics
 King s Maths School Robotics Club Workshop 9: First steps in electronics 1 Getting Started Make sure you have everything you need to complete this lab: Arduino for power supply breadboard black, red and
DNT2400. Low Cost 2.4 GHz FHSS Transceiver Module with I/O
 2.4 GHz Frequency Hopping Spread Spectrum Transceiver Point-to-point, Point-to-multipoint, Peer-to-peer and Tree-routing Networks Transmitter Power Configurable from 1 to 63 mw RF Data Rate Configurable
RC-WIFI CONTROLLER USER MANUAL
 RC-WIFI CONTROLLER USER MANUAL In the rapidly growing Internet of Things (IoT), applications from personal electronics to industrial machines and sensors are getting wirelessly connected to the Internet.
INSTANT ROBOT SHIELD (AXE408)
") INSTANT ROBOT SHIELD (AXE408) 1.0 Introduction Thank you for purchasing this Instant Robot shield. This datasheet is designed to give a brief introduction to how the shield is assembled, used and configured.
INSTANT ROBOT SHIELD (AXE408) 1.0 Introduction Thank you for purchasing this Instant Robot shield. This datasheet is designed to give a brief introduction to how the shield is assembled, used and configured.
Gesture Controlled Car
 Gesture Controlled Car Chirag Gupta Department of ECE ITM University Nitin Garg Department of ECE ITM University ABSTRACT Gesture Controlled Car is a robot which can be controlled by simple human gestures.
Lab 2: Blinkie Lab. Objectives. Materials. Theory
 Lab 2: Blinkie Lab Objectives This lab introduces the Arduino Uno as students will need to use the Arduino to control their final robot. Students will build a basic circuit on their prototyping board and
TWEAK THE ARDUINO LOGO
 TWEAK THE ARDUINO LOGO Using serial communication, you'll use your Arduino to control a program on your computer Discover : serial communication with a computer program, Processing Time : 45 minutes Level
DNT900. Low Cost 900 MHz FHSS Transceiver Module with I/O
 DEVELOPMENT KIT (Info Click here) 900 MHz Frequency Hopping Spread Spectrum Transceiver Point-to-point, Point-to-multipoint, Peer-to-peer and Tree-routing Networks Transmitter Power Configurable from 1
Coding with Arduino to operate the prosthetic arm
 Setup Board Install FTDI Drivers This is so that your RedBoard will be able to communicate with your computer. If you have Windows 8 or above you might already have the drivers. 1. Download the FTDI driver
DragonLink Advanced Transmitter
 DragonLink Advanced Transmitter A quick introduction - to a new a world of possibilities October 29, 2015 Written by Dennis Frie Contents 1 Disclaimer and notes for early release 3 2 Introduction 4 3 The
The use of programmable robots in the education of programming
 Proceedings of the 7 th International Conference on Applied Informatics Eger, Hungary, January 28 31, 2007. Vol. 2. pp. 29 36. The use of programmable robots in the education of programming Zoltán Istenes
J. La Favre Using Arduino with Raspberry Pi February 7, 2018
 As you have already discovered, the Raspberry Pi is a very capable digital device. Nevertheless, it does have some weaknesses. For example, it does not produce a clean pulse width modulation output (unless
ProLink Radio. 900 MHz SDI-12 Data Radio Scienterra Limited. Version A-0x0C-1-AC 20 October 2009
 ProLink Radio 900 MHz SDI-12 Data Radio Scienterra Limited Version A-0x0C-1-AC 20 October 2009 For sales inquiries please contact: ENVCO Environmental Collective 31 Sandringham Rd Kingsland, Auckland 1024
MAKEVMA502 BASIC DIY KIT WITH ATMEGA2560 FOR ARDUINO USER MANUAL
 BASIC DIY KIT WITH ATMEGA2560 FOR ARDUINO USER MANUAL USER MANUAL 1. Introduction To all residents of the European Union Important environmental information about this product This symbol on the device
DR-TRC105-EV Evaluation Kit. User s Guide
 DR-TRC105-EV Evaluation Kit User s Guide DR-TRC105-304-EV DR-TRC105-315-EV DR-TRC105-345-EV DR-TRC105-372-EV DR-TRC105-390-EV DR-TRC105-403-EV DR-TRC105-434-EV DR-TRC105-450-EV 2010-2015 by Murata Electronics
Multipurpose Iron Man Glove & Moveable Platform
 Trinity University Digital Commons @ Trinity Mechatronics Final Projects Engineering Science Department 5-2018 Multipurpose Iron Man Glove & Moveable Platform Destinee Davis Trinity University, ddavis2@trinity.edu
APDS-9960 RGB and Gesture Sensor Hookup Guide
 Page 1 of 12 APDS-9960 RGB and Gesture Sensor Hookup Guide Introduction Touchless gestures are the new frontier in the world of human-machine interfaces. By swiping your hand over a sensor, you can control
HAW-Arduino. Sensors and Arduino F. Schubert HAW - Arduino 1
 HAW-Arduino Sensors and Arduino 14.10.2010 F. Schubert HAW - Arduino 1 Content of the USB-Stick PDF-File of this script Arduino-software Source-codes Helpful links 14.10.2010 HAW - Arduino 2 Report for
DFRduino Romeo All in one Controller V1.1(SKU:DFR0004)
") DFRduino Romeo All in one Controller V1.1(SKU:DFR0004) DFRduino RoMeo V1.1 Contents 1 Introduction 2 Specification 3 DFRduino RoMeo Pinout 4 Before you start 4.1 Applying Power 4.2 Software 5 Romeo Configuration
DFRduino Romeo All in one Controller V1.1(SKU:DFR0004) DFRduino RoMeo V1.1 Contents 1 Introduction 2 Specification 3 DFRduino RoMeo Pinout 4 Before you start 4.1 Applying Power 4.2 Software 5 Romeo Configuration
Arduino STEAM Academy Arduino STEM Academy Art without Engineering is dreaming. Engineering without Art is calculating. - Steven K.
 Arduino STEAM Academy Arduino STEM Academy Art without Engineering is dreaming. Engineering without Art is calculating. - Steven K. Roberts Page 1 See Appendix A, for Licensing Attribution information
acknowledgments...xv introduction...xvii 1 LEGO MINDSTORMS NXT 2.0: people, pieces, and potential getting started with the NXT 2.0 set...
 acknowledgments...xv introduction...xvii about this book...xvii part I: introduction to LEGO MINDSTORMS NXT 2.0...xviii part II: building...xviii part III: programming...xviii part IV: projects...xix companion
Sten-Bot Robot Kit Stensat Group LLC, Copyright 2013
 Sten-Bot Robot Kit Stensat Group LLC, Copyright 2013 Legal Stuff Stensat Group LLC assumes no responsibility and/or liability for the use of the kit and documentation. There is a 90 day warranty for the
The µbotino Microcontroller Board
 The µbotino Microcontroller Board by Ro-Bot-X Designs Introduction. The µbotino Microcontroller Board is an Arduino compatible board for small robots. The 5x5cm (2x2 ) size and the built in 3 pin connectors
Schematics for Breakout Examples
 Schematics for Breakout Examples This document contains wiring diagrams and component lists for the examples. A diagram may be used for more than one example file. The corresponding files are listed for
Arduino Lesson 1. Blink. Created by Simon Monk
 Arduino Lesson 1. Blink Created by Simon Monk Guide Contents Guide Contents Overview Parts Part Qty The 'L' LED Loading the 'Blink' Example Saving a Copy of 'Blink' Uploading Blink to the Board How 'Blink'
CURIE Academy, Summer 2014 Lab 2: Computer Engineering Software Perspective Sign-Off Sheet
 Lab : Computer Engineering Software Perspective Sign-Off Sheet NAME: NAME: DATE: Sign-Off Milestone TA Initials Part 1.A Part 1.B Part.A Part.B Part.C Part 3.A Part 3.B Part 3.C Test Simple Addition Program
Workshops Elisava Introduction to programming and electronics (Scratch & Arduino)
") Workshops Elisava 2011 Introduction to programming and electronics (Scratch & Arduino) What is programming? Make an algorithm to do something in a specific language programming. Algorithm: a procedure
Workshops Elisava 2011 Introduction to programming and electronics (Scratch & Arduino) What is programming? Make an algorithm to do something in a specific language programming. Algorithm: a procedure
Arduino Microcontroller Processing for Everyone!: Third Edition / Steven F. Barrett
 Arduino Microcontroller Processing for Everyone!: Third Edition / Steven F. Barrett Anatomy of a Program Programs written for a microcontroller have a fairly repeatable format. Slight variations exist
100UF CAPACITOR POTENTIOMETER SERVO MOTOR MOTOR ARM. MALE HEADER PIN (3 pins) INGREDIENTS
 INGREDIENTS") 05 POTENTIOMETER SERVO MOTOR MOTOR ARM 100UF CAPACITOR MALE HEADER PIN (3 pins) INGREDIENTS 63 MOOD CUE USE A SERVO MOTOR TO MAKE A MECHANICAL GAUGE TO POINT OUT WHAT SORT OF MOOD YOU RE IN THAT DAY Discover:
05 POTENTIOMETER SERVO MOTOR MOTOR ARM 100UF CAPACITOR MALE HEADER PIN (3 pins) INGREDIENTS 63 MOOD CUE USE A SERVO MOTOR TO MAKE A MECHANICAL GAUGE TO POINT OUT WHAT SORT OF MOOD YOU RE IN THAT DAY Discover:
EE 308 Lab Spring 2009
 9S12 Subsystems: Pulse Width Modulation, A/D Converter, and Synchronous Serial Interface In this sequence of three labs you will learn to use three of the MC9S12's hardware subsystems. WEEK 1 Pulse Width
DS1807 Addressable Dual Audio Taper Potentiometer
 Addressable Dual Audio Taper Potentiometer www.dalsemi.com FEATURES Operates from 3V or 5V Power Supplies Ultra-low power consumption Two digitally controlled, 65-position potentiometers Logarithmic resistor
EMBEDDED SYSTEM DESIGN FOR A DIGITAL MULTIMETER USING MOTOROLA HCS12 MICROCONTROLLER
 EMBEDDED SYSTEM DESIGN FOR A DIGITAL MULTIMETER USING MOTOROLA HCS12 MICROCONTROLLER A Thesis Submitted in partial Fulfillment Of the Requirements of the Degree of Bachelor of Technology In Electronics
Series SPPM2 Graphical User Interface Panel Meter. Specifications - Installation and Operating Instructions MINI USB PORT
 Series SPPM Graphical User Interface Panel Meter Bulletin PCSPPM Specifications Installation and Operating Instructions / [9.0] 9/ [9.] / [9.9] / [.9] / [.] 9/ [9.] JTAG [FOR INTERNAL USE] ALARMS, SERIAL
Internet of Things (Winter Training Program) 6 Weeks/45 Days
 6 Weeks/45 Days") (Winter Training Program) 6 Weeks/45 Days PRESENTED BY RoboSpecies Technologies Pvt. Ltd. Office: W-53g, Sec- 11, Noida, UP Contact us: Email: stp@robospecies.com Website: www.robospecies.com Office: +91-120-4245860
(Winter Training Program) 6 Weeks/45 Days PRESENTED BY RoboSpecies Technologies Pvt. Ltd. Office: W-53g, Sec- 11, Noida, UP Contact us: Email: stp@robospecies.com Website: www.robospecies.com Office: +91-120-4245860
Welcome to Arduino Day 2016
 Welcome to Arduino Day 2016 An Intro to Arduino From Zero to Hero in an Hour! Paul Court (aka @Courty) Welcome to the SLMS Arduino Day 2016 Arduino / Genuino?! What?? Part 1 Intro Quick Look at the Uno
RFBee User Manual v1.0
 RFBee User Manual v1.0 Index RFBee... 1 Overview... 2 Specifications... 3 Electrical Characterstics... 3 System Block Diagram... 4 Microprocessor-Atmega168... 4 RF Transceiver-CC1101... 4 Hardware Installation...
1 Introduction. 2 Embedded Electronics Primer. 2.1 The Arduino
 Beginning Embedded Electronics for Botballers Using the Arduino Matthew Thompson Allen D. Nease High School matthewbot@gmail.com 1 Introduction Robotics is a unique and multidisciplinary field, where successful
Installation Manual. Ultra RF Analogue Transmitter QC0168. Manual Ref: QC0168. Version: March
 Installation Manual Ultra RF Analogue Transmitter QC0168 Manual Ref: QC0168 Version: March 17 1.0 System Concept RF Transmitters connect to sensors or meters and send data to the infrastructure internet
Closed-Loop Transportation Simulation. Outlines
 Closed-Loop Transportation Simulation Deyang Zhao Mentor: Unnati Ojha PI: Dr. Mo-Yuen Chow Aug. 4, 2010 Outlines 1 Project Backgrounds 2 Objectives 3 Hardware & Software 4 5 Conclusions 1 Project Background
G.U.N.D.A.M. Didier Lessage, Gabriel Rodriguez, Blake Simonini
 G.U.N.D.A.M. Didier Lessage, Gabriel Rodriguez, Blake Simonini School of Electrical Engineering and Computer Science, University of Central Florida, Orlando, Florida 32816-2450 Abstract The GUNDAM is a
Obstacle Avoiding Robot
 Obstacle Avoiding Robot Trinayan Saharia 1, Jyotika Bauri 2, Mrs. Chayanika Bhagabati 3 1,2 Student, 3 Asst. Prof., ECE, Assam down town University, Assam Abstract: An obstacle avoiding robot is an intelligent
2.017 DESIGN OF ELECTROMECHANICAL ROBOTIC SYSTEMS Fall 2009 Lab 4: Motor Control. October 5, 2009 Dr. Harrison H. Chin
 2.017 DESIGN OF ELECTROMECHANICAL ROBOTIC SYSTEMS Fall 2009 Lab 4: Motor Control October 5, 2009 Dr. Harrison H. Chin Formal Labs 1. Microcontrollers Introduction to microcontrollers Arduino microcontroller
TRC EV DR TRC EV DR TRC EV
 DR-TRC103-EV Evaluation Kit User s Guide DR TRC103 868 EV DR TRC103 915 EV DR TRC103 950 EV DR-TRC103-EV User s Guide (2015/04/17) Page 1 of 11 www.murata.com Introduction The DR TRC103 series evaluation
Arduino. AS220 Workshop. Part II Interactive Design with advanced Transducers Lutz Hamel
 AS220 Workshop Part II Interactive Design with advanced Transducers Lutz Hamel hamel@cs.uri.edu www.cs.uri.edu/~hamel/as220 How we see the computer Image source: Considering the Body, Kate Hartman, 2008.
Pulse Width Modulation and
 Pulse Width Modulation and analogwrite ( ); 28 Materials needed to wire one LED. Odyssey Board 1 dowel Socket block Wire clip (optional) 1 Female to Female (F/F) wire 1 F/F resistor wire LED Note: The
Total Hours Registration through Website or for further details please visit (Refer Upcoming Events Section)
") Total Hours 110-150 Registration Q R Code Registration through Website or for further details please visit http://www.rknec.edu/ (Refer Upcoming Events Section) Module 1: Basics of Microprocessor & Microcontroller
Total Hours 110-150 Registration Q R Code Registration through Website or for further details please visit http://www.rknec.edu/ (Refer Upcoming Events Section) Module 1: Basics of Microprocessor & Microcontroller
Arduino An Introduction
 Arduino An Introduction Hardware and Programming Presented by Madu Suthanan, P. Eng., FEC. Volunteer, Former Chair (2013-14) PEO Scarborough Chapter 2 Arduino for Mechatronics 2017 This note is for those
Artificial Intelligence Planning and Decision Making
 Artificial Intelligence Planning and Decision Making NXT robots co-operating in problem solving authors: Lior Russo, Nir Schwartz, Yakov Levy Introduction: On today s reality the subject of artificial
Main improvements are increased number of LEDs and therefore better temperature indication with one Celsius degree increments.
 LED Thermometer V2 (Fahrenheit/Celsius/±1 ) PART NO. 2244754 After completing this great starter kit, users will have a nice interactive LED thermometer. You will learn one principle how temperature can
GE423 Laboratory Assignment 6 Robot Sensors and Wall-Following
 GE423 Laboratory Assignment 6 Robot Sensors and Wall-Following Goals for this Lab Assignment: 1. Learn about the sensors available on the robot for environment sensing. 2. Learn about classical wall-following
Debugging a Boundary-Scan I 2 C Script Test with the BusPro - I and I2C Exerciser Software: A Case Study
 Debugging a Boundary-Scan I 2 C Script Test with the BusPro - I and I2C Exerciser Software: A Case Study Overview When developing and debugging I 2 C based hardware and software, it is extremely helpful
EMG click PID: MIKROE-2621
 EMG click PID: MIKROE-2621 EMG click measures the electrical activity produced by the skeletal muscles. It carries MCP609 operational amplifier and MAX6106 micropower voltage reference. EMG click is designed
Arduino Digital Out_QUICK RECAP
 Arduino Digital Out_QUICK RECAP BLINK File> Examples>Digital>Blink int ledpin = 13; // LED connected to digital pin 13 // The setup() method runs once, when the sketch starts void setup() // initialize
Project Report. Object Following Robot
 Project Report Object Following Robot Group Members: 1. Haad Yaqub Rathore (17100093) 2. Muhammad Umar Javed (17100136) 3. Huzaifa Arif (17100157) 4. Hunza Zainab (17100075) Project Objective & Introduction:
Object Detection for Collision Avoidance in ITS
 Available online www.ejaet.com European Journal of Advances in Engineering and Technology, 2016, 3(5): 29-35 Research Article ISSN: 2394-658X Object Detection for Collision Avoidance in ITS Rupojyoti Kar
Jaguar Motor Controller (Stellaris Brushed DC Motor Control Module with CAN)
") Jaguar Motor Controller (Stellaris Brushed DC Motor Control Module with CAN) 217-3367 Ordering Information Product Number Description 217-3367 Stellaris Brushed DC Motor Control Module with CAN (217-3367)
Jaguar Motor Controller (Stellaris Brushed DC Motor Control Module with CAN) 217-3367 Ordering Information Product Number Description 217-3367 Stellaris Brushed DC Motor Control Module with CAN (217-3367)
A servo is an electric motor that takes in a pulse width modulated signal that controls direction and speed. A servo has three leads:
 Project 4: Arduino Servos Part 1 Description: A servo is an electric motor that takes in a pulse width modulated signal that controls direction and speed. A servo has three leads: a. Red: Current b. Black: