OTHER TOOLS & SUPPLIES
|
|
|
- Tobias Kennedy
- 5 years ago
- Views:
Transcription
1
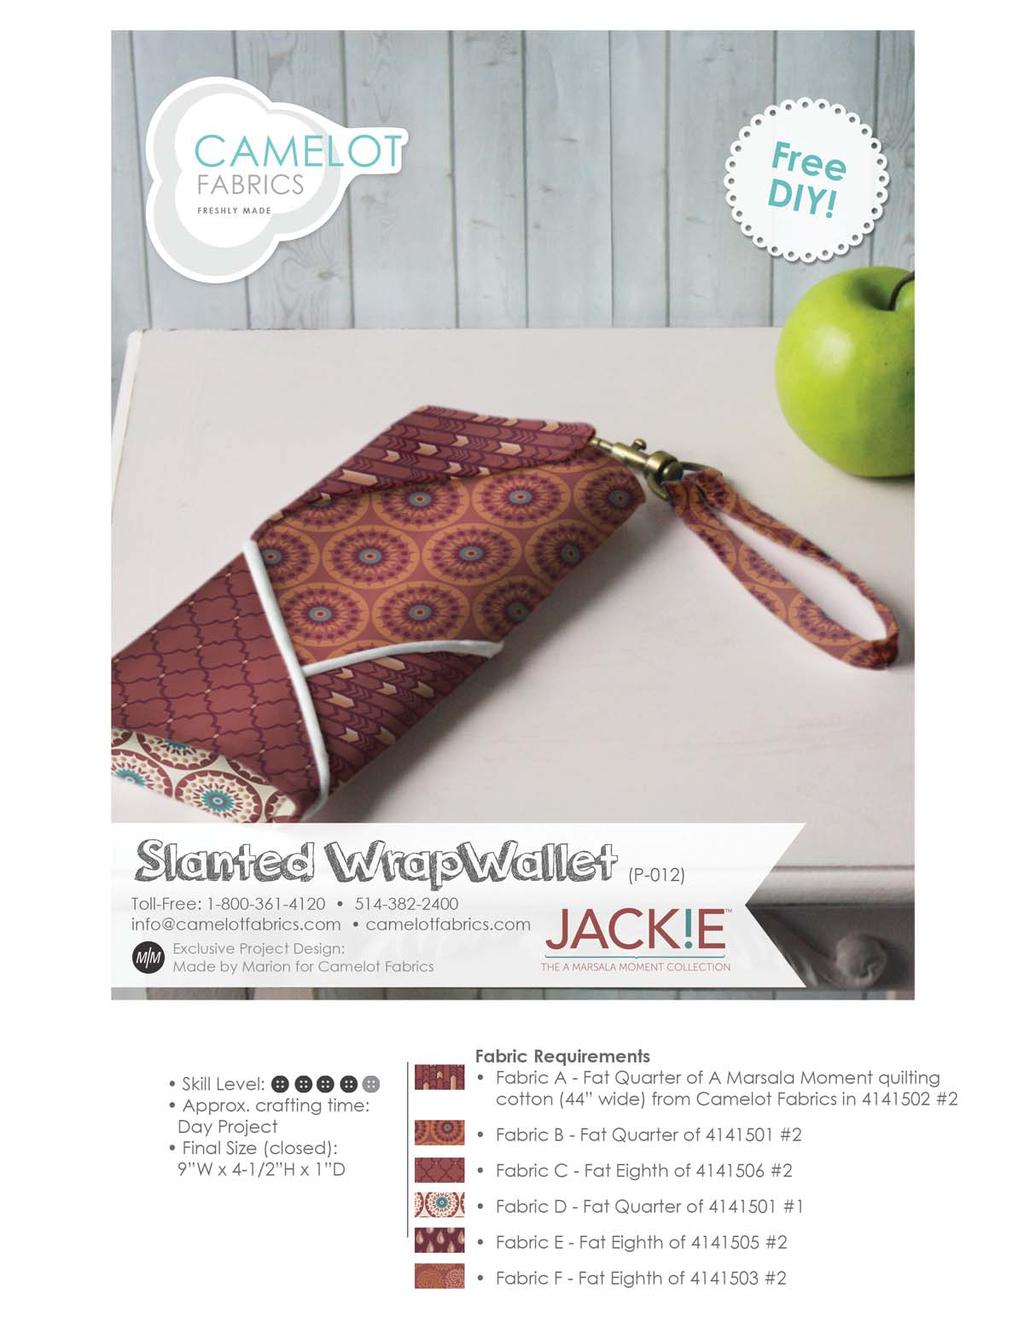
2 OTHER TOOLS & SUPPLIES - Fat Eighth of fusible fleece - 1/4 yd of fusible cotton interfacing (22 wide) - 1 yd of piping in coordinating color - (1) 1 D-Ring - (1) 1 swivel hook - (1) 8 closed-end zipper - sew-on snap - paper printer - basic sewing supplies: - sewing machine (with zipper foot) - needle & coordinating thread - iron & pressing surface - scissors & fabric shears - straight pins - fabric marker NOTES 1. Please wash, dry & iron your cotton before beginning. 2. Unless otherwise directed, sew all seams with a 1/2 seam allowance. 3. Make sure to include all notches when cutting your fabric. 4. RST = Right Sides Together CUTTING 1. Print the Slanted Wrap Wallet Template (pp 9-19) at 100% size. Measure the Test Square on page 1 to make sure your pattern was printed at the correct scale. 2. Trim the pattern pieces along the marked borders, and join them according to the numbered triangles. Cut out the pieces. 3. Pin the template pieces to the appropriate fabrics as indicated on the pattern pieces. The backs of the templates should be against the fabrics Wrong Sides. The arrow on each pattern piece indicates the direction of the fabric s grain; if you re using a multi-directional fabric, just make sure that the arrow is either parallel or perpendicular to the selvage. Cut out the pieces in fabric.
3 PIECING THE FRONT Note: to get close enough to the piping s cord, we recommend using a zipper foot for this section. 1. Trim the tape of the piping to 1/2 wide, if necessary. 2. Baste the piping to the edge of Shell piece 1 with a 1/4 seam allowance as shown, against the fabric s Right Side. The cord should be 1/2 from the fabric s edge (ie. just outside your seam allowance when you join the Shell pieces). Trim the piping 1 longer than the fabric s edge as shown. 3. Sew the Shell 1 piece to the Shell 2 piece, RST, with their single notches aligned. Your seam should run snugly against the cord of the piping. Press the seam & piping tape to one side.
4 4. Baste the remaining length of piping to the double-notched edge of Shell piece 3, just as you did in Step Sew the piping edge of Shell 3 to the double-notched edge of the Shell 1 & 2 unit, lining up the notches. Press the seam & piping tape toward Shell 3. MAKING THE LINING 1. Tack the open end of your zipper closed by sewing several stitches between the tops of the zip teeth on either side, either by hand or with a wide zig-zag stitch, the length set to 0. If you re doing this by hand, we recommend sewing a couple of stitches with the hand wheel to begin with, to make sure your stitch is wide enough. 2. Place the zipper next to the top (longer) edge of your Lining Bottom piece, with the fabric s Wrong Side facing up and the zipper centered along its edge. Mark on the fabric where the zipper s teeth begin and end. 3. Sew the top edge of the Lining Bottom to the bottom edge of the Lining Top, RST, leaving a gap between the marks from Step 2 for the zipper. Press the seam open, including the gap.
5 4. Pin (1) side of your zipper s tape into the gap between the (2) Lining pieces, so that the center of the zipper is aligned with the folds of the Lining pieces. 5. Mount your zipper foot on the left side of your machine s presser foot. With the zipper partially open, sew down its left-hand side, with the teeth to the right-hand side of the needle. When you come to the zip s toggle, lower your needle into the work, lift your presser foot and slide the toggle past the needle, closing the zipper. Lower your presser foot and sew to the end of the zipper. 6. At the bottom of the zipper, lower your needle, lift your foot and turn the work 90 clockwise. Lower the foot and sew a few stitches across the bottom of the zipper, backstitching for strength. 7.Turn the work again, and sew up the second side of the zipper. When you approach the toggle, lower your needle, lift the foot, slide the toggle past the needle and lower the foot to resume sewing. Sew a few stitches across the top of the zip, backstitching as you did at the bottom. Note: for more details on how to insert a zipper, take a look at this tutorial on our website: 8. Fold back both Lining pieces, RST, to expose the seam allowance on (1) side of the zipper tape. Sew the Zip Pocket to the zipper tape along (1) 9 edge, with the fabric s Right Side against the zipper s Wrong Side. Repeat with the second 9 edge of the Zip Pocket piece, so the fabric makes a tube. 9. Sew the sides of the Zip Pocket closed.
6 10. Place the (2) Patch Pocket pieces on your pressing surface, Right Side down. Cover them with the cotton interfacing, glue side down, and press well to bond the layers. Peel the fused fabric away from your ironing board and trim the excess interfacing. 11. Sew the Patch Pocket pieces, RST, along their top & bottom edges with a 1/4 seam allowance. Clip the corner & curves, press the seams open and turn the Patch Pocket Right Side out. Press. 12. Topstitch the Patch Pocket s top & bottom edges with an 1/8 seam allowance. 13. Fold the Pocket in half, bringing the top & bottom edges together, and topstitch the layers together down the center axis. 14. Cut along the fold at the new bottom of the Pocket unit. 15. Baste the sides of the Patch Pocket to the Lining with a 1/8 seam allowance. The bottom & side edges should be aligned, and the back of the Patch Pocket against the Right Side of the Lining. 16. Transfer the snap marking to the Lining by placing the template over the Lining and poking a pin through the center of the snap mark. Mark the Lining with a pencil where the pin is inserted, and hand-stitch the post of your snap directly over the pencil mark.
7 STRAP & D-RING 1. Fold & press the D-Ring Tap in half, Wrong Sides facing, bringing the (2) shorter edges together. Unfold the piece. Fold each short edge to the center crease, and press. Fold the piece in half along the center crease once more, and press. 2. Topstitch 1/8 from each long folded edge. 3. Wrap the Tab around the straight side of your D-Ring, and baste the ends together. 4. Fold the ends of the Wrist Strap piece inward by 1/2, Wrong Sides together, and press. Fold, press & topstitch the Strap in the same way as the Tab. 5. Wrap the ends of the Strap side by side around the bar of your swivel hook and topstitch them in place as shown. 6. Baste the D-Ring Tab to the Right Side of the Lining as shown, half-way between the zipper and the top of the Patch Pockets.
8 ASSEMBLY 1. Place your Fleece Interfacing with its adhesive side against the Lining s Wrong Side. The edges of the fleece should be 1/4 in from the Lining s edges. 2. Pin the layers together around the edges. The pins should be inserted from the Lining side. 3. Make sure that the zip pocket is lying smoothly against the Lining Bottom, the press the Lingin well to bond it to the fleece. Begin by pressing only in the center, then remove the pins and press all the way to the edges. Be careful not to iron over the pins, or they ll get stuck! 4. Sew the Shell to the Lining, RST, with a 1/4 seam allowance. Leave a 4 along the top slanted edge. Clip your curves & corners, and press the seams open, including the gap. 5. Turn the work Right Side out through the gap and topstitch around the edge of the wallet, with a 1/8 seam allowance. 6. Fold up the bottom of the wallet so the Patch Pockets rest against the zipped pocket, and press. Fold the top of the wallet down over the folded layer, wrap its tip around the first fold, and press again to set all creases. 7. Mark on the Shell where the snap touches it, and hand-stitch the ring of the snap directly over that mark.
9 Lining - Bottom Cut (1) from Lining fabric (D) 1 Test Square 2 x 2 5cm x 5cm 8

10 1 2 9
11 Zipper Pocket Cut (1) from Fabric F
12 D-Ring Tab Cut (1) from Fabric B 3 4 Wrist Strap Cut (1) from Fabric B 11
13 4 Cut (1) from Fabric A Shell #1
14 8 Snap Placement Lining - Top Cut (1) from Lining fabric (D) 5
15 9 Shell #2 Cut (1) from Fabric B 5 6 Snap Placement
16 Shell #3 Cut (1) from Fabric C
17 11 Patch Pocket Cut (2) from Fabric E 7
18 12
19 12 13 interfacing Cut (1) from Fusible Fleece (with back of Template against adhesive side of Fleece)
20 13 Slanted Wrap Wallet
5. Fold & press the Binding strip in half lengthwise, Wrong Sides facing, and unfold.
 OTHER TOOLS & SUPPLIES - 2/3 yd of pom-pom trim - paper printer - basic sewing supplies: - sewing machine - needle & coordinating thread - iron & pressing surface - scissors, fabric shears & pinking shears
CAMELOT FABRICS. 3. Draw a vertical line on the pointed end of each Strap, a tiny bit longer than the diameter of your buttons.
 Other Supplies - 2 buttons in coordinating color - paper printer - basic sewing supplies - sewing machine with buttonhole foot - iron & pressing surface - scissors & fabric shears - measuring tape - fabric
c) Fold & press the Binding in half lengthwise, Wrong Sides facing, and unfold.
 Fold & press the Binding in half lengthwise, Wrong Sides facing, and unfold.") OTHER TOOLS & SUPPLIES - 1 yd of quilt batting (58 wide) - (2) 1-1/2 to 2 metal rings - (10) 7/16 metal grommets - paper printer - basic sewing supplies: - sewing machine with even feed foot - needle &
OTHER TOOLS & SUPPLIES - 1 yd of quilt batting (58 wide) - (2) 1-1/2 to 2 metal rings - (10) 7/16 metal grommets - paper printer - basic sewing supplies: - sewing machine with even feed foot - needle &
Venn Diagram Placemats (D-031)
") OTHER TOOLS & SUPPLIES For (4) Mats - (2) Large, (2) Mini - 1/4 yd quilt batting (60 wide) - 5 yds extra-wide double-fold bias binding - Basic sewing supplies; - sewing machine - needle & coordinating
OTHER TOOLS & SUPPLIES For (4) Mats - (2) Large, (2) Mini - 1/4 yd quilt batting (60 wide) - 5 yds extra-wide double-fold bias binding - Basic sewing supplies; - sewing machine - needle & coordinating
Sunshiney Day Tote & Zip Pouch
 Sunshiney Day Tote & Zip Pouch Sunshiney Day Tote 16 x 4 x 16 Yardage Requirements for Tote: 1/3 yd. Print 1 3/4 yd. Print 2 1 yd. Print 3 1 yd. Buckram 1 yd. Fusible Fleece (44 wide) 1/3 yd. Medium weight
One Step Quilts - handbag and pouch
 One Step Quilts - handbag and pouch A sweet handbag and pouch pattern sewn from one yard of pre-printed fabric from Lecien. Fabric and notions: 1 yard of the One Step Quilts handbag and pouch fabric 1
World s Easiest Tote Bag!!!
 World s Easiest Tote Bag!!! Tutorial by Shruti Dandekar Finished Size : 12 x 4 x 18 An easy and quick to make Tote Bag with instructions on making the handles and a zip pocket. World s Easiest Tote Bag
 Size approximatly: 9 W x 6,5 H https://www.facebook.com/ideiasegostos-222596481249947/ Materials: 3 different FQ of fabric : -Fabric A and B for the exterior -Fabric C for the lining A B C -Light weight/medium
NOTES 1. Please wash, dry & iron your fabric before beginning. 2. Use a 1/4 seam allowance throughout. 3. All seams are sewn Right Sides together.
 OTHER TOOLS & SUPPLIES - fiber stuffing or fabric scraps - paper printer - 24 contrasting embroidery floss & an embroidery hoop, for eyes - 2 yds of ribbon, for hanging (optional) - basic sewing supplies:
Squares Tote. Supplies Needed. B efore you begin. Cutting. P ippet Moesby Collection. Finished Size: 15" x 20" x 5" (38.10cm x 50.80cm x 12.
 Squares Tote Finished Size: 15" x 20" x 5" (38.10cm x 50.80cm x 12.70cm) Supplies Needed P ippet Moesby Collection 2 pkgs. Fabric Palette Pippet Moesby Squares (5" x 5", 12.70cm x 12.70cm) 1 yd. (1 meter
Squares Tote. Supplies Needed. B efore you begin. Cutting. Sewing. Paris Collection. Finished Size: 15" x 20" x 5"
 Squares Tote Finished Size: 15" x 20" x 5" Supplies Needed Paris Collection 2 pkgs. Fabric Palette Paris Charms (5" x 5") 3 Fabric Palette Singles ( x 21") 2 matching for lining & 1 for handles and tabs
Beaded Clutch. Other Supplies 7 zipper
 Beaded Clutch Other Supplies 7 zipper Preparation 1. Print out the templates found on the last three pages of this tutorial at 100% of actual size and trace them onto folded double layers of your fabric
Note: Yardage and supplies listed are for all three bags.
 Stash Pouches Finished sizes: Large 10" (25.4 cm) wide x 81/2" (21.6 cm) tall x 31/2" (8.9 cm) deep Medium 9" (22.9 cm) wide x 7" (17.8 cm) tall x 3" (7.6 cm) deep Small 8" (20.3 cm) wide x 6" (15.2 cm)
Cut 1 lightweight interfacing
 1 2 A note on interfacing for this bag: This pattern is intended to produce a slouchy bag, so you will want to look carefully at your fabrics before you decide on which interfacing and stabilisers to use.
hard core hook case a sewing pattern by
 hard core hook case a sewing pattern by hard core hook case This case is something I designed for myself to store my crochet hooks and other tools. What gives it an edge are the contrast patches, skull
1. Print our the Fox Hat pattern (pages 8-11 of this tutorial) at 100% of actual size. Cut out the
 at 100% of actual size. Cut out the") Other Supplies - 2 black buttons (for eyes) - One bag of fiber stuffing - Paper printer - Basic sewing supplies: - sewing machine - needle & coordinating thread - straight pins - scissors & fabric shears
Other Supplies - 2 black buttons (for eyes) - One bag of fiber stuffing - Paper printer - Basic sewing supplies: - sewing machine - needle & coordinating thread - straight pins - scissors & fabric shears
london calling bag a sewing pattern by
 a sewing pattern by london calling bag This project on its own is a very big gusseted bag with a zippered top closure. But the optional details include a front pocket with Union Jack applique, buckle adjustable
Urban Jungle Bag Advanced
 Urban Jungle Bag Advanced Designed by Sara Lawson Sewn By Sara Lawson http://sewsweetness.com This adorable bag features leather handles and accent detailing on the front and sides. With a zipper top,
Project Instructions. Flannel Bunting. with Optional Swaddle Wrap. Finished Size: 18" x 25 ¼"
 Center Front place on fold 25 ½" finished length The Land of Whimzie The Land of Whimzie Project Instructions Flannel Bunting with Optional Swaddle Wrap Finished Size: 18" x 25 ¼" Skill Level: Experience
Sew Spoiled Designs. Weekender Travel Tote. Sew Spoiled. By Leah Williams. Sew Quick, Sew Easy,
 Sew Spoiled Designs Weekender Travel Tote By Leah Williams Sew Quick, Sew Easy, Sew Spoiled Sew Spoiled 2009 Sew Spoiled patterns content within the tutorial is copyrighted and cannot be reproduced elec-
What you will need: 9 x 12 piece of fabric (interior pocket) 9 x 8.5 piece of fabric (bottom of zipper pocket) 4 x 9 piece of fabric (top of zipper
 9 x 8.5 piece of fabric (bottom of zipper pocket) 4 x 9 piece of fabric (top of zipper") What you will need: 9 x 12 piece of fabric (interior pocket) 9 x 8.5 piece of fabric (bottom of zipper pocket) 4 x 9 piece of fabric (top of zipper pocket) 6 x 9 piece of fabric (zipper pocket lining)
What you will need: 9 x 12 piece of fabric (interior pocket) 9 x 8.5 piece of fabric (bottom of zipper pocket) 4 x 9 piece of fabric (top of zipper pocket) 6 x 9 piece of fabric (zipper pocket lining)
All seam allowances are 1/2 unless otherwise noted. All pattern pieces include the seam allowance. Please read all instructions before beginning.
 This small bag will allow you to try out several fun bag-making techniques; adding a metal twist lock, using piping in a bag, making darts, and adding elastic pockets. Use your favorite print and combine
Full details of the products you ll need including the colours of Decracraft Felt, can be found on the next page.
 PATTERN BY Our light yet sturdy drawstring bag features a combination of stunning colours from our Decracraft Felt range. Create your own drawstring bag using this pattern. Full details of the products
Travel Jewelry Case. Skill Level: Experienced beginner. by Caroline Fairbanks- Critchfield. About Caroline Fairbanks-Critchfield
 Travel Jewelry Case by Caroline Fairbanks- Critchfield Skill Level: Experienced beginner This sweet case has spots for your earrings, rings, necklaces, and bracelets. It s a perfect way to show off coordinating
Evie Carry All Trio. Tools: Needle and thread PURSE
 Evie Carry All Trio Purse Make Up Bag Sunglasses Case 9 zipper 1 spool all purpose thread SUNGLASSES CASE 1/8 yd exterior 1/8 yd 810 Tru-Grid 1/8 yd interior 1/8 yd 987 Fusible Fleece ½ dia. Circular Velcro
featuring STARGAZER COLLECTION BY AGF STUDIO Space Trip FREE PATTERN
 featuring STARGAZER COLLECTION BY AGF STUDIO Space Trip FREE PATTERN Space Trip DESIGNED BY FABRICS DESIGNED BY CAP-ST-1106 TWINKLY PHASES CAP-ST-1108 PLANETARIUM CAP-ST-1103 INTERRUPTED SIGNAL CAP-ST-1104
2016 Courtesy of Art Gallery Quilts LLC. All Rights Reserved.
 ST YL E NAME 2016 Courtesy of Art Gallery Quilts LLC. All Rights Reserved. CONSTRUCTION Sew all rights sides together with ¼"seam allowance. Arrange the triangles together in rows. QUILT DESIGNED BY AGF
Escape Mini Bags Finished size: 8" x 10" x 2" Makes 2 Bags
 TM Escape Mini Bags Finished size: 8" x 10" x 2" Makes 2 Bags SUPPLIES NEEDED 2-1 Yard Cottons (Escape Brown Floral and ) 2 - ¼ Yard Cottons (Escape Green Floral) 3 8 yd. Pellon 987F Fusible Fleece 1 ½
Carissa is the perfect clutch for every day, not too big, not too small. Six card sl
 Carissa Clutch Carissa is the perfect clutch for every day, not too big, not too small. Six card slots, zippered pocket, wristlet strap and an optional hand strap. Finished size of bag is: Height 7 inch
Bon Voyage - bag pattern -
 ~~~ Bon Voyage Bag Pattern ~~~ 2014 Geta Grama; www.romanianquiltstudio.com Bon Voyage - bag pattern - Size: 18 wide at top; 21 wide at bottom; 15'' tall (without straps); 5'' deep; two interior pockets;
Big Pocket Baby Clutch Tutorial The pattern pieces all include a 3/8'' seam allowance.
 Big Pocket Baby Clutch Tutorial The pattern pieces all include a 3/8'' seam allowance. You will need: 3-4 fat quarters of fabric (depending on how many different fabrics you want to use). More fabric will
Cargo Duffle Pattern. structured duffle // cargo pockets // great for traveling
 Cargo Duffle Pattern structured duffle // cargo pockets // great for traveling Fabric Requirements & Notions: Cut Pattern Pieces: + requirements based on 44 wide fabric+ 1 yard exterior main 3/4 yard bottom
Embroidered Scrap Bag and Bed Caddy Carol A. Brown
 Embroidered Scrap Bag and Bed Caddy Carol A. Brown Materials: 1. Outer fabric for Scrap Bag (sturdy fabric such as poplin): at least 12-1/2 wide by 22 high. 2. Outer fabric for Bed Caddy (sturdy fabric
Double Zipper Device Sleeve with Wrist Strap
 Published on Sew4Home Double Zipper Device Sleeve with Wrist Strap Editor: Liz Johnson Thursday, 13 July 2017 1:00 We love the idea of concealing a cutting-edge electronic device inside a vintage wrapper.
Evie Carry All Trio Skill level: Intermediate
 Evie Carry All Trio Skill level: Intermediate http://www.pellonprojects.com Designed by Sara Lanan Make this cute ensemble with a sunglass case, make-up bag and purse. Fabric Needed (For all three items)
Sunday: My Way-Life s Little Everything Bag
 Sunday: My Way-Life s Little Everything Bag The Sunday Bag was designed to be like a lazy Sunday afternoon- A Blank Canvas. The design was created to be simple; a beginner sew, but an open canvas for those
Fabric Headband. Shopping List: Two ⅛ yard pieces of contrasting fabric. ⅛ yard of ⅜ wide elastic. All-purpose thread for construction
 Fabric Headband This stylish headband is super easy to make and it s reversible, too! A great way to use up those fabric bits left over from other projects. You can even embellish the fabrics with decorative
Kindle Case with Pocket 3 An In-the-Hoop Project
 Kindle Case with Pocket 3 An In-the-Hoop Project 2011, 2015 Peggy Severt, Pegboard Crafts Updated April 2015. Minor improvements. pegboard1@yahoo.com or peggy@pegboardcrafts.com http://www.pegboardcrafts.com
Christmas Tree Pillow By Marie Duncan
 Christmas Tree Pillow By Marie Duncan Christmas is coming and you want to be ready! This fun piped, patchwork pillow made with the Hex N More Ruler will go together quickly and be a treasured holiday decoration
Kindle Case with Pocket 1 An In-the-Hoop Project
 Kindle Case with Pocket 1 An In-the-Hoop Project 2011, 2015 Peggy Severt, Pegboard Crafts Updated April 2015. Minor improvements. pegboard1@yahoo.com or peggy@pegboardcrafts.com http://www.pegboardcrafts.com
a free sewing pattern by
 a free sewing pattern by 2 kitty wallet This project is a fun companion piece to my Kitty Purse pattern. It's a bi-fold wallet with the traditional slots for cards (6) and one for receipts or bills. A
patterns MN2206 // VERONIKA
 patterns MN2206 // VERONIKA SIZES XS - XL SKILL www.megannielsen.com VERONIKA // Basic full circle skirt for woven or stretch fabrics. Pattern features include optional roomy scalloped pockets and two
Floral Frenzy Pillow. Time to Sew! Created By: Alison O Grady Level: Confident Beginner Time: 2-3 Hours
 Created By: Alison O Grady Level: Confident Beginner Time: 2-3 Hours Sewing is fun! Set aside some time out of your day to make this easy, no fuss pillow that showcases many great features of the Horizon
P layful Cuties 2 - Nursery Rhymes Quilt
 P layful Cuties 2 - Finished Size: 40 ½" x 46 ½" (102.87cm x 118.11cm) Nursery Rhymes Quilt Fabrics Needed 3 Wishes Fabric Playful Cuties 2 Collection ¾ yd (68.58cm) Gray Dots (13876-Gray) for Piecing
Basic Sewing Portfolio. Name
 Basic Sewing Portfolio Name Back stitching Whip stitch Starting in the corner of a sample begin stitching diagonally. 3-4 stitches Hold up the back stitching lever and backstitch to the beginning. Release
Supplies Needed. Instructions. Project Instructions Ellie & Eliza Stuffed Elephants. Skill Level 2: Some experience necessary
 The Land of Whimzie The Land of Whimzie Project Instructions & Eliza Stuffed Elephants Finished Size: 10" x 16 ½"- 6" x 10 ½"-Eliza Skill Level 2: Some experience necessary Approx. Crafting Time: 3-5 hours
City Dapper Backpack. Featuring Tim Holtz Eclectic Elements Zippers, Hardware, and Dapper fabric collection
 Featuring Tim Holtz Eclectic Elements Zippers, Hardware, and Dapper fabric collection Whether you re adventuring to a foreign country or navigating your city s streets, you can carry every thing you need
tablet sleeve a sewing pattern by
 a sewing pattern by tablet sleeve This project is a simple zippered pouch made to fit most 7 tablets. It features a zipper that wraps around the top half of the pouch so it opens wide and fits snugly around
Make a small zipped bag or pencil case from upcycled fabric
 Make a small zipped bag or pencil case from upcycled fabric FAMILY CRAFTS MAKE USE OF YOUR FABRIC SCRAPS WITH THIS HANDY GUIDE. ONCE MASTERED, IT CAN BE ADAPTED TO CREATE BAGS OF ALL SIZES. YOU WILL NEED
Bowled Over Bag. Supplies Needed. Notes. Swatches. Special Thanks To
 Supplies Needed Main fabric (front, back, and side panels) 1yd Contrasting fabric and lining 2 yds 20in Coats heavyweight metal zipper 2/3 of a yard of VELCRO FABRIC FUSION brand fastener Dual duty xp
All seam allowances are 1/2 unless otherwise noted. All pattern pieces include the seam allowance. Please read all instructions before beginning.
 This beginner-friendly bag features an easy to install top zipper, and two topstitched pockets on the inside. Use your favorite fabric print and adorn it with the optional grosgrain ribbons! All seam allowances
tri-fold wallet a sewing pattern by
 a sewing pattern by tri-fold wallet This project is for a basic wallet that folds up into thirds, but it features a contrast front band, snap closure, credit card pockets, cash pocket, and zippered coin
Vera Bradley Inspired DIY Cargo Duffel Bag
 Vera Bradley Inspired Materials: 1.5 yards of main outer fabric 1.5 yards of inner canvas 0.5 yards of accent fabric 1.5 yards fleece interfacing 22 heavy duty zipper 7 zipper 10 piping 9 yards ½ bias
Superhero Cape + Mask
 Superhero Cape + Mask By Joanna Marsh If you re looking for a fun project to sew for your little ones, this is it! Make a superhero set for each kiddo in your life with their favorite colors and they ll
Name: Class: Monster Doll. Grading Rubric
 Name: Class: Monster Doll Grading Rubric Grade yourself on the skills listed below. (0 being the lowest, and 5 being the highest.) Once you have graded yourself in each area, pin your grading sheet to
Cargo Duffle Pattern. structured duffle // cargo pockets // great for traveling
 Cargo Duffle Pattern structured duffle // cargo pockets // great for traveling Fabric Requirements & Notions: + Requirements based on 44 wide fabric. 1 yard exterior main 3/4 yard bottom accent/bottom
Prima Diva. .Style, function and loads of compliments That s what the Stella Sling Bag brings!!
 .Style, function and loads of compliments That s what the Stella Sling Bag brings!! Supplies: 1/2 Yard Main Print (Outside of wallet, Outside of pockets, optional strap, etc..) 5/8 Yard Accent Print (Lining
Frou Frou Bag Intermediate
 Frou Frou Bag Intermediate Sewn By Sara Lawson http://www.sewsweetness.com This bag features ruffled flaps, snap closure and an adjustable strap. The small front pockets are 3-dimensional. Beautiful detailing
waterproof pocket variation
 waterproof pocket variation DESCRIPTION Keep your phone, wallet and dog treats dry with this waterproof pocket for our Kelly Anorak. A separate external flap keeps the pocket bag closed and prevents water
HOW TO MAKE A SLIPCOVER INSTRUCTIONS Instructions are for slipcovering a wing-back chair. The principle is the same for an arm chair or sofa.
 HOW TO MAKE A SLIPCOVER INSTRUCTIONS Instructions are for slipcovering a wing-back chair. The principle is the same for an arm chair or sofa. YOU WILL NEED: Slipcover fabric Piping cord Zipper Thread Ruler
of a 3kind {by Ellen March, stockings designed by Tara Rex}
 3kind of a {by Ellen March, stockings designed by Tara Rex} Stitch simple stockings to adorn your mantel this holiday season. Make each stocking different or the same depending on the desired finished
Beginning Level (9-11 Years)
") OKLAHOMA COOPERATIVE EXTENSION SERVICE 4-H Fabrics & Fashions Construction Items Beginning Level (9-11 Years) Division of Agricultural Sciences and Natural Resources Oklahoma State University OKLAHOMA
OKLAHOMA COOPERATIVE EXTENSION SERVICE 4-H Fabrics & Fashions Construction Items Beginning Level (9-11 Years) Division of Agricultural Sciences and Natural Resources Oklahoma State University OKLAHOMA
My Color Notes. Finished Dimensions: 7" square cube, 6" square cube, 5" square cube, 4" square cube, 3" square cube, 2" square cube
 Nesting Cubes H Light- to medium-weight woven cotton fabric: 10 squares of fabric measuring 8" 8" 10 squares of fabric measuring 7" 7" 10 squares of fabric measuring 6" 6" 10 squares of fabric measuring
The Katey An in-the-hoop project
 The Katey An in-the-hoop project An over-the-shoulder/cross-body purse with 3 pockets. Back pocket is zippered and full length of the purse. Middle pocket is open. Front pocket has a flap closure and includes
Embroidered Scrap Bag Carol A. Brown
 Embroidered Scrap Bag Carol A. Brown Materials: 1. Outer fabric (sturdy fabric such as poplin): at least 12 1/2 wide by 22 high. 2. Medium weight fusible interfacing: same size as for fabric. 3. Lining
the Poppy clutch Materials Skill Level Advanced Beginner Fabric Flora by Kelly Ventura for Windam
 the Poppy clutch The Poppy Clutch is perfect for an evening out, a quick trip to the store, or carrying some on the go essentials in a larger bag. It is large enough to still fit a wallet and other accessories.
Word Play Scissor Pouch Pattern
 1 Word Play Scissor Pouch Pattern 2 Wordplay Scissor Pouch Pattern by Sarah Fielke Materials: To make all three pouches you will need: * 25cm (10") of dark fabric for the applique background. I used 43141-8
pleated clutch a sewing pattern by
 a sewing pattern by pleated clutch This project is for a small and simple clutch, assembled with a French seam, and a front decorated in lots of detailed pleats. It also features a wrist strap for holding
Growler Getter. Supplies: ½ yard main fabric. ½ yard Insul-Shine. 8 x 10 piece of Fusible Fleece 2. ¼ yard or fat quarter of coordinating fabric
 Supplies: ½ yard main fabric ½ yard Insul-Shine 8 x 10 piece of Fusible Fleece 2 ¼ yard or fat quarter of coordinating fabric 1 9 x 12 sheet of Steam-A-Seam 2 1 yard nylon cord 1 cord stop Coordinating
GO! Qube 8" Patchwork Portfolio Finished Size: Open 28" x 12½"; Closed 9¾" x 12½"
 GO! Qube 8" Patchwork Portfolio Finished Size: Open 28" x 12½"; Closed 9¾" x 12½" For use with GO! Qube Mix & Match 8" Block (55776) Fabrics are from the Soho Solids and Pop Basics Collection and are provided
Creative Sewing. Quilt Block Pillow Instructions and Visual Aid
 Creative Sewing Quilt Block Pillow Instructions and Visual Aid 1. You will need (2) 3 wide strips of fabric that will coordinate well with a T-Shirt of your choice. Place the strips right sides together
The Little Bow Zipper Wallet PDF Pattern
 A PDF PATTERN BY MICHAEL ANN MADE The Little Bow Zipper Wallet PDF Pattern By Michael Ann Made Photo Instructions PDF This pattern was created by Michael Ann Shreeve for MichaelAnnMade.com. So glad you're
The Panty Pack Skill Level: Intermediate
 The Panty Pack Skill Level: Intermediate http://www.pellonprojects.com Designed By Michelle Dorsey Sewn By Michelle Dorsey What girly girl wouldn t want a special bag to hold her delicate undies when she
featuring METROPOLITAN
 featuring METROPOLITAN FREE PATTERN COLLECTION BY AGF STUDIO FA B R I C S D ES I G N E D BY AG F S T U D I O FUS-CL-900 FUS-CL-901 BRAVE BLOOMED CITY HULA HOOPS CITY FUS-CL-904 FUS-CL-905 SUBTLE JOURNEY
Central. Fabric. Dot to Dot Quilt. Supplies Needed. Instructions. Skill Level 2: Experience necessary. Project Instructions
 Fabric Project Instructions Central Dot to Dot Quilt Skill Level 2: Experience necessary Crafting Time: Weekend Project Supplies Needed 1 Fabric Central Dot Bundle 1 1 Fabric Central Dot Bundle 2 Fabric
Underwater Stripes Bag Skill Level: Beginner
 Underwater Stripes Bag Skill Level: Beginner Designed By Sara Lawson Sewn By Sara Lawson www.sewsweetness.com Fabric Needed Exterior Lining Materials Needed Pellon TP971F Thermolam Plus Pellon SF101 Shape-Flex
*All seam allowances are 1/4 unless otherwise noted. All pattern pieces include the seam allowance.
 Kelley Crossbody Bag Supplemental Instructions to Online Video Course www.craftygemini.com http://craftygemini.com/2016cgbagclub 2015 Crafty Gemini LLC. All rights reserved. *This pattern cannot be photocopied,
Blues & Jazz. Pack Designs
 Pack 12369 10 Designs Note: Some designs in this collection may have been created using unique special stitches and/or techniques. To preserve design integrity when rescaling or rotating designs in your
Sewing Skills Quiet Book Debra Proctor, Wasatch County Extension Agent, FCS/4-H Susan Haws, Summit County Extension Agent, FCS/4-H
 FL/ST/Construction/2010 Project Skills: Closures Life Skills: Learning to learn, making decisions. Level: 2 Sewing Skills Quiet Book Debra Proctor, Wasatch County Extension Agent, FCS/4-H Susan Haws, Summit
Boy s Autumn Vest. By Elaine Shepherd. Page 1. Time: 5 hours to cut out, stitch and press Skill Level: Beginner - Intermediate
 By Elaine Shepherd Time: 5 hours to cut out, stitch and press Skill Level: Beginner - Intermediate Janome/Elna Supplies Required: Janome/Elna sewing machine Straight Stitch/Zig Zag Foot A, Overedge Foot
scientist's satchel a sewing pattern by
 scientist's satchel a sewing pattern by scientist s satchel sewing tutorial scientist s satchel This project is a steampunk inspired messenger bag with a vertical zippered pocket on the front flap. It
{ FEATURING PARADISE COLLECTION}
 { FEATURING PARADISE COLLECTION} F R E E P R O J E C T S H E E T DESIGNED WITH LOVE BY DESIGNED WITH LOVE BY FABRICS DESIGNED BY PATRICIA BRAVO for ART GALLERY FABRICS Finished Size: 56.5" by 64.5" Block
Travelling Wallet Sewing level: 2
 Travelling Wallet Sewing level: 2 Material. Soft leather approximately 3 square feet (see cutting instructions). 1/3 yd. (30 cm) lining fabric, width at least 90 cm). 1 zipper, 4 (10 cm). 1 press stud.
Zipped Up Selvage Pouch
 Zipped Up Selvage Pouch created by Vanessa Christenson materials and tools Selvages from past projects; you ll need approximately eight 6 -long strips for each square (12 squares = about 100 strips) Two
Zippy QUILTER'S PLANNER COVER. Supplies. Before you begin
 Zippy QUILTER'S PLANNER COVER By Amanda Hines of What the Bobbin and Stephanie Palmer of Late Night Quilter. Photos by Kitty Wilkin and Stephanie Palmer. Supplies Thank you for joining in the fun and making
~~~ Little Wonders Pouch Patterns ~~~ 2014 Geta Grama; Boxy Pouch
 Boxy Pouch Pouch size: 6 wide at bottom; 9 wide at top; 7½ tall; 3 deep ~ Please read all the instructions carefully before starting to make the pouch ~ Page 1 1. Materials List Main fabric: 10 x 20 (I
Crazy Seminole Cell Phone bag
 Crazy Seminole Cell Phone bag By Soni Grint Have some fun making this crazy seminole cell phone bag. Learn how to make a basic seminole pieced unit and a foundation pieced crazy patchwork pocket while
Hip Packing Holster. ¼ yd lining fabric one - 7 ½ x 24 lining one - 8 x 4 ½ (C) elastic pocket. ¼ yd fusible fleece one - 7 ½ x 24
 elastic pocket. ¼ yd fusible fleece one - 7 ½ x 24") Hip Packing Holster Read directions before starting. Seam allowances are ¼, basting is 1/8. Options are given to make slits for a belt or for a strap. Or you can do both. Make the following cuts in the
Hip Packing Holster Read directions before starting. Seam allowances are ¼, basting is 1/8. Options are given to make slits for a belt or for a strap. Or you can do both. Make the following cuts in the
Cushion Cover with Piping and a Zip
 Cushion Cover with Piping and a Zip Requirements: Cushion pad. Main fabric (1cm (1/2 ) longer and 1cm (1/2 ) wider than your cushion pad) x 2 pieces Piping cord (size 4 or 5 works well enough to go around
Sew Sweetness. Clydebank Tote. Sara Lawson
 Sew Sweetness Clydebank Tote Sara Lawson Clydebank Tote This tote features cut-out handles and comes in two different sizes; size small is a great handbag size, and size large would make a great large
free pattern featuring aligned COLLECTION BY AGF STUDIO
 free pattern featuring aligned COLLECTION BY AGF STUDIO QUILT DESIGNED BY AGF STUDIO FABRICS DESIGNED BY AGF STUDIO CAP-A-7000 Interconnected CAP-A-7001 Slanted CAP-A-7002 Hyphenated CAP-A-7003 Lineup
Designed by Anna Graham
 Just Kisses BAG GATHERER CROSSBODY Designed by Anna Graham www.noodle-head.com Featuring A small crossbody bag that s fun and satisfying to make and easy to use. Holds the basics without weighing you down!
Travel Purse by Darlene Guillory
 Travel Purse by Darlene Guillory Use this handy purse when flying, going to the beach, on a cruise, or going to your next Sewing/Quilt Expo. It's just the right size to carry your driver's license, cash,
Kitties-To-Go Handbag
 Published on Sew4Home Kitties-To-Go Handbag Editor: Liz Johnson Wednesday, 21 February 2018 1:00 Tabby Road is a classic collection from Tula Pink that debuted well over a year ago, but has continued to
The Allie An in-the-hoop project
 The Allie An in-the-hoop project A wallet/coin purse for the 5x7 hoop. The Allie has 3 credit card slots in the front section which features a large flap with a snap closure. You can carry coins or other
Cotton, Cotton Blends and Calico. Fabric, 25 (63cm) Square Contrast, 20 (50cm) Square Fleece, 25 (63cm) Square
 Square Contrast, 20 (50cm) Square Fleece, 25 (63cm) Square") Sewer s organizer has elastic strap holders, three contrasting pockets with encased edges and loop and button closure.finished size: 4-1/2 x 6-1/2 (12cm x 17cm) SUGGESTED FABRICS: YOU WILL NEED: NOTIONS:
Sewer s organizer has elastic strap holders, three contrasting pockets with encased edges and loop and button closure.finished size: 4-1/2 x 6-1/2 (12cm x 17cm) SUGGESTED FABRICS: YOU WILL NEED: NOTIONS:
Zippered Box Pencil Case Tutorial
 Zippered Box Pencil Case Tutorial Step 1: What you'll need 2 pieces of exterior fabric measuring 30 cm by 25 cm. (The longer side will be the top of your pouch, keep this in mind when cutting directional
Bee #4 - Table Runner
 This Bee features step by step instructions to successfully multi-hoop and embroider with accuracy and ease. Embroider one side of this versatile table runner, and use a beautiful printed fabric for the
gothic lolita satchel
 gothic lolita satchel a sewing pattern by gothic lolita satchel sewing tutorial gothic lolita satchel This satchel was inspired by the Gothic Lolita style so popular amongst Harajuku fashionistas in Japan.
Messenger Bag Tutorial
 Messenger Bag Tutorial The finished measurements of this bag are 15 wide X 13 long X 3 ½ deep. Prepare: Begin by cutting out your pattern pieces. You ll need two inner, two outer and two hidden fleece