Installa on Guide: Fence Distributors. YourNextFence.com
|
|
|
- Beryl Robertson
- 5 years ago
- Views:
Transcription


1 TM YourNextFence.com


2 Plan Your Fence each line by dividing the length of each line in inches by 97. Round any remainder up. 2

3 Calculate Materials Tools Needed Stakes Circular Saw String Line Drill Marking Paint Pencil Hammer Wheelbarrow Tape Measure 4 Level Shovel Miter Saw Before you begin you dig. Check local HOA and zoning laws which may regulate the height and placement of your fence. Apply for local permits as directed by local code Post Hole Digger Digging Bar Speed Square Finish Nail Gun eyes and ears. For a step by step installa on video, visit: 3 3
 Trex is a federally registered trademark of Trex Company, Inc. Horizons HORIZONTAL FENCE SYSTEM is a patent pending trademark of FDS Distributors, Inc.. 4")
4 Exploded View A C D F G E B C A. 1 Trex Post Cap B. 1 Trex Post C. 2 Horizons Horizontal Rail Brackets D. Horizons Horizontal Rails D F E. F. Horizons Vertical Back Rails Horizons Vertical Front Rails E G. 15 Trex Fence Pickets (91 1/2 ) Trex is a federally registered trademark of Trex Company, Inc. Horizons HORIZONTAL FENCE SYSTEM is a patent pending trademark of FDS Distributors, Inc.. 4
5 Step 1: Understand Install Method 1. Step Method: This method gradually steps up the slope and the rails remain level. This may leave gaps under the fence. The downhill post will need to be set taller. Longer posts may be required. When laying out the fence post spacing, measure on a level line from one post to another. 5 5
. 2 in Fig. 1 Step 3: Dig Holes 1.")
6 Step 2: Stake and String pins so that stakes will not be disturbed when digging holes and approx. 4-5 inches inside of property pins to insure not to encroach on neighbors property (See Fig.1). 2. string every 97 on center. Ideal spacing between posts is 92. If from the string to mark the center of the hole (see Fig. 1). 2 in Fig. 1 Step 3: Dig Holes 1. Dig the holes for the posts making sure not to disturb the stakes for the string. be approximately 12 diameter and 30 deep (consult local condi ons and codes). Holes should be dug so they allow equal amounts of concrete on all sides of posts (see fig. 2). 6
. 2. Set the first post in the hole.")
7 A If posts will be set on sloping or uneven ground, or will be stepping, skip to step 4B. 1. A ach a horizontal rail bracket using two 1 screws (3 3/4 below the top of each post). End posts will only have one bracket that faces the fence sec on, line posts will have brackets, a ached on two sides (see Fig.3). 2. Set the first post in the hole. Plumb and level the post to the string line (ensure that the post is 76 3/4 high*) and fill the hole around the post with concrete mix. 3. Place post into the next hole. Place a horizontal rail onto the brackets. Use a level on the rail and raise or lower 3 3/4 the previous post. This rail will also ensure that your posts are spaced correctly (see Fig.3). Plumb and level the post to the string line and fill the hole around the post with concrete mix. 76 3/4 Fig all posts are set. 30 Min. Typ. Consult local conditions and codes for post depth Fig
8 4B 1. A ach a horizontal rail bracket 3 3/4 below the top of the post to one side of each post using two 1 screws (see Fig.4). 2. Set the uphill post first. This post should be set at 76 3/4 tall with the bracket facing to the next post down hill. Plumb and level the post to the string line. Fill the hole around the post with concrete mix (see Fig. 4). 3. Place the next downhill post in its hole with the bracket facing uphill towards the last post that you set. Place a horizontal rail onto the brackets of the two posts and place a level on the rail. Adjust the post height of the downhill post un l the rail is level (see Fig. 5). This will also ensure that posts are spaced correctly. Plumb and level the post and fill the hole around the post with concrete mix. 3 3/4 76 3/4 Fig. 4 Fig Min. Typ. Consult local conditions and codes for post depth 12 8
9 4. of this bracket, measure from the horizontal rail to the ground on the uphill side of the post, and subtract this from the height of the rail on the first post. Add this measurement to 3 3/4 and this will be the placement of the downhill bracket (see Fig. 6). 8 5/8 Fig /8-74 1/2 5 1/8 +3 3/4 8 5/8 5. Repeat steps 3 and 4 un l all posts are set. 5: Cut Horizontal Rails 1. If you have sec ons that are shorter than 92 between posts, you will need the rails using a metal cu ng blade. Be sure to cut only one end of the rails (see Fig. 7). Touch up the cut end using a zinc rich primer and a matching top coat to help prevent rust. Fig 7 9 9
10 2. Place a horizontal rail over the brackets with the screw holes facing you. If the rail has been cut, you will need to slide the cut end over one bracket first and then drop the other end over the other bracket (see Fig. 8). Fig 8 Step 6: Attach Vertical Back Rails 1. A ach a ver cal back rail (angle with notch) to the post on each end of the horizontal rail. Place the ver cal back rail so the notch fits around the bracket and the back rail is snug and flush with the horizontal rail (see Fig. 9). The screw holes on the horizontal rail should be on the side opposite the ver cal back rail. A ach the rails to the posts using the provided screws (see Fig. 10). Top Rail screw holes bracket Vertical Back Rail Fig. 9 Fig
, to prevent hi ng the brackets. 2. Remove the horizontal rail and slide the picket onto the rail with the 45 cuts facing upwards (see Fig. 11).")
11 Step 7A: Cut and Hang Top Picket 1. Cut the top picket 1/2 shorter than the horizontal rail. Cut the upper corners on each end at a 45 angle and 1 1/2 deep (see Fig. 11), to prevent hi ng the brackets. 2. Remove the horizontal rail and slide the picket onto the rail with the 45 cuts facing upwards (see Fig. 11). With picket in place, drop the rail back over the brackets, being sure to face the picket knuckles toward the ver cal back rail (see Fig. 12). 45º 1 1/2 Fig. 11 Horizontal Rail Picket Vertical Back Rail Fig
12 Step 7B: Hang The Pickets 1. Hang the remaining 14 pickets from the top picket by interlocking them to each other (see Fig. 13). 2. Before installing the last picket, slide the remaining horizontal rail onto the bo om picket. Then hang the last picket onto the rest of the pickets (see Fig. 14). Fig. 13 Fig
13 Step 8: A ach Ver cal Front Rails 1. A ach a ver cal front rail to the post on each end, opposite the ver cal back rail. The shorter flange should lay flat against the post and the larger flange should be pushed ghtly against the pickets. Hold it flush against the top of the top rail and a ach the ver cal front rails to the posts (see Fig. 15). 2. Screw the ver cal front rails and horizontal rails to the pickets (see Fig. 16). Fig. 15 Fig
. Fig. 18 For a step by step installa on video, visit: https://www.yournextfence.")
14 Step 9: Secure Vertical Rails to Horizontal Rails 1. Secure the ver cal rails to the horizontal rails using the provided self-drilling screws in each corner on both front and back sides (see Fig. 17). Fig. 17 Fig Place post caps onto the post and secure using adhesive or finish nails. (see fig. 18). Fig. 18 For a step by step installa on video, visit: 14
15 Install Single Gate A. Trex Fence Post B. Horizons Gate Panel C. FDS Steel Post S ffener E. Horizons Gate Latch F. Horizons Gate Striker G. FDS Gate Handle (2) D. FDS Gate Hinge (2) Trex is a federally registered trademark of Trex Company, Inc. Horizons HORIZONTAL FENCE SYSTEM is a patent pending trademark of FDS Distributors, Inc. 15
16 (Single Gate) Step 1: Set the Gate Posts A. Slide the Steel Post S ffener* into the hinge post. The faces away from the gate opening. B. Set posts** into post holes. The holes should be 30 deep by 12 wide***. Plumb and level posts so they are parallel with each other and fill the hole with concrete mix. C. The opening (measuring from the inside face of one post to inside face of the other post) for a standard size Trex Horizons Gate panel should be 46 1/4. (****The opening for a standard Large Size Trex Gate panel is 65 3/4 wide) Custom heights and widths are possible. *Note: If the Hinge Post is not connected to a fence panel or if a large gate panel is used, it may be necessary to use a **Note: Due to concrete cure -3 days before gate is installed. ** ***Note: Consult local condi ons and codes for actual depth. 16
17 (Single Gate) Step 2: Install the Gate Panel A. Using a 3/8 6 screws. Pre-drilling with a 3/16 1/2 self-drilling B. Place the gate panels in the opening. Adjust the gates so the top rail lines up with the top rail of the fence. C. Using the supplied 1 1/2 self- the outside corner of each hinge to the gate post con- with a 3/16 -drilling drill D. A the hinge bracket to the hinge post. B C x4 D x2 17
18 (Single Gate) Step 3: A ach Latch and Handles A. 36 from the ground (or to desired height) using the supplied 1 1/2 self-drilling screws. The latch should be oriented so the catch is on the gate-swing side of the post. The catch will face up or C. B. Using the supplied 1 1/2 selfto the gate panel, lining the striker rod up with the catch on the post latch. gate panel upright, using the supplied 1 self-drilling screws. Han- 3/4 in from the edge of the gate panel. The handle height must be staggered to avoid screws hi ng each other. A Catch Gate swing (Single Gate) Step 4: Make any Final Adjustments Gate swing Catch B x4 C A. 11/16 wrench. B. C. Note: Due to weather and temperature changes, periodic hinge adjustment may be necessary to ensure proper latch connec on. 18
19 Install Double Gate A. Trex Fence Post (2) B. Horizons Gate Panel (2) C. FDS Steel Post S ffener (2) D. FDS Gate Hinge (4) E. Horizons Gate Latch F. Horizons Gate Striker G. FDS Gate Handle (2) H. FDS Drop Rod B2 B1 A H BACK SIDE OF B2 Trex is a federally registered trademark of Trex Company, Inc. Horizons HORIZONTAL FENCE SYSTEM is a patent pending trademark of FDS Distributors, Inc. 19
20 (Double Gate) Step 1: Set the Gate Posts A. Slide the Steel Post S ffeners* into the posts. The open side of the steel s ffener should be placed so it faces away from the gate opening. B. Set posts into post holes**. The holes should be 30 deep by 12 wide***. Plumb and level posts so they are parallel with each other and fill hole with concrete mix. C. The opening (measuring from the inside face of one post to inside face of the other post) for 2 standard size Trex Horizons Gate panels should be 91 1/2 wide. (****The opening for a double gate using Large Trex Gate panels is 130 1/2 wide) Custom heights and widths are possible. *Note: If the Hinge Post is not connected to a fence panel or if a large gate panel is used it may be necessary to use a Heavy **Note: Due to concrete cure -3 days before gate is installed. ** ***Note: Consult local condi ons and codes for actual depth. 20
21 (Double Gate) Step 2: Install the Gate Panel A. Using a 3/8 6 1/2 self-tapping screws. Pre-drilling with a 3/16 B. Place the gate panels in the opening. Adjust the gates so the top rails line up with each other and with the top rail of the fence. C. Using the supplied 1 1/2 self- Pre-drilling with a 3/16 easier. D. hinge bracket to the hinge post. A B C x4 D x2 21

22 (Double Gate) Step 3: A ach Latch and Handles A. - only one panel is in use) approximately 36 from the ground (or to desired height) using the supplied 1 1/2 self-drilling screws. The latch should be oriented so the catch is on the gate-swing side of the post. The catch will face up or down depend- B. Using the supplied 1 1/2 selfthe gate panel, lining the striker rod up with the catch on the post latch. Gate swing Catch A C. panel upright, using the supplied 1 self-drilling screws. Handles should 3/4 in from the edge of the gate panel. The handle height must be staggered to avoid hi ng each other. Catch Gate swing (Double Gate) Step 4: Make any Final Adjustments B x4 C A. 11/16 wrench. B. C. Note: Due to weather and temperature changes, periodic hinge adjustment may be necessary to ensure proper latch connec on. 22
23 (Double Gate) Step 5: Mount the Drop Rod A. - Reverse the drop rod brackets depending on which side of the gate the drop rod is to be mounted. B. 3 from the 2 self-drilling screws on the inside edge of the gate panel upright and (1) 1 self-drilling screw on the face of the 14 from C. 24 el and 2 to the center of the screw holes from the edge of the gate panel. A. D. where the drop hits. If the gate is over a concrete pad, drill an 8 deep hole using a 3/4 masonry bit for the drop rod to slide into when the gate is closed. For gates over soil, dig a hole 8 wide x 18 deep below the rod, fill it with concrete, and insert an 8 long 3/4 pvc pipe in the concrete for the concrete has cured. B. 2 C

24 Care And Maintenance Clean fence to remove dirt and debris. Soap, hot water and a so brush are all that needed Water Spots, Leaf Staining and Wood Tannins Scuffs & Abrasions Rust Stains, Ground-In Dirt and Grime and Pigment Staining Oil and grease Stains Mold & Mildew Pressure Washer Sanding Disposal Trex Company does not recommend sanding. Sanding will change the appearance of the surface of Trex Material and will void the warranty. Do not burn Trex products. Trex is a federally registered trademark of Trex Company, Inc. Horizons HORIZONTAL FENCE SYSTEM is a patent pending trademark of FDS Distributors, Inc. Contact us YourNextFence.com Sales@YourNextFence.com 15
Installa on Guide: Fence Distributors. YourNextFence.com
 YourNextFence.com Plan Your Fence each line by dividing the length of each line in inches by 96. Round any remainder up. 2 Calculate Materials * For standard single gates (46 1/4 opening) : (1) small Trex
Installation Guide: Fence
 N Installation Guide: Fence Visit trexfencing.com Trex Horizons Fencing www.trexfencing.com PLESE RE REFULLY Trex Horizons Fence olors Saddle Woodland rown Winchester Grey* *When it is new, Winchester
SEMI-PRIVACY PANEL AND GATE INSTALLATION INSTRUCTIONS
 SEMI-PRIVACY PANEL AND GATE INSTALLATION INSTRUCTIONS 1 BEFORE YOU START, IT S IMPORTANT TO CHECK: That fence or the fence post footings do not exceed your lot lines of your property. If you can locate
CertainTeed INSTALLATION GUIDE SIMTEK FENCE PRODUCTS. Fence Installation Guide 3', 4' & 6' High
 CertainTeed INSTALLATION GUIDE SIMTEK FENCE PRODUCTS Fence Installation Guide 3', 4' & 6' High INSTALLATION GUIDE These instructions are designed to assist both professional installers and do-it-yourselfers
UNIVERSAL PANEL AND GATE
 PVC Fencing / Residential Style UNIVERSAL PANEL AND GATE INSTALLATION INSTRUCTIONS Fencing Without Boundaries TM 1 BEFORE YOU START, IT S IMPORTANT TO CHECK......That fence footings do not exceed legally
FENCE INSTALLATION GUIDE 8 HIGH WALLS
 FENCE INSTALLATION GUIDE 8 HIGH WALLS 1.866.648.9336 www.simtekfence.com INSTALLATION GUIDE These instructions are designed to assist both professional installers and do-it-yourselfers of SimTek decorative
OPEN PICKET PANEL AND GATE INSTALLATION INSTRUCTIONS
 For All Your Vinyl Fencing Needs OPEN PICKET PANEL AND GATE INSTALLATION INSTRUCTIONS 1 BEFORE YOU START, IT S IMPORTANT TO CHECK: That fence or the fence post footings do not exceed your lot lines of
Ranch Rail Vinyl Fence
 Ranch Rail Vinyl Fence INSTALLATION INSTRUCTIONS These instructions are to be used as general guidelines for the installation of your vinyl fence under normal installation conditions. Local conditions
SECTION 19: Endwood Fusion Welded Gate Installation Guide
 SECTION 19: Endwood Fusion Welded Gate Installation Guide ASSEMBLY AND INSTALLATION FOR: Fusion Welded Gates Gate Frame with Full Size Pickets Privacy & Board on Board California & Shadowbox Gate width
Installation Instructions. Tools Needed. Tape measure. Level. Shovel or Post hole digger. Concrete. Drill. Stakes. Mallet or hammer.
 Installation Guide EcoStone Fence 1330 West 400 North Orem, UT 84057 Toll Free 1.866.648.9336 Tel. 1.801.655.5236 Fax 1.801.655.5240 www.ecostonefence.com Installation Instructions Introduction. These
ALUMINUM FENCE. Additional freight charges may apply depending on order size. Please call for quote at
 ALUMINUM FENCE Additional freight charges may apply depending on order size. Please call for quote at 1-888-662-1788 Powder Coat Finish FORGERIGHT Fences are offered in the choice of three colors: Black,
FENCE INSTALLATION GUIDE 6 HIGH FENCE
 FENCE INSTALLATION GUIDE 6 HIGH FENCE 1.866.648.9336 www.simtekfence.com INSTALLATION GUIDE These instructions are designed to assist both professional installers and do-it-yourselfers of SimTek decorative
TRADITIONAL & SCALLOP PICKET INSTALLATION INSTRUCTIONS
 TRADITIONAL & SCALLOP PICKET 1 WHAT YOU LL NEED TO INSTALL POWER AUGER OR POST HOLE DIGGER(CLAMSHELLS) SHOVEL DIGGING BAR (OPTIONAL) BRIGHT COLORED SPRAY PAINT STRING LINE STAKES AND LEVEL CORDLESS OR
PRIVACY FENCE WITH LATTICE INSTALLATION INSTRUCTIONS
 PRIVACY FENCE WITH LATTICE INSTALLATION INSTRUCTIONS These instructions are to be used as general guidelines for the installation of your vinyl fence under normal installation conditions. Local conditions
PRIVACY FENCE WITH SCALLOPED PICKET INSTALL INSTRUCTIONS
 PRIVACY FENCE WITH SCALLOPED PICKET INSTALL INSTRUCTIONS These instructions are to be used as general guidelines for the installation of your vinyl fence under normal installation conditions. Local conditions
Installation Guide. Capped Cellular PVC Fencing. Table of Contents. Storage and Handling Tools Needed Fence Layout and Locating Posts
 Capped Cellular PVC Fencing Installation Guide Table of Contents Storage and Handling Tools Needed Fence Layout and Locating Posts Installation instructions 4 x 4 Over Sleeve Post - 3.5 Rail Privacy Shadowbox
6a. Eight Steps to Chain-Link Fence Installation
 6a. Eight Steps to Chain-Link Fence Installation Before You Start You will need the following tools to install your chain-link fence: Post hole digger Wheelbarrow, shovel and hoe for mixing concrete Tape
RANCH RAIL FENCE INSTALLATION INSTRUCTIONS
 1 WHAT YOU LL NEED TO INSTALL POWER AUGER OR POST HOLE DIGGER(CLAMSHELLS) SHOVEL DIGGING BAR (OPTIONAL) BRIGHT COLORED SPRAY PAINT STRING LINE STAKES AND LEVEL CORDLESS OR POWER DRILL WITH DRILL AND SCREW
Installation Guide. Step-by-Step Guide
 Installation Guide Step-by-Step Guide Thank you for choosing one of our quality products. We are the industry leaders in designer panel fencing. This product will provide you with years of trouble free
Residential Fencing Picket. Installation Guide
 Residential Fencing Picket. Installation Guide Jabiru Picket Fence White Contents Getting Started 4 Installation Tips 4 Shortening a Panel Tools Required 5 Instructions 6 3 Getting Started Congratulations
Good Neighbour INSTALLATION GUIDE GOOD NEIGHBOUR FENCING BEFORE YOU START TOOLS AND HARDWARE REQUIRED
 INSTALLATION GUIDE Good Neighbour GOOD NEIGHBOUR FENCING Stratco Good Neighbour fencing is both strong and attractive. Its design allows clean and uncluttered lines to be enjoyed by neighbours on both
Qwik-Fence Installation Instructions
 Qwik-Fence Installation Instructions 1 Tools Required The following installation instructions should be used as a guide for installing Folding Guard Qwik-Fence Partitions. Good common sense and appropriate
GOOD NEIGHBOUR FENCING INSTALLATION GUIDE GOOD NEIGHBOUR FENCING BEFORE YOU START TOOLS AND HARDWARE REQUIRED
 GOOD NEIGHBOUR FENCING Stratco Good Neighbour fencing is both strong and attractive. Its design allows clean and uncluttered lines to be enjoyed by neighbours on both sides of the fence. Good Neighbour
FENCE INSTALLATION GUIDE 3, 4, & 6 HIGH FENCE
 FENCE INSTALLATION GUIDE 3, 4, & 6 HIGH FENCE 1.866.648.9336 www.simtekfence.com INSTALLATION GUIDE These instructions are designed to assist both professional installers and do-it-yourselfers of SimTek
PRIVACY INSTALLATION FOR: Standard 6 H x 8 W Privacy Fence 4 x 4 Post Sleeve & Brackets Dog Ear or Straight-Edge Pickets 1.75 x 3.
 PRIVACY INSTALLATION FOR: Standard 6 H x 8 W Privacy Fence 4 x 4 Post Sleeve & Brackets Dog Ear or Straight-Edge Pickets 1.75 x 3.5 Rail Storage and Handling Fence Preparation and Layout Locate and Set
SHADOWBOX INSTALLATION FOR: Standard 6 H x 8 W Shadowbox Fence 5 x 5 Routed Posts Dog Ear or Straight-Edge Pickets 1.75 x 3.5 Rail
 SHADOWBOX INSTALLATION FOR: Standard 6 H x 8 W Shadowbox Fence 5 x 5 Routed Posts Dog Ear or Straight-Edge Pickets 1.75 x 3.5 Rail Storage and Handling Fence Preparation and Layout Locate and Set Posts
Installation Fence Guide Kodiak Iron. Exceptional Fencing Extraodinary Customer Service
 Installation Fence Guide Kodiak Iron Exceptional Fencing Extraodinary Customer Service Kodiak Fence System Installation Guide Thank you for the purchasing the Kodiak Fence System. Fence installation is
ASPEN STYLE. ORNAMENTAL GATE INSTALLATION GUIDE 3 Rails, Pressed Top/Flat Bottom Model No. EGBR5842-N2P
 1 ASPEN STYLE ORNAMENTAL GATE INSTALLATION GUIDE 3 Rails, Pressed Top/Flat Bottom Model No. EGBR5842-N2P INSTALLATION VIDEO AVAILABLE AT: video01.xcelfence.com Item Description Gate installation and assembly
Flex Fence Instruction Manual
 The Safer Stronger Smarter Choice Flex Fence Instruction Manual Table of contents 2 3 4 4 5 5 6 7 8 10 10 11 11 12 13 13 15 18 18 19 20 22 Table of contents Supplies, tools and equipment Introduction Laying
INSTALLATION MANUAL. 2. Check with local utility companies for locations of underground cables or pipe lines.
 INSTALLATION MANUAL Install our maintenance free fencing system yourself! About 90% of our residential clientele install our fencing systems themselves. Why hire and pay someone to install it when you
Decorative Driveway Gate Installation Manual
 Decorative Driveway Gate Installation Manual Installation Instructions for All Single and Dual Gate Kits IMPORTANT: Before digging the holes for your installation, be sure to contact the appropriate utility
The following instructions will guide you through the installation of your new vinyl railing stair kit.
 Installation Guide Vinyl Standard Stair Railing Tools Required Protective eye glasses Tape measure Variable speed drill/screwdriver Rotary hammer or hammer drill and masonry percussion bit recommended
INSTALLATION MANUAL. 2. Check with local utility companies for locations of underground cables or pipe lines.
 INSTALLATION MANUAL Install our maintenance free fencing system yourself! About 90% of our residential clientele install our fencing systems themselves. Why hire and pay someone to install it when you
TREX fencing. form + function = fabulous trex fencing Trex Seclusions and Trex Surroundings
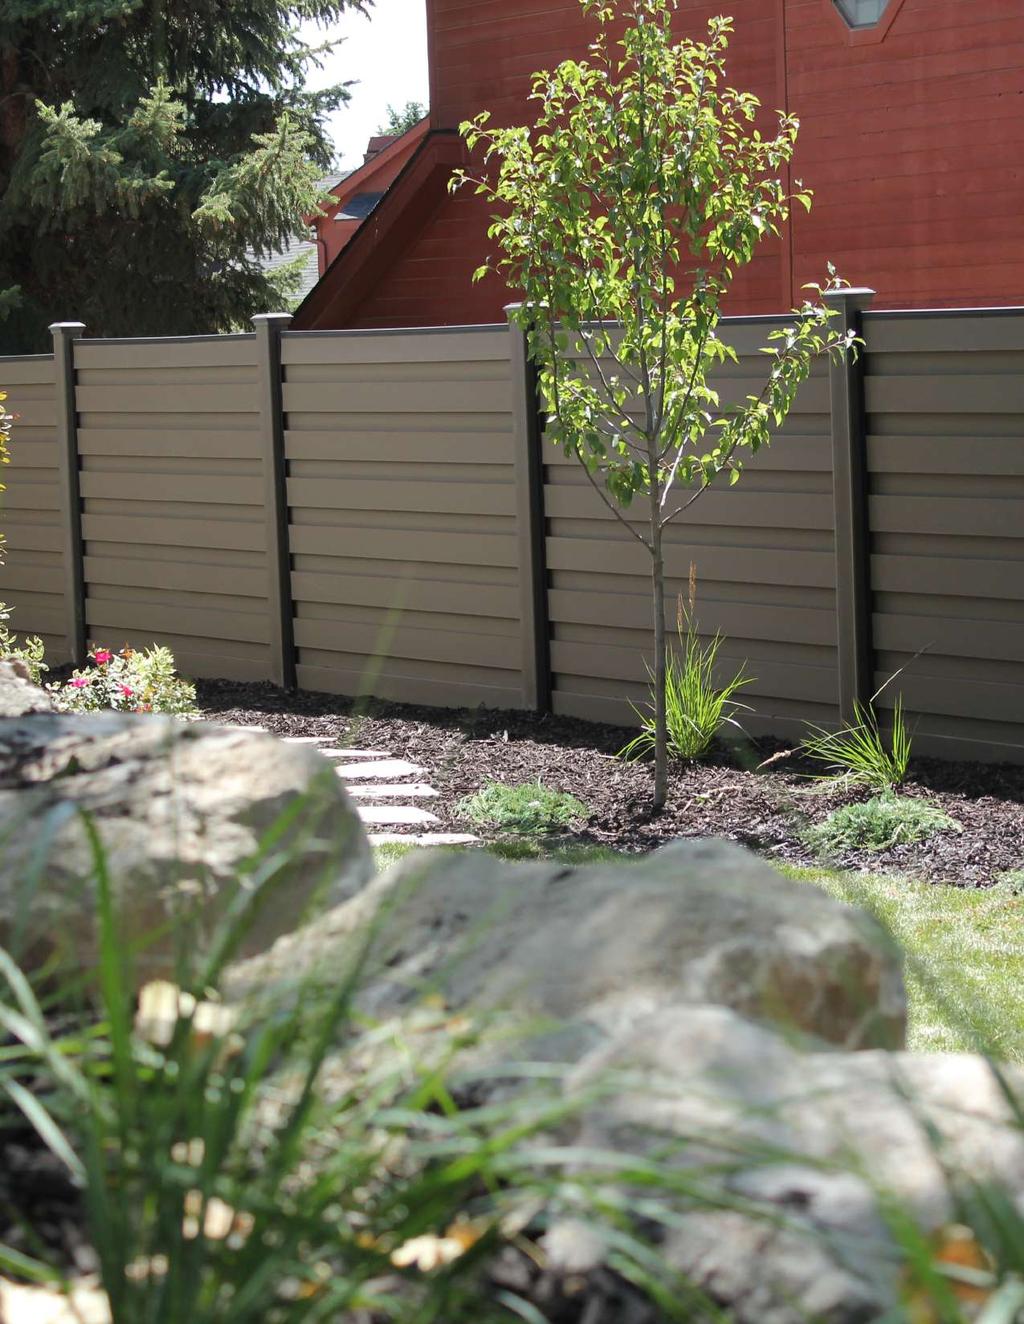
 TREX fencing form + function = fabulous trex fencing Trex Seclusions and Trex Surroundings A Trex fence. How neighborly. Whether the goal is privacy, safety or a stunning garden backdrop, a Trex fence
Dura-Lock Roof System
 DLR-14 Dura-Lock Roof System Assembly and Installation Instructions Read the instructions before starting the job. They explain the steps required to produce a finished product that will meet factory specifications.
IMPORTANT: CHECK THE INSIDE OF THE LARGER PIECES IN YOUR BOX FOR OTHER MATERIALS PACKED INSIDE.
 ASSEMBLY GUIDE Newport Vinyl Picket Fence with Post and No-Dig Steel Pipe Anchor Kit (6 H x 7 W) 68 / in /6 in 6 in / in 7/8 in 8 / in 6 in in Ground 4 in This fence can easily be trimmed down horizontally
T r e x Art i s a n Se r i e s Railing
 T r e x Art i s a n Se r i e s Railing I n s t a l l a t i o n In s t ru c t i o n s Trex Railing Components A. Trex Top Rail B. Trex Bottom Rail C. Trex Railing Support Bracket D. TrexExpress Railing
Vinyl Fence and Railing
 Vinyl Fence and Railing WHY PRO ELITE & PRO GUARD VINYL? Virtually maintenance free Weather resistant Safe, strong, durable, and ideal for all climates No painting, sanding, or maintenance required Easy
ASPEN STYLE. ORNAMENTAL FENCE INSTALLATION GUIDE 3 Rails, Pressed Top/Flat Bottom Model No. NBR7958-NPF
 1 ASPEN STYLE ORNAMENTAL FENCE INSTALLATION GUIDE 3 Rails, Pressed Top/Flat Bottom Model No. NBR7958-NPF INSTALLATION VIDEO AVAILABLE AT: video01.xcelfence.com Item Description Fence installation and assembly
Vinyl Fence Installation Instructions. Privacy Fence Installation Instructions
 Privacy Fence Installation Instructions Tips Before You Start - Read this instruction sheet completely. - During fence assembly, work on a soft, non-abrasive surfaces where possible to avoid - scratching
Manchester Vinyl Picket Gate with Posts (42 Wide x 42 Tall)
") ASSEMBLY INSTRUCTIONS Manchester Vinyl Picket Gate with Posts (4 Wide x 4 Tall) /4 in / in 4 in 6 in 45 /8 in 4 in 8 in 4 / in Gate Opening in Ground 49 / in Outside Posts This Gate is designed to be integrated
ASSEMBLY INSTRUCTIONS Manchester Vinyl Picket Gate with Posts (4 Wide x 4 Tall) /4 in / in 4 in 6 in 45 /8 in 4 in 8 in 4 / in Gate Opening in Ground 49 / in Outside Posts This Gate is designed to be integrated
INSTALLATION INSTRUCTIONS
 INSTALLATION INSTRUCTIONS GLI POOL PRODUCTS / 1100 PERFORMANCE PLACE / YOUNGSTOWN, OH 44502 PH. 800-448-2343 FAX 330-744-1228 www.glipoolproducts.com WARNING THERE IS NO SUBSTITUTE FOR COMPETENT ADULT
Aluminum Pre-Built Fence For Standard & Heavy-Duty Series
 ALUMFENCEA-BOM Aluminum Pre-Built Fence For Standard & Heavy-Duty Series INSTALLATION INSTRUCTIONS Read all instructions prior to installing product. Refer to manufacturers safety instructions when operating
PRO-RIB FENCE PANELS INSTALLATION GUIDELINES. Virtually Maintenance Free Available in 24 Colors Custom Heights Available by the Inch
 PRO-RIB FENCE PANELS INSTALLATION GUIDELINES Virtually Maintenance Free Available in 24 Colors Custom Heights Available by the Inch www.midwestmanufacturing.com Page 2 TOOLS NEEDED Measuring Tape Drill
Installation Instructions for. Before You Begin TOOLS REQUIRED
 Composite Railing System STEP-BY-STEP Installation Instructions for Spectrum Composite Railing Virtually maintenance free 20-year warranty EverNew Spectrum Railing system is designed to work with a number
1. Layout. Step 1. Step 2. Step 3. Fig. 1
 1-3/8 Panel Clamp Tools You Will Need: Tape Measure, Mason s String, Stakes, Hole Digger, Shovel, Level, Wheelbarrow, Wrenches or Adjustable Wrench, Hacksaw, Pliers, Cutting Pliers, Fence Stretcher and
6 1/2 x 6 1/2 Flat Top Pergola
 6 / x 6 / Flat Top Pergola A S S E M B L Y G U I D E Models: Portland, Liberty O P T I O N A L A C C E S S O R Y Bolt Down Bracket Kit V.-0506 Ta b l e o f Co n t e n t s PAGE The Introduction & Overview......................................................
FENCING ASSEMBLY INSTRUCTIONS
 1 SET POSTS Determine the post locations, 93" or 117" centers. Post spacing is flexible and can be decreased for terrain, etc. All posts should be set in concrete appropriate to local conditions.* POST
FENCES AND GATES
 FENCES & GATES 32 31 00 Natures Composites NATURES COMPOS TES fence. deck. landscape. TM Natures Composites 1302 Industrial Park Ave. Torrington, WY 82240 Tel: 307-532-9942 Fax: 307-532-9943 Email: jw@naturescomposites.com
10 x 10 Flat Top Two Tone Pergola
 0 x 0 Flat Top Two Tone Pergola Models: Bordeaux ASSEMBLY GUIDE OPTIONAL ACCESSORIES Arch Kit System ( Arches) Privacy Fence Panel System ( Panels & Middle Post) Bolt Down Bracket Kit ( for Pergola) Ver.0-00
Post & Rail Crossbuck
 Post & Rail Crossbuck 1. Getting Started 6. Crossbuck Be sure to call underground prior to digging Assemble gates (if necessary) and decide where they will be located Stake out the fence line Space and
Fence System Components
 Fence System Components Line Post Interior Flat Exterior Flat Gothic Caps Section Top Rail Picket Exterior Ball New England Bottom Rail Corner Post End/Gate Post Gate 3/4" ON EACH SIDE ADJUSTABLE NYLON
PORCH RAIL INSTALLATION INSTRUCTIONS. Level Rail... 2 Stair Rail... 8 Care & Maintenance, Finishing... 15
 PORCH RAIL INSTALLATION INSTRUCTIONS Level Rail... 2 Stair Rail... 8 Care & Maintenance, Finishing... 15 COMPONENT LIST LEVEL RAIL KIT Porch Rail was designed to meet the most stringent building codes.
INSTALLATION INSTRUCTIONS
 INSTALLATION INSTRUCTIONS TOOLS REQUIRED Rechargeable, variable speed drill 3/8 diameter drill bit 3 Robertson bits #0, #1 and #2 Slot screwdriver Non marring hammer with 1 head Level Caulk or sealant
PVC Fencing Install Instructions
 PVC Fencing Install Instructions Step 1-Pounding the Galvanized Steel Posts Call your local area utility company to come mark underground lines before any digging or pounding any posts into the ground.
INSTALLATION MANUAL BRACKET MOUNT FOR DOG-EAR PICKETS & SQUARE TOP PICKETS
 STYLE BOARD ON BOARD (Privacy) SHADOWBOX (Semi-Private) TRADITIONAL (Semi-Private) INSTALLATION MANUAL BRACKET MOUNT FOR DOG-EAR PICKETS & SQUARE TOP PICKETS Questions, problems, missing parts? Before
AFCO-Rail Post INSTALLATION INSTRUCTIONS AFCO-RAIL POST
 AFCO-Rail Post INSTALLATION INSTRUCTIONS TOOLS REQUIRED: Drill Bits (for the appropriate fastener) Drill (with adjustable clutch, recommended) Level String Line Tape Measure Tools to install fasteners
Step by Step Installation Instructions. Poly Shutters. Customer Service or visit us online at smithandnoble.com
 Step by Step Installation Instructions Poly Shutters Customer Service 800.248.8888 or visit us online at smithandnoble.com Thank you for purchasing from smith+noble. Your new window treatments have been
Downtown Rack. Custom logo option available
 Custom logo option available Downtown Rack The Downtown Rack uses thick, square-tube construction that can t be cut with a pipe cutter. The extended width of the Downtown Rack makes for easy bike parking
INSTALLATION MANUAL FACE MOUNT FOR DOG-EAR & SQUARE TOP PICKETS. STYLE BOARD ON BOARD (Privacy) SHADOWBOX (Semi-Private) TRADITIONAL (Semi-Private)
 SHADOWBOX (Semi-Private) TRADITIONAL (Semi-Private)") STYLE BOARD ON BOARD (Privacy) SHADOWBOX (Semi-Private) TRADITIONAL (Semi-Private) INSTALLATION MANUAL FACE MOUNT FOR DOG-EAR & SQUARE TOP PICKETS Questions, problems, missing parts? Before returning to
STYLE BOARD ON BOARD (Privacy) SHADOWBOX (Semi-Private) TRADITIONAL (Semi-Private) INSTALLATION MANUAL FACE MOUNT FOR DOG-EAR & SQUARE TOP PICKETS Questions, problems, missing parts? Before returning to
Swerve Rack CUSTOM RACKS AVAILABLE
 CUSTOM RACKS AVAILABLE Swerve Rack The design of the Swerve mirrors the bike frame, thus providing superior bike support while making it easy to secure both the bike frame and wheel with a standard u-lock.
Post & Rail. Includes: Crossbuck, 2-Rail, 3-Rail and 4-Rail POST SUPPORT OPTIONS
 Post & Rail Includes: Crossbuck, 2-Rail, 3-Rail and 4-Rail STAGGER RAIL ENDS FOR GREATER STRENGTH ALLOW 1-1/2" GAP ON HINGE SIDE OF GATE AND 1-1/4" ON LATCH SIDE OF GATE HARDWARE DIG HOLES 30" MINIMUM
6 1/2 x 6 1/2 Wood Grain Flat Top Pergola
 6 / x 6 / Wood Grain Flat Top Pergola A S S E M B LY G U I D E Models: Lakewood OPTIONAL ACCESSORY Bolt Down Bracket Kit Ver /AUG/0 Ta b l e o f Co n t e n t s PAGE The 6.5 x 6.5 Wo o d Grain Flat Top
10x10 Trellis Pergola
 0x0 Trellis Pergola ASSEMBLY GUIDE Ver.0-7 Table of Contents PAGE Introduction & Overview...................................................... Pergola Materials Overview..............................................................
8 x 8 Flat Top Pergola
 A S S E M B L Y G U I D E O P T I O N A L A C C E S S O R Y Bolt Down Bracket Kit Models: Mirage, Mandalay Ver 6/00 Ta b l e o f Co n t e n t s Introduction & Overview......................................................
H O O P RAC K. Simple Security
 H O O P RAC K Simple Security The Hoop Rack is a proven design that provides high security and easy bike parking. The Hoop Rack uses thick pipe construction and the full radius of the bend makes the Hoop
Installation Instructions for Bifold Doors (JII103)
") Thank you for selecting JELD-WEN products. Attached are JELD-WEN s recommended installation instructions for premium composite, hollow and solid core molded Bifold Doors. Bifolds are designed for fast
Thank you for selecting JELD-WEN products. Attached are JELD-WEN s recommended installation instructions for premium composite, hollow and solid core molded Bifold Doors. Bifolds are designed for fast
6 1/2 x 6 1/2 Wood Grain Flat Top Pergola
 / x / Wood Grain Flat Top Pergola A S S E M B LY G U I D E Models: Lakewood OPTIONAL ACCESSORY Bolt Down Bracket Kit V.-09 Ta b l e o f Co n t e n t s The PAGE Introduction & Overview.......................................................
Balustrade Systems / Installation Instructions
 A. PARTS AND SUPPLIES NEEDED FOR INSTALLATION Hardware included for each 10 section of rail: 2 3 x 1-1/2 L-brackets 4 1-3/4 x 3/16 Blue hex-head screws for anchoring the L-brackets to the newel cap, column
10 x 10 Arch Top Pergola
 0 x 0 Arch Top Pergola I N S T A L L A T I O N G U I D E O P T I O N A L A C C E S S O R I E S Privacy Fence Panel System ( Panels & Middle Post Included) Bolt Down Bracket Kit (Set of ) Additional Shade
Fold-A-Way Patio Door ASSEMBLY & INSTALLATION GUIDE
 Fold-A-Way Patio Door ASSEMBLY & INSTALLATION GUIDE This instruction guide provides the minimum recommended procedures to correctly prepare the rough opening, install a fold-a-way patio door unit and apply
Cedar fence. Construction plan. fence with shutters of which you. can decide the angle, allowing to create the required amount of privacy.
 4" STEP BY STEP Guide Construction plan Cedar fence A fence with shutters of which you can decide the angle, allowing to create the required amount of privacy. 4" X 4" 76 1 /2" Diffi culty level: 1 2 3
A Quick Reference Guide to Planning an Installation
 PAGE 1 A Quick Reference Guide to Planning an Installation Plan and Measure Your Aluminum Fence Layout Before installing your fence, draw a plan to scale on a piece of graph paper as shown in the example.
INSTALLATION MANUAL BRACKET MOUNT FOR DOG-EAR PICKETS & SQUARE TOP PICKETS
 STYLE BOARD ON BOARD (Privacy) SHADOWBOX (Semi-Private) TRADITIONAL (Semi-Private) INSTALLATION MANUAL BRACKET MOUNT FOR DOG-EAR PICKETS & SQUARE TOP PICKETS Questions, problems, missing parts? Before
10 x 10 Flat Top Pergola
 0 x 0 Flat Top Pergola A S S E M B L Y G U I D E Models: Venetian, Tuscany, Luxor, Acadia O P T I O N A L A C C E S S O R I E S Arch Kit System ( Arches) Privacy Fence Panel System ( Panels & Middle Post)
INSTALLATION INSTRUCTIONS CHAIN-LINK FENCE AND GATE
 INSTALLATION INSTRUCTIONS CHAIN-LINK FENCE AND GATE 1 BEFORE YOU START, IT S IMPORTANT TO CHECK......That fence footings do not exceed legally established property lines. If uncertain, refer to real estate
COMPOSITE RAILING INSTALLATION
 COMPOSITE RAILING INSTALLATION Tools All you ll need is a hammer and screw gun, circular saw (carbidetipped blade with fewer than 20 teeth is recommended), level, tape measure, rasp and blue chalk line.
PREPARATION & TOOL CHECK LIST
 INSTRUCTION MANUAL RAILING PRODUCTS BEGIN TO AGE AS SOON AS THEY ARE EXPOSED TO NATURE. BUILDINGS EXPERIENCE AGING FACTORS DIFFERENTLY, SO IT IS DIFFICULT TO PREDICT HOW LONG RAILING PRODUCTS WILL LAST.
NON-ELECTRIC DOG FENCES
 NON-ELECTRIC DOG FENCES Thank you! Thank you for ordering your non-electric dog fence kit from Pet Playgrounds. In less than a day you will have your very own personal dog park installed on your property.
The Nantucket Legacy Arbor
 SSEMLY INSTRUTIONS The Nantucket Legacy rbor Please read through before starting assembly. IMPORTNT: HEK THE INSIDE OF YOUR POSTS FOR LL MTERILS. heck ox for These ontents In. the Keystone event of missing
Nervous Nelly Vinyl Gate REALLY. Important stuff to know about installing your WamBam gate
 Nervous Nelly Vinyl Gate RELLY Important stuff to know about installing your WamBam gate. 1-877-778-5733 www.wambamfence.com CLEVER JOE Your Installation Buddy 02.2017 Reality Check 1 - Read Over Fence
12ft X 12ft Attached Breeze Pergola Assembly Manual. Outdoor Living Today. (For Both 9 and 12 High Posts) June 1st/2012 Version #4
 June 1st/2012 Version #4") 12ft X 12ft Attached Breeze Pergola Assembly Manual (For Both 9 and 12 High Posts) Outdoor Living Today June 1st/2012 Version #4 Note: Installation of Wall Side Girders (P) and Wall Mount Brackets (M)
12ft X 12ft Attached Breeze Pergola Assembly Manual (For Both 9 and 12 High Posts) Outdoor Living Today June 1st/2012 Version #4 Note: Installation of Wall Side Girders (P) and Wall Mount Brackets (M)
10x10 Trellis Pergola
 0x0 Trellis Pergola ASSEMBLY GUIDE Ver.-007 Table of Contents PAGE 0x0 Trellis Pergola Introduction & Overview...................................................... Pergola Materials Overview..............................................................
6 1/2 x 6 1/2 Wood Grain Flat Top Pergola
 / x / Wood Grain Flat Top Pergola A S S E M B LY G U I D E Models: Lakewood OPTIONAL ACCESSORY Bolt Down Bracket Kit V.- Ta b l e o f Co n t e n t s The PAGE Introduction & Overview.......................................................
Installation. *HDWC-INSTR-006* HDWC-INSTR-006 Rev. K; ECN G 2018 Bradley Page 1 of 24 3/22/2018
 Installation Phenolic Restroom Partitions Floor-raced Series 500 For Standard Height Doors and Panels Only Table of Contents Pre-Installation Information... 2-3 Layout Dimensions for rackets...4 Mounting
installation care & maintenance instructions lifecycledecking.com 25-year limited residential warranty 20-year limited commercial warranty
 installation care & maintenance instructions lifecycledecking.com 25-year limited residential warranty 20-year limited commercial warranty Installation Instructions As with any building project, use proper
CXT PRO RAILING INSTALLATION INSTRUCTIONS For Installations Using Aluminum and Glass Balusters Sold Separately
 CXT PRO RAILING INSTALLATION INSTRUCTIONS For Installations Using Aluminum and Glass Balusters Sold Separately CCRR-0171 PFS AA-652 Drill/power screwdriver Assorted drill bits Hammer Miter or circular
BioPrism Solid Surface
 Please read all instructions before installing products. These instructions are intended for use with InPro s standard toilet partitions, which include 58 high doors and wall panels, when deviating from
HOOP RACK HEAVY DUTY Setbacks WALL 36" WALL 42" 36" STREET 59" STREET Dero
 Setbacks WALL 36" WALL 42" STREET 36" 59" STREET Installation Instructions Tape Measure Marker or Pencil Masonry Drill Bit Drill (Hammer drill recommended) Hammer Wrench 9/16 Level RECOMMENDED BASE MATERIAL
HOW TO INSTALL ELITE PANELED WAINSCOTING Using X-Rails with Either Raised, Flat or Beaded Panels
 HOW TO INSTALL ELITE PANELED WAINSCOTING Using X-Rails with Either Raised, Flat or Beaded Panels 1. First, remove the cover plates from all electrical outlets. All baseboards should also be removed; the
Shetland Stalls Installation Instructions
 Shetland Stalls Installation Instructions RAMM Horse Fencing and Stalls 13150 Airport Hwy. Swanton, OH 43558-9615 1-800-434-8456 Rev. 1/9/18 Before you start Kit can accommodate up to 12 wide stall front
UNIDOOR X (STYLE L1)
") UNIDOOR X (STYLE L) SHOWER DOOR & GLASS PANEL INSTALLATION INSTRUCTIONS IMPORTANT DreamLine reserves the right to alter, modify or redesign products at any time without prior notice. For the latest up-to-date
UNIDOOR X (STYLE L) SHOWER DOOR & GLASS PANEL INSTALLATION INSTRUCTIONS IMPORTANT DreamLine reserves the right to alter, modify or redesign products at any time without prior notice. For the latest up-to-date
Aluminum Railing Gate Kit
 BOM-34115787 Aluminum Railing Gate Kit INSTALLATION INSTRUCTIONS Read all instructions prior to installing product. Refer to manufacturers safety instructions when operating any tools. To register your
Steady Freddy Vinyl Gate REALLY. Important stuff to know about installing your WamBam gate
 Steady Freddy Vinyl Gate RELLY Important stuff to know about installing your Wamam gate. 1-877-778-5733 www.wambamfence.com CLEVER JOE Your Installation uddy This Gate is lso Designed to Fit the ig en
Vinyl Fence Products. Installation Guidelines. Hyde Park with H-Post Fence
 Vinyl Fence Products Installation Guidelines Hyde Park with H-Post Fence Hyde Park with H-Post Privacy Fence 1. Getting Started Be sure to call underground prior to digging Assemble gates (if necessary)
8 x 8 Flat Top Pergola
 A S S E M B L Y G U I D E O P T I O N A L A C C E S S O R Y Bolt Down Bracket Kit Models: Mirage, Mandalay Ver 8.0/MAR 0 Ta b l e o f Co n t e n t s PAGE Introduction & Overview......................................................
Plain Jane Vinyl Gate REALLY. Important stuff to know about installing your WamBam gate
 Plain Jane Vinyl Gate RELLY Important stuff to know about installing your WamBam gate. 1-877-778-5733 www.wambamfence.com CLEVER JOE Your Installation Buddy 02.2017 Reality Check 1 - Read Over Fence Instructions
Sawn Baluster Sizing and Installation Guide
 Sawn Baluster Sizing and Installation Guide Welcome to the Durabrac sizing and installation guide for Sawn Balusters. This guide has been prepared to answer any questions you may have about our Sawn Balusters
12 x 12 Flat Top Pergola
 x Flat Top Pergola Model: Regency, Roosevelt ASSEMBLY GUIDE OPTIONAL ACCESSORIES: Bolt Down Bracket Kit Canvas Weave Shade Kit Privacy Wall Pergola Planter ( for Pergola) (Regency Only) (Regency Only)
Two Panel Frameless Bypass Door
 INSTALLATION INSTRUCTIONS Two Frameless Bypass Door Series 00 Please Record Model Number From Carton Label Here Please read these instructions carefully to familiarize yourself with the required tools,