SpeedZip. Fixing and Handling Guide
|
|
|
- Rhoda Dixon
- 5 years ago
- Views:
Transcription
1
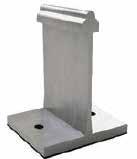
2 Section 1 Delivery/Storing On Site/Handling l SpeedZip is factory or on-site manufactured. l Straight SpeedZip bundles are a maximum 1 tonne, 2 No. sheets nestled and then and placed face to face, banded with steel bands around timber frames where appropriate. l Curved SpeedZip is bundled with all sheets the same way up, on trestles and the correct way up for hoisting direct to the roof. l Packs may be separated by wood fibre dunnage load separators. l Packing sheets are marked as packing sheets. l Some paint finishes have protective strippable film. l If storing sheets for any length of time, keep clear of the ground and stack sheets to slight fall to shed rainwater. l Cover with waterproof sheeting and support at 2m intervals. If water has accumulated on the sheets, ensure it is removed before hoisting. l Note: Stucco aluminium will discolour (oxidise) if exposed to strong alkalis i.e. cement, mortar, lime etc, or if left exposed in the pack for long. 1

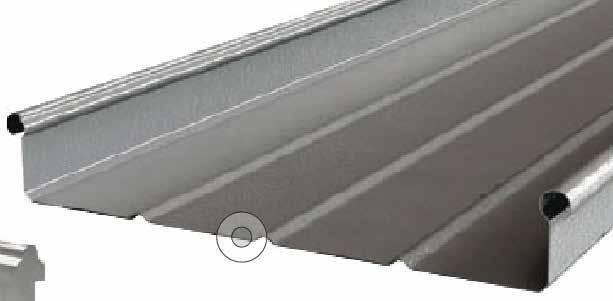
3 l Ensure frame will carry any point loading applied. l Load roof over main supports. l Roof sheet bundles are 1 tonne max. WalkLiner 1020/32 packs are 1.5 tonne max. l Ensure that all the under ribs are facing in the direction of lay. This will prevent unnecessary handling and turning around on the roof. The direction of lay should always be into the prevailing wind where possible. Note: Capillary groove in top of rib 2

4 l Packs under 7.5m can be lifted with care using a site fork lift. l Packs 7.5m to 13.6m can be lifted using 2 No. web slings with the sling angle > 45, subject to the crane company s advice. l Lifting beams are available to hire for bundles over 13.6m long. l Beams are provided subject to costs and terms contained within the quote. l Where possible return the beams and slings with the delivery lorry. 3
5 Section 2 Installation 1. Establish a straight line at the verge, 90 degrees to the eaves line. 2. Install the first line of halter brackets to this line. Always use 2 No. stainless steel fixings provided per halter, but note that the gable hook is also secured with one of these screws. 3. Use the gauging template to set out SpeedZip halter brackets. Halter brackets have an integral EPDM pad under the base. Use the correct gauging template for the profile, check for creep in gauging. The gauging should be:- 408mm +1/-2mm. 4. Install the ridge support zed under the halter brackets at the ridge only. Isolate galvanised steel from aluminium with self adhesive tape. GGauging Template 4
6 5. Install the self adhesive eaves filler strip. 6. Install the first sheet, ensuring that the under rib clicks into the halters. 7. Use the hand tongs to squeeze the over rib for 300mm at each end of the sheet before mechanically zipping up the whole sheet. This must be done. Protect painted finishes from tongs by using cloth or similar. 5
7 8. Then zip up the over rib using the zipping tool. Use the dead man switch. 9. Install the fixed point fixing at the specified position. A sheet must have one and only one fixed point. Use 4.8x12m aluminium rivets or specified fixed point fixing. 10. Install the next sheet. Ensure that the over rib sits tight on the under rib and zip-up the seam. Always zip-up as you go, and use hand tongs for the first and last 300mm. Avoid walking on the SpeedZip sheets as much as possible. When working on a detail (e.g. ridge), work off secure boarding. Protect roof access positions. Only install as much insulation as can be covered in one SpeedZip installation session, keeping the insulation dry. Walk on ribs if possible to minimise risk of damage to pans. 11. To unzip a profile use the unzipping attachment at the front of the zipper. Note that once unzipped, the seam may not re-seam fully. In this instance, and where ever seaming is not sufficient, use omega cover strips. Omega cover strip 6
8 12. Omega cover strips - for use with rooflights or as (11) above, use an omega zipping tool plus omega tongs. 13. At ridge, turn up pan of sheet to vertical, install filler and ridge dam. Fix ridge dam to seam of SpeedZip using 4.8mm diameter rivets. Fix ridge to ridge dam at 200mm nominal centres. 14. At eaves, install angle strip under eaves. Secure with 2 No. aluminium rivets per pan. At pitches <10, form eaves turndown. Note: Isolate aluminium flashings from galvanised steel spacer. Ensure that insulation fills cavity, under slight compression 7
9 SpeedZip tool care The tools are provided under hire and included in the tool box are: l SpeedZip zipper l Deadman switch and lead l Hand tongs l Turn up / turn down tool The tools provided have been factory serviced, checked and set. It is the customers duty to keep the tools in good condition and to return them in good condition, in the tool box, promptly when no longer needed. Damage requiring repair will be charged for. Zipper The zipper tooling (the wheels under the machine) should be nylon for painted roof sheet and stainless steel for stucco aluminium. l Tooling should be regularly inspected and kept clean and burr free. l Remove any accumulated debris or nicks using emery cloth and white spirit, as appropriate. l The integrity of wiring should be visually checked. l Tools can be set by the two 19mm side bolts to give a sheet rib head diameter of about 20-22mm. l If tooling is changed over, use a 19mm socket plus extension, retaining all washers. Special tooling is available for zipping omega strips. Hand Tongs l Keep hand tongs clean. l Always use a cloth or other material in tongs to protect painted sheets. l Always use tongs to squeeze ribs at each end before setting the zipper over the rib. Turn up/ Turn down tool Keep clean and clear of debris. 8
10 Section 3 SpeedZip Checklist Checklist for liner/ spacer /insulation. Steel WalkLiner fixed using 5.5mm diameter screws plus 15mm diameter bonded washer at 4 No. per sheet width. 60mm min end lap, 8 No. screws per sheet at end laps, hips or valleys (WalkLiner is nonfragile Class B to ACR [M]001:2000) 2 No. Screws plus 15mm diameter washers per IsoBar bracket IsoBar brackets at 765mm centres (1020 max centres), sway brackets installed for brackets of 260mm and above Liner side laps sealed using SD Seal, end laps sealed using 6x5mm butyl bead Liner 50mm air-seal under-profile fillers, bedded in sealant, installed at eaves, ridge, hip valley, 2 No. screws per pan Liner sealed and stitched to all perimeters StramCheck sealed, 75mm laps, sealed at roof edges, perimeters, penetrations etc Insulation continuous/dry/no gaps, tucked under and around spacer (including at ridges/hips etc). Check that insulation fills cavity If rooflights are to be installed. Note need to align liner and SpeedZip ribs Rooflight liner 3.0kg/m² (3.6kg/m² if R<70). Fixed using 30mm sealed washers, 8 No. per sheet at end laps, 4 No. per sheet at intermediate support (non-fragile Class B to ACR [M]001:2000) Checklist for SpeedZip Halter gauge - correct gauging template being used, 408mm +1/-2mm 2 No. stainless steel hex head fixings per halter Profile clicked onto halter before zipping Eaves/ridge halter-to-sheet-end 125mm to 300mm Fixed point installed (4.8x12mm AL rivet) Hand tongs used to clamp 300mm each end of sheet Zip sheets as they are laid (including gable rib) Gable detail installed - channel fixed with 4.8x12mm rivets at 500mm centres/gable hook/gable tee Turn up at ridge Ridge closer dam fixed to rib using 4.8x12mm rivets, filler block installed Eaves-angle riveted to the underside of the sheet (min 2 No. 4.8x12mm rivets per pan) Eaves- turn down at eaves on slopes of 10 degrees or less in addition to eaves angle Eaves filler at eaves, zed support under ridge halters mm clear SpeedZip overhang at eaves 9

11 Section 4 Verge Detail 1. Halter Bracket plus 1mm pad, 2 No. stainless steel screws, fix with one screw until gable hook is installed. 2. Gable hook fixed with Halter bracket, hooks over aluminium channel (3). 3. Aluminium channel, rivet to rib at 500mm centres using 4.8x12mm aluminium pop rivets, self curves to 10m radius. Do not rivet to halter. Keep rivets 100mm or more away from halter. 4. Gable tee clips over gable channel. Use slotted gable tee if radius less than 70m. 5. Flashing riveted to gable tee at 450mm max centres with sealed rivets. N.B. Always use SpeedZip supplied accessories. 10
, clearance gap (5) in mm equals 1.8 times sheet length in metres. Break aluminium angle at changes in sheet length. 4.")
12 Section 5 Eaves Detail 1. Halter bracket, 2 No. stainless steel screws per bracket, mm from sheet end. 2. Square section filler block, self adhesive (alternative rib shaped filler available). 3. Aluminium angle riveted to underside of sheet. 2 No. rivets per pan, (4), clearance gap (5) in mm equals 1.8 times sheet length in metres. Break aluminium angle at changes in sheet length. 4. Turn down needed in addition to aluminium angle where roof slope at eaves is less than 10. N.B. Always use SpeedZip accessories, flashings and trims. 11

13 Section 6 Ridge Detail 1. Halter Bracket fixed with 2 No. stainless steel screws, mm from sheet end. 2. Fixed point, (at ridge or in position specified). Rivet through inner rib into halter bracket using 4.8 x12mm AL rivet. 3. Turn up of pan. 4. Ridge closer with ridge filler block within closer, rivet to ribs at each end using 4.8 x12mm aluminium pop rivet. 5. Ridge cap riveted to ridge closer using 2 No. rivets per ridge closer, 200mm centres (2 No. fixings per ridge dam). 6. Ridge support zed. N.B. Always use SpeedZip supplied accessories. 12
14 Omnis By System Unit 62, Blackpole Trading Estate West, Worcester WR3 8ZJ T: +44 (0) F: +44 (0) E: Omnis By System reserves the right to make substitutions and modifications to the specifications of any of its products without prior notice. It is the customer s responsibility to ensure that the Company s products are correctly installed and that they are suitable for the customer s particular requirements and application. The Company undertakes business only upon its standard terms and conditions. For project specific NBS based specifications, CAD Details, samples or technical assistance please contact our technical department on omnis@systembuildingproducts.com All information is correct as of the date of this document, created May 2015.
SpeedDeck. Fixing and Handling Guide
 SpeedDeck Section 1 Delivery/Storing On Site/Handling l SpeedDeck is factory or on-site manufactured. l Straight SpeedDeck bundles are a maximum 1 tonne, sheets nestled and banded with polypropylene or
Verge Flashing. Verge Flashing. Only use if flashings requirements can be site measured before ordering. Verge Clip
 Tolerance Detail (recommended) Verge Closure Verge Channel Verge Clip Verge Flashing VERGE CHANNEL RIVETTED TO EUROSEAM AT APPROX 400MM CENTRES USING 4.8 X 12MM RIVETS. NB: DO NOT RIVET AT HALTER POSITION
900 SERIES PANEL SHEET INDEX STAGGERED ENDLAP STAGGERED MALE LEG AT ENDLAP CONTINUOUS FEMALE ENDLAP INSTALLATION SEQUENCE CI-WR
 900 SERIES PANEL CI-DS-01-900 CI-PJ-01-900 CI-PJ-02-900 CI-EL-01-900 CI-EL-02-900 CI-EL-03-900 CI-EL-04-900 CI-EL-05-900 CI-EL-06-900 CI-EL-07-900 CI-EL-08-900 CI-RD-01-900 CI-RD-02-900 CI-RD-03-900 CI-EV-01-900
900 SERIES WALL PANELS
 CI-DS-01-900 CI-PP-01-900 CI-PJ-01-900 CI-PJ-02-900 CI-PJ-03-900 CI-BS-01-900 CI-BS-02-900 CI-BS-03-900 CI-BS-04-900 CI-BS-05-900 CI-OC-01-900 CI-OC-02-900 CI-IC-01-900 CI-FO-01-900 CI-FO-02-900 CI-FO-03-900
 SUPREME WALL GARDEN ASSEMBLY INSTRUCTIONS 24/08/16 www.hallsgreenhouses.com Please refer to website for the most up to date instructions. SAFETY WARNING 1. Always wear protective glasses, shoes, gloves
PINEHAVEN SHEDS Assembly Instructions FOR LEAN-TO SHEDS
 PINEHAVEN SHEDS Assembly Instructions FOR LEAN-TO SHEDS GARDEN PRODUCTS www.pinehavensheds.co.nz 5/16 hex drive bit, By asking about our products at your nearest DIY or gardening store www.pinehavensheds.co.nz
DUTCH GABLE FREESTANDING CARPORT
 DUTCH GABLE FREESTANDING CARPORT STRATCO OUTBACK ASSEMBLY INSTRUCTIONS. Your complete guide to building a FREESTANDING Outback DUTCH GABLE CARPORT BEFORE YOU START Carefully read these instructions. If
Everbright E610 polycarbonate light panels Installation guidance
 Everbright E610 polycarbonate light panels Installation guidance Mono-pitched applications: Eaves For pitched roofs above 0-degree fix aluminium angle EL17 to supporting structure with self drilling screws
Installation Guide. Step 3. Valley Flashing. Step 7. Transition Flashings and Accessories. Step 6. Hip and Ridge Installation
 Step 7. Transition s and Accessories Step 3. Valley Step 6. Hip and Ridge Installation Step 2. Rake Trim Step 5. Installing the Shingles Step 1. Eave Starter Installation Step 4. Endwall s Installation
Table of Contents Light Gauge Metal Roof & Wall Panels
 Table of Contents Light Gauge Metal Roof & Wall Panels Installation Guide for Delta Rib, Nor-Clad, Strata Rib & 2-1/2 Corrugated Introduction Important Notice Notes: April 2008 Minimum Recommended Tools
INSTALLATION INSTRUCTIONS LS X 12-2 X 7 1/2 FRAME LOAFING SHED
 INSTALLATION INSTRUCTIONS LS-12 12 X 12-2 X 7 1/2 FRAME ACTUAL FRAME BASE SIZE: 12 X 12-2 LOAFING SHED Our unique assembly process quickly transforms the individual pieces into a finished structure that
Installation guide for 20/20
 Introduction The following installation instructions are recommended minimum requirements for the 20/20. The designer and fixer should ensure that tiles are installed in accordance with BS 5534; The British
installation guide Villa
 installation guide Villa Table of Contents Introduction............................. 2 Safety................................... 2 Tools.................................... 2 Codes & Requirements....................
Ekoroof LiteTile Dimensions
 Ekoroof LiteTile Dimensions 7 3 3.5 Height 40 Width 20 Length Weight per Panel: 3 kg / 6.61 lbs 2 2 Area per panel 800 in / 5.55 ft 2 Panels per Square: 20 (including overlap, for a 100 ft covered area)
ThermoSpan EPS. Metalcraft COMMERCIAL ROOFING CREPS. Insulated Panel Systems DETAIL LIST
 ThermoSpan EPS DETAIL LIST 00 / 15 COVER SHEET 01 / 15 RIDGE DETAIL 02 / 15 HEAD FLASHING DETAIL 03 / 15 EAVES GUTTER DETAIL 04 / 15 INSULATED GUTTER 05 / 15 INSULATED BOX GUTTER 06 / 15 BARGE CAPPING
DW HORIZONTAL INSTALLATION
 AR-PJ-01-DW2H 2" HORIZONTAL PANEL JOINT AR-PJ-02-DW2H 2" VERTICAL PANEL JOINT AR-PJ-03-DW2H 3" HORIZONTAL PANEL JOINT AR-PJ-04-DW2H 3" VERTICAL PANEL JOINT AR-PJ-05-DW2H CUSTOM REVEAL AR-PJ-06-DW2H DW-2000S
Finesse Profiles. Nailstrip
 Installation Details Profile and Lap Detail 265/465 38mm NAILSTRIP *other widths available CD GRADE PLYWOOD 19mm STRUCTURE SILICONE * MIN 20mm VENTILATION GAP * WHEN ROOF PITCH IS UNDER 7.5 OR TOTAL COMBINED
This installation guide has been created to assist in constructing a Liniar conservatory roof from a kit format.
 1.00 - Introduction This installation guide has been created to assist in constructing a Liniar conservatory roof from a kit format. Please note, each roof has been individually designed to meet specific
Tuff-Rib Install Guide
 Install Guide bestbuymetalroof.com Page 2 of 27 Page 3 of 27 1. Page 4 2. a. Installation Guide b. Panel Squaring Pages 5, 6 Pages 7, 8 3. Pages 9, 10 4. a. Fascia (optional) b. Eave / 1.5x3.5 Angle c.
Steel Roofing & Siding INSTALLATION GUIDE
 Steel Roofing & Siding INSTALLATION GUIDE Your Authorized Dealer is: WASHINGTON Auburn (800) 700-7228 WASHINGTON Spokane (866) 321-5954 www.nuraymetals.com CALIFORNIA Redlands (800) 806-8729 CONTENTS BEFORE
CURVED ROOF ASSEMBLY INSTRUCTIONS ATTACHED VERANDAH. Your supplementary guide to building an ATTACHED CURVED ROOF VERANDAH or PATIO BEFORE YOU START
 ROOF ATTACHED VERANDAH ASSEMBLY INSTRUCTIONS Your supplementary guide to building an ATTACHED ROOF VERANDAH or PATIO This set of instructions should be used in conjunction with the Stratco instruction
Construction details: Master-C type profiles and joints:
 Construction details: Master-C type profiles and joints: Master-C 3g 32 mm. (1 1/4 ) 1000 mm. (39 3/8 ) outer face inner face 10.5 fixing details: sealing washers shall be installed through a 2-3/8 x 1-9/16
Stratco Sanctuary INSTALLATION BEFORE YOU START TOOLS REQUIRED GUIDE
 INSTALLATION GUIDE Stratco Sanctuary Verandahs, Patios and Carports BEFORE YOU START It is important to check with your Local Government Authority prior to the installation of your new Stratco Sanctuary
Installation Guide GRP Dormer
 Installation Guide GRP Dormer To ensure optimum performance please follow the correct fitting procedures outlined in this installation guide. Site safety and good building practice should be adhered to
Installation Guide Simplicity Alfresco. V1.9 Lu070318
 0333 305 5272 www.canoports.co.uk Installation Guide Simplicity Alfresco V1.9 Lu070318 Tools Required Below is a list of tools that you will require to install your the Simplicity Alfresco System. Cordless
Capella Gutter & Soffit
 Page 1 Capella Gutter & Soffit For Customer Services (parts & delivery enquiries only) call: 01254 683 079 For Technical Support (installation queries) call: 0871 574 7293 Technical support calls cost
PRODUCT INFORMATION MANUAL SECTION: 16 FIXED METAL AWNINGS FIXED METAL AWNINGS
 FIXED METAL AWNINGS Fixed Metal Awnings BAHAMA Maximum Width Minimum Width Minimum projection Minimum Drop TS - Truss Support Maximum Overhang Minimum Overhang Unlimited 500mm TS=1601mm PS=2847mm PS=
Nutec Bigsix Roofing Accessories
 Nutec Bigsix Roofing Accessories Nutec Bigsix Close Fitting Adjustable Ridge Capping (Grey) Adjustable for 0º - 0º pitches 70-000 87 mm 70-00 87 mm Nutec Bigsix Close Fitting Adjustable Ridge Capping (Terracotta)
Roofs. Installation instructions Models Monterrey and Elite
 Roofs Installation instructions Models Monterrey and Elite A complete roof includes a lot more than just the roofing sheets. A combination of lead-ins, water removal systems, ladders, roof bridges and
Roll-Fix Kit The complete dry hip kit RFIG
 H I P Roll-Fix Kit The complete dry hip kit RFIG.045-0906-1 Roll-Fix is a quick and simple dry-fix roofing kit for hips. l Quick and easy to install no special tools required l Universal application fits
The Leka System Installation Guide
 Installation Guide The Leka System Installation Guide The following guide has been created to assist in the fabrication and installation of the Leka System. Please note that each roof is individual and
15 YEAR GUARANTEE. Tough and long lasting Guaranteed waterproof for 15 years Economical and easy to fix AVAILABLE IN A RANGE OF COLOURS
 INSTALLATION GUIDE AVAILABLE IN A RANGE OF COLOURS 15 YEAR GUARANTEE Tough and long lasting Guaranteed waterproof for 15 years Economical and easy to fix Coroline corrugated bitumen sheet is a tough lightweight
TABLE OF CONTENTS A. PBR
 TABLE OF CONTENTS A. PBR Panel 1. PBR Panel Architect/Engineer Information....................................... 2 2. PBR Panel UL 90 Requirements............................................... 3 3. PBR
400 SERIES VERTICAL INSTALLATION
 CI-DS-01-400V CI-PJ-01-400V CI-PJ-02-400V CI-PJ-03-400V CI-BS-01-400V CI-BS-02-400V CI-BS-03-400V CI-BS-04-400V CI-BS-05-400V CI-OC-01-400V CI-OC-02-400V CI-IC-01-400V CI-IC-02-400V CI-FO-01-400V CI-FO-02-400V
Gardman Lean-to Greenhouse Assembly Instructions
 Page 1 Gardman Lean-to Greenhouse Assembly Instructions Our Help Line provides support and advice to customers of Summer Garden Buildings after ordering. For advice before you buy you can phone us free
REGAL. Installation Manual
 REGAL Installation Manual General Information The details shown on the following pages are suggestions or guidelines for installing the Regal system. The installation details shown here are proven methods
TRADITIONAL GABLE ATTACHED PATIO AND CARPORT. Your complete guide to building an ATTACHED Outback TRADITIONAL GABLE PATIO or CARPORT
 TRADITIONAL GABLE ATTACHED PATIO AND CARPORT STRATCO OUTBACK ASSEMBLY INSTRUCTIONS. Your complete guide to building an ATTACHED Outback TRADITIONAL GABLE PATIO or CARPORT BEFORE YOU START Carefully read
INSTALLATION GUIDE. Outback. Flat Attached BEFORE YOU START ADDITIONAL MATERIALS TOOLS REQUIRED. VERAnDAHS PATIOS CARPORTS
 INSTALLATION GUIDE Outback VERAnDAHS PATIOS CARPORTS Flat Attached BEFORE YOU START It is important to check your Local Government Authority requirements before the installation of your new Stratco Outback
Global Roofing Solutions Klip-Lok 406 Aluminium
 GRS Klip-Lok 406 Global Roofing Solutions Klip-Lok 406 Aluminium www.globalroofs.co.za marketing@globalroofs.co.za GRS Klip-Lok 406 GRS Klip-Lok 406 Alum. 09/18 Typical Specification Materials The roofing
OUTBACK FLAT ATTACHED VERANDAH PATIO CARPORT - INSTALLATION GUIDE BEFORE YOU START TOOLS REQUIRED ADDITIONAL MATERIALS
 BEFORE YOU START It is important to check your Local Government Authority requirements before the installation of your new Stratco Outback Flat Verandah. It is the builder s responsibility to ensure any
W L. Standard Sizes: 2.125m underside of gutters m total height m roof m roof m roof.
 H Standard Sizes: H 2.125m underside of gutters. 2.280m total height. L L 5.450m roof. 6.050m roof. 7.250m roof. W W 3.000m roof/2.640m between posts. 3.600m roof/3.240m between posts. 5.400m roof/5.040m
INSTALLATION GUIDE LEARN MORE AT DECRA.COM
 Villa Tile INSTALLATION GUIDE LEARN MORE AT DECRA.COM Table of Contents DECRA Villa Tile Roof Overview... 2 Introduction... 3 Safety... 3 Tools.... 3 Estimating Sheet... 3 Codes & Requirements... 3 Roof
INSTALLATION INSTRUCTIONS LS X 12-2 X 7 1/2 FRAME LOAFING SHED
 INSTALLATION INSTRUCTIONS LS-24 24 X 12-2 X 7 1/2 FRAME ACTUAL FRAME BASE SIZE: 24 X 12-2 LOAFING SHED Our unique assembly process quickly transforms the individual pieces into a finished structure that
 TremLock T-138 INSTALLATION MANUAL T-138 www.tremcoroofing.com 3735 Green Road Beachwood, Ohio 44122 1.800.852.6013 50 Beth Nealson Drive Toronto, Ontario M4H 1M6 1.800.668.9879 7241 6/8/18 TABLE OF CONTENTS
Installation Guide Contemporary Alfresco V1.3 LU
 Installation Guide Contemporary Alfresco V1.3 LU 010818 Tools Required Below is a list of tools that you will require to install you're the Contemporary Alfresco System. Cordless Drill Mastic Gun Spirit
Table of Contents. Fasteners... 4 Venting Preparation Installation with Battens - DECRA Tile & DECRA Shake 1
 Table of Contents DECRA Tile & Shake Roof Overview... 2 Introduction... 3 Safety... 3 Tools.... 3 Estimating Sheets... 4 Codes & Requirements... 4 Roof Slope... 4 Underlayment... 4 Deck Preparation....
INSTALLATION INSTRUCTIONS LS X 12-2 X 7 1/2 FRAME LOAFING SHED
 INSTALLATION INSTRUCTIONS LS-30 30 X 12-2 X 7 1/2 FRAME ACTUAL FRAME BASE SIZE: 30 X 12-2 LOAFING SHED Our unique assembly process quickly transforms the individual pieces into a finished structure that
INSTALLATION GIUDE.
 INSTALLATION GIUDE INTRODUCTION The instructions and drawings included here are intended only as a guide for the installation of ECO Roofing Systems Spanish and Modern profiles. The materials and methods
Insulated Corrugated. Patio Installation Guide. SupaCore Insulation Superior Thermal Performance. Colorbond Steel Roof & Ceiling. InsulRoof roof panel
 Using the slot on the Turn-up/Turn-down tool, place the tool into the steel sheeting InsulRoof roof panel Rivet fixing through flashing Insulated Corrugated Roof pan turned down - gutter en 100mm Gutter
Safety Glasses Safety Gloves Ladders Measuring Tape Spirit Level String Line. Tin-Snips Rivet Gun Caulking Gun Silicone Socket Set
 BEFORE YOU START Carefully read these instructions and refer to them constantly during each stage of construction. If you do not have all the necessary tools or information, contact Stratco for advice.
Skypod. Pitched PVC-U skylights. Installation guide PITCHED PVC-U SKYLIGHTS ISSUE 1
 Skypod Pitched PVC-U skylights PITCHED PVC-U SKYLIGHTS Installation guide ISSUE 1 Skypod pitched PVC-U skylights Installation guide Contents 1. Surveying 3 2. Installation 4 3. Additional information 10
Greenhouse Assembly Instructions
 Greenhouse Assembly Instructions Our Help Line provides support and advice to customers of Summer Garden Buildings after ordering. For advice before you buy you can phone us free 7 days a week on 0800
Installation Manual. Last Updated 4 February, Postal PO Box 932 Bayswater VIC
 Installation Manual Last Updated 4 February, 2013 Part 1: Provided Material The Panel Expandable Foam Sealing Strip Barge Capping Z-Fascia Structural Screws Timber: 3/8 head size Metal: 5/16 head size
skypod INSTALLATION GUIDE Issue 2 CONTENTS 1. Preparing to install 3 2. Installation 4 3. Installing jack rafters Installation examples 11
 skypod INSTALLATION GUIDE Issue 2 CONTENTS 1. Preparing to install 3 2. Installation 4 3. Installing jack rafters 10 4. Installation examples 11 INSTALLATION GUIDE SURVEYING WARNING 1.2 Good surveying
Fastener Selector Guide Bemo standing seam system
 Fastener Selector Guide Bemo standing seam system Fastener Selector Guide Contents Products for specific applications Pages 4-9 Technical data Pages 10-13 Accessories Page 13 Technical notes Page 14 Bemo
NEW skypod INSTALLATION GUIDE
 NEW skypod INSTALLATION GUIDE NOW INCLUDES ACUTE CONTENTS 1. Preparing to install 2 2. Installation 4 3. Installing jack rafters 10 4. Installation examples 11 If in doubt at any stage Please contact the
eco-shake INSTALLATION INSTRUCTION
 1 eco-shake INSTALLATION INSTRUCTION NOTE: Shuffling the eco-shakes during installation may be necessary to obtain a uniform color throughout the roof. Due to the natural wood content in the ecoshakes,
BBA BRITISH BOARD OF AGREMENT CERTIFICATE NO. 87 / 1823 / C
 Fixing Guide BBA BRITISH BOARD OF AGREMENT CERTIFICATE NO. 87 / 1823 / C Onduline Fixing Guide Introduction Onduline is the world s largest manufacturer of bituminous corrugated sheets. Onduline roofing
Tuff Rib Panel Installation Specifications
 Tuff Rib Panel Installation Specifications ROOF APPLICATION: Roof slope must be a minimum of a 2/12 pitch to use this product. For slopes lower than a 3/12 pitch, lap sealant is suggested on the side laps
TABLE OF CONTENTS A-1
 TABLE OF CONTENTS PAGE NUMBER: DETAIL DESCRIPTION A-1...TABLE OF CONTENTS A-2...GENERAL NOTES B-1...GENERAL INFORMATION C-1...EAVE DRIP DETAIL C-2...EAVE DRIP with GUTTER DETAIL C-3 & C-4...FIXED RIDGE
CONSERVATORY ROOF INSTALLATION GUIDE Issue
 CONSERVATORY ROOF INSTALLATION GUIDE Issue 3 CONTENTS 1. Statements 2. General assemblies 3. Victorian / Edwardian roof installation 4. Jack rafter installation 5. P-shaped roof installation 6. Lean-to
Klip-Lok 406 Aluminium
 Klip-Lok 406 Alumin GRS Klip-Lok 406 Global Roofing Solutions TM Klip-Lok 406 Aluminium Talk to THE SMART ROOF PEOPLE Visit www.globalroofs.co.za or email info@globalroofs.co.za GRS Klip-Lok 406 GRS Klip-Lok
4. Metal roof jacks at penetrations and attachments
 - - - - - - - - - - - - - - - - - - - - - - - - - - - - - - - - - - - - - - - - - - - - - - - - - - - - - - - - - - - - - - - - - - - - - - SECTION 07 61 00 METAL SHINGLE ROOFING - - - - - - - - - - -
Sandtoft installation guides
 a The Sandtoft Multiverge system has been specially designed to suit most single lap large format concrete and clay roof tiles (suits batten gauges from 280 to 345mm). The system is extremely quick and
Sheet Steel Facts. Most common head design for self-drilling, self-tapping screws.
 Sheet Steel Facts Fastener Guide for Sheet Steel Building Products August, 2003 Fastener Materials Fasteners are manufactured from several materials and coatings. For the purpose of this fact sheet, the
Eurocell conservatory roof system. Installation manual Issue 3
 Eurocell conservatory roof system Installation manual Contents Statement General Assemblies Cross Sections Victorian/ Edwardian Roof Installation Jack Rafter Installation P Shape Roof Installation 15-45
ALPINE TRAY. To get the best from this product please follow these recommendations.
 F I X I N G D E TA I L S ALPINE TRAY The standing seam roofing profile is designed to withstand some of New Zealand s harshest weather in our toughest environments. To get the best from this product please
Synseal assembly guide 2009:Synseal assembly guide /2/09 12:38 Page 1. Conservatory Roof Assembly Guide
 Synseal assembly guide 2009:Synseal assembly guide 2007 9/2/09 12:38 Page 1 Conservatory Roof Effective from February 2009 Synseal assembly guide 2009:Synseal assembly guide 2007 9/2/09 12:39 Page 6 3.1
The Roofing Store TRS 9 35MM 78MM 150MM 78MM PRODUCT TECHNICAL DATA
 TRS 9 35MM 78MM 150MM 78MM THICKNESS END SPAN INTERNAL SPAN MINIMUM PITCH 0.55MM 2.30M 3.20M 3 DESCRIPTION TRS 9 profile is designed for commercial and industrial roofing. The profile is suitable for low
BARDOLINE INSTALLATION INSTRUCTIONS
 BARDOLINE INSTALLATION INSTRUCTIONS www.onduline.com CONTENTS General conditions Material requirements Terms Estimating shingle requirements Roof preparation Shingle application 9 GENERAL CONDITIONS ONDULINE
FischerTHERM plusdach The Sandwichelement with the special something
 The Sandwichelement with the special something Contents Page General Product Range 4 Fasteners 5 Secure fastening 7 Assembly 8 9 Details 0 References 4-5 FischerProfil 05 FischerTHERM plusdach The first
ONDUVILLA. The Attractive Alternative to Shingles I N S T A L L A T I O N I N S T R U C T I O N S
 ONDUVILLA The Attractive Alternative to Shingles I N S T A L L A T I O N I N S T R U C T I O N S 1 INSTALLATION INSTRUCTIONS Even though ONDUVILLA is easy to install, it is important to read through these
Installation Procedures
 Installation Procedures Nutec Bigsix Roofing sheets properly laid and fixed in accordance with recommendations will provide many years of trouble-free protection from the elements. Failure to follow these
SLATE & SHINGLE INSTALLATION
 EAVE EDGE Apply a small strip of roofing paper to the bottom of eave. Eave flashing is attached to substrate with roofing nails every 9". Install underlayment over entire roof. (See Fig. 1) PAGE 1 Bend
INSTALLATION GUIDE SLIMLINE ROOF LANTERN 4 PANE CONFIGURATION
 INSTALLATION GUIDE SLIMLINE ROOF LANTERN 4 PANE CONFIGURATION SLIMLINE STEP-BY-STEP INSTALLATION GUIDE Thank you for choosing Roof Maker, we hope you are delighted with your new rooflight. Our roof lanterns
GLOSSARY. A useful collection of definitions for commonly used terms in tile roofing.
 A useful collection of definitions for commonly used terms in tile roofing. Abutment Where the roof tiles meet a structure rising above the roof. Accessory A concrete or terracotta product used to finish
3/ /
 SUNGLAZE system is designed for both rafter and purlin construction options. Recommended minimum roof slope for Sunglaze applications is 5 o. Where lower slopes are necessary, we recommend rafter construction.
Special Roofs and Vertical Slating
 Special Roofs and Vertical Slating Roofs falling into the category of "special" roofs have the following characteristics: (a) any roof slope equal to or greater than the minimum pitch for the size of slate
NEW equinox INSTALLATION GUIDE Issue
 NEW equinox INSTALLATION GUIDE Issue 2 CONTENTS 1. Preparing the ring beam 2 2. Installing the framework 3 3. How to install structural support posts 7 4. Insulation and waterproofing 8 5. Tile application:
ROOF FRAMING INFORMATION BATTEN INSTALLATION CORONA SHAKE INSTALLATION ACCESSORY INSTALLATION ESTIMATING DATA GENERAL INFORMATION
 ROOF FRAMING INFORMATION BATTEN INSTALLATION CORONA SHAKE INSTALLATION ACCESSORY INSTALLATION ESTIMATING DATA GENERAL INFORMATION ROOF FRAMING INFORMATION It is the responsibility or roofers, building
skypod INSTALLATION GUIDE CONTENTS Issue 2 If in doubt at any stage NOW INCLUDES ACUTE BE SAFE WHEN WORKING AT HEIGHT
 skypod INSTALLATION GUIDE Issue 2 NOW INCLUDES ACUTE CONTENTS 1. Preparing to install 2 2. Installation 4 3. Installing jack rafters 10 4. Installation examples 11 BE SAFE WHEN WORKING AT HEIGHT Ensure
TYPICAL BARGE DETAIL - CROSS SECTION
 SELECTED OWENS CORNING ASPHALT SHINGLES APPLY A BEAD OF BITUMASTIC ADHESIVE/SEALANT METAL BARGE DRIP EDGE FLASHING No15 RAG FELT ROOF UNDERLAY PLYWOOD ROOF FRAME BARGE BOARD SOFFIT LINING (IF APPLICABLE)
utopia Window & Door Products Orangery Home Extension Products Conservatory Products Skylight Products
 Window & Door Products Orangery Home Extension Products Conservatory Products Skylight Products utopia Installation Guide Version 1.1 June 2011 Dear Customer, Thank you for choosing the Ultraframe Utopia
GIRTS ON BACK OF BUILDING
 GIRTS ON BACK OF BUILDING ALL GIRTS ARE 1 1/2 SQUARE TUBE. GIRT LENGTHS FOR 12, 20, 24, AND 30 WIDE BUILDINGS: ON 12 WIDE BUILDINGS GIRTS ARE 67 3/4 LONG ON 20 WIDE BUILDINGS GIRTS ARE 56 3/4 LONG ON 24
NEW equinox INSTALLATION GUIDE Issue
 NEW equinox INSTALLATION GUIDE Issue 1 CONTENTS If in doubt at any stage 1. Preparing the ring beam 2 2. Installing the framework 3 3. Insulation and waterproofing 7 4. Tile application: Steel tiles 9
Ulltraclad Aluminium Cladding. Contents. 1.0 General Information Design Information Installation Information 7. 4.
 Ulltraclad Aluminium Cladding Contents 1.0 General Information 2 2.0 Design Information 4 3.0 Installation Information 7 4.0 Maintenance 10 5.0 Health & Safety 10 1 1.0 General Information 1.1 Introduction
PBR Panel Installation Specifications
 4906 St. Stephens Rd. 5780 Hwy 90 W Eight Mile, Al 36613 Theodore, AL 36590 251 456 2254 251 653 1550 251 457 2254(F) 251 653 1514(F) PBR Panel Installation Specifications ROOF APPLICATION: Roof slope
COMPONENTS OF THE CLICKFAST FASCIA AND GUTTER SYSTEM 5: INTERNAL MITRE
 INTRODUCING THE CLICKFAST FASCIA AND GUTTER SYSTEM The Clickfast Fascia and Gutter System was originally designed by Stratco and has proven to be the most successful fascia and gutter system in Australia
ROOFING APPLICATION STANDARD (RAS) No. 115 STANDARD PROCEDURES FOR ASPHALTIC SHINGLE INSTALLATION
 No. 115 STANDARD PROCEDURES FOR ASPHALTIC SHINGLE INSTALLATION") ROOFING APPLICATION STANDARD (RAS) No. 115 STANDARD PROCEDURES FOR ASPHALTIC SHINGLE INSTALLATION 1. Scope 4. Underlayment 2. 1.1 This roofing application standard has been developed to provide a responsive
ROOFING APPLICATION STANDARD (RAS) No. 115 STANDARD PROCEDURES FOR ASPHALTIC SHINGLE INSTALLATION 1. Scope 4. Underlayment 2. 1.1 This roofing application standard has been developed to provide a responsive
Roofs. Installation instructions Models Classic C and D
 Roofs Installation instructions Models Classic C and D A complete roof includes a lot more than just the roofin g sheets. A combination of lead-ins, water removal systems, ladders, roof bridges and snow
CROSSBAR RAFTER ISOMETRIC
 Super Sky Products' typical glazing system consists of glass panels or "lites" which are attached to the main framing members using extruded aluminum "retainers" or "pressure plates". These retainers are
CLEARSPAN GABLE STRATCO OUTBACK ASSEMBLY INSTRUCTIONS. WITH GAZEBO END ATTACHED PATIO
 CLEARSPAN GABLE WITH GAZEBO END ATTACHED PATIO STRATCO OUTBACK ASSEMBLY INSTRUCTIONS. Your supplementary guide to building an ATTACHED CLEARSPAN GABLE VERANDAH or PATIO WITH GAZEBO END This set of instructions
Installation guide. Step-by-step instructions
 Installation guide Step-by-step instructions Contents Tools Required to Install p1 Screws & Fixings p2 Injection Moulded Solid Components p3 Components p4 Georgian Hips & Ancillaries p5 Fixing Eaves Beam
Corus Building Systems. Kalzip fixing manual
 Corus Building Systems Kalzip fixing manual Kalzip fixing manual Contents Contents Page Section 1 Introduction 1:1 Section 2 The system 2:1 Section 3 Transport 3:1 Section 4 Site preparation 4:1 Section
Agricultural and Industrial Roofing and Cladding
 Cl/SfB l (4-) Nf9 l l September 2010 l Agricultural and Industrial Roofing and Cladding CEMSIX Corrugated sheets and accessories Cembrit companies have been manufacturing corrugated sheets since 1910.
Table of Contents. Notes to Designer/User Map of Typical Roof Conditions Fastener Placement Fastener Selection...
 Table of Contents Section Page Notes to Designer/User... 2-3 Map of Typical Roof Conditions... 4 Fastener Placement... 5 Fastener Selection... 6 Ridge/Hip Flashing... 7 Valley Flashing... 8 Eave Flashings...
ENGINEERING STRENGTH INSTAL L AT I O N M A NUAL OUR STRENGTH IS OUR STRENGTH
 ENGINEERING STRENGTH INSTAL L AT I O N M A NUAL OUR STRENGTH IS OUR STRENGTH RAFTER PREPERATION RAFTER PREPARATION A FRAME PREPERATION AND ASSEMBLY A FRAME PREPARATION AND ASSEMBLY... Open boxes, remove
Assembly Instructions 10 X 10 Aluminum Roof Support
 Assembly Instructions 10 X 10 Aluminum Roof Support Aluminum Roof Support Bolt Package 16-5/16 X 2 ¼ SS Bolt 24-5/16 X 1 SS Bolt 40-5/16 SS Nylon Lock Nuts 16-5/16 SS Flat Washers 28-4 ½ Wood Screws 36-1