VISOR Solar User Manual
|
|
|
- Claud Ray
- 5 years ago
- Views:
Transcription
1
2 Content 1 Purpose of this user manual Applications covered by VISOR Solar sensors Key features User benefits Interfaces Component selection Product lines Machine integration VISOR product line Illumination & Background Illumination & Background for wafer analysis Illumination & Background for cell analysis Mounting accessories Setting-up the camera Installation Mechanical mounting the clamp and the camera Electrical connection Assign IP address to the camera Starting up the Software SensoFind Adjust the sensor to ensure the perpendicular mounting Focusing Configure or upload a job file to the camera System design Recommended setup: Reflective foil or back light Machine parts in the image Front light applications Shutter speed Contrast Software configuration Image acquisition parameters with Job Alignment (Advanced version only) Configuration of the Detector characteristics Calibration Teaching the sensor your machine configuration Setting of the dimension measurement Measurement of wafer and cell distances Checking the thresholds with Result Configuration of chip detection: Chips Chip Size tool Chip Shape tool Checking the results of the Chip tools Fiducials Pattern Matching Detector Hole Tool Holes, Cracks and Stains Checking the quality of the antireflective coating Sunny side up / down Busbar analysis Cell analysis Stringers I/O mapping Digital output Interfaces Timing Telegram Starting the sensor Cycle time VISOR related tools VISOR Vision Sensor E _01 Page 2 of 75
3 7.1. Software SensoView Data log Related products Useful links and contacts Appendix A: Test sample VISOR Vision Sensor E _01 Page 3 of 75

4 Copyright No part of this document may be reproduced, published or stored in information retrieval systems or data bases in any manner whatsoever, nor may illustrations, drawings and the layout be copied without prior written permission from SensoPart Industriesensorik GmbH. SensoPart accepts no responsibility for printing errors and mistakes which occurred in drafting this user manual. Subject to delivery and technical alterations. General remark All data shown is based on tests under laboratory conditions. It is necessary to confirm the results of our tests under process conditions to achieve process stability. Therefore, SensoPart provides demo samples and recommends to use this opportunity for final application evaluation. Please use the data shown as a recommendation only. Your individual process environment such as ambient light, heterogeneous reflection behaviour of your products, colour, variability of inspected goods, repeatability of parts and feeding processes et cetera need to be considered within your final solution. Please consider space requirements, accuracy and stability of the positioning of optical systems, communication protocols to your PLC (Ethernet, sequential, digital) and timing within your process as well. Manual Version 1.3 describing Software Versions 1.6.x.y First publication September 2012 SensoPart Industriesensorik GmbH Nägelseestraße 16 D Gottenheim VISOR Vision Sensor E _01 Page 4 of 75
5 1 Purpose of this user manual The VISOR Solar sensors are dedicated products developed to meet the needs of the silicon wafer production, cell handling and module fabrication. They include the functionality of a camera, a powerful illumination and fast data processing unit to provide an integrated stand-alone solution. The vision sensors provide precise positioning tasks with real world 50 µm accuracy and all established quality checks. The products are extremely easy to use and can be configured using established terms of the photovoltaic industry. Moreover, any square / rectangular products can be inspected The knowledge of machine vision is NOT a necessary precondition. However, choosing the right set-up requires an overview of the abilities of the camera, which this user manual is targeting to provide. It guides users from their specific application to select the best fitting products and tools to implement them for highest accuracy, stability and convenience. For further details on the products please refer to the corresponding datasheets and documents, or contact our technical support team all listed in section 9 Useful links and contacts. VISOR Vision Sensor E _01 Page 5 of 75
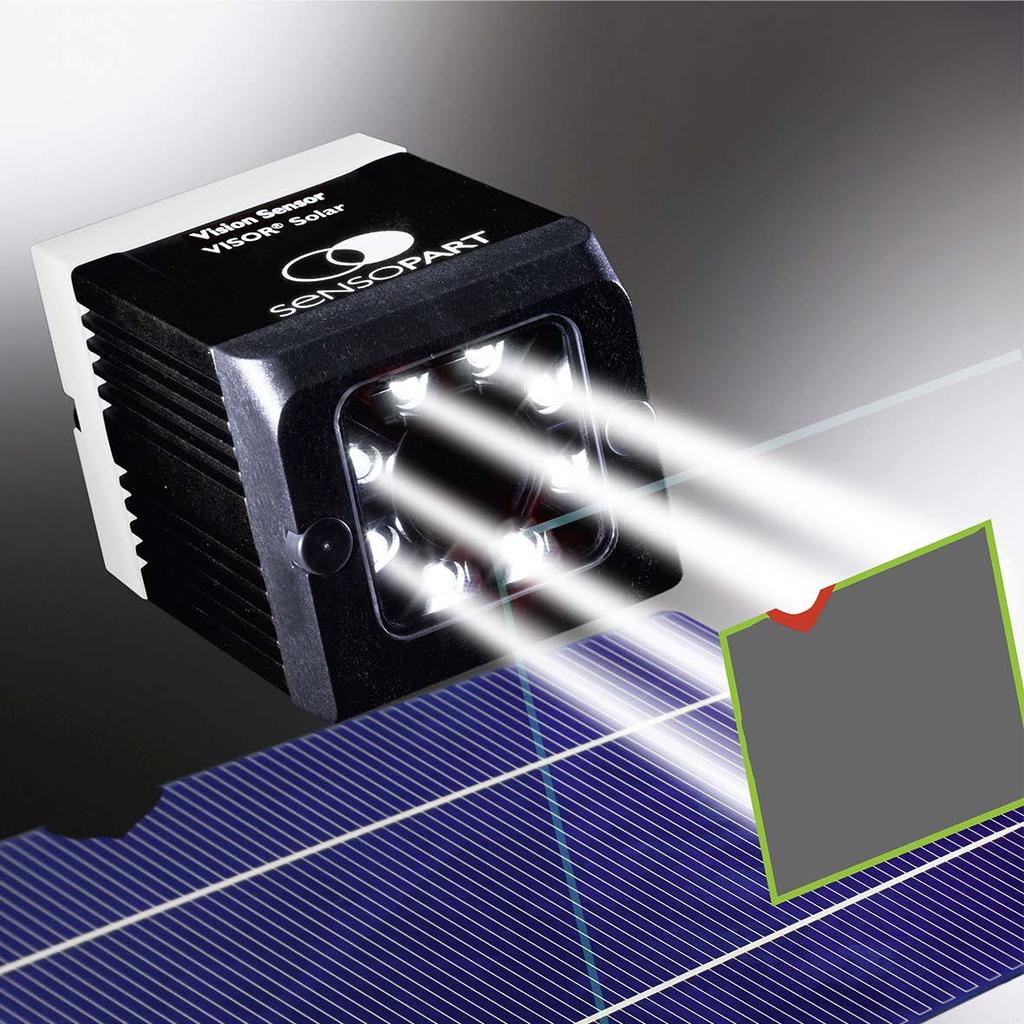
6 2 Applications covered by VISOR Solar sensors 2.1 Key features Since silicon wafers are extremely fragile and have to be handled frequently before becoming solar cells, they have to be checked with regard to the following properties: Wafer and cell position: X,Y and angle Absolute accuracy better than 50 µm and a repeatability of a few microns can be obtained. Following this user manual, best performance for cell inspection, robot pick and place of the cells is obtained. Wafer and cell dimensions Measuring the wafer dimensions the sensor makes sure 5 and 6 Inch material is not mixed. Due to the accuracy of 100 µm double layers of two wafers can be detected to be sorted out. Chips, which may cause a breakage of the cell The edges of wafers may be damaged during handling forming chips. Chips from 0.5 mm in size can be either identified due to their size or due to their shape. The sensor is able to distinguish between comparatively harmless mouse bites and severe shark teeth defects. Holes Holes formed during the manufacturing of the ingot or block with sizes down to 0.02 mm 2 can be detected. Busbars position, pads The position of the busbars is correctly identified for tabber / stringer tools and for electrical tests like cell sorting or electroluminescence. Cell type identification Different cell types can be identified due to the number and spacing of busbars, the presence of pads and manufacturer logos. Moreover, the correct identification of the upper surface can be detected. The availability of the functions for each camera model is described in section 3.1 Product lines. VISOR Vision Sensor E _01 Page 6 of 75


7 2.2 User benefits The sensors are designed for industrial usage withstanding even harsh conditions. Due to the integration of the illumination into the camera and a standardised set of mounting accessories the integration into machines becomes an easy task. CAD files can be found on our website. Easy integration, cost-efficient solution The key objective of the product line is to provide robust and reliable wafer and cell analysis on a stand-alone solution with minimal integration efforts for the user. The internal illumination was developed so even sunlight shielding becomes obsolete. Most of the tasks like position and chip detection can be provided without any costly backlight. Instead the internal high power LEDs are used in conjunction with a dedicated cost-effective reflective foil. Another important benefit is the small working distance of just 350 mm when testing 6 Inch wafers. Thus, the sensor requires very limited space which is scarce in actual production equipment. The sensor can be triggered via a digital I/O signal or via an Ethernet command. In the Advanced version additionally an encoder input is available to provide a high position accuracy when using conveyor belts with varying speed. High flexibility, versatile product family The product family comprises of a wide range of models. The complete product line shares the same software, tools and accessories. All mechanical dimensions are identical. Depending on the requirement of the cell makers machines can be upgraded easily with best-fitting camera model with almost no development efforts. Concluding, the wide product line of the VISOR Solar provides highest flexibility and cost-effective production tools available on the world vision market today. Figure 1: Typical lab setups using VISOR V10-SO and an inexpensive reflective foil RF775. The position is detected from a distance of just 350 mm without any daylight protection. Left tool comprises of MP45, MST45-40, MG45, MST45-20, MB45, MA45 and MK45. VISOR Vision Sensor E _01 Page 7 of 75

8 2.3 Interfaces The sensors run on 24V DC industrial power supplies and provide short-circuit proof digital I/O. For data such as position measurement the fully integrated ethernet or a serial bus connections may be used. The protocol is easily configurable and can be adapted to almost any PLC. A trigger signal may be sent as a digital input or via Ethernet. Data can be pulled by a server or transmitted by the sensor via FTP or SMB. An Engineering level SensoConfig software is provided for the configuration and setup, whilst for easy overview and job selection the Operator level SensoView provides live images and statistics. In addition to these there is also a 3 level password protection built in to stop unauthorised changes being made. 3 Component selection The VISOR Solar product family comprises of different models sharing a wide range of illumination and lens options, so all physical mounting possibilities are ensured. Figure 2: VISOR drawings Top: Integrated lens and illumination Bottom: C-Mount version VISOR Vision Sensor E _01 Page 8 of 75

9 3.1 Product lines The Standard product line of the VISOR V10 provides fundamental functions for the detection of wafer position and chips. The complete feature set is provided as Advanced product line. Figure 3: Product line overview of VISOR Solar Note: The VISOR Solar performs both wafer and in cell analysis. For reasons of simplicity in the following only the term wafer will be used representing both kinds of devices: Wafers and cells VISOR Vision Sensor E _01 Page 9 of 75


10 3.2 Machine integration VISOR product line Within the Advanced product line (V10-SO-A ) different models are available to provide the best fit to the requirements of the specific machine. They offer different colours of the internal illumination and different focal length lenses to adapt to the required working distance. White light cameras are most frequently used and can be combined with external red ring or area lights as well. Infrared light is not seen by the operators, and thus avoids potential disturbances by the flash, and is also very robust against ambient light changes due to its special in built lens filter. According to the requested working distance the lens type is selected. The table below provides information on typical setups. Figure 4: Key parameters of VISOR V10-SO for machine integration An easy way to calculate the distance as a function of the field of view is to use the software tool SensoCalc, which can been downloaded from our homepage see section 9 Useful links and contacts. Figure 5: SensoCalc supporting the selection of the best fitting camera for a given field of view and working distance VISOR Vision Sensor E _01 Page 10 of 75

11 A second criterion to choose the right lens can be the ability to detect chips at the edge of the wafer. Chips can be identified by the two tools Chip Size and Chip Shape. The ability to detect a chip depends on the size and shape of the defect and to a minor extent on the lens used. Figure 6: Screenshot when detecting an 1 mm deep chip of a wafer with the Chip size tool. Setup of V10-SO as shown in Figure 1. The slight dependence of the detection limit on the lens used is described in Figure 7. All cameras meet typical requirements using the chip shape tool. However, the best results optically are obtained using the 12mm or C-Mount models. VISOR Vision Sensor E _01 Page 11 of 75


12 Figure 7: Typical limits of chip detection Illumination & Background For sufficient robustness against ambient light and vibrations a shutter speed below 1 ms should be used. The wafer and cell can be illuminated by the camera internal LEDs or by adding a ring light such as with the red ring light LFR 115 RD-24-2L12. In cases where it is difficult to reach a sufficient shutter speed, a ring light can be used in parallel to the internal light. Since C-Mount cameras are not equipped with internal LEDs, a ring light becomes mandatory. Figure 8: V10-SO-A1-C with C-Mount lens and ring light LFR 115 RD-24-2L12 VISOR Vision Sensor E _01 Page 12 of 75


13 Illumination & Background for wafer analysis For wafer analysis it is recommended to place the reflective foil RF 775 in the background. Using integrated powerful illumination, this results in a shutter speed of less than 0.2 ms for very little costs. A similar approach can be followed using the C-Mount camera with a ring light. For detailed values of the shutter speed see Figure 4. In the special case of detecting holes in wafers or cells a back light is necessary to provide sufficient light through the tiny defects. Such backlight lights can be controlled by the sensor when adding the connection adapter LA 45 V-24-2L12. Figure 9: VISOR with Back light LF 200 RD and connection adapter LA 45 V-24-2L Illumination & Background for cell analysis To analyse the printing on the front side of a cell, Infrared illumination is strongly recommended. The usage of white illumination may cause disturbing reflections in combination with polycrystalline material. Figure 10: Images of a polycrystalline cell with poor antireflective coating using recommended infrared (left) and non-recommended white illumination (right) As background the usage of a homogeneous white material is recommended. This can be plastic or coated aluminium. Do not use the reflective foil in these applications. VISOR Vision Sensor E _01 Page 13 of 75


14 3.2.3 Mounting accessories Each VISOR camera comes with a mounting clamp MK 45. The camera may be fixed to it via the dovetail fitting on its base. Figure 11: Mounting clamp MK 45 To support the easy and precise adjustment of the camera, the use of the mounting bracket MG 2A (no ), shown in Figure 12: Mounting bracket with two axes MG 2A is recommended. The precise orientation of the camera towards the object is crucial for reliable measurements. Figure 12: Mounting bracket with two axes MG 2A Mounting kits are available for the accessories like external illumination as well and can be found using the product finder on the SensoPart homepage, see section 9 Useful links and contacts. Within the VISOR product family the different accessories may be combined, e.g. an MG2A with external illumination. VISOR Vision Sensor E _01 Page 14 of 75
15 4 Setting-up the camera 4.1. Installation The VISOR user manual provides detailed information on the setup. The document can be found under Windows Start / All Programs / SensoPart / VISOR vision sensor / Documentation. In this document the main steps are briefly listed. Mechanical mounting the clamp and the camera Electrical connection to power supply and Ethernet, optionally to PLC and trigger input Assign IP address to the camera Adjust the focus screw for a sharp image Configure a camera job or upload a job file to the camera Verify image quality and output results After just about 15 minutes of mounting and installation, the sensor runs autonomously within the machine performing the desired wafer tests Mechanical mounting the clamp and the camera At first, the mechanical mounting is done. The camera should be mounted at a location with minimal vibration, perpendicularly to the wafer respectively cell and with free line of sight to it. Usually, the mounting bracket MG 2A is used supporting easy adjustments. Alternatively, a precisely adjusted mounting clamp MK 45 may be used. The camera should be mounted on a stable part of your machine with the correct working distance, which is depending on the camera-type (see section VISOR product line ) from your wafer respectively cell. The mounting bracket MG 2A is fixed with three cylinder head M6 screws in the base plate. To assemble the mounting clamp MK 45 on your machine use the two internal screw threads (both M4) on the back side of the clamp. The mounting bracket MG 2A is fixed with three M6 screws in the base plate. The camera can be fixed on both mounting accessories with the dovetail on the front side. Before mounting the camera make sure, that is possible to route all cables needed in a proper way to the camera. This is simplified by our offered cables with the optional angled plug. Make sure that under every operation condition no parts disturb the sight of the camera towards the wafer / cell. The targeted mounting situation is shown here: Figure 13: The mounting situation VISOR Vision Sensor E _01 Page 15 of 75
16 The precise adjustment can be done when the camera is working with your PC and will be described later Electrical connection After mechanical mounting, the electrical connection is built up. On top of the camera there are three connection sockets (see Figure 2). The 24 VDC connection socket provides the power supply and digital I/O of the camera. Use a cable CL12FX-Xm (available in 2m, 5m, 10m with angled or straight plug) to connect the power supply of the camera and the I/O with your PLC. The pinning of the cable is shown in the following table: PIN Colour of wire Usage 1 Brown + Ub (24V DC) 2 Blue GND 3 White IN (external trigger) 4 Green READY Pink IN/OUT (Advanced version: encoder -) 6 2 Yellow IN/OUT 7 2 Black IN/OUT, LED B 8 2 Grey IN/OUT, LED C 9 Red OUT (external illumination) 10 Violet IN (Advanced version: encoder +) 11 Grey & Pink VALID 3 12 Red & Blue OUT (ejector, max. 100 ma), LED A *1 *2 *3 READY: Ready for next external trigger Switchable input/output VALID: Indicates that the image analysis has been done and the outputs are set according to the result. Figure 14: Pinning of the power supply and I/O cable The I/Os on pins 5-8 provides currents of max. 50 ma each. For detailed information of the electrical characteristics see VISOR user manual as well. Now use the LAN socket to connect the camera via Ethernet to your PC or PLC, the required cables are named CI L4MG/RJ45G-SG-Xm-PUR (available in 3m, 5m, 10m with angled or straight plug). To configure the sensor you need to setup a connection to a PC. After the configuration, no PC is needed and the sensor will work as a standalone system. It is possible to connect the PC directly to the camera or via a switch or hub as shown here: Figure 15: Possible Ethernet interfacing of the camera In the Advanced version of the camera, the Data socket may be used for serial data transfer to a PLC. For connection use a data cable like CI L5FS Xm-G/W-PUR.with the RJ45 connector (available in 2m, 5m, 10m with angled or straight plug). VISOR Vision Sensor E _01 Page 16 of 75

17 After connection of all needed cables switch on the power supply and check the LED display of your camera. The correct connection of the power cable results in the lighting of the green Pwr LED. After connection, the camera will flash once to indicate it has finished the power up and is ready for operation Assign IP address to the camera After the electrical connection is done, the camera has to be linked to your PC. To connect the VISOR Vision Sensor to a PC via ethernet the IP addresses of both devices have to correspond. PC s ethernet socket (not WLAN) and sensor have to be in the same subnet, but have different IP numbers. That means their IP addresses are identical except of the number behind the last dot. The default IP of the VISOR is with Subnet mask = To establish a direct connection, e.g. the PC must be set to a corresponding, fixed IP address like follows. Alternatively, the sensor s IP address has to be changed. The following settings are described for operating system Windows : 1. Click on Start Control Panel Network Connection LAN Connection Properties the window "Local Area Connection Properties" is open. 2. In the list This connection requires following elements select the option Internet Protocol (TCP/IP) and then click the button Properties. 3. In the following window (see fig. 15) set the desired IP address of the PC and the sub-network data. 4. Confirm entries with OK Example: The VISOR Vision Sensor is pre-set to IP address and subnet mask In this case, the IP address may be set to any value between and , with subnet mask , with the exception of existing IP addresses like the one of the PC used. Figure 16: IP properties To change the IP address of the sensor, see use button Set of the program SensoFind being described in the next section. VISOR Vision Sensor E _01 Page 17 of 75

.")
18 4.1.4 Starting up the Software SensoFind Now most (excluding the fine adjustment and the focusing) of the Hardware configuration steps are done and the remaining steps of the configuration of your sensor will be done with the programs SensoFind and SensoConfig. With the next steps, the fine adjustment of the sensor will be checked and the conditions to ensure best possible imaging conditions will be prepared. First start the program SensoFind. In the first opened window, all connected cameras will appear in the Active sensor list. If no camera appears, click on the button Find on the left (see Figure 17). When there is also no camera available or a connection is not possible, this is likely due to incompatible network and firewall settings on the local PC. In this case please contact your local IT department to solve the issue. Figure 17: SensoFind is used for the camera selection, here are 3 cameras found (2 solar + 1 code reader) Double-click on the sensor to start the program SensoConfig. Automatically a small window (Figure 18) will open. If you press OK, the sensor will stop working, therefore, you should not do this while the sensor and the machine is working. It may cause damage, depending on your machine configuration. After ensuring your machine and sensor are in a safe operating mode press OK to continue. Figure 18: Warning Pop-up VISOR Vision Sensor E _01 Page 18 of 75
. A detailed description of transferring the Job is given in section 4.1.")
19 Afterwards a window like this will be shown: Figure 19: Screenshot of an SensoConfig window with a wafer image Press the New button (marked with the red rectangle in Figure 19 ), this will create you a new default Job and allows you to make the necessary settings (e.g. the shutter speed). A detailed description of transferring the Job is given in section Configure or upload a job file to the camera You are now able to configure the sensor and make the necessary settings. VISOR Vision Sensor E _01 Page 19 of 75

20 4.1.5 Adjust the sensor to ensure the perpendicular mounting First check if the sensor is mounted in the right working distance. The working distance can be calculated with the program SensoCalc. For further information refer to section VISOR product line. First adjustments target the perpendicular mounting of the sensors to the wafer or cell to be checked. Use a reflective foil, mirror or sheet of glass and put it on the position your wafer is typically placed. Other positions (e.g. an direction of view not perpendicular to the object) can cause a maladjustment. You get an image from your sensor like this: Figure 20: Camera image of the reflective foil Decrease the shutter speed (use the slider or the spin box marked with an rectangle in Figure 20) to get an image with a bright dot / ring of bright dots near to the centre and a dark background: VISOR Vision Sensor E _01 Page 20 of 75

21 Figure 21: Camera image of a reflective foil with the cursor position marked The position of the bright spot should be in the centre of your camera image. To ensure this, the best method is the following: - Bring the cursor to the position of the half resolution of your camera, e.g. for VGA X: 320, Y: 240. The current position of your cursor is indicated on the bottom of the window in pixels. In Figure 21 above it is marked with the lower rectangle, in the same part of your window the intensity I at the cursor position is printed as well. - Then, adjust the sensor mechanically to move the centre of the bright spot into the centre of the field of view (which is marked with your cursor now). Then your image should look like Figure 22. VISOR Vision Sensor E _01 Page 21 of 75
22 Figure 22: Camera image with the correct perpendicular mounting of the sensor image Now you can be sure your sensor is properly adjusted. You are now able to check the focus. VISOR Vision Sensor E _01 Page 22 of 75

23 4.1.6 Focusing Place a wafer under the sensor and increase the shutter speed from low values until you reach an intensity of 255 on the complete reflective foil. Your screen should look like Figure 23. Figure 23: Camera image with the right working distance and optimal mounting Then zoom in (use the controls marked with an rectangle in Figure 23) to see an enlarged image of the upper left corner of the wafer. VISOR Vision Sensor E _01 Page 23 of 75
24 To scroll the image use the scroll bars marked in Figure 24. Figure 24: Camera image with the marked scroll bar Use the screwdriver supplied (others may cause damage) to rotate the small slotted screw focus in the rear of the camera and ensure a sharp image of your wafer. The sharper the image focus, the more accurate the camera will perform chip measurements and surface analysis. Ideally, the transition from dark to light is completed within 2-3 pixels (cells on the image chip). VISOR Vision Sensor E _01 Page 24 of 75

25 After getting a sharp image of the first corner scroll to the other corners and ensure they are sharp as well. Maybe, the focus needs to be readjusted to get the most sharp image of the complete wafer. A sharp image looks like this: Figure 25: Sharp image of an wafer Now, all sensor adjustments are completed and the mounting of the sensor is finished. The adjustments and settings done should not be changed, readjustments are usually not needed. VISOR Vision Sensor E _01 Page 25 of 75

26 4.1.7 Configure or upload a job file to the camera The sensor works with instructions saved in the Job File on a PC drive. The Job-file contains all settings previously defined using the SensoConfig-Software. Each Job-file can be uploaded to the sensor for stand-alone operation. There are three principle ways to get a job file: Create a new job as described in section 5 Software configuration. Load an old job file from your PC which is set up for a machine with the same configuration. To do this click on the Load button on the lower and use a saved Job-file Connect a camera to a PC, start SensoConfig and all jobs will be downloaded from the camera to the PC. To upload a new Job to the sensor click on the Start sensor button on the upper left side of your window. The sensor will start then to work without the need of a PC, all needed information of the job file are saved on the sensor and will stay there even when the sensor is without a power supply. The sensors of the Standard product line may store up to 2 job files simultaneously. For sensors of the Advanced product line the number of jobs may reach up to 255, but may be lower in case of complex jobs. Figure 26: Load a job file and upload it to the sensor. VISOR Vision Sensor E _01 Page 26 of 75
27 4.2. System design For best performance during operation the application of the sensor should aim the following targets: High precision o High accuracy o High repeatability and reproducibility High robustness against ambient influences, such as o Ambient illumination and sun light o Vibrations Minimal maintenance o No re-calibration o Sporadic cleaning In the following these targets are discussed with respect to the different options of setups. The VISOR Solar sensor utilises powerful and intensively field-proven algorithms. To ensure that the sensor achieves this standard, some basic aspects of the system design impacting the fundamental camera s image quality need to be discussed. The following sections are useful to make sure the sensor will operate in an optimal way and is able to fulfil its targets Recommended setup: Reflective foil or back light High precision and robustness require a short exposure time which is a key success factor as mentioned previously. Preferably this is obtained when analysing wafers by using the VISOR camera in a setup with a reflective foil RF775 as shown in Figure 1. To achieve minimal maintenance and to prevent fragments from accumulating on the foil, it can be tilted to let fragments slide down. Technically and commercially this setup is the most preferred solution. The reflective foil can be placed freely under the wafer: The wafer may lay on top of the foil. The foil may be tilted towards the wafer plane. When measuring wafers on conveyor belts, the foil typically may be placed several centimetres below the belts, fully supporting accurate measurements. For the analysis of the front side printing of cells do not use a reflective foil, but a homogeneous white background. In all setups using the reflective foil, a backlight or a white background, the wafer appears as dark and the background appears as bright Machine parts in the image In the absence of an even and homogeneous background, e.g. a reflective foil or a back light, machine parts may be observed by the camera which will affect the analysis of the wafer. Typical examples are conveyor belts being used to transport the wafer and which may be interpreted as chips or protrusions. To avoid these effects, there are the following software solutions: Blanking region feature found in Detector / Wafer tab / Blanking region: The conveyor belt can be masked out not to influence the wafer analysis. An example is shown in Figure 27 below. Blanking should be used to a minimum extend only not to impede the accuracy and processing speed. Ignore protrusions, which is offered in the Chip size tool during Expert mode. This way external defects are cut off and not considered. Note: The Chip shape tool always ignores protrusions. Metals transport belts in the background: Wafer / Miscellaneous / Contour smoothing and Ignore protrusions provide a reliable analysis in Expert mode as shown in Figure 28. VISOR Vision Sensor E _01 Page 27 of 75

28 Other solutions include: Use the different camera lights (SensoPart offers white, red and infrared illumination) to benefit from the different reflectivity of the different materials. Try to use dark parts like anodized aluminium or black painted machine parts in the observed section of the machine. Reflections of machine parts can be reduced by increasing their distance to the wafer and camera. Figure 27: Four purple Blanking regions are used to blank conveyor belts: The chip on the left edge is detected without any influence of the conveyor. VISOR Vision Sensor E _01 Page 28 of 75

29 Figure 28: Using Contour smoothing and Ignore protrusions the wafer analysis can be performed even on a metal grid. These examples illustrate the ability of the camera to operate even with confusing and difficult background conditions. Further options for unusual conditions have been established and can be applied in cooperation the SensoPart technical support team contactable at our headquarters in Germany or via your local area sales channel Front light applications In case neither a reflector nor a back light can be deployed in the machine, the wafer will likely appear bright in front of a dark background of the machine. This is a satisfactory solution although limitations will be found on the sensors ability to find small defects. It should be noted that for hole detection a back light solution is always required to achieve good image contrast between the wafer and the background. Care and attention has to be spent on shutter speed and contrast, which are treated in the following sections. VISOR Vision Sensor E _01 Page 29 of 75
30 Shutter speed The shutter speed has to be adjusted to show the bright parts of the image either the background or the wafer / cell with intensity values slightly below saturation. Since the reflectivity of the reflective foil (RF775) is very high, in this case the shutter speed becomes very short and results in fractions of a millisecond. Even in case the reflective foil cannot be used, the shutter speed of 1-2 ms should not be exceeded to avoid disturbances by ambient light and by vibrations. Obviously, the reflectivity of a wafer strongly depends on the process step of the wafer under test. As-cut wafers reflect better than textured ones. The later reflect better than anti-reflective coated cells. To ensure sufficient shutter speed under all circumstances the user may choose among the following options: Increase the overall gain setting for the image up to a value of 4. This can be done in Job / Image acquisition tab / gain. Then, the shutter speed can be adjusted by the same factor (see also Figure 20: Camera image of the reflective foil ) In case the shutter speed exceeds 1.6 ms the LED power is reduced proportionally to avoid overheating. Adjusting the minimum cycle time of the overall inspection will avoid this. This setting can be found in Job / Cycle time tab / Cycle time (min) this effect can be avoided. For details see the online help file in the VISOR software. Use an additional ring light in parallel to the internal illumination. This typically reduces the exposure time by a reduction factor of x3 in case of a red ring light. Adding an infrared ring light to an infrared camera provides a reduction factor of x4 in shutter speed. Use a C-Mount version with lenses having high aperture The adjustment of an optimal shutter speed leads to following intensity characteristics: Usually the wafer cell is darker than the background (this is the common setting for detection of cells and texturized wafers): Intensity on the background near the wafer (e.g. on a reflective foil) should be on 255 (this is the maximum) Intensity on the wafer should be as low as possible, a typical magnitude is between 20 and 40. Remember: The intensity at the cursor position is printed on the lower right border of the window (see Figure 21 ). In case the wafer is brighter than the background (this is the common situation for wafers when not using a reflective background): Intensity on the wafer should be on 255 Intensity on the background should be as low as possible With improving the intensity contrast, the sensor performance increases. The button Auto shutter will give you a first proposal for the shutter speed. The optimal setting in your machine depends on the background light conditions and the job accuracy. A manual fine adjustment brings you to optimal contrast settings with best sensor performance. To adjust the intensity start with a small shutter speed and then bring the bright areas on your image to 255. In the bright areas the intensity should be saturated at 255. A small value for shutter speed will lead you also to small effects on motion blur. Motion blur is a result of the movement of the object during the time needed to capture the image (shutter speed). E.g. if the product is moving at 20 m/min and the shutter speed is 1.0 ms then the amount of motion blur is mm. VISOR Vision Sensor E _01 Page 30 of 75
31 Contrast Wafers on poorly reflecting background like metal sheets may reveal a poor contrast since the reflectivity of metal and the wafer may be similar. The edge of the tested wafer may appear less straight than under recommended conditions. To ensure the high quality of analysis nevertheless, the user may consider the following options: Change the colour of the illumination to achieve different reflectivity of the materials. SensoPart offers white, red and infrared illumination for cameras and external light sources. Adjust Binarization / threshold factor in Expert mode (this is found in SensoConfig software on the top menu bar, in View Expert mode) for a smoother contour in the green plotted overlay. A manual setting of the wafer brightness threshold should be limited to lab tests only. For stable mass production always use Automatic binarization. A smooth contour can be obtained by using Wafer / Miscellaneous / Contour smoothing in Expert mode. Use Job / Pre-processing / Dilation and Erosion filters with same areas subsequently. Some other solutions are described in section Machine parts in the image. The usage of filters reduces the ability to resolve chips and should be avoided. Further options for unusual conditions for your application can be applied in cooperation with the SensoPart technical support team. VISOR Vision Sensor E _01 Page 31 of 75
32 5 Software configuration This section describes how the software tools are used and optimized to meet the requirements of the application. For details on general VISOR tools see VISOR user manual as well. To run offline analysis of stored images choose the requested model in the SensoFind section Sensors for simulation mode. The configuration of the VISOR sensors is performed in the following simple six steps using SensoConfig: 1) Image acquisition parameters with Job o This includes the configuration of the Image acquisition parameters illumination, trigger mode and timing 2) Alignment (Advanced version only) o This feature allows to refer all regions of interest (ROI) positions to one fiducial or edge 3) Configuration of the detection characteristics via Detector o Tool box for image processing, here are the characteristics of the wafer defined which are tested wit the sensor, available tools are listed in Figure 3. 4) Adjustment of the needed I/Os via Output o Definition of digital I/O and telegram for data transmission 5) Control of the adjustments via Result o The results of image processing are displayed on the screen for information and to check the influences of the set parameters. 6) Start sensor o By clicking on this button, the configuration parameters are transferred to the sensor, which then runs autonomously from the configuration PC. Only in this mode the cycle time is displayed on the lower edge of the screen. Please note that outputs will be set or reset according to your parameters. No liability is taken for damage occurring from this action. Unless stated otherwise, all operations are done running SensoConfig without activating the Expert mode. VISOR Vision Sensor E _01 Page 32 of 75

33 5.1 Image acquisition parameters with Job After mechanically mounting and electrically connecting the camera, it will be necessary to set the shutter speed, gain and focus to ensure a sharp, clear, high contrast image. This basis setup provides best performance of the sensor and will led you to a optimal productivity. The most relevant controls are explained in this section 5.1 Image acquisition parameters with Job, a complete description can be found in the VISOR user manual. Ensure before starting that your sensor provides a sharp image. The focus is adjusted by the use of the small slotted screw in the rear of the camera (please use the screw driver provided to avoid any damage). See section Focusing. To implement these basic settings go to Job Image acquisition as shown in Figure 29. All settings are saved in a so-called Job file. This job file can be saved with the button Save, (see Figure 29), e.g. to make a backup or to use the settings in a similar machine. To load a job file use the Load button. With the Delete button single jobs are deleted, with the Delete all, all jobs can be deleted. With the New button, a new Job file is created. Figure 29: SensoConfig software interface Several jobs can be stored on the camera depending on the model (see Figure 3: Product line overview of VISOR Solar). The jobs can be switched either by Ethernet command, serial or parallel commands or via toggling a digital input. VISOR Vision Sensor E _01 Page 33 of 75
34 Resolution: Always choose the VGA (640x480) resolution since the wafers and cells have a square shape. Trigger mode: With choosing the trigger mode as free run your sensor will continuously take pictures, this mode is preferred when you are setting up the camera. Immediately, you will see the results of your changes. It is also possible to run the sensor in free run mode in the production setting, with the result of a asynchronous data acquisition. The better setting in your production will be the trigger mode, then the sensor takes pictures when they are needed from your machine. The setting of the trigger characteristics (e.g. a time delay) will be described later in section VISOR Vision Sensor E _01 Page 34 of 75

35 Timing. The trigger from the machine can be simulated by the trigger button on the left of your screen. Shutter Speed: Use the scroll bar to adjust the right shutter speed as described in section Shutter speed. While using the reflective foil the shutter speed as a guide will be in the order of 0.2ms to give high contrast between the dark solar cell and the bright reflector (see fig. 4). The shutter speed can be decreased with using the Gain, as described in the next break. Gain: Typically, the default setting of 1 is sufficient when dealing with a reflective foil. However, if the image contrast is not high enough, increasing the gain will increase the brightness of the overall image. By increasing the gain, a shorter shutter speed can be achieved. This also lead to smaller effects of a moving wafer or machine vibration to the image quality. Quadrants: With this items you can choose the LEDs which are illuminated just by clicking on them. This feature of the sensor allows you to avoid bad reflections from machine parts or from the wafer which can cause bad image conditions. Usually, all LED are illuminated to ensure a high shutter speed. Illumination: With the menu internal and external illumination you can choose the used illumination condition, per default the internal illumination is on and the external are off. The external illumination can also operate in permanent mode, this is preferred when you will avoid the flash from the illumination, but can shorten the lifetime of your external illumination. Once the basic settings are done, then we can move on to the calibration and image distortion settings. Usually no configurations in the tab Image transmission have to be done, since the transmission to SensoView per default is On (see Figure 30). This setting is used to transfer your sensor images to the program SensoView. Figure 30: Image transmission The tabs Archiving, Pre-processing and Cycle time are only needed in special applications, see the VISOR user manual for further information. After the illumination settings are done and a sharp image is available you are now able to teach the sensor in how to analyse the images (e.g. which characteristics have to be checked or which measurements have to be done). VISOR Vision Sensor E _01 Page 35 of 75

36 5.2 Alignment (Advanced version only) This feature is available in the Advanced version only. If you are using the Standard version, you can skip this section. The Alignment option is used when a large field o view is used and a fast preliminary position is helpful. This position can be used to determine the position of a smaller region of interest (ROI) which causes a faster processing of all measurements and a higher throughput of the VISOR sensors. 5.3 Configuration of the Detector characteristics The detector sub menu is designed to choose the method of image processing: Which measurements are done and which characteristics are tested. One image can be processed with one or several detectors. To analyse cells, typically a wafer and a busbar detector have to be implemented. In case fiducials are to be considered a pattern matching detector is used for each of them. The settings needed in every application of the sensor are described in the following sections until Checking the thresholds with Result To implement a new measurement to be performed from the sensor, a new detector has to be applied. By clicking on the New button (see Figure 29, when using a sensor with factory settings, a new detector will be created automatically). A window like this will be shown: Figure 31: Detectors available in the VISOR Solar Advanced product line. The VISOR sensors are able to run several tests or measurements on your wafer. All the tests results are provided in the section Result. Typically the results are compared to user defined limits and ranges defining the PASS / FAIL criterions. To generate a PASS a wafer has to PASS ALL criteria activated by the user (criterion1 AND criterion2 etc.). VISOR Vision Sensor E _01 Page 36 of 75
.")
37 The following paragraph provides a basic guideline how to define limits and ranges. A typical set-up of the sensor criteria provides the following results: All good sample devices PASSes the tests and all defect parts FAIL (see Figure 32). To reach this aim, some devices (OK and Not-OK ones) should be tested under several operating modes with some start criteria, and then the criteria should be re-adjusted until they provide your production needs. To provide a high reliability of your tests you may tighten the criteria, this means the number of wafer damages identified by the sensor increases and you lower the risk of production downtime caused by broken wafers. If the quality criteria are too tough, you get a possibility of false rejected wafers. To provide a high yield you may lower your criteria. This implies the possibility of getting a PASS result of a bad device with all the bad impacts on your production. Figure 32: Setting of the threshold parameters For typical applications in the solar industry choose a Wafer detector (number 5 in Figure 31). The other kinds of detectors can be used for special tasks and will be described later or in the VISOR user manual. The following description is written for the Wafer detector, unless its state otherwise. Before adjusting settings ensure that your wafer is complete inside of the yellow search region of interest (ROI) of your detector image. You can resize the ROI, with drag and drop the black dots on the edges of the ROI to the needed position. The change of the position of the ROI is also done with drag and drop to the needed position. To rotate the ROI click on the arrowhead of the arrow on the right side and rotate the ROI around the centre of the rectangle. VISOR Vision Sensor E _01 Page 37 of 75

38 5.3.1 Calibration For typical applications in the solar industry choose at least a Wafer detector (5 th item in Figure 31). The other detectors can be used for special tasks and will be described later or in the VISOR User Manual. The following description is written for the Wafer detector, unless it is stated otherwise. Before adjusting settings ensure that your wafer is complete inside of the yellow search region of interest (ROI) of the detector. The ROI can be resized with drag and drop by shifting the black dots at the edges and corners of the ROI to the needed position. The change of the position of the ROI is also done with drag and drop to the needed position. To rotate the ROI click on the arrowhead of the arrow on the right side and rotate the ROI around its centre. When starting to use a wafer detector an initial calibration is recommended, which is done by just three clicks, see Figure 32: 1.) Go to Detector and choose the tab Calibration 2.) For a 6 inch cell or wafer just activate the mm units 3.) Finally press Calibrate to wafer Figure 33: Using Wafer Detector / Calibration the camera is calibrated within three clicks. VISOR Vision Sensor E _01 Page 38 of 75
39 The meaning of the controls on the calibration tab is as follows: Distortion removal: The usage of cameras with internal 6 mm lenses allows small working distances. However, a slight optical distortion of the square object is observed in the image. For best results with the V10 6 mm cameras ALWAYS activate the distortion removal this can be found under Detector / Calibration tab / distortion removal without changing the default values. Since other camera models do not cause any significant optical distortion, do not activate distortion removal with these models. Default values are Kappa (x10e-6) = and Scale = Please note that just the algorithms and the overlay of their results consider a distortion removal. For reasons of speed, the images shown on the screen are not compensated. This may yield to apparent discrepancies during the configuration, but has no effect on the quality of the performance. Activating Calibration / Distortion removal results in 18 ms processing time. mm units: All cameras operate on the basis of pixels. To switch to more user-friendly metric dimensions, the user should activate mm units (also under Detector / Calibration tab). Calibration: The calibration factor for the translation of pixels to mm units can be derived most easily from a wafer being exposed to the camera. By default its wafer height is assumed to be mm. For 5 inch wafers it should be changed to 125 mm. Clicking on Calibrate to wafer the calibration factor is computed and displayed. Alternatively, the calibration factor can be set manually. In Appendix A: Test sample a wafer with a size of 156 mm and some chips is attached, which can also be used to calibrate the sensor. To reproduce the calibration factor it is recommended to use the same wafer or a longer-lasting metal sheet during all calibrations. Whenever the mechanical setup or the focus is adjusted, the last calibration step should be repeated. Offset level of chip depth: The internal lenses yield to a small blurring of the image, which influences the detection of chips. To compensate this effect a default offset of 0.4 mm is provided, which compensates this effect. This setting should not be changed for the internal 6 mm and 12 mm lenses of the V10 models. VISOR Vision Sensor E _01 Page 39 of 75
 which have to be blanked.")
40 5.3.2 Teaching the sensor your machine configuration Since the sensor is made to work in a lot of different environmental conditions, a few settings depending on the individual machine configuration are needed. This includes the contrast setting between the wafer and background, the shape and size of the wafer and machine parts in the image (e.g. from conveyor belt) which have to be blanked. Figure 34: Applying the wafer detector for position detection and size verification First, choose the contrast setting between wafer and background with the Brightness menu on the left. If your wafer appears brighter than the background choose Bright. If it appears darker than the background choose Dark. The default setting is Dark. With the Blanking region menu you can choose the number of Blanking regions inside the image to avoid effects on the wafer analysis from machine parts in the image. In the image shown they appear as violet rectangles like in Figure 27 at section Machine parts in the image. The position of the Blanking region can be changed by drag and drop. Their size is changed by drag and drop of their edges to the right position. By drag and drop of the arrowhead in the rectangle you can rotate each Blanking region similar to that of the ROI. Please note, that the blanking regions must not split the wafer completely into separate parts (so called blobs ). All pixels of a wafer must remain connected without considering blanking regions. VISOR Vision Sensor E _01 Page 40 of 75
41 5.3.3 Setting of the dimension measurement As a standard the wafer height and width is determined without extra time. The result is compared to the acceptance ranges set by the user. Since height and width are determined independently, these values may differ a bit, even when a quadratic wafer is tested. A absolute accuracy better than 50 µm and a overall repeatability of a few microns can be obtained in determining the wafer dimensions. Now you have to choose, if you want to compare the width and the height to two independent thresholds or to one. Usually, both dimensions are compared to one value by choosing the Shape as Square, which is also the default. Both measured wafer dimensions are then compared to the ranges set with Height. The ranges can be set using the number edit or the slider. In the slider you see the excluded range as a red region, the accepted range as a green region and the actual measured value as a blue line. In case different tolerances shall be applied to the width and the height the parameter Shape has to be set to Rectangular. Then, the wafer dimensions are compared independent to the ranges set by Height and Width. This dimension feature allows the user to Distinguish between 5 and 6 inch wafers. Run a quality control of the wafer dimension as shown in Figure 34 with just 1 mm tolerance Sort out double wafers: In case two adjacent wafers picked from one box could not be separated properly and are placed together on a conveyor typically the size of the two wafers is larger than the size of a single wafer and can therefore be taken as a criterion for double wafers. Notice should be spent on the following aspects to achieve highest accuracy: Necessary o Stable mechanical setup no vibrations of the wafer or camera o Camera s direction of view is perpendicular to the wafer o Clear edges of the wafer in the image o Wafer / brightness and wafer / shape is set correctly. o Under all conditions the wafer must be entirely in the yellow search region of interest (ROI) o Visible parts of the machine close to the wafer are masked using blanking regions o Low value of shutter speed, lower than 2 ms Recommended o Low value of shutter speed, preferably lower than 1 ms o For position detection the wafer should not move during image acquisition, see below. Optimized o The center of the image is adjusted to the average wafer position o The camera has been powered on >1 hour before the calibration o In case of shutter speed >0.5 ms: Constant or no ambient light o Optionally, fixed reference positions are recorded in parallel, see section Fiducials Width and height are defined as the maximum extension of the wafer and are insensitive against chips. To determine the area of the wafer without considering potentially missing parts of chips, set the control wafer / area to active. The additional cycle time to perform area checks is typ. 16 ms with V10 in VGA resolution. To determine the area activate the Area option. This feature allows you to distinguish between a monocrystalline and a polycrystalline wafer in an simple way if they have different areas. Most monocrystalline wafers have a chamfer, the polycrystalline don t. If the Area criteria is activated and causes a FAIL the sensor will stop the analysis and therefore no further parameters will be checked. With the Position control menu you can choose if the sensor is checking the position of the wafer or not. The default of this function is Off. There are two possible shapes of the tested regions: a rectangular or an elliptical region. The position and size of the position region (which appears as a blue rectangle/ellipse in the camera image) can be changed in the same way like the blanking region which is described above. The sensor tests, whether the centre of the wafer (appears as a light blue cross) is inside of the tested region. VISOR Vision Sensor E _01 Page 41 of 75
42 With a controlled setup as indicated previously an absolute accuracy better than 50 µm and an overall repeatability of a few microns can be obtained for the position of the wafer. The objective of this section is to guide users in obtaining the best performance in their application. Moving objects may be observed by the camera as well. The systematic error on the position detection can be calculated by the inbuilt trigger delay time (1 ms) + half the shutter speed (e.g. 0.2 ms / 2) with both values being multiplied by the transport speed (e.g m/s). Thus, in this example the output value is shifted systematically by mm in the transport direction. With the knowledge of the transport speed the PLC may compensate this effect. The angle observed is compared to the Angle range. The range of the accepted angle can be chosen using the slider and the number edit as before at the adjustment of the Height of the wafer. Stable imaging conditions lead to a constant green overlay of the wafer edge and to almost constant values of the wafer position shown in Results / Wafer / Center X, Center Y and Angle. With optimized setups shown in Figure 1 subsequently recorded positions do not vary by more than the displayed resolution: 1 µm. The resulting position can be transmitted via Ethernet or serial bus to a PLC or robot controlling unit. Alternatively, the sensor may compare these values against user settings to perform a PASS / FAIL decision and to control one of digital outputs for this purpose. Using a V10 model in VGA resolution the standard deviation of the repeatability is typ. 0.5 µm. respectively in a setup like described in Figure 1. This outstanding repeatability underlines the high precision and reliability of the algorithm employed in this product line. The average cycle time to perform this operation is just 43 ms without distortion removal. VISOR Vision Sensor E _01 Page 42 of 75

43 Measurement of wafer and cell distances With the Wafer Detector it is also possible to measure the distance between two wafers. To do this, create a new Wafer Detector, choose the Brightness as Bright, Shape as Rectangle and define the ROI in a proper way. An example for a string inspection is shown in Figure 35. The distance is given as Height, since it s the shorter side of the ROI. Figure 35: Typical set-up of a distance measurement This easy setup provides further very valuable information: The width is a quality measure for the presence of the two ribbons within the ROI. If one of them is missing, the width will increase significantly. Adding a second wafer detector the presence of the lower ribbon can be performed as well. VISOR Vision Sensor E _01 Page 43 of 75
.")
44 5.3.4 Checking the thresholds with Result After setting the initial thresholds of dimensions and position, it is useful to check the result of further tests. These results of the sensor are shown in Result. With the knowledge of the results of your measurement your thresholds can be readjusted (as described before). By clicking on the Result button you get an image like Figure 36. On the right, the Statistics are shown of all images taken by the sensor since starting it, or since resetting the Statistics. On the left are the results of the actual image taken by the sensor, in respect to the actual Detector used. The following description is unless stated otherwise in respect to the Wafer Detector. The name of the actual Detector is grey marked in the small window Detectors on the left. Figure 36: Screenshot of the first tab of Result In the Wafer tab the main measurements of the actual image are summarized: The Center position, the Angle, the Height, Width and the Area. These values are compared from the sensor to the threshold and therefore the wafer gets a PASS or a FAIL result. The green or grey dot gives you the information which test is activated or not. It is useful to check if the values shown from the sensor are reasonable or if some misinterpretations are done e.g. from a wrong or old calibration. VISOR Vision Sensor E _01 Page 44 of 75
45 5.3.5 Configuration of chip detection: Chips As a result of sawing or handling of wafers chips may break out of them during any step of the processing. In the following the chips may propagate and cause a complete breakage of the wafer and a contamination of the production lines. Sharp defects like triangular ones will likely propagate. Due to their shape they are called shark teeth. More flat defects are called mouse bites or blunts and propagate less likely. A typical requirement in production is to detect chips which exceed 1 mm. The VISOR Solar sensors offer two different tools for such detections: Chip Size and Chip Shape. The Chip size tool detects the deviation of the observed wafer edge from the fit of an ideal geometry. The tool is easy to set up, fast in operation and largely independent of the shape of the defect. The tool may be used to detect the area of the chip. The Chip shape tool detects sharp edges of the contour. It provides the highest sensitivity and can detect chips down to 0.5 mm. However, it requires more processing time and is insensitive to very soft blunts. The performance of the two alternative tools is described Figure 7. Both algorithms are able to distinguish chamfers from chips. If the chip detection is operating, it is useful to check the dimensions of the wafer to sort out wafers which are broken in an ideal rectangle. As stated before in section Setting of the dimension measurement, the thresholds of the chip detecting tools should be set up carefully, with the implications of Figure 32 in mind. Also check the results after setting new thresholds. VISOR Vision Sensor E _01 Page 45 of 75
46 Chip Size tool Using the Chip Size tool the analysis of chip is performed in two subsequent steps. It detects potential chips due to deviations in the geometry fit. The found potential chips may be filtered with regard of their extent to provide stable analysis results. 1. The observed depth of a potential chip exceeds the threshold defined as Level of chip depth. Remark for specialists: The depth of a chip is determined by the size of deviation of the observed wafer edge from the turquoise marked fit of an ideal square. This provided the name Chip Size tool. 2. To cause a FAIL the chip additionally either violates 1. AND (2a. OR 2b.) a. above rule of chip depth for at least the number of pixels defined in Deviations per chip OR b. the limit defined in Area per chip In the example below, a chip is detected and shown in eightfold magnification. The red line indicates locations violating above distance check of the fit condition 1 FAILED. These deviations are observed for 15 times condition 2a causes a FAIL. Concluding, the chip size tool rejects the wafer. Since the two previous conditions FAILED the comparison to Area per chip becomes irrelevant in this case. Figure 37: Applying the Chip Size tool: Locations exceeding the Level of chip depth are shown in red. If additionally, the Area per chip is exceeded the line will be broad red. Please note that the Level of chip depth is not identical to the physical dimension. Due to the finite camera resolution and effects of the optics there is an offset between the two, which is compensated by a calibration parameter, see section Calibration. Figure 7 reveals the detection limits with the Level of chip depth used in above example. The average cycle time to perform this operation on a good wafer is 13 ms. Typical chips increase the cycle time by a few ms. However, analysing several massive defects in one wafer, this tool may take 24 ms or more. VISOR Vision Sensor E _01 Page 46 of 75

47 Chip Shape tool The Chip Shape tool scans for sudden angle deviations along the edge of a wafer. To generate a fail signal, the chip violates 1. The set Level of chip depth AND 2. The set Angle deviation, which defines the sensitivity of the algorithm The locations representing a chip according to this scanning method are shown in orange. To illustrate the performance of this tool, it has been applied to the same chip like used in the previous section keeping the default parameters. Figure 38: Applying the Chip Shape tool to the same chip shown in Figure 37 Detected chips are shown in orange. Above chip could be detected reliably with angle deviation set between 10 and 140. Since just the peak of the chip is observed, this tool cannot differentiate between large and small chips of the same shape. The average cycle time to perform this operation on a good wafer is 32 ms. Typical chips increase the cycle time by a few ms. However, analysing several massive defects in one wafer, this tool may take 48 ms or more. VISOR Vision Sensor E _01 Page 47 of 75

48 Checking the results of the Chip tools To check the results of the Chip tools, press the button Result (a window like in Figure 39 will be shown). In the tab Summary the results of the Chip tools are shown: Figure 39: Tab Summary of the Result sub menu Contour points found gives you the number of contour points used to define the contour line of the actual wafer. The dot on the right is green if this option is active or grey if its not. Chip size: Deviation gives the number of contour points which have a deviation from the calculated ideal contour of the wafer. These points are listed with their exact positions in the Chip contour tab. Chip size: Area exceeded provides the number of chips found on the wafer with violate both the criteria of the Chip size tool: Level of chip depth and Area, see section Chip Size tool Chip shape gives the number for the Chip shape tool (section Chip Shape tool ). Hole represents the number for found holes (section Holes, Cracks and Stains ). At max. 10 holes will be detected. All found chips are listed in the Chip overview tab. If the mm units option (under Detector / Calibration) is activated all the given positions and results are in mm, to find a chip on the screen it may be useful to deactivate this option. To check the adjusting of your threshold it may be useful to check if all found chips are needed to identify as chips. It is also possible, that different settings are more useful to your production needs as discussed in section 5.3 Configuration of the Detector characteristics. VISOR Vision Sensor E _01 Page 48 of 75

49 5.3.6 Fiducials Pattern Matching Detector Fiducials are used to trace changes of the coordinate system and to compensate for them. To ensure a long-term stability and reliability for accurate position detection it is strongly recommended to implement two fiducials in the machine and to detect their position. Moreover, is beneficial in machine configurations with two cameras, one fixed and the other mobile on a robot. To do this, two fiducials like screws have to be placed at fixed locations fixed close to the object. By detecting them with the sensor, a coordinate system in a plane is fixed and all positions and measurements can be referred to that coordinate system. When the fiducials are detected by two sensors, their coordinate systems are synchronized dynamically. A possible configuration to this purpose is shown in Figure 40. Figure 40: One possible configuration to use the fiducial option. The fiducials should be fixed on the reference frame with this following characteristics: Their position should be at two sides of the wafer, on a line through the centre of the. The fiducials are detected with two Pattern matching Detectors by the sensor. These Detectors are added with the New button described in section 5.3 Configuration of the Detector characteristics - 1 st item in Figure 31. To configure the Pattern matching detector, the steps are similar to the steps of configuration of the Wafer detector. First, the yellow region of interest (ROI) has to be defined, the size and position of the ROI depends on the size of your fiducials. Only patterns inside of the ROI are registered and compared to the saved pattern. To teach a pattern, the red rectangle has to be positioned as close as possible to the actual positions of the fiducials (it is very useful to make use of the possibility to zoom into the actual image). The actual detected pattern is marked with a green rectangle, this is usually at a likewise position as your red rectangle so you will see one red/green rectangle instead of two rectangles. VISOR Vision Sensor E _01 Page 49 of 75

50 Please note, that the Pattern matching Detector will only provide the center of the fiducial as position once the center of the green box has been initially moved to the center of the fiducial. Figure 41: Configuring the Pattern matching detector for a round fiducial. While using similar fiducials you can easily transfer your saved pattern from one Pattern matching Detector to the other with the Copy button. Further information on the Pattern matching Detector can be found in the VISOR User Manual. The centres of the fiducials detected by the sensor are used to define the coordinate system, the coordinates of the fiducials are given out via the data interfaces of the sensors. Under the Result sub menu the actual positions are listed. Depending on the different mounting position of your sensors and therefore different calibration factors of the two sensors all given positions and measurements have to be done in pixels. VISOR Vision Sensor E _01 Page 50 of 75

51 5.3.7 Hole Tool The Hole tool is very versatile to detect spots within the area of the wafer or cell, which are of special interest such as Holes formed during the manufacturing of the ingot or block Cracks Stains from a printing process Holes or inhomogeneities in the antireflective coating In the following the usage of the hole tool and the mentioned applications will be described. Figure 42: Configuring the Hole detector The wafer detector determines the average grey level of the wafer. Referring to this level, which can be shifted by a value entered in Brightness threshold, deviations within the wafer/cell area can be detected. Select the Brightness of the spot of interest as Bright or Dark. For test purposes the user may enter Absolute values not related to the gray level of the wafer. To achieve sufficient stability of the tests, it is strongly recommended to use Relative thresholds only. The default setting Marked pixel of Overlay makes all pixels meeting above criteria to be shown in red. Adherent pixels (so-called blobs) which do not meet the Area criterion cause a FAIL and will surrounded with a red rectangle see 1 st item above. In case 10 holes have been detected, the search for further holes is aborted. Blanking regions affect the search for holes only in case they cover the wafer AND the surrounding. Blacking areas, which are completely inside the green square area are ignored see 2 nd and 3 rd item above. In case the Expert setting Filter wafer edge has been activated (not shown here) holes which are close to the wafer edge are ignored see 4 th item above. VISOR Vision Sensor E _01 Page 51 of 75
. The tab Summary provides the number of found holes.")
52 All found holes exceeding the area limit are shown in the sub menu Result (press button Result as in Figure 36) in the tab Hole. They listed with their position and size (see Figure 43). The tab Summary provides the number of found holes. Figure 43: Tab Hole of the Result sub menu VISOR Vision Sensor E _01 Page 52 of 75

53 Holes, Cracks and Stains Holes formed during the manufacturing of the ingot or block can be observed using the back light shown in Figure 9 in combination with the hole tool. The same setup should be used to detect cracks. Moreover, this tool can be used for detecting the larger stains as residues from the printing process in a front light setup. The brightness threshold has to be adjusted to observe the defect, which is then marked in red. Figure 44: Hole detection Using an active backlight holes and cracks can be detected down to 0.02 mm 2. The average cycle time to perform this operation is 6 ms, largely independent of the wafer properties. VISOR Vision Sensor E _01 Page 53 of 75

54 Checking the quality of the antireflective coating The quality of the antireflective coating (ARC) of wafers can be checked from the sensor with the hole tool of a wafer detector. Visible defects of the ARC may be caused by the following origins: Dust particles of sizes of typ. 1mm 2 Insufficient cleaning before the ARC process on spots of 100 mm 2 and more To check the antireflective coating first create a Wafer Detector as described in section 5.3 Configuration of the Detector characteristics. Then use the hole tool to detect areas with bad antireflective coatings and therefore a higher reflection. Choose in the tab Hole of the Detector sub menu the Brightness as Bright. With Brightness threshold you choose the threshold between the good and the bad areas on your wafer surface. In typical applications, the default setting of 30 (relative), will lead you to good results. As known from the threshold settings before and in according to section 5.3 Configuration of the Detector characteristics, it is very useful to check your setting on some test wafers. A screenshot of a typical setting is shown in Figure 45. Figure 45: Example of a polysilicon wafer with an incomplete ARC due to insufficient cleaning VISOR Vision Sensor E _01 Page 54 of 75

55 5.3.8 Sunny side up / down As a result of manual handling wafers may be put on conveyors with the sunny side down. With the sensor such wafers can be sorted out. The grey level detector can be used to differentiate the wafers according to the different reflectivity. To make use of the grey level detector, a new Detector has to be created, which is described in section 5.3 Configuration of the Detector characteristics. You have to choose a Grey type (4 th item in the window shown in Figure 31). According to the brightness of the wafer a Greylevel range is defined, which should include only one wafer orientation. The Threshold is then adjusted according to the stability requirements. Figure 46 : Detection of sunny side up (shown in upper part) and sunny side down (shown in lower part) using grey level detectors The average cycle time to perform this operation is below 1 ms, largely independent of the wafer properties. VISOR Vision Sensor E _01 Page 55 of 75

56 5.3.9 Busbar analysis For several applications the position and type of busbar needs to be detected: Tabbers / stringers Electrical tests Print control Cell type identification For this purpose the Busbar detector has been developed. It can be applied to solid busbars as well as to busbars comprising of pads as shown in Figure 47. Even busbars of MWT cells can be analysed. Figure 47: Analysing busbars of a pad cell To analyse the front side printing of a cell a front light illumination either by the internal LEDs or by a ring light should be applied. A white homogeneous background provides best results. Do not use an active backlight or a reflective foil when performing a busbar analysis. To analyse cells with their busbars the following configurations may be applied. If a homogeneous background is applied, the busbar detector can be combined with a wafer detector subsequently analysing the same image acquired by one job. In case no homogeneous background can be provided, the busbar can still be detected due to the two detector concept. But a wafer detector may not be able to separate the cell from the machine parts. Thus, the job may comprise of just one busbar detector. To optimize the illumination for the different requirements of the wafer and busbar detector the two detectors can be distributed to two different jobs. This way even a switched backlight can be run in combination with the wafer detector without affecting the busbar detection. However, this approach requires a much higher cycle time and job switching by a PLC. VISOR Vision Sensor E _01 Page 56 of 75

57 The easiest way to determine the calibration factor for mm units is to implement a wafer detector and copy the value to the clipboard. To make use of the Busbar detector, a new Detector has to be created, which is described in section 5.3 Configuration of the Detector characteristics. Choose a Busbar detector (6 th item in the list in Figure 31). For calibration activate mm units on the tab calibration and paste the calibration factor determined by the wafer detector or other means into the busbar detector s control calibration factor and press Apply, see Figure 48. All settings of calibration including distortion removal should be identical for all wafer and busbar detectors. Figure 48: Calibration of the busbar detector VISOR Vision Sensor E _01 Page 57 of 75
 has to be adjusted in the well-known manner (described in section 5.3 Configuration of the Detector characteristics).")
58 Then, switch to the tab Busbar to configure the busbar detection. Figure 49: Settings of the busbar detector The settings of the Busbar Detector are done with a few clicks. First, the yellow region of interest (ROI) has to be adjusted in the well-known manner (described in section 5.3 Configuration of the Detector characteristics). The number of busbars has to be set with the slider to the value corresponding to the analysed cell. Any deviation between setting and observed number of busbars will lead to a FAIL. With Area per busbar the area of each busbar is compared to the limits. The actual measured area is shown in the slider as a blue line, see Figure 49:. If the area of the busbars is not in the set range, this will cause a FAIL. With the slider Angle range the angle of the busbars in respect to the coordinate system of the sensor can be checked. With the Position control the measured position of the gravity centre of the busbars will be checked. This is done with two possible shapes of allowed areas, a rectangle or an ellipse. They appear as blue areas on the screen. The size and position are changed similarly to those of the ROI. Activating the Overlay by switching to Busbar pixel will lead to a colouring all pixel which are considered to be part of a busbar. Please note, that the function of the busbar detection has been successfully verified on various known cell designs. In case of very conventional cells like ones with more busbars than pads per busbar the sensor may not operate as expected. VISOR Vision Sensor E _01 Page 58 of 75


59 After a successful detection of the busbars, each busbar will be surrounded by a green computed rectangle. In case of an active distortion removal the rectangle and the image may apparently deviate despite of a good fit. The center of all busbars is always indicated as a green cross. To compare it to the center of the cell activate the position control of the wafer detector and find the wafer center as a blue cross as shown in Figure 34. The results of the Busbar detector are shown in the Result window after selecting this detector in the list. In the tab Busbar from the Result window there are the main characteristics of the busbars: The centre of gravity, the angle of the set of busbars and their width and length. In the Figure 50: Result tabs of the Busbar Detector the dot right of the centre values is grey, because the Position control feature is not activated. The angle of the Busbars is in the acceptance range of therefore the dot right to it is green. All FAILs will result in a red coloured dot. Figure 50: Result tabs of the Busbar Detector The values of the individual busbars are shown in the tab Overview. These values include the centre, the area and the number of Pads. Since some Busbars are not printed as straight line (to reduce consumption of expensive silver paste) they are printed as a dashed line with some pads as contact to the ribbons. For this purpose the number of Pads detected is shown. Interrupted busbars are indicated by a higher number of pads. As area all pixels belonging to pads are considered, but not the spacing in between them. VISOR Vision Sensor E _01 Page 59 of 75
60 Cell analysis Cells of different designs can be distinguished by setting up a job file for each of them and check for the following properties: Cell types Cell property Distinguished types Detector Detected parameter Size 5 and 6 inch cells Wafer Height Chamfer Mono and multicristalline Wafer Area Chamfers of different sizes Color Reflectivity Brightness Score Number of busbars 2 and 3 busbar cells Busbar Number of busbars Busbar spacing 75 mm / 78 mm / 105 mm cells Busbar Centers of each busbar Number of pads Standard busbars / pad cells Busbar Number of pads Busbar width Cell design Busbar Busbar width Several job files can be loaded on one camera of the Advanced product line. Via an Ethernet command the job for execution can be selected. The quality of the following cell properties can be tested: Quality criteria for cells Quality criterion Detector Detected parameter Chip Wafer Chip size Chip shape Height Hole Wafer Hole Crack Wafer Hole Stain Wafer Hole Busbar interruption Busbar Number of pads Sunny side up Gray level Score For further parameters please contact SensoPart technical support Stringers To make sure that only cells of the same appearance and design are combined in a string a job describing a certain cell type and running relevant quality test has to be set up. Obviously, the center and orientation of the busbar and cell has to become part of the telegram as well. Usually, stringers require a lengthy telegram interfacing them to a PLC. To make sure, this telegram definition is identical for all cell test recipes, it is recommended to define a master job with a master telegram tested in conjunction with the PLC. move to section Job. do a right click on this master job to get a context menu use "copy parameters" for telegram items only to transfer these to a second job. Any differences in telegrams or interfaces will be indicated by a message Inconsistent telegram when starting the sensor. It is recommended to use two fiducials to ensure a long-term stability of the position detection. VISOR Vision Sensor E _01 Page 60 of 75

61 5.4 Adjustment of the needed I/Os via Output The configuration of the in-built digital I/Os are done under I/O mapping. The sensor includes four user configurable I/Outputs and the data interfaces. Depending on your machine configuration, different settings are needed. The sensor is able to communicate with the PLC of your machine via digital I/Os, RS 232, RS 422, Ethernet and Ethernet/IP. The general settings of all interfaces are done with the Interfaces tab. With Timing the trigger delay and other delay times can be configured. The definition of the messages sent via the data interfaces can be done with the Telegram tab. Figure 51: Start window to configure the Outputs I/O mapping With the I/O mapping you can chose which digital In- or Outputs you use. The pinning has been described in section Electrical connection respectively in Figure 14. The digital I/Os pins 5-8 can be configured either as input or as output. In Figure 51 a screenshot of the start window is shown. In the advanced version, pin 10 can be used as positive encoder input. Optionally on pin 5 a negative encoder input is available. To configure an I/O as Input or Output use the check boxes. The available functions are described in the in Online help of SensoConfig on the right. VISOR Vision Sensor E _01 Page 61 of 75
, on pin 6 the inverted result of detector 2 (a wafer detector), on pin 7 the result of detector 2, on pin 8 the inverted result of")

62 5.4.2 Digital output With the Digital output tab you can define, which results are attributed to which pins. In Figure 52 an example is shown. On pin 5 is the result of detector 1 (a grey level detector), on pin 6 the inverted result of detector 2 (a wafer detector), on pin 7 the result of detector 2, on pin 8 the inverted result of detector 2. On pin 9 is the signal for the external illumination and on pin 12 the result of both detectors. The targeted effect of the Output signal can be chosen, just by using the drop down list. When you use the Extended option on the left, a logical expression can be written in the last column Logical expression to use a logical expression of the result of different detectors. Some examples to write logical expressions are given in the in built help on the right. Figure 52: Tab Digital Output of the Output sub menu Interfaces Figure 53: Tab Interfaces of the Output sub menu Via the Interfaces you are able to configure characteristics of the interfaces. The settings are done by using the drop down lists just with a few clicks. First, you have to enable the needed interface, then you can choose the useful settings via the Setting 1/2 column. The Internal I/O can be set as NPN or as PNP Output, in the NPN configuration a external Pull-up-Resistor is needed on the Inputs (Figure 54). Figure 54: Example of the external electrical connection of the Internal I/Os For the RS 422 interface the data transfer rate have to be chosen, default is When you use an External I/O extension, here you have to tell the sensor which kind of external extension you use. When using the Ethernet protocol you can choose which port is your In- or Output. The number of logical outputs can be changed with the spin boxes. VISOR Vision Sensor E _01 Page 62 of 75

63 Timing As described before its useful to trigger the sensor to provide a synchronous image acquisition. The sensor may also provide a delay between the trigger signal and the image acquisition. There are two units that can be used to provide the delay: The typical way will be time delay where the image acquisition starts some milliseconds after the trigger signal. The second way provides a high position accuracy even on conveyor belts with varying speed by using an encoder input signal (available only in the Advanced version). In the Standard version of the sensor the time delay is determined with the Timing tab. With Trigger Delay the time between trigger and the start of the image recording is determined. The time delay between the trigger signal and the change of the output signals depending on the result of the Detecto result is determined with the Digital Output tab. All delays are given in milliseconds. Figure 55: Tab Timing of the Output sub menu After assigning an encoder pin the delay will then be measured in encoder steps. For further information see the online help on the right of SensoConfig Telegram A telegram can be setup easily by a few clicks to meet the standard defined by the PLC. At first, ensure that the respective ports are activated. In case values like positions are to be transmitted, in the section Output / Interfaces the Ethernet interface becomes Enabled. Alternatively, serial links or the field bus Ethernet / IP may be enabled. Digital outputs to distinguish between PASS and FAIL parts do not require a definition of a telegram. It is recommended not to change other parameters than the enabling of the interfaces (see Figure 53). Secondly, an ASCII or binary telegram is composed according to the requirement of the PLC by few further clicks. VISOR Vision Sensor E _01 Page 63 of 75

64 The settings done in the following screenshot leads to a ASCII telegram containing: Data length: e.g. 22 o Separator: ; Wafer center X position in µm: e.g o Separator: ; Wafer center Y position in µm: e.g o Separator: ; Wafer angle in Millidegrees: e.g. 232 o Separator: ; Result of chip test: Either P for PASS or F for FAIL o Separator: ; Figure 56: Definition of a typical ASCII telegram To add new results to the telegram click on the right on the + button. A new line in the Payload window will be shown. First ensure, that the check box Active is checked, then choose your Detector in the next drop down box. In the drop down menu Value you can choose the result which is given out. VISOR Vision Sensor E _01 Page 64 of 75

65 In addition Figure 57 shows the telegram definition of a Busbar Detector. Figure 57: Telegram definition of a Busbar Detector. Once the sensor has been started, it autonomously sends a telegram for each image taken. The example above is compliant to a tool logging the telegrams into a.txt file, which is described in section VISOR Vision Sensor E _01 Page 65 of 75
66 7.1.2 Data log. 5.5 Starting the sensor Now all settings are done, their results checked you are now able to start the sensor it will then run autonomously. To start the sensor press the Start button as described at the beginning of section 5 Software configuration. All needed settings will be stored now on the sensor, until they are overwritten with new settings. It may be useful to save the actual Job-file on your PC as a back-up or to use it in similar machine configuration as described in section VISOR Vision Sensor E _01 Page 66 of 75

67 6 Cycle time This section summarizes the cycle times which are to be expected under typical conditions. Obviously, the cycle time depends on the content of the image, which may deviate from the setups used here. Typically, the 6 mm cameras run with a cycle time of 72 ms, whereas 12 mm and C-Mount cameras require just 57ms for the same task. Figure 58: Cycle time of the offered tools. The Typical setup refers to a V10-SO with 6 mm lenses. In case of severe disturbances of the image, e.g. when there is no wafer but a machine background present or a hand of the operator is exposed to the camera, the cycle time may deviate significantly from the above observations. To cope with such situations in a line which constantly feeds wafers, the Job / cycle time / max. cycle time should be activated and set to a value which is required for an undisturbed line operation. Thus, the image analysis will be aborted after this duration and the result will be a FAIL. VISOR Vision Sensor E _01 Page 67 of 75

68 7 VISOR related tools 7.1. Software SensoView With the VISOR software package comes a tool dedicated to be used by operators. Unlike SensoConfig it can be used during running production to show the actual images, results and statistics. The operator cannot change parameters with this software. SensoView is started by selecting a camera with SensoFind and pressing the View button. The first pages shows the results as described previously for SensoConfig. In case of several jobs and detectors being uploaded to the camera, the respective item can be selected within SensoView. Figure 59: Results shown to the operator using SensoView In a very convenient way, the Current image, the Next image or the Next failed images can be saved by simply pressing the Archiving button. To avoid unintended usage, this function must have been enabled previously by SensoConfig / Job / Image transmission / SensoView. The path of the archive can be defined within SensoView / File / Result archiving The archived images can be analysed in offline simulation with varied detector settings. Thus, the user can optimize the line without running the line during the optimization. VISOR Vision Sensor E _01 Page 68 of 75

69 The statistics of PASS and FAIL devices is shown on a further tab. Additionally, the execution time is shown. Figure 60: Statistics shown to the operator using SensoView For further details see VISOR user manual. VISOR Vision Sensor E _01 Page 69 of 75

70 7.1.2 Data log The data of the sensor s telegram is usually read out by the PLC. To test the precision of the VISOR sensors and the setup in the individual machine it may be useful to read-out the telegram sent from the sensor. This can be done with the freeware program Hercules available from the Internet: To get a telegram for the program Hercules first enable Ethernet in the section Output / tab Interfaces. Second, in Output / tab Telegram the following settings led to a telegram with a new line after each data set / telegram (LineFeed = 0x0A, Carriage Return = 0x0D). Figure 61: Definition of an ASCII telegram to create a log file, for Excel import. VISOR Vision Sensor E _01 Page 70 of 75

71 To receive the date, open the Hercules tool, turn to the tab TCP Client and enter the IP address of the sensor which runs autonomously, define the Port as 2005 and connect to it by pressing the highlighted button. With the context menu of the Hercules tool the data can be submitted to a log file. A typical telegram shown with the Hercules software is given here. Figure 62: Receiving date from the VISOR with the Hercules tool via Ethernet. VISOR Vision Sensor E _01 Page 71 of 75

72 8 Related products The most important products for the applications shown above are listed here. An actual and complete overview is offered by the product finder on our homepage. VISOR Vision Sensor E _01 Page 72 of 75

73 VISOR Vision Sensor E _01 Page 73 of 75
74 9 Useful links and contacts Free download of Vision Sensor VISOR PC Software with sample images including visor-pc-software-v1300 SensoFind, SensoCalc, SensoConfig, Registration required SensoView VISOR user manual SensoCalc Manual on Ethernet communication Product Finder CAD drawings Technical support After installation of above software: Windows START / All programs / SensoPart / VISOR Vision sensor / documentation / user manual After installation of above software: Windows START / All programs / SensoPart / SensoCalc After installation of above software: Windows START / All programs / SensoPart / VISOR Vision sensor / Tools / Ethernet support@sensopart.de VISOR Vision Sensor E _01 Page 74 of 75

75 Appendix A: Test sample VISOR Vision Sensor E _01 Page 75 of 75
Visor Solar sensor for inspecting solar cells
 Visor Solar sensor for inspecting solar cells Focusing on what matters made in Germany The VISOR Solar sensor operates accurately and reliably even in fast-cycle processes. The VISOR Solar sensor measures
It s set up! VISOR. The vision sensor with which you can immediately get going.
 It s set up! VISOR. The vision sensor with which you can immediately get going. 1 Unpack, set up and get going never before have vision sensors been so powerful and so easily and intuitively operated.
ivu Plus Quick Start Guide P/N rev. A -- 10/8/2010
 P/N 154721 rev. A -- 10/8/2010 Contents Contents 1 Introduction...3 2 ivu Plus Major Features...4 2.1 Demo Mode...4 2.2 Sensor Types...4 2.2.1 Selecting a Sensor Type...5 2.3 Multiple Inspections...6 2.3.1
VISOR object sensor In a class of its own.
 VISOR object sensor In a class of its own. 1.3 Mpx Vision sensors and systems Optical sensors Ultrasonic sensors Inductive sensors Capacitive sensors It s set up! VISOR. The vision sensor with which you
GlassSpection User Guide
 i GlassSpection User Guide GlassSpection User Guide v1.1a January2011 ii Support: Support for GlassSpection is available from Pyramid Imaging. Send any questions or test images you want us to evaluate
Vision Sensors Inspector. The intelligent vision solution in an easy-to-use sensor package.
 P R O D U C T I N F O R M AT I O N Vision Sensors Inspector The intelligent vision solution in an easy-to-use sensor package. Product overview Inspector I10 Inspector I20 Inspector I40 Inspector P30 Tough
VISOR Color. Vision sensor for the most precise object detection. made in Germany HIGHLIGHTS OF THE VISOR COLOR
 VISOR Color Vision sensor for the most precise object detection made in Germany The same or not the same? The VISOR Color detects even the smallest of colour nuances more reliably than the human eye. This
Visor object sensor for part detection
 Visor object sensor for part detection Detects the right part in the wrong place and vice versa made in Germany Glue dot present? Early detection by monitoring presence in this case caps for the beverages
ivu Series TG Image Sensor
 Quick Start Guide Introduction The ivu Series Image Sensor is used to monitor labels, parts, and packaging for type, size, orientation, shape, and location. The sensor has an integrated color touch screen
Versatile Camera Machine Vision Lab
 Versatile Camera Machine Vision Lab In-Sight Explorer 5.6.0-1 - Table of Contents Pill Inspection... Error! Bookmark not defined. Get Connected... Error! Bookmark not defined. Set Up Image... - 8 - Location
Quick Start Overview. Related Information. In addition, the sensor includes integrated Help.
 Quick Start Guide Introduction The ivu Plus TG Series sensor is used to monitor labels, parts, and packaging for type, size, orientation, shape, and location. The sensor has an integrated or remote color
LASER. Analog Laser Displacement Transducer. LAM Series. Key-Features: Content:
 LASER Analog Laser Displacement Transducer LAM Series Key-Features: Content: Overview, Measuring Principle...2 Installation Instructions...3 Technical Data...4 Technical Drawings.7 Electrical Connection...9
Models included: GEO EDGE
 Models included: GEO EDGE Printed in USA 12/04 P/N 118000 rev. A WARNING... Not To Be Used for Personnel Protection Never use this product as a sensing device for personnel protection. Doing so could lead
Nova Full-Screen Calibration System
 Nova Full-Screen Calibration System Version: 5.0 1 Preparation Before the Calibration 1 Preparation Before the Calibration 1.1 Description of Operating Environments Full-screen calibration, which is used
inphoto ID Canon camera control software Automatic ID photography User Guide
 inphoto ID Canon camera control software Automatic ID photography User Guide 2008 Akond company 197342, Russia, St.-Petersburg, Serdobolskaya, 65A Phone/fax: +7(812)600-6918 Cell: +7(921)757-8319 e-mail:
ThermaViz. Operating Manual. The Innovative Two-Wavelength Imaging Pyrometer
 ThermaViz The Innovative Two-Wavelength Imaging Pyrometer Operating Manual The integration of advanced optical diagnostics and intelligent materials processing for temperature measurement and process control.
FT 25-C. RGB colour sensor in miniature housing. Optical sensors Ultrasonic sensors Inductive sensors Capacitive sensors Vision sensors and systems
 FT 5-C RGB colour sensor in miniature housing Optical sensors Ultrasonic sensors Inductive sensors Capacitive sensors Vision sensors and systems FT 5-C RGB colour sensor in miniature housing with high
LASER. Analog Laser Displacement Transducer. LAM Series. Key-Features: Content:
 LASER Analog Laser Displacement Transducer LAM Series Key-Features: Content: Measuring Principle...2 Installation Instructions...3 Technical Data LAM-S...4 Technical Data LAM-F...5 Technical Drawing...6
Using the USB2.0 camera and guider interface
 Using the USB2.0 camera and guider interface The USB2.0 interface is an updated replacement for the original Starlight Xpress USB1.1 unit, released in 2001. Its main function is to provide a USB2 compatible
Basler IP Fixed Dome Camera. User s Manual
 Basler IP Fixed Dome Camera User s Manual Document Number: AW000903 Version: 05 Language: 000 (English) Release Date: 16 September 2010 Contacting Basler Support Worldwide Europe and the Middle East: Basler
BR2 Lap Beacon Manual
 MoTeC BR2 Lap Beacon Manual Contents Introduction... 1 Overview... 3 Operation...3 Orientation...5 Range...5 Alignment...5 Verifying Operation...6 Split Beacon Use...6 Configuration - Quick Start... 7
How to combine images in Photoshop
 How to combine images in Photoshop In Photoshop, you can use multiple layers to combine images, but there are two other ways to create a single image from mulitple images. Create a panoramic image with
Distance sensors. System description. Distance measurement using triangulation
 Distance sensors System description Distance measurement using triangulation The measurement principle of optical triangulation is suitable for the precise determination of distances at close range. With
Smart Vision Sensor INSTRUCTION MANUAL
 Smart Vision Sensor INSTRUCTION MANUAL DATALOGIC AUTOMATION Via Lavino 265-40050 Monte S.Pietro - Bologna Italy Tel: +39 051 6765611- Fax: +39 051 6759324 www.automation.datalogic.com e-mail: info.automation.it@datalogic.com
COMPACT GUIDE. Camera-Integrated Motion Analysis
 EN 06/13 COMPACT GUIDE Camera-Integrated Motion Analysis Detect the movement of people and objects Filter according to directions of movement Fast, simple configuration Reliable results, even in the event
DATAVS2 series.
 VISION SENSORS DATAVS2 series The DATAVS2 vision sensor series presents all the characteristics able to solve artificial machine vision applications in a flexible and intuitive way. DATAVS2 is a completely
inphoto ID PS Automatic ID photography With Canon PowerShot camera User Guide
 inphoto ID PS Automatic ID photography With Canon PowerShot camera User Guide 2018 Akond company Phone/fax: +7(812)384-6430 Cell: +7(921)757-8319 e-mail: info@akond.net akondsales@gmail.com http://www.akond.net
Copyright (English) Vision Sensor Manual
 Vision Sensor Manual") Copyright (English) No part of this document may be reproduced, published or stored in information retrieval systems or data bases in any manner whatsoever, nor may illustrations, drawings and the layout
Copyright (English) No part of this document may be reproduced, published or stored in information retrieval systems or data bases in any manner whatsoever, nor may illustrations, drawings and the layout
FTA SI-640 High Speed Camera Installation and Use
 FTA SI-640 High Speed Camera Installation and Use Last updated November 14, 2005 Installation The required drivers are included with the standard Fta32 Video distribution, so no separate folders exist
Laser Damage Threshold System For Final Optics Testing
 University of California, San Diego UCSD-LPLM-06-01 Laser Damage Threshold System For Final Optics Testing Lane Carlson June 5, 2006 Laser Plasma and Laser Matter Interactions Center for Energy Research
Motic Live Imaging Module. Windows OS User Manual
 Motic Live Imaging Module Windows OS User Manual Motic Live Imaging Module Windows OS User Manual CONTENTS (Linked) Introduction 05 Menus, bars and tools 06 Title bar 06 Menu bar 06 Status bar 07 FPS 07
Before you start, make sure that you have a properly calibrated system to obtain high-quality images.
 CONTENT Step 1: Optimizing your Workspace for Acquisition... 1 Step 2: Tracing the Region of Interest... 2 Step 3: Camera (& Multichannel) Settings... 3 Step 4: Acquiring a Background Image (Brightfield)...
AgilEye Manual Version 2.0 February 28, 2007
 AgilEye Manual Version 2.0 February 28, 2007 1717 Louisiana NE Suite 202 Albuquerque, NM 87110 (505) 268-4742 support@agiloptics.com 2 (505) 268-4742 v. 2.0 February 07, 2007 3 Introduction AgilEye Wavefront
CALIBRATION MANUAL. Version Author: Robbie Dowling Lloyd Laney
 Version 1.0-1012 Author: Robbie Dowling Lloyd Laney 2012 by VirTra Inc. All Rights Reserved. VirTra, the VirTra logo are either registered trademarks or trademarks of VirTra in the United States and/or
OzE Field Modules. OzE School. Quick reference pages OzE Main Opening Screen OzE Process Data OzE Order Entry OzE Preview School Promotion Checklist
 1 OzE Field Modules OzE School Quick reference pages OzE Main Opening Screen OzE Process Data OzE Order Entry OzE Preview School Promotion Checklist OzESchool System Features Field unit for preparing all
HG G B. Gyroscope. Gyro for AGV. Device Description HG G B. Innovation through Guidance. Autonomous Vehicles
 Device Description HG G-84300-B Autonomous Vehicles Gyroscope HG G-84300-B Gyro for AGV English, Revision 06 Date: 24.05.2017 Dev. by: MG/WM/Bo Author(s): RAD Innovation through Guidance www.goetting-agv.com
Contents STARTUP MICROSCOPE CONTROLS CAMERA CONTROLS SOFTWARE CONTROLS EXPOSURE AND CONTRAST MONOCHROME IMAGE HANDLING
 Operations Guide Contents STARTUP MICROSCOPE CONTROLS CAMERA CONTROLS SOFTWARE CONTROLS EXPOSURE AND CONTRAST MONOCHROME IMAGE HANDLING Nikon Eclipse 90i Operations Guide STARTUP Startup Powering Up Fluorescence
Difrotec Product & Services. Ultra high accuracy interferometry & custom optical solutions
 Difrotec Product & Services Ultra high accuracy interferometry & custom optical solutions Content 1. Overview 2. Interferometer D7 3. Benefits 4. Measurements 5. Specifications 6. Applications 7. Cases
inphoto ID SLR Automatic ID photography With Canon SLR camera User Guide
 inphoto ID SLR Automatic ID photography With Canon SLR camera User Guide 2014 Akond company Phone/fax: +7(812)384-6430 Cell: +7(921)757-8319 e-mail: info@akond.net akondsales@gmail.com http://www.akond.net
QHY367C. User s Manual Rev. 1.3
 User s Manual Rev. 1.3 This document is an online document. You may save this PDF file or print it out. QHYCCD reserves the right to change this user manual without prior notice. Package Contents please
Wireless sensor system
 Wireless sensor system Internet / Ounet PC in internal network GW Internet connection FIGURE 1 structure of wireless sensor network = Base station = Routing wireless sensor = Wireless sensor General description
DATAVS2 series.
 VISION SENSORS DATAVS2 series The DATAVS2 vision sensor series presents all the characteristics able to solve artificial machine vision applications in a flexible and intuitive way. DATAVS2 is a completely
Figure 1 The Raith 150 TWO
 RAITH 150 TWO SOP Figure 1 The Raith 150 TWO LOCATION: Raith 150 TWO room, Lithography area, NanoFab PRIMARY TRAINER: SECONDARY TRAINER: 1. OVERVIEW The Raith 150 TWO is an ultra high resolution, low voltage
Smart Vision Sensor INSTRUCTION MANUAL
 Smart Vision Sensor INSTRUCTION MANUAL www.vision-sensors-illuminators.com DATASENSOR S.p.A. Via Lavino 265 40050 Monte S. Pietro - Bologna - Italy Tel: +39 051 6765611 Fax: +39 051 6759324 http://www.datasensor.com
MC3 Motion Control System Shutter Stream Quickstart
 MC3 Motion Control System Shutter Stream Quickstart Revised 7/6/2016 Carousel USA 6370 N. Irwindale Rd. Irwindale, CA 91702 www.carousel-usa.com Proprietary Information Carousel USA has proprietary rights
RPMSP Series Installation Guide
 RPMSP Series Installation Guide Contents 1. Overview... page 1 2. Unpacking the Projector...2 3. Projector Configuration...2 4. Projector Throw Distance and Mounting...9 5. Projection Lens Focus...9 6.
Chlorophyll Fluorescence Imaging System
 Quick Start Guide Chlorophyll Fluorescence Imaging System Quick Start Guide for Technologica FluorImager software for use with Technlogica CFImager hardware Copyright 2006 2015 TECHNOLOGICA LIMITED. All
Nikon D7100 Camera Kit. -Checklist and Operations Manual-
 Airborne Digital Reconnaissance System (ADRS) Nikon D7100 Camera Kit -Checklist and Operations Manual- V4.2 October 21, 2014 National Headquarters, Civil Air Patrol 2 1.0 Equipment Pre-Mission Check 1.1
Technical Note How to Compensate Lateral Chromatic Aberration
 Lateral Chromatic Aberration Compensation Function: In JAI color line scan cameras (3CCD/4CCD/3CMOS/4CMOS), sensors and prisms are precisely fabricated. On the other hand, the lens mounts of the cameras
VISION. DataVS2 DATAVS2
 DATAVS2 The DataVS2 vision sensor series presents all the characteristics to solve artificial machine vision applications in a flexible and intuitive way. DataVS2 is a completely embedded device: the optic,
Machine Vision Basics
 Machine Vision Basics bannerengineering.com Contents The Four-Step Process 2 Machine Vision Components 2 Imager 2 Exposure 3 Gain 3 Contrast 3 Lens 4 Lighting 5 Backlight 5 Ring Light 6 Directional Lighting
inphoto ID Canon and Olympus camera control software Automatic ID photography User Guide
 inphoto ID Canon and Olympus camera control software Automatic ID photography User Guide 2006 Akond company 197342, Russia, St.-Petersburg, Serdobolskaya, 65a Phone/fax: +7(812)600-6918 Cell: +7(921)757-8319
SYNGUIDER USER'S MANUAL
 SYNGUIDER USER'S MANUAL GETTING STARTED PREPARING THE SYNGUIDER BASIC OPERATIONS OPERATION UNDER THE NIGHT SKY SPECIFICATIONS 1 3 4 9 15 060613V1 Thank you for choosing the SynGuider. The SynGuider can
BacklightFly Manual.
 BacklightFly Manual http://www.febees.com/ Contents Start... 3 Installation... 3 Registration... 7 BacklightFly 1-2-3... 9 Overview... 10 Layers... 14 Layer Container... 14 Layer... 16 Density and Design
Aimetis Outdoor Object Tracker. 2.0 User Guide
 Aimetis Outdoor Object Tracker 0 User Guide Contents Contents Introduction...3 Installation... 4 Requirements... 4 Install Outdoor Object Tracker...4 Open Outdoor Object Tracker... 4 Add a license... 5...
VCNL4000 Demo Kit. IR Anode. IR Cathode. IR Cathode SDA SCL
 VISHAY SEMICONDUCTORS Optoelectronics Application Note INTRODUCTION The VCNL4000 is a proximity sensor with an integrated ambient light sensor. It is the industry s first optical sensor to combine an infrared
INSPECTION SENSORS SVS2 SERIES VISION SENSORS HIGHLIGHTS APPLICATIONS
 INSPECTION VISION SENSORS SVS2 SERIES The SVS2 vision sensor series presents all the characteristics able to solve artifi cial machine vision applications in a fl exible and intuitive way. SVS2 is a completely
Reference and User Manual May, 2015 revision - 3
 Reference and User Manual May, 2015 revision - 3 Innovations Foresight 2015 - Powered by Alcor System 1 For any improvement and suggestions, please contact customerservice@innovationsforesight.com Some
SKF TKTI. Thermal Camera Software. Instructions for use
 SKF TKTI Thermal Camera Software Instructions for use Table of contents 1. Introduction...4 1.1 Installing and starting the Software... 5 2. Usage Notes...6 3. Image Properties...7 3.1 Loading images
LPR SETUP AND FIELD INSTALLATION GUIDE
 LPR SETUP AND FIELD INSTALLATION GUIDE Updated: May 1, 2010 This document was created to benchmark the settings and tools needed to successfully deploy LPR with the ipconfigure s ESM 5.1 (and subsequent
WARNING VSPM-6F2113 (Inspector PIM60)
") WARNING VSPM-6F2113 (60) The Inspector is equipped with a LED illumination that must be considered as a lamp system of Risk Group 1 (low risk) according to IEC 62471:2006 WARNING: OPTICAL RADIATION DO
WARNING VSPM-6F2113 (60) The Inspector is equipped with a LED illumination that must be considered as a lamp system of Risk Group 1 (low risk) according to IEC 62471:2006 WARNING: OPTICAL RADIATION DO
ISONIC PA AUT Spiral Scan Inspection of Tubular Parts Operating Manual and Inspection Procedure Rev 1.00 Sonotron NDT
 ISONIC PA AUT Spiral Scan Inspection of Tubular Parts Operating Manual and Inspection Procedure Rev 1.00 Sonotron NDT General ISONIC PA AUT Spiral Scan Inspection Application was designed on the platform
Hartmann Sensor Manual
 Hartmann Sensor Manual 2021 Girard Blvd. Suite 150 Albuquerque, NM 87106 (505) 245-9970 x184 www.aos-llc.com 1 Table of Contents 1 Introduction... 3 1.1 Device Operation... 3 1.2 Limitations of Hartmann
How-to guide. Working with a pre-assembled THz system
 How-to guide 15/06/2016 1 Table of contents 0. Preparation / Basics...3 1. Input beam adjustment...4 2. Working with free space antennas...5 3. Working with fiber-coupled antennas...6 4. Contact details...8
Instruction Manual for HyperScan Spectrometer
 August 2006 Version 1.1 Table of Contents Section Page 1 Hardware... 1 2 Mounting Procedure... 2 3 CCD Alignment... 6 4 Software... 7 5 Wiring Diagram... 19 1 HARDWARE While it is not necessary to have
AF Area Mode. Face Priority
 Chapter 4: The Shooting Menu 71 AF Area Mode This next option on the second screen of the Shooting menu gives you several options for controlling how the autofocus frame is set up when the camera is in
A Revolution in Profile Measurement
 2D Laser Displacement Sensor LS Series * FASTUS is a product brand of Optex FA. Linearity ±0.1% of F.S. Sampling period 0.5 ms (max. speed) Superbly affordable 2D measurement A Revolution in Profile Measurement
GXCapture 8.1 Instruction Manual
 GT Vision image acquisition, managing and processing software GXCapture 8.1 Instruction Manual Contents of the Instruction Manual GXC is the shortened name used for GXCapture Square brackets are used to
Job Sheet 3. Using the Machine Vision System OBJECTIVE PROCEDURE. Setup and connections
 Job Sheet 3 Using the Machine Vision System OBJECTIVE Install the Machine Vision System on the Flexible Manufacturing System and use it to perform quality control on the boxes filled with marbles. PROCEDURE
RICOH Stereo Camera Software R-Stereo-GigE-Calibration
 RICOH Stereo Camera Software R-Stereo-GigE-Calibration User's Guide RICOH Industrial Solutions Inc. 1/18 Contents 1. FUNCTION OVERVIEW... 3 1.1 Operating Environment... 3 2. OPERATING PROCEDURES... 4 3.
Vinyl Cutter Instruction Manual
 Vinyl Cutter Instruction Manual 1 Product Inventory Inventory Here is a list of items you will receive with your vinyl cutter: Product components (Fig.1-4): 1x Cutter head unit complete with motor, plastic
Technical data. Your advantages
 Technical data Nominal torque: 50 Nm to 2.000 Nm, bidirectional Rotational speed: 10.000 rpm Accuracy: ±0,2 % Temperature range: -40 C to +85 C Protection class: IP50, IP65 Output signals: 0-10 V/4-20
Stitching MetroPro Application
 OMP-0375F Stitching MetroPro Application Stitch.app This booklet is a quick reference; it assumes that you are familiar with MetroPro and the instrument. Information on MetroPro is provided in Getting
CHAPTER1: QUICK START...3 CAMERA INSTALLATION... 3 SOFTWARE AND DRIVER INSTALLATION... 3 START TCAPTURE...4 TCAPTURE PARAMETER SETTINGS... 5 CHAPTER2:
 Image acquisition, managing and processing software TCapture Instruction Manual Key to the Instruction Manual TC is shortened name used for TCapture. Help Refer to [Help] >> [About TCapture] menu for software
Kigamo Scanback which fits in your view camera in place of conventional film.
 What's included Kigamo Scanback which fits in your view camera in place of conventional film. SCSI Cable to connect your Scanback to the host computer. A 3-meter SCSI cable is standard. Kigamo also has
WPE 48N USER MANUAL Version1.1
 Version1.1 Security instructions 1. Read this manual carefully. 2. Follow all instructions and warnings. 3. Only use accessories specified by WORK PRO. 4. Follow the safety instructions of your country.
QL55 Series Luminescence Sensor
 Self-contained, microprocessor-based luminescence sensor Features Self-contained design in a robust, compact metal housing High sensitivity Microprocessor-controlled Senses luminescent marks, even on luminescent
Contents Technical background II. RUMBA technical specifications III. Hardware connection IV. Set-up of the instrument Laboratory set-up
 RUMBA User Manual Contents I. Technical background... 3 II. RUMBA technical specifications... 3 III. Hardware connection... 3 IV. Set-up of the instrument... 4 1. Laboratory set-up... 4 2. In-vivo set-up...
LITESTAGE USER'S GUIDE
 LITESTAGE USER'S GUIDE Note: This is a general user's guide for all of the Litestage models. Equipment shown is not included on all models. For more information on additional equipment and accessories,
Answering frequently asked Questions (Firmware V.107)
") FAQ EasyConn Profibus plug Answering frequently asked Questions (Firmware V.107) EasyConn LEDs: While connected, the Profibus connector offers the following test functions for start-up and trouble shooting
FAQ EasyConn Profibus plug Answering frequently asked Questions (Firmware V.107) EasyConn LEDs: While connected, the Profibus connector offers the following test functions for start-up and trouble shooting
Kit for building your own THz Time-Domain Spectrometer
 Kit for building your own THz Time-Domain Spectrometer 16/06/2016 1 Table of contents 0. Parts for the THz Kit... 3 1. Delay line... 4 2. Pulse generator and lock-in detector... 5 3. THz antennas... 6
Matsushita Electric Works, Ltd. The tough, compact image sensing device that is easy to use. LightPix AE20 ARCT1B250E
 The tough, compact image sensing device that is easy to use LightPix AE20 ARCT1B250E-1 06.6 http://www.nais-e.com/vision/ Panasonic... the new name for Matsushita Electric Works, Ltd. Advanced usabiliy,
English PRO-642. Advanced Features: On-Screen Display
 English PRO-642 Advanced Features: On-Screen Display 1 Adjusting the Camera Settings The joystick has a middle button that you click to open the OSD menu. This button is also used to select an option that
SPECTRO Series SPECTRO-3-30-POL. Design. SPECTRO-3 Series True Color Sensors. Product name: Accessories: (p )
") SPECTRO Series - Measuring range typ. 15 mm... 80 mm - Polarization filter (very intense reducution of gloss effect) - Up to 31 colors can be stored - RS232 interface (USB or Ethernet adapter is available)
SPECTRO Series - Measuring range typ. 15 mm... 80 mm - Polarization filter (very intense reducution of gloss effect) - Up to 31 colors can be stored - RS232 interface (USB or Ethernet adapter is available)
INTRODUCTION TO VISION SENSORS The Case for Automation with Machine Vision. AUTOMATION a division of HTE Technologies
 INTRODUCTION TO VISION SENSORS The Case for Automation with Machine Vision AUTOMATION a division of HTE Technologies TABLE OF CONTENTS Types of sensors... 3 Vision sensors: a class apart... 4 Vision sensors
Vandal Proof Camera: v-cam 500 (D-WDR, 650 TVL, Sony Effio-E, 0.05 lx) Vandal Proof Camera: v-cam 500 (D-WDR, 650 TVL, Sony Effio-E, 0.
 Vandal Proof Camera: v-cam 500 (D-WDR, 650 TVL, Sony Effio-E, 0.") Vandal Proof Camera: v-cam 500 (D-WDR, 650 TVL, Sony Effio-E, 0.05 lx) Code: M10772 View of the camera View of the inside. Visible OSD keypad (on the left picture) and lens locking screws (on the right).
Vandal Proof Camera: v-cam 500 (D-WDR, 650 TVL, Sony Effio-E, 0.05 lx) Code: M10772 View of the camera View of the inside. Visible OSD keypad (on the left picture) and lens locking screws (on the right).
1 ImageBrowser Software User Guide 5.1
 1 ImageBrowser Software User Guide 5.1 Table of Contents (1/2) Chapter 1 What is ImageBrowser? Chapter 2 What Can ImageBrowser Do?... 5 Guide to the ImageBrowser Windows... 6 Downloading and Printing Images
This has given you a good introduction to the world of photography, however there are other important and fundamental camera functions and skills
 THE DSLR CAMERA Before we Begin For those of you who have studied photography the chances are that in most cases you have been using a digital compact camera. This has probably involved you turning the
COGNEX. Checker 3G Series. User s Guide
 COGNEX Checker G Series User s Guide COGNEX What is Checker G and what does it do? Table of Contents Checker G is a programmable vision sensor that verifies the presence and appearance of objects. You
 www.cairn-research.co.uk Free Phone: 08453301267 (UK only) Tel: +44 (0) 1795590140 Fax: +44 (0) 1795594510 Important Information Please Read Before Installing and Operating Your Optosplit II For maximum
Photoshop Elements Hints by Steve Miller
 2015 Elements 13 A brief tutorial for basic photo file processing To begin, click on the Elements 13 icon, click on Photo Editor in the first box that appears. We will not be discussing the Organizer portion
Assembly Instructions
 Assembly Instructions optocontrol 2520 Functions Edge measurement with the shadow principle (Edge low-high; edge high-low) Measurement of diameter-, width-, gap incl. center axis Counting of edges or segments,
ISCapture User Guide. advanced CCD imaging. Opticstar
 advanced CCD imaging Opticstar I We always check the accuracy of the information in our promotional material. However, due to the continuous process of product development and improvement it is possible
Line beam for fast, accurate measuring of height and width
 454 displacement sensor series Line beam for fast, accurate measuring of height and width Linearity of ±0.1% F.S. Sampling period of 0.5 ms (max. speed) 2-dimensional measurements at a significantly low
ScanArray Overview. Principle of Operation. Instrument Components
 ScanArray Overview The GSI Lumonics ScanArrayÒ Microarray Analysis System is a scanning laser confocal fluorescence microscope that is used to determine the fluorescence intensity of a two-dimensional
Momentum and Impulse. Objective. Theory. Investigate the relationship between impulse and momentum.
 [For International Campus Lab ONLY] Objective Investigate the relationship between impulse and momentum. Theory ----------------------------- Reference -------------------------- Young & Freedman, University
A Stony Brook Student s Guide to Using CCDSoft By Stephanie Zajac Last Updated: 3 February 2012
 A Stony Brook Student s Guide to Using CCDSoft By Stephanie Zajac Last Updated: 3 February 2012 This document is meant to serve as a quick start guide to using CCDSoft to take data using the Mt. Stony
gfm-app.com User Manual
 gfm-app.com User Manual 03.07.16 CONTENTS 1. MAIN CONTROLS Main interface 3 Control panel 3 Gesture controls 3-6 2. CAMERA FUNCTIONS Exposure 7 Focus 8 White balance 9 Zoom 10 Memory 11 3. AUTOMATED SEQUENCES
Technical Guide for Radio-Controlled Advanced Wireless Lighting
 Technical Guide for Radio-Controlled Advanced Wireless Lighting En Table of Contents An Introduction to Radio AWL 1 When to Use Radio AWL... 2 Benefits of Radio AWL 5 Compact Equipment... 5 Flexible Lighting...
UCP-Config Program Version: 3.28 HG A
 Program Description HG 76342-A UCP-Config Program Version: 3.28 HG 76342-A English, Revision 01 Dev. by: C.M. Date: 28.01.2014 Author(s): RAD Götting KG, Celler Str. 5, D-31275 Lehrte - Röddensen (Germany),