DNR reserves the right, without prior notice or liability, to make changes in equipment design or specifications.
|
|
|
- Sharon Hutchinson
- 5 years ago
- Views:
Transcription
1
2 Important Notice Copyright DNR Bio-Imaging Systems, Ltd. All rights reserved. The information contained in this document is proprietary and is subject to all relevant copyright, patent, and other laws protecting intellectual property, as well as any specific agreement protecting DNR Bio-Imaging Systems, Ltd. (DNR) rights in the aforesaid information. Neither this document nor the information contained herein may be published, reproduced, or disclosed to third parties, in whole or in part, without the express, prior written permission of DNR. Such information is supplied solely for the purpose of assisting explicitly and properly authorized users of the LumiBIS. DNR reserves the right, without prior notice or liability, to make changes in equipment design or specifications. The text and graphics are for the purpose of illustration and reference only. The specifications on which they are based are subject to change without notice. Information in this user guide is subject to change without notice. Corporate and individual names and data used in examples herein are fictitious unless otherwise noted. The software described in this user guide is furnished under license. The software may be used or copied only in accordance with the terms of that agreement. Other company and brand products and service names are trademarks or registered trademarks of their respective holders. This document may contain flaws, ommissions, or typesetting errors; no warranty is granted nor liability assumed in relation thereto unless specifically undertaken by DNR sales, contract, or order confirmation. Information contained herein is periodically updated and changes will be incorporated into subsequent editions. If you have encountered any error please contact DNR. Contact us at: USA Toll-free number:
3 Table of Contents 1 Introduction Installing the LumiBIS System... 3 Safety Requirements... 3 Out of the Box... 4 Minimum PC Requirements... 4 Hardware Set Up... 5 Software Installation... 5 Install the GelCapture software from CD... 6 Install the Hardware Drivers... 9 I/O Driver Installation... 9 Camera Driver Installation CCD Calibration Focus Calibration Ready to Start LumiBIS: A First Look Features and Benefits System Overview The LumiBIS Unit Optical Bench Smart Dark Chamber Rear Panel GelCapture Toolbar Basic Tools Insert the Sample Detect the sample i
4 2. Preview the Image Preview an image Adjust the Lens Focus Calibration Adjust the Camera Lens Set the Camera Parameters Set Exposure Time Set the Gain Set the Brightness Set the Lights Dual UV Configuration (Optional) Set the LEDs (optional) Select the Filters Acquire Acquire an image Saving Save Advanced Save Set up Advanced Save (Software Integration) Set up Advanced Save (Hardware Integration) Advanced Tools Default Settings To revert to the Default Settings: Procedures Open a procedure Create a procedure based on an image Save a procedure Presets Load a preset Save the configuration as a preset Image Statistics Graph Inverted Image ii
5 View the image as an inverted image Pseudocolors View the image in pseudocolors User defined Pseudocolors Show/Hide Overexposure Zoom In and Out Actual Pixels Fit to Window Full Screen Troubleshooting Glossary iii
6 iv
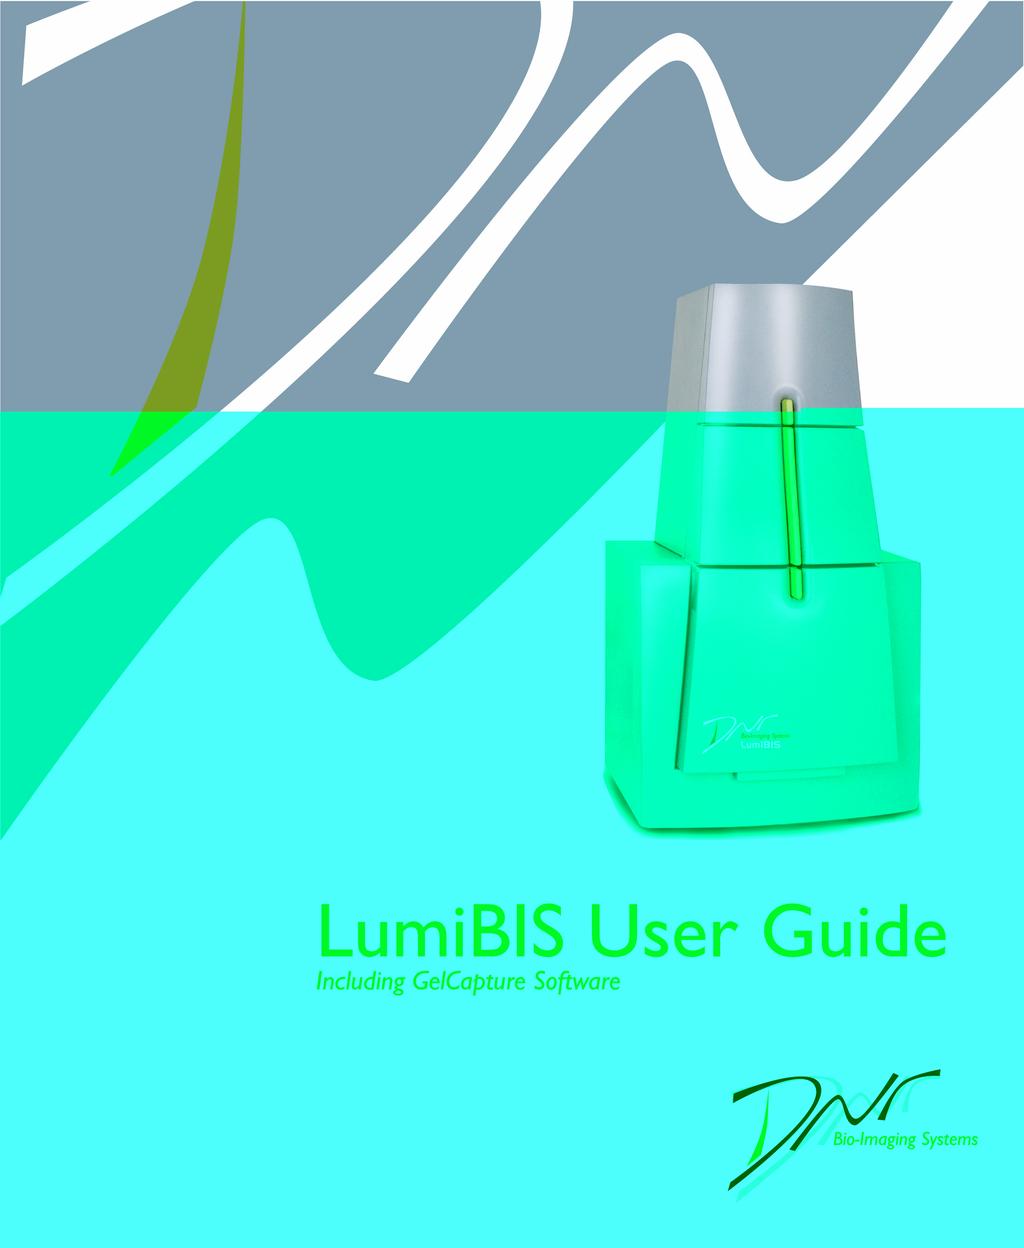
7 1 Introduction The LumiBIS is a fully automated, versatile documentation workstation that supports fluorescent, colorimetric, and advanced fluorescent applications all with the touch of a button. The optional integrated monochromatic LEDs system has six types of LEDs that support a diverse variety of fluorescent applications. The system includes DNR's unique Automatic Drawer Detection Technology that automatically adjusts the software to match the illumination conditions. This fully motorized, completely automatic workstation supports view, zoom, iris, focus, and illumination sources, to name a few, on PC monitors in real time. Its intuitive, easy-to-use GelCapture acquisition and operation software completes this imaging station. This User Guide is one of two documents packaged with the LumiBIS system. Become familiar with the next chapter, Installing the LumiBIS System. Once the system is installed and operational continue to explore the system s features and procedures. Everything you need to know about your LumiBIS system is included in this guide. Please pay special attention to the highlighted chapters below. They contain information that you may need to refer to in your day-to-day use of the LumiBIS. Chapter Topics Covered 1 Introduction An introduction to the manual and the topics covered. 2 Installing the LumiBIS System A step-by-step set of instructions for installing the system. 3 LumiBIS: A First Look An introduction to the LumiBIS unit and the GelCapture software. 4 Basic Tools The preparatory steps for capturing an image. 5 Advanced Tools How to use the configuration and viewing options. 1
8 Introduction 6 Troubleshooting A listing of the most common issues and how to resolve each. 7 Glossary A list of terms used in this guide and their definitions. Once you are more familiar with the system, you may want to refer to The LumiBIS Quick Reference Guide, which is a more condensed version of this guide intended for experienced users. This user guide is intended for use with the following models: LumiBIS with the 1.4 Mpixel CCD camera LumiBIS with the 2 Mpixel CCD camera 2
9 2 Installing the LumiBIS System This chapter is designed to help you quickly install your new LumiBIS system. Once you have completed these steps, your LumiBIS will be completely operational. This chapter contains: Safety Requirements Out of the Box a visual check list of the system Minimum PC Requirements Hardware Set Up Software Installation CCD Calibration Focus Calibration Ready to Start Safety Requirements To insure your safety and the safety of your equipment do the following: Ensure compatibility between the power supply cable and the local electrical outlet. Ensure proper grounding of the AC power outlet to protect both personnel and the equipment. Ensure that all devices are turned off before making any connections. Check that the ventilation openings of the LumiBIS are clear. Place the LumiBIS at least 30cm away from the walls and ceiling. Do not store the system in temperatures below 2ºC. The recommended operating conditions for the LumiBIS are 25ºC±5 (78ºF±15.5) and 55% relative humidity. 3
10 Installing the LumiBIS System Do not store the system in direct sunlight. Also do not store the system in the direct flow of the air conditioner. Do not clean the system with harmful solvents. Only use 70% Ethanol. Use only a 4A fuse for an acceptable range of V. Do not open the system. Due to the danger of exposure to high voltage, only trained service technicians may open the system. Ensure that the system is physically stable. Do not place the system near any vibrating or magnetic equipment. When using gloves it is recommended to use only gloves without talc. Out of the Box The LumiBIS system has the following components: 1. LumiBIS 2. Camera cable (FireWire) 3. I/O cable (USB 2.0) 4. 1 AC power cord (European or North American) 5. GelCapture and image analysis software CDs 6. 2 Drawers: WL, UV Minimum PC Requirements In order to install and operate both the LumiBIS and the GelCapture software the workstation must have the following: Pentium 4 (not Celeron) 2.4 GHz, minimum 256 RAM, minimum Windows XP Pro (English version) 4
11 Hardware Set Up Monitor resolution: 1024 x 768 pixels 1 FireWire slot Hardware Set Up Setting up the LumiBIS unit can be done quickly and easily using the following steps: Note: The system must be off until you are instructed to turn it on. On the rear panel of the LumiBIS, make the following connections: 1. Connect the power cord to the wall socket. 2. Connect the I/O cable to the appropriate socket on the LumiBIS backplane. Connect the cable to the appropriate slot in the back of the PC workstation. Note: Connect the FireWire cable only after the GelCapture installation. Software Installation After hardware setup install all of the necessary software as follows: Install the GelCapture software from the CD. Install the I/O and camera drivers. 5

12 Installing the LumiBIS System Install the GelCapture software from CD 1. Insert the installation CD into the computer. The installation wizard automatically begins. On the Welcome screen, click Next. 2. In the Select Destination Location window specify the destination folder for the system. The default is C:\Program Files\DNR\GelCapture. Click Next. 6

13 Software Installation 3. Select the component to install and click Next. There are two configurations with which the LumiBIS can be installed: with or without LEDs (LumiBIS/LumiBIS with LEDs). The LEDs illumination allows you to detect dyes which require unique excitation wavelengths. The LumiBIS with LEDs is implemented in the system only under request. Additional information about the LEDs can be read on page 33. 7


14 Installing the LumiBIS System 4. On the Select Additional Tasks screen, if desired select to create a GelCapture desktop icon. Also select the Dual UV Lights, or Lower UV Illumination Only, if applicable. Click Next to continue the installation. Dual UV Lights enable sample detection with two UV wavelengths kinds. Additional information about the Dual UV can be read on page After verifying that the installation information is correct click Install. 8

15 Install the Hardware Drivers 6. When the installation is complete, you have the option of restarting your computer now or later. 7. Select Yes, restart the computer now and click Finish. Note: You cannot start using GelCapture properly until you have restarted your computer. Install the Hardware Drivers I/O Driver Installation After restarting the workstation install the I/O driver: 1. After the PC restarts, turn on the LumiBIS unit. Windows XP Pro automatically detects the I/O controller inside the LumiBIS. 9
16 Installing the LumiBIS System 2. You need to install the I/O drivers (three times). After the I/O driver installation process the Found New Hardware Your new hardware is installed and ready to use message appears. Note: You will need to reinstall the drivers each time you change the USB cables positions or places. Camera Driver Installation 1. Connect the camera to the appropriate port on the PC with the FireWire cable. 2. Right click on the My Computer desktop folder. 3. Select the Properties option. 4. Open the Hardware option in this window. 5. Open the Device Manager option in this window. 6. Click Imaging Devices to display the list. 10


17 Install the Hardware Drivers 7. Right click on the Generic 1394 Desktop Camera (with a yellow exclamation mark on the left). 8. Choose Update driver option. 9. Install the driver. a. Choose No, not this time in the first installation window. Click Next. 11


18 Installing the LumiBIS System b. Choose Install from a list or a specific location (Advanced). Click Next. c. Choose Don t search. I will choose the driver to install. Click Next. 12


19 Install the Hardware Drivers d. Choose DNR LumiBIS SOM. Click Next. e. Click Continue Anyway. f. Click Finish. 13
20 Installing the LumiBIS System 10. Verify that the IEEE generic 1394 line appears without the yellow exclamation mark on the left side. The LumiBIS camera driver is installed and ready to use. CCD Calibration The system must be calibrated after installation and before use. This calibration must be performed after the initial set up and any time a different computer is connected to the LumiBIS. DNR recommends that you calibrate the system annually or less as a part of your preventative maintenance operations. 14


21 Focus Calibration Transition to Camera Calibration by clicking File Calibration Camera Calibration. The CCD Calibration Progess window appears. The bar under Dark images displays the calibration progress. Focus Calibration Calibrating the focus for each zoom step must occur before using the system. However, in order to calibrate the focus you must first learn to navigate GelCapture. After becoming familiar with the GelCapture system, refer to page 28 to set the focus. Ready to Start The LumiBIS system is now configured and ready. Read the rest of this guide before using the LumiBIS system. Once you are more familiar with the system, its features, and its configurations, then you may wish to use The LumiBIS Quick Reference Guide. 15
22 Installing the LumiBIS System 16
23 3 LumiBIS: A First Look The DNR LumiBIS is a reliable, superior, gel documentation system. This fully automated system controls the camera, lens, illumination, and other setting using a PC workstation. Using the automated zoom the researcher quickly and easily changes the field of view to suit the sample size. The simple user interface provides laboratory researchers with quick, accurate image acquisition, and results. Features and Benefits The key features that make the LumiBIS the choice for bio-imaging professionals include: Reliable fluorescence and colorimetric gel documentation system. CCD Camera with high resolution 1.4/2 Mpixels, 16-bit file format. Motorized high-speed zoom lens, iris, and focus. Enhanced sensitivity, maximum light, minimal geometric and light distortion. Stores and saves an unlimited number of procedures. There are five presets for quick image detection. Smart Dark Chamber TM technology with an automated UV protection mechanism and application recognition. Protects the user from harmful UV radiation by automatically shutting down the illuminator when the door is opened. Each light type has its own drawer with its own unique locking mechanism. As soon as the drawer is set properly the system knows which light is in use and adjusts itself accordingly. Offers 10 different types of epi-illumination. High magnification in real time provides a detailed viewing of the samples. Click-of-a-button interface to perform most operations. 17
24 LumiBIS: A First Look System Overview The LumiBIS system is an integrated hardware and software solution. The sample is placed within the LumiBIS Unit, which is both controlled and monitored by the GelCapture software. GelCapture also previews and saves the detected images, which are then exported for analysis. Configurations can be saved and later recalled for use with future samples. Insert the sample into the system Detect and acquire the sample image Analyse 18
25 The LumiBIS Unit The LumiBIS Unit The LumiBIS is a state-of-the-art bio-imaging device with a 16-bit CCD camera and two removable drawers. The unit is divided into three sections: Rear Panel Optical Bench Smart Dark Chamber Optical Bench The optical bench houses a quality zoom lens with iris adjustment, zoom, and focus. The lens contains a motorized zoom, motorized focus, and motorized iris which move automatically according to the controls configured at the workstation. Due to the automated nature of the LumiBIS the optical bench is sealed. Smart Dark Chamber The bottom slot accommodates two different drawers for two different light types: White Light (WL) and Ultra Violet (UV). As each drawer is inserted and the door closed properly, the drawer fits into place, making the Smart Dark Chamber light-tight. The intelligent dark box instantly recognizes the inserted drawer and configures the system accordingly. 19

26 LumiBIS: A First Look The Smart Dark Chamber is equipped a with special mechanism for user safety. When the LumiBIS door is opened, the UV lights turn off automatically to prevent harmful UV radiation from escaping. As we all know the risks with this kind of radiation, this feature bring a unique advantage to the LumiBIS. Rear Panel The power connection, safety fuses, and cables are on the rear panel. I/O cable connector : The I/O USB2 cable is responsible for the system communication. FireWire cable: The FireWire cable is responsible for the camera voltage and communication. Two(2) 4-ampere safety fuses: Both fuses are used in the LumiBIS s operation; if either fuse blows, it will need to be replaced. On/Off button: Powers on and off the unit. AC power connector: The AC power cable powers the unit. The unit ships with a destination specific cable for European or North American voltage. 20
27 GelCapture GelCapture The GelCapture application seamlessly integrates with the LumiBIS unit for complete control to configure, capture, and save sample images for analysis. The interface shows the features and tasks on the main screen. Menu Bar Toolbar Exposure Time Gain Brightness Light/Optics/Graph Tab LEDs Light Filter Door/Drawer Status Viewing Area Menu Bar: The drop-down menu items contain all of the GelCapture features. Toolbar: Those features which are not available on the left panel are available across the top as buttons. Exposure Time: Exposure time is set in increments of 1 minute down to 10 milliseconds. See 4.1 Set Exposure Time on page 30. Gain: Gain increases light sensitivity at the expense image clarity. See 4.2. Set the Gain on page 31. Brightness: The brightness is a level of black in the image. See 4.3. Set the Brightness on page
28 LumiBIS: A First Look Light: LEDs: Set the monochromatic LED lights. See 6. Set the LEDs (optional) on page 33. Lights: Indicates which lights, and what type, are being used. See 5. Set the Lights on page 32. Filters: Set the filter selection. See 7. Select the Filters on page 33. Optics: Set the camera lens. See 3. Adjust the Lens on page 27. Focus Set the optimal focus. Iris Set the aperature. Zoom Set the zoom position. Graph: Image Statistics Graph. See Image Statistics Graph on page 44. Door status/ Drawer type: Viewing Area: Indicates if the lower door is open or closed, and what drawer type is being used. The captured image appears here. Toolbar The most common tasks and features can usually be accessed with a single click of a button. Default Open Procedure Save Procedure Load Presets Open File Restores the system configuration to the default settings. Opens a procedure. Saves the configuration as a specified procedure. Loads a preset. Right clicking on the Load Preset icon opens the Preset dialog menu, which allows you to create your own presets. Opens a previously scanned and saved TIFF image. 22
29 GelCapture Save Copy Image Statistics Graph Inverted Image Pseudocolors Show/Hide Overexposure Zoom in Zoom Out Actual Pixels Fit to Window Full Screen GelQuant RGB Saves the image to the file. Copies the image to the clipboard. You can then paste the image in any number of Windows applications. Generates statistics about the sample image. This is the same function as selecting the Graph tab. Presents an inverse version of the image. Shows the sample in simulated color. Shows in red those areas that are overexposed. Digitally zooms in to the image. This should not be confused with the camera s zoom. Digitally zooms out of the image. This should not be confused with the camera s zoom. Presents the image in its actual size. Resizes the image to fit within the image window. Displays the image so that it fills the entire screen. To return to the GelCapture main screen press [Esc]. Short cut to the GelQuant analysis software if installed. Enables detection of the sample in true colors (as opposed to pseudocolors). 23
30 LumiBIS: A First Look 24
31 4 Basic Tools The LumiBIS system supports configuring and fine tuning the system in order to optimally acquire different sample types. Use the following basic steps to preview and capture a sample image: 1. Insert the sample. 2. Preview the sample. 3. Set the camera parameters. 4. Set the machine parameters. 5. Capture the image. 6. Use the Advanced Save features. This feature is for serial image detection. Each stage is covered in greater detail in the following sections. In brief, before you can capture the image, you need to configure the system. 1. Insert the Sample The very first step, inserting the sample on the appropriate LumiBIS(UV/WL) drawer, is completed in a few quick steps. 1.1 Detect the sample 1. Turn on the LumiBIS unit. 2. Start the GelCapture software. 3. Open the lower door of the LumiBIS. If the lights are on, it automatically switches off as a safety precaution. If the LEDs are on, they stay on when the door is opened. The LEDs are not harmful nor do they pose a safety hazzard. 25
32 Basic Tools 4. Select the required drawer, which is usually determined by the sample s dyes. Fluorescent dyes UV (Ultra Violet) Visible dyes WL (White Light) 5. Place the sample into the center of the drawer for image capture. 6. Close the drawer and the door. 7. If the door is closed and the drawer is in place, the GelCapture software indicates the drawer type. Drawer open and not in place Drawer closed and in place Note: After every use clean the drawer with 70% Ethanol. 2. Preview the Image During the Preview mode, there are several parameters that have to be set, including the Iris position, Focus position, Zoom position, and the Filter selection. In order to set these parameters: 1. Choose a drawer and an appropriate sample, and insert it into the system. 2. Activate the Preview mode. An image displays on the screen according to the default parameters. Along with this the Statistics graph window appears, which shows the statistic parameters of this image. 3. In order to set the Optics parameters, click on the Optics tab in the lower left corner of the GelCapture window. Here you may set parameters for zoom, iris, 26
33 3. Adjust the Lens and focus. Clicking on the Light tab allows you to see the LEDs, lights, and filter parameters. Once the system is configured and ready, you can preview an image of the sample. The Preview function captures the image according to the camera and machine parameters which are described in the following pages. For more advanced image capture possibilities, please refer to 9.2 Advanced Save, page Preview an image These general steps are the stages of image preview: 1. Click Preview. 2. Set the camera parameters: exposure time, gain, and brightness. 3. Adjust the lens. 4. Set the light and filter parameters. GelCapture captures the image with your current parameters, which you can now save. 3. Adjust the Lens Three adjustments can be made to the lens to refine the image: focus, iris, and zoom. The focus adjustment allows you to capture a sharper image. This is done by clicking the left/right focus arrows. Pay attention to the focus setting number box. During this process, this number increases and decreases, while you reach an optimum focus position. The focus setting number box shows a maximum value, which is more accurate than the human eye. The best focus is the maximum value. 27
34 Basic Tools Opening and closing the iris changes the amount of light. The more closed the iris, the less light. The more open the iris, the greater the light that enters the camera. Iris is open Iris is closed Adjust the zoom settings to create a more detailed image. The (-) position means that the field of view is the greatest. The (+) position means the sample is seen in greater detail, limiting the field of view. The other positions are varying degrees of the two extremes. The LumiBIS is equipped with five zoom positions, differing from each other in the Field Of View (FOV). Optimize detection by choosing the zoom parameter that is the most similar to the physical zoom position. 3.1 Focus Calibration GelCapture allows you to predefine the focus setting number for each zoom step. 1. Open the GelCapture software system. 2. Insert the sample and turn on the appropriate lights. 3. Click Preview mode. 28

35 3. Adjust the Lens 4. Click on the Optics tab in the bottom left of the screen. 5. Choose the desired zoom position. 6. From the File menu click File Calibration Focus Calibration. The Set Focus Position button appears to the left of the focus arrows. 7. Set a sharp focus for the given sample. 8. After reaching an optimum focus, click Set Focus Position. 9. A pop-up message appears with the focus value related to the chosen zoom position. Click OK. 10. Now the focus is set to the desirable zoom position. Repeat this process for each zoom position. 29
36 Basic Tools 3.2 Adjust the Camera Lens These general steps are the stages of adjusting the camera lens: 1. Click the Optics Tab. 2. Select the Zoom setting. If a Focus calibration setting exists for this zoom step, it superscedes the settings in step 2. You may need to fine tune the Focus again. 3. Select the Iris setting. 4. Use the Focus arrows to fine tune the focus for the image. 4. Set the Camera Parameters 4.1 Set Exposure Time Set the exposure time by sliding the millisecond slider to the appropriate exposure time. The exposure times can range from as little as 10 milliseconds up to 1 minute (software integration). 30
37 4. Set the Camera Parameters The recommended exposure times, by light type, are as follows: UV (Ultra Violet) 1 20 sec. WL (White Light) 30ms 1 sec Set the Gain Gain increases or decreases the strength of an electrical signal. When the gain is increased, the image s brightness also increases, but so does any electronic noise. This results in a brighter image with less clarity. To adjust the gain, start with a low setting and increase the amount incrementally. This way, you minimize the amount of image degradation. The gain guidelines for the two light types are as follows: UV (Ultra Violet) Some gain may be needed WL (White Light) No gain should be needed 31

38 Basic Tools 4.3. Set the Brightness Use the brightness settings to obtain brighter images. The brightness is a level of the black in an image. A high brightness settings results in a low amount of black in the image. 5. Set the Lights The basis for most of the settings and configurations are the lights. For example, your lights determine which filters to use (if any), the exposure time, and how the iris should be set. The LumiBIS is equipped with UV and white light illuminations which can come in upper and lower modes. There is also an option for LEDs epi-illumination. If the sample is translucent or opaque then only epi-illumination should be turned on. In transparent samples, either epi-illumination or trans-illumination can be used. Translucent/Opaque/ Transparent Transparent Note: The system automatically recognizes the drawer kind, and activates the appropriate illumination source. If the drawer is the WL drawer, the WL illumination is activated. If it's a UV drawer, the UV illumination sources is activated. 32
39 6. Set the LEDs (optional) 5.1 Dual UV Configuration (Optional) With an Ultra Violet (UV) configuration it is also possible to have a dual UV configuration. A Dual UV configuration allows scanning single or multiple samples with two different UV wavelengths. For example, one set of bulbs could be 312nm (standard) and the other 254nm or 360nm. The configuration allows for two kinds of UV lighting. Since this configuration comes with UV illumination only, a white light illumination is possible using an optional light converter. This changes the UV light to visible light for colorimetric dyes. This configuration requires special setup. For more information please contact the DNR Support department. 6. Set the LEDs (optional) LEDs (Light Emitting Diodes) are monochromatic lights located in the upper sides of the Smart Dark Chamber. They are used to augment the visibility of a dyed area. You can use a single LED or a combination of several. LEDs start at 470nm (blue) and can reach up to 621nm (which approaches red). Using a combination of all the LEDs gives the full spectrum (white light). 7. Select the Filters The sample is stained with specific dyes to make a specific area visible. In order to make the dyed area stand out, other wavelengths must be blocked. Then the system detects 33
40 Basic Tools only the emitted light from the stained sample. This blocking is achieved through filters. The LumiBIS is equipped with a filter wheel with diverse optional filters. The LumiBIS is equiped with a six position filter wheel. While the system is shipped with the standard three filters above, many more filters are supported. Contact your DNR representative for more information about available filters. 8. Acquire Acquire the image after adjusting the camera and the machine parameters. 8.1 Acquire an image 1. Click Preview. GelCapture captures the image with your current parameters, which you can now save. 9. Saving Most systems have the option of saving a file using Save or Save As. GelCapture allows you to save or use its Advanced Save feature. 9.1 Save You can save a copy of the current captured image either as a TIFF or BMP image.to save a captured image: 1. Capture the image in Preview mode. 2. Click on Image Save ( ). 3. In the DNR File Save dialog box enter the image name and click Save. 34
41 9. Saving 4. Acquire the image after adjusting all the camera and machine settings. Note: Do not expose the image for a long amount of time with high gain. If the image is overexposed wait at least one minute before performing a new image preview. Along with that, reduce the exposure time and/or the gain. Your captured image is now saved. 9.2 Advanced Save The Advanced Save feature is an automated mechanism that enables you to capture a sequence of images, using either software or hardware integration. Software integration creates a series of images with the same exposure time, while hardware integration creates a series of images with a decreasing or increasing exposure time. This is especially helpful if you are not sure what the ideal exposure time is. Additionally, some materials fade after time. The difference between the two types of integration is that software integration combines the captured image to show the result of the sum of the images. Hardware integration captures the image for the full amount of time specified. This example has three separate images: image #1, image #2, and image #3 (see table below). Image Exposure Time #1 1 minute #2 2 minutes #3 3 minutes Using software integration and starting with image #1, the system captures a real one minute exposure. For image #2 the system takes the last image, which is image #1, and combines it with a real one minute exposure to create image #2. For image #3 the system takes the last image, which is the composite image #2, and combines it with a real one minute exposure. 35
42 Basic Tools Hardware Integration exposes image #1 for one real minute, image #2 for two real minutes, and image #3 for three real minutes. Software Integration Hardware Integration Image #1 Image #1 captured image, 1 minute exposure captured image, 1 minute exposure Image #1 Image #2 Image #2 + captured image, 1 minute exposure captured image, 1 minute exposure captured image, 2 minute exposure Image #1 Image #2 Image #3 Image #3 + + captured image, 1 minute exposure captured image, 1 minute exposure captured image, 1 minute exposure captured image, 3 minute exposure 36
. 5. Choose between the Summary and Average options (SW integration only).")
43 9. Saving Set up Advanced Save (Software Integration) 1. Click Advanced Save ( ). The Advanced Save settings appear on the left of the GelCapture window. 2. Move the Number of Images slider to the desired figure. 3. Set the exposure time. 4. Add a time delay (optional). 5. Choose between the Summary and Average options (SW integration only). Summery: The images are being summarized by the software (see the software integration picture above). Average: The shown images are the average of all of the image series. 6. Click Continue ( ) at the bottom. 7. Enter the name of the image series in the Save As dialog box, select the desired acquisition parameters. 8. Click Acquire at the bottom. GelCapture begins capturing and saving the image according to the specifications. 9. When finished, Click Abort. 10. Click Return ( ) to return back to the main screen. 37

44 Basic Tools Set up Advanced Save (Hardware Integration) 1. Click Advanced Save. The Advanced Save settings appear on the left. 2. Move the Number of Images slider to the desired figure. 3. Check Hardware Integration. 4. Set the exposure time. a. Move the exposure time sliders to the appropriate start time and then click Start Time on the left. b. Move the exposure time sliders to the appropriate end time and then click End Time on the right. 5. Add a time delay (optional). 6. Click Continue at the bottom. 7. Enter the name of the image in the Save As dialog box and select the desired image acquisition parameters. GelCapture begins capturing and saving the image according to the specifications. 8. Click Return when you are finished to return back to the main screen. 38
45 5 Advanced Tools The toolbar across the top of GelCapture window contains various tools to aid image capture and observation. These tools help you to refine the image capture process started in Chapter 4. The first four icons constitute the group of system configuration tools: Default, Procedures, and Presets. The second and third groups comprise three icons discussed in Chapter 4 Basic Tools: Open, Save, and Copy. These are not discussed in this chapter. The fourth icon group contains the imaging tools to alter the image s appearance for enhancing the image quality before sending it off for analysis: Image Statistics Graph, Inverted Image, Pseudocolors, and Show/Hide Overexposure. The fifth group are utility tools for modifying the viewing screen: Zoom In and Out, Actual Pixels, Fit to Window, and Full Screen. The sixth group are optional tools available for purchase. The GelQuant analysis software short cut is active if the GelQuant analysis system is installed. The RGB tool enables detection of the sample in true colors (as opposed to pseudocolors) if the appropriate components are purchased. These are not discussed in this chapter. 39
46 Advanced Tools Default Settings Sometimes after experimenting with a configuration it is easier to restart from the beginning, or a known reference point. With a click of a button, you can return the system to its default settings. To revert to the Default Settings: Click Default ( ). Your system now reverts back to its default settings. Procedures The normal image capture operation consists of defining the steps of an experiement and executing the experiment. Use the GelCapture procedures to define and refine the image capture routine. Procedures aid experimentation through saving configurations complete with settings for the camera, lens, illumination, and filters. Presets act like quick keys for quick setups of routine procedures. Once a routine, or procedure, is defined it can be saved as a preset a procedure that is run often. The procedure is the combined steps towards an image capture; the preset is the quick setup of that procedure. GelCapture allows the creation and access to an unlimited number of procedures. The number of presets is limited to five. Procedures can be created and saved at anytime, before or after an image is captured. 40
47 Procedures Components of a Procedure: Exposure time Settings (milliseconds) Gain Brightness Lighting: LEDs, Light Filters Optics: Focus, Iris, Zoom Open a procedure 1. Click Open Procedure ( ). 2. Select the desired procedure. 3. Click Open. The system is now configured according to the selected procedure. Create a procedure based on an image 1. Open the image. 41

48 Advanced Tools 2. Click Save Procedure ( ). 3. Name the procedure. A procedure is saved based on the image s settings. Save a procedure 1. Set the camera and machine parameters. 2. Click Save Procedure ( ). 3. In the DNR File Save dialog box name the procedure. 4. Click Save. The configuration is saved as a procedure, to be loaded and used in the future. 42
. 2.")
49 Presets Presets Presets are frequently used procedures. GelCapture allows the creation of up to five presets. Presets are intended to be those configurations used most often and accessed the quickest. Presets can be saved at anytime, before or after an image is captured. Load a preset The system comes with five presets for general use. 1. Click Load Presets ( ). 2. Click on the desired preset number. The system is now configured according to the selected preset. Save the configuration as a preset 1. Click Load Presets ( ). 2. Right-click on the desired preset number. 43

50 Advanced Tools 3. Enter the preset name. 4. Click OK. Your preset now appears in the Load preset dialog box. The configuration has been saved as a preset. The next time you need to use this configuration all you need to do is load this preset. Image Statistics Graph Even though the system uses professional lenses, you do not need to be a professional photographer to capture great images. The Image Statistics Graph window is the tool to help you capture the sharpest possible image. 1. Click Image Statistics Graph ( ) or click on the Graph tab in the lower left-hand corner of the screen. 44

51 Inverted Image The Image Statistics Graph window appears. Count Edge Min Max Peak Median The number of gray levels in the image. Refers to the image sharpness. Indicates in the statistical curve where the lowest reading is. Indicates in the statistical curve where the highest reading is. A maximum of 65,535 indicates the highest rating. If there is no value then the image is probably underexposed. The grayscale value with the highest number of pixels. The median grayscale value where half of the pixels are smaller and half of the pixels are bigger. Inverted Image An inverted image shows the image with the color scale inverted: light areas appear dark, and dark ones appear light, much like a negative. This feature is useful in such scenarios as helping you to decipher dark areas. 45


52 Advanced Tools View the image as an inverted image 1. Click Invert Image ( ). 2. Click Invert Image again to view the image in its original form. Pseudocolors An image can be represented using two options of pseudocoloring. 1. The orange/green/blue option colors the image closer to the sample s true color. For example, samples of Coomassie Brilliant Blue dye will be colored blue. 2. The second option presents the image in regard to hot and cold areas. In this mode the colors are based on the image grayscale. Red colors refer to the maximum grayscale levels and blue colors refer to the minimum grayscale levels. The pseudocolors feature in this example illustrates the levels throughout the sample s image. Original Image Pseudocolors The cooler colors, such as the blues, indicate where the image is undersaturated. The hotter colors, such as red, indicate where the image is oversaturated. Green indicates the saturation levels are in the mid-range. View the image in pseudocolors 1. Click the Pseudocolors button ( ). 2. Click the Pseudocolors button again to view the image in its original form. 46

53 Pseudocolors User defined Pseudocolors Define the pseudocolors according to one or a combination of orange/green/blue. 1. Click View Pseudocolors individual color. 2. To choose a blue Pseudocolor click View Pseudocolors Blue. 3. To choose a green Pseudocolor click View Pseudocolors Green. 4. To choose an orange Pseudocolor click View Pseudocolors Orange. 47
54 Advanced Tools Show/Hide Overexposure Overexposure happens when too much light is present for the proper rendering of an image. When an area is over exposed it looks like large areas contain light. Large clumps appear to be part of the image, distoring the detail of the image. 1. Click Overexposure ( ) to see the areas of the image that are over exposed in red. 2. Click Overexposure again to view the image in its original form. Zoom In and Out To increase or decrease magnification of your viewing area use the zoom tools. 1. Click Zoom In ( ) to increase magnification. 2. Click Zoom Out ( ) to decrease magnification. Actual Pixels To change the display according to the real image size, use the Actual Pixels tool. 1. Click Actual Pixels ( ) to display the image in its actual pixel size. 2. Click Actual Pixels again to view the image in its original form. Fit to Window To change the display to fit the window use the Fit to Window tool. 1. Click Fit to Window ( ) shrink or enlarge the image to fit the window. 48
55 Full Screen 2. Click Fit to Window again to return the view to its original form. Full Screen To change the display to fill the screen use the Full Screen tool. 1. Click Full Screen ( ) or [Esc] to display the image across the entire screen. 2. Click [ESC] again to return the view to its original form. 49
56 Advanced Tools 50
57 6 Troubleshooting Before you contact support, read over this section to see if you can resolve the problem by yourself. To make this as easy as possible, we have created a list of the most common problems and their possible solutions. Item# Problem Possible Reason 1. After turning on the LumiBIS, the I/O devices are not found. 2. After turning on the LumiBIS, the camera is not recognized. Improper I/O USB2 cable connections. Improper camera FireWire board/cable connections. Corrective Action Verify that the USB2 cable is stable in the LumiBIS and PC ports. After this verification, restart the GelCapture software. Verify that the FireWire cable is stable in the PC appropriate port. 3. My captured images are extremely fuzzy or blurry. 4. The images taken with my LumiBIS are very dark. Camera and lens adjustments or improper illumination and filter settings. Improper camera and lens setting. Improper filter or illumination settings. Verify that the FireWire board is stable in its appropriate PC slot. (Only verify this while the PC is turned off.) Adjust first the zoom in regards to the sample size, then adjust the iris and focus settings. Be sure that the illumination source and the chosen filter are appropriate for the examine sample stain. Open the Iris. In addition, increase the exposure time. Verify that the illumination source and filter settings are appropriate for the examine sample stain. 51
58 Troubleshooting 5. A check UV/WL bulb message appears. 6. The image is overexposed (has become saturated). The bulb(s) are in the wrong position in their bulb holder (light socket). The bulb(s) are burned. The exposure time setting is too high. The Gain setting is too high. The iris is open too wide. Take out the drawer and check the appropriate bulb position (see the following drawings for bulb location). Check the appropriate bulb vitality. Decrease the exposure time. Decrease the gain setting. Close the iris in one or more steps. Transilluminator bulbs drawing Rear system side WL-4 UV-4 UV-3 UV-2 UV-1 WL-3 WL-2 WL-1 Front system side Epi illumination sources Left system side WL UV LEDs WL UV LEDs Right system side 52
59 7 Glossary Amplifier Noise The noise that is added when a signal is passed through an electrical component, such as an amplifier. CCD A CCD, or Charge Coupled Device, is one of the two main types of image sensors used in digital cameras. When a picture is taken, the CCD is struck by light coming through the camera's lens. Each of the thousands or millions of pixels that make up the CCD converts this light into electrons. The number of electrons, usually described as the pixel's accumulated charge, is measured, and then converted to a digital value. Dynamic Range The range that a sensor is capable of differentiating. If the sensor can differentiate between two points in an image, then each point is translated into a pixel of the image; if the sensor is not able to differentiate, then the two points will be pixels of noise. Dynamic Range is also referred to as Signal to Noise Ratio (SNR). Exposure Time The length of time that light is allowed to pass through to the camera lens to form an image. Fluorescence The process whereby a fluorescent molecule is excited at one wavelength and immediately re-emits it at another (longer) wavelength. 53
60 Glossary Gain Gain is a camera feature which increases or decreases the strength of an electrical signal. When the gain is increased the image s brightness also increases, but so does any electronic noise. This results in a brighter image with less clarity. Iris A mechanical diaphragm which adjusts the lens aperture. When there are high levels of illumination then iris should be closed, and when there are low levels of illumination the iris should be opened. Pixel A pixel, or picture element, is the basic unit that the camera uses to build an image. Image size is also measured in pixels. Pseudocolors Illustrates the levels throughout the sample s image. The cooler colors, such as blue, indicate where the image is undersaturated, and the hotter colors, such as yellow or red, indicate where the image is oversaturated. Green indicates the levels are in the mid-range. Quantum Efficiency A measure of the efficiency by which photons generate electrons in a pixel. The Q/E is a function of wavelength. Resolution Although definitions vary, the most common one is the number of pixels on a CCD. 54

61
ScanGear CS-U 5.6. for CanoScan FB1210U Color Scanner. User s Guide
 ScanGear CS-U 5.6 for CanoScan FB1210U Color Scanner User s Guide Copyright Notice Copyright 2000 Canon Inc. This manual is copyrighted with all rights reserved. Under the copyright laws, this manual may
DigiScope II v3 TM Aperture Scope User s Manual
 DigiScope II v3 TM Aperture Scope User s Manual Welcome Thank you for choosing DigiScope II v3 TM Aperture scope! The DigiScope II v3 TM Aperture Scope is an exciting new device to Capture and record the
LumaSpec 800S User Manual
 LumaSpec 800S User Manual Worldwide distribution VERSION 09112014 Prior Scientific, Ltd Cambridge, UK Prior Scientific, Inc Rockland, MA. USA Prior Scientific, GmbH Jena, Germany Prior Scientific KK Tokyo,
CHAPTER1: QUICK START...3 CAMERA INSTALLATION... 3 SOFTWARE AND DRIVER INSTALLATION... 3 START TCAPTURE...4 TCAPTURE PARAMETER SETTINGS... 5 CHAPTER2:
 Image acquisition, managing and processing software TCapture Instruction Manual Key to the Instruction Manual TC is shortened name used for TCapture. Help Refer to [Help] >> [About TCapture] menu for software
Optika ISview. Image acquisition and processing software. Instruction Manual
 Optika ISview Image acquisition and processing software Instruction Manual Key to the Instruction Manual IS is shortened name used for OptikaISview Square brackets are used to indicate items such as menu
Training Guide for Carl Zeiss LSM 5 LIVE Confocal Microscope
 Training Guide for Carl Zeiss LSM 5 LIVE Confocal Microscope AIM 4.2 Optical Imaging & Vital Microscopy Core Baylor College of Medicine (2017) Power ON Routine 1 2 Verify that main power switches on the
NexImage Burst USER S MANUAL Model # 95518, # ENGLISH
 NexImage Burst USER S MANUAL Model # 95518, # 95519 ENGLISH Congratulations on your purchase of the Celestron NexImage Burst Solar System imaging camera. Your NexImage camera comes with the following:
NexImage USER S MANUAL. Model # 93708, # # 95518, # ENGLISH
 NexImage USER S MANUAL Model # 93708, # 93711 # 95518, # 95519 ENGLISH Congratulations on your purchase of the Celestron NexImage Solar System imaging camera. Your NexImage camera comes with the following:
English QT V01 CANON INC PRINTED IN CHINA
 English Quick Start Guide English Please read this guide before operating this scanner. After you finish reading this guide, store it in a safe place for future reference. Table of Contents Package Contents...
Brightness and Contrast Control Reference Guide
 innovation Series Scanners Brightness and Contrast Control Reference Guide A-61506 Part No. 9E3722 CAT No. 137 0337 Using the Brightness and Contrast Control This Reference Guide provides information and
ScanGear CS-U 6.0. for CanoScan D646U Color Scanner. User s Guide
 ScanGear CS-U 6.0 for CanoScan D646U Color Scanner User s Guide Copyright Notice Copyright 2000 Canon Inc. This manual is copyrighted with all rights reserved. Under the copyright laws, this manual may
GXCapture 8.1 Instruction Manual
 GT Vision image acquisition, managing and processing software GXCapture 8.1 Instruction Manual Contents of the Instruction Manual GXC is the shortened name used for GXCapture Square brackets are used to
The ideal K-12 science microscope solution. User Guide. for use with the Nova5000
 The ideal K-12 science microscope solution User Guide for use with the Nova5000 NovaScope User Guide Information in this document is subject to change without notice. 2009 Fourier Systems Ltd. All rights
Installation & User Manual Micro-Image Capture 7
 Installation & User Manual Micro-Image Capture 7 Ver1.2016 Product Warranty Quality Assurance Every Micro-Image Capture system passes quality assurance tests including focus, resolution quality and mechanical
Imagers- Molecular, Cell Standard Operating Procedures
 Bio-Rad ChemiDoc XRS and Image Lab Software Jump to Export Images to other Apps Floid cell imaging station Life technologies Jump to Chemi-luminescence Protocol Imagers- Molecular, Cell Standard Operating
U GENIUS. Gel imaging at a touch
 U GENIUS 3 Gel imaging at a touch U:GENIUS 3 Simply Genius. Designed to make your gel imaging simple, quick and easy. No set up, no external computer - just a complete imaging system for all your 1D needs.
Micro-Image Capture 8 Installation Instructions & User Guide
 Micro-Image Capture 8 Installation Instructions & User Guide Software installation: Micro-Image Capture Software 1. Load Micro-Image Capture software CD onto host PC. Auto Run should start driver/software
Automated Imaging Technology to Simplify Your Workflow!
 Automated Imaging Technology to Simplify Your Workflow! BioSpectrum Imaging System Imaging Made Easy for Chemiluminescence Bioluminescence Colorimetric Fluorescence MegaCam 810 Camera OptiChemi 600 Camera
USER MANUAL PV 360. Vidifox Document Camera
 Vidifox Document Camera PV 360 USER MANUAL Please read this User Manual thoroughly before you use the document camera. Keep the CD-ROM in a convenient place so you can use it quickly if you need to. Please
Supplement. ScanMaker s480/s380 features, scenarios, and information. Getting to Know Your ScanMaker s480/s380
 Supplement ScanMaker s480/s380 features, scenarios, and information Getting to Know Your ScanMaker s480/s380 The ScanMaker s480/s380 is a high-performance scanner with the versatility to scan photos and
Windows INSTRUCTION MANUAL
 Windows E INSTRUCTION MANUAL Contents About This Manual... 3 Main Features and Structure... 4 Operation Flow... 5 System Requirements... 8 Supported Image Formats... 8 1 Installing the Software... 1-1
CHROMACAL User Guide (v 1.1) User Guide
 User Guide") CHROMACAL User Guide (v 1.1) User Guide User Guide Notice Hello and welcome to the User Guide for the Datacolor CHROMACAL Color Calibration System for Optical Microscopy, a cross-platform solution that
CHROMACAL User Guide (v 1.1) User Guide User Guide Notice Hello and welcome to the User Guide for the Datacolor CHROMACAL Color Calibration System for Optical Microscopy, a cross-platform solution that
BioSpectrum Imaging System
 BioSpectrum Imaging System Imaging Made Easy for Chemiluminescence Bioluminescence Colorimetric Fluorescence MegaCam 810 Camera OptiChemi 610 Camera BioChemi 510 Camera GelCam 310 Camera 8.1 megapixel
Visioneer OneTouch Scanner. Installation Guide FOR WINDOWS
 Visioneer OneTouch Scanner Installation Guide FOR WINDOWS TABLE OF CONTENTS i TABLE OF CONTENTS Getting Started with your new Scanner....................... 1 Step 1: Installing the Scanner Software.......................
reference guide reference guide reference guide
 hp photosmart 240 series reference guide reference guide reference guide contents 1 welcome..................................... 1 find more information.............................. 1 what s in the box.................................
PC: A. Place the Microtek CD-ROM into the CD- ROM drive. B. Follow the on-screen instructions to install the driver and software.
 Start Here Installing your Microtek ScanMaker s450/s350 Step 1: Unpack Contents Unpack your scanner package and check for major components. 1 1. Scanner with built-in transparency adapter 2. Software CD
Contents STARTUP MICROSCOPE CONTROLS CAMERA CONTROLS SOFTWARE CONTROLS EXPOSURE AND CONTRAST MONOCHROME IMAGE HANDLING
 Operations Guide Contents STARTUP MICROSCOPE CONTROLS CAMERA CONTROLS SOFTWARE CONTROLS EXPOSURE AND CONTRAST MONOCHROME IMAGE HANDLING Nikon Eclipse 90i Operations Guide STARTUP Startup Powering Up Fluorescence
Kigamo Scanback which fits in your view camera in place of conventional film.
 What's included Kigamo Scanback which fits in your view camera in place of conventional film. SCSI Cable to connect your Scanback to the host computer. A 3-meter SCSI cable is standard. Kigamo also has
DC155 Digital Visualizer. User Manual
 DC155 Digital Visualizer User Manual Table of Contents CHAPTER 1 PRECAUTIONS... 4 CHAPTER 2 PACKAGE CONTENT... 6 CHAPTER 3 PRODUCT OVERVIEW... 7 3.1 PRODUCT INTRODUCTION... 7 3.2 I/O CONNECTION... 8 3.3
User s Guide. Windows Lucis Pro Plug-in for Photoshop and Photoshop Elements
 User s Guide Windows Lucis Pro 6.1.1 Plug-in for Photoshop and Photoshop Elements The information contained in this manual is subject to change without notice. Microtechnics shall not be liable for errors
Supplement. ScanMaker s450/s350 features, scenarios, and information. Getting to Know Your ScanMaker s450/s350
 Supplement ScanMaker s450/s350 features, scenarios, and information Getting to Know Your ScanMaker s450/s350 The ScanMaker s450/s350 high-performance scanner with the versatility to scan photos and film.
iq-led Software V2.1
 iq-led Software V2.1 User Manual 31. January 2018 Image Engineering GmbH & Co. KG Im Gleisdreieck 5 50169 Kerpen-Horrem Germany T +49 2273 99991-0 F +49 2273 99991-10 www.image-engineering.com CONTENT
English User's Guide
 User's Guide Imacon Flextight 343 2 2003 Imacon A/S. All rights reserved. Imacon Flextight 343 User's Guide, Part No 70030009, revision B. The information in this manual is furnished for informational
Quick Start Guide. Setup and Scanning. Try the Additional Features. English
 English Quick Start Guide Be sure to install the software programs before connecting the scanner to the computer! Setup and Scanning Check the Package Contents p.3 Install the Software Windows Macintosh
RENISHAW INVIA RAMAN SPECTROMETER
 STANDARD OPERATING PROCEDURE: RENISHAW INVIA RAMAN SPECTROMETER Purpose of this Instrument: The Renishaw invia Raman Spectrometer is an instrument used to analyze the Raman scattered light from samples
Quick Start Guide. Setup and Scanning. Try the Additional Features. English
 English Quick Start Guide Be sure to install the software programs before connecting the scanner to the computer! Setup and Scanning Check the Package Contents p.3 Install the Software Windows Macintosh
T:GENIUS GEL IMAGING AT A TOUCH
 T:GENIUS GEL IMAGING AT A TOUCH The T:Genius is an integrated system for DNA and protein analysis and gel documentation. Based on the successful Syngene gel documentation range, the T:Genius features an
ThermaViz. Operating Manual. The Innovative Two-Wavelength Imaging Pyrometer
 ThermaViz The Innovative Two-Wavelength Imaging Pyrometer Operating Manual The integration of advanced optical diagnostics and intelligent materials processing for temperature measurement and process control.
Monaco ColorWorks User Guide
 Monaco ColorWorks User Guide Monaco ColorWorks User Guide Printed in the U.S.A. 2003 Monaco Systems, Inc. All rights reserved. This document contains proprietary information of Monaco Systems, Inc. No
Horiba LabRAM ARAMIS Raman Spectrometer Revision /28/2016 Page 1 of 11. Horiba Jobin-Yvon LabRAM Aramis - Raman Spectrometer
 Page 1 of 11 Horiba Jobin-Yvon LabRAM Aramis - Raman Spectrometer The Aramis Raman system is a software selectable multi-wavelength Raman system with mapping capabilities with a 400mm monochromator and
ChemiDoc and ChemiDoc MP Imaging Systems with Image Lab Touch Software Operational Qualification Protocol (OQ)
") ChemiDoc and ChemiDoc MP Imaging Systems with Image Lab Touch Software Operational Qualification Protocol (OQ) Catalog #17001401 and 17001402 Table of Contents Page Section 1: General Information 2 1.1
ChemiDoc and ChemiDoc MP Imaging Systems with Image Lab Touch Software Operational Qualification Protocol (OQ) Catalog #17001401 and 17001402 Table of Contents Page Section 1: General Information 2 1.1
Training Guide for Carl Zeiss LSM 510 META Confocal Microscope
 Training Guide for Carl Zeiss LSM 510 META Confocal Microscope AIM 4.2 Optical Imaging & Vital Microscopy Core Baylor College of Medicine (2017) Power ON Routine 1 2 Turn ON Components and System/PC switches
Ordering Information & Specifications. VisionWorksLS Capabilities. Image Analysis Capabilities
 Ordering Information & Specifications VisionWorksLS Capabilities Each system includes: Camera and lens, darkroom with motorized or manual platform, three emission filters, white light illuminator, choice
User Manual. Copyright 2010 Lumos. All rights reserved
 User Manual The contents of this document may not be copied nor duplicated in any form, in whole or in part, without prior written consent from Lumos. Lumos makes no warranties as to the accuracy of the
ScanGear CS-U 5.8. for CanoScan D660U Color Scanner. User s Guide
 ScanGear CS-U 5.8 for CanoScan D660U Color Scanner User s Guide Copyright Notice Copyright 2000 Canon Inc. This manual is copyrighted with all rights reserved. Under the copyright laws, this manual may
DC300. Document Camera USER MANUAL
 DC300 Document Camera USER MANUAL 1 Please read this manual carefully before operating the document camera and keep it for reference. PRECAUTIONS NOTICE: PLEASE READ CAREFULLY BEFORE USE Use the document
W i n d o w s. ScanGear CS-S 4.3 for CanoScan FB1200S Color Image Scanner. User's Guide
 f o r W i n d o w s ScanGear CS-S 4.3 for CanoScan FB1200S Color Image Scanner User's Guide How to Make Best Use of the Manuals 2 When you open the box Printed Manual CanoScan FB1200S Quick Start Guide
Training Guide for Carl Zeiss LSM 7 MP Multiphoton Microscope
 Training Guide for Carl Zeiss LSM 7 MP Multiphoton Microscope ZEN 2009 Optical Imaging & Vital Microscopy Core Baylor College of Medicine (2017) Power ON Routine 1 2 Turn Chameleon TiS laser key from Standby
WELCOME WHAT S IN THE BOX
 WELCOME Congratulations on purchasing your Visioneer PaperPort flatbed scanner. With your scanner, you can quickly scan paper documents and color photos to place their electronic images on your computer.
Copyright 2014 SOTA Imaging. All rights reserved. The CLIOSOFT software includes the following parts copyrighted by other parties:
 2.0 User Manual Copyright 2014 SOTA Imaging. All rights reserved. This manual and the software described herein are protected by copyright laws and international copyright treaties, as well as other intellectual
Technical Benefits of the
 innovation in microvascular assessment Technical Benefits of the Moor Instruments moorflpi-2 moorflpi-2 More Info: Measurement Principle laser speckle contrast analysis Measurement 85nm Laser Wavelength
IBIL setup operation manual for SynerJY software version
 IBIL setup operation manual for SynerJY software version 1.8.5.0 Manual version 1.0, 31/10/2008 Author: Carlos Marques Equipment Managers: Carlos Marques, +351219946084, cmarques@itn.pt Luís Alves, +351219946112,
Supplement. ScanMaker i280 features, scenarios, and information. Getting to Know Your ScanMaker i280
 Supplement ScanMaker i280 features, scenarios, and information Getting to Know Your ScanMaker i280 The ScanMaker i280 is a high resolution scanner for reflective scanning. It features 4800 x 9600 dpi,
U:GENIUS S Y N G E N E. Gel imaging at a touch A DIVISION OF THE SYNOPTICS GROUP
 U:GENIUS Gel imaging at a touch S Y N G E N E A DIVISION OF THE SYNOPTICS GROUP U:GENIUS Simply Genius. Designed to make your gel imaging simple, quick and easy. No set up, no external computer - just
The CO2 Sensor Calibration Kit
 The CO2 Sensor Kit For use with all BAPI CO 2 Sensors Instruction Manual CO 2 Kit Product Identification and Overview BAPI s CO 2 Sensor Kit is designed to calibrate and verify the operation of all BAPI
Contents Chapter One- Introduction
 Contents Chapter One- Introduction... 1 1.1 Applications supported... 1 1.2 Hardware... 1 1.2.1 Specifications... 1 1.2.2 System Components... 2 1.2.2.1 Darkroom... 2 1.2.2.2 UV transilluminator... 1.2.2.
ISCapture User Guide. advanced CCD imaging. Opticstar
 advanced CCD imaging Opticstar I We always check the accuracy of the information in our promotional material. However, due to the continuous process of product development and improvement it is possible
Using the Nikon TE2000 Inverted Microscope
 Wellcome Trust Centre for Human Genetics Molecular Cytogenetics and Microscopy Core Using the Nikon TE2000 Inverted Microscope Fluorescence image acquisition using Scanalytic s IPLab software and the B&W
EinScan-SE. Desktop 3D Scanner. User Manual
 EinScan-SE Desktop 3D Scanner User Manual Catalog 1. 2. 3. 4. 5. 6. 7. 8. 1.1. 1.2. 1.3. 1.1. 1.2. 1.1. 1.2. 1.3. 1.1. 1.2. Device List and Specification... 2 Device List... 3 Specification Parameter...
Training Guide for Leica SP8 Confocal/Multiphoton Microscope
 Training Guide for Leica SP8 Confocal/Multiphoton Microscope LAS AF v3.3 Optical Imaging & Vital Microscopy Core Baylor College of Medicine (2017) Power ON Routine 1 2 Turn ON power switch for epifluorescence
Training Guide for Carl Zeiss AxioZoom V16 Stereo Microscope
 Training Guide for Carl Zeiss AxioZoom V16 Stereo Microscope ZEN 2012 Optical Imaging & Vital Microscopy Core Baylor College of Medicine (2017) Power ON Routine 1 2 If you require fluorescence imaging,
Picture Style Editor Ver Instruction Manual
 ENGLISH Picture Style File Creating Software Picture Style Editor Ver. 1.12 Instruction Manual Content of this Instruction Manual PSE is used for Picture Style Editor. In this manual, the windows used
Quick Guide. NucleoCounter NC-3000
 Quick Guide NucleoCounter NC-3000 Table of contents Setting up the FlexiCyte Protocol 2 Editing Image Capture and Analysis Parameters 3 Optimizing Exposure Time 4 Compensation for Spectral Overlap 6 Creating
Picture Style Editor Ver Instruction Manual
 ENGLISH Picture Style File Creating Software Picture Style Editor Ver. 1.18 Instruction Manual Content of this Instruction Manual PSE stands for Picture Style Editor. In this manual, the windows used in
This has given you a good introduction to the world of photography, however there are other important and fundamental camera functions and skills
 THE DSLR CAMERA Before we Begin For those of you who have studied photography the chances are that in most cases you have been using a digital compact camera. This has probably involved you turning the
inphoto ID Canon and Olympus camera control software Automatic ID photography User Guide
 inphoto ID Canon and Olympus camera control software Automatic ID photography User Guide 2006 Akond company 197342, Russia, St.-Petersburg, Serdobolskaya, 65a Phone/fax: +7(812)600-6918 Cell: +7(921)757-8319
For customers in USA This device complies with Part 15 of the FCC rules. Operation is subject to the following two conditions:
 User manual For customers in North and South America For customers in USA This device complies with Part 15 of the FCC rules. Operation is subject to the following two conditions: (1) This device may not
Quick Start Guide. Setup and Scanning. Try the Additional Features. English
 English Quick Start Guide Be sure to install the software programs before connecting the scanner to the computer! Setup and Scanning Check the Package Contents p.3 Install the Software Windows Macintosh
DOCUMENT SCANNER INSTRUCTIONS. Space. Backup. Count Only. New File. Scanner. Feeding Option Manual Auto Semi-Auto
 E FILM F Scanner A Space Count Only New File Feeding Option Manual Auto Semi-Auto Backup DOCUMENT SCANNER INSTRUCTIONS NOTICE q Copyright 2001 by CANON ELECTRONICS INC. All rights reserved. No part of
Vernier SpectroVis Plus Spectrophotometer (Order Code: SVIS-PL)
") Vernier SpectroVis Plus Spectrophotometer (Order Code: SVIS-PL) SpectroVis Plus is a portable, visible to near-ir spectrophotometer and fluorometer. What is included with the SpectroVis Plus? One SpectroVis
Vernier SpectroVis Plus Spectrophotometer (Order Code: SVIS-PL) SpectroVis Plus is a portable, visible to near-ir spectrophotometer and fluorometer. What is included with the SpectroVis Plus? One SpectroVis
Version 4.2 For WINDOWS
 SIGMA Photo Pro User Guide Companion Processing Software for SIGMA Digital Cameras Version 4.2 For WINDOWS I M P O R T A N T : Please Read Before You Start Thank you very much for purchasing this SIGMA
QUANTUM ST4. User manual 1/ /2009 index f
 03/2009 index f QUANTUM ST4 User manual 1/135 Please read me first! Please read carefully the installation instruction before proceeding to the installation. Please do not connect the QUANTUM ST4 USB camera
Zeiss LSM 880 Protocol
 Zeiss LSM 880 Protocol 1) System Startup Please note put sign-up policy. You must inform the facility at least 24 hours beforehand if you can t come; otherwise, you will receive a charge for unused time.
Start Here. Installing your Microtek ScanMaker 9800XL Plus PC:
 Start Here Installing your Microtek ScanMaker 98XL Plus Step : Unpack Contents. Optional package items depend on the scanner configuration that you purchased. Unpack your scanner package and check for
Ideal for display mura (nonuniformity) evaluation and inspection on smartphones and tablet PCs.
 evaluation and inspection on smartphones and tablet PCs.") 2D Color Analyzer Ideal for display mura (nonuniformity) evaluation and inspection on smartphones and tablet PCs. Accurately and easily measures the distribution of luminance and chromaticity. The included
2D Color Analyzer Ideal for display mura (nonuniformity) evaluation and inspection on smartphones and tablet PCs. Accurately and easily measures the distribution of luminance and chromaticity. The included
Reference Guide. Color Image Scanner
 Color Image Scanner All rights reserved. No part of this publication may be reproduced, stored in a retrieval system, or transmitted in any form or by any means, electronic, mechanical, photocopying, recording,
INGENIUS 3 LOW COST, HIGH PERFORMANCE GEL DOCUMENTATION AND ANALYSIS
 INGENIUS 3 LOW COST, HIGH PERFORMANCE GEL DOCUMENTATION AND ANALYSIS The InGenius 3 uses a high performance 3m pixel camera. The darkroom assembly is easily connected to a PC. GeneSys image acquisition
User Guide for TWAIN / DirectX interface for GRYPHAX USB 3.0 cameras
 User Guide for TWAIN / DirectX interface for GRYPHAX USB 3.0 cameras The TWAIN & DirectX driver for PROGRES GRYPHAX USB 3.0 cameras enables user to operate with TWAIN and DirectX supported 3 rd party software
Leica DMi8A Quick Guide
 Leica DMi8A Quick Guide 1 Optical Microscope Quick Start Guide The following instructions are provided as a Quick Start Guide for powering up, running measurements, and shutting down Leica s DMi8A Inverted
MC3 Motion Control System Shutter Stream Quickstart
 MC3 Motion Control System Shutter Stream Quickstart Revised 7/6/2016 Carousel USA 6370 N. Irwindale Rd. Irwindale, CA 91702 www.carousel-usa.com Proprietary Information Carousel USA has proprietary rights
ScanGear CS-U 5.3 for CanoScan FB630U/FB636U Color Image Scanner User s Guide
 ScanGear CS-U 5.3 for CanoScan FB630U/FB636U Color Image Scanner User s Guide Copyright Notice 1999 Canon Inc. This manual is copyrighted with all rights reserved. Under the copyright laws, this manual
SOP-P051. Scanning of Optical Filters With USB2000. Objective: To determine the spectral transmittance properties of an optical filter.
 Purdue University Cytometry Laboratories SOP-P051 Scanning of Optical Filters With USB2000 Objective: To determine the spectral transmittance properties of an optical filter. Procedure: 1. Ensure that
Nikon View DX for Macintosh
 Contents Browser Software for Nikon D1 Digital Cameras Nikon View DX for Macintosh Reference Manual Overview Setting up the Camera as a Drive Mounting the Camera Camera Drive Settings Unmounting the Camera
bioteknika T:GENIUS GEL IMAGING AT A TOUCH
 bioteknika T:GENIUS GEL IMAGING AT A TOUCH The T:Genius is an integrated system for DNA and protein analysis and gel documentation. Based on the successful Syngene gel documentation range, the T:Genius
INGENIUS 3. Low cost, high performance gel documentation and analysis
 INGENIUS 3 Low cost, high performance gel documentation and analysis INGENIUS 3 When simplicity and budget matter. The InGenius 3 gel documentation and analysis system is compact, easy to use and offers
Chemiluminescence- and Fluorescence-Imager Celvin S
 Chemiluminescence- and Fluorescence-Imager Chemiluminescence on Western Blots Fluorescent staining of proteins Fluorescent staining of DNA Chemiluminescence/Fluorescence in multi-well plates Colorimetrically-stained
DC162 Digital Visualizer. User Manual. English - 1
 DC162 Digital Visualizer User Manual English - 1 Chapter 1 Precautions Always follow these safety instructions when setting up and using the Digital Visualizer: 1. Please do not tilt the machine while
ibox Spectra Small Animal Imaging System
 ibox Spectra Small Animal Imaging System Installation and User Instructions UVP, LLC Ultra-Violet Products Ltd. 2066 W. 11th Street Unit 1, Trinity Hall Farm Estate Upland, CA 91786 Nuffield Road, Cambridge
SKF TKTI. Thermal Camera Software. Instructions for use
 SKF TKTI Thermal Camera Software Instructions for use Table of contents 1. Introduction...4 1.1 Installing and starting the Software... 5 2. Usage Notes...6 3. Image Properties...7 3.1 Loading images
Digital Design and Communication Teaching (DiDACT) University of Sheffield Department of Landscape. Adobe Photoshop CS5 INTRODUCTION WORKSHOPS
 University of Sheffield Department of Landscape. Adobe Photoshop CS5 INTRODUCTION WORKSHOPS") Adobe INTRODUCTION WORKSHOPS WORKSHOP 1 - what is Photoshop + what does it do? Outcomes: What is Photoshop? Opening, importing and creating images. Basic knowledge of Photoshop tools. Examples of work.
Adobe INTRODUCTION WORKSHOPS WORKSHOP 1 - what is Photoshop + what does it do? Outcomes: What is Photoshop? Opening, importing and creating images. Basic knowledge of Photoshop tools. Examples of work.
Digital Portable Overhead Document Camera LV-1010
 Digital Portable Overhead Document Camera LV-1010 Instruction Manual 1 Content I Product Introduction 1.1 Product appearance..3 1.2 Main functions and features of the product.3 1.3 Production specifications.4
Picture Style Editor Ver Instruction Manual
 ENGLISH Picture Style File Creating Software Picture Style Editor Ver. 1.15 Instruction Manual Content of this Instruction Manual PSE stands for Picture Style Editor. indicates the selection procedure
ID Photo Processor. Batch photo processing. User Guide
 ID Photo Processor Batch photo processing User Guide 2015 Akond company 197342, Russia, St.-Petersburg, Serdobolskaya, 65a Phone/fax: +7(812)384-6430 Cell: +7(921)757-8319 e-mail: info@akond.net http://www.akond.net
Gel imaging at a touch S Y N G E N E A DIVISION OF THE SYNOPTICS GROUP
 Gel imaging at a touch S Y N G E N E A DIVISION OF THE SYNOPTICS GROUP Use the large colour touch screen to navigate your way through the functions of. The icon driven menu is both intuitive and easily
Color Management User Guide
 Color Management User Guide Edition July 2001 Phase One A/S Roskildevej 39 DK-2000 Frederiksberg Denmark Tel +45 36 46 01 11 Fax +45 36 46 02 22 Phase One U.S. 24 Woodbine Ave Northport, New York 11768
Gel Doc XR+ and ChemiDoc XRS+ Imaging Systems with Image Lab Software
 Gel Doc XR+ and ChemiDoc XRS+ Imaging Systems with Image Lab Software Instrument Guide Version 6.0 Gel Doc XR+ and ChemiDoc XRS+ Imaging Systems with Image Lab Software Instrument Guide Version 6.0 Bio-Rad
English PRO-642. Advanced Features: On-Screen Display
 English PRO-642 Advanced Features: On-Screen Display 1 Adjusting the Camera Settings The joystick has a middle button that you click to open the OSD menu. This button is also used to select an option that
S101v2 Webcam with adjustable focus
 S101v2 Webcam with adjustable focus User Manual Kodak and the Kodak trade dress are trademarks of Eastman Kodak Company used under license. 2010 Sakar International, Inc. All rights reserved. WINDOWS and
User s Guide. USB Microscope. Version 1.2A
 User s Guide USB Microscope Version 1.2A Contents 1. Product Introduction... 2 1.1 Packing Contents:... 2 1.2 Start to use... 2 1.3 Buttons on microscope... 4 1.4 Microscope focus... 5 2. Printed Notice...
S100 Webcam. User s Manual
 S100 Webcam User s Manual Kodak and the Kodak trade dress are trademarks of Eastman Kodak Company used under license. 2009 Sakar International, Inc. All rights reserved. WINDOWS and the WINDOWS logo are