INSTALLATION ACCESSORIES A STEP BY STEP GUIDE TO GOOD COLD WELDING
|
|
|
- Russell McCormick
- 5 years ago
- Views:
Transcription


1 INSTALLATION ACCESSORIES A STEP BY STEP GUIDE TO GOOD COLD WELDING
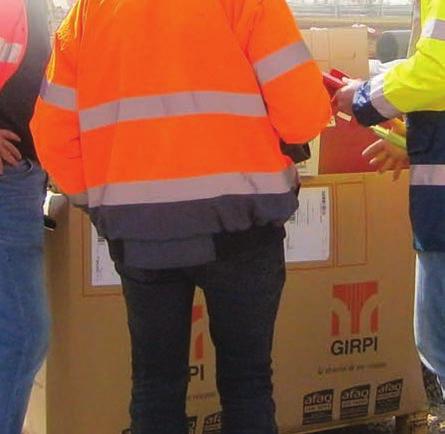
2 PREPARING THE JOB CHECKLIST: HAVE ALL THE ITEMS YOU NEED IN YOUR POSSESSION: Pipes and fittings Welding polymers, cleaner Tools IPE (individual protection equipment) CHECK YOUR EQUIPMENT BEFORE STARTING: Do I have the right welding polymer? Is it still in good condition? Do I have cleaner and clean rags? Check the use-by dates CHECK AMBIENT WORKING CONDITIONS: Installation temperature between +5 C and +35 C Avoid strong sunlight, rain, wind Work in a clean, well-ventilated location


3 TOOLS AND EQUIPMENT Pipe cutter Chamfering tools Felt pen Soft, lint-free cloths Socket depth gauge Gloves + CHOOSE YOUR WELDING POLYMER NEW POLYMERS, NEW APPLICATION RANGES SYSTEM O GIRAIR KRYOCLIM PVC-U K62 Cleaner+ stripper RERFI RERFAST HPFI GAFI CSTB-certified adhesive* * Cold water


4 Step 1 PREPARE 1 Make a clean, square cut using an adapted pipe cutter Chamfer using an adapted chamfering tool. CHAMFER SIZE Chamfering facilitates joining and allows for an even distribution of the welding polymer between the pipe and fitting to be joined. PIPE Ø Ø 16 Ø 20 - Ø 50 Ø 63 - Ø 225 CHAMFER LENGTH 1-2 mm 2-3 mm 3-6 mm 3 Deburr / trim the inside of the pipe.

5 4 Check: the pipes and fittings must be clean and dry, with no scratches or impact marks. 5 Measure and mark the socket depth of the fitting using the gauge. Remember to mark the orientation of the fittings. PROHIBITED The following actions may jeopardise the quality of the welds. Do not store the pipes in unprotected or exposed areas, e.g. directly on the ground, exposed to rain, sunlight, etc. Do not cut the pipes using metal saws, disk saws, etc. Do not chamfer using grinders, sanders, angle grinders, etc. Do not connect fittings to pipes that have not been chamfered and deburred / trimmed. Do not assemble fittings or pipes that are wet, dirty or dusty. Do not apply the welding polymer with an unsuitable tool (piece of wood, rag, finger, glove, etc.). Do not dilute the welding polymers with water or solvents. Do not apply sustained forces (twisting, pulling) during the first minutes following assembly. Do not adjust a fitting s orientation after assembly. Do not allow the welding polymer to dry between application and joining.

 on the Female parts first, and then the Male parts.")
6 Step 2 JOIN 6 Clean the parts to be welded, first female then male, using CLEANER+. Use a clean, lint-free piece of cloth. Leave to dry or wipe dry using a soft, lint-free piece of cloth. 7 8 Shake the pot for 5 seconds to mix the polymer when doing the first welds of the day. The more the polymer is shaken, the more fluid it will be. If you find that it is too fluid, leave it to settle for a few minutes. Apply the welding polymer in a thin, uniform coat. To obtain better adherence, carry out 4 to 8 rotations (depending on the diameter) on the Female parts first, and then the Male parts. To avoid droplets, remove any surplus polymer by scraping the applicator on the neck of the pot. 250 ML POT > For Ø16 to Ø50 1 L POT > For Ø40 to Ø160 Applicators optimised for the size of the pipes are provided with the pots.


7 Work in a team of 2 for Ø > Immediately push together the Male and Female parts up to the mark, push straight without twisting, and hold for 5 seconds. WELD BEAD = PROFESSIONAL WELD Leaving the welding polymer bead as it is helps check that the weld is done. 10 Clean off drips using a clean, lint-free piece of cloth. Remember to close the pot after each use. After joining, make sure that the recommended drying times are respected before loading the network with pressurised water, whether for new installations or for renovations. For further information, refer to the label on the pot of welding polymer.
8 SERVICES Telephone hotline, training sessions, production of drawings and bills of materials, a BIM library, induction training on site: an entire team is there to help. Telephone hotline To answer your questions: Training centre Helping contractors and specifiers to understand GIRPI system installation techniques. On-site technical assistance A team at your side to support you in getting your job started. Custom-made fabricated items A workshop at your disposal to produce special parts. Création : ON SE DIT TU - Réf GCHANTIERGB RCS LE HAVRE B / ex Rue Robert Ancel CS HARFLEUR FRANCE Tél. :
Durapipe ABS Jointing Guide
 Durapipe ABS Jointing Guide Solvent cement welding offers a simple and quick means of constructing high integrity, leak-free joints. The solvent cement operates by chemically softening the joint surfaces.
Pipe Diameter Part Number Rotary Cutter 6-63mm Rotary Cutter 10-90mm Rotary Cutter mm ips
 Installers and installation equipment Installation personnel should be trained and technically competent for this jointing method. Training for installers is available free of charge on request from our
Guidelines for working with
 Guidelines for working with 1. Sawing Circular Saws When using circular saws, only the circular saw blades that are not set are suitable for cutting PARAPAN. Hardened metal saw blades that have the greatest
THE GOOD GUIDE TO ELECTROFUSION JOINTING....Connect
 THE GOOD GUIDE TO ELECTROFUSION JOINTING...Connect THE GOOD GUIDE TO ELECTROFUSION JOINTING This guide will provide basic information to enable the operative to: Equipment required: Understand the principles
Clay Modeling Film. Features of Clay Modeling Film. Use Clay Modeling Film
 Clay Modeling Film The series of Clay Modeling Film, originally developed by TOOLS INTERNATIONAL Corp, is mainly used for interior/exterior shape confirmation, checking highlights and qualification studies
Explorer Wiring Kit (assembled)
") Explorer Wiring Kit (assembled) For Vintage, Firestorm & Standard Series Please Read All Instructions Before Beginning. Tools you will need: Soldering Iron (35 watt preferably) Solder Wet Sponge Wire Clippers
Explorer Wiring Kit (assembled) For Vintage, Firestorm & Standard Series Please Read All Instructions Before Beginning. Tools you will need: Soldering Iron (35 watt preferably) Solder Wet Sponge Wire Clippers
8 x 10 Sandwich Panel
 *Before starting, please read entire manual *Changes can be made in order for this manual to work for you 8 x 10 Sandwich Panel Follow all applicable sections of the attached Manufacturing Plan. Objectives:
Side and rear window, assembly overview
 64-7 Side and rear window, assembly overview 1 - Side/rear window Removing Unbroken Page 64-9 Broken Page 64-11 Installing Page 64-13 Curing time Page 64-21 Re-sealing Page 64-25 2 - PUR adhesive sealant
ANCHOR PLATE ATTACHMENT STEEL STUD FRAMING OR FURRING CONSTRUCTION WITH ACCESS FROM PANEL SIDE ONLY
 ANCHOR PLATE ATTACHMENT STEEL STUD FRAMING OR FURRING CONSTRUCTION WITH ACCESS FROM PANEL SIDE ONLY INSTALLATION MATERIALS No. 8 Phillips Head Tek Screws Glazier's horseshoe shaped shims 1/16 inch, 1/8
CIRRUS AIRPLANE MAINTENANCE MANUAL MODELS SR22 AND SR22T CHAPTER 56-30: DOOR GENERAL. Door 56-30: DOOR. 1. General
 CIRRUS AIRPLANE MAINTENANCE MANUAL Door CHAPTER 56-30: DOOR GENERAL 56-30: DOOR 1. General The cabin door windows are manufactured of acrylic and adhesive bonded to the door structure. Replacement is accomplished
Flat Style Fender Flares Front Pair. Jeep. Included in Hardware Kit:
 Jeep Flat Style Fender Flares Front Pair STEP 1 PRIOR TO INSTALLATION A) Bushwacker only approves installing the fl ares according to these written instructions with the hardware provided. WARNING: Failure
1/4 Rubber Spacer, 26 pcs. M5-.8 Machine Screw, 26 pcs 13. Female Wire Connector, 4 pcs
 97-06 Jeep Wrangler TJ Set Part #10920-07 Rev-3 12-15-08 A) B) C) D) E) F) G) STEP 1 - PRIOR TO INSTALLATION Bushwacker only approves installing the fl ares according to these written instructions with
Telecaster Wiring Kits Please Read All Instructions Before Beginning. Tools you will need: Soldering tips: Removing Current Wiring: Step 1. Step 2.
 Telecaster Wiring Kits Please Read All Instructions Before Beginning. Tools you will need: Soldering Iron (35 watt preferably) Solder Wet Sponge Wire Clippers Wire Strippers 3/8 Drill Bit 5/32 Drill Bit
ClearView Panels Mil 3 Finished Sides with Grommets 1 Hem Side Mil 3 Finished Sides with Grommets 1 Hem Side DESCRIPTION
 ClearView Panels Photo may show a different but similar model. 2006 FarmTek All Rights Reserved. Reproduction is prohibited without permission. Revision date: November 2006rp STK# DESCRIPTION 105659 16
MaxiMist Pro Series Spray Gun
 MaxiMist Pro Series Spray Gun Your purchase includes the MaxiMist Pro Series Spray Gun Please read these instructions carefully and keep for your reference. Refer to the included instruction manual as
Plastic Push. 5/16 Hex Head Bolt, 20 pcs. Retainer, 20 pcs. Female Bullet Connector, 4 pcs. Side Refl ex Refl ector, 2 pcs
 A) B) C) D) E) F) G) STEP 1 - PRIOR TO INSTALLATION Bushwacker only approves installing the fl ares according to these written instructions with the hardware provided. WARNING: Failure to install according
Flat Style Fender Flares Front Pair. Jeep. Included in Hardware Kit:
 Jeep Flat Style Fender Flares Front Pair STEP 1 PRIOR TO INSTALLATION A) Bushwacker only approves installing the fl ares according to these written instructions with the hardware provided. WARNING: Failure
SCION xa / xb DOOR SILL PROTECTOR Section I Installation Preparation
 Section I Installation Preparation Part Number(s): PTS21-52030 (xa, ) PTS21-52031 (xa, Rear) PTS21-52032 (xb, ) PTS21-52033 (xb, Rear) Kit Contents, (PTS21-52030 or PTS21-52032) Item # Quantity Reqd. Description
*Before starting, please read entire manual *Changes can be made in order for this manual to work for you. 3 x 6 I-Beam
 *Before starting, please read entire manual *Changes can be made in order for this manual to work for you 3 x 6 I-Beam Follow all applicable sections of the attached Manufacturing Plan. Objectives: Understand
SCION tc 2005 PEDESTAL SPOILER Preparation. Part Number: PT47A XX PT47A XX PT47A XX
 Preparation Part Number: PT47A-21052-XX PT47A-21062-XX PT47A-21082-XX Kit Contents Item # Quantity Reqd. Description 1 1 Painted Spoiler Assembly 2 1 LH Gas Strut 3 1 RH Gas Strut 4 1 Hardware Bag Hardware
HARPS BY GEAR4MUSIC USER GUIDE
 HARPS BY GEAR4MUSIC USER GUIDE INCLUDED ACCESSORIES 1 x Harp 1 x Padded Gig Bag 1 x Tuning Key 1 x Set of Spare s 1 x User Guide MAINTENANCE OF YOUR HARP Gear4music harps include very carefully selected
PAINTING AND DYEING POLYJET PARTS
 SOFTWARE/PRODUCT/FINISHING/MATERIAL OVERVIEW For sales samples, photography or finished models, painted and dyed PolyJet parts will give your customers a compelling preview of your newest products. Painting
CATALOG LISTING SPECIFICATIONS 11 30mA 22 to 130mm (White Paper), 22 to 70mm (Black Paper) 3 to 130mm (White Paper) Ambient light Seal
, 22 to 70mm (Black Paper) 3 to 130mm (White Paper) Ambient light Seal") Convergent Laser Measurement Sensor Model HLB-D130DN Very small or thin parts can be detected by differences in distance, unaffected by color or reflection rate of the target object. Size (12 x 16.3 x
Convergent Laser Measurement Sensor Model HLB-D130DN Very small or thin parts can be detected by differences in distance, unaffected by color or reflection rate of the target object. Size (12 x 16.3 x
PolyCarb has good resistance to many chemicals. Some chemicals may harm the PolyCarb sheets. Contact us when in doubt about any chemical.
 Polycarbonate Panels This manual provides the basic information for working with and installing PolyCarb sheets. Due to their hollow core, prior preparation is needed before the actual installation, with
Kent Kings Cross Bench KKCB5500
 Kings Cross Bench Kent Kings Cross Bench Specify: Kent Kings Cross Bench ; 5500mm overall length; European Oak Timber (IFSE Certified) treated with Danish Oil; Grade 316L Stainless Steel; Bead Blasted
SUPERSEDED. NOT the LATEST REVISION
 Figure 1 OPTIMATE 2.5mm bayonet ceramic connector kits listed in Figure 1 are designed to be applied to fiber optic cable. Coupling Receptacle Kit 501381 1 is used to mate two bayonet connectors in free
DEBURRING TOOLS THE WORLD'S BEST DEBURRING TOOLS AND BLADES
 DEBURRING TOOLS THE WORLD'S BEST DEBURRING TOOLS AND BLADES ROYAL DEBURRING BLADES PRICE HEAVY-DUTY BLADES PER PER E-BLADES NUMBER Great Low Prices E-100 10 22025 $14.65 Heavy Duty HSS for steel and aluminum.
IMPORTANT: This product cannot perform its intended function if not properly installed.
 www.emseal.com HORIZONTAL COLORSEAL INSTALL DATA - HORIZONTAL COLORSEAL FEBRUARY 2015, PAGE 1 OF 3 INSTALLD AT DO NOT OPEN ANY PACKAGES or install this material until all members of your crew have read
Tidland Narrow Web Shaft
 TIDLAND WINDING SOLUTIONS Tidland Narrow Web Shaft User Manual 3" GN 3" GH EN MI 556500 1 J IMPORTANT SAFETY INSTRUCTIONS When using this Tidland product, basic safety precautions should always be followed
assembly guide Sliding Track Assembly Guidance Manual & Technical Data Sheets Issue ML/02 SEPTEMBER 2007
 Issue ML/02 SEPTEMBER 2007 assembly guide Sliding Track Assembly Guidance Manual & Technical Data Sheets Savekers Limited 101 Aldridge Road, Perry Barr, Birmingham, B42 2TS t f e w 0121 331 1903 0121 331
Rev. 05/16 01 ACRYLIC INSTALLATION GUIDE
 Rev. 05/16 01 ACRYLIC INSTALLATION GUIDE Contents 1.0 Inspection 3 2.0 Storage 3 3.0 Handling 3 4.0 Planning & Preparation 3 5.0 Panels 4 6.0 Accessories 4 7.0 Tools & Fixings 4 8.0 Fitting Tips 5 9.0
DEBURRING TOOLS THE WORLD'S BEST DEBURRING TOOLS AND BLADES
 DEBURRING TOOLS THE WORLD'S BEST DEBURRING TOOLS AND BLADES ROYAL DEBURRING BLADES Great Low Prices HEAVY-DUTY E-BLADES BLADES PER NUMBER E-0 22025 PRICE PER $14.20 Heavy Duty HSS for steel and aluminum.
Wilsonart Decorative Edge Fabrication Manual
 Fabrication Manual BR1515 - Revision 10/2013 Product Description Wilsonart Decorative Edge moldings may well be the best way to attain leading-edge kitchen and bath design without a leading edge budget.
Installation Instructions
 Installation Instructions Roof edge trim profile Series TAG multi-piece aluminium profile Front face height: 250-1050 mm supplied with patented 4F brackets as standard height-adjustable, horizontally moveable,
Model S-520 Coin Counter / Sorter Operating Manual
 Model S-520 Coin Counter / Sorter Operating Manual Table of Contents Using the Product Safely... 2 About the Warning Stickers and Points of Warning/... 2 Warning.... 3. 4 Names of the Main Parts......
FlameOff Fire Barrier Paint. Application Guide
 TM FlameOff Fire Barrier Paint Application Guide FlameOff FCI Phone: (888)816-7468 Email: info@flameoffcoatings.com Web: www.flameoffcoatings.com FlameOFF Coatings, Inc. owns and certifies all data in
PURESTREAM SYSTEM - ASSEMBLY GUIDE
 PURESTREAM SYSTEM - ASSEMBLY GUIDE VISIT OUR WEBSITE : www.cagpurification.com our installment procedure videos in the PURESTREAM Piping section. NECESSARY TOOLS FOR INSTALLATION We suggest the use of
Mirrorcraft Project Especially for Dogs
 Mirrorcraft Project Especially for Dogs DIY Customized Pet Mirror Make a mirror photo frame to Display your Pets Photo Irene Jacobs April 2007 Mirrorcraft is a fun craft to easily create you own customized
5/16 Hex Head Bolt, 16 pcs. Plastic Push Retainer, 6 pcs. Alcohol Wipe, 2 pcs. Side Refl ex Reflector, 2 pcs
 STEP 1 PRIOR TO INSTALLATION A) Bushwacker only approves installing the fl ares according to these written instructions with the hardware provided. WARNING: Failure to install according to these instructions
UNCONTROLLED 3 STANDARD PROCEDURES FOR PREPARING 33KV CABLES
 3 STANDARD PROCEDURES FOR PREPARING 33KV CABLES 3.1 Single-Core Copper Wire Screened Polymeric Cables 3.1.1 Removing the Outer Sheath Clean and abrade the outer sheath with an approved abrasive paper for
Turkey Football Panel
 Turkey Football Panel PROJECT TITLE: Turkey Football Turkey Football Panel A Stained Glass Project DESIGNED BY: Jeanne Baruth for Diamond Tech SKILL LEVEL: (Adult 1-5 1 being the easiest, 5 being difficult)
Jeep. Flat Style Fender Flares Front Pair Front Part # Rev-9 02/23/2016 For complete fitment info visit :
 STEP 1 PRIOR TO INSTALLATION A) Bushwacker only approves installing the fl ares according to these written instructions with the hardware provided. WARNING: Failure to install according to these instructions
INSTALLATION INSTRUCTIONS
 INSTALLATION INSTRUCTIONS Accessory MOON P/N 08R01-TR0-100 Application 2013 CIVIC 4-DOOR Publications No. AII 13080 Issue Date NOV 2012 Put this information in the glove box with the vehicle owner s manual.
INSTALLATION MANUAL GIOTTO SCREEN
 INSTALLATION MANUAL GIOTTO SCREEN Before installing the Giotto screen, please read the following instructions carefully: The Giotto screen must be used INDOORS ONLY. It is forbidden to stay under the Giotto
JPM COACHWORKS INSTALLATION GUIDE
 JPM COACHWORKS INSTALLATION GUIDE 2015+ FORD MUSTANG MANUAL SHIFT BOOT Pre-Installation Warning: The installation of this product requires adhesives for proper assembly. Please read and follow all safety
EZYSTONE WORKSURFACES
 EZYSTONE WORKSURFACES Installation & Maintenance Instructions 1. Tools Required Worktop Edge Finishing Kit Pack 1-100mm Velcro Backing Pad Pack 2-100mm Diamond Dry Cut Velcro Discs (100 Grit Yellow) (200
INSTALLATION INSTRUCTIONS
 SG57f GENUINE PARTS INSTALLATION INSTRUCTIONS. DESCRIPTION: Sunroof Wind Deflector. APPLICATION: Pathfinder; Frontier with no roof rails 3. PART NUMBER: 999D4-XR00 4. KIT CONTENTS: Item No. ) ) 3) 4) 5)
Included in Hardware Kit 2. FLAT STYLE FENDER FLARE. Jeep Wrangler YJ Fronts. Set Part # Rev STEP 1 PRIOR TO INSTALLATION
 Jeep Wrangler YJ Fronts Set Part #10067-07 Rev-0 05-05-11 A) B) C) D) E) STEP 1 PRIOR TO INSTALLATION Bushwacker only approves installing the fl ares according to these written instructions with the hardware
Application guidance for Printed Vinyl decals
 Paint Masks - Dry Rub Decals - Waterslides - Printed media Telephone: Website: email: +44(0)7872 181119 (mobile) http://www.flightlinegraphics.com sales@flightlinegraphics.com Application guidance for
DOUBLE GLAZING SYSTEMS
 DOUBLE GLAZING SYSTEMS EASYFIX SUPERGLAZE EASYGLAZE FILMGLAZE Enjoy Warmth All Year Round not just in the Summer! TUBEWAY SALES LTD are proud to offer four effective secondary double glazing systems to
Marvel Abrasive Tools
 +91-8048763597 Marvel Abrasive Tools https://www.indiamart.com/marvelabrasivetools/ Our company is among the leading manufacturers and exporters reckoned for offering a precisely designed array of Grinders,
Saw, Files, Grinders and Brushes
 ß 7005-7008 0 Overall length approx. 295, working length approx. 15, trim height approx. 25. 7005 Smooth, hardened cast steel wire, 0,35 Ø. Wire scratch brushes 7007 Brass wire, fine, 0,15 Ø, crimped.
METHOD STATEMENT. Sika FloorJoint S
 METHOD STATEMENT Table of Contents 1 SCOPE 3 2 PRODUCT 3 2.1 3 3 SUBSTRATE REQUIREMENTS 3 4 Preparation of the Substrate 3 4.1 Mapping of the joint panels on the floor for the saw cuts 3 4.2 Execution
ProSeal Instructions for RB67 film back and camera body
 ProSeal Instructions for RB67 film back and camera body Please read these instructions completely before you start. Knowledge strengthens confidence, and like most jobs, this is better done right the first
Masking: Each mirrored sheet is well protected by a durable paint backing and
 STORAGE Horizontal storage: If mirror sheets are stored flat, care must be taken to avoid warping, slipping and scratching. If different sizes are stored together the largest panels should at the bottom
INSTALLATION OF SERRATED METAL CORE WITHOUT FULL DISASSEMBLY OF A HEAT EXCHANGER
 PVP2010 25685 INSTALLATION OF SERRATED METAL CORE WITHOUT FULL DISASSEMBLY OF A HEAT EXCHANGER Abstract Problem Russ Currie R Davis Flexitallic Limited Scandinavia Mill Cleckheaton West Yorkshire UK Rcurrie@flexitallic.eu
INSTALLATION INSTRUCTIONS
 INSTALLATION INSTRUCTIONS Roush Mustang Rear Valances This kit is intended for professional installation. Roush Performance 28400 Plymouth Road Livonia, MI 48150 1-800-59-ROUSH Application: Mustang 1999
SprayMax 2K Headlight Clearcoat 250 ml Prod.-no.:
 Peter Kwasny GmbH, Heilbronner Strasse 96, 74831 Gundelsheim / Germany Telephone: +49 (0) 06269-95-0; Fax: +49 (0) 6269-95-80 internet: www.kwasny.de e-mail info@kwasny.de EU-GB SprayMax 2K Headlight Clearcoat
VIEWpanel Technical Manual
 VIEWpanel Technical Manual VIEWpanel is a prefabricated panel comprising 0.21 aluminium skin (1100 alloy) both sides, apart from our lite grade, which is 0.12 aluminium skin both sides and a polyethylene
Gas Solutions. Perfection Permasert 2.0 Gas Coupling Installation Guide
 Gas Solutions Perfection Permasert 2.0 Gas Coupling Installation Guide Permasert 2.0 Mechanical Gas Couplings A B C D E F A B C D Permasert 2.0 Coupling: Molded from PE4710 resin. Meets or exceeds US DOT
PART NUMBER: T-R20 PACKAGE CONTENTS: GENUINE ACCESSORIES INSTALLATION INSTRUCTIONS Scuff Plate TOOLS REQUIRED: APPLICABLE MODELS: 2013 MAZDA CX-
 PART NUMBER: 0000-8T-R20 PACKAGE CONTENTS: GENUINE ACCESSORIES INSTALLATION INSTRUCTIONS TOOLS REQUIRED: APPLICABLE MODELS: 2013 MAZDA CX-5 FRONT SCUFF PLATE (Qty 2) 50% ISOPROPYL ALCOHOL/RESIDUE FREE
PVC Pipe Painting Guide a FORMUFIT field manual
 PVC Pipe Painting Guide a FORMUFIT field manual www.formufit.com 1 PVC Pipe Painting Guide 2 Welcome. This guide is designed to be friendly, knowledgable and to provide options for different people from
Risk Assessment & Safe Working Practice
 RA Ref Number: 46 Revision: 3 Project/Job Number Reference Insert Job Number Approval Date: 30/03/2018 RA Description: Electrical Termination Pyro Next Review Date: 01/04/2019 Notes: Please refer to Safe
ASX / OUTLANDER SPORT MZ538307EX SIDE MOULDING INSTALLATION AND HANDLING INSTRUCTIONS
 ASX / OUTLANDER SPORT MZ538307EX SIDE MOULDING INSTALLATION AND HANDLING INSTRUCTIONS Side moulding Thank you for purchasing the Mitsubishi Genuine Accessory. To install and use the product correctly with
PROFESSIONAL PIPE CUTTING POWER TOOLS
 PROFESSIONAL PIPE CUTTING POWER TOOLS PipeCut V1000 PipeCut P400 PipeCut 170 PipeCut 170E PipeCut PipeCut 280E PipeCut 360E UNIQUE EXACT METHOD FOR CUTTING PIPES The Exact pipe cutting system is designed
Standard Kit #1 (3-way switch)
") Standard Kit #1 (3-way switch) Please Read All Instructions Before Beginning. Tools you will need: Soldering Iron (35 watt preferably) Solder Wet Sponge Wire Clippers 3/8 Drill Bit 1/4 Drill Bit Variable
Standard Kit #1 (3-way switch) Please Read All Instructions Before Beginning. Tools you will need: Soldering Iron (35 watt preferably) Solder Wet Sponge Wire Clippers 3/8 Drill Bit 1/4 Drill Bit Variable
Sutherland Welles Ltd.
 Sutherland Welles Ltd. FLOOR INSTRUCTIONS MURDOCH S SYSTEM Floor Sanding Prep Murdoch s Uralkyd 500 Floor Finish Sanding Process First Sanding The initial cut either removes finish from an existing floor
Cardboard Model Buildings
 Cardboard Model Buildings Get more model kits from http://www.modelbuildings.org PRINTING & ASSEMBLY TIPS: These OO designs can easily be resized by reducing the print percentage as follows: OO scale is
GENUINE PARTS INSTALLATION INSTRUCTIONS
 GENUINE PARTS INSTALLATION INSTRUCTIONS DESCRIPTION: APPLICATION: PART NUMBER: REAR SPOILER KIT - CARBON FIBER INFINITI Q60 T99J1 5CH0B KIT CONTENTS: Item Qty. Part Description A 1 Spoiler Assembly B 4
Inlay String Thicknesser
 Inlay String Thicknesser 05P32.10 The Veritas Inlay String Thicknesser is used to scrape veneer or inlay string to a desired thickness. Unlike a conventional scraper, the sole of this tool does not bear
PANEL INSTALLATION GUIDE
 GUIDE The Manufacturer has provided these instructions as installation guidelines in accordance with ASTM E-330. The manufacturer, however neither installs the panels nor has any control over the installation.
TOYOTA TUNDRA 2015 BLACK TEXTURED FENDER FLARE
 TOYOTA TUNDRA 2015 BLACK TEXTURED FENDER FLARE Part Number: 00016-34083-02 Accessory Code: BF1000 Conflicts Note: Kit Contents Item # Quantity Reqd. Description 1 1 Left Front Fender Flare 2 1 Right Front
Included in Hardware Kit 2. FLAT STYLE FENDER FLARE. Jeep Wrangler YJ. Set Part # Rev STEP 1 PRIOR TO INSTALLATION
 Jeep Wrangler YJ Set Part #10924-07 Rev-0 05-05-11 A) B) C) D) E) STEP 1 PRIOR TO INSTALLATION Bushwacker only approves installing the fl ares according to these written instructions with the hardware
Especially suitable for work in restricted working spaces.
 Innovative ratchet pipe cutter with a worldwide patent and ratchet mechanism allows you to cut a pipe without having o completely rotate the tool. Especially suitable for work in restricted working spaces.
Easyfix. Easyglaze. Superglaze. Filmglaze
 Easyfix Easyglaze Superglaze Filmglaze Magnetglaze Magnetglaze Pro TUBEWAY (SALES) LTD are proud to offer six effective secondary double glazing systems to the general public. Each system is available
INSTALLATION INSTRUCTIONS of Chevron and Herringbone Engineered Hardwood Flooring
 INSTALLATION INSTRUCTIONS of Chevron and Herringbone Engineered Hardwood Flooring www.tomson-floors.com TABLE OF CONTENTS 3 USING THE PRODUCT 3 YOUR RESPONSIBILITIES 4 PRE-INSTALLATION INSPECTION 5 BASIC
TOYOTA CAMRY LIP SPOILER Preparation
 Preparation Part Number: PT29A-03070-XX Kit Contents 1 1 Lip Spoiler 2 1 Hardware Bag Hardware Bag Contents 1 2 M6 Nuts 2 2 M6 Bolts Additional Items Required For Installation 1 1 Installation Kit, P/N
Assembly instructions
 Assembly instructions Important notes on VOSS assembly instructions In order to ensure maximum performance and functional reliability of VOSS products, the respective assembly instructions, operating conditions
A Precision 2000 Mixed Media Project
 Día de los Muertos (Day of the Dead) Panel A Precision 2000 Mixed Media Project PROJECT TITLE: Día de los Muertos (Day of the Dead) Panel DESIGNED BY: Andy Spencer SKILL LEVEL: (Adult 1-5: 1 being the
Titan Installation Instructions
 Titan Installation Instructions Introduction: This manual was written to cover the fabrication and installation of sink bowls and tub and shower surrounds in residential and commercial applications. As
COLLECTIBLES SHELF WOODWORKS: BEGINNER PROJECT. (with optional instructions for Throw Blanket Rack)
") WOODWORKS: BEGINNER PROJECT COLLECTIBLES SHELF (with optional instructions for Throw Blanket Rack) A fine addition to any decorating scheme, this easy-to-build shelf is a perfect way to display collectibles.
WOODWORKS: BEGINNER PROJECT COLLECTIBLES SHELF (with optional instructions for Throw Blanket Rack) A fine addition to any decorating scheme, this easy-to-build shelf is a perfect way to display collectibles.
Application Tooling Specification Sheet
 Hand Crimp Tool Application Tooling Specification Sheet TYPE 4D Order No. 63819-0800 FEATURES A full cycle ratcheting hand tool ensures complete crimps Ergonomic soft grip handles for comfortable crimping
Instructions for Making Repairs to 3M 8681HS Blade Tapes Installed on Enstrom Helicopter Blades.
 REPORT NO: TITLE: Instructions for Making Repairs to 3M 8681HS Blade Tapes Installed on Enstrom Helicopter Blades. MODEL NO: All PREPAIRED BY: P.B. dupont CHECKED BY: APPROVED BY: 1. SCOPE This specification
Application Tooling Specification Sheet
 HAND CRIMP TOOL Application Tooling Specification Sheet TYPE 4D Order No. 63819-1000 FEATURES A full cycle ratcheting hand tool ensures complete crimps Ergonomic soft grip handles for comfortable crimping
EXTERIOR PAINTING
 SECTION 099113 - EXTERIOR PAINTING PART 1 - GENERAL 1.1 RELATED DOCUMENTS A. Drawings and general provisions of the Contract, including General and Supplementary Conditions and Division 01 Specification
Application Tooling Specification Sheet
 HAND CRIMP TOOL Application Tooling Specification Sheet TYPE 4D Order No. 63819-0900 FEATURES A full cycle ratcheting hand tool ensures complete crimps Ergonomic soft grip handles for comfortable crimping
Eerie Halloween by Nunn Design
 Eerie Halloween by Nunn Design Approximate finished length: 20 inches Beads and other products needed for necklaces: 1 - Pewter Itsy Square Bezel Pendant with Flat Loop by Nunn Design - Antique Gold -
BERKEL 818/919 SERIES Slicer
 Hardee s Food Systems, Inc. BERKEL 818/919 SERIES Slicer EQUIP 1601 Slicers October 1, 1994 CALIBRATION EQUIPMENT and TOOLS 10 millimeter Metric Wrench CLEANING SUPPLIES Berkel USDA Authorized Oil Multi-Purpose
Field Installed Connectors for TraceTek 7000-HUV Bulk Cable Installation Instructions
 TraceTek TT-7000-HUV-CK-MC-M/F Field Installed Connectors for TraceTek 7000-HUV Bulk Cable Installation Instructions Description These instructions describe field connecting of TT7000-HUV Bulk Sensing
College of Forestry 610: Power Tools
 College of Forestry 610: Power Tools Safety Policy & Procedure Manual Section 600: Workshops and Shop Tools Effective: 01 January 2007 Revised: August 2014 PURPOSE The purpose of this section is to provide
Installation Instructions: OFC Gas Grip
 Installation Instructions: OFC Gas Grip Made in Germany Innovations: 2 gas cables installed in the handlebars Maintenance-free For universal use* Use of top-quality materials Long service life 6 bearings
MIL-STD B (SH) UPDATE
 UPDATE") MIL-STD-2042-5B (SH) UPDATE Method 5A1 Insert Equipment and materials (to be added to table 5A1-I) Pliers 3.2.2.2 Cable and fiber preparation for Fiber Systems International backshells. Step 1: Ensure
MIL-STD-2042-5B (SH) UPDATE Method 5A1 Insert Equipment and materials (to be added to table 5A1-I) Pliers 3.2.2.2 Cable and fiber preparation for Fiber Systems International backshells. Step 1: Ensure
SURFACE FINISH MAINTENANCE
 SURFACE FINISH MAINTENANCE SURFACE FINISH MAINTENANCE Lumec strongly recommends that you maintain your luminaires twice a year in order to prolong the appearance of the finished surface. By following this
Application Tooling Specification Sheet
 Modular Crimp Head Order No. 63811-5970 FEATURES Application Tooling Specification Sheet TYPE 4A Hand Crimp Tool Order No. 63811-5900 % A full cycle ratcheting hand tool ensures complete crimps % Ergonomically
Bounce Back How to install Plastic Coated Wire Fencing
 Bounce Back How to install Plastic Coated Wire Fencing The information provided is suggested only. It is up to the individual to ensure they use the correct fencing method suitable for their situation.
Order Number
 Order Number 200218-5500 FEATURES Application Tooling Specification TYPE 4D A full-cycle ratcheting hand tool ensures complete crimps Ergonomic soft grip handles for comfortable crimping A precision user-friendly
TOYOTA CAMRY & CAMRY HV BODY SIDE MOLDING Preparation
 Preparation Part Number: PT938-03120-XX Kit Contents 1 1 Molding, LH Front Door 2 1 Molding, LH Rear Door 3 1 Molding, RH Front Door 4 1 Molding, RH Rear Door Hardware Bag Contents 1 2 Additional Items
Painting Safety Procedure
 Pars Oil & Gas Company Painting Safety Procedure HEALTH, SAFETY AND ENVIRONMENT PROCEDURE Painting Safety Procedure DOCUMENT ID - PR-66-POGC-002 REVISION 0.0 Pars Oil & Gas Company Pages 10 Revision 00
SAFETY AND OPERATING MANUAL
 SAFETY AND OPERATING MANUAL BladeRunner X2 WX572 9 10 8 11 5 7 12 6 20 1 2 4 3 14 13 15 A2 A1 17 18 B2 B1 1 2 1 2 19 B3 3 4 2 C 1 D1 D1 C 2 1 E1 D2 1 2 E2 1 2 F G1 G1 F OFF ON G2 G3 H1 H2 I1 I2 I1 I2 J
How To Create An Entertainment Unit
 How To Create An Entertainment Unit Materials required: 2 x Pine Panels - 1800mm x 450mm x 18mm 4 x Pine Panels - 310mm x 450mm x 18mm 1 x Pine Panels - 650mm x 450mm x 18mm 6 x Bun feet (your choice of