Lodge II Pergola. Manual and Installation Instructions. Please read these instructions before removing parts from crate
|
|
|
- Amy Ramsey
- 6 years ago
- Views:
Transcription

1 Lodge II Pergola Manual and Installation Instructions Please read these instructions before removing parts from crate

2 Introduction Thank you for your purchase from The Outdoor GreatRoom Company. This pergola has been engineered and manufactured in the USA. The purpose of this manual is to make the installation and assembly simpler. Outdoor GreatRoom company recommends visiting with your local authority for building codes, restrictions, or requirements for this product. Please read the manual through before starting the project. This pergola is made of premium grade kiln dried Douglas Fir. Douglas Fir, if maintained properly, will last a very long time, similar to life of both Cedar and Redwood. All finished pieces have been dipped in stain to ensure penetration. It is recommended that the pergola receive a clear, oil based stain yearly to maintain the color, minimize warping and prevent rotting. Every few years a colored oil based stain should be used to keep the original color. Due to the immersion process used to stain wood pieces, parts may arrive slightly wet. If this occurs, it is recommended that wood pieces be removed from crate and allowed to air-dry for a day or two before assembly. Important: Anchoring Required Contact your local authority for details Read instructions prior to assembly Assistance is required and we recommend at least 4 people for installation Do not let wood pergolas touch bare ground. Over time this can cause moisture damage and rotting of wood. If you have questions contact the place of purchase Douglas Fir Lumber may have surface splits. This occurs while the lumber dries and seasons. This characteristic is also known as checking in the lumber industry. These can be upwards of 1/8 running inches to feet in length. These characteristics do not deter the structural strength and integrity of the product nor does it affect or void the warranty. Before Beginning, make sure that all components listed on the net page were included with your hardware kit. Contact your dealer if any parts are missing. Tools Required Corded or Cordless Drill Phillips screw bit Measuring Tape Level Socket Set Rubber Mallet Ladder Hammer Drill* Concrete Drill Bit* Concrete Anchors* Forklift (Highly recommended for raising sides and A-frame, but not required) Metal shears (required for optional roof installation) *Only Required for anchoring to concrete surfaces. Disclaimer The Outdoor GreatRoom Company is not liable for damage caused by weather or misuse Rv-B


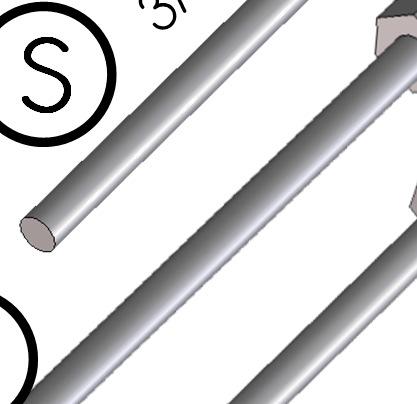

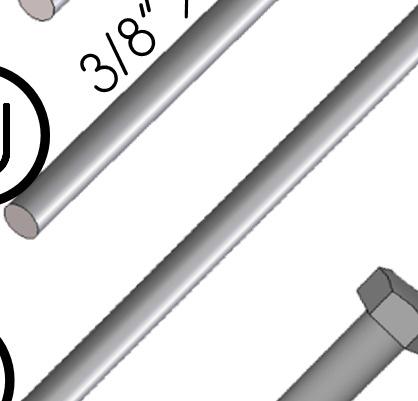
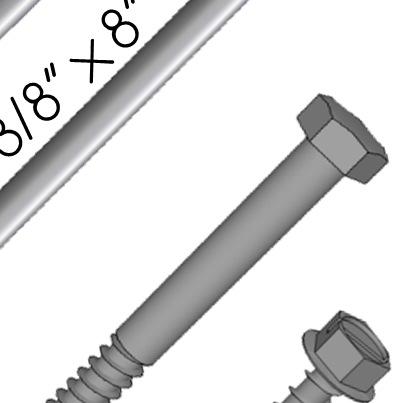
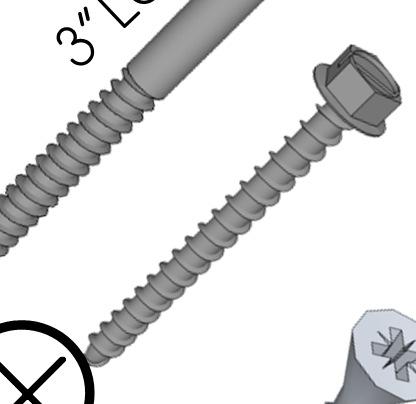
3 Lodge II Pergola Assembly Instructions Part List 1 (Parts not shown to scale) A M L B S C N T O U D V P E W F J G H I X Q R K Y Foot Washer Nut Lock-washer
 to hold parts in position. Assemble as shown.")

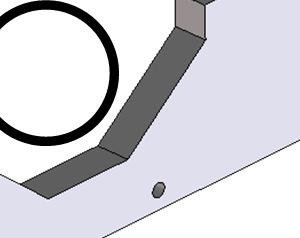
4 Lodge II Pergola Assembly Instructions A-Frame Assembly Step 1: Use construction adhesive and supplied wood screws to assemble in the configuration shown. Apply construction adhesive to parts D and L avoiding areas near bolt holes. Insert bolts from back side (the side not visible in the figure below) to hold parts in position. Assemble as shown. Insert wood screws Y from back side as indicated by the diagram to the right. Remove bolts once screws are in place. J L C IMPORTANT: Parts B and J eist in two forms. The center A-frames of this pergola require parts B and J with pre-drilled screw holes at one end of each beam used to fasten the center section to the ledger beam assembly. Make sure the screw holes are facing outward when assembling the center A-frame in step 6. Screw diagram 1. 2 D Step 2: B L Repeat the process from step 1 on parts D, L, and B. Insert bolts U from back side (leave hole at each end empty for now). Screw diagram 2 D


5 Lodge II Pergola Assembly Instructions A-Frame Assembly 3 Step 3: Assemble as shown. Insert bolts U from back side as necessary to hold frame together. Insert additional screws as shown. Screw diagram 3 H Step 4: E I G Apply adhesive and bolt assembly from step 1 as shown. Every bolt requires a washer and lock washer. Insert 4 screws in locations shown in step 3. Washer Nut Bolt Lock-Washer


")

6 Lodge II Pergola Assembly Instructions A-Frame Assembly 4 Step 5: Bolt beams F into place as shown. This completes assembly of the first outside A-frame. Repeat steps 1-4 to assembly the second outside A-frame. (Note: Center A-frame requires different parts) E Step 6: Repeat steps 1-5 to assemble center A-frame replacing part E with part F as shown. F F F Screw holes


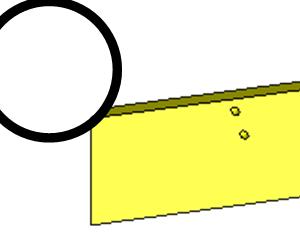
7 Lodge II Pergola Assembly Instructions Ledger Beam Assembly 5 Step 7: Assemble as shown. Insert bolts for assistance in lining parts up. Glue pieces in place and insert screws from back side. Remove bolts after screws are in place. R M D N R Screw diagram 4 Step 8: O Apply adhesive to parts D and N. Assemble as shown. Insert bolts from front side, add washer, lock-washer, and nut. Tighten all bolts. Insert screws from front side as shown. Do not bolt ends. Repeat steps 7 and 8 for second ledger beam. Screw diagram 5

8 Lodge II Pergola Assembly Instructions Column Assembly 6 Step 9: Insert feet into column A base and fasten with bolt T making sure to use a washer, and lock-washer. If feet fit tightly, a rubber mallet may be used to force beams into place. Tighten securely and repeat for the three remaining Step 10: Stand columns up on footings or surface to be mounted to in approimate final positions given by the center-to-center distances shown at right. Columns feature a decorative engraving on one side, so be sure to keep this in mind while orienting columns. Ensure columns are adequately supported until at least A-frame sections are bolted in place.


9 Lodge II Pergola Assembly Instructions Main Assembly 7 Step 11 : Lift ledger beams and lower into place on columns with beams O facing outward. Step 12: Lift the first A-frame into place on top of ledger beam/column assembly with beams E facing outward. Keep columns supported.


10 Lodge II Pergola Assembly Instructions Main Assembly 8 Step 13: Insert part K into end of A-frame. K A rubber mallet may be required if it does not slide in easily. Slide downward until both holes line up. Insert bolts S and V as indicated with washers and lockwashers. Tighten securely. Step 14: Lift center A-frame into place. This is the frame assembled in Step 6. Ensure frame is centered and pergola is squared before fastening to ledger beams with wood screws Y. Repeat steps to complete installation of A-frames.
11 Lodge II Pergola Assembly Instructions Final Assembly 9 K K Step 15: Attach Corbels Q to each corner as shown using he-head screws X K Step 16: Insert crossbeams P and fasten through pre-drilled holes with lag bolts W. Tighten.


12 Lodge II Pergola Assembly Instructions Post Placement and Anchoring Peak height


. 4 ½ panels will be required for each side.")
13 Lodge II Pergola Assembly Instructions Optional Steel Roof 11 If you purchased an optional steel roof system for your Lodge II, use the instructions in this section to assemble your roof. Included in your roof kit: 9 Roof Panels Small roof screws End cap Ridge Flashing Required Tools (not included) : Step 1 : Cut end flashings to the length of roofing panels plus an additional 4 inches to allow for overhang. End Flashing Power drill Tape measure Level ¼ he socket Electric or pneumatic metal shears Step 2 : Flashing Using supplied screws, fasten end flashing to roof frame with front edge flush with front of A- frame as shown. Overlap ends to form a continuous peak. Step 3 : Overlap flashing ends Lay roof panels on pergola structure, grooves in the direction of the slope of the roof, leaving peak eposed and panel ends flush with end of ridge flashing, overlapping as necessary (do not leave gaps between panels). 4 ½ panels will be required for each side. One panel should be cut to size and used for both sides of the roof. Once panels have been cut to fit, ensure they are even and level, mark stud locations and attach to frame with supplied screws. Step 4 : Cut ridge flashing to desired length (2 overhang on each end suggested), Lay on top of pergola and fasten to roof with supplied screws.
14 Lodge II Pergola Assembly Instructions - Warranty Info 12 Lodge II Pergola Warranty Information Your new Lodge II pergola is warranted against structural defects for a period of three (3) years from the date of purchase. This does not apply to damage caused by ecessive loads such as snow or use of roof as storage. Your Lodge II pergola is warranted against defects in finish and other defects not related to structure for a period of one (1) year from the date of purchase. All metal hardware must be sprayed with a clear lacquer sealer once your pergola is assembled to prevent rust and corrosion. The Outdoor Greatroom Company etends the following warranty for Outdoor Greatroom outdoor products used in the United States of America or Canada. Dealers and employees of The Outdoor Greatroom Company have no authority to make any warranty or authorize any remedies in addition to or inconsistent with the terms of this warranty. This warranty gives you specific legal rights. You may also have other rights that vary from state to state. The Outdoor Greatroom Company warrants that this Outdoor Greatroom Outdoor Product (the Product ) will be free from defects in material and workmanship for a period of one (1) year for finish and other non-structural defects and three (3) years from its date of purchase structurally. This warranty is subject to the conditions, eclusions and limitations described below. This warranty applies only to the original owner of the Product and is non-transferable. The Outdoor Greatroom Company obligation under this warranty does not etend to damages resulting from (1) assembly, operation or maintenance of the Product not in accordance with the Installation/Assembly Instructions, Operating Instruc-tions and the Listing Agency Identification Label furnished with the Product; (2) installation or use which does not comply with local building codes and ordinances; (3) shipping, improper handling, improper operation, abuse, misuse, accident or unworkmanlike repairs; (4) use of fuels other than those specified in the Operating Instructions; (5) Installation or use of components not supplied with the Product or any other components not epressly authorized and approved in writing by The Outdoor Greatroom Company; and/or (6) modification of the Product not epressly authorized and approved in writing by The Outdoor Greatroom Company. Any of the circumstances described in the previous sentence voids this warranty. This warranty is void if the Product or any component has been removed, repaired, or replaced before The Outdoor Greatroom Company has been afforded a reasonable opportunity to inspect the Product. This warranty is limited to the replacement or repair of defective components or workmanship and The Outdoor Greatroom Company may fully discharge its obligations under this warranty by repairing or replacing, at its discretion, the defective components. The Outdoor Greatroom Company will provide replacement parts at no charge and will pay reasonable and necessary labor and freight costs related to replacing or repairing defective components under this warranty. The maimum amount recoverable under this warranty is limited to the pur-chase price of the Product and, if The Outdoor Greatroom Company is unable to provide replacement or repair in an epedient and cost-effective manner, The Outdoor Greatroom Company may discharge all obligations under this warranty by refunding the purchase price of the Product. EXCEPT TO THE EXTENT PROVIDED BY LAW, THE OUTDOOR GREATROOM COMPANY MAKES NO EXPRESS WARRANTIES OTHER THAN THE WARRANTY EXPRESSED HEREIN. THE DURATION OF ANY IMPLIED WARRANTY IS LIMITED TO THE DURATION OF THE WARRANTY SPECIFIED ABOVE. IN NO EVENT SHALL THE OUTDOOR GREATROOM COMPANY BE LIABLE FOR ANY INCIDENTAL OR CONSE-QUENTIAL DAMAGES CAUSED BY DEFECTS IN THE PRODUCT. Some states do not allow limitations on how long an implied warranty lasts, or do not allow eclusion or limitation of incidental or consequential dam-ages, so these limitations may not apply to you. To obtain service under this warranty, you must: Send written notice of the claimed condition to: The Outdoor Greatroom Company, 2015 Silver Bell Road, #195, Eagan, MN Affirm that you are the original owner of the Product. Provide The Outdoor Greatroom Company reasonable opportunity to investigate the claim, including reasonable opportunity to inspect the Product prior to any repair or replacement work and before the Product or any component of the Product has been removed. Obtain The Outdoor Greatroom Company s consent to any warranty work before the work is done. The Outdoor Greatroom Company
Sonoma Outdoor Kitchen Pergola. Assembly Instructions
 Sonoma Outdoor Kitchen Pergola Assembly Instructions Introduction Thank you for your purchase from The Outdoor GreatRoom Company. This pergola has been engineered and manufactured in the USA. This user
Sonoma 1216 Pergola Manual and Installation Instructions. Please read these instructions before removing parts from crate
 Sonoma 1216 Pergola Manual and Installation Instructions Please read these instructions before removing parts from crate Introduction Thank you for your purchase from The Outdoor Greatoom Company. This
HOT GLASS WILL CAUSE BURNS DO NOT TOUCH GLASS UNTIL COOLED NEVER ALLOW CHILDREN TO TOUCH GLASS
 Glass Guard ssembly instructions for Glass Guard-, Glass Guard-0, Glass Guard-, Glass Guard-, Glass Guard--R, Glass Guard-0-R, Glass Guard-0-R, Glass Guard--L, Glass Guard-WV and Glass Guard-66 Keep children
Costco High Wire Assembly Instruc ons & Owner's Manual
 2254 Costco High Wire Assembly Instruc ons & Owner's Manual Important! Read this manual completely through before assembly and use. Consumer assistance Toll free If you need to order replacement parts
Spa & Hot Tub Necessities. Cover Removal System Installation & Use Manual
 Spa & Hot Tub Necessities Cover Removal System Installation & Use Manual SET-UP AND ASSEMBLY BEFORE BEGINNING ASSEMBLY, CAREFULLY READ THE FOLLOWING INFORMATION AND INSTRUCTIONS: Place all parts in a cleared
INSTALL INSTRUCTIONS WELCOME TO THE NEWAGE PERFORMANCE CABINETRY SERIES NEWAGE STEEL WELDED CABINETRY
 NEWAGE STEEL WELDED CABINETRY WELCOME TO THE NEWAGE PERFORMANCE CABINETRY SERIES ALL CABINETS MUST BE MOUNTED TO STUDS ON A SECURE WALL, AS PER THESE INSTRUCTIONS. FAILURE TO DO SO MAY RESULT IN SERIOUS
Install Instructions. NewAge Steel Welded Tall Locker
 Kit Contains Full Width Adjustable Steel Shelves (4) Height-Adjustable Steel Leveling Legs (4) Aluminum Door Trim (2) 2.5 x ¼ Cabinet Mounting Lag Bolts (4) Large Zinc Plated Mounting Washers (4) 5/8 x
Installation Manual XRL Solar Rail System
 Installation Manual XRL Solar Rail System Solar Mounting Solutions June 2009 www.ironridge.com 2009 IronRidge, Inc. All Rights Reserved Version 1.0 2 XRL Solar Rail System Installation Guide Introduction
Tilting & Swiveling Plasma/LCD Flat Panel Wall Mount Installation Guide Model: A380SM
 Tilting & Swiveling Plasma/LCD Flat Panel Wall Mount Installation Guide Model: A380SM Easy installation Built-in level for easy positioning Corrective leveling adjustments after installation Forward /
Unirac Installation Manual
 Tile Roof Hook Universal Mount Unirac R Pub 090727-1ii June 2009 A HILTI GROUP COMPANY Unirac welcomes input concerning the accuracy and user-friendliness of this publication. Please write to publications@unirac.com.
Tilting Flat Panel Wall Mount Installation Guide
 Tilting Flat Panel Wall Mount Installation Guide Model: A580TM Easy installation Built-in level for easy positioning Safety bolts lock the TV on the mount Easy to adjust tilt angles: +5 to -15 degrees
INSTRUCTION BOOK FOR. IDEA Screen & Panoramic for Nureva Span
 INSTRUCTION BOOK FOR IDEA Screen & Panoramic for Nureva Span Disclaimer Milestone and its affiliated corporations and subsidiaries (collectively "Milestone"), intend to make this manual accurate and complete.
Single Arm Pole Mount. Installation Manual Edition v1.01. For models: UNI-SA/14 UNI-SA/21.5 UNI-SA/26 UNI-SA01-MAN
 Pole Mount Installation Manual 2016 Edition v1.01 For models: UNI-SA/14 UNI-SA/21.5 UNI-SA/26 UNI-SA01-MAN Table of Contents 1 1 2 3 4 5 5 Introduction Customer Support Project Essentials Assembly: Steps
Worktop. Weight Capacity. 100 lbs. 21 Corner Worktop. 48 Worktop. Fits over 2 Cabinets. 72 Worktop. Fits over 3 Cabinets. 200 lbs. 150 lbs.
 Bold.0 Warning: Excessive weight hazard! Use two or more people to move, assemble or install cabinets and locker to avoid back injury. Do not leave children unattended near cabinets. High risk of tipping
Worktop INDEX eight Capacity Unpacking
 Pro.0 Series Warning: Excessive weight hazard! Use two or more people to move, assemble or install cabinets and locker to avoid back injury. Do not leave children unattended near cabinets. High risk of
DRIVEWAY SERIES D554 D560
 DRIVEWAY SERIES D554 D560 Version ' Keep this instruction manual in case you have to contact the manufacturer for replacement parts. 2 FAILURE TO FOLLOW THESE WARNINGS MAY RESULT IN SERIOUS INJURY AND/OR
Models 2030 and 2040
 Models 2030 and 2040 Overview... 2 Tools Needed... 2 Hardware... 2 Assembly... 3-8 Installation... 9 Operation... 9 Maintenance... 10 Accessories... 10 Limited Warranty... 10 Document # 101290 0607 Printed
Loading Dock Safety Gate
 Installation Instructions/Operation and Maintenance Manual Models LDSG-120-PCY LDSG-144-PCY Table of Contents Product Information...2 Parts List...3 Installation Instructions...5 Operation...13 Inspection
Please Do Not Return This Product To The Store!
 MODEL NOS. T8512 TOURNAMENT SERIES 3 TABLE TENNIS TABLE OWNER'S MANUAL 1. Read this manual carefully before starting assembly. Read each step completely before beginning each step. 2. Some smaller parts
12X20 Breeze Pergola Assembly Manual Outdoor Living Today
 12X20 Breeze Pergola Assembly Manual Outdoor Living Today Revision #10 July 21th, 2015 Note: Post Mounting Hardware is NOT included in this kit. Please confirm with your local building permit office to
Page 1 of 18. SunRail System Installation Instructions
 Page 1 of 18 SunRail System Installation Instructions Page 2 of 18 SunRail Stainless Steel Railing Installation Guide Table of Contents Before You Begin 3 Installing Surface Mount Bases for a Two Rail
12 x 14 retractable sunshade
 12 x 14 retractable sunshade Installation and Operating Instructions YP11691 Pergola Room Sold Separately Revised 11/29/2013 Yardistry North America Toll Free Customer Support: 1.888.509.4382 info@yardistrystructures.com
Hardware Box 1 1/4 Diameter x 3/4 Long Bolts 24 1/4 Nylon Lock Nut 24 1/4 Diameter x 3 Long Lag Bolt 8 1/4 Washers 56
 Warning: Excessive weight hazard! Use two or more people to move, assemble or install overhead rack to avoid back or other injury. Do not leave children unattended near overhead rack. High risk of injury
Tilting, Swiveling & Rotating Flat Panel Wall Mount
 Tilting, Swiveling & Rotating Flat Panel Wall Mount Model: VXA980TC +5 to -5 +5 to -5 Supports most 0-80 Flat Panel TVs Maximum Weight Capacity: 32 lbs. Supports VESA Sizes up to 600x500 For technical
8X10 Breeze Pergola Assembly Manual Outdoor Living Today
 8X10 Breeze Pergola Assembly Manual Outdoor Living Today Revision #11 Jan 18th, 2018 Note: Post Mounting Hardware is NOT included in this kit. Please confirm with your local building permit office to determine
Assembly Instructions
 Thank You For Purchasing The Best Overhead Storage Rack Assembly Instructions Overhead Storage Rack 8 x 4 8 x 3 8 x 2 6 x 4 6 x 3 6 x 2 4 x 4 Two 8 x4 Racks Pictured P.O. Box 714, El Cerrito, CA 94530
Installation Instructions/Operation and Maintenance Manual. PS DOORS Contact Information. Website psdoors.com
 Ladder Safety Gate Installation Instructions/Operation and Maintenance Manual Models All Models: LSG-5 to LSG-48 Table of Contents Product Information...2 Inspection & Mainteance...2 Warranty Information...2
12ft X 12ft Attached Breeze Pergola Assembly Manual. Outdoor Living Today. (For Both 9 and 12 High Posts) June 1st/2012 Version #4
 June 1st/2012 Version #4") 12ft X 12ft Attached Breeze Pergola Assembly Manual (For Both 9 and 12 High Posts) Outdoor Living Today June 1st/2012 Version #4 Note: Installation of Wall Side Girders (P) and Wall Mount Brackets (M)
12ft X 12ft Attached Breeze Pergola Assembly Manual (For Both 9 and 12 High Posts) Outdoor Living Today June 1st/2012 Version #4 Note: Installation of Wall Side Girders (P) and Wall Mount Brackets (M)
Models 2130 and 2140
 Models 2130 and 2140 Overview... 2 Tools Needed... 2 Hardware... 2 Assembly... 3-10 Installation...11 Operation... 11 Maintenance... 12 Accessories...12 Limited Warranty... 12 Printed in USA 2007 Perform
Models 2130 and 2140
 Models 2130 and 2140 Overview... 2 Tools Needed... 2 Hardware... 2 Assembly... 3-10 Installation...11 Operation... 11 Maintenance... 12 Accessories...12 Limited Warranty... 12 Perform the following sequence
Full Height Ladder Safety Gate
 Full Height Ladder Safety Gate Installation Instructions/Operation and Maintenance Manual Models Powder Coat Yellow (PCY) 304 Stainless Steel (SS) Hot Dipped Galvanized (GAL) Table of Contents Product
Performance 2.0 Series
 Performance. Series Warning: Excessive weight hazard! Warning: Excessive weight hazard! Use two or more people to move, assemble, or install cabinets and locker to avoid back injury. Do not leave children
Pergola Room Kit. Installation and Operating Instructions YM Revised 01/09/2013
 Pergola Room Kit Installation and Operating Instructions YM12514 Yardistry North America Toll Free Customer Support: 1.888.509.4382 info@yardistrystructures.com www.yardistrystructures.com Yardistry /
Installation Manual. Tamarack Solar Products. Top of Pole Mount Edition v1.01. For models:
 Mount Installation Manual 2016 Edition v1.01 For models: UNI-TP/06 UNI-TP/06LL UNI-TP/08 UNI-TP/08LL UNI-TP/10 UNI-TP/10LL UNI-TP/12 UNI-TP/12LL UNI-TP02-MAN Table of Contents 1 Introduction 1 2 Customer
12 x 12 Pergola room
 12 x 12 Pergola room Installation and Operating Instructions YM11635X Retractable Sunshade Sold Separately Yardistry North America Toll Free Customer Support: 1.888.509.4382 info@yardistrystructures.com
YGR-LO-8 GUARD RAILING YGR-TP18 & YGR-TP42 POSTS Installation Manual
 VESTIL MANUFACTURING CORP. 2999 North Wayne Street, P.O. Box 507, Angola, IN 46703 Telephone: (260) 665-7586 -or- Toll Free (800) 348-0868 Fax: (260) 665-1339 www.vestilmfg.com e-mail: sales@vestil.com
AM500-U Installation Guide
 1321 S. State College Blvd., Fullerton, CA 92831 USA Included Components Maximum Flat Panel Weight: 500 lb. / 226.79 kg. Wall Mount Bracket (Qty 2) Cross Bar 5/16 Flat Washers (Qty 6) Universal Spacers
Tilting & Swiveling Flat Panel Wall Mount Installation Guide Model: AXS2040
 Tilting & Swiveling Flat Panel Wall Mount Installation Guide Model: AXS2040 20-40 66 lbs. Supports VESA sizes up to: 200x200 For technical assistance or troubleshooting please call 1-855-994-2825 or visit
Owner's Manual Frequently Asked Questions Assembly Instructions Warranty Information
 12X10 PERGOLA Model: # 6214 Owner's Manual Frequently Asked Questions Assembly Instructions Warranty Information INS-6214-A-PERGOLA-ENG 04/25/14 Manufacturer: Backyard Discovery 3001 North Rouse Pittsburg,
Installation Instructions Tailgate Rack Bracket
 Installation Instructions Tailgate Rack Application: Jeep Wrangler 1986 Current Part Number: 41411 www.bestop.com - We re here to help! Visit our web site and click on Ask a Question. Click here for more
SHED-5932-F, MANUAL.doc
 VESTIL MANUFACTURING CORP. 2999 North Wayne Street, P.O. Box 507, Angola, IN 46703 Telephone: (260) 665-7586 -or- Toll Free (800) 348-0868 Fax: (260) 665-1339 www.vestilmfg.com e-mail: HUsales@vestil.comU
WoodTrac Direct Mount Ceiling System
 WoodTrac Direct Mount Ceiling System Assembly Instructions All product is Class C rated and some product is available Class A rated. Check the ordering information to obtain the class rating for your product.
The Heritage Pergola
 Eye Level Corporation One Trefoil Drive Trumbull, CT 06611 USA Phone: 888.782.1760 Fax: 888.782.1761 www.@eyelevelliving.com The Heritage Pergola Installation Instructions ARBORS COLUMNS HOSE REELS MAILBOX
10X12 Arched Breeze Pergola Assembly Manual Outdoor Living Today
 10X12 Arched Breeze Pergola Assembly Manual Outdoor Living Today ITEM# BZ1012ARCH Revision 2 March 25th/2015 Note: Post Mounting Hardware is NOT included in this kit. Please confirm with your local building
BASE & WALL CABINET SETUP GUIDE BY SUNSTONE
 BASE & WALL CABINET SETUP GUIDE BY SUNSTONE Read all instructions before you install cabinet. Very important to follow each step in order as detailed in this Instruction Guide!!! To installer or person
One Shelf, Wall Mounted A/V Component Stand Installation Guide Model: EX101SS
 One Shelf, Wall Mounted A/V Component Stand Installation Guide Model: EX0SS For technical assistance or troubleshooting please call -855-994-3832. This product is intended for use only with Audio/Video
Classic Tire Swing Set
 Owners & Instruction Manual Classic Tire Swing Set This instruction booklet is to be used exclusively for Eastern Jungle Gym customers only. It is not to be handed out to the general public. Any duplication
1-CYLINDER TORNADO LIFT INSTALLATION MANUAL
 1-CYLINDER TORNADO LIFT INSTALLATION MANUAL Model: TORNADO LIFT 2K 2018 Edition PROVIDED FOR ASSEMBLY Foot Pads 12 sq. Square Tube Legs (optional) Cross Beams Side Beams 2.5 Dia. Cylinders (with hoses
Important safety considerations
 Important safety considerations This product is intended for use by children not less than 2 years of age. Warning: possible problems of entrapment could occur if used by children under 2 years of age.
PB 8328 WS 8328 IMPORTANT!! JAMBOREE
 PB 8328 WS 8328 JAMBOREE IMPORTANT!! PLEASE READ BEFORE BEGINNING ASSEMBLY!! Please make sure all lumber, hardware and accessory parts are accounted for. If you are missing anything, please DO NOT RETURN
00108/00110 INSTRUCTION MANUAL
 00108/00110 INSTRUCTION MANUAL Removable and Adjustable Mudflap System IMPORTANT! Please Read this Instruction Booklet prior to assembly of your Rock Tamer Kit. IMPORTANT! Exhaust Systems Note: Any modifications
Unirac Flat Flashing INSTALLATION MANUAL
 Unirac Flat Flashing INSTALLATION MANUAL 2011 by Unirac, Inc. All rights reserved. Pub 110301-1ii, March 2011 A HILTI GROUP COMPANY R 1411 Broadway Boulevard NE Albuquerque, NM 87102-1545 USA IMPORTANT!
6-CYLINDER TORNADO LIFT INSTALLATION MANUAL
 6-CYLINDER TORNADO LIFT INSTALLATION MANUAL Model: TORNADO LIFT 18K 2018 Edition PROVIDED FOR ASSEMBLY (4) Foot Pads 16 sq. (4) Square Tube Legs (optional) (2) Cross Beams (2) Side Beams 2.5 Dia. Cylinders
Owner's Manual Frequently Asked Questions Assembly Instructions Warranty Information
 Large Dog House Model: # 5213 Owner's Manual Frequently Asked Questions Assembly Instructions Warranty Information Manufacturer: Backyard Discovery 3001 North Rouse Pittsburg, KS 66762 1-800-856-4445 Register
8x8 Spa Breeze Pergola Assembly Manual Outdoor Living Today
 8x8 Spa Breeze Pergola Assembly Manual Outdoor Living Today Revision 3. Feb 18th/2015 Note: Post Mounting Hardware is NOT included in this kit. Please confirm with your local building permit office to
PATRIOT DOCKS ASSEMBLY INSTRUCTIONS
 6/1/2008 PATRIOT DOCKS ASSEMBLY INSTRUCTIONS Congratulations on your new Patriot Dock purchase. This manual contains instructions to assemble basic dock configurations for use at typical shoreline application.
ALUMA-VENT AWNING REGULAR END STYLE INSTALLATION INSTRUCTIONS
 ALUMA-VENT AWNING REGULAR END STYLE INSTALLATION INSTRUCTIONS Contact us at: 1-888-442-2928 or www.americana.com Options in your kit: A. Splice Pg 16 B. Column Pg 17 C. C-Channel Brace Pg 19 D. Runner
Powered by. For further installation assistance: prxperformance.com/pages/murphy-rack
 Powered by The 90 Fold-in Murphy Rack is made by the creators of the original Profile Folding Rack at PRx Performance and is Patent Pending. An up-to-date record of patents and patent pending items can
FXL-168 FIXED RACK ASSEMBLY INSTRUCTIONS SALES ORDER #
 ZOMEWORKS FXL-168 FIXED RACK ASSEMBLY INSTRUCTIONS SALES ORDER # 1 1011 Sawmill Road NW, PO Box 25805, Albuquerque, NM 87125 USA (505) 242-5354 / (800) 279-6342 / FAX (505) 243-5187 E-mail: zomework@zomeworks.com
 Menu Board Tilt or Fixed Mount Installation Instructions MDS1T-200, MDS1T-300, MDS1T-400 MDS2T-200, MDS2T-300, MDS2T-400 MDS3T-200, MDS3T-300, MDS3T-400 MDS4T-200, MDS4T-300, MDS4T-400 MDS5T-200, MDS5T-300,
GENERAL INSTALLATION GUIDE: WARRANTY: PRODUCT INFORMATION T F
 GENERAL INSTALLATION GUIDE: Unless otherwise indicated, all Seven Oaks M.U. Architectural Products materials are to be used for decorative purposes only. All products must be installed using ample amount
Installation Instructions. Tools Needed. Tape measure. Level. Shovel or Post hole digger. Concrete. Drill. Stakes. Mallet or hammer.
 Installation Guide EcoStone Fence 1330 West 400 North Orem, UT 84057 Toll Free 1.866.648.9336 Tel. 1.801.655.5236 Fax 1.801.655.5240 www.ecostonefence.com Installation Instructions Introduction. These
Models 2230 and 2240
 Models 2230 and 2240 Overview... 2 Tools Needed... 2 Hardware...3 Assembly... 4-13 Installation... 14 Drawer Removal... 15 Operation... 15 Maintenance... 15 Accessories... 16 Limited Warranty... 16 Perform
FENCE INSTALLATION GUIDE 8 HIGH WALLS
 FENCE INSTALLATION GUIDE 8 HIGH WALLS 1.866.648.9336 www.simtekfence.com INSTALLATION GUIDE These instructions are designed to assist both professional installers and do-it-yourselfers of SimTek decorative
OASIS 12x10 PERGOLA MODEL: #
 Backyard Discovery 3305 Airport Drive Pittsburg, KS 66762 1-800-856-4445 OASIS 12x10 PERGOLA MODEL: #1606517 Owner's Manual Frequently Asked Questions Assembly Instructions Warranty Information Register
Sunset Swings By Health in Motion, LLC
 Sunset Swings By Health in Motion, LLC Model 421 Lounge Swing Assembly and Operation Manual Record Serial Number Here www.sunsetswings.com by Health In Motion, LLC. 11/6/2009 421 Owners Assembly and Operation
Planishing hammer stand For use with SKU Planishing hammer
 Planishing hammer stand For use with SKU 94847 Planishing hammer Model 96300 Assembly And Operation Instructions Please Note: Planishing Hammer not included with Stand. Due to continuing improvements,
Desk/Wall-Mount Rack
 Desk/Wall-Mount Rack Patent(s) Pending Installation Instructions Post P/N: 119-1752 119-1781 119-1782 119-4014 Frame P/N: 119-1591 119-1754 119-1755 Kit Contents (2) Frames (4) Posts Assembly Hardware
ATTENTION: PLEASE READ AND UNDERSTAND ALL INSTRUCTIONS AND WARNINGS BEFORE ASSEMBLING, INSTALLING OR USING THIS PRODUCT.
 INSTALLATION MANUAL Models 96111-3-02 & 96511-3-02 Bulkheads for 2014 and Later Ford Transit Connect Vans ATTENTION: PLEASE READ AND UNDERSTAND ALL INSTRUCTIONS AND WARNINGS BEFORE ASSEMBLING, INSTALLING
Basic Spring Motor Roller Shades
 Basic Spring Motor Roller Shades ATTENTION!!! READ CAREFULLY! This shade has a reliable long-lasting Spring Motor. The Spring Motor must have proper tension in order to function as intended. Handling in
SolarMount-I INSTALLATION MANUAL
 SolarMount-I INSTALLATION MANUAL 2010 by Unirac, Inc. All rights reserved. Pub 100621-1ii, June 2010 R A HILTI GROUP COMPANY 1411 Broadway Boulevard NE Albuquerque, NM 87102-1545 USA IMPORTANT! Unirac
INSTALLATION INSTRUCTIONS
 INSTALLATION INSTRUCTIONS Premier Mounts Tilting Wall Mount Model: TWM-085 For use with Panasonic 85 Flat Panel NORTH AMERICA 3130 East Miraloma Avenue Anaheim, CA 92806 USA USA and Canada Phone: 1.800.368.9700
Dundalk LeisureCraft Cedar Pod Sauna Assembly Instructions
 Dundalk LeisureCraft Cedar Pod Sauna Please read and understand the complete instructions prior to assembly and use of your sauna. Customer agrees not to hold Dundalk LeisureCraft Inc. and any of its authorized
Instruction Sheet D-CPU. Secure CPU Holder
 Instruction Sheet D-CPU Secure CPU Holder I-00457 Rev A PARTS LIST NOTE: Select Security Components when a more secure application is desired. Mounting Track with Mounting Tape Security Bracket Assembly
WOOD GAZEBO. Installation and Operating Instructions YM12705Z. with ALUMINUM ROOF. HEIGHT: 10 6 or 3.2m. Revised
 WOOD GAZEBO with ALUMINUM ROOF Installation and Operating Instructions YM12705Z Revised 03-22-2017 HEIGHT: 10 6 or 3.2m 12'-1 5/32" 3687.1 Yardistry North America Toll Free Customer Support: 1.888.509.4382
Please Do Not Return This Product To The Store!
 MODEL NOS. T81 TABLE TENNIS TABLE OWNER'S MANUAL 1. Read this manual carefully before starting assembly. Read each step completely before beginning each step.. Some smaller parts may be shipped inside
Please Do Not Return This Product To The Store!
 MODEL NO. T8176 QUICK SERVE 3000 TABLE TENNIS TABLE OWNER'S MANUAL 1. Read this manual carefully before starting assembly. Read each step completely before beginning each step. 2. Some smaller parts may
ApexDesk Assembly Guide
 ELECTRIC HEIGHT-ADJUSTED SIT TO STAND DESK ApexDesk Assembly Guide REV-1507C Table of Contents CAUTION, USE & LIABILITY... 3 PARTS & HARDWARE LIST... 4 PARTS / COMPONENT DIAGRAMS... 5 ASSEMBLY INSTRUCTIONS...
Installation Instructions TrekStep Side Mount
 Installation Instructions TrekStep Side Mount Vehicle Application Ford F150 Regular Cab and Super Cab 2009 Current Part Number: 75402-15 Fits both Driver s and Passenger Side www.bestop.com - We re here
orientation Conergy SunTop Instructions for professional installation
 On-roof Framed modules Portrait orientation Landscape Three-tab Shingle Plain tile Slate Double Roman tile Metal roof Material warranty orientation Conergy SunTop Instructions for professional installation
ASSEMBLY INSTRUCTIONS
 LEGAL DISCLAIMER: MameRoom Designs LLC will not be held liable for any incidental or consequential damages for breach of any expressed or implied warranty of the Ultimate Arcade cabinet, nor an incidental
Install Instructions READ THIS FIRST BEFORE UNPACKING CABINET WARNING: WARNING: Do not leave children unattended near cabinets.
 24 age Steel RTA tool Cabinet RAD THIS IRST BOR UNPACKIN CABINT If you are having difficulty with the tool drawer assembly please view this installation video at www.newageproducts.com/tooldrawerinstall
THANK YOU FOR PURCHASING FROM HERITAGE PATIOS
 Installation Guide THANK YOU FOR PURCHASING FROM HERITAGE PATIOS Your purchase is engineered by nearly a half century of commercial and residential product design proudly manufactured in the USA from responsibly
Installation Manual Tilt Leg
 Installation Manual Tilt Leg Solar Mounting Solutions March www.ironridge.com 2010 IronRidge, Inc. All Rights Reserved Version 2.0 2 Tilt Leg Installation Guide Introduction The Tilt Leg is a flexible
FENCE INSTALLATION GUIDE 6 HIGH FENCE
 FENCE INSTALLATION GUIDE 6 HIGH FENCE 1.866.648.9336 www.simtekfence.com INSTALLATION GUIDE These instructions are designed to assist both professional installers and do-it-yourselfers of SimTek decorative
FIXED-POSITION WALL MOUNT FOR TVs in.
 INSTALLATION GUIDE FIXED-POSITION WALL MOUNT FOR TVs 19-39 in. NS-HTVMFAB For wood-stud, solid concrete wall, or concrete block installations Safety information and specifications..... 2 Tools needed.............................
C872 Series ADJUSTABLE HEIGHT. Version 3
 C872 Series ADJUSTABLE HEIGHT GOAL SYSTEM Version 3 Thank you and congratulations for purchasing a Ryval Hoops Goal - the finest basketball goal system on the market today! You will discover that Ryval
GB-AVSTOR5 Ceiling Equipment Storage Box with Pipe Coupler
 Ceiling Equipment Storage Box with Pipe Coupler INSTALLATION INSTRUCTIONS CREATING POSITIVE CUSTOMER EXPERIENCES 9534-500-021-00 Contents Weight Limit... 2 Warning Statements... 2 Installation Tools...
Check us out on-line! Installation Instructions
 Installation Instructions 2 OPTIONAL ACCESSORIES Order Quantum Rack Accessories Online at www.dawsbetterbuilt.com Cargo Lock Kit Secure Your Load Cargo Locks can easily be installed and adjusted left or
YUKON PATIO COVER INSTALLATION INSTRUCTIONS
 YUKON PATIO COVER INSTALLATION INSTRUCTIONS Before You Begin: Consult your local building department for any required permits You may be required to obtain a building permit for this structure. Contact
Installation & Assembly: Two Piece Suspended Ceiling Plate
 Installation & ssembly: Two Piece Suspended Ceiling Plate Model: CMJ453 Max UL Load Capacity: 250 lb (113 kg) Compatible model/series* EC* EXT* DD* 2300 White Oak Circle urora, Il 60502 (800) 865-2112
Double Beam Freestanding Pergola Installation Guide
 Double Beam Freestanding Pergola Installation Guide Patent Pending. Copyright 2011 USAVinyl, LLC - All Rights Reserved The information contained in these instructions are proprietary to USAVinyl, LLC and
TETRA SHOWER ENCLOSURE INSTALLATION INSTRUCTIONS
 TETRA SHOWER ENCLOSURE INSTALLATION INSTRUCTIONS IMPORTANT DreamLine TM reserves the right to alter, modify or redesign products at any time without prior notice. For the latest up-to-date technical drawings,
Assembly Instructions and Parts Manual JPSF-1 Fence and JPSR Rail Set
 Assembly Instructions and Parts Manual JPSF-1 Fence and JPSR Rail Set WALTER MEIER (Manufacturing) Inc. 427 New Sanford Road LaVergne, Tennessee 37086 Part No. M-708482 Ph.: 800-274-6848 Revision C2 02/2013
9 QUICK RELEASE WOODWORKING VISE
 9 QUICK RELEASE WOODWORKING VISE 94386 OPERATING INSTRUCTIONS Due to continuing improvements, actual product may differ slightly from the product described herein. 349 Mission Oaks Blvd., Camarillo, CA
SERIES M MIXER MASTS
 SERIES M MIXER MASTS T AB L E O F C O N T E N T S V e n d o r D a t a Material Data Sheet 4-in. Mixer Mast Specification 3-in. Mixer Mast Specification 2 - in. M i x e r M a s t S p e c i f i c a t i o
M ACS Instructions
 APPLICABLE MODELS: Nissan Frontier 2005 and up short bed with Utili-Trak mounting rails PACKAGE CONTENTS 00-0060-M-01-1205 ACS Instructions Leitner Designs 25675 Taladro Circle Unit E Mission Viejo, CA
AM95 Installation Guide
 1321 S. State College Blvd., Fullerton, CA 92831 USA Included Components: Maximum Flat Panel Weight: 95 lb. / 43.1 kg. M4 X 25mm M5 X 25mm M6 X 12mm (Qty 2) M6 X 25mm M8 X 25mm Allen Key Plastic Cover
Ventilation System. Installation Manual. Hog Slat Inc. Newton Grove, NC USA March
 Installation Manual 1 Tunnel Door Framing Instructions It is import to make sure the Tunnel Door opening is flat and plumb. A maximum variation of +/- ½ throughout the length of the opening is acceptable.
Storage Shed. OWNER S MANUAL / Instructions for Assembly. Size 4 x 6 Ver Customer Service Hotline (800)
") Storage Shed OWNER S MANUAL / Instructions for Assembly Size 4 x 6 Ver. 1.1 Patent #416.091 Customer Service Hotline (800) 483-4674 www.uspolymersinc.com Your Total Solution To Maintenance Free Storage
Storage Shed OWNER S MANUAL / Instructions for Assembly Size 4 x 6 Ver. 1.1 Patent #416.091 Customer Service Hotline (800) 483-4674 www.uspolymersinc.com Your Total Solution To Maintenance Free Storage