Sketches by: Becky Fleck. 10 pages of. project inspiration GET INSPIRED AT PINKPAISLEE.COM
|
|
|
- Sharlene Hamilton
- 6 years ago
- Views:
Transcription


1 Sketches by: Becky Fleck 10 pages of project inspiration GET INSPIRED AT PINKPAISLEE.COM


2 TABLE OF CONTENTS SEE WHAT OUR DESIGNERS CREATED WITH THESE "PAGE MAPS" a b c d e h f g a page 9 b page 3 c page 8 d page 11 e page 4 i f page 7 g page 10 h page 12 i page 6 j page 5 j
, adhere with glue.")
3 DELICIOUS BY janna werner Vintage Vogue, London Market, Wood Shop Alphabets & Indigo Bleu other supplies: rhinestones, spray, sewing machine, white marker, sequins Step 1: Use the London Market papers for this layout. Step 2. Cut 2 different patterned papers in different sizes (like the grey and light one on this layout), adhere with glue. Don't use the glue too close to the edges or you wont be able to flip the paper edges up (for a more distressed look). Step 3. Cut 4 small stripes of patterned paper (2 for the bottom, 2 for the top), attach them using a sewing machine. You can either sew them directly onto the layout or fix the stripes first and glue them to the paper a erwards. If you don't sew just add them with adhesive. Step 5. Spritz to create colored dots on the layout. Step 6. Place and glue the photos to your page. Step 7. Arrange the embellishments. Glue and/or sew them onto your paper. Step 8. Place the title under photos. I used a white marker to add a distressed look to the wooden shop alphabets. It is also fun to embellish the photos, whether it is with sequins or parts of the title. Step 4. Use a London Market Collage Sheet as your photo background, use the sewing machine to adhere. You can also sew without thread, this leaves tiny holes on your paper.
 as le hand background and Mayfair (Blue side) as right hand background. Step 2. Making up le page of sketch first: Add 1 inch strip of Mayfair down le side.")
 add to right hand side of page. Trim 3 photos from 4 x 6 inches to 3.")
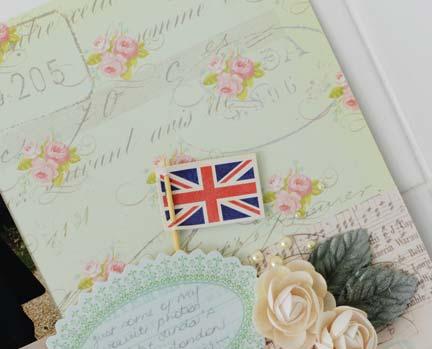
4 LOVE Kim Arnold featuring: London Market Wood Shop Alphas Other Supplies: flowers, string & pearls Step 1. Use Curiosities (Pink side) as le hand background and Mayfair (Blue side) as right hand background. Step 2. Making up le page of sketch first: Add 1 inch strip of Mayfair down le side. Add ¼ inch strip of Addington (grey side) next to Mayfair strip Use decorative punch on edge of Kensington cutting a strip 3.5 x 12 inches wide (cut it so postage stamp design is at top of strip) add to right hand side of page. Trim 3 photos from 4 x 6 inches to 3.5 x 6 inches, add to layout with right edge tucked under decorative strip of Kensington Fussy cut a corner rose design from Addington and place in bottom right corner. Add scallop punched decorative strips to le edge of photos and bottom edge of bottom photo. Place large rose die cut at bottom le corner of photos, layer crown die cut. Add postage stamps from Ephemera pack to postage stamp at top of Kensington strip. Add spool button with tie twined around layout to postage stamp cluster. Finish with flowers and pearls. Step 3. Complete right page of sketch: Cut piece of Kensington 6 inches wide and 5.5 inches high making sure that flower design is included on piece. Attach to right side of page 1.75 inches from bottom edge. Create two columns of photos and various strips of patterned paper on le of page first column is 3.25 inches, second column is 3.5 inches wide. Add scallop punched decorative strips below Kensington piece and at top of second photo of second column. Add journaling block and title. Create a British flag using pennant from Ephemera pack and a toothpick. Add to journaling block. Add title. Finish with flowers and pearls.

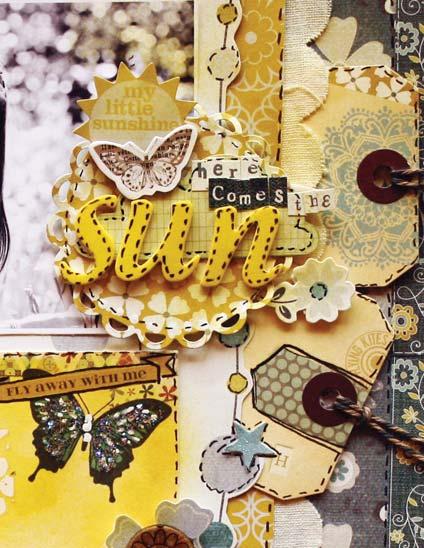
5 SUN by Larissa Albernaz featuring: Indigo Bleu Prairie Hill She Art Spring Jubilee Expressions Alphas Other Supplies: Markers, Pens & stickles Step 1. Use Indigo Bleu Denim Patterned Paper as the base of your layout Step 2. Cut Indigo Bleu Burlap Patterned Paper to 9" x 12" and adhere it to the base. Score it at 2½" from the edge. Step 3. Adhere another piece (6½" x 12") of Indigo Bleu Jacquard Patterned Paper. Step 4. Print 4 photos (1) 5" X 3½" (2) 2½" X 2" (1) 5" X 2¾". Step 5. Paste your photos as shown in the sketch. Step 6. Glue Prairie Hill shipping tag just below your first photo, spray yellow glimmer mist over it and add some texture using She Art Press-Ons. Step 7. Use a cutting machine - cut three doilies from Indigo Bleu Calico Patterned Paper. Step 8. Decorate each doily and also one Chat Cloud using Pink Paislee Prairie Hill Element Stickers, Clear Stamps and Indigo Bleu Buttons. Add your tittle to one of these doilies. Paste them into your layout. Step 9. Add some more layers to your borders by cutting and pasting two 1½" X 12" strips of Tweed and Denim Patterned Paper along with Indigo Bleu Border Stickers. Step 10. Add two tags near your tittle to include your hidden journaling. Step 11. Finish up by outlining the borders.
 over the Mistables Misting mask, add a pinch of gesso or white acrylics. Step 3.")

6 swi ng BY Mahlin Wiggur featuring: Mistables, Spring Jubilee, London Market & Declaration COOL TIP DISTRESS THE EDGES OF YOUR PAPERS TO CREATE A SHABBY CHIC EFFECT. Step 1. Use the Notting Hill paper for you background Step 2. Use 2 different colors of mist (yellow and aqua) over the Mistables Misting mask, add a pinch of gesso or white acrylics. Step 3. Cut the Soiree paper in two pieces, 10 x 1¼ and 6 x 4, Add some color with mist (pink and aqua) rough up the edges and layer the pieces on the left side of your layout. Step 4. Add a Soiree Collage Card to the right and add your photos, straight or a bit whimsical. Step 5. Cut out the bird from the Soiree Celebration paper and layer it over the pink and blue pieces of paper on the left. Use dimensional adhesive for the pop up effect. Step 6. For the upper right corner, layer a shipping tag, ephemera and chipboard bits. Step 7. Add embellishments, I used London Market Chipboard stickers buttons (misted with yellow), ephemera and flowers. Step 8. Add your title, I outlined my Declaration alphabet stickers with a black pen and added some glitter glue.


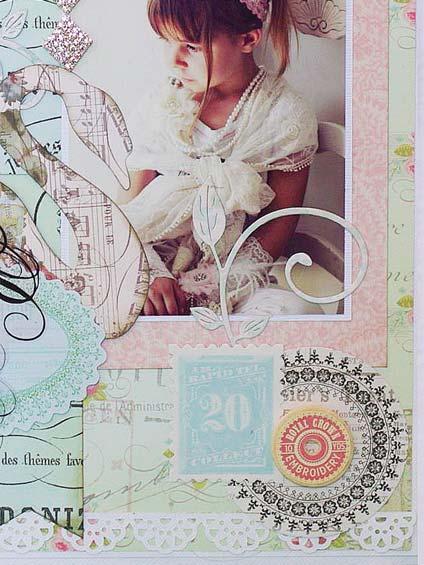
7 precious moments by Renata Moni Bidin featuring: Spring Jubilee She Art Other Supplies: notebook border punch (optional,) scissors, staples, distress tool Step 1. Start by using the back side of Shindig for the base of your layout. Step 2. Trim the blue side of Party paper to 6" x 12" and layer on top of Shinding paper. Hand cut the flourish of this paper. Step 3. Add a border using the Spring Jubilee Press Ons on the blue paper. Step 4. Decorate the corner of the blue paper using more Press Ons and make a new patterned paper of your own way! Step 5. Add the first Collage Card with the coral side. Decorate using the flourish you hand cut. I used foam dots to give volume. Step 6. Add the second Collage Card on the blue paper. Trim as much as you like and glue it in the vertical. Step 7. Use a border punch to make the notebook border effect (or any border punch you'd like.) Step 8. Add a pennant using scraps of the papers and decorate using rhinestones. Step 9. Now, Place your photos. I like to use a white border on them to make them pop on the page. Step 10. Once your photos are placed, hand cut a tag from the Festival paper and Add it over the main photo. You can see the tag is not completed. So, with a small rub-on of flourish we will hide to make the tag perfect as you can see on the finish layout. Step 11. Add layers to your tag, overlaying another tag to it. I used a chipboard tag and I decorated it with patterned paper to match with the colors I am using. Step 12. Add your title. Step 13. Finish your layout details by adding hand cut pieces from the 6" x 6" Paper Pack (like the small bird) and more Press Ons.

 8.5\" x.5\" then cut \"v\" at both ends. Ink. Step 5. Die Cut an image/shape from Kensington Paper incorporating flowers.")
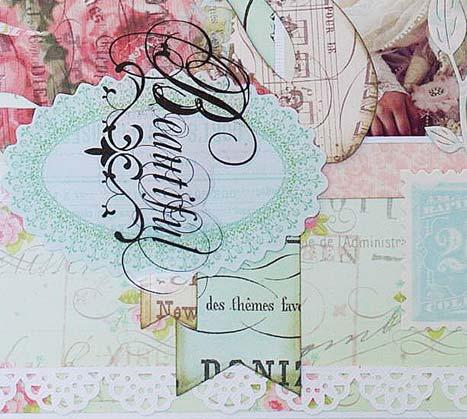
8 beautiful girl by Steph Devlin featuring: London Market Other Supplies: white cardstock, bling & sentiment stamp INK THE EDGES OF ACCENT STRIPS AND DIE CUT ELEMENTS TO HELP THEM STANDOUT FROM THE BASE PAPERS UNDERNEATH. PROJECT INSTRUCTIONS Step 1. Cut White Cardstock to 8.5 x 11 Step 2. Cut Mayfair Paper 8.1 x 10.5" and adhere to base. Step 3. Punch out white cardstock border with favorite border punch and adhere to top and bottom. Step 4. Cut out the following: Banner - Strip from Curiosities Paper (Green) 10" x 1.5" then cut "v" at both ends. Ink. Banner - Strip from Curiosities Paper (Brown) 8.5" x.5" then cut "v" at both ends. Ink. Step 5. Die Cut an image/shape from Kensington Paper incorporating flowers. (Swan) and die cut flourishes from Royal Charm Paper. Step 6. Cut Photo Mat Rectangle from Curiosities Paper using back side (Pink), then ink. Step 7. Now you have all the elements you can stick down on base as per example including your photo. I used a 5" x 3.5" photo. Step 6. Lastly add bling, ephemera, spool and title as shown.
, glitter (gold), doily, masking tape,")

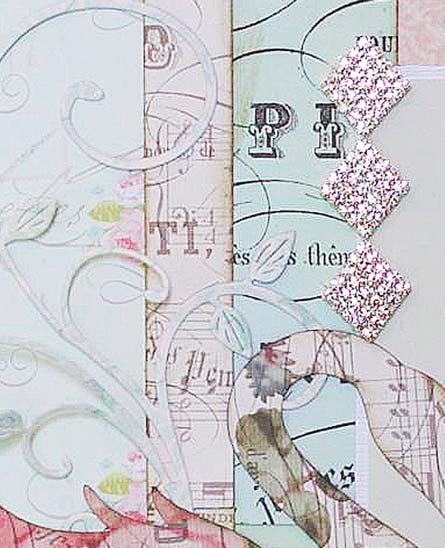
9 COOL TIP CREATING YOUR LAYOUT OVER A BLANK WHITE SURFACE KEEPS THE FOCUS ON YOUR FAVORITE PHOTOS! PROJECT INSTRUCTIONS NAILS by Felicitas Klink featuring: London Market Indigo Bleu She Art Cushies Alphabets Other Supplies: white cardstock, color spray (pink), glitter (gold), doily, masking tape, liquid glue, white thread and sewing machine Step 1. Drop some color splashes on the cardstock. Be careful with the dropping action otherwise you ll get too many big splatters. Step 2. Same technique as in step one: drop some liquid glue on the paper and trickle glitter on the glue spots. Let it dry and take off the excess. Step 3. Cut some paper pieces out of coordinating patterns. Make sure that all pieces will have different sizes. Top layer: your photo. I cut one paper (the pink one) with edge scissors to mix the composing up. Don t glue your paper block on the cardstock yet. Step 4. Cut two paper stripes and lay it under your paper block. Grab a doily and place it under the vertical paper stripes. Step 5. To get a light and fluffy effect sew over some spots of your paper block. Don t cut the thread too short when you finished sewing. I used the white long thread as an embellishment on my projects. Step 6. Now glue the paper block over your cardstock. Make sure that you don t cover all the color / glitter splashes you created on the base. Step 7. Color some mistable chipboard buttons in pink. It s nice when the chipboard buttons have different color tones. Place the circles on your scrapbook page. Step 8. Set the title onto your pages and highlight the layout with masking tape stripes and rub-ons. That s it!

10 bunny BY Karola Witczak featuring: London Market Cushies Alphabet - Meringue other supplies: 3D adhesive, scissors, embellishments, decorative scissors and punches. CUT OUT DECORATIVE ELEMENTS FROM PATTERNED PAPERS IF YOU NEED THAT FINAL COORDINATING TOUCH ON YOUR PROJECT COOL TIP Step 1. Start with Mayfair paper cut out 8" x 11" for base. Step 2. Cut out a 6" x 9" rectangle from Curiosities paper and layer it with a little bit bigger rectangle from Royal Charm paper. Cut decoratively edges of the light turquoise background using decorative edge scissors. Step 3. Adhere the rectangles in the center of the page and sew it using sew machine or by hand. Step 4. Using border punches cut some decorative strips from Curiosities paper (light pink side), ink the edges and adhere under the edges of rectangles, this way you can mimic another layer. Step 5. Prepare 3 photos, I put some gesso on the edges of each photo and most of my paper embellies - this way you can add some light and airy look to the page. Step 6. Adhere one collage sheet (white) from the Collage Sheets about 1½ " from the top of the page, then adhere bigger photo on it and under the rest of photos. You can use 3D foam tape to add some dimension as I did. Step 7. Now we can make a title under photos, a little bit on the right of page, I used Cushies alphas, because my title is short. Step 8. As you can see on the sketch there is a place for your journaling. Because I wanted to make a a very dimensional look on ma layout I used a few strips of paper, adhered it using 3D foam tape and I wrote some journaling there. Step 9. Now you can add some embellies - I made a delicate and looks like a half of doilies banner on the top of the page (using punches), also added some paper flowers and a printed bird from the Ephemera set. I cut out also 2 butterflies from Royal Charm paper and layered it with other embellies. A cherry on the top is a gorgeous wooden spool button and some 3D paint dots here and there.


11 Love BY Piradee Talvanna featuring: London Market, Mistables, Nantucket & Daily Junque other supplies: mist, crystal pins, doilies, scissors and adhesive. Step 1. Start by selecting the pattern paper that you would like to use for the main background area. Cut a strip of 6½" x 12" and another thin one of ¾" x 12" above it. Step 2. Cut another strip of pattern paper (or cardstock like I did) for the left side of the layout and adhere it next to the previously cut pieces. STEP 3. Next using ribbons from the Nantucket and Mistable Collections, adhere those where the papers are joined. Step 4. With some of the die cuts from the ephemera pack, create an embellishment cluster on the top right side of the layout. Layering the various pieces together and adding a wooden spool embellishment for some variation. Step 5. Likewise on the middle left side of the layout create another embellishment cluster, mixing in the jumbo number and leaving enough space for your layout tile. Step 6. Finally add your pictures and journaling details


12 laugh BY Stacey Young featuring: Spring Jubilee & Artisan Element Circles other supplies: texture paste, spray, sequins, washi tape, thread Step 1. Using a piece of cardboard, scrape some Gesso onto the background piece of paper. Step 2. Cut a piece of Spring Jubilee Party paper measuring 4¾" and keeping the vertical length. Distress the sides and attach to the background paper 5 cm in from the le hand side. Step 3. Apply more Gesso to the centre of the page. Spray some Shimmerz randomly to the layout too. Step 4. Attach the circle Artisan element part way down your page. Step 5. Cut out another rectangular piece of patterned paper from the petite paper pack. This time 2¼" x 8" long. Cut in at each end like a pennant. Distress the edges and adhere to the page where you photo cluster will be. Step 6. Using foam tape layer the photo mat, ripped material, distressed paper, torn calico, shipping tag, photo, Artisan Element, in that order. Step 7. Using string and twine create a circle wrapping it around your hand several times. Attach this to the le hand of your photo. Step 8. Adhere a second photo to the top of your photo mat using foam tape. Run Gesso around the edges of the picture with your finger. Step 9. Add flowers, bird elements and butterflies to the layout as shown. Step 10. Using the floral Clear Stamp, stamp around the frame of the photo (in the corners) with black ink. Step 11. Make another twine circle and layer a banner across the top of the layout using foam tape. Attach the cut out birdcage and bird also using foam tape. Step 12. Stamp a transparency sheet with the script Clear Stamp and use this as a base for your title. Adhere the letters using foam tape and attach the sheet over the circle element to the le of the photo. Step 13. Lastly apply texture paste and Shimmerz to the corners and around your embellishments along with some washi tape. Add some sequins randomly but keeping it centred to the picture.
12 pages of. project inspiration
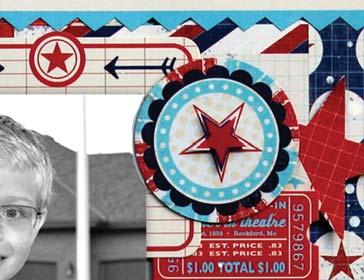
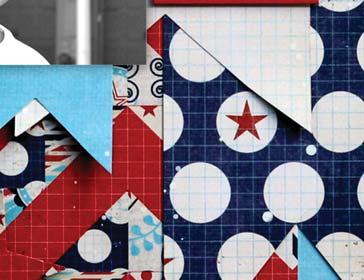
 12 pages of project inspiration YOU LOVE STICKS BY Kim Arnold Declaration Block Party Alphabet Stickers PROJECT INSTRUCTIONS: STEP 1: Use Block Party patterned paper for the base of the layout. STEP 2:
HopeChest. 6 pages of. project inspiration
 HopeChest c o l l e c t i o n 6 pages of project inspiration BEAUTIFUL PRINCESS by Betsy Veldman COOL TIP use journal cards to create the perfect photo mat Pink Paislee Products: Hope Chest: Heirlooms
SECRET CRUSH. 6 pages of SWEET. project inspiration
 SECRET CRUSH 6 pages of SWEET project inspiration Framed 3D Flowers BY JESS MUTTY Secret Crush: Love Notes, Polka Dance & Endless Love Paper Paper Goods & Element Stickers Artisan Circles & Squares White
Designed by Gloria Stengel
 Designed by Gloria Stengel Graphic 45 Supplies: 2 sheets Cut Apart (#4501051) 2 sheets Flourish (#4501052) 1 pack Cardstock Tags and Pockets (#4501056) 2 Large Tags - Ivory (#4500849) 1 pack Washi Tape
Scrapbook Kit Projects from Stacy Cohen scrapbookandcards.com
 SCRAPBOOK KIT SPRING 2017 Scrapbook Kit Projects from Stacy Cohen step-by-stepinstructions instructions++tips sketch step-by-step HELLO SPRING (24x12) 1 Select Pearl Gray cardstock as layout base. Trim
BLUE SKIES. & butterflies SCRAPBOOK KIT SPRING Scrapbook Kit Projects from Kelly Goree. scrapbookandcards.com
 BLUE SKIES & butterflies SCRAPBOOK KIT SPRING 2018 Scrapbook Kit Projects from Kelly Goree Q U A R T E R LY C R A F T K I T S step-by-stepinstructions instructions++tips sketch step-by-step SPRING FLING
Designed by Annette Green
 Designed by Annette Green Graphic 45 Supplies: 2 sheets Botanical Tea (#4500875) 1 sheet Robin's Egg (#4500881) 1 sheet Hello Friend (#4500882) 1 sheet Sweet Chamomile (#4500884) 1 pack Chipboard Tags
All Year Cheer Card Kit
 All Year Cheer Card Kit February, 2017 Designer, Wendi Robinson Finished size: 5 ½ x 4 ¼ Happy Birthday Photo Play Party Boy 1. Cut Slate Cardstock to 5 ½ x 8 ½ and fold in half to create card base 2.
Decorative Box with Easel Card Set & Side Waterfall Album
 Designed by ~ Annette Green Graphic 45 Supplies: 1 ea Botanical Tea Deluxe Collector's Edition (4501684) 1 ea Kraft 5 x 5 Mixed Media Box (4500984) 1 pk G45 Staples Metal Door Pulls (4500548 or 4500842)
Card kit project sheets
 Card kit project sheets Use these projects to host an OWH cardmaking party! You may also use them for make-and-takes or classes, just please credit OWH. 1 Cut papers as per sketch. 2 Cut backer to 5.5
Designed by Gloria Stengel
 Designed by Gloria Stengel Graphic 45 Supplies: 1 sheet August Cut Apart (#4501043) 1 sheet August Flourish (#4501044) 1 each 6x6 Patterns & Solids Pad (#4501053) 1 2 pack Ephemera Cards *1 for each month
Glassine Bag Album. Materials
 Glassine Bag Album Images Copyright Stampin Up! Copyright Kimberly Van Diepen Materials Paper Chocolate Chip cardstock (4 3/8 x 5 ¾ (2), 4 x 6, ½ x 2 ¼ and scrap) Rose Red cardstock (4 3/8 x 5 ½, 4 x 6
Graphic 45 club august 2013
 Graphic 45 club august 2013 STUDENT SUPPLY LIST Paper Trimmer Adhesive (dry, liquid, glue dots, 1/8 sookwang tape) Foam Squares Pencil Ruler Scissors Craft Knife & Cutting Mat Vertical Photos: one 4 x
PICNICS. & popsicles. Scrapbook Kit Projects from Kelly Goree. scrapbookandcards.com SCRAPBOOK KIT SUMMER 2018
 PICNICS & popsicles SCRAPBOOK KIT SUMMER 2018 Scrapbook Kit Projects from Kelly Goree QUARTERLY CRAFT KITS step-by-step instructions + + tips sketch LUCKY STARS (24x12) 1 Select Atlantic cardstock for
CHASING. fireflies. Scrapbook Kit Projects from Lisa Dickinson SCRAPBOOK KIT SUMMER scrapbookandcards.com
 CHASING fireflies SCRAPBOOK KIT SUMMER 2017 Scrapbook Kit Projects from Lisa Dickinson Q U A R T E R LY C R A F T K I T S step-by-stepinstructions instructions++tips sketch step-by-step VACATION (24x12)
euphoria collection kit
 scrapbook.com euphoria collection kit featuring/ Euphoria paper collection collection kit created by/ kelly goree designer note/ Use scraps first if at all possible. instructions/ kit supplies/ 1 Euphoria
CARD # 1. Designed by Gloria Stengel. Place In Time - December Card Be Merry. Graphic 45 Supplies: Additional Supplies: Tools & Adhesive Instructions:
 Place In Time - December Card Be Merry CARD # 1 Designed by Gloria Stengel Graphic 45 Supplies: 218 sheets piece December of red Cut-Apart twine (#4500614) 18 sheet piece December of red Foundations sparkle
Scrapbook Kit Projects from Stacy Cohen scrapbookandcards.com
 SCRAPBOOK KIT SPRING 2016 Scrapbook Kit Projects from Stacy Cohen step-by-stepinstructions instructions+ +tips sketch step-by-step THE GREAT HUNT (24 x12 ) 1 Select Classic White cardstock as your layout
All Year Cheer Card Kit
 All Year Cheer Card Kit December, 2016 Designer, Wendi Robinson Finished size: 5 x 5 Hello There Pebbles Winter Wonderland 1. Cut Robin s Egg Cardstock to 5 x 10 and fold in half to create card base 2.
Vintage Birthday Ensemble Designed By: Carrie Rhoades May 2012
 Vintage Birthday Ensemble Designed By: Carrie Rhoades May 2012 Vintage and paper crafting are a hot combination right now, so why not incorporate that in to a birthday celebration? This ensemble is a great
Designed by Gloria Stengel
 Designed by Gloria Stengel Graphic 45 Supplies: 1 sheet Cut Apart (#4501043) 1 sheet Flourish (#4501044) 1 each 6 x6 Patterns & Solids Pad (#4501053) 1 pack Time to Flourish Chipboard Tags (#4501059) 2
INSTRUCTIONS. Vintage Scrapbook Page Layout #1 12 x 12 inches with photo mat and pull-out photo/journaling tag
 INSTRUCTIONS Vintage Scrapbook Page Layout #1 12 x 12 inches with photo mat and pull-out photo/journaling tag My Angel Policy You may use the instructions included with this tutorial to create and produce
Garden Goddess Mixed Media Binder Album
 Designed by ~ Annette Green Graphic 45 Supplies: 1 each Garden Goddess 8 x 8 Paper Pad 1 pack Garden Goddess Chipboard 1 pack Garden Goddess Tags & Pockets 1 each Mixed Medium Album Kraft 1 pack G45 Staples
Twelve Days of Christmas Mixed Media Album
 Designed by ~ Kathy Clement Graphic 45 Supplies: 1 pack Twelve Days of Christmas DCE 1 each Mixed Media Album Red (4501741) (4501790) Additional Supplies: 1 piece 8½ x 11 Cardstock cream or ivory 36 May
lay it on me sketch layouts
 scrapbook s lay it on me sketch layouts featured products/ Chatterbox Happy Garden papers Scenic Route Loveland papers Crate Paper Sweet Branch papers BasicGrey painted brads Crate Paper brads and rub-ons
Christmas Magic Merry Christmas Lantern
 Designed by ~ Annette Green Graphic 45 Supplies: 1 each Deep Rectangular Matchbook Box (4501520) 1 each Christmas Magic Collection Pack (4501735) 1 pack Christmas Magic Chipboard (4501737) 1 pack Metal
acorn AVENUE SCRAPBOOK KIT AUTUMN 2017 Scrapbook Kit Projects from Stacy Cohen scrapbookandcards.com
 acorn AVENUE SCRAPBOOK KIT AUTUMN 2017 Scrapbook Kit Projects from Stacy Cohen step-by-stepinstructions instructions++tips sketch step-by-step PONY RIDE (24x12) 1 Select two sheets of white cardstock as
eerie collection kit collection kit scrapbook.com designer note/ Use scraps first if possible. instructions/ created by/ kelly goree
 scrapbook.com eerie collection kit featuring/ Eerie paper collection collection kit created by/ kelly goree designer note/ Use scraps first if possible. instructions/ kit supplies/ 1 Eerie Collection Pack
Want to Create MORE Pages In LESS Time? Click Here ==>
 Scrapbooking Coach 2016 This document is the sole property of ScrapbookingCoach.com. It may not be shared, copied, or re-produced in any way or form without express permission of ScrapbookingCoach.com
Happy Times 6-Page Scrapbooking Kit
 Happy Times 6-Page Scrapbooking Kit 1. Begin by attaching the Wood BTP to the outside edge of both base pages. These are your anchor pieces. 2. Next attach the two 1.5 x 6" strips of Ombre BTP to the top
scarlet seasons scrapbook.com All I Want For Christmas BasicGrey supplies: Other supplies:
 BasicGrey supplies: Scarlet s Letter patterned papers, mini monogram letters, diecut tags and letter stickers; chipboard mini monograms; wholy cow rub-ons Other supplies: charcoal and brown chalk ink 2
Hostess Rewards Project Instructions Australia New Zealand
 Hostess Rewards Project Instructions Australia New Zealand Level 2 Hostess Rewards Artwork: Hostess Rewards Products Needed: A1195 My Acrylix Lovely Leaves M1150 My Acrylix Little Leaves 1388 Colonial
Connie Stewart (405)
") Thank you for being a PAPER PUMPKIN subscriber! I hope that you enjoy the fabulous projects that my fellow demonstrators and I have created for you this month. If I can answer any questions or help you
Thank you for being a PAPER PUMPKIN subscriber! I hope that you enjoy the fabulous projects that my fellow demonstrators and I have created for you this month. If I can answer any questions or help you
Steampunk Debutante : Junk Journal
 Designed by ~ Maria Cole Graphic 45 Supplies: 1 pack Steampunk Debutante DCE 1 pack G45 Staples Large Tag Kraft 1 pack G45 Staples Large Tag Ivory 1 each Antique Brass Door Knocker 1 pad Decades Dye Ink
Scrapbook Kit Projects from Nicole Nowosad scrapbookandcards.com
 SCRAPBOOK KIT SPRING 2016 Scrapbook Kit Projects from Nicole Nowosad step-by-stepinstructions instructions++tips sketch step-by-step TODAY (24 x12 ) 1 Select Classic White cardstock as your layout base.
2-Page Birthday Layout
 2-Page Birthday Layout SUPPLIES: 1 sheet purple cardstock 1 sheet beige cardstock 1 sheet patterned paper (Purple Beach from Making Memories Coastline Paper line) 4 Bar brads, various sizes 6 balloon die-cuts
DO-IT-YOURSELF DISNEY-INSPIRED GIFT WRAP DISNEY
 DO-IT-YOURSELF DISNEY-INSPIRED GIFT WRAP YOU WILL NEED*: Printed templates Scissors Tape Glue Craft paper Various ribbon *Additional supplies may be needed for each version and are listed before Step 1.
Convention 2013 Opening Session Projects
 Convention 2013 Opening Session Projects 5 Projects demonstrated by Pam Morgan To watch Pam Morgan make the projects see the video here: http://youtu.be/r3swig96hnw Starting approximately at time mark
MINI TRAVEL ALBUM & SUITCASE COVER Designed By: Regina Andari July 2013
 MINI TRAVEL ALBUM & SUITCASE COVER Designed By: Regina Andari July 2013 A mini travel album is the perfect way to save photos and memorabilia from a special trip and to keep special notes and give a written
bittersweet six layout kit
 scrapbook.com bittersweet six layout kit featuring/ Bittersweet paper collection six layout kit created by/ kelly goree instructions/ layout 1/ She s Ours: 12"x12" single kit supplies/ 1 Bittersweet Collection
Reunion. Assembly Line Cardmaking. December 2014 Greetings to Go
 Assembly Line Cardmaking December 2014 Greetings to Go Reunion Reunion Materials: Greetings to Go Club Scrap Collection Unmounted (UM) Stamps Unmounted (UM) Borders & Backgrounds Unmounted Greeting Unmounted
Pick Your Poison: Haunted House Treat Box, Luminary, Charm Bracelet and Gift Tag Designed By: Kris Kilkenny September 2011
 Pick Your Poison: Haunted House Treat Box, Luminary, Charm Bracelet and Gift Tag Designed By: Kris Kilkenny September 2011 These Halloween projects make cute gifts for your best friend or that special
WINTER. Scrapbook Kit Projects from Meghann Andrew SCRAPBOOK KIT WINTER scrapbookandcards.com
 WINTER SCRAPBOOK KIT WINTER 2018 Scrapbook Kit Projects from Meghann Andrew Q U A R T E R LY C R A F T K I T S step-by-stepinstructions instructions++tips sketch step-by-step JOYFUL (24x12) 1 Select two
WINTER. Scrapbook Kit Projects from Lisa Dickinson SCRAPBOOK KIT WINTER scrapbookandcards.com
 WINTER SCRAPBOOK KIT WINTER 2018 Scrapbook Kit Projects from Lisa Dickinson step-by-stepinstructions instructions++tips sketch step-by-step CHRISTMAS FUN (24x12) 1 Select Diamond cardstock for left side
A Proper Gentleman's Board Book
 Designed by ~ Annette Green Graphic 45 Supplies: 1 pack A Proper Gentleman DCE 1 pack 12x12 Chipboard Sheets Black 1 pack G45 Staples Antique Metal Clock Keys 1 pack G45 Staples Regular Tags Black (4501806)
Whimsy Paper Fundamentals Album Project 10 Double Pages + Bonus Title Page
 Whimsy Paper Fundamentals Album Project 10 Double Pages + Bonus Title Page Materials needed: Z3127 Paper Fundamentals Whimsy 1385 White Daisy Cardstock Z3165 Fundamental Stickers Whimsy Pack X7202C Kaleidoscope
green at heart mini album
 national scrapbook day green at heart mini album featuring/ Green at Heart paper collection what i love about you by/ layle koncar kit supplies/ 1 Capital album in Milk Chocolate (brown) 1 Green at Heart
Creating with the Envelope Punch Board Designed By: Regina Andari April 2014
 Creating with the Envelope Punch Board Designed By: Regina Andari April 2014 The Envelope Punch Board is no longer a new tool, but there are plenty of new ways to create with it. Learn to make a fun camera-shaped
By: Ronda Wade Project Life! Everyday Cards using the Hello Lovely Card kit and accessory pack.
 By: Ronda Wade Project Life! Everyday Cards using the Hello Lovely Card kit and accessory pack. This class is featuring the Hello Lovely Card kit and accessory pack for an awesome All Occasion card class.
Candy Cane Lane Wreath
 Holiday Helper Candy Cane Lane Wreath Decorating your home for the holidays is a very special occasion. This rustic, country-style wreath will be the perfect addition to your entry way, or coupled with
Halloween IDEA BOOK 2012
 Halloween IDEA BOOK 2012 HALLOWEEN...VINTAGE STYLE! PAGE 2 Cool crisp air, the crunch of leaves and acorns...fall is here, and Halloween is not far behind! This year, make your Halloween extra special
Shopping List:- How to make a... Strictly Dancing Tri Fold Box. How to make a... Creative Expressions You are a Treasured Friend Card
 Shopping List:- Grand Calibur Die Cutting Machine : WIZGC-200 Shopping Sue Wilson New List:- Zealand Collection ~ Wellington Die : CED8205 Grand Creative Calibur Expressions Die Cutting Stamps Machine
happy stache bash! stache bash ever! free
 We mustache your opinion... Do you love this trendy party idea or what? Just look inside for adorable ideas that ll help you throw your happiest stache bash ever! happy stache bash! {CREATIVE INSPIRATIONS
Hugs & Kisses Layout Workshop By Vicki Boutin
 Hugs & Kisses Layout Workshop By Vicki Boutin Kit: Hugs & Kisses Collection Pack, Hugs & Kisses- Devotion 12x12 paper 2 sheets, 24/7- Good Stuff 12x12 paper- one sheet, 24/7 Red Tweed/Calendar 12x12 paper,
Flutter Easel Calendar Box with Sliding Drawer
 Designed by ~ Maria Cole Graphic 45 Supplies: 1 each Flutter 12x12 Collection Pack Flutter Stickers *Included w/collection Pack 1 pack Flutter Ephemera Cards 1 pack G45 Staples Antique Metal Door Pulls
collograph 1 of a kind card materials list
 collograph Collography is a relief-printing process; a piece of cardboard or wood is covered with shapes, fibers, texture mediums, etc., to create a collage printing plate. In this simplified version I
Shopping List:- Shopping List:- How to make a... Acetate Mothers Day Card How to make a... Strictly Dancing Tri Fold Box
 Shopping List:- Shopping List:- Grand Calibur Die Cutting Machine : WIZCAL Spellbinders All in One Tool : WIZTOOL Grand JustRite Calibur Floral Fan Elements Die Cutting : JRCR02092 Machine : WIZCAL JustRite
April 2016 Club Scrap Deluxe. Preparation: Trim the White and Pink Printed Cutaparts into sections as indicated by the artwork.
 Assembly Line Scrapbooking April 2016 Club Scrap Deluxe Dahlia Materials: Dahlia Deluxe Kit with Embellishment Option Tools and Supplies: 12 Paper Trimmer Adhesive Foam Adhesive Tape 3x14 CS Grid Ruler
Hello Pumpkin. Deluxe Scrapbooking Workshop. 2 single pages, 2 layouts. Featured Technique: Using Mixed Media
 Deluxe Scrapbooking Workshop Hello Pumpkin 2 single pages, 2 layouts Featured Technique: Using Mixed Media Additional Materials Needed: D1784 Z2805 Z6502 Z2812 Z4181 Z1204 Z2060 Z2089 Z4214 My Acrylix
Page of the Month Bonus Projects
 Page of the Month Bonus Projects Supply List: All leftover papers and embellishments from class All supplies listed on POTM supply list from class Black Soot Distress Ink Paper/Other: 1 x BG Candy Buttons
HALF CASE CARD & TAG KEEPER
 HALF CASE CARD & TAG KEEPER By Debbie Henderson All images copyright 1990-2017 Stampin Up! Stampin Up! Supplies Used: Stamps: Christmas Quilt Inks: Tranquil Tide, Blushing Bride, Pool Party, Whisper White
Scrapbook Kit Projects from Lisa Dickinson scrapbookandcards.com
 SCRAPBOOK KIT AUTUMN 2016 Scrapbook Kit Projects from Lisa Dickinson step-by-stepinstructions instructions++tips sketch step-by-step GO AUTUMN (24x12) 1 Select 06 paper (red plaid side) for the left half
Penelope. Workshops Your Way
 Workshops Your Way Penelope This workshop guide includes patterns, photos, tips, and cutting diagrams to walk you through creating all four Penelope Workshops Your Way layouts. At the end of this guide,
Mosaic Flip Flop Album Designed By: Christy Fulk June, 2013
 Mosaic Flip Flop Album Designed By: Christy Fulk June, 2013 This is such a fun album to make! There are eight 6 x 6 pages in this album, along with eight half page flaps. Everyone will love how the pages
Using Slide Mounts Colleen Olsen
 Using Slide Mounts Colleen Olsen mommycol@verizon.net Here are 182 ideas for using slide mounts: 1. stamp words on 2. ink on 3. color with permanent markers 4. cover with patterned paper or cardstock 5.
Happy Times Card Workshop
 This Happy Times Card Workshop makes 12 cards from 1/2 of a Paper Packet. The other half of the paper could be used to double the workshop to complete 24 cards, or it could be used for other types of paper
Sketch #18. Instructions Angie Kennedy Juda.
 Sketch #18 Instructions Angie Kennedy Juda www.mychicnscratch.com The Fine Print: Thank you so much for subscribing to Definitely Sketches. We respectfully request that you do not copy and distribute this
BELLA PAPERIE. Class Requirements You will need to bring a basic tool kit to all classes
 BELLA PAPERIE Class Requirements 2015 You will need to bring a basic tool kit to all classes This kit includes- ruler (cm & inches), pencil, rubber, scissors, 12inch/30.5cm paper trimmer, craft knife,
Cupcake Box Gift Set Designed By: Amanda Corbet June 2012
 Cupcake Box Gift Set Designed By: Amanda Corbet June 2012 Do you need a really bright and fun gift to celebrate someone s birthday? Well this set has it all for you! There are instructions to create this
An exclusive project for Studio 5 viewers. Enjoy!
 An exclusive project for Studio 5 viewers. Enjoy! Christmas Configurations Keepsakes House The main product you will need to make this or similar project is Tim Holtz Ideology Configuration Boxes Configuration
Retreat 2007 Greetings to Go Hometown
 Retreat 2007 Greetings to Go Hometown Materials: Hometown Greetings to Go UM Borders and Backgrounds Embellishment Pack Don t Get Us Started Wood Mounted Stamp Welcome Home Alphabet Stickers White Glossy
Shopping List:- How to make a... Strictly Dancing Tri Fold Box. How to make a... A Friend is like a Rainbow Kite Card
 Shopping List:- Grand Calibur Die Cutting Machine : WIZCAL Couture Shopping Creations Vintage List:- Rose 12" x 12" Paper Pad : CO723971 Sue Grand Wilson Calibur Noble Die Collection Cutting Pierced Machine
Holiday Decorative Plate Collection Designed By: Amy Storrie October 2013
 Holiday Decorative Plate Collection Designed By: Amy Storrie October 2013 You will love having this beautiful plate displayed in your home year round. Each of the eight inserts has a Velcro back so that
Designed by Maria Cole
 Designed by Maria Cole Graphic 45 Supplies: 1 sheet of Every Blooming Thing (4501472) 1 sheet of Plant Kingdom (4501474) 1 sheet of Seasonal Splendor (4501475) 1 sheet of Verdant Woodlands (4501479) 2
Shopping List:- How to make a... Strictly Dancing Tri Fold Box. How to make a... Pink Peony Jar Card
 Shopping List:- Grand Calibur Die Cutting Machine : WIZGC-200 Shopping Sue Wilson Frames List:- & Tags Delicate Garden Frame Die : Grand CED4307, Calibur Noble Die Double Cutting Pierced Machine Rectangle
Snowman Gift Box Tower Designed By: Amanda Corbet December 2011
 Snowman Gift Box Tower Designed By: Amanda Corbet December 2011 This adorable snowman gift box tower is the perfect way to shower someone special with gifts. Finished as shown this box is over 16 inches
Pressed Flowers. Materials: Directions: Pressed flowers Heavyweight paper Picture frame Craft glue Small paint brush Tweezers
 Pressed Flowers Pressed flowers Heavyweight paper Picture frame Craft glue Small paint brush Tweezers 1. Pressed flowers can be purchased online or you can easily press them yourself. Begin by folding
Included in this package:
 Included in this package: Cutting Box (Inside and Outside Panels and Lid) 2 styles (ornate swirl or lattice cut cut) Bell, Tree and Star Poinsettia with lace backing Printable sheet to scissor cut or use
Floral Shoppe Four Card Set w/ Die Cut Paper Flowers
 Designed by ~ Maggi Harding Graphic 45 Supplies: 1 sheet Midnight Medley (4501689) 1 sheet Sunlit Medley (4501690) 1 sheet Burgundy Blossoms (4501691) 2 sheets Verdant Blossoms (4501692) 1 sheet Pink Lilies
Designed by Denise Johnson
 Designed by Denise Johnson Graphic 45 Supplies: 1 sheet Puppy Love (#4500958) 1 sheet Four-legged Friend (#4500959) 1 sheet Playful Pals (#4500964) 1 sheet Pitter-patter (#4500966) 1 sheet Cats and Dogs
Darling PAPERCRAFT. Designs. included. Paper by Design. free
 12 Darling PAPERCRAFT Designs included Paper by Design {CREATIVE INSPIRATIONS free FROM HOBBY LOBBY } 5 x 7 Boy This design piles on the cuteness, from jumbo glitter alphas to just-for-baby stickers. The
INSTA SQUARES CHIPBOARD STICKERS DESIGNER CARDSTOCK. 6x8 ELEMENTS. with our. connect two separate elements together. layer
 ACY G E L Legacy Simple Inspiration ebook www.simplestories.com INSTA SQUARES make it easy to connect two separate elements together on your layouts! layer CHIPBOARD STICKERS on a background with a similar
June 2014 Greetings to Go Picnic
 June 2014 Greetings to Go Picnic Picnic Materials: Greetings to Go Club Scrap Collection Unmounted Stamps Unmounted (UM) Borders & Backgrounds Unmounted Greeting Unmounted Art Nouveau Thin Lines Embossing
Additional Supplies: Tools, Adhesives & Ink: Notes:
 Designed by ~ Annette Green Supplies: 1 ea Imagine 12x12 Collection Pack 1 pk Imagine Chipboard 1 ea Antique Brass Door Plates & knobs 1 ea Decades Dye Pad : Robin's Egg Light Blue (4501717) (4501719)
Hearts A Plenty Trio
 Hearts A Plenty Trio By Heidi Tekunoff January 2013 This month's free tutorial features three cards using variations on Negative Space and lots of hearts as the focal point, along with the Hearts Collection
The Important Thing. Everyday Life Album Instructions. Materials Needed. Gather photos (22 total) (P) = portrait (L) = landscape
 (P) = portrait (L) = landscape") Everyday Life Album Instructions The Important Thing Materials Needed D1772 My Acrylix Documented Scrapbooking Stamp Set E1032 My Acrylix Typography Alphabet Stamp Set BULK408 Chelsea Gardens Bulk Packet
Everyday Life Album Instructions The Important Thing Materials Needed D1772 My Acrylix Documented Scrapbooking Stamp Set E1032 My Acrylix Typography Alphabet Stamp Set BULK408 Chelsea Gardens Bulk Packet
a creative lifestyle newsletter from pink paislee
 November 2011 NOVEMBER 2011 a creative lifestyle magazine from pink paislee a creative lifestyle newsletter from pink paislee CONTEST: WIN A $25 GIFT CARD TO BARNES & NOBLE details inside {comingsoon}
Vintage-Inspired Ornament Gift Set Designed By: Michelle Joy Wecksler November 2013
 Vintage-Inspired Ornament Gift Set Designed By: Michelle Joy Wecksler November 2013 This Ornament Gift Set is perfect for the upcoming Holiday Season! This set features a vintage-inspired ornament, a beautiful
contained glass for the masses Can t Be free It s about thinking outside the vase!
 Can t Be contained It s about thinking outside the vase! Take our vast selection of floral containers to a new level you ll be surprised at what you can create. glass for the masses {CREATIVE INSPIRATIONS
June 2007 Club Scrap Chapter One
 June 2007 Club Scrap Chapter One Materials: Club Scrap Chapter One Kit Embellishment Pack Wood Mounted Rubber Stamp Set Unmounted Borders & Backgrounds You Did It Wood Mounted Stamp Tools: Stapler 12 Paper
A Dozen Creative Gift Wrap Ideas
 A Dozen Creative Gift Wrap Ideas Karen Fontinelle Independent Stampin Up! Demonstrator www.karenstamps.com We all need to wrap a gift from time to time. In case you ve run out of wrapping paper or just
Original Recipe. Spring Flowers Easter Wreath by Melissa Mortenson
 Original Recipe Spring Flowers Easter Wreath by Melissa Mortenson Hi!! Spring has finally sprung in my end of the world and I can not tell you how excited I am! It seems like it's been a very loooong winter.
Getting Ready for Santa Gift Set Designed By: Julie Beltramo November 2013
 Getting Ready for Santa Gift Set Designed By: Julie Beltramo November 2013 This gift set will make anyone excited to get ready for Santa! The Covered Notepad will help you keep track of who s been naughty
Made with Love Mini Album
 Workshop Made with Love Mini Album Additional Materials Needed: Exclusive Stamp Set: CC4192 My Acrylix For My Mother Stamp Set* Z2831 Charcoal Exclusive Inks Stamp Pad Z2844 Pixie Exclusive Inks Stamp
Class #7 Fold out Photos
 Class #7 Fold out Photos In this class we re going to make a fun page that holds five photos on the one page. We ll be using the washi tape for this although if you don t have any you can use regular household
October 2013 Greetings to Go Lock & Key
 October 2013 Greetings to Go Lock & Key Lock & Key Materials: Greetings to Go Club Scrap Collection Unmounted Stamps Lock & Key Materials not included in the Club Stamp kit: Unmounted (UM) Borders & Backgrounds
Birthday. Inspiration Book.
 Birthday Inspiration Book 1. Cut A2 card base from Sugar Cube and fold in half. 2. Die cut the following: a. Happy die from Think Happy Thoughts Stamp & Die Combo out of Oreo cardstock b. Up Up & Away
Be Inspired by TSR s February Sketch: Created exclusively for The ScrapRoom by Julie Bonner
 January and February are exciting and chaotic months for us at The ScrapRoom, as this is Trade Show time of year for us. During the Trade Show, we get to see all of the newest releases from our favorite
Birthday Basics Party Pack Designed By: Anjii Rempel June 2013
 Birthday Basics Party Pack Designed By: Anjii Rempel June 2013 Perk up your party with a banner, mini-cupcake décor, Invitation and Thank You cards and goody bag stuffers! Instructions Step 1 Using Raspberry
DECORATIVE BRADS SILHOUETTE CUT FILES. 4x6 CARDS. 2x12 ELEMENTS. with our. little something extra to your projects! happiness is
 A Charmed Life Simple Inspiration ebook www.simplestories.com DECORATIVE BRADS make it easy to add that little something extra to your projects! happiness is SILHOUETTE CUT FILES create your own die cuts