2.4GHzWireless Digital Microscope. Comprehensive Operating Instruction
|
|
|
- Gregory Payne
- 6 years ago
- Views:
Transcription

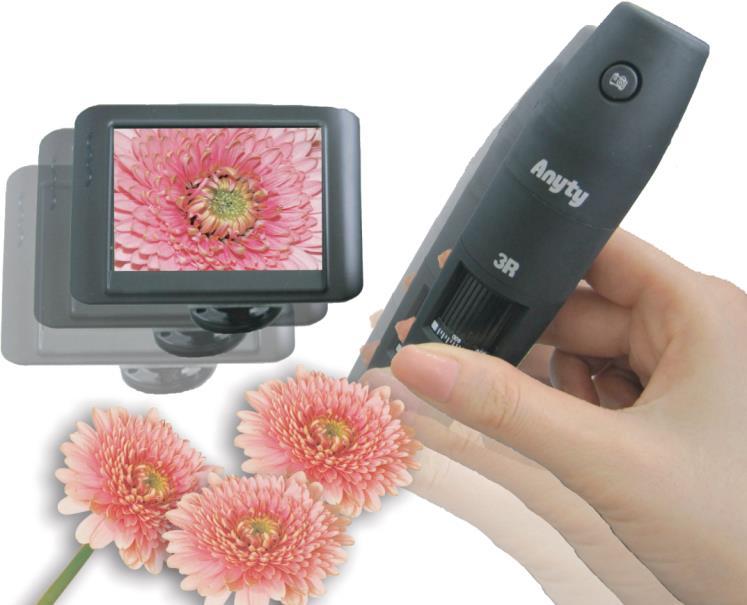


1 2.4GHzWireless Digital Microscope Comprehensive Operating Instruction
2 Contents 1 For your safety 2 2 Anyty Series Line up and Accessories 3 Manual of Anyty Series PC Model P1 How to charge Anyty Wireless Digital Microscope 5 P2 Requirement of using Attached Software(Anyty VIEW) 6 P3 Installation of Anyty VIEW(Windows7/Vista) 7 P4 Installation of Anyty VIEW(Windows8) 12 P5 Simple use of the product 13 P6 Turn the power on and Channel Harmonization 14 P7 About operation of Anyty Digital Microscope 15 P8 Capture with Anyty VIEW 16 P9 Edit images which have been photographed by Anyty VIEW 28 P10 Play movies which have been filmed by Anyty VIEW 30 P11 Spec 31 Manual of Anyty Series TV Model T1 How to charge Anyty Digital Microscope and LCD Monitor 32 T2 Switch on and Channel Harmonization 34 T3 Simple use of the product 37 T4 About operation of Anyty Digital Microscope 38 T5 Capturing still pictures 39 T6 Capturing movie 40 T7 Preview of images/movies 41 T8 Deletion of images/movies 43 T9 About all kinds of setting 44 T10 About all atteched accessory(tv connection stand) 47 T11 Spec(LCD Monitor) 48 4 Common Fix 49 About the sign of magnification PLEASE NOTE: The signed Magnification is based on exact size of when using 15 inch monitor. Any using other size of monitor or specified monitors for TV model could lead to different magnification. 1
3 1 For your safety For safety use of the product, prohibition of using and cautions are written. To ensure customer s safety, PLEASE read this carefully before using. Caution Contents of actions lead to danger to life or serious injury. Attention TV Model has two types of charging adaptors. PLEASE use them properly. DO NOT mix them up. Attention DO NOT leave or use the product under direct sunlight and circumstances of high temperature. Otherwise it would lead to dilation or explosion of the battery. If smoke or smell is emitted, PLEASE stop using the product immediately. DO NOT look straight at the light laze from the product. DO NOT look directly at LED light source. It could damage your Visual Acuity. AVOIDING touching with wet hands DO NOT use the product with wet hands or the product in wet conditions. It could lead to electric shock. Decommissioning prohibited DO NOT decommission or modify the product. It could lead to electric shock or fire hazard. DO NOT use Organic Solvent on Resin body PLEASE note that using of alcohol or thinner for cleaning is prohibited. DO NOT use supply unit in addition to specified supply unit. It has danger of causing fire hazard or electric shock. Caution Other contents that you should be careful about. Unplug the power cable from the Microscope, Monitor when the charging is complete. DO NOT insert fingers in lens part. In addition, DO NOT point strong light to lens part. Rechargeable batteries are In-built. PLEASE follow the instruction of disposal. 2

 (For x80 / 150) (For x100) C.")
4 2 Anyty Series Line UP and Accessory This Comprehensive Operating Instruction is for 2.4GHz Wireless Microscope Anyty Series. PLESE NOTE: The combination of Accessory could be different due to the your demanded Model Contents of Accessories in different type of products mentioned below(to see all contents of every models, please go to next page) A. Common Accessories for all models Operating Instruction(This book) Dedicated Case B. Accessories in Microscope of magnification x 200 Model of magnification x 200 Three Lens covers (For x60 / 200) (For x80 / 150) (For x100) C. Accessories in Microscope of magnification x 600 Model of magnification x 600 Two Lens covers (For x500) (For x600) D. Accessories in PC Model USB Receiver Product Stand AC/USB Adaptor miniusb Cable Microscope Charging Cable Holder Simple Scale Software CD E. Accessories in TV Model Dedicated Monitor Stand for Monitor AC/USB Transform Adaptor AC Charger for Monitor miniusb Cable Microscope Charging Cable TV Cable 3
5 Summary of common contents in every type of products Contents and accessories in every Model are noted below. PLEASE check Alphabets in previous page if it contains the right accessories. No Product Model Contents GHz Wireless Digital Microscope Magnification x 200 PC Model 2.4GHz Wireless Digital Microscope Magnification x 200 TV Model 2.4GHz Wireless Digital Microscope Magnification x 600 PC Model 2.4GHz Wireless Digital Microscope Magnification x 600 TV Model 3R-WM401PC 3R-WM401TV 3R-WM601PC 3R-WM601TV 2.4GHz Wireless Digital Microscope Set of Magnification x 200 PC&TV Model 3R-WM401PCTV 2.4GHz Wireless Digital Microscope Set of Magnification x 600 PC&TV Model 3R-WM601PCTV 2.4GHz Wireless Digital Microscope Magnification of x 200/600 PCModel 3R-WM461PC 2.4GHz Wireless Digital Microscope Magnification x 200/600 PC Model 2.4GHz Wireless Digital Microscope 3R-WM461TV Full set of Magnification x 200/600 PC3R-WM461PCTV &TV Model A B D A B E A C D A C E 2.4GHz Wireless Digital Microscope Microscope of Magnification x 200 3R-WM401 A B 2.4GHz Wireless Digital Microscope Microscope of Magnification x 600 3R-WM601 A C 2.4GHz Wireless Digital Microscope A Receiver for PC Model 2.4GHz Wireless Digital Microscope A Monitor for TV model 3R-WMSOFTSET 3R-WMMOTV Operation of PC Model See page 5 Operation of TV Model See page 32 A B D E A C D E A B C D A B C E A B C D E A D A E 4
6 P1 How to charge Anyty Wireless Digital Microscope Microscope itself is chargeable. Before start using it, please charge the battery of microscope. Connect charging cable (attached inside) to charging connector on Microscope. Then, connect to USB port on PC or AC/USB Transform Adaptor. During charging period, the dial switch will be shining (blue light). Charging period will be approximately 3 hours. It could last for 5 hours in full power condition. Attention USB Charging Cable is for Microscope ONLY. DO NOT use ANY other charging cable on it.. Charging Connector Charging Connector is on back of Microscope. Dial Switch Power switch is on side face of Microscope. Turn right until you hear the sound of click and the power will be turned on. Turn left until the same sound is made. The power will be off. Dial Switch Dial Switch will be lighting up during charge or operation Patterns of lighting up in each condition are noted below. Charging Blue flash Charging complete Blue light Low power Red light 5
7 P2 Requirements of using attached Software(Anyty VIEW) Installation of Anyty VIEW will be required in order to be able to use PC Model on PC. Requirements will be mentioned below. The software of this product is not officially compatible with Windows8 purchased in To understand the newest compatibility, please contact: The minimum specs Compatible OS Windows7(32bit / 64bit) Newer than WindowsXPSP2 Vista (Only for 32 bit) CPU CPU above Pentium Ⅲ 600Mhz Optics Drive Essential Memory 256MB or more of Physical Memory Save Area 100MB or more HD space Connection Method USB1.1/2.0 Display Space 15 Inch(XGA)or more of display space Graphics Facility 16bit color or higher graphics facility Practical use authority Installation and using of the software may require ADM Recommended specs CPU Memory Save Area Display Space Graphics Facility Pentium 4 1.6Ghz or better CPU 512MB or more memory space 10GB or more HD space 17 Inch(SXGA)or more display space Higher than 16bit color, 64MB or more of Graphics Card 6


8 P3 Installation of Anyty VIEW(Windows7/Vista) The installation could be done irregular if antivirus software is active. PLEASE exit antivirus software for a while refers to its manual during installation. DO NOT connect Receiver to PC until installation is complete. Please press Continue if User Account Control(UAC) is activated. 1 Insert Software CD into CD-ROM. The option will be shown as below if auto play is activated. Press Autorun.exe to start installation. If Auto play is not activated. Please double click My computer and RIGHT click CD-ROM icon, choose Open. Then find Autorun.exe and double click to start installation. 7
 or Install Software(64bit) on the basis")
 3 The image")
9 2 The Menu will be shown as below when set up program is activated. Choose Install Software(32bit) or Install Software(64bit) on the basis of your PC specs. Please see 49 page to confirm your PC spec(32bit or 64bit) 3 The image will be shown on screen as below. Please press Next 8

10 4 License Agreement will be shown. To continue installation, please tick I accept'. Then click Next. 5 You could choose which folder to save it at next screen. Normally, click Next to start program installation. 9
11 6 Press Finish when screen shows as below. It is all complete about installation of Anyty VIEW. Move on to examination of Receiver. 7 Connect Receiver to USB port on PC with miniusb cable. Windows will detect the device automatically. Installation will be done when the message shows as below. The name will be shown in Device Manager as images shows as below To confirm by Device Manager, please left click on Start and right click on Computer. Then find Manage and left click on it. 10

12 During the Device installation, please press Install this driver software anyway to continue installation. 11


13 P4 Installation of Anyty VIEW(Windows8) The software of this product is not officially compatible with Windows8 purchased in To understand the newest compatibility, please contact us at: In case of using Windows8 32bit version to install, insert install CD into CD-ROM. Then click the icon of computer on Desktop so the explorer will be shown. Thirdly, open (click) CD-ROM icon and run Autorun.exe. In the follow-up processing, please go to page 7 of Installation of Windows7/Vista. During the Device installation, please press Yes to continue installation 12


14 P5 Simple use of the product Detailed manual of step of use will be showing below 1 Connect Receiver to PC and tune the channel 2 Install a lens cover and turn the power on. 3 Launch software Anyty VIEW 4 Adjust luminance of LED and Magnification dial. As you press shutter button, the image will be saved in the PC. 13
15 P6 Turn the power on and Channel Harmonization 1. Connect specified Receiver to PC with miniusb cable. Once they have been connected, please set the channel from one of 1, 2, 3, 4 Switch of Channel (Channel of ) 2. Then adjust the switch on Anyty Wireless Microscope as same number as on Receiver Switch of Channel (Channel of ) 3. Once the channel has been tuned, please turn dial switch right on Anyty Wireless Microscope Sound of click is the sign of power on. Dial switch Dual-purpose switch to Adjust luminance of LED and power 14
16 P7 About operation of Anyty Microscope Magnification dial should be facing you when you use Microscope 1. Load the lens cover The product is monofocal. Lange from object to Microscope will be different according to different magnification you have selected. Figure of magnification is printed on attached lens cover. Please use switch to lens cover with the corresponding figure of magnification when you take picture. It will be the right focal length as the lens cover and object touch each other. Trimming could be done with Magnification dial. Magnification dial Lens dial 2. To shoot under untouched and unknown magnification condition, the lens cover could be removed from Microscope. In the condition of untouchable between object and lens cover, or in case of shooting without lens cover, you could turn magnification to desired figure first. Then adjust distance between object and Microscope. PLEASE DO NOT touch built- in LED and lens. Pull lens cover to direction of arrow to remove it. 15

17 P8 Capture with Anyty VIEW Launch Anyty VIEW software The icon of Anyty VIEW will be established in Program and Desktop In some case, icon would not be established on desktop. Desktop icon Double click to launch Anyty VIEW. You are also able to open it from Start (All)Program 3R Anyty VIEW Please left click 3R Anyty VIEW to launch it Main Window Once the program is launched, the Main window will be shown. 16

18 About icons on Main Window The icons in the image of below will be shown at upper side of Window. To understand name and function of each icon, please look at images shown below Function of each icons Photographing still picture Filming/Stop Continuous shooting of still picture Attach to Save Thumbnail of image and movie Icon of summary of image/movie Data of image and movie will be shown as thumbnail on left side of main window. Click the icons shown above to switch between thumbnail of images and movies. Data of image/movie will be saved in 3R files in My Document so you are able to browse those data through Exploler 17
19 Condition of thumbnail The frames as shown below will be occurred according to its condition at the moment. Thumbnail of selected at the moment. ~ Pink and Green frame Saved thumbnail ~ Green frame at right down corner The images saved in another file through using Save icon ~ No frame Taking still picture Three ways of taking still picture. 1 Press icon on tool bar 2 Press keyboard button F2 3 Press round button on Microscope Image data will be saved in folder, 3R Files in My Document as name of Still pic_year-month-day hour minute second_(magnification)_number.bmp Magnification will be the figure that you have entered in main window. See scale Magnification dial to enter magnification.( page 23) 18
 To set how many images will be saved per second. Higher number will make quality of the movie higher but size of data and load will be larger too.")
20 Film movies Two ways of film movies 1 Press icon on tool bar 2 Press keyboard button F3 The setting window as below will be showing through two steps above. Set each option and press OK. Filming will start. Frame Rate(1~30) To set how many images will be saved per second. Higher number will make quality of the movie higher but size of data and load will be larger too. Normally, please use it under default condition. (Reference Analogue TV: Approx 30 fps Movies on Mobile phone: 15~24fps) Time limit Check the box to set filming time (in seconds ) and stop filming automatically Click to start or stop filming manually. When stop filming, the data will be saved automatically. Little error could be possible depend on condition or codec Codec You are able to choose different kind of codec (External Software) of movie to watch by PC. You might need to install specific codec depend on your PC. Please go to 4 Common Fix( page 49) to see how to install the codec. 19

21 Continuous shooting of still picture You could use this function to shoot still pictures continually. Click to display window (Setting menu) as an image below. Press Start to start photographing after finish setting each option. Start Time Set start later year, month, day, hour,minute, second by now Interval Setting shooting time interval in seconds. Next shooting will be done in time you have set after current shooting. Capture Set how many pictures you want to take and save. File size It shows the size of pictures based on your settings. Attach to Select thumbnail of images or movies and press this icon, or choose Attach to from Menu bar. After that, the defaults software in your PC will be opened automatically with selected data adjust. Saving Select thumbnail of images or movies and press. The window for saving will be shown so you could resave data in any file you want. Press same icon when you want to save edited data. 20
. Settings You are able to change each setting or make it display scales.")
 Change the language of the software.")
22 About options on Main bar File Contains the same functions of icons on the Main Window (Save edited data in any file you want in your PC, Delete chosen images/movies or all data). Settings You are able to change each setting or make it display scales. Two kinds of resolution of saved pics Changing options of display (see page 22) Mainly changes the measurement functions settings Shows scale and circle.etc on the screen (see page 22) Change the language of the software. Capture Contains the same functions of icons on the Main Window (Taking still picture or filming movie and taking Continuous picture) Help Display the software version and our website. 21


23 Settings of image quality You are able to set quality of Microscope in this option. Change resolution of the saving picture. Adjust Brightness of captured image Adjust Contrast of captured image Adjust Saturation of captured image Adjust Sharpness of captured image Adjust Hue of captured image Display cross line and others You are able to set cross line on screen during shooting. It is useful when you want to aim the place and check the time. You can find them in Settings Cross line Scale Circle Display a cross line at the center of screen Display scale horizontally and vertically. It will overlap cross line. Dial gauge will not change due to change of magnification. Use center of screen as a baseline to display circle 22

24 Full Screen Mode Click Maximization icon to view Anyty View in full screen. To terminate full screen mode, please press ESC button on keyboard. Input magnification. There is a blank for entering magnification at top of right side of the main window during shooting period. Please see magnification dial gauge and the number printed on lens cover to enter, the measuring function will calculate the data automatically based on figure in the blank. (go to page 26) See Magnification dial gauge and enter. Change of direction Click the icons on the menu bar to change screen direction. Flip horizontal Icons of changing direction Flip Vertical Color modification Click icons which have functions of Negative, Vampix and Color Incalidation. Negative Vampix Color Invalidation 23
 1 Click the icon on menu bar.")
25 Negative and Vampix Color Invalidation Icons (choose two) Measurement functions Icons at right side of menu bar are for measuring. Each icon has its specific measurement method. Icons of measurement Operation of Measurement functions(e.g. Linear size) 1 Click the icon on menu bar. Measurement of Linear size 24


26 2 Next, please click two points of what you want to measure. For example, click bottom and top part of the L when you want to measure height of it. Click twice at the point of red arrow 3 At last, click anywhere you want to display the value. It will be displayed Please click Save icon to save the value you have measured if you want. Click once more and the measured value will be displayed 25
. You might need to click more than twice depend on some specific measurement.")
.")
27 Attention The figures are calculated based on shooting magnification at top right side of the Main window. If you want to obtain more accurate numerical value, please see page 26 or page 27 (Additions and Corrections). You might need to click more than twice depend on some specific measurement. Additions and Corrections Use Additions and Corrections to calculate more accurate value. Steps are shown below. 1First, capture attached simple scale ore micro meter with Microscope. Then, click the icon on top right side as picture shows below. Calibration 2Next, please click two side of the scale that already clear of size (same as calculate Linear size). Click two sides 3The window shows as below will be displayed. Please enter the size and click OK. 26


 Click Setting in setting on menu bar or click")
28 4Value will be filled in left side of magnification. From then on, the measurement will be done based on the calibration value. Clear the measurement function If you want to renewal the measurement or delete it, please click the icon at right side of correction icon. Click Undo to delete previous measurement. Also, click Delete All to delete all value you have entered. Pen settings(setting of measurement functions) Click Setting in setting on menu bar or click setting in icon to display Pen setting menu. You are able to set font of letter (Linear size. etc). 27

29 P9 Use Anyty VIEW to edit captured still picture Click thumbnail of still picture to open editing window You are able to measure and input words here as you have done in capture screen. Open Open named picture which are captured by Anyty VIEW only. Save You are able to save the picture as another name after editing. Paint You are able to paint line and figure in picture. Measure Enter magnification to enable measurement and editing. Operation steps are same as in page 24 Pen setting You are able to change color of painting and line of measurement. Screen and control are same as manual on page 27 28

30 Text setting You are able to input text on picture. Please enter texts in black. Change font of texts Font will be different between vertical writing and horizontal writing. Press OK when finish entering Left click to insert text on part of images where you wish to put Undo Return to previous status during editing. Redo Redo of what you have done before Undo Enter magnification at capture period. You must do this when you measure size. Calibration Use this to improve accuracy of measurement. To understand control step, please see page 26 29

31 P10 Playing captured movies with Anyty Double click the movies you have captured in main window to open movie player and start playing it. 30
32 P11 Spec Spec of 2.4GhzWireless microscope Anyty PC Model Image sensor 350 thousand pixel CMOS sensor Still picture size 720x480,640x480,320x240 Movie size 720x480,640x480,320x240(maximum 30fps) Light source 8 adjustable LED white light Wireless type 2.4Ghz wireless 4 channels(transmitter/receiver) Transmission distance Approx 5m PC interface (receiver) USB 2.0/1.1 Magnification(x200) x10~200(15 inch LCD screen) Magnification(x600) x450~600(15 inch LCD screen) Power source Charging(Li-ON Battery) Full charge time Approx 3 hours Max working time Maximum 5 hours Life Approx 500 cycle Power consumption Maximum 0.75W Focus range x200 model: 8~300mm x600 model: Close-up photography only Body size 135mm (L)x36mm (R) 31
33 T1 Charging Anyty Microscope and LCD Monitor Before using Microscope, please charge battery of Microscope. Connect attached charging cable to charging connector on Microscope. Connect other side of cable to USB port on PC or AC/USB transform adaptor. During charging period, dial switch flashes blue Charging period will be approx 3 hours. Maximum 5 hours of working time in full power condition. Attention USB charging cable is specialized to Microscope. Please DO NOT use it for charging LCD monitor. It could be the cause of breakdown or heating. Charging connector Dial switch Turn it right until it sounds click and the power will be on. Charging Charging complete Low power Blue flash Blue light Red light 32
34 Next, please charge battery of monitor. Connect attached adaptor to the charging port on left side of the LCD Monitor, and then connect other side to household wall outlet. (100V) A part of monitor at left up side will light red during charging period. The red light will turn off when the charging is complete. Charging time will be about 3 hours. It lasts about maximum 2hours in full power condition. Attention AC adaptor is only for LCD Monitor. Please, DO NOT use it on Microscope. It could be the cause of breakdown or heating. During charge period Charge complete Red light Light off Press power button at top side of LCD Monitor to turn the power on. Light on top left side will be green and monitor will be turned on. Please press power button longer to turn the power of. 33
35 T2 Turn on the power and tuning radio channel Insert MicroSD card in to LCD Monitor. Confirm that the MicroSD card is inserted properly. Then choose one of four channels. After tuning, turn the dial switch right on the Microscope until it sounds click to turn on the power. Dial switch Dual-purpose switch to Adjust luminance of LED and power Then turn of the power of the LCD Monitor. 34
36 The monitor will shows screen as described below Channel will be shown on top right side of the screen. Radio Channel Press button to do the tuning in case of mismatching channel. button Setting is complete if the picture is displayed. 35
37 Language setting This manual is based on English. Steps 1 Press button( ) for about 2 seconds and release in condition of power on. 2 Setting menu will be displayed Select SYSTEM SETTING with, button and press OK to confirm. 3Each setting will be displayed Select Language with, button and press OK to confirm. 4The language will be set Select English with, button and press OK to confirm 5Press( )button 3 times to back to main screen That is all about language setting. 36

38 T3 Simple use of the product See more details about operation steps. 1 Turn the both power of Microscope and LCD monitor on. 2 Load lens cover and adjust magnification and focal point. 3 Press button on the monitor to select image/movie to capture. 4 Press OK button to save the data. 37
39 T4 About operation of Anyty Microscope Shutter button would not be used in TV model Magnification dial should be facing you when you use Microscope 1. Load the lens cover The product is monofocal. Lange from object to Microscope will be different according to different magnification you have selected. Figure of magnification is printed on attached lens cover. Please use switch to lens cover with the corresponding figure of magnification when you take picture. It will be the right focal length as the lens cover and object touch each other. Trimming could be done with Magnification dial. Magnification dial Lens dial 2. To shoot under untouched and unknown magnification condition, the lens cover could be removed from Microscope. In the condition of untouchable between object and lens cover, or in case of shooting without lens cover, you could turn magnification to desired figure first. Then adjust distance between object and Microscope. PLEASE DO NOT touch built- in LED and lens. Pull lens cover to direction of arrow to remove it 38
40 T5 Capture the still picture The images captured by Anyty Wireless Microscope will be saved in SD card in the LCD screen. In order to capture still pictures, please turn on the power of LCD Monitor first and press button. It will be still picture mode. Saving still picture Residual amount of a battery Channel Icon of still picture mode Icon of Micro SD card Savable number of pictures Current Time Time stamp Press OK button at left side of the LCD monitor in Saving Still Picture Mode to save current screen. The icon of MicroSD will be marked F if the SD card is full. 39
41 T6 Capture movie The Initial State (first time turn the power on) of the LCD Monitor will be Movie capture mode. Or press at Still picture mode. It will be switched to Movie capture mode Saving movie mode Residual amount of a batter Icon of Movie mode Icon of Micro SD card Possible recording time or recording time Current Time Time stamp Press Ok button at left side of the LCD monitor in Movie capture mode and recording will be starting. During capturing period, a round icon at top of the screen will flash. Capturing time will be shown at bottom right side of the screen. Press OK again to stop recording. The icon of MicroSD will be marked F if the SD card is full 40
42 T7 Preview (Images/Movies) Press button at right side of the LCD monitor to activate Preview of Images/Movies Mode. Index of folders will be shown. They are separated by different capturing date. Press, button to select and OK to confirm. Then, the index of selected file will be shown. Press, to choose Data of what you want to view and press OK to confirm. Movie data Image data Difference between Image/Movie data: Data with double quotation mark Image data Data with no quotation mark Movie data Preview images Press OK to display the image on screen. Press OK again to back to previous screen. 41
43 Preview of movies Press OK to play the movie. Halt : Press OK when the movie is playing. Forwarding : Press when the movie is playing Rewind : Press when the movie is playing End : Press to end 42

44 T8 Delete images/movies Select the file that you want to delete with, button. Then, press button for 2 seconds. It will ask you if you confirm. Select Yes and press OK to delete the file. 43
45 T9 About each settings You are able to change each setting of LCD Monitor. Turn on the LCD monitor and Press button for 2 seconds Setting menu will be showing up as below. Press, button to select and press OK to confirm. Language setting Please go to page 36 Video type setting Normally, unnecessary to change from NTSC to another. 1 Select SYSTEM SETTING in setting menu. 2 Select Video System 3 Select one from NTSC and PAL and press OK to confirm Formatting All data in SD card will be deleted after formatting 1 Select SYSTEM SETTING in setting menu. 2 Select Format. 3 Choose Yes to format MicroSD card. Initialize the config All setting will be reset after initializing the config. 1 Select SYSTEM SETTING in setting menu. 2 Choose Default Setup. 3 Select Yes to initialize the config. 44
46 Version information Confirm a version of the internal software. 1 Select SYSTEM SETTING in setting menu. 2 Select Version. 3 Current software version will be displayed. Frame rate Change the frame rate of the movie 1 Select RECORDER SETTING in setting menu. 2 Select Frame Rate. 3 You are able to change frame rate from 10 to 30fps. Time stamp Changing having time stamp or not 1 Select RECORDER SETTING in setting menu. 2 Select Time Stamp. 3 Select one from ON, OFF and press OK to confirm. Capturing type You are also able to switch between still/video from setting 1 Select RECORDER SETTING from setting menu. 2 Select Recording Type. 3 Select one from Still, Video and press OK to confirm. Preview You are also able to find preview function from setting. 1 Select EVENT PLAYBACK from setting menu. 2 You are able to preview still/video. 45
47 Time setting Change the setting of the internal date and time 1 Select Date / Time in setting menu 2 Set Year-month-day and Hours Use Up and Down button to change value and move to the next item by the Confirm button 3 Push the menu button if you have set all values and finish. 46
48 T10 About accessories (TV connection stand) Loading of Magnet stand for LCD monitor. The LCD Monitor could not only be held by hand to use it, but also can be fixed with a magnet stand. Attach stand to LCD monitor to put it on the desk or fix it with magnet power. Caution Please be careful not to fix it to device which could be affected by its magnetic force. TV output function It is able to display video in LCD Monitor on TV. Please connect picture input of TV to the picture output of the LCD monitor with an attached video cable. A picture will be output to TV without a screen being displayed when you switch on the LCD monitor Use USB cable to connect(optional) Please use miniusb cable (sold at market) to connect with PC when you want to view data on PC. Connect LCD Monitor and PC with miniusb cable and turn on the monitor. You are able view the data of the card of the MicroSD slot with a PC as a removable disk. The animation will be saved in XviD Codec. Please set up the animation software corresponding to the XviD form. 47
49 T11 Spec(LCD Monitor) 2.4Ghz Wireless Microscope Anyty TV Model Spec of the LCD Monitor Please refer to the detail of the specifications of the PC model for the specifications of the main body of Anyty microscope The magnification will be based on the size of images which are displayed on 15 inches monitor. The magnification of when it is displayed it with a attached monitor of the TV model will be different. Thank you for your understanding beforehand. LCD 3.5 inches TFT LC Resolution 320x240 Video format PAL/NTSC Frequency 2414MHz 2432MHz 2450MHz 2468MHz Power supply 5VDC Consumption current(max)500ma Charging time About 3 hours Working time Maximum 2 hours Resolution of still/video 640x480 Movement size 27MB/min Frame rate Maximum 30fps Output signal level VP-P@75ohm Receiver sensitivity -85dbm External form 100x75x25mm Weight 140g Workable temp -10 ~50 Workable humidity 15~85%RH 48
50 4 Common Fix A If Anity VIEW device or Anyty VIEW software were working OK but suddenly stops working properly, Please try the following. 1 Close Anyty VIEW software and unplug receiver. 2 After waiting for 3 minutes, plug on receiver. 3 Power on the Microscope and re-open Anyty VIEW program. B After PC resume from standby or hibernate Anyty VIEW might not work properly, please close it and re-open to try. C If it does not work even if you connect a microscope and re-start Anyty VIEW, please uninstall Anyty VIEW once, and install Anyty VIEW once again and try. D When there is wireless LAN or Bluetooth in the environment using the microscope, it may have an influence on operation of the microscope. E When you could not operate an LCD monitor in TV model, please push the reset button of the backside with a former thin thing and switch it on again F Please try the following operation to confirm the number of the bits of the system by Windows7 and Vista Please right click the Computer and click Property Please look at System Option in System. G Please follow the steps to install codec for saving animation. Insert a software CD into CD-ROM of the PC and open My Computer of the start button. Next, right click the CD-ROM and choose Open. Then find Autorun.exe to activate install program. Install the software according to the instructions of the screen. After installation is complete, MJPG_MainConcept Video V3.2.4 will be available in the column of codec. 49

51 Manufactured and sold by 3R SYSTEMS CORP. HQ No Naka, Hakata-ku, Fukuoka City, Japan Official website 50
Portable Digital Microscope Viewter. 3R-VIEWTER-500UV(UV LED Model) 3R-VIEWTER-500IR(IR LED Model) Operating Instruction
 3R-VIEWTER-500IR(IR LED Model) Operating Instruction") Portable Digital Microscope Viewter 3R-VIEWTER-500UV(UV LED Model) 3R-VIEWTER-500IR(IR LED Model) Operating Instruction Index 1. Contents 2 2. Name of each parts 3 3. Set up 3.1 Charging 5 3.2 Insert SD
Portable Digital Microscope Viewter 3R-VIEWTER-500UV(UV LED Model) 3R-VIEWTER-500IR(IR LED Model) Operating Instruction Index 1. Contents 2 2. Name of each parts 3 3. Set up 3.1 Charging 5 3.2 Insert SD
DigiScope II v3 TM Aperture Scope User s Manual
 DigiScope II v3 TM Aperture Scope User s Manual Welcome Thank you for choosing DigiScope II v3 TM Aperture scope! The DigiScope II v3 TM Aperture Scope is an exciting new device to Capture and record the
For customers in Canada This Class B digital apparatus meets all requirements of the Canadian Interference-Causing Equipment Regulations.
 User manual For customers in North and South America For customers in USA This device complies with Part 15 of the FCC rules. Operation is subject to the following two conditions: (1) This device may not
Digital Microscope. User Manual
 Digital Microscope User Manual Features The digital microscope provides 10~200X adjustable magnification range. The build-in high-performance white LED can illuminate the object without using any auxiliary
KoPa Scanner. User's Manual A99. Ver 1.0. SHENZHEN OSTEC OPTO-ELECTRONIC TECHNOLOGY CO.,LTD.
 KoPa Scanner A99 User's Manual Ver 1.0 SHENZHEN OSTEC OPTO-ELECTRONIC TECHNOLOGY CO.,LTD. http://www.ostec.com.cn Content Chapter 1 Start... 1 1.1 Safety Warnings and Precautions... 1 1.2 Installation
Welcome 1. Precaution
 Table of Contents EN Precaution....2 Preparation.. 4 Standard accessories....4 Parts Names & Functions...5 Computer System requirements.... 6 Technical Specifications 7 Install the software.. 7 Start Microscope.8
The ideal K-12 science microscope solution. User Guide. for use with the Nova5000
 The ideal K-12 science microscope solution User Guide for use with the Nova5000 NovaScope User Guide Information in this document is subject to change without notice. 2009 Fourier Systems Ltd. All rights
Magic Wand Portable Scanner with Auto-Feed Dock. PDSDK-ST470-VP-BX2 User Manual
 Magic Wand Portable Scanner with Auto-Feed Dock PDSDK-ST470-VP-BX2 User Manual Table of Contents 1. KEY FEATURES... 2 2. FUNCTIONAL PARTS... 2 3. EXPLANATION OF THE STATUS ICONS... 4 4. GETTING STARTED...
FILM SCANNER P Instruction Manual
 FILM SCANNER P16-41458 Instruction Manual CONTENTS Safety Precautions 0 Features & Package Contents 1 Description of Parts 2 Loading Slides 3 Loading Negatives 4 Scanning Slides or Film 5-9 Transferring
FAST TRACK READ ME FIRST! FAST TRACK E300 A Quick-Start Guide to Installing and Using Your COOLPIX 300. Contents. Nikon View... 25
 READ ME FIRST! FAST TRACK FAST TRACK E300 A Quick-Start Guide to Installing and Using Your COOLPIX 300 Contents Checklist Before you begin... 2 Using the COOLPIX 300... 4 GETTING TO KNOW YOUR COOLPIX 300...
Table of Contents -1-
 -0- Table of Contents EN 1. Precaution... 2 2. Preparation... 5 Standard Accessories... 5 Part Names... 6 Installing the Battery Pack... 8 Charging the Battery Pack... 9 3. Place Film / Slide Into The
Table of Contents -1-
 -0- Table of Contents EN 1. Precaution... 2 2. Preparation... 5 Standard Accessories... 5 Part Names... 6 Installing the Battery Pack... 8 Charging the Battery Pack... 9 3. Place Film/ Slide Into The Holder...
Windows INSTRUCTION MANUAL
 Windows E INSTRUCTION MANUAL Contents About This Manual... 3 Main Features and Structure... 4 Operation Flow... 5 System Requirements... 8 Supported Image Formats... 8 1 Installing the Software... 1-1
Happy Link Software INSTRUCTION MANUAL
 Happy Link Software INSTRUCTION MANUAL 101001E-3 HAPPY Contents Regarding this software Normal Operation -------------------------------------------------------------------------------------------------
USER MANUAL PV 360. Vidifox Document Camera
 Vidifox Document Camera PV 360 USER MANUAL Please read this User Manual thoroughly before you use the document camera. Keep the CD-ROM in a convenient place so you can use it quickly if you need to. Please
Combo Scanner. User Manual
 Combo Scanner User Manual I. Unpack the Combo Scanner Backlight Holder Combo Scanner Business card Fixture Photo/Business Card Holder User Manual Quick Installation Guide Note This Combo Scanner supports
DC300. Document Camera USER MANUAL
 DC300 Document Camera USER MANUAL 1 Please read this manual carefully before operating the document camera and keep it for reference. PRECAUTIONS NOTICE: PLEASE READ CAREFULLY BEFORE USE Use the document
Digital Portable Overhead Document Camera LV-1010
 Digital Portable Overhead Document Camera LV-1010 Instruction Manual 1 Content I Product Introduction 1.1 Product appearance..3 1.2 Main functions and features of the product.3 1.3 Production specifications.4
Slide & Film Scanner. Instruction Manual LDSCAN11
 Slide & Film Scanner Instruction Manual LDSCAN11 1 Contents Unpacking...3 System Requirements...4 PC System Requirements...4 Mac System Requirements...4 Product Overview...5 Place Film / Slide Into The
Mighty Scope 5M. Instruction Manual. aveninc.com
 Mighty Scope 5M Instruction Manual aveninc.com Contents Features 2 Specifications 2 Contents 2 PC System Requirements 3 Driver Installation Procedure 3 Getting Started 3 Software Installation (PC) 4 Mighty
Film2USB Converter. Quick Start Guide & User s Manual. Model Number F2USB-05
 Film2USB Converter Quick Start Guide & User s Manual Model Number F2USB-05 www.film2usb.com www.clearclicksoftware.com Table of Contents Safety Precautions... 3 Package Contents... 4 Description of Parts...
The screen pictures shown in this manual may differ depending on the type of computer or camera used.
 Operating Manual Thank you for purchasing the PENTAX Digital Camera. This is the manual for PENTAX PHOTO Browser 3 and PENTAX PHOTO Laboratory 3 software for your Windows PC or Macintosh for enjoying images
PC System Requirement For Dual Microscope
 REV.F The 200X digital microscope provides a 10~200X adjustable magnification range, and the 500X microscope provides 500X magnification. The built-in high-performance LEDs can illuminate an object without
FE-150/X-730 FE-160/X-735
 DIGITAL CAMERA FE-150/X-730 FE-160/X-735 Advanced Manual Detailed explanations of all the functions for getting the most out of your camera. Thank you for purchasing an Olympus digital camera. Before you
Operating Manual. (Version 3.10)
") Operating Manual (Version 3.10) Thank you for purchasing this PENTAX Digital Camera. This is the manual for PENTAX PHOTO Browser 3 and PENTAX PHOTO Laboratory 3 software for your Windows PC or Macintosh
Operating Manual (Version 3.10) Thank you for purchasing this PENTAX Digital Camera. This is the manual for PENTAX PHOTO Browser 3 and PENTAX PHOTO Laboratory 3 software for your Windows PC or Macintosh
S100 Webcam. User s Manual
 S100 Webcam User s Manual Kodak and the Kodak trade dress are trademarks of Eastman Kodak Company used under license. 2009 Sakar International, Inc. All rights reserved. WINDOWS and the WINDOWS logo are
23070 / Digital Camera Owner s Manual
 23070 / 23072 Digital Camera Owner s Manual 2007 Sakar International, Inc. All rights reserved. 2007 Crayola Windows and the Windows logo are registered trademarks of Microsoft Corporation. All other trademarks
CHAPTER1: QUICK START...3 CAMERA INSTALLATION... 3 SOFTWARE AND DRIVER INSTALLATION... 3 START TCAPTURE...4 TCAPTURE PARAMETER SETTINGS... 5 CHAPTER2:
 Image acquisition, managing and processing software TCapture Instruction Manual Key to the Instruction Manual TC is shortened name used for TCapture. Help Refer to [Help] >> [About TCapture] menu for software
CONTENTS. Chapter I Introduction Package Includes Appearance System Requirements... 1
 User Manual CONTENTS Chapter I Introduction... 1 1.1 Package Includes... 1 1.2 Appearance... 1 1.3 System Requirements... 1 1.4 Main Functions and Features... 2 Chapter II System Installation... 3 2.1
Operating Manual. (Version 3.5)
") Operating Manual (Version 3.5) Thank you for purchasing this PENTAX Digital Camera. This is the manual for PENTAX PHOTO Browser 3 and PENTAX PHOTO Laboratory 3 software for your Windows PC or Macintosh
Operating Manual (Version 3.5) Thank you for purchasing this PENTAX Digital Camera. This is the manual for PENTAX PHOTO Browser 3 and PENTAX PHOTO Laboratory 3 software for your Windows PC or Macintosh
Optika ISview. Image acquisition and processing software. Instruction Manual
 Optika ISview Image acquisition and processing software Instruction Manual Key to the Instruction Manual IS is shortened name used for OptikaISview Square brackets are used to indicate items such as menu
User s Manual. For correct usage please read these instructions carefully and keeps in a safe place for future reference!
 User s Manual For correct usage please read these instructions carefully and keeps in a safe place for future reference! Contents 1: Safety precautions... 2 2: Package contents... 3 3: Description of parts...
For customers in USA This device complies with Part 15 of the FCC rules. Operation is subject to the following two conditions:
 User manual For customers in North and South America For customers in USA This device complies with Part 15 of the FCC rules. Operation is subject to the following two conditions: (1) This device may not
User Guide of ISCapture
 User Guide of ISCapture For Windows2000/XP/Vista(32bit/64bit)/Win7(32bit/64bit) Xintu Photonics Co., Ltd. Version: 2.6 I All the users of Xintu please kindly note that the information and references in
Table of Contents -1-
 -0- Table of Contents EN 1. Precautions. 2 2. Preparation.. 5 Standard Accessories.. 5 Parts Names.. 6 3. Install The Driver and Software 7 Install the Driver 7 Install the Software.. 8 4. Place Film/Slide
Mini Photo Printer User Manual
 Mini Photo Printer User Manual CONTENTS SAFETY INFORMATION PACKAGE CONTENT PRINTER SETUP A) Charge Printer B) Power On C) Load Paper INSTALLING APP PARING MOBILE DEVICE & CANON MINI PRINT USER INTERFACE
Photo Maker. User Manual
 Photo Maker User Manual PhotoMaker Mac Manual.indd 1 12/01/2011 4:46:14 PM Mac Manual.indd 2 12/01/2011 4:46:14 PM Contents 1. Precautions 2. Standard Accessories 3. Part Names 4. Installing the software
Wireless Handy Scanner
 User Guide Works with iscanair Go Scanner App Wireless Handy Scanner For smartphones, tablets, and computers Wi-Fi 802.11g/n supported All trademarks are the property of their respective owners and all
Table of Contents -1-
 -0- Table of Contents 1. Precautions. 2 2. Preparation.. 5 Standard Accessories.. 5 Parts Names.. 6 3. Install The Driver and Software 7 Install the Driver 7 Install the Software.. 8 4. Place Film/Slide
Nikon D7100 Camera Kit. -Checklist and Operations Manual-
 Airborne Digital Reconnaissance System (ADRS) Nikon D7100 Camera Kit -Checklist and Operations Manual- V4.2 October 21, 2014 National Headquarters, Civil Air Patrol 2 1.0 Equipment Pre-Mission Check 1.1
PRORADAR X1PRO USER MANUAL
 PRORADAR X1PRO USER MANUAL Dear Customer; we would like to thank you for preferring the products of DRS. We strongly recommend you to read this user manual carefully in order to understand how the products
MEASUREMENT CAMERA USER GUIDE
 How to use your Aven camera s imaging and measurement tools Part 1 of this guide identifies software icons for on-screen functions, camera settings and measurement tools. Part 2 provides step-by-step operating
Operating Manual (Version 3.6)
") e_kb464_pc_84percent.book Page 1 Monday, September 29, 2008 2:00 PM Operating Manual (Version 3.6) e_kb464_pc_84percent.book Page 2 Monday, September 29, 2008 2:00 PM Thank you for purchasing this PENTAX
e_kb464_pc_84percent.book Page 1 Monday, September 29, 2008 2:00 PM Operating Manual (Version 3.6) e_kb464_pc_84percent.book Page 2 Monday, September 29, 2008 2:00 PM Thank you for purchasing this PENTAX
ISCapture User Guide. advanced CCD imaging. Opticstar
 advanced CCD imaging Opticstar I We always check the accuracy of the information in our promotional material. However, due to the continuous process of product development and improvement it is possible
DIGITAL CAMERA. Quick Start Guide
 En DIGITAL CAMERA Quick Start Guide Table of Contents pg. 1 Check the package contents pp. 2 11 Take Pictures Step 1 Charge the batteries...pg. 2 Step 2 Attach the camera strap...pg. 3 Step 3 Insert the
Direct Printing from PictBridge-compatible Printers
 Direct Printing from PictBridge-compatible Printers This camera is compatible with PictBridge for direct printing with PictBridge-compatible printers. Connect the camera to a PictBridge-compatible printer
ArcSoft PhotoImpression Table of Contents:
 ArcSoft PhotoImpression Table of Contents: 1. Welcome to PhotoImpression 2. Highlights of PhotoImpression 3. System Requirements 4. Installing PhotoImpression 5. Working with PhotoImpression Getting Started
USER MANUAL NEGATIVE & SLIDE TO SD SCANNER FS351N
 NEGATIVE & SLIDE TO SCANNER FS351N USER MANUAL Thank you for purchasing your Neostar Film and Slide to Scanner. Please read and retain these instructions for future reference. Extra 3-packs of Slide or
Watec USB Camera. User s Manual
 Watec USB Camera User s Manual Rev. 3.02 Watec Co., Ltd. September 5, 2018 Revision Record Rev. Date Changes Remarks 1.00 August 28, 2013 - Initial Release 2.00 - - 3.00 August 29, 2016 Correction to Watec
GXCapture 8.1 Instruction Manual
 GT Vision image acquisition, managing and processing software GXCapture 8.1 Instruction Manual Contents of the Instruction Manual GXC is the shortened name used for GXCapture Square brackets are used to
CobraCam USB III Portable Inspection Camera with USB Interface Instruction Manual
 CobraCam USB III Portable Inspection Camera with USB Interface Instruction Manual 07/13 Test Equipment Depot - 800.517.8431 99 Washington Street, Melrose, MA 02176 TestEquipmentDepot.com CobraCam USB 3
DIGITAL CAMERA. Quick Start Guide
 En DIGITAL CAMERA Quick Start Guide Table of Contents pg. 1 Check the package contents pp. 2 15 Take pictures Step 1 Charge the batteries...pg. 2 Step 2 Attach the camera strap...pg. 3 Step 3 Insert the
eflex 75x/300x Digital Microscope with Flexible Neck User Guide
 eflex 75x/300x Digital Microscope with Flexible Neck User Guide Table of Contents Important information... 4 Product description... 4 Computer requirements... 5 Windows based PC... 5 Mac OS based PC...
Model S-520 Coin Counter / Sorter Operating Manual
 Model S-520 Coin Counter / Sorter Operating Manual Table of Contents Using the Product Safely... 2 About the Warning Stickers and Points of Warning/... 2 Warning.... 3. 4 Names of the Main Parts......
Table of Contents. 1. Precautions Preparation.. 5
 0 Table of Contents EN 1. Precautions..... 2 2. Preparation.. 5 l Standard Accessories... 5 l Parts Names.. 6 3. Install The Software... 7 l Install the Software in Windows..... 7 l Install the Software
REV.C. SmartScope 5M
 REV.C SmartScope 5M The 200X digital microscope provides a 10~200X adjustable magnification range, and the 500X microscope provides 500X magnification. The built-in high-performance LEDs can illuminate
Dust reduction filter. Live View
 E P2 Art Filters, Multi Exposure, Multi aspect Tiltable, high contrast and high resolution electronic viewfinder* Accessory Port High Speed 12.3 Megapixel Live MOS sensor High performance built in Real
Instruction Manual for the Software of ASSAN V2 Series Receiver
 Instruction Manual for the Software of ASSAN V2 Series Receiver I. Setup 1. Double click SETUP to enter the welcome interface and click Next. 2. Enter your name and company name and click Next. 3. Select
Quick Start Guide. Setup and Scanning. Try the Additional Features. English
 English Quick Start Guide Be sure to install the software programs before connecting the scanner to the computer! Setup and Scanning Check the Package Contents p.3 Install the Software Windows Macintosh
S101v2 Webcam with adjustable focus
 S101v2 Webcam with adjustable focus User Manual Kodak and the Kodak trade dress are trademarks of Eastman Kodak Company used under license. 2010 Sakar International, Inc. All rights reserved. WINDOWS and
inphoto ID Canon and Olympus camera control software Automatic ID photography User Guide
 inphoto ID Canon and Olympus camera control software Automatic ID photography User Guide 2006 Akond company 197342, Russia, St.-Petersburg, Serdobolskaya, 65a Phone/fax: +7(812)600-6918 Cell: +7(921)757-8319
E-520. Built-in image stabiliser for all lenses. Comfortable Live View thanks to high speed contrast AF** 100% D-SLR quality
 E-520 Built-in image stabiliser for all lenses Excellent dust reduction system Professional functions 10 Megapixel Live MOS sensor Comfortable Live View thanks to high speed contrast AF** 100% D-SLR quality
Please read this manual before using the printer. Please keep this manual within easy reach for quick reference.
 INSTRUCTION MANUAL Please read this manual before using the printer. Please keep this manual within easy reach for quick reference. GARMENT PRINTER support homepage http://www.brother.com/usa/garmentprinters/
Motic Live Imaging Module. Windows OS User Manual
 Motic Live Imaging Module Windows OS User Manual Motic Live Imaging Module Windows OS User Manual CONTENTS (Linked) Introduction 05 Menus, bars and tools 06 Title bar 06 Menu bar 06 Status bar 07 FPS 07
Mini Photo Printer User Manual
 Mini Photo Printer User Manual CONTENTS SAFETY INFORMATION PACKAGE CONTENT PRINTER SETUP A) Charge Printer B) Power On C) Load Paper INSTALLING APP PARING MOBILE DEVICE & CANON MINI PRINT USER INTERFACE
inphoto ID Canon camera control software Automatic ID photography User Guide
 inphoto ID Canon camera control software Automatic ID photography User Guide 2008 Akond company 197342, Russia, St.-Petersburg, Serdobolskaya, 65A Phone/fax: +7(812)600-6918 Cell: +7(921)757-8319 e-mail:
Quick Start Guide. Setup and Scanning. Try the Additional Features. English
 English Quick Start Guide Be sure to install the software programs before connecting the scanner to the computer! Setup and Scanning Check the Package Contents p.3 Install the Software Windows Macintosh
Quick Start Guide. Setup and Scanning. Try the Additional Features. English
 English Quick Start Guide Be sure to install the software programs before connecting the scanner to the computer! Setup and Scanning Check the Package Contents p.3 Install the Software Windows Macintosh
Specifications for Fujifilm FinePix F850EXR 16MP Digital Camera
 Specifications for Fujifilm FinePix F850EXR 16MP Digital Camera Model name FinePix F850EXR Number of effective pixels 16.0 million pixels Image sensor 1/2-inch EXR CMOS with primary color filter Storage
Watec USB Camera. User s Manual
 Watec USB Camera User s Manual Rev. 3.01 Watec Co., Ltd. April 17, 2017 Revision Record Rev. Date Changes Remarks 1.00 August 28, 2013 - Initial Release 2.00 - - 3.00 August 29, 2016 Correction to "Watec
Family HD Webcam F101
 Family HD Webcam F101 User Manual Kodak and the Kodak trade dress are trademarks of Eastman Kodak Company used under license. 2010 Sakar International, Inc. All rights reserved. WINDOWS and the WINDOWS
Picture Style Editor Ver Instruction Manual
 ENGLISH Picture Style File Creating Software Picture Style Editor Ver. 1.12 Instruction Manual Content of this Instruction Manual PSE is used for Picture Style Editor. In this manual, the windows used
Case Air Wireless TETHERING AND CAMERA CONTROL SYSTEM
 Case Air Wireless TETHERING AND CAMERA CONTROL SYSTEM PRODUCT MANUAL CAWTS03 v3.14 Windows ABOUT CASE AIR The Case Air Wireless Tethering System connects and transfers images instantly from your camera
OPERATION MANUAL MIMAKI ENGINEERING CO., LTD.
 OPERATION MANUAL MIMAKI ENGINEERING CO., LTD. http://www.mimaki.co.jp/ E-mail:traiding@mimaki.co.jp D200674 About FineCut for CorelDRAW Thank you very much for purchasing a product of Mimaki. FineCut,
MANUAL. Textron Motors Diagnostic Tool. This manual is valid for the following Textron Motors Diagnostic Tool:
 MANUAL Textron Motors Diagnostic Tool This manual is valid for the following Textron Motors Diagnostic Tool: 0507 TD0507_HB Rev F 6..05 en_english Read the manual before performing the task on the engine.
Apple Photos Quick Start Guide
 Apple Photos Quick Start Guide Photos is Apple s replacement for iphoto. It is a photograph organizational tool that allows users to view and make basic changes to photos, create slideshows, albums, photo
DOCUMENT SCANNER INSTRUCTIONS. Space. Backup. Count Only. New File. Scanner. Feeding Option Manual Auto Semi-Auto
 E FILM F Scanner A Space Count Only New File Feeding Option Manual Auto Semi-Auto Backup DOCUMENT SCANNER INSTRUCTIONS NOTICE q Copyright 2001 by CANON ELECTRONICS INC. All rights reserved. No part of
<Motion Panorama> 180 Vertical : 2160 x 9600 Horizontal : 9600 x Vertical : 2160 x 6400 Horizontal : 6400 x 1440
 FUJIFILM X-T10 Spec Sheet Model name FUJIFILM X-T10 Number of effective pixels 16.3 million pixels Image sensor 23.6mm x 15.6mm (APS-C) X-Trans CMOS II with primary color filter Total number of pixels:
ET-413 2MP USB PEN MICROSCOPE
 ET-413 2MP USB PEN MICROSCOPE USER S MANUAL INTRODUCTION FUNCTIONS AND APPLICATIONS The ET-413 2 Mega-Pixel USB PEN MICROSCOPE is a new electronic product for micro observations. It is a tubular imaging
Please read and retain these instructions for future reference. PLEASE SAVE THESE INSTRUCTIONS FOR FUTURE REFERENCE.
 PLEASE SAVE THESE INSTRUCTIONS FOR FUTURE REFERENCE. Package contents: Film & photo scanner USB cable Negative film holder Positive holder 4 in 1 photo tray (with brackets) OCR CD (not pictured) AC/DC
UCE-DSO210 DIGITAL OSCILLOSCOPE USER MANUAL. FATIH GENÇ UCORE ELECTRONICS REV1
 UCE-DSO210 DIGITAL OSCILLOSCOPE USER MANUAL FATIH GENÇ UCORE ELECTRONICS www.ucore-electronics.com 2017 - REV1 Contents 1. Introduction... 2 2. Turn on or turn off... 3 3. Oscilloscope Mode... 3 3.1. Display
USER MANUAL. ScanFlex AUTOMATED SCANNING DEVICE SCANFLEX Rev 5.0
 USER MANUAL ScanFlex AUTOMATED SCANNING DEVICE 05-12-17 SCANFLEX 3.1.4 Rev 5.0 Culturing Cells in a Mechanically Active Environment Flexcell International Corporation 2730 Tucker Street, Suite 200 Burlington,
User s Guide. USB Microscope. Version 1.2A
 User s Guide USB Microscope Version 1.2A Contents 1. Product Introduction... 2 1.1 Packing Contents:... 2 1.2 Start to use... 2 1.3 Buttons on microscope... 4 1.4 Microscope focus... 5 2. Printed Notice...
WiFi Photo & Document Scanner User Guide
 WiFi Photo & Document Scanner User Guide CONTENTS Safety precautions What s in the box Product diagram Operation / charge the battery Download and install iscan Air App FREE Connect to a WiFi network Scan
Digital Director Troubleshooting
 Digital Director Troubleshooting Please find below the most common FAQs to assist in the understanding and use of the product. For details related to each specific camera model, refer to the Compatibility
Installation & User Manual Micro-Image Capture 7
 Installation & User Manual Micro-Image Capture 7 Ver1.2016 Product Warranty Quality Assurance Every Micro-Image Capture system passes quality assurance tests including focus, resolution quality and mechanical
Chapter5 Camera Settings and Other Functions
 Chapter5 Camera Settings and Other Functions Changing Camera Settings.. 106 Adding or Deleting a Folder... 106 Keep Settings... 108 Changing the LCD Confirmation Time... 109 Auto Power Off Setting... 110
Introduction to: Microsoft Photo Story 3. for Windows. Brevard County, Florida
 Introduction to: Microsoft Photo Story 3 for Windows Brevard County, Florida 1 Table of Contents Introduction... 3 Downloading Photo Story 3... 4 Adding Pictures to Your PC... 7 Launching Photo Story 3...
Fujifilm FinePix T550
 Fujifilm FinePix T550 Features 1.Wide-angle 24mm ** &12x Optical Zoom Lens in Slim Body Lens-shift image stabilization reduces the blur that tends to occur when the camera is zoomed in. Fujifilm's proprietary
Ideal for display mura (nonuniformity) evaluation and inspection on smartphones and tablet PCs.
 evaluation and inspection on smartphones and tablet PCs.") 2D Color Analyzer Ideal for display mura (nonuniformity) evaluation and inspection on smartphones and tablet PCs. Accurately and easily measures the distribution of luminance and chromaticity. The included
2D Color Analyzer Ideal for display mura (nonuniformity) evaluation and inspection on smartphones and tablet PCs. Accurately and easily measures the distribution of luminance and chromaticity. The included
1 ImageBrowser Software User Guide 5.1
 1 ImageBrowser Software User Guide 5.1 Table of Contents (1/2) Chapter 1 What is ImageBrowser? Chapter 2 What Can ImageBrowser Do?... 5 Guide to the ImageBrowser Windows... 6 Downloading and Printing Images
UCE-DSO212 DIGITAL OSCILLOSCOPE USER MANUAL. UCORE ELECTRONICS
 UCE-DSO212 DIGITAL OSCILLOSCOPE USER MANUAL UCORE ELECTRONICS www.ucore-electronics.com 2017 Contents 1. Introduction... 2 2. Turn on or turn off... 3 3. Oscilloscope Mode... 4 3.1. Display Description...
Printer Software Guide
 Printer Software Guide (For Canon CP Printer Solution Disk Version 4) Macintosh 1 Contents Safety Precautions...3 Read This First...4 About the Manuals...4 Printing Flow Diagram...5 Printing...7 Starting
SKF TKTI. Thermal Camera Software. Instructions for use
 SKF TKTI Thermal Camera Software Instructions for use Table of contents 1. Introduction...4 1.1 Installing and starting the Software... 5 2. Usage Notes...6 3. Image Properties...7 3.1 Loading images
Nikon Firmware Update for Coolpix 950 Version 1.3
 Nikon Firmware Update for Coolpix 950 Version 1.3 Notes: 1. It is most important that you follow the supplied directions; failure to follow all of the steps may result in your camera being disabled. 2.
Scanner Parts. Scanner Specifications. General. Mechanical. Epson Perfection V200 Photo. P Power/ ] Start button Status light. { Copy button.
![Scanner Parts. Scanner Specifications. General. Mechanical. Epson Perfection V200 Photo. P Power/ ] Start button Status light. { Copy button.](/thumbs/73/68379766.jpg "Scanner Parts. Scanner Specifications. General. Mechanical. Epson Perfection V200 Photo. P Power/ ] Start button Status light. { Copy button.") Scanner Parts { Copy button Scan to E-mail button a b P Power/ ] Start button Status light c e d a Scan to PDF button Film holder Scanner Specifications General Scanner type Flatbed color Photoelectric
Scanner Parts { Copy button Scan to E-mail button a b P Power/ ] Start button Status light c e d a Scan to PDF button Film holder Scanner Specifications General Scanner type Flatbed color Photoelectric
Picture Style Editor Ver Instruction Manual
 ENGLISH Picture Style File Creating Software Picture Style Editor Ver. 1.18 Instruction Manual Content of this Instruction Manual PSE stands for Picture Style Editor. In this manual, the windows used in
EPSON P R O D U C T I N F O R M A T I O N G U I D E
 EPSON P R O D U C T I N F O R M A T I O N G U I D E UPDATE FOR BUSINESS SYSTEM PRODUCTS 7/09 This package provides a scanner product section to be added to the Epson Business System Product Information
Welcome to Polaroid PhotoMAX FUN!
 Contents Welcome to Polaroid PhotoMAX FUN!...................... 1 The Polaroid PhotoMAX FUN! Digital 320 Creative Kit......... 2 Kit components......................................... 3 Polaroid Digital
reference guide reference guide reference guide
 hp photosmart 240 series reference guide reference guide reference guide contents 1 welcome..................................... 1 find more information.............................. 1 what s in the box.................................