Ian Barber Photography
|
|
|
- Marcus Hardy
- 5 years ago
- Views:
Transcription
1 1
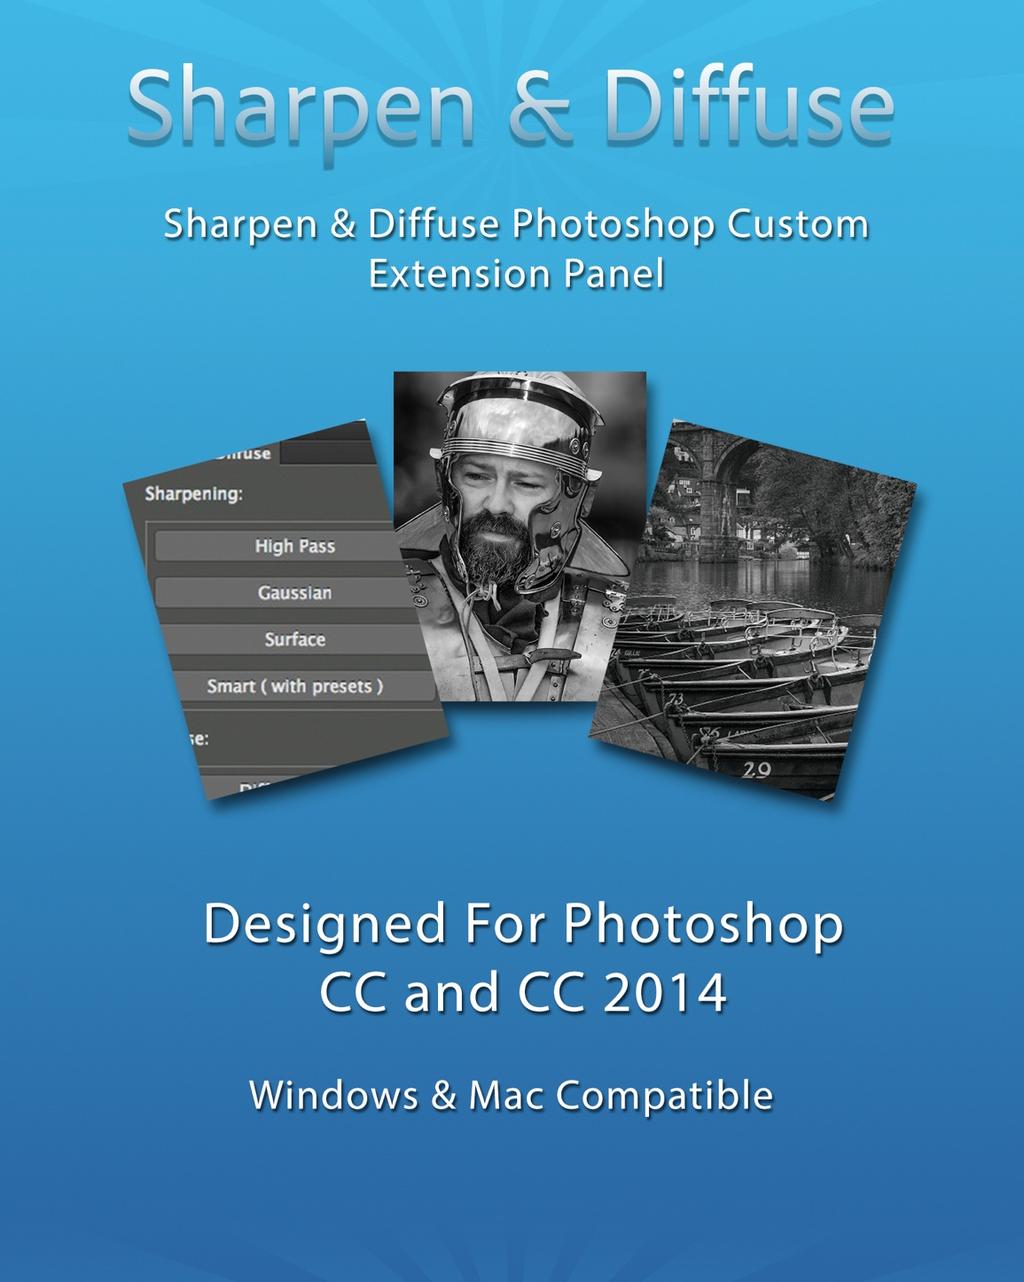
2 Ian Barber Photography Sharpen & Diffuse Photoshop Extension Panel June 2014 By Ian Barber 2
3 Ian Barber Photography Introduction The Sharpening and Diffuse Photoshop panel gives you easy access to various sharpening and diffusion options all from one convenient place. The panel is fully compatible with both Windows and Mac versions of Photoshop CC and Photoshop CC
4 Sharpening The panel contains four separate sharpening options which are: High Pass Gaussian Surface Smart (with presets) High Pass The High Pass retains edge details in the specified radius where sharp colour transitions occur and suppresses the rest of the image. (A radius of 0.1 pixel keeps only edge pixels.) The filter removes low-frequency detail from an image. You adjust the radius to suite your creative vision but be careful not to push this value to high as you run the risk of introducing artefacts like halos around the edges. By default, the panel sets the blending layer to Linear Light but you can experiment with other blending modes. Gaussian The Gaussian sharpen option actually uses the Gaussian blur to produce a sharpened image. To make it as simple as possible to understand it woks like this. Original Image - Blur = Outline Outline + Original Image = Final Result You adjust the radius to suite your creative vision but be careful not to push this value to high as you run the risk of introducing artefacts like halos around the edges. By default, the panel sets the blending layer to Linear Light but you can experiment with other blending modes. 4

5 Surface Blur The Surface Blur option blurs an image while preserving edges. The Radius option specifies the size of the area sampled for the blur. The Threshold option controls how much the tonal values of neighbouring pixels must diverge from the centre pixel value before being part of the blur. You adjust the radius and threshold to suite your creative vision but be careful not to push this value to high as you run the risk of introducing artefacts like halos around the edges. By default, the panel sets the blending layer to Linear Light but you can experiment with other blending modes. Smart (with presets) Smart Sharpen Sharpens an image by letting you set the sharpening algorithm or control the amount of sharpening that occurs in shadows and highlights. This is the recommended way to sharpen if you don t have a particular sharpening filter in mind. In Photoshop CC, the enhanced Smart Sharpen filter allows you to produce highquality results through adaptive sharpening technology that reduces noise and halo effects. I have included 4 presets which can be used as a starting point and you can then tweak the values to meet your own taste. 5

6 Sharpening Tips All digital images can benefit from sort of sharpening but one of the biggest issues I often see is the over use of sharpening in photographs. Applying a small amount of sharpening several times through your workflow can sometimes be more beneficial than applying a large amount at the end. Pre Sharpening Unless you have disabled the function in your RAW converter such as Lightroom or Photoshop, a small amount of sharpening is applied to the image as it passes through the RAW conversion stage. Camera RAW and Lightroom apply a value of 25 by default. Landscapes When processing an image of a landscape which may contain elements in the distance such as trees, hills, mountains etc there is nothing worse when images appear to have been sharpened with the same amount all the way from the foreground to the distance. Naturally, the further away the elements in a scene are, the less sharp they appear to our eyes so try to remember this when faced with a scene which have elements in the distance. Graduated Filter One way to deal with this in Photoshop is to apply the sharpening effect to the whole image, then add a layer mask and use a graduated adjustment layer (black to transparent) to reduce the effect from the distance to the horizon. 6

7 Sky and Clouds I personally never sharpen sky or clouds simply because I think it looks un-natural. When I look at clouds with my own eyes, I always see softness and they never have crisp defined edges so why add that in the image. If you want to enhance the look of clouds especially when working in black and white, work on delicate contrast enhancements by brightening the whites and reducing the darks (dodging and burning). You can use the Dodge and Burn option for this which is in the Extras part of the Panel. 7
8 Output Sharpening Sharpening for output is one of the most important aspects of sharpening in my opinion. An image which has been sharpened to look good on screen in not necessarily going to look good in print. My typical workflow for dealing with this is. Work Non destructively I always work in layers in Photoshop and name them as I create them to help me remember what they do and why I created them Creative Sharpening Throughout the editing, I will usually apply a small amount of creative sharpening which is where I may make a selection and then apply some sharpening to that selection. Output Sharpening When I talk about output sharpening, I am referring to how the final image will be viewed, this is typically going to be either on screen or in print. Screen devices comes in all different sizes and resolutions, one viewer maybe looking at your image on a mobile phone and another viewer could be using the latest ipad retina display or even an imac 27 inch monitor. We have to always have that in mind when we are applying sharpening to an image. When I have completed the edit, I will then take all those layers and put them into a group and name that group Master Edit. At this stage, this file now becomes my Master file. I leave all the layers intact because it allows me to come back at anytime in the future and tweak any of the adjustments should I choose to. 8

9 Master File - All Layers Grouped What I do next is duplicate the file by going to Image - Duplicate and usually add the suffix - For Web or For Print to the duplicated name. 9

10 I then flatten all the layers on this duplicated version and then resize the image. For general web viewing I usually resize to 1000px on the longest edge. After the image has been resized, I then apply the final output sharpening to it. I then save it as a jpg file and delete the duplicated version. I do the same process for Print and one difference is that when I am resizing the image, I set the dpi value to 360dpi. The reason why I use 360dpi is because my current Epson Printer (R-3880) has a native resolution of 360dpi. Unless I think I will be making a lot of prints, I will again delete the duplicated version after the print has been made. This may seem like a long winded process but what I am doing is always preserving the Master file which allows me to maintain that nondestructive workflow which I like. One Size Doesn t Fit All Unfortunately with sharpening techniques, it s not as simple as one size fits all especially when your dealing with print as different paper types are going to deal with the amount of sharpening in different ways. Experiment with different methods and strengths. 10
11 Diffuse The panel also has a diffuse section which gives you three different strengths including Diffuse - Low, Diffuse - Medium and Diffuse - High. The diffuse option is used to to effectively render certain parts of the image softer than the rest. This can be used creatively by drawing the viewers eye to a certain part of the image by removing the emphasis from other areas. Typical Workflow Just like most things in Photoshop there are numerous ways to achieve the effect your looking for so just as we mentioned with sharpening, unfortunately there is no one size fits all approach which we can use. I will demonstrate at least two ways in which you can use the diffuse options in your image. Method 1 - Global Diffuse Choose from one of the three available strengths and press the button. This will create a separate Diffuse layer and automatically apply a white layer mask. The white layer mask reveals the overall effect. Set your foreground colour to Black, take a soft brush and start to paint away the areas where you do not want the effect to show. Adjust both the Flow and Opacity rate of the brush to take further control. Tip: If you are wanting to diffuse the background, rather than paint with a brush you can apply a black to transparent gradient on the mask running from top to about the horizon line or anyway you choose. 11

12 Low Diffuse with Gradient applied to the mask Method 2 - Selective Diffuse Performing a selective Diffuse can be done by making a selection of the area which you want to diffuse with any of the selection tools available in Photoshop and then applying your chosen strength. Tip: When making a selection, adding some feathering to that selection will give a smoother transition towards the edge of the selection. Low Diffuse with Selection (200px feather) 12

13 Examples of Different strengths. Diffuse - Low Diffuse - Medium Diffuse - High 13

14 Ian Barber Photography Conclusion The Sharpen and Diffuse panel is fully compatible with both Windows and Mac which are capable of running Photoshop CC and Photoshop CC Sharpening can be a mine field and although there are literally dozens of ways to do it in Photoshop, the options on this panel offer some of the more common ones and will give you good ground for a starting point. If I was asked to emphasise anything from image sharpening it would be to keep it under control, don t over sharpen elements in the distance, don t sharpen skies, think about your output sharpening and remember.. A little goes along way. 14
15 References I hope you enjoy using the Sharpen and Diffuse Panel and if you have any questions, please contact me via the contact for on the Digital Black and White Website. Digital Black and White Website: Ian Barber Photography Website: YouTube Videos: 15
Central Photography [INSTAGRAM EFFECTS]
![Central Photography [INSTAGRAM EFFECTS]](/thumbs/96/129260346.jpg "Central Photography [INSTAGRAM EFFECTS]") 1 1. Open Photoshop. 2. Go to File/New (Ctrl+N). 3. Name your file. 4. Set the Width to 11 inches. 2 5. Set the Height to 8.5 inches. 6. Set your Resolution to 200 pixels/inch. 7. Set your Background Contents
1 1. Open Photoshop. 2. Go to File/New (Ctrl+N). 3. Name your file. 4. Set the Width to 11 inches. 2 5. Set the Height to 8.5 inches. 6. Set your Resolution to 200 pixels/inch. 7. Set your Background Contents
in association with Getting to Grips with Printing
 in association with Getting to Grips with Printing Managing Colour Custom profiles - why you should use them Raw files are not colour managed Should I set my camera to srgb or Adobe RGB? What happens
PHOTOTUTOR.com.au Share the Knowledge
 THE DIGITAL WORKFLOW BY MICHAEL SMYTH This tutorial is designed to outline the necessary steps from digital capture, image editing and creating a final print. FIRSTLY, BE AWARE OF WHAT CAN AND CAN T BE
The Arcane & Mystical Knowledge
 The Arcane & Mystical Knowledge Sharpening: What is it? Enhancement of local contrast that produces the appearance of greater definition and clarity (accutance). Where areas of different luminance values
Transforming Your Photographs with Photoshop
 Transforming Your Photographs with Photoshop Jesús Ramirez PhotoshopTrainingChannel.com Contents Introduction 2 About the Instructor 2 Lab Project Files 2 Lab Objectives 2 Lab Description 2 Removing Distracting
SHARPENING: The Arcane & Mystical Knowledge
 SHARPENING: The Arcane & Mystical Knowledge Sharpening: What is it? Why do it? Enhancement of local contrast that produces the appearance of greater definition and clarity (accutance). Where areas of different
loss of detail in highlights and shadows (noise reduction)
") Introduction Have you printed your images and felt they lacked a little extra punch? Have you worked on your images only to find that you have created strange little halos and lines, but you re not sure
Introduction Have you printed your images and felt they lacked a little extra punch? Have you worked on your images only to find that you have created strange little halos and lines, but you re not sure
Pacific New Media David Ulrich
 Pacific New Media David Ulrich pacimage@maui.net www.creativeguide.com 808.721.2862 Digital Imaging Workflow in Adobe Photoshop All color and tonal correction editing should be done in a non-destructive
Pacific New Media David Ulrich
 Pacific New Media David Ulrich pacimage@maui.net www.creativeguide.com 808.721.2862 Sharpening and Noise Reduction in Adobe Photoshop One of the limitations of digital capture devices and digital chips
Topaz Labs DeNoise 3 Review By Dennis Goulet. The Problem
 Topaz Labs DeNoise 3 Review By Dennis Goulet The Problem As grain was the nemesis of clean images in film photography, electronic noise in digitally captured images can be a problem in making photographs
Beauty Panel for Photoshop.
 Beauty Panel for Photoshop... About us STÖHR+SAUER has developed a tools panel for beauty retouching in Photoshop for all fans of people photography and provides this panel free of charge "as is" (without
Contents: Bibliography:
 ( 2 ) Contents: Sizing an Image...4 RAW File Conversion...4 Selection Tools...5 Colour Range...5 Quick Mask...6 Extract Tool...7 Adding a Layer Style...7 Adjustment Layer...8 Adding a gradient to an Adjustment
Using Adobe Photoshop
 Using Adobe Photoshop 6 One of the most useful features of applications like Photoshop is the ability to work with layers. allow you to have several pieces of images in the same file, which can be arranged
 http://blog.spoongraphics.co.uk/tutorials/how-to-intensify-your-landscape-photos-in-photoshop This post was originally published in 2011 THE TIPS AND TECHNIQUES EXPLAINED MAY BE OUTDATED. The post-processing
How to Create Fake Shadows
 TIP SHEET #8 How to Create Fake Shadows As well as the colour, it s the shadows in a picture that help to give it mood and atmosphere so in this tutorial I want to show you how you can add in extra shadows.
Maine Day in May. 54 Chapter 2: Painterly Techniques for Non-Painters
 Maine Day in May 54 Chapter 2: Painterly Techniques for Non-Painters Simplifying a Photograph to Achieve a Hand-Rendered Result Excerpted from Beyond Digital Photography: Transforming Photos into Fine
Glowing Surreal Planet Design. Final Image Preview
 Glowing Surreal Planet Design Final Image Preview. Step 1 First, go to the S:\ drive and locate the folder called Glowing Planet Design. Copy the City Skyline file and paste it in your Glowing Planet Design
HDR with Smart Objects
 HDR with Smart Objects March 2006 HDR with Smart Objects The article could be easily called Shoot once, Use it twice, because this article explains how to use a single RAW file to get most data out of
Sharpening is an essential final step before output. But sometimes, you don t want to
 Sharpening is an essential final step before output. But sometimes, you don t want to sharpen your entire image equally. Skin tones, clouds, noisy areas - it s best to apply less sharpening to these areas,
Creating a Contrast Mask. Text and images Copyright (C) 2002 Eric R. Jeschke and may not be used without permission of the author.
 2002 Eric R. Jeschke and may not be used without permission of the author.") Creating a Contrast Mask Text and images Copyright (C) 2002 Eric R. Jeschke and may not be used without permission of the author. Intention In this tutorial I'll show you how to do create a contrast mask
Creating a Contrast Mask Text and images Copyright (C) 2002 Eric R. Jeschke and may not be used without permission of the author. Intention In this tutorial I'll show you how to do create a contrast mask
Mullingar Camera Club Basic introduction to Digital Printing using Photoshop CC.
 Mullingar Camera Club Basic introduction to Digital Printing using Photoshop CC. Table of Contents Course aims: 1 Course presentation notes: 1 Introducing Photoshop: 1 Adjusting the Brightness or Contrast
Combine Black-and-White and Color
 Combine Black-and-White and Color Contributor: Seán Duggan n Specialty: Fine Art Primary Tool Used: Smart Objects Combining color and black-and-white in the same image is a technique that has been around
MELBOURN & DISTRICT PHOTOGRAPHIC CLUB
 MELBOURN & DISTRICT PHOTOGRAPHIC CLUB REPLACING SKIES (There are several ways to replace the sky from one image into another image). This Guidance shows just one way to do it although depending on the
Learning Photo Retouching techniques the simple way
 Learning Photo Retouching techniques the simple way Table of Contents About the Workshop... i Workshop Objectives... i Getting Started... 1 Photoshop Workspace... 1 Setting up the Preferences... 2 Retouching
Design a Halloween Pumpkin Wallpaper in Photoshop
 Design a Halloween Pumpkin Wallpaper in Photoshop By: Alvaro Guzman Halloween is near! So let's take a pumpkin image, carve it up, and light it for this coming holiday. You'll learn how to get this nice
Painting Special Effects on Photographs
 TUTORIAL 7 Painting Special Effects on Photographs In this tutorial you will learn how to transform a photo into a striking color composition with paintbrushes, masks, blending modes, color, and paper
2Click the Symbol XX
 Adjustment Layers, Channels and Layer Masks 2Click the Symbol XX ( Adjustment Layer ) and choose Channel Mixer. 3Check the box Monochrome and choose the values R=30, G=60, B=10. Thus you ll get a grayscale
Black and White using Photoshop
 Topics to be covered: Methods for B&W conversion Improving the image Toning Printer color management Black and White using Photoshop Various ways to get to B&W Adobe Raw Converter (ACR) in from Bridge
Extreme Makeovers: Photoshop Retouching Techniques
 Extreme Makeovers: Table of Contents About the Workshop... 1 Workshop Objectives... 1 Getting Started... 1 Photoshop Workspace... 1 Retouching Tools... 2 General Steps... 2 Resolution and image size...
Module All You Ever Need to Know About The Displace Filter
 Module 02-05 All You Ever Need to Know About The Displace Filter 02-05 All You Ever Need to Know About The Displace Filter [00:00:00] In this video, we're going to talk about the Displace Filter in Photoshop.
Advanced Photography. Topic 3 - Photoshop Filters. Learning Outcomes
 Topic 3 - Photoshop Filters Learning Outcomes In this lesson, we're going to take a look at some techniques that make use of some of the more practical filters. We are also going to learn how to convert
Add Rays Of Sunlight To A Photo With Photoshop
 Add Rays Of Sunlight To A Photo With Photoshop Written by Steve Patterson. In this photo effects tutorial, we'll learn how to easily add rays of sunlight to an image, a great way to make an already beautiful
Diploma in Photoshop
 Diploma in Photoshop Photoshop Selection Tools Selection Tools allow us to isolate areas of our image and apply adjustments to these selected areas only. A selection simply isolates one or more parts of
Local Adjustment Tools
 PHOTOGRAPHY: TRICKS OF THE TRADE Lightroom CC Local Adjustment Tools Loren Nelson www.naturalphotographyjackson.com Goals for Tricks of the Trade NOT show you the way you should work Demonstrate and discuss
An Introduction to Layers, Masks and Channels in Photoshop
 An Introduction to Layers, Masks and Channels in Photoshop Roy Killen, GMAPS, EFIAP, GMPSA (c) 2017 Roy Killen Layers, Masks and Channels Page 1 Two approaches to image editing When images are edited in
TV Aquarium. Create a new document. 8.5 x 11, 300 dpi. Save as TV Aquarium Your Name. Create TV shape. Use Pen
 Create a new document. 8.5 x 11, 300 dpi. Save as TV Aquarium Your Name. Create TV shape. Use Pen Tool, Convert Point Tool and Direct Selection Tool. We need side shapes to create patches of light and
Basic Digital Dark Room
 Basic Digital Dark Room When I took a good photograph I almost always trying to improve it using Photoshop: exposure, depth of field, black and white, duotones, blur and sharpness or even replace washed
Photoshop CC Editing Images
 Photoshop CC Editing Images Rotate a Canvas A canvas can be rotated 90 degrees Clockwise, 90 degrees Counter Clockwise, or rotated 180 degrees. Navigate to the Image Menu, select Image Rotation and then
Doing More with Photoshop
 Doing More with Photoshop Topic 7 Layer Masks Learning Outcomes In this lesson, we will take a look at layer masks in Photoshop. By the end of this lesson, you will have a good understanding of what layer
photoshop filters kelly ludwig assistant professor
 photoshop filters kelly ludwig assistant professor sharpening images reducing noise correcting distortions in images practical filters There are over 100 filters that ship with Photoshop and they're all
How to Create a Landscape Wallpaper for your Desktop
 How to Create a Landscape Wallpaper for your Desktop Why not create a vector landscape wallpaper? In this simple tutorial, you will learn how to create an eye-appealing wallpaper quickly and effectively.
Photoshop Textures Assignment # 2
 Photoshop Textures Assignment # 2 Objective: Use Photoshop to create unique texture from scratch that can be applied to backgrounds, objects, tetx and 3D objects to create new and exciting compositions.
By Washan Najat Nawi
 By Washan Najat Nawi how to get started how to use the interface how to modify images with basic editing skills Adobe Photoshop: is a popular image-editing software. Two general usage of Photoshop Creating
Colorful Glowing Mask Photoshop Tutorial Photoshop TUTfactory The best Photoshop tutorials in one place
 Step 1: To start, create new canvas sized at 994 1312 pixels, and fill it with black. Next, create a new layer, and go to Filter->Render->Clouds. Duplicate this layer, and then merge the two layers. Set
IMAGE CORRECTION. You can find this and more information with video tutorials at
 IMAGE CORRECTION You can find this and more information with video tutorials at http://www.adobe.com/support/photoshop/ P H O T O S H O P T O O L S CLONE STAMP TOOL The Clone Stamp tool paints one part
How to Resize And Sharpen A Digital Image With PhotoShop CC
 How to Resize And Sharpen A Digital Image With PhotoShop CC I will assume that you have done all your editing. You have saved your file as a master copy. I save it as a PSD with all the layers so that
Thank you for spending your evening with me! Truly enjoyed chatting and sharing image blending.. :)
") easymail Webmail :: Texture Blending Notes 1 of 2 9/4/2016 8:38 PM Subject From To Date Texture Blending Notes Denise Silva Denise Silva 2016-09-02 8:10 am Texture
easymail Webmail :: Texture Blending Notes 1 of 2 9/4/2016 8:38 PM Subject From To Date Texture Blending Notes Denise Silva Denise Silva 2016-09-02 8:10 am Texture
From Advanced pixel blending
 1 From www.studio.adobe.com Blending pixel layers in Adobe Photoshop CS2 lets you do things that you simply can t do by adjusting a single image. One situation where we blend pixel layers is when we want
HISTOGRAMS. These notes are a basic introduction to using histograms to guide image capture and image processing.
 HISTOGRAMS Roy Killen, APSEM, EFIAP, GMPSA These notes are a basic introduction to using histograms to guide image capture and image processing. What are histograms? Histograms are graphs that show what
Course Syllabus. Course Title. Who should attend? Course Description. Photoshop ( Level 2 (
 Course Title Photoshop ( Level 2 ( Course Description Adobe Photoshop CC (Creative Clouds) is the world's most powerful graphic design (bitmap-based) program for editing, manipulating, compositing, enhancing
Essential Post Processing
 Essential Post Processing By Ian Cran Preamble Getting to grips with Photoshop and Lightroom could be described in three stages. One is always learning and going through stages but there are three main
The original image. The final rainbow effect.
 ADD A realistic rainbow to a photo In this Photoshop photo effects tutorial, we re going to learn how to easily add a rainbow, even a double rainbow, to a photo. Of course, as with most photo effects,
IMAGE SHARPENING. Dr Roy Killen EFIAP APSEM GMPSA (C) ROY KILLEN SHARPENING!1
 ROY KILLEN SHARPENING!1") IMAGE SHARPENING Dr Roy Killen EFIAP APSEM GMPSA 2017 (C) ROY KILLEN SHARPENING!1 IMAGE SHARPENING WHAT IS A SHARP IMAGE? 3 GETTING IMAGES SHARP IN CAMERA 3 GENERAL SHARPENING PRINCIPLES 7 SHARPENING WITH
IMAGE SHARPENING Dr Roy Killen EFIAP APSEM GMPSA 2017 (C) ROY KILLEN SHARPENING!1 IMAGE SHARPENING WHAT IS A SHARP IMAGE? 3 GETTING IMAGES SHARP IN CAMERA 3 GENERAL SHARPENING PRINCIPLES 7 SHARPENING WITH
Luminosity Masks Program Notes Gateway Camera Club January 2017
 Luminosity Masks Program Notes Gateway Camera Club January 2017 What are Luminosity Masks : Luminosity Masks are a way of making advanced selections in Photoshop Selections are based on Luminosity - how
ADDING A RAINBOW TO A PHOTOGRAPH
 ADDING A RAINBOW TO A PHOTOGRAPH This assignment will cover how to add a simple rainbow (or if you want to go crazy, a double rainbow) to any photograph. This will give us some great work with gradients,
A quick note: We hope that you will find something from the Tips and Tricks that will add a little pizazz to your yearbook pages!
 A quick note: The following pages are tips and tricks for Basic Photoshop users. You may notice that some instructions indicate that non-awpc fonts were used, and that some colors were created using the
PHOTOSHOP TUTORIAL: DIGITAL DARKROOM TECHNIQUES
 PHOTOSHOP TUTORIAL: DIGITAL DARKROOM TECHNIQUES STEP BY STEP TRAINING Learn by doing step by step exercises. Includes downloadable class files that work on Mac & PC. EDITION 1 Copyright Info Published
Teton Photography Group
 Overview general post-processing (editing) workflow for serious photographers Focus on processes more than software Examples using Adobe Lightroom and Photoshop Teton Photography Group January 2016 Emphasis
The original image. Let s get started! The final rainbow effect. The photo sits on the Background layer in the Layers panel.
 Add A Realistic Rainbow To A Photo In this Photoshop photo effects tutorial, we ll learn how to easily add a rainbow, and even a double rainbow, to a photo! As we ll see, Photoshop ships with a ready-made
PASS4TEST. IT Certification Guaranteed, The Easy Way! We offer free update service for one year
 PASS4TEST IT Certification Guaranteed, The Easy Way! \ We offer free update service for one year Exam : 9A0-125 Title : Adobe Photoshop Lightroom 2 ACE Exam Vendors : Adobe Version : DEMO Get Latest &
Unit 7 : Image Painting, Editing and Layers
 Unit 7 : Image Painting, Editing and Layers Introduction This Unit describes about various painting tools; such as selection, cropping and measuring tools, retouching, drawing and type tools, Navigation
Kent Messamore 3/6/2010
 Post Processing Kent Messamore 3/6/2010 What we will cover Post Processing Photoshop, Lightroom, Elements, and others JPEG or RAW Photoshop Elements Workflow Organization, Create, share Photoshop Elements
Adobe PhotoShop Elements
 Adobe PhotoShop Elements North Lake College DCCCD 2006 1 When you open Adobe PhotoShop Elements, you will see this welcome screen. You can open any of the specialized areas. We will talk about 4 of them:
Challenge Image: Blur the Background
 Challenge Image: Blur the Background Challenge Image: Blur the Background In this lesson, we re going to work on a challenge image that was submitted by a Masters Academy member. The image features a little
Using Adobe Photoshop
 Using Adobe Photoshop 8 In the last section we looked at adjusting colours to improve your image. In this section we ll look at various ways of touching up your images to fix problems with the images or
VECTOR PAINTINGS - User Guide VECTOR PAINTINGS. For Adobe Photoshop Elements 2019, 2018, 15, 14, 13, 12, 11. User Guide
 VECTOR PAINTINGS For Adobe Photoshop Elements 2019, 2018, 15, 14, 13, 12, 11 User Guide CONTENTS 1. THE BASICS...1 1.1. About the effects...1 1.2. How the actions are organized...1 1.3. Downloading and
Advanced Stacker PLUS v14
 Advanced Stacker PLUS v14 An Owners Guide The ADVANCED STACKER+ from StarCircleAcademy is a set of Photoshop actions that allows you to stack star shots into star trails including creative things like
Acknowledgements About this book Other Goodies Included with this Book Resources for Nikon Photographers. Part I: Capture NX2 2. Why Capture NX2?
 The Photographer s Guide to Capture NX2 Contents Acknowledgements About this book Other Goodies Included with this Book Resources for Nikon Photographers x xi xii xiii Part I: Capture NX2 2 Why Capture
Post-Processing/Editing Page 1
 All images need a little something to help re-create or re-imagine what you think a particular image should look like. Whether it is adding a digital gradient to a sky to help saturate and deepen the colours
Contents Foreword 1 Feedback 2 Legal information 3 Getting started 4 Installing the correct Capture One version 4 Changing the version type 5 Getting
 Contents Foreword 1 Feedback 2 Legal information 3 Getting started 4 Installing the correct Capture One version 4 Changing the version type 5 Getting to know Capture One Pro 6 The Grand Overview 6 The
Printing on the Epson You should save a second.psd or tiff version of your image for printing
 Printing on the Epson 9600 Preparing your image to print You should save a second.psd or tiff version of your image for printing Resizing To observe the image size and resolution of an existing file, you
copyright B. Moose Peterson / WRP 2012
 Where does the viewer s eye go first in your photograph? More importantly, where do YOU want the viewer s eye to look first in your print? These are very important questions and the answers directly affect
Learning Adobe Photoshop CS6
 Module 1 Contents Chapter 1: Introduction to Photoshop Loading Photoshop...1-1 The Tools Panel...1-2 Using the Tools...1-3 The Panel Group...1-5 Layers...1-6 Loading a Sample File...1-6 Looking at the
Practice: Using Layer Masks
 DIGITAL IMAGING I UNIT 4 1 Practice: Using Layer Masks INTRODUCTION: Layer Masks are a way to hide elements on a layer without erasing them. In that manner, the hidden elements can be re-exposed without
Exploring Photoshop Tutorial
 Exploring Photoshop Tutorial Objective: In this tutorial we will create a poster composed of three distinct elements: a Bokeh, an image and title text. The Bokeh is an effect which is sometimes seen in
A Bunch of Buzzwords? Non-destructive, Selective, Non-linear and Nonmodal Editing of Photographs
 A Bunch of Buzzwords? Non-destructive, Selective, Non-linear and Nonmodal Editing of Photographs by Uwe Steinmueller uwe@outbackphoto.com Global and Local Editing The Editing Workflow Program The need
Making Digital POSiTiVES & Negatives for Contact Printing Sandra C. Davis
 Making Digital POSiTiVES & Negatives for Contact Printing 2005-13 Sandra C. Davis Suggested reading: Making Digital Negatives for Contact Printing by Dan Burkholder, Twin Palms Press, and The Inkjet Negative
Selective Editing in Camera Raw 5
 Selective Editing in Camera Raw 5 The editing tools that you saw in the last chapter are global editing tools. That is, they affect all parts of the image. So, when you choose to, for example, brighten
Selective Edits in Camera Raw
 Complete Digital Photography Seventh Edition Selective Edits in Camera Raw by Ben Long If you ve read Chapter 18: Masking, you ve already seen how Camera Raw lets you edit your raw files. What we haven
Texts and Resources: Assessments: Freefoto.com Group Photo Projects
 Effective Date: 2009-10 Name of Course: Digital Photography Grade Level: 9-12 Department: Industrial Technology and Engineering Length of Course: 30 cycles Instructional Time: 180 days Period Per Cycle:
Using Adobe Photoshop
 Using Adobe Photoshop 8 In the last section we looked at adjusting colours to improve your image. In this section we ll look at various ways of touching up your images to fix problems with the images or
Page 1 of 9. Blending Multiple Exposures The Manual Way to HDR (High Dynamic Range) TJ Avery 7-Feb-2008
 TJ Avery 7-Feb-2008") Page 1 of 9 Blending Multiple Exposures The Manual Way to HDR (High Dynamic Range) TJ Avery 7-Feb-2008 The Problem Many natural landscape photographs will contain a range of light that exceeds what can
Page 1 of 9 Blending Multiple Exposures The Manual Way to HDR (High Dynamic Range) TJ Avery 7-Feb-2008 The Problem Many natural landscape photographs will contain a range of light that exceeds what can
Color, Resolution, & Other Image Essentials
 www.gilbertconsulting.com blog.gilbertconsulting.com kgilbert@gilbertconsulting.com Twitter: @gilbertconsult lynda.com/keithgilbert Every Photoshop image consists of three specific attributes: image resolution,
Star Diffusion Tutorial
 Star Diffusion Tutorial Learn how to add a unique dreamy effect to your photos with this Star Diffusion Photoshop tutorial. This Photoshop effect creates diffusion in the shape of a four-point star and
People In Spaces A Workshop on using Photoshop to introduce Entourage Elements into existing work.
 People In Spaces A Workshop on using Photoshop to introduce Entourage Elements into existing work. Peter M. Gruhn peter.gruhn@the-bac.edu Sponsored by Atelier and the Learning Resource Center 1 Layers
LANDSCAPE PHOTOGRAPHY TECHNIQUES, COMPOSITION, AND PROCESSING
 LANDSCAPE PHOTOGRAPHY TECHNIQUES, COMPOSITION, AND PROCESSING Tom Price LANDSCAPE PHOTOGRAPHY TIPS AND TRICKS Wide angle lens desirable 16-18 mm good focal length for APC-C sensor Telephoto also produce
SHAW ACADEMY NOTES. Ultimate Photography Program
 SHAW ACADEMY NOTES Ultimate Photography Program What is a Raw file? RAW is simply a file type, like a JPEG. But, where a JPEG photo is considered a photograph, a RAW is a digital negative, an image that
PanosFX CARTOONS User guide PANOSFX CARTOONS. Photoshop actions - for PS CC, CS6, CS5, CS4, CS3. User Guide
 PANOSFX CARTOONS Photoshop actions - for PS CC, CS6, CS5, CS4, CS3 User Guide CONTENTS 1. THE BASICS... 1 1.1. About the effects... 1 1.2. How the actions are organized... 1 1.3. Installing the actions
Photoshop: a Beginner s course. by: Charina Ong Centre for Development of Teaching and Learning National University of Singapore
 Photoshop: a Beginner s course by: Charina Ong Centre for Development of Teaching and Learning National University of Singapore Table of Contents About the Workshop... 1 Prerequisites... 1 Workshop Objectives...
Photoshop Blending Modes
 Photoshop Blending Modes https://photoshoptrainingchannel.com/blending-modes-explained/#when-blend-modes-added For those mathematically inclined. https://photoblogstop.com/photoshop/photoshop-blend-modes-
Photoshop CC: Essentials
 Photoshop CC: Essentials Summary Workspace Overview... 2 Exercise Files... 2 Selection Tools... 3 Select All, Deselect, And Reselect... 3 Adding, Subtracting, and Intersecting... 3 Working with Layers...
Using The Nik Collection Plug-ins In Lightroom And Photoshop. Dan Lenardon
 Using The Nik Collection Plug-ins In Lightroom And Photoshop Dan Lenardon What Are We Going To Cover Today? A Brief Overview Of The Nik Collection By Google How To Use Nik From Within Lightroom How To
Adobe Photoshop CC update: May 2013
 Adobe Photoshop CC update: May 2013 Welcome to the latest Adobe Photoshop CC bulletin update. This is provided free to ensure everyone can be kept upto-date with the latest changes that have taken place
Here is a 100% zoom close up. Name in Popsicles
 Here is a 100% zoom close up Name in Popsicles Step 1 Let s start by creating a new Photoshop document. Mine is 2560 1440 pixels. Fill the background with a color of your choice (it s not important at
Realistic Skin Smoothing
 TIP SHEET #7 Realistic Skin Smoothing I think it s fair to say when it comes to retouching techniques, the number of different ways to smooth skin is seemingly endless. From blurring techniques through
Creating Pastel Images and other effects in Photoshop
 Creating Pastel Images and other effects in Photoshop Martin Addison 2015 Creating pastel images Page 1 Martin Addison FRPS Using White Layers in Photoshop 1. Create a new empty Layer 2. Edit> Fill 3.
Adobe Photoshop CC 2018
 Adobe Photoshop CC 2018 By Martin Evening Welcome to the latest Adobe Photoshop CC bulletin update. This is provided free to ensure everyone can be kept up-to-date with the latest changes that have taken
The Camera Club. David Champion January 2011
 The Camera Club B&W Negative Proccesing After Scanning. David Champion January 2011 That s how to scan a negative, now I will explain how to process the image using Photoshop CS5. To achieve a good scan
GRINDHOUSE MOVIE POSTERS
 Follow the instructions below to create a grindhouse style movie poster for your short film. You can also see a detailed video tutorial here: http://www.youtube.com/watch?v=-drhbfvhft0 GOOD LUCK!! CREATING
This exercise shows how the Unsharp Mask in Adobe Photoshop Elements can sometimes repair blurred photographs in Post Production.
 Unsharp Mask This exercise shows how the Unsharp Mask in Adobe Photoshop Elements can sometimes repair blurred photographs in Post Production. Task Take a photograph of something close up but don t have