MADALYNNE X SIMPLICITY
|
|
|
- Rudolph Hall
- 5 years ago
- Views:
Transcription


1 MADALYNNE X SIMPLICITY 8711 UNDERWIRE BRALETTE AND MATCHING UNDERWEAR GUIDE + SEW ALONG
2 TABLE OF CONTENTS 01 ABOUT MADALYNNE INTIMATES INSPIRATION OVERVIEW MORE ABOUT MONOWIRES SUPPLIES NEEDED DETERMINING SIZE AND CHOOSING A MONOWIRE GRADING THE CUTTING SEW ALONG: PART ONE SEW ALONG: PART TWO SEW ALONG: PART THREE SEW ALONG: PART FOUR SEW ALONG: PART FIVE PATTERN ALTERATIONS YOUR MORE MADALYNNE 28


3 01: ABOUT MADALYNNE INTIMATES Madalynne Intimates is the manifestation of Maddie Flanigan s passion for sewing and teaching lingerie. She is the founder and owner, and her budding brand offers ready made bras, bralettes, underwear, and bodysuits, as well as DIY lingerie kits, lingerie sewing patterns, and bra making workshops. Every piece is designed at Madalynne Studios and either assembled in Philadelphia or sewn in Brooklyn; made in the USA being important to the brand. Overall, Madalynne s overarching vision is to provide women with well fitting intimates that support more than just your shape. From a floral lace halter bralette to a cheeky underwear, intimates that lift your personal style. At the same time, intimates worth facebook.com/maddiemadalynne The 8711 pattern comes with instructions, but if you re like me, then you re a visual learner and need pictures. In the sew along portion of this guide, I will walk you through each and every step. My goal is to set you up for success. This guide will also include additional information about monowires, determining your size, sewing lingerie and more. Ready? Let s get started! pinterest.com/mmadalynne


4 02: INSPIRATION Bralettes have undergone a transformation in the past few years. A large B or a small C cup, I only remember my mom wearing an underwired bra. Never a bralette. I also only remember bralettes being in the junior s department, unless it was a sports bra type of bra, in which case it could be in the women s section. In my early 20s, bralettes became a thing. Trendy. Made from colorful lace, super sheer materials and straps the size of spaghetti, bralettes were designed to be pretty, not functional. Most were unstructured, unlined, and downright unsupportive. Their comfort level was appealing though. Women are busy nowadays and want a bra with the ease of a bralette but with the support of underwire. So, bra companies have responded and have beefed up their bralettes to be more supportive. The 8711 is my attempt to offer just that - to combine the ease of a bralette and the support of an underwire bra. It is based on 2 of my favorite me-made styles. The first, Edena, which has an interior frame. It is the red bralette shown on this page. Sewn in October 2016, I still have and wear it daily. That rule about getting rid of your bras every 6 months to a year? Psshhhttt! Didn t follow that! My second favorite me-made is Taryn, which has a continuous monowire. It is the blush pink bralette shown on this page. I combined both styles to create the design for the 8711.

5 03:OVERVIEW The 8711 is an underwire bralette with an interior frame, called a floating bridge, that holds a continuous monowire for support. The monowire combined with bust darts creates a bralette that gives shape and doesn t flatten. The bralette also has a hook and eye closure at center back and adjustable elastic shoulder straps. The underwear is a low rise style with 3 tiered flounces on back. The bralette is available in sizes 32A-42DD and the underwear is available in sizes XS-XL.

6 04:MORE ABOUT MONOWIRES Monowires are as elusive as bra tulle. Seriously, what the heck are they? First, is it one word or two? Are they different than regular underwires? Do they serve a different function or are they just for aesthetic? Do they create a monoboob? Mono wires are drafted from two classic underwires. If you overlap them so that the base of the curves align, you will see that they are related. Monowires are also curved, or 3-dimensional, so that they shapes to the curvature around the body. Refer to top and bottom photos on following page. When you first look at a monowire, it might seem narrow. Here s why. On a classic underwire, there is space in between the underwires for the bridge. On a monowire, the bridge is merged. This however, pushes the breasts closer together. Refer to middle photo on following page. Some say that monowires are only for aesthetic. In my personal experience, they not only provide support and lift, but are very comfortable. They anchor a bra, or in this case, bralette, to the chest wall and don t flatten me out like a pancake. Source: Natasha Estrada, Bra Making Supplies


7 01. MONOWIRE BASED ON CLASSIC UNDERWIRE 02. REGULAR UNDERWIRE. THERE IS A SPACE IN BETWEEN UNDERWIRES FOR BRIDGE 02. ON A MONOWIRE, BRIDGE IS MERGED 01. MONOWIRE IS 3-DIMENSIONAL


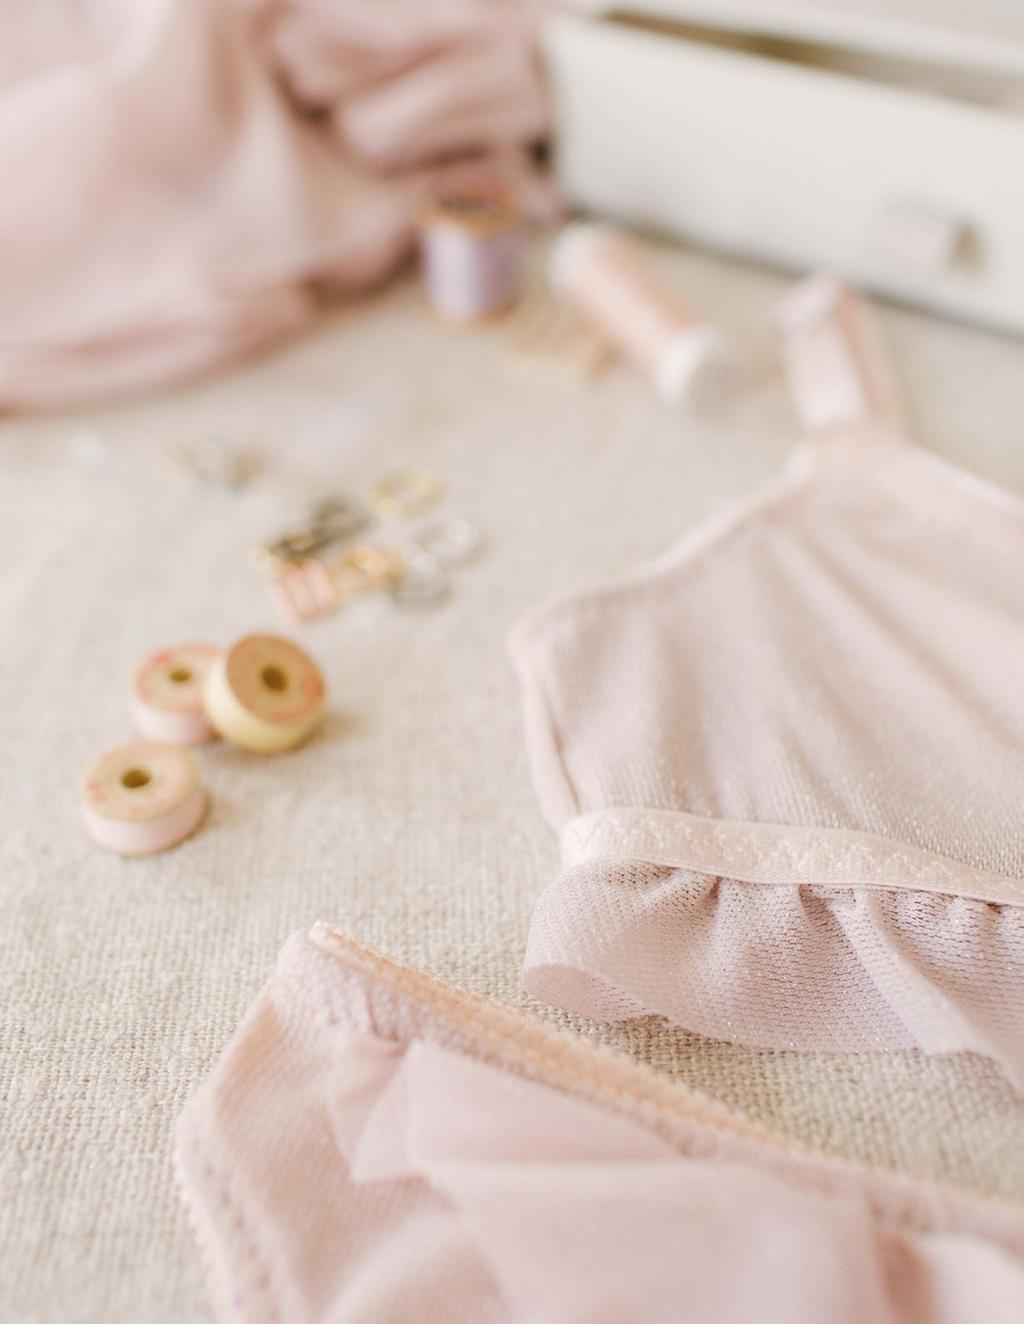
8 05:SUPPLIES NEEDED MAIN FABRIC: This is the fabric that will used for the outer layer of the bralette and underwear. For this guide, it will be a blush pink metallic stretch mesh. Pattern was designed to be made with fabric that has 30-40% stretch. LINING: This is the fabric that will be used to line the bralette and underwear. For this guide, the lining will be a nude stretch mesh. Pattern was designed to be made with lining that has 30-40% stretch. FABRIC FOR FLOATING BRIDGE: This is the fabric that will be used for the floating bridge. For this guide, it will be a nude powernet. Sheer cup lining or 15 denier tricot is an alternative option that is more stable. PICOT PLUSH ELASTIC: This elastic will be used to finish front neckline, armhole, top back band on the bralette, and leg openings and waist of the underwear. For this guide, the elastic will be 1/2 wide. It is okay to use 1/4 or 3/8 wide. I would not suggest anything wider than 1/2. SHOULDER STRAP ELASTIC: This elastic will be used to for the straps of the bralette. It will also be used at the underbust to connect the bottom of the bralette to the bottom ruffle. It is okay to use 1/4 or 3/8 wide. RINGS + SLIDERS: The rings and sliders will be sewn to the shoulder strap elastic. For this guide, rings + sliders will be 1/2 wide. The width of rings + sliders should be the same as the width of the shoulder strap elastic.
.")


9 CONTINUOUS MONOWIRE: The continuous monowire will go inside plush channeling (pictured to the right). PLUSH CHANNELING: Plush channeling will be sewn onto the floating bridge and encase the monowire. HOOK + EYE: Closure at the back of the bralette to securely fasten. For this guide, hook + eye will be 2 x 3, which means that there are 2 rows and 3 columns. Larger sizes will require a 3 x 3 hook and eye. BALLPOINT NEEDLE: Which type of needle you use depends on the type of fabric. For most stretch laces, stretch meshes, jerseys and similar stretch fabrics, suggested to use a ballpoint, stretch or microtex needle. ODIF S 505 SPRAY: Optional, but highly suggested. Used mostly to spray baste main fabric to lining prior to cutting, but also used during sewing in luie of pins. My favorite brand is Odif s no drying time and does not gum up on needles. 28MM ROTARY CUTTER: You can use regular scissors, but I suggest using a rotary cutter to get the most precise cut. PINS: Regular pins are okay to use. You do not need special pins to sew the 8711.
10 SHOPPING LIST BRALETTE [ ] 1/2 YARD MAIN FABRIC [ ] 1/2 YARD LINING FABRIC [ ] 1/4 YARD POWERNET OR SHEER CUP LINING FOR FLOATING BRIDGE [ ] 1 5/8 YARD PICOT PLUSH ELASTIC [ ] 2 1/2 YARDS SHOULDER STRAP ELASTIC [ ] 1 YARD PLUSH CHANNELING [ ] 2 RINGS + 2 SLIDERS [ ] 2 X 3 OR 3X3 HOOK + EYE (DEPENDING ON BAND SIZE - SEE BELOW) [ ] 1 CONTINUOUS MONOWIRE HOOK AND EYE CLOSURE 2 X 3 FOR BAND SIZES 32, 34, 36 CUP SIZES A, B, AND C 3 X 3 FOR BAND SIZES 32, 34, 36 CUP SIZES D AND DD 3 X 3 FOR BAND SIZES 38, 40, 42 CUP SIZES A, B, C, D AND DD UNDERWEAR [ ] 5/8 YARD MAIN FABRIC [ ] 5/8 YARD LINING FABRIC [ ] 1/4 YARD COTTON JERSEY FOR CROTCH LINING [ ] 2 3/4 YARDS PICOT PLUSH ELASTIC EXTRAS [ ] 28MM ROTARY CUTTER [ ] ODIF S 505 SPRAY ADHESIVE [ ] BALLPOINT, STRETCH OR MICROTEX NEEDLE SIZE 11, 12 AND/OR 14 [ ] REGULAR PINS
11 06: DETERMINING SIZE + CHOOSING A MONOWIRE To determine your band size, measure around your chest directly under your breasts, keeping the tape measure snug and level. Then refer to size chart on left below below. To determine your cup size, measure your chest at the fullest part of your breasts. Subtract your band size from this number. Then refer to chart on right below. The underwear is true to size, but the band size for the bralette runs small. If you wear a 34B, suggested to cut a 36B. Refer to the bottom chart on this page to see how the sizes of the 8711 compare to the sizes of other Madalynne patterns (i.e. Barrett Bralette). When choosing a monowire size, I suggested to buy the size you will cut, and one size up and down. A lot can happen during sewing - you may trim here or cut down something there, which could affect the size of the monowire. Looking for monowires? Visit to get purchase monowires for the FULL BUST (ACROSS THE FULLEST PART OF THE BREAST) in in in in in in in in MADALYNNE PDF PATTERNS (ALPHA SIZE) - XS S M L XL 2XL 3XL MADALYNNE PDF PATTERNS (BAND SIZE) MADALYNNE COMMERCIAL PATTERNS (BAND SIZE)

12 07: GRADING THE BAND SIZE CUP SIZE BACK BAND Each band size regardless of cup size grows 1/4 in the center front. So, the 40 band will be 1 wider between the cups than the 32. Total circumference increases by 2 per band size. So, a 32 band will be 2 wider than the a 34 band. This means that the width of the front and the floating bridge increase by 1 and the width of the back band increases by 1. Refer to photo on top on following page. My top finger is pointing to a 32 band and my bottom finger is pointing to a 34 band. One of the squares on my cutting mat is 1. Each cup size regarless of band size grows outward by approximately 1/8. So, the B cup curves outward approximately 1/8 more than the A cup, the DD cup curves outward approximately 1/8 more more than the D cup, etc. Refer to photo on bottom left on following page. From one band size to the next, each cup size grows outward in the following proportions: A: 4mm B: 5mm C: 7mm D: 9mm DD: 12mm So, the 36A is 4mm wider at the upper edge of the cup than the 34A; the 40DD is 12mm wider than the 38DD. For the back band, cup size A is the widest, then decreases from B to C, D, and DD. The D and DD also get 3/4 taller. This is to maintain the correct band-to-cup ratio. If you look at the floating bridge grade, you ll notice that even though the individual bridge pieces are labeled by band size, they still grow at the side seam. This is so you have a proportionate distance between the side seam and the edge of the cup. Otherwise, by the time you get to DD, you have maybe a 1/2 between the outer edge of the cup and the side seam. Even though that piece grows wider at the side seam, you don t want to increase the band size. So the back band gets shorter at the center back in order to take back those grown-on inches.


13 01. BAND SIZE GRADE 03. BACK BAND GRADE 02. CUP SIZE GRADE


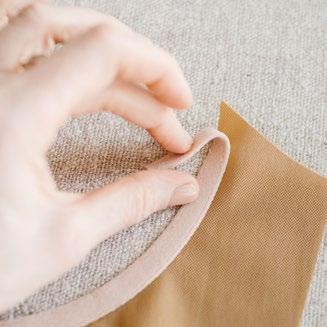
14 08: CUTTING Cutting fine fabrics such as stretch mesh and lace can be really difficult. It s like cutting chiffon lots of shifting! To make it easier, use a temporary spray adhesive such as Odif s 505 to spray baste the main fabric and the lining fabric together prior to cutting. See photo below. You won t permanently adhere them the glue will wear off in a short amount of time and/or during washing. For the 8711, spray baste the main fabric and the lining and cut out the front and the back band of the bralette and the front and back of the panty. Leave the floating bridge, bottom ruffle for the bralette and flounces for the underwear unlined. If you spray baste, I suggest cutting and sewing within a few days because if not, the glue will wear off and what you did was just a waste of time. Suggested to use a rotary cutter for the most precise cut.


15 09: SEW ALONG PART ONE ASSEMBLING THE CUPS AND FLOATING BRIDGE The very first step is to sew the bust darts. With right sides together, pin dart legs on front. Sew from bottom edge to dart point. Backstitch at beginning, but do not backstitch at dart point. Sew off edge of fabric and tie in a knot at least 3 times. See photo to the above. means am I a perfectionist, but when sewing the channeling, try to be as close to perfection as possible. In the next steps, you re going to insert the monowire into the channeling. If the two rows of stitching are too close together, the monowire won t fit inside. The next step is to assemble the floating bridge. With right side of floating bridge facing up, place channeling on top so one edge is aligned with the edge of the fabric. Plush side of channeling should be facing up. Use a straight stitch to sew channeling to the floating bridge approximately 1/8 away from channeling s edge. The closer to the edge, the better. Start and stop stitching 1/2 from beginning and end. After, sew approximately 1/8 away from other edge. Start and stop stitching 1/2 from beginning and end as well. Leave excess channeling at either end so that the channeling extends approximately 1 past the edge of the floating bridge. I don t pin channeling in place before sewing it to the floating bridge. For me, it s easier to walk the channeling as I m sewing. By this, I mean that I place the channeling so that the inner edge aligns with the fabric. I start sewing and then adjust the channeling as I sew. Refer to photo on the right. If you ve taken one of my workshops or if you ve read one of my tutorials, one of my mottos is perfection is overrated. By no


16 SEWING CHANNELING - INNER EDGE OF CHANNELING IS ALIGNED WITH EDGE OF FABRIC SEWING CHANNELING - START AND STOP STITCHING 1/2 FROM BEGINNING AND END BUST DARTS FROM RIGHT SIDE

17 10: SEW ALONG PART TWO SEW FRONT, FLOATING BRIDGE AND BACK BAND TOGETHER, AND ATTACH ELASTIC Next, we re going to sew front, floating bridge and back band together at the side seam. Pin wrong side of floating bridge and wrong side of front together along bottom edge. Darts should face towards center front and plush side of the channeling should face up. Then pin bra front, floating bridge and back band together at side seam. Sew all three together at side seam using a straight stitch. You can baste floating bridge to bra front at bottom edge or you can leave pinned as I have done in photo above. Then, attach the picot plush elastic to the front neckline and underarm/top back band. With right side of bra facing up, place elastic on top. The pattern has ¼ seam allowance throughout, so if you re using ¼ elastic, you will align the flat edge of the elastic with the edge of the fabric. If you re using 1/2 elastic like I am, the elastic should extend 1/4 beyond the fabric s edge. In both cases, the picot should face inward (towards the fabric) and plush side should face up. Sew along the picot edge with a zigzag stitch. Be sure to push side seam seam allowances towards back and fold channeling down so that you don t sew over it. Stitch width and length for a zig zag stitch will vary from machine to machine. A good rule of thumb is to ensure that the stitch width does not exceed half the width of the elastic. Why? Because we re going to sew another pass of zig zag stitches on the other side non-picot side. This will prevent the zig zag stitches from overlapping. Also, try to stitch as close to the picot as possible without going off the edge of the elastic. If you think you re going off, you re probably doing it right. Here s a question I receive A LOT. Should I stretch elastic when sewing? In most cases, I set elastic flat, meaning I don t stretch it when sewing. Why? In normal garments, there is what s called ease, so the pattern measures more than your body measurements. In lingerie however, there is negative ease, so the pattern measures less than your body measurements. Why would you want to make it any smaller? The exception to this is when you want the bra to hug the body in certain areas, like around the armpit. For this bralette, I set all elastics flat except in the armpit area. I didn t use any calculation, and have developed a feel


18 for how much to stretch, which you will too with practice ;) Going back to my comment about perfection. When sewing the elastic at the strap points, the space between the elastics should be as close to 1/2 as possible (or the width of your elastic). Refer to photo on bottom right below. This will allow you to flip the elastics to the wrong side in the next steps. If it s anything less than the width of your elastic, you won t be able to flip it. If it s anything more than 1/2, you won t be able to fit the strap points through the rings when attaching the shoulder straps. Once you sew the first pass of zig zag stitches on the front neckline and underarm/top back band, flip the elastics to the wrong side of the bralette and sew along the edge opposite to the one you just sewed. Use a zigzag stitch again.


19 11: SEW ALONG PART THREE ADD BOTTOM RUFFLE, INSERT MONOWIRE AND ATTACH HOOKS + EYES We re getting close to finishing the bralette! Now it s time to add the bottom ruffle, insert the monowire and attach the hooks + eyes! On the pattern, the bottom ruffle is shirred from center front to side seam, and then not shirred (or flat) from side seam to center back. Sew a line of basting stitches 1/4 from top edge of bottom ruffle from circular notch to circular notch. Then, overlap bottom ruffle and bottom of bralette ¼. Bottom ruffle should be on top and circular notches on bottom ruffle should align with side seams on bralette. Pin in place. Then, pull one thread (either top or bottom, but not both) to create shirring until the length of the bottom ruffle matches the length of the bottom of the bralette. With bra facing right side up, lay shoulder strap elastic on top so that it covers the overlap of the bottom ruffle and bottom of the bralette. Shiny side of strap elastic should face up. Use a 1 or a 3-step zigzag stitch that extends the width of the elastic to secure all three layers together. Personally, I do not pin strap elastic in place prior to sewing this step. If you feel more comfortable, however, you can pin first.


20 Monowire time! Now the bralette will really take shape and look like a bralette. Insert monowire into plush channeling. Something that I didn t know when I first started sewing lingerie - underwires, including monowires, go inside channeling. They do not go in between the channeling and the fabric. Because monowires are long, inserting it will take some time. Push the monowire in a little, then straighten out the channeling a little. Patience is key! Once the monowire is in place, sew a bartack approximately 1/8 from the edge of the underarm. Trim channeling close to stitching. See photo on left below. Onto the hooks + eye! First, eyes go on the left side of the bra as if you were fastening it on someone else, and hooks go on the right. Open tape on eyes and spray Odif s temporary adhesive inside. Wrap the tape s around the center back and press in place for a few seconds. Use a straight stitch and sew 1/8 from the tape s edge. See photo on right below. For the hook side, you will do the same, but sew with hook facing up. You must sew with hooks facing up to avoid your machine from getting damaged. You may have to adjust your needle position so that you can get close to the hooks and sew onto the tape.


.")
21 12: SEW ALONG PART FOUR MAKE STRAPS AND FNISH SIDE SEAM The final step for the bralette is to make the straps and to finish the side seams. Let s start with the straps... First, cut two lengths of shoulder strap elastic 16 long each. Depending on the length of your torso, your straps might need to be shortened or lengthened, but this is a good length to test. Also, shortening or lengthening straps is a super quick fix. Feed ends of the strap elastics up and through the bottom of sliders, over the center bar,s and then down through the other side. Each should look like a belt buckle with one short end and one long end. See photo on left above. in previous step. The standard length from slider to ring is approximately 2. See photo below. The last step for the straps is to attach them to the top of the back band. With wrong side of bralette facing up, overlap strap elastics so that they extend approximately 3/8 below top of back band on inside (the width of the elastic). Refer to photo on top of following page. Also, refer to notches on pattern to know how far away from center back (or hook + eye) straps should be. Sew a bartack approximately 1/8 below the top edge of the back band. You can sew another bartack just below for extra security. Try on bralette and lengthen or shorten if needed. Then, fold short sides down and sew a bartack as close to sliders as possible. Trim close to stitching. Put rings through strap points and turn back 1/2. Sew a bartack as close to rings as possible. Trim close to stitching. Refer to photo on right above. Tip: apply clear nail polish to end of strap elastic to prevent it from fraying/wearing. Now, weave long sides of strap elastics through rings from back to front. Then weave up and over center bars again just like


22 Now, let s finish the side seams... First, trim the side seams to approximately 1/8 and finger press open. Since side seams are finished in the elastic at the underarm, you will have to clip from edge of fabric to stitch line. Be careful not to clip through the side seams. See photo below. Two questions that you may be wanting to ask. The first is, Can I NOT clip seam allowancces and press to one side? My answer is, Sure! I press seam allowances open so they won t be bulky when I sew channeling on top. If you find it easier not to clip and to press to one side, then do that. The second question is, Do you press lingerie with an iron? The answer to this is, Sometimes I do and sometimes I don t. It depends on the project and it especially depends on the fabric. If I am pressing with an iron, it is usually to help elastic lie flat. Sometimes, it is wavy after sewing - the same way a knit gets wavy - and giving it a ight steam and press will make a world s difference. The other time I use an iron is when I finish the project. It makes it look like a little more professional. Whenever I iron however, I ALWAYS use a synthetic heat setting since I ALWAYS use a synthetic fabric. Now, lay a piece of channeling over side seam so that it covers the seam allowance. Plush side should be facing up. Use a straight stitch to sew a box around the channeling approximately 1/8 to 1/16 from edge. I don t pin in place - I spray Odif s temporary adhesive on the wrong (non plush) side of channeling, press the channeling over the seam allowance for a few seconds and then start sewing. Channeling should extend from top of picot elastic at side seam to shoulder strap elastic at bottom of bra. It shouldn t extend into bottom ruffle. When finished sewing, trim close to the stitch line at top and bottom.


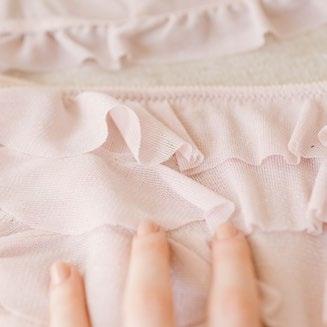
23 13: SEW ALONG PART FIVE SEWING THE UNDERWEAR Compared to the bralette, sewing the underwear is a breeze. So, part five of the sew along will cover making the underwear from start to finish. Let s go... First is to sew the flounces to the back. Use a temporary marking pen/pencil, basting stitch or pins to mark flounce placement. Refer to pattern. Then, with wrong side of flounces facing right side of back, sew together using a zigzag stitch that is approximately ¼ wide and aligns with the top edge of flounce. Top flounce should align with waistline and middle and bottom flounces should align with markings you just made. Also, top flounce should begin and end approximately 1/2 from side seam and middle and bottom flounces should begin and end approximately ¼ from fabric edge to allow for leg elastic to be sewn in next steps. See photo above on right. Remove basting stitches if necessary. Now, sew front and back underwear together at side seam. Use a straight stitch. You can overlock the seam allowances if you have a serger, but there will only be approximately 1/2 of the seam allowances shown when the leg and waist elastic is sewn. Last is to sew the picot plush elastic at waist and leg openings. You will sew exactly the same way as the bralette. Since the elastic isn t being finished in something (i.e. hook + eye), overlap beginning and endsapproximately 1/2 on the first pass, and then flip and sew the second pass as normal. Next is to sew the crotch seam. With right sides facing, pin front and back together at crotch seam. Then, with wrong side of back facing up, place crotch lining on top right side of crotch lining should be facing wrong side of back. Re-pin all three layers together at crotch seam and sew using a straight stitch. Trim to grade seam allowances if necessary and fold crotch lining forward.
24
25 14: PATTERN ALTERATIONS INCREASE WIDTH OF BACK BAND Draw a straight line down through the center of the back band. Then cut along the line. Spread pattern desired amount. Redraw new pattern shape. INCREASE WIDTH STRAP POINTS Redraw strap points so that they are wider. Blend to 0 at center front and side seam. Size of ring will also increase depending on how much strap points are increased. BACK BAND 0 0 FRONT BACK BAND INCREASE WIDTH BETWEEN STRAP POINTS If you have a wide torso, then you may want to increase the width between your strap points. Just like the width of the back band, this a super easy pattern alteration. Basically, you re going to cut off the top portion of the front pattern piece, indiciated in dark pink to the right, and shift towards the side seam. Last, redraw new pattern shape. FRONT
26 14: PATTERN ALTERATIONS INCREASE CUP VOLUME If your breasts are spilling out of the top of your bralette, or you have side and under boob, then you need to increase cup volume. Adding width at the side seam or length at the bottom will make the pattern bigger, but it is increasing it at the wrong spot. The bralette needs to get bigger within the bralette - at the center where the fullest part, apex, is. Draw a straight line up through center of bust dart to bust dart point and then out to armhole. The floating bridge pattern is shown on diagram below only to indicate placement of line at underarm. It should hit somewhere in between where floating bridge would be and strap point. After, draw a second straight line from middle of the side seam through bust point to center front. Cut up through line that goes through bust dart and out to the armhole. Stop cutting just before line ends at the armhole, leaving a small bit intact, about 1/8. This will leave a little bit to swing the pattern piece open. Then cut along line from side seam to bust dart. Just like before, stop cutting about 1/8 before bust dart. The last cut is fron the center front to bust point. Cut all the way through bust point. Now, swing pieces 3 and 4 down and to the left. Move piece 2 down so that bottom aligns with piece 3. Last, redraw new pattern shape. FRONT FLOATING BRIDGE 4 1 FRONT 3 2 FLOATING BRIDGE Floating bridge pattern will also have to be increased in the same manner. Depending on how much the front and floating bridge are increased, monowire size will also increase.


, so I sometimes prefer a regular")

27 15: YOUR 8711 One of the best aspects of having this blog is being able to share what I ve learned. It has been so much fun and fulfilling so see everyone s Madalynne me-mades. Excuse my French, but holy shit, y all have blown me away with some awesome 8711! Sharing just a few below to boost @MRSPORFIRIA This bralette is honestly the best of both worlds. It has a mono-wire which is super comfortable and makes it morecomfortable for women with a larger bust to wear a super cute bralette. Even for people like me with a smaller chest, I think it s great! Sometimes I hate wearing bralettes because they re so tight (to you know, hold you in), so I sometimes prefer a regular bra. The 8711 is not only supportive, but comfortable, lightweight and stylish. This would also be a great project for a beginner to intermediate sewer because this project is quick and let me tell you, when you re able to put that mono-wire through and it takes shape into a bra, it is so satisfying! I ve never had such a satisfying project in that short of time sewing it share your 8711 on @NAOMAE.STITCH.BYJANELLE


28 16: MORE MADALYNNE Did you know? Madalynne has 6 other lingerie patterns + 1 bodysuit pattern with Simplicity. Visit for more information and to shop the patterns and sewing kits. {HASHTAG} #BRAMAKINGWITHMADALYNNE { } HELLO@MADALYNNE.COM
SIERRA A SIMPLE, WRAP AROUND BRALETTE
 SIERRA A SIMPLE, WRAP AROUND BRALETTE 01: ABOUT MADALYNNE INTIMATES www.madalynne.com Madalynne Intimates is the manifestation of Maddie Flanigan s passion for sewing and teaching lingerie. She is the
NOELLE HIGH WAISTED UNDERWEAR PATTERN
 NOELLE HIGH WAISTED UNDERWEAR PATTERN TABLE OF CONTENTS 01 ABOUT MADALYNNE INTIMATES 03 02 OVERVIEW 04 03 SUPPLIES NEEDED 05 04 GETTING STARTED 07 05 CUTTING + DIRECTION OF GREATEST STRETCH 08 06 MORE
MALLORI LANE. A simple, strappy bralette by Madalynne. page 1
 MALLORI LANE A simple, strappy bralette by Madalynne page 1 OVERVIEW Mallori Lane is a simple bralette finished with skinny strap detailing along the back. Designed for smaller-chested women with little
NOELLE: A SIMPLE, HALTER BRALETTE + PANTY
 PAGE 1 NOELLE: A SIMPLE, HALTER BRALETTE + PANTY OVERVIEW NOELLE HALTER BRALETTE + PANTY GETTING STARTED NOELLE IS A HALTER BRALETTE AND HIGH-WAISTED PANTY. THE BRALETTE FEATURES A RACERBACK, ADJUSTABLE
Simple Leggings Two girls. Same name. One mission. Teach the world to sew.
 Simple Simon and Company Simple Leggings Two girls. Same name. One mission. Teach the world to sew. Simple Leggings Sewing with knits is made easy with this simple leggings pattern. Once you are finished
INTRODUCTION. xoxo, Gertie
 INTRODUCTION T he Jane Set was inspired by a truly fabulous Ceeb of Miami jumpsuit, one of my favorite vintage garments I ve had the honor of trying on. I loved its stretchy curve-hugging fabric, built-in
patterns MN2206 // VERONIKA
 patterns MN2206 // VERONIKA SIZES XS - XL SKILL www.megannielsen.com VERONIKA // Basic full circle skirt for woven or stretch fabrics. Pattern features include optional roomy scalloped pockets and two
Sewing KID Shorts: The BASIC Shorts
 Page 1 of 21 Sewing KID Shorts: The BASIC Shorts by Dana on June 27, 2013 Welcome to the first part of our KID Shorts series! This is a series of tutorials to companion the KID Shorts PATTERN, which you
Jodie s Sewing Studio
 Jodie s Sewing Studio Children s Kuspuk Pattern How to Use a Jodie s Sewing Studio Pattern For best results, study the pattern pieces first and read the notes and terms on each piece. Pieces are labeled
THE STELLAN TEE A free pattern
 A free pattern BEGINNER // SIZES XXS - XXL A modern take on the basic T-shirt, the Stellan Tee has a boxy, slightly cropped fit, proportionally long sleeves (super cute when rolled-up) and a subtly curved
Jodie s Sewing Studio
 Jodie s Sewing Studio Friday s Kuspuk Pattern How to Use a Jodie s Sewing Studio Pattern For best results, study the pattern pieces first and read the notes in the margins and the terms on each piece.
SPRING SHORTS # 1403
 PATTERN RUNWAY SPRING SHORTS # 1403 Launch into spring with these super cute and easy to wear elastic waist shorts. With a Paper-Bag waist and front side pockets, these little sweeties are sure to be a
ISABELLA TANK. Copyright 2014 Spitupandstilettos.com All Rights Reserved. Level: Easy Time: 2-3 Hour Pages: 23
 ISABELLA TANK Level: Easy Time: 2-3 Hour Pages: 23 This woven tank features a partial facing, button back closure and a Copyright 2014 Spitupandstilettos.com All Rights Reserved Size Chart (1) BUST: Measure
WRAP DRESS. A DIY pattern for use with Alabama Stitch Book, Alabama Studio Style, Alabama Studio Sewing + Design, and Alabama Studio Sewing Patterns
 WRAP DRESS A DIY pattern for use with Alabama Stitch Book, Alabama Studio Style, Alabama Studio Sewing + Design, and Alabama Studio Sewing Patterns theschoolofmaking.alabamachanin.com Alabama Chanin 2017
Pattern By Nemiha Studebaker for Sarah Jane Studios. Sizes 2-6
 Pattern By Nemiha Studebaker for Sarah Jane Studios Sizes 2-6 General Instructions 1. Carefully read through all instructions before you begin. 2. Wash, dry, and iron your fabric before starting. 3. Seam
Dolly s Darling Dungarees
 Dolly s Darling Dungarees All photos, text, and pattern pieces Dandelions n Dungarees 2013. All rights reserved. No part of this publication may be reproduced or transmitted in any form or by any means
ELIZABETH DRESS. Copyright 2014 Spitupandstilettos.com All Rights Reserved. Level: Advanced Time: 4-5 Hours Pages: 36
 ELIZABETH DRESS Level: Advanced Time: 4-5 Hours Pages: 36 This dress features a sweetheart neckline, darts, pleats, bias binding and contrast! Copyright 2014 Spitupandstilettos.com All Rights Reserved
a sewing pattern by moon kitty headband
 a sewing pattern by moon kitty headband moon kitty headbands These headbands are a classic piece for your head with a twist for Sailor Moon fans -- or at least cat fans! Make yours from black, white, or
50/50 Dress. 2 models, Slim or Casual 3 different sleeve lengths +sleeveless Eu size (US 4-24)
") 50/50 Dress 2 models, Slim or Casual 3 different sleeve lengths +sleeveless Eu size 34-54 (US 4-24) This pattern is copyrighted, with all rights reserved. You may print copies of the PDF for your own use.
50/50 Dress 2 models, Slim or Casual 3 different sleeve lengths +sleeveless Eu size 34-54 (US 4-24) This pattern is copyrighted, with all rights reserved. You may print copies of the PDF for your own use.
Frances by. #frances 1/7
 Frances by #frances /7 Frances by XS to XXXL Oversized top in lightweight fabric with short, loose, gathered sleeves. A round, wide neckline on the front. The top is slightly longer in the back and the
Every day skirts. 7 different skirts Optional pockets Eu size (US 12mo-14y)
") Every day skirts 7 different skirts Optional pockets Eu size 80-164 (US 12mo-14y) This pattern is copyrighted, with all rights reserved. You may print copies of the PDF for your own use. You may not make
Every day skirts 7 different skirts Optional pockets Eu size 80-164 (US 12mo-14y) This pattern is copyrighted, with all rights reserved. You may print copies of the PDF for your own use. You may not make
Lacey Thong Pattern from fehrtrade.com
 Lacey Thong Pattern from fehrtrade.com This is a pattern for thong-style underwear with lace over the hips and triangular seaming front and back with contrast body and separate, lined crotch piece. Waist
Freya tunic 300min. For a novice, add approx 195 min STITCH DICTIONARY
 tternfreepatternfreepatternfreepatternfreepatternfreepatternfreepatternfreepatternfreepatternf YourFREE Dress &Tunic Pattern Freya tunic 300min For a novice, add approx 195 min Your FREE downloadable pattern
View A. View B. Ciao Bella Size September 2012 Ellie Inspired, Laura Johnson
 View A View B Ciao Bella Size 1-12 September 2012 Ellie Inspired, Laura Johnson Quick Measure 1 2 3 4 5 6 Ciao Bella is written for wovens and stretch knits. View A has an optional overskirt of overlapping
Swing Top, Dress and Leggings
 Swing Top, Dress and Leggings DG PATTERNS Thank you for downloading the Swing top, tunic and dress, plus the basic leggins. Please refer to this document for printing instructions and a stepby- step tutorial.
Lydia Hoodie Variation By: BurdaStyle
 Lydia Hoodie Variation By: BurdaStyle http://www.burdastyle.com/projects/lydia-hoodie-variation This is a fun hoodie variation for our basic Lydia knit top. Download both the Lydia Hoodie Variation (BS-022)
Soft & Stuffable Fabric Shopping Bags: Shop Pretty
 Published on Sew4Home Soft & Stuffable Fabric Shopping Bags: Shop Pretty Editor: Liz Johnson Wednesday, 07 June 2017 1:00 As more and more stores up their recycling commitment (some entire cities have
Sadie By: BurdaStyle. Materials.
 Sadie By: BurdaStyle http://www.burdastyle.com/projects/sadie Here is our perfect basic knit tank. We are in the middle of a wicked heat wave here in Brooklyn, and these pictures of this lovely tank top
Intro to Sewing Coats: Chloe Coat. Chloe Coat. sizes 8-20
 Intro to Sewing Coats: Chloe Coat Chloe Coat sizes 8-20 Chloe Coat - Instructions - Please use these instructions alongside our online videos to help you sew your Chloe Coat. All the seam allowances are
No-ribbon version. Ribbon version XS - XXXL
 Toni by #Toni / Toni by No-ribbon version Ribbon version XS - XXXL A loose, straight dress, that comes to just above the knee with halflength raglan sleeves, a round neckline and side pockets in the side
Lydia Hoodie Variation
 Lydia Hoodie Variation By: burdastyle http://www.burdastyle.com/projects/lydia-hoodie-variation This is a fun hoodie variation for our basic Lydia knit top. Download both the Lydia Hoodie Variation (BS-022)
Barbara's Bloomers and Bonnet Set By: Create Kids Couture
 Barbara's Bloomers and Bonnet Set By: Create Kids Couture Difficulty Level: Beginner Create Kids Couture 2013 Barbara's Bloomers and Bonnet Set 1 Materials Needed: Fabric (see chart below for quantities
How to Use This LillyGiggle Pattern
 How to Use This LillyGiggle Pattern Step 1 - Print this entire packet. Be sure that your printer settings say to NOT scale or reduce/enlarge images. THIS IS VERY IMPORTANT. Please see your printer owner
By Laurie Pessetto. Instructions:
 Materials: 1 yard Fusi Form Lightweight Interfacing (fusible) 1 ¼ yards base fabric 1 ½ yards contrast fabric 3 packages of medium rick rack (7½ yards) Thread Button Stitch Witchery Tools: Fabric scissors
pattern BONUS Ruffled Halter By LiesL Gibson {from page 41}
 ruffled halter This adorable halter has a simple pull-on style that s easy and fun for summer, featuring a casing formed by the first ruffle for a clean, uncluttered finish. For other fun looks, try making
Basic Sewing Portfolio. Name
 Basic Sewing Portfolio Name Back stitching Whip stitch Starting in the corner of a sample begin stitching diagonally. 3-4 stitches Hold up the back stitching lever and backstitch to the beginning. Release
Bodacious Bow Peasant Dress
 Bodacious Bow Peasant Dress 1 This peasant dress is simple and fun and with the added bow it surely can be called THE BODACIOUS BOW dress. The sleeves are in ¾ or long sleeves. List of required materials:
Fairfield County 4-H Clothing Projects Guide Guidelines for completing Clothing projects
 Fairfield County 4-H Clothing Projects Guide Guidelines for completing Clothing projects Read and complete activities and requirements in the project book. Decide which fabrics best suit the pattern you
High low dress. Short front, long back Pockets Eu size (US 12 months - 14 years)
") High low dress Short front, long back Pockets Eu size 80-164 (US 12 months - 14 years) This pattern is copyrighted, with all rights reserved. You may print copies of the PDF for your own use. You may not
High low dress Short front, long back Pockets Eu size 80-164 (US 12 months - 14 years) This pattern is copyrighted, with all rights reserved. You may print copies of the PDF for your own use. You may not
Print only the sizes you need using the Layers function
 Print only the sizes you need using the Layers function 2 DESCRIPTION Lindy Petal Skirt is a simple knit pencil skirt with an elastic waistband. It features two overlapping curved front panels that resemble
Soft & Stuffable Fabric Shopping Bags
 Published on Sew4Home Soft & Stuffable Fabric Shopping Bags Editor: Liz Johnson Wednesday, 03 June 2015 1:00 As more and more stores up their recycling commitment (some entire cities have banned plastic
PatternMaker Pattern Drafting Sofware for PC. Learning Center. Patterns. PatternMaker Sewing projects Women's Camisole. Home page.
 Home page Svensk manual Suomeksi PatternMaker dealers Counter started 2000-01-01 Site Map December 5th, 2001 PatternMaker Pattern Drafting Sofware for PC Versions & prices Download & buy Demo version Macro
Applique Starfish Tote. week THREE. designed by: JOANNA MARSH of Kustom Kwilts kustomkwilter.com estimated sewing time: 2-3 hours
 designed by: JOANNA MARSH of Kustom Kwilts kustomkwilter.com IG: @kustomkwilts se 2018 with Applique Starfish Tote estimated sewing time: 2-3 hours finished size: approx 21 x 23 Want a quick and easy project
know you ve got your little three piece where they re all hooked together. I m going to take my next three piece, make sure that I don t have anything
 Hi, I m Jenny from the MSQC. I have a super fun project for you today. Take a look at these darling little Christmas stockings behind them. Christmas is coming. It s never too early to prepare and this
OMA-Love Is In The Air Pillow (Partial ITH for 6x10 hoops)
") OMA-Love Is In The Air Pillow (Partial ITH for 6x10 hoops) This Valentine s Day pillow is made as a mostly in the hoop project. The background is quilted and the contrast strips and borders are applied
OMA-Love Is In The Air Pillow (Partial ITH for 6x10 hoops) This Valentine s Day pillow is made as a mostly in the hoop project. The background is quilted and the contrast strips and borders are applied
We re going to start by sewing a simple pair of lounge-around-the-house, no-one-ismaking-me-take-these-things-off,
 We re going to start by sewing a simple pair of lounge-around-the-house, no-one-ismaking-me-take-these-things-off, stretch jersey, comfy knit pants. We ll just call them Comfy Pants for short. And, I m
Drawstring Pant Instructions 1. Baste Waistline 2. Add Embroidery 3. Prepare for Construction 4. Sew Front and Back Panels 5.
 DRAWSTRING PANT A DIY pattern for use with Alabama Stitch Book, Alabama Studio Style, Alabama Studio Sewing + Design, and Alabama Studio Sewing Patterns theschoolofmaking.alabamachanin.com Alabama Chanin
Emily Variation 1 By: BurdaStyle
 Emily Variation 1 By: BurdaStyle http://www.burdastyle.com/projects/emily-variation-1 Here is a fun variation of our classic Emily blouse. With wide bell sleeves and a sweet flat collar, this is a great
BUTTON-UP DRESS ISSUE 39 SKILL LEVEL
 BUTTON-UP DRESS ISSUE 9 SKILL LEVEL ABOUT IN THE FOLDS PATTERNS GARMENT OVERVIEW (INCLUDING FABRIC SUGGESTIONS AND NOTIONS) SIZING + GARMENT MEASUREMENTS (INCLUDING FABRIC REQUIREMENTS) CONTENTS ABOUT
[ mocha ] ELSIE DRESS. modern + comfort.
![[ mocha ] ELSIE DRESS. modern + comfort.](/thumbs/96/128932754.jpg "[ mocha ] ELSIE DRESS. modern + comfort.") [ mocha ] modern + comfort www.mochapattern.com [ mocha ] modern + comfort Mocha is a new women s apparel brand by Sue Kim and Veronica Yang. Mocha designs aim to be modern, natural, and comfortable, but
[ mocha ] modern + comfort www.mochapattern.com [ mocha ] modern + comfort Mocha is a new women s apparel brand by Sue Kim and Veronica Yang. Mocha designs aim to be modern, natural, and comfortable, but
Venn Diagram Placemats (D-031)
") OTHER TOOLS & SUPPLIES For (4) Mats - (2) Large, (2) Mini - 1/4 yd quilt batting (60 wide) - 5 yds extra-wide double-fold bias binding - Basic sewing supplies; - sewing machine - needle & coordinating
OTHER TOOLS & SUPPLIES For (4) Mats - (2) Large, (2) Mini - 1/4 yd quilt batting (60 wide) - 5 yds extra-wide double-fold bias binding - Basic sewing supplies; - sewing machine - needle & coordinating
good-night nightie SIZE CHART FABRIC 45" (115.5 cm) 54" (137 cm) OTHER SUPPLIES RESOURCES Cot ton l aw n or cot ton voile
 54 (137 cm) OTHER SUPPLIES RESOURCES Cot ton l aw n or cot ton voile") good-night nightie This sweet nightgown is easy to construct and effortless to wear. With a shirred elastic detail at the neckline, shoulder ties, comfortable French seams, and lace detail at the hem,
good-night nightie This sweet nightgown is easy to construct and effortless to wear. With a shirred elastic detail at the neckline, shoulder ties, comfortable French seams, and lace detail at the hem,
How to Make Twirly Shorts By Stacy at thelandofka.com
 How to Make Twirly Shorts By Stacy at thelandofka.com Description: This tutorial is for making a skirt/short combo. It will be a drop waist twirly skirt with attached shorts underneath. You can add the
Cloudy Day Hoodie. With or with out Hood Buttons or zipper closure EU sizes: S-XXXXL
 With or with out Hood Buttons or zipper closure EU sizes: S-XXXXL This pattern is copyrighted, with all rights reserved. You may print copies of the PDF for your own use. You may not make duplicate copies
Intro to Sewing with Knit Fabrics
 Intro to Sewing with Knit Fabrics - Fitting guide: Full Bust Adjustment (FBA) and Small Bust Adjustment (SBA) for princess seams (Emma Dress only) - What is a Full Bust Adjustment (FBA)? An FBA involves
Tankini for a Little Girl.
 Tankini for a Little Girl. Description: This tutorial is for Tankini bathing suit with a lined top. Materials: ½ Yard swimsuit material Matching thread ½ Yard Swimsuit elastic Embellishments (optional
By Laurie Pessetto. Here are some tips and tricks to ensure your tailored jacket turns out looking professional.
 By Laurie Pessetto Here are some tips and tricks to ensure your tailored jacket turns out looking professional. Skill Level Intermediate sewing and pressing skills Tips Fusible Acro is a fusible, washable
Personalize An Off-The-Rack Tee
 Published on Sew4Home Personalize An Off-The-Rack Tee Editor: Liz Johnson Friday, 26 June 2015 1:00 Now's the time to stock up on cute summer tees. They're on sale nearly everywhere. We hit the local Target
Big Picture. What s the goal? Preparation. Materials. DIY Wrap Skirts Leader Guide. Prep Time: 30 Minutes Activity Time: 2.5 Hours Difficulty: Level 2
 DIY Wrap Skirts Leader Guide WITH THIS ACTIVITY MODULE Handout (either Radius Method or Slat/Strip Method) We are Engineers! Movement Improvement Marvelous Materials Smart Clothing Patternmaking Tools
Stretchy Headbands: Pleated & Turban Styles
 Published on Sew4Home Stretchy Headbands: Pleated & Turban Styles Editor: Liz Johnson Tuesday, 15 March 2016 1:00 You've seen these awesome headbands everywhere. They're a go-to solution for yoga class,
All seam allowances are 1/2 unless otherwise noted. All pattern pieces include the seam allowance. Please read all instructions before beginning.
 This small bag will allow you to try out several fun bag-making techniques; adding a metal twist lock, using piping in a bag, making darts, and adding elastic pockets. Use your favorite print and combine
[ mocha ] LUZ SEMI TIGHT SKIRT. modern + comfort.
![[ mocha ] LUZ SEMI TIGHT SKIRT. modern + comfort.](/thumbs/96/128972410.jpg "[ mocha ] LUZ SEMI TIGHT SKIRT. modern + comfort.") [ mocha ] modern + comfort LUZ SEMI TIGHT SKIRT www.mochapattern.com LUZ SEMI TIGHT SKIRT [ mocha ] modern + comfort Mocha is a new women s apparel brand by Sue Kim and Veronica Yang. Mocha designs aim
[ mocha ] modern + comfort LUZ SEMI TIGHT SKIRT www.mochapattern.com LUZ SEMI TIGHT SKIRT [ mocha ] modern + comfort Mocha is a new women s apparel brand by Sue Kim and Veronica Yang. Mocha designs aim
Design, pattern, text and images are 2017 Anna Maria Horner and are intended for personal use.
 Introducing the Snuggle & Play Dress inspired by my feisty, littlest girl, Mary Anna, who loves being able to get dressed by herself every morning. The ease and comfort of the stretch knit top of the dress
Julia by. #Julia 1/11
 Julia by / Julia by XS - XXXL For those who adore showing off something unique, we ve created a long version of the Julia kimono. The light and airy fabric and the side slits lend it a touch of elegance
PROJECT PREPARATION FOR FEMININE HYGIENE KITS
 PROJECT PREPARATION FOR FEMININE HYGIENE KITS See below for recent updates to these instructions The pattern and instructions were downloaded from sewinpeace.blogspot.com under Tutorials, then Cloth Feminine
Easy Knit Pencil Skirt. week FIVE. designed by: Girl Charlee Fabrics GirlCharlee.com estimated sewing time: 1 hour
 2018 se with designed by: Girl Charlee Fabrics GirlCharlee.com IG: @girlcharlee Easy Knit Pencil Skirt estimated sewing time: 1 hour finished size: Varies Ready to try your hand at sewing up apparel now?
EC Sewing Women's Slacks and Shorts
 University of Nebraska - Lincoln DigitalCommons@University of Nebraska - Lincoln Historical Materials from University of Nebraska- Lincoln Extension Extension 1969 EC69-455 Sewing Women's Slacks and Shorts
FREE. trim sundress. Creative Ideas from Jo-Ann more projects, tips & techniques at Joann.com , WILTN
 trim sundress FREE 12345678, WILTN Creative Ideas from Jo-Ann more projects, tips & techniques at Joann.com SUPPLIES & TOOLS: 53" shirred knit dress fabric; Note: Measure before purchasing yardage! Measure
london calling bag a sewing pattern by
 a sewing pattern by london calling bag This project on its own is a very big gusseted bag with a zippered top closure. But the optional details include a front pocket with Union Jack applique, buckle adjustable
Sure-Fit Designs High Cowl Neck/Shirred Split Sleeve
 Fitting the Fast & Easy way with... Sure-Fit Designs High Cowl Neck/Shirred Split Sleeve Pg. 1...Kind of a Cold-Shoulder with Cowl Neck. You'll love this new downloadable Fashion Leaflet detailing how
Holiday Holly in 3-D A Wallhanging Ellen O. Designs for Sulky of America
 A Wallhanging Ellen O. Designs for Sulky of America What We Used WHAT FABRICS WE USED: Cotton Fabrics 42 to 44 (Image 1) Dark green 1/2 yard Medium green 1/4 yard Light green 1/4 yard Christmas/Holiday
Puzzle Dress. 2 models, Slim or Casual Tank top back or Razor back Eu size (US 4-24)
") 2 models, Slim or Casual Tank top back or Razor back Eu size 34-54 (US 4-24) This pattern is copyrighted, with all rights reserved. You may print copies of the PDF for your own use. You may not make duplicate
2 models, Slim or Casual Tank top back or Razor back Eu size 34-54 (US 4-24) This pattern is copyrighted, with all rights reserved. You may print copies of the PDF for your own use. You may not make duplicate
Construction Cards Beginning Level (9-11 Years)
") Beginning Level (9-11 Years) Division of Agricultural Sciences and Natural Resources Oklahoma State University Beginning Level (9-11 Years) No. 801 Seam Finishes Seam finishes make clothes look neat on
Beginning Level (9-11 Years) Division of Agricultural Sciences and Natural Resources Oklahoma State University Beginning Level (9-11 Years) No. 801 Seam Finishes Seam finishes make clothes look neat on
Copyright 2014 HulaKitty Design / ClothingPatterns101. All rights reserved
 1 Copyright 2014 HulaKitty Design / ClothingPatterns101. All rights reserved Contents Printing and Assembling Your Pattern Choosing Your Size Cutting the Fabric General Sewing Tips and Instructions Instructions
Sewing Instructions for Pocket Pinny Carol A. Brown
 Sewing Instructions for Pocket Pinny Carol A. Brown Make this Pocket Pinny for yourself or for anyone else who jogs, walks or rides a bike. The reflective tape increases visibility at night and the pocket
Sasha Sundress, Knickers, Bolero & Flip-flops
 Sasha Sundress, Knickers, Bolero & Flip-flops Materials: 0.5 metre Cotton Fabric 0.25 metre fabric for lining Bolero 0.5 metre 1/4 wide elastic for Waist and legs 2 Snap Fasteners Small Beads or Sequins
Pockets; Seam Finishes
 Lessons 4, 5 Complete the sentences. 4. A zipper should be applied a facing has been applied, but a band has been applied to a garment. 5. Coil zippers are made of or. One advantage of them is the ease
Martha s A-Line Skirt with Darts
 Martha s A-Line Skirt with Darts Add a tailored look to a basic skirt with darts, a zipper, and a waist facing made of fabric or ribbon. The waist is flat with no band, and the skirt lies smoothly over
World s Easiest Tote Bag!!!
 World s Easiest Tote Bag!!! Tutorial by Shruti Dandekar Finished Size : 12 x 4 x 18 An easy and quick to make Tote Bag with instructions on making the handles and a zip pocket. World s Easiest Tote Bag
Make Trousers (beginners)
") Make Trousers (beginners) This tutorial will help you to make your first pair of trousers. If you have already made some in the past and are just looking for a recap, you probably want the refresher tutorial.
Make Trousers (beginners) This tutorial will help you to make your first pair of trousers. If you have already made some in the past and are just looking for a recap, you probably want the refresher tutorial.
shiba cube puppy plush a sewing pattern by
 shiba cube puppy plush a sewing pattern by If you ve ever sewn a cube before, this pattern takes it to the next level! The classic geometric shape forms a chubby little puppy body complete with four stubby
Slipper Sole. Cut 1 in Main Cut 1 in lining Cut 1 in wadding PER SLIPPER
 Slipper Sole Cut 1 in Main Cut 1 in lining Cut 1 in wadding PER SLIPPER Slipper Top Cut 1 in Main Cut 1 in lining Cut 1 in wadding PER SLIPPER Sorbetto Top with Tucks: 1 Getting Started Body Measurements
Garden Party Apron: Make it from Fat Quarters
 Published on Sew4Home Garden Party Apron: Make it from Fat Quarters Editor: Liz Johnson Tuesday, 09 May 2017 1:00 There they sat. Five gorgeous fat quarters we d been hoarding from Amy Butler s classic
How to Make Gathers by Machine
 Published on Sew4Home How to Make Gathers by Machine Editor: Liz Johnson Thursday, 08 December 2016 1:00 We love to gather with friends and family to share good food and conversation. We enjoy gathering
Quilted Spider Web Trick-or-Treat Drawstring
 By Joanna Marsh of Kustom Kwilts and Designs Make a quick and easy candy collecting tote bag for trick-or-treating that can be used for years in just a few hours! The Janome Horizon Memory Craft 8900QCP
So Sew Easy Boho Chic Tunic Tutorial
 So Sew Easy Boho Chic Tunic Tutorial The first time I made this Boho Chic Tunic pattern, I had just turned 15 years old. Originally a dress, I decided to remake and share it with you. For me, it represents
Sew Classic for Children Children s Corner: Classic Sewing Magazine, Spring 2016
 Claire BY LEZETTE THOMASON Since 1978 Children s Corner has honored the classic traditions of children s garment sewing with timeless designs. The four original owners began a shop that designed and stitched
Beginning Level (9-11 Years)
") OKLAHOMA COOPERATIVE EXTENSION SERVICE 4-H Fabrics & Fashions Construction Items Beginning Level (9-11 Years) Division of Agricultural Sciences and Natural Resources Oklahoma State University OKLAHOMA
OKLAHOMA COOPERATIVE EXTENSION SERVICE 4-H Fabrics & Fashions Construction Items Beginning Level (9-11 Years) Division of Agricultural Sciences and Natural Resources Oklahoma State University OKLAHOMA
The Sunshine An in-the-hoop project
 The Sunshine An in-the-hoop project All the music I walk to is on my phone, but my new iphone 6+ is too big to fit in my pocket. This case is the perfect solution. That s my iphone 6+ peeking out of it
10/2011 Wrap blouse with ruffled collar
 10/2011 Wrap blouse with ruffled collar By: burda style magazine http://www.burdastyle.com/projects/102011-wrap-blouse-with-ruffle Wrap blouse with ruffled collar burda style magazine patterns FAQ Materials
Easy Doll Blanket Pattern Courtesy of A Jot and A Journal
 Easy Doll Blanket Pattern Courtesy of A Jot and A Journal Every special little girl in your life will enjoy wrapping her favorite doll in this cozy blanket custom made just for her. This quick and easy
Cut 1 lightweight interfacing
 1 2 A note on interfacing for this bag: This pattern is intended to produce a slouchy bag, so you will want to look carefully at your fabrics before you decide on which interfacing and stabilisers to use.
FOUNDATION ~ HAND & MACHINE STITCHES
 FOUNDATION ~ HAND & MACHINE STITCHES AIM ~ To show some of the many hand and machine stitches and their uses. ~ To show the necessity of some of the stitches when sewing seams. 3. SEAMS ~ Straight open
Alexander Blouse. By: burdastyle.
 Alexander Blouse By: burdastyle http://www.burdastyle.com/projects/alexander-blouse This blouse is truly a work of art and quite a unique pattern. The ruffled sleeves and rippling hemline are created by
The Pea Pod. baby carrier. Created by Sascha Romeo Piccoli Piselli.
 The Pea Pod baby carrier Created by Sascha Romeo Piccoli Piselli www.piccolipiselli.blogspot.com sascharomeo@rocketmail.com This baby carrier is designed to be worn on the hip. The adjustable two buckle
Bound and Determined:
 Think You Don t Have Time to Create Beautiful Quilts? From quick-quilt adaptations of classic patterns to fun, fresh novelty designs, McCall s Quick Quilts provides you with a treasury of time- and effort-saving
Dunja By: BurdaStyle. Materials.
 1D Dunja By: BurdaStyle http://www.burdastyle.com/projects/dunja With a few fairly simple modifications, the JJ blouse can become the sugary confection we call the Dunja top, which is perfect for celebrating
THE FOLD LINE PRESENTS TRIBE PATTERNS. hello sailor top
 THE FOLD LINE PRESENTS TRIBE PATTERNS hello sailor top contents fabric and pattern pieces 2 layplans 3 Instructions 4-18 glossary 19 sizes 20 Fabric and pattern pieces fabrics We recommend light weight
M is for Moto Joggers (FREE Capri length version)
") M is for Moto Joggers (FREE Capri length version) M is for Moto Joggers (FREE Capri Length Version) is a multi-sized ladies capri length jogging/lounge pant pattern with an elastic waist band. The pattern
M is for Moto Joggers (FREE Capri length version) M is for Moto Joggers (FREE Capri Length Version) is a multi-sized ladies capri length jogging/lounge pant pattern with an elastic waist band. The pattern
Flannel Apron with Rick Rack Accents
 Published on Sew4Home Flannel Apron with Rick Rack Accents Editor: Liz Johnson Wednesday, 06 March 2019 1:00 An apron in flannel makes for some cozy cookin'! We created our original sample from fat quarters,