CORNELY LG3 English. NV. A. DE KONINCK Avenue Sleeckx B-1030 BRUSSELS -BELGIUM. Phone : ++32/ Fax : ++32/
|
|
|
- Elwin Baldwin
- 6 years ago
- Views:
Transcription

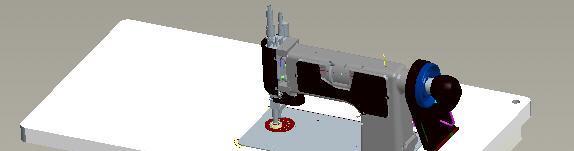
1 TITAN BARATTO CORNELY CORNELY LG3 English OPERATOR'S MANUAL NV. A. DE KONINCK Avenue Sleeckx B-1030 BRUSSELS -BELGIUM Phone : ++32/ Fax : ++32/ info@titansew.com Web :
2
3 C O N T E N T CHAPTER 1 : INSTALLATION 2 1. Fly Wheel Rotation 2 2. Training 2 3. Sewing 2 CHAPTER 2 : MECHANICAL ADJUSTMENT 3 1. Needle Setting 3 2. Needle Bar Orientation 4 3. Needle Plate Setting 6 4. Feeddog Setting 6 5. Foot Pressure Adjustment 7 CHAPTER 3 : THREADING 8 CHAPTER 4 : STITCH LENGTH 14 CHAPTER 5 : THREAD TENSION 14 CHAPTER 6 : LUBRICATION 16 CHAPTER 7 : INSTALLATION OF THE BOBIN STAND 17 CHAPTER 8 : INSTALLATION OF THE EURAMOT MOTOR 18 CHAPTER 9 : SPARE PARTS MANUAL 19 C_LG3_MANUAL 11/01/2006 1
4 CHAPTER 1 : INSTALLATION FLY WHEEL ROTATION While sitting in front of the machine and you put your hand on the top of the Fly Wheel you have to push the flying wheel away from you (backwards). The Fly Wheel must turn clockwise. NEVER PULL!! TRAINING To use the Cornely LG3 is not that difficult, the only thing you have to do is practising. You have to begin to sew on the piece of paper on which the design is drawn. You have to follow this design by operating the crank. The so called hook (=needle) will punch along this pre-traced design together with the movements of the Crank C (Fig. 1B). After a while you can handle it perfectly. TO START SEWING You have to start the motor by pressing the pedal and the motor starts running. The harder you push the faster the motor will run. To stop the motor you have to release the pedal so the speed will decrease. C_LG3_MANUAL 11/01/2006 2


5 CHAPTER 2 : MECHANICAL ADJUSTMENT 1. NEEDLE SETTING Select carefully the needle according the thickness of the thread. Screw tightly the needle into the needle holder C by means of the flat tweezer delivered with the accessories. The needle should be positioned in the flat opening of the needle holder. (Fig. A) C FIG. A The needle holder is passing through the tube C and should be placed in the correct position with the screw C by hand and adjust the height so that the material can slide under the needle without touching it. (Fig. B) C C FIG. B C_LG3_MANUAL 11/01/2006 3


6 The needles have different sizes and named as : Hook N 1 : Part n : C.0253SC070 Hook N 2 : Part n : C.0253SC080 Etc. C.0253SC090 C.0253SC100 C.0253SC110 C.0253SC120 The lower side of this hook is guide into C You have to adjust the lower guide so that the material can slide under needle without touching it. You have different kind of guides according to the thickness of the hooks. Guide Part n : C.00601C01 for hook : C.0253SC070 C.00601C02 for hook : C.0253SC080 C.00601C03 for hook : C.0253SC090 C.00601C04 for hook : C.0253SC100 C.00601C05 for hook : C.0253SC110 C.00601C06 for hook : C.0253SC NEEDLE BAR ORIENTATION The crank C and the hook and the cone lever C must be placed in the same direction. (Fig. 1A-1B) This means for the Chain-stitch at 6 o clock. C FIG. 1A C_LG3_MANUAL 11/01/2006 4

 The hook must be exactly in the opposite position as it was during the chain stitch")
7 C FIG. 1B If you are sewing the Moss-stitch, you have to turn the hook 180. This means : the hook at 12 o clock and the crank at 6 o clock and pulling the part C to the left and turning backwards. (Fig. 2) The hook must be exactly in the opposite position as it was during the chain stitch work. FIG. 2 C C C_LG3_MANUAL 11/01/2006 5
8 3. NEEDLE PLATE SETTING The needle should pass the needle plate in one of the 12 foreseen holes. Use the hole just in front from where the threaded needle is coming out of the needle plate. Choose a convenient hole so that the needle can pass freely though the hole. The needle must be exactly in the middle of the hole. Don t use too large holes, especially with thin material. If this is not the case, do the following : To turn the plate : C (Fig. 3), unscrew part C (Fig. 2) and use the curved point knife. If the hole is correctly placed, screw part C again. (Fig.2) C C.00601C01/2/3 C C.00946A FIG. 3 4.FEEDDOG SETTING The Cornely LG3 is normally equipped with 1 rubber feeddog : C.00946A. We are using the feeddog with teeth C.00946D when using hard fabric. The other feeddog is used for fine fabric. (Fig. 4) By raising lever C (Fig. 3), you are moving the feeddog upwards. C_LG3_MANUAL 11/01/2006 6
9 . FEEDDOG RUBBER C.00946A C.CA-26 C.00946D C.00946L C.CA-28 C C.CA-33 C.01133D FIG. 4 C.00946A C.00946D 5. FOOT PRESSURE ADJUSTMENT By unscrewing the nut : C.10152, you are regulating the tension in the C.10151, regulating bushing. (Fig. 5) For very high speed, ask for the spring C instead of the spring C to increase the tension of the pressure foot C FIG. 5 C C C.13296
10 CHAPTER 3 : THREADING The machine is supplied with spoolholder C (Fig. 6), which requires cylindrical spools. We also have spoolholders for conical spools. a. The machine threading with a cylindrical spoolholder is the following : C C C C.13295V C C FIG. 6 C_LG3_MANUAL 11/01/2006 8


11 Raise the pad, C (Fig. 6) insert the spool on the shaft and adjust nut screw C.13295V. Pull the thread through the eye of the tension spring C The thread must come from below the spool. Pass the thread hook C through the big hole of the needleplate C which is in front of the needle hole. Catch the thread and pull it up under the needleplate C Pass the thread under foot C.00946A which has been raised beforehand. The thread must be laying towards you. Start the motor while holding the thread on the table with your left hand as instructed above just the time to do one stitch so that the needle catches the thread and let it pass through the plate. Now, remove the thread from the needle with the curved knife and lay the thread on the table. The thread tension is adjusted by pad pressure. The spool tension can be regulated by raising the lever C (Fig. 6) or lower the lever C b. The machine threading with a conical spoolholder is the following : D C E C FIG. 7 Put the conical Bobbin on the spoolholder A.,(Fig. 8 ), put the yarn through the eye B (Fig. 8), pass through eye C (Fig. 7) between the tension disc D (Fig. 7) then pass through the eye E to pass afterwards through the tensionspring C Follow now the instruction as for the cylindrical spoolholder. C_LG3_MANUAL 11/01/2006 9
12 FIG. 3 B A FIG. 8 C The machine threading for braiding. The machine CORNELY LG3 makes every kind of braiding (flat, raised, side sewn of center sewn) with any braid, cord, ribbon, strung beads, silk, cotton, tergal, terylene, cellophane, plastics, metal threads etc. Work with a chain stitch and check that the hook point of the needle is in the same place as the flat edge of needle tube. Then set the braiding attachment C.10288W complete.(fig. 10) Place the braid, cord or ribbon, etc. on the spool L (Fig. 9) above the head of the machine. Use small ball chaplet to pass the braid through the needle tube, entering top opening, going out of the needle tube through the botton opening, then passing through the suitable guide or nipple. (See Chapter 7.) Nipple must be in the same direction as the hollow part of the needle tube The nipple is composed of four parts : - small tube tightened in the needle tube - screw. - Small spring for cloth pressure (if taping) - guide The braid must slide freely in the nipple but reasonable. When you ask for a new guide, never forget to send us a small sample of the braid or cord. C_LG3_MANUAL 11/01/


13 SPOOL L FIG. 9 FIG. 10 C.10288W C_LG3_MANUAL 11/01/
14 SEVERAL THREAD WORKS Accessories are mounted on weaving gear C and are marked A & C, as well as on the gear. (Fig. 11) Two threads works are made by braid curling around the chainstitch row which sews it on the cloth. Three threads works are made with additional stuffing between coiling and chain stitch. a. Two threads works Use the following parts : - Spoolholder C.10632W mounted on the weaving gear C Weaver C.10300W - Nipple C.00601C...for 2 threads screwed in lower tube (according thickness) (Fig. 11). The thread comes from spool C.00635M, passes through the hole of the weaver holder C through the eyelet C then into the thread guide C.10304/1.7 or C.10304/3, according to the thickness. Let the lace pass under the pressure foot. The thread tension is adjusted by the screw which is under the spoolholder. The weaver height settings will be made when the machine is disclutched and the nipple is in upper position. Release the weaver assembly holding screw and set the lining with lower part of nipple. Since in two threads works, the chain stitch is completely coated by the coiling thread, machine must be set with a rather short stitch. b. Three threads works Use the following parts : - Spoolholder C.10632W complete - Weaver C.10300W complete - Nipple C.01127A for three threads, size according to cord thickness - Braiding attachment C.10288W complete (Fig. 10 & 11) Same works as with two threads, plus a Stuffing thread which must come through the hook needle holder. It is better to use a rather flexible material. Put the crank towards the operator, the stuffing thread passage hole must be on the opposite side. The hook needle will be screwed so that its hook will be on the opposite side of the flat part of the needle holder. The coiling thread comes from spool C.00635M and passes through holes. Follow the instructions as for 2 threads. The stuffing thread comes from the braiding attachment C.10288W complete and passes through the needle holder and the guide and comes upon material. The hook needle is set rather close to the material to obtain a short chain stitch. C_LG3_MANUAL 11/01/
15 c. Spine or Picot works The thread is coming from the braid spool, passes through the hook holder and the nipple. Adjust very strong then tension and increase the hook height. The chain stitch thread tension must be practically zero. This spine stitch happens only when working on circles or curves. WARNING : For all those kinds of works, make sure that the weaving gear is correctly set. To check this, run the machine at full speed to be sure the declutching is correct. Turn the crank to the left, hole A on the weaving gear must be just in front of the operator. C.10632W C C C.10300W C.00635M C.00601C01/02 C.01127A C FIG. 11 C.10304/1.7 C_LG3_MANUAL 11/01/
 FIG. 12 C.10015 C.")

16 CHAPTER 4 : ADJUSTING THE STITCH LENGTH. To adjust the stitch length, you have to unscrew the nut : C (fig. 5), then turn the screw C (Fig. 5). Screw downwards to shorten the stitch and screw upwards to lengthen the stitch. If you want to have very big stitches or the fabric has to pass fluently the feeddog without braking the thread you have to unscrew C and raise part : C (Fig. 12) FIG. 12 C C CHAPTER 5 : ADJUSTING THE THREAD TENSION The thread tension can be regulated by 1. adjusting the needle height 2. adjusting the thread tension a. Adjusting the needle height If you want a very thin stitch you have to lower the needle. If you want a very large stitch you have to upper the needle but not TOO high because this can cause lack of stitches. b. Adjusting the thread tension There is also here a difference in adjusting the thread tension depending from the Cylindrical or Conical spoolholder. The tension cannot be too high or too less. For the cylindrical spoolholder you can regulate the tension by the lever C (Fig. 6) C_LG3_MANUAL 11/01/
17 For the conical spoolholder you can regulate the tension by screw (Fig 13). If you are missing some stitches : increase the tension If the thread is breaking : decrease the tension FIG. 13 CONICAL BOBBIN The Cornely machine is probably the most durable piece of machinery ever made. This could be due to the care they are given by the operator. C_LG3_MANUAL 11/01/
18 CHAPTER 6 : LUBRICATION When you oil the machine, do it sparingly. If you get too much oil, the machine will spit the oil back onto the fabric. Every moving part needs oil on it. OIL TYPE ARAL VITAN G F 22 BP ENERGOL HLP 22 FINA HYDRAN 22 MOBIL D.T.E. 22 SHELL TELLUS C.22 The machine Cornely LG3 has a special equipment situated in front of the head with which you can change the speed when curling around the chainstitch row. You can choose to curle around every 2/3/4/5 or 6 stitches according the work. This is a very easy operation. For the simple chainstitch work you have to put the speed on O. (Fig 14). FIG 14 C_LG3_MANUAL 11/01/


19 CHAPTER 7 : INSTALLATION OF THE BOBIN STAND C_LG3_MANUAL 11/01/
20 CHAPTER 8 : INSTALLATION OF THE EURAMOT MOTOR *ACTUATOR *COMMUTATION TRANSMITTER FOR DC MOTOR *POSITION TRANSMITTER C_LG3_MANUAL 11/01/
CORNELY FD. OPERATING MANUAL English
 CORNELY FD OPERATING MANUAL English NV. A. DE KONINCK SA. Avenue Sleeckx 84-86 B-1030 BRUSSELS - BELGIUM Phone : ++32/2 216 31 40 Fax : ++32/2 242 41 89 E-mail : info@titansew.com Web : www.titansew.com
Basic steps to time the Gammill quilting machine s rotary sewing hook
 Basic steps to time the Gammill quilting machine s rotary sewing hook 1.) Turn the machine off and unplug it. 2.) With the needle bar in the raised position, remove the bobbin and bobbin case. 3.) Remove
S-85SCH
 4411-4423-4432-4443-4452 5511-5523-5532-5554 44S-85SCH Service Manual 104 73 14-26 2014-02-24 CONTENTS 1. Names of principal parts...2 2. Removing methods of external parts 2-1 Sewing table...3 2-2 Face
UK10 UK11. First published: June No.KX03023
 UK10 UK11 First published: June 2003 No.KX03023 INTRODUCTION Thank you for purchasing Kansai Special s UK series machine. Please study this instruction manual carefully before operating the machine. 1.
First published : May 1997 Fourth edition : January No
 First published : May 1997 Fourth edition : January 2006 No. 050153 INTRODUCTION Thank you for your purchasing Kansai Special's FX Series. Read and study this instruction manual carefully before beginning
SERVICE MANUAL AND PARTSLIST
 SERVICE MANUAL AND PARTSLIST Next 20 CONTENTS WHAT TO DO WHEN... 1~3 SERVICE ACCESS FACE COVER... 4 TOP COVER... 4 BASE COVER... 5 REAR COVER... 6 FRONT COVER... 7 MECHANICAL ADJUSTMENT NEEDLE THREAD TENSION...
CONTENTS PRECAUTIONS BEFORE STARTING OPERATION PREPARATION FOR OPERATION CAUTIONS ON USE OPERATION
 CONTENTS PRECAUTIONS BEFORE STARTING OPERATION ------------------------------------- 1 PREPARATION FOR OPERATION 1. Adjustment of needle bar stop position ---------------------------------------------------------
SERVICE MANUAL MODEL: 13512, 14412, 15312
 SERVICE MANUAL MODEL: 13512, 14412, 15312 CONTENTS TROUBLESHOOTING... 1-3 SERVICE ACCESS (1) FACE COVER, BELT COVER... 4 SERVICE ACCESS (2) BASE PLATE... 5 SERVICE ACCESS (3) FRONT COVER... 6 SERVICE ACCESS
Daily Maintenance. 2. Insert bobbin cases in to rotary hooks. Make sure bobbin thread is not over 2 inches long. Close bobbin case covers.
 Rotary hook 1. Open bobbin case covers and remove bobbin cases. Use brush to remove lint build up in and around rotary hooks. Compressed air may also be used. Daily Maintenance Cle aning Oiling Rotary
EasyStitch. Instruction and guarantee manual 1 YEAR GUARANTEE
 EasyStitch Instruction and guarantee manual 1 YEAR GUARANTEE CONTENTS: 1. Machine Parts 2. Accessories 3. Safety Instructions 4. Battery Installation 5. Threading 6. Fitting fabric and sewing 7. Adjusting
We have made a summary with a few steps to follow, to help you solve the most common problems.
 Matri will do everything possible to identify and resolve any problems that occur with your machine, within the warranty period. But it is not always necessary to send back your machine to be repaired.
SEWING MACHINE For use with Janome HD 1000
 SEWING MACHINE For use with Janome HD 1000 YALE CENTER FOR ENGINEERING INNOVATION AND DESIGN Table of Contents p. 3-5... Winding the Bobbin p. 6-7... Threading the Bobbin p. 8-10... Threading the Needle
INSTRUCTION BX1425P,PSM,PTV BX1433P,PSM,PTV BX1025P,PSM BX1033P,PSM. No First published : November 1997
 INSTRUCTION Industrial Sewing Machines BX1425P,PSM,PTV BX1433P,PSM,PTV BX1025P,PSM BX1033P,PSM First published : November 1997 No. 970112 INTRODUCTION Thank you for your purchasing Kansai Special's BX
the needle, the user must take sufficient care to avoid injury and observe the sewing area continuously while sewing.
 / - nstruct0fl maflua 7 the needle, the user must take the light bulb is 15 watts. agent. by anyone but an authorized Pfaff D) The drive belt must never be adjusted B) When leaving the machine, chan C)
INTRODUCTION THANK YOU FOR CHOOSING OUR OVERLOCK MACHINE FOR YOUR SAFETY BEFORE YOU USE - 1 -
 INTRODUCTION THANK YOU FOR CHOOSING OUR OVERLOCK MACHINE This overlock machine can stitch dependable seams on all kinds of fabric, both light and heavy, including cotton, wool, rayon, tricot, jersey, and
FBX-PA-2AC. Third edition : April No
 FBX-PA-2AC Third edition : April 2006 No. 060058 INTRODUCTION Thank you very much for purchasing Kansai Special FBX series. Read and study this Instruction Manual carefully before you start any of the
FBX1104P FBX1104 FBX1106P FBX1106
 FBX1104P FBX1104 FBX1106P FBX1106 Second edition : September 2004 No. 040037 INTRODUCTION Thank you for your purchasing Kansai Special's FBX Series. Read and study this instruction manual carefully before
OPERATING INSTRUCTIONS 3421UX VETERANS BLVD, CARLSTADT, NJ 07072
 OPERATING INSTRUCTIONS 3421UX5-1 400 VETERANS BLVD, CARLSTADT, NJ 07072 CONTENTS DESCRIPTION... 3 OPERATOR INFORMATION... 5-8 INSTALLATION...... 4 ADJUSTMENT... 8-17 LUBRICATION... 5 INDEX Description
Replacing the Reciprocator on an SWF Multi-head.
 Replacing the Reciprocator on an SWF Multi-head. Follow the instructions below to replace the reciprocator in the SWF multi-head machines. The tools required are found in the tool kit that came with the
SCHACHT STANDARD FLOOR LOOMTM
 SCHACHT STANDARD FLOOR LOOMTM FL3109 FL3111 FL3113 FL3115 FL3121 FL3123 FL3125 FL3127 FL3310 FL3312 FL3314 FL3316 FL3322 FL3324 FL3326 FL3328 Assembly instructions LOW CASTLE LOOM IN MAPLE Find out more
Top Innovations, Inc. Innovative Products to Make Your Life Easier. Model SP-402 Owner s Manual
 Top Innovations, Inc. Innovative Products to Make Your Life Easier Model SP-402 Owner s Manual THIS IS NOT A TOY! Adult supervision recommended Item contains sharp functional points and small parts Machine
WX8800 WX8700 LX5801 WX8842 WX MC30
 WX8800 WX8700 LX5801 WX8842 WX8842-1 MC30 First published : August 1991 Third edition : August 2004 No. 040037 INTRODUCTION Thank you for your purchasing Kansai Special's WX Series. Read and study this
BERNINA. Overlocker Workbook 2
 Overlocker Plus For current BERNINA models 2016 BERNINA of America. Permission granted to copy and distribute in original form only. Content may not be altered or used in any other form or under any other
CONTENTS LOCATE AND IDENTIFY THE PARTS... WIND THE BOBBIN... PREPARE YOUR TOP THREAD... STITCH SELECTOR / STITCH LENGTH/STITCH WIDTH CONTROLS...
 SERVICE MANUAL SEWING MACHINE MODEL 385. 15208400 OCTOBER, 2003 CONTENTS LOCATE AND IDENTIFY THE PARTS... WIND THE BOBBIN... PREPARE YOUR TOP THREAD... STITCH SELECTOR / STITCH LENGTH/STITCH WIDTH CONTROLS...
Service Manual 1st Release August 2001
 Service Manual 1st Release August 2001 Contents 1 Foreword 3 Notes on the sewing machine in relation to environment, handling, cleaning and safety 5 Specifications off PFAFF machines 6 Removing the housing
MAIN PARTS
 MAIN PARTS 7 8 9 10 11 12 13 1 2 3 17 4 5 6 01 02 03 04 05 12 23 34 45 56 13 24 35 46 57 14 25 36 47 58 15 16 26 27 37 38 48 49 59 60 06 07 08 09 10 17 18 28 29 39 40 50 51 61 62 19 30 41 52 63 20 21 31
JVice Care and Maintenance Thanks for purchasing a Jvice. If properly looked after your Jvice will give a lifetime of tying pleasure.
 JVice Care and Maintenance Thanks for purchasing a Jvice. If properly looked after your Jvice will give a lifetime of tying pleasure. Although it is manufactured from highest quality materials any metal
SERVICING MANUAL 419S/423S
 SERVICING MANUAL 415 419S/423S TROUBLESHOOTING PROBLEM CAUSE REMEDY REFERENCE 1. SKIPPING 1. NEEDLE IS NOT INSERTED INSERT THE NEEDLE PROPERLY. STITCHES PROPERLY. 2. NEEDLE IS BENT OR WORN. CHANGE THE
A. Preparing the fabric (not shown):
:") INSERTING ZIPPERS - CENTER INSERTION The zipper can be snapped on to the right or to the left side of the needle so that you can sew close to the zipper. When sewing on the right side of the zipper, attach
INSERTING ZIPPERS - CENTER INSERTION The zipper can be snapped on to the right or to the left side of the needle so that you can sew close to the zipper. When sewing on the right side of the zipper, attach
INSTRUCTION. Industrial Sewing Machines V7100/D,DE,F,ML W8100/D,DE,F,C W8042 W V7002-1S W8103-1S. No Third edition : March 2001
 INSTRUCTION Industrial Sewing Machines V7100/D,DE,F,ML W8100/D,DE,F,C W8042 W8042-1 V7002-1S W8103-1S Third edition : March 2001 No. 010012 INTRODUCTION Thank you for your purchasing Kansai Special's V.W
SERVICE MANUAL FOR DT4-B281 FOUR NEEDLE DOUBLE CHAIN STITCHER WITH PULLER. From the library of: Superior Sewing Machine & Supply LLC
 SERVICE MANUAL FOR DT4-B281 FOUR NEEDLE DOUBLE CHAIN STITCHER WITH PULLER Table of Contents [A] Model Plate Display... 1 [B] Specifications... 2 [C] Description of Mechanism... 3 [) Needle bar mechanism...
SERVICE MANUAL PARTS LIST MODEL: NH40
 SERVICE MANUAL & PARTS LIST MODEL: NH40 CONTENTS What to do when... 1-3 SERVICE ACCESS Face Cover... 4 Bed Cover... 5 Free-arm Cover... 6 Front Cover... 7 Rear Cover... 8 MECHANICAL ADJUSTMENT Presser
NILUS II 8 SHAFTS JACK-TYPE LOOM
 NILUS II 8 SHAFTS JACK-TYPE LOOM 36" 45" 60" 8 SHAFTS 1029-0008 1030-0008 1031-0008 On receiving the loom, unpack and lay out the loom components. Do NOT discard any packing material until all parts are
Replacing the Reciprocator on the SWF Compact Series Machine (601C and 1201C)
") Follow the instructions below to replace the reciprocator in the SWF Compact series machines. The tools required can be found in the tool kit that came with the machine. Preparation 1. First, place the
Follow the instructions below to replace the reciprocator in the SWF Compact series machines. The tools required can be found in the tool kit that came with the machine. Preparation 1. First, place the
CONTENTS. LOCATE AND IDENTIFYTHE PARTS... WlNDTHE BOBBIN... PREPARE YOUR TOP THREAD... WHAT TO DO WH EN...
 SERVICE MANUAL SEWING MACHINE MODEL 385.11206300 MARCH, 2003 CONTENTS LOCATE AND IDENTIFYTHE PARTS... WlNDTHE BOBBIN... PREPARE YOUR TOP THREAD... WHAT TO DO WH EN... 1 2 3 4-6 SERVICE ACCESS FACE COVER...
SERVICE MANUAL FOR HOMELOCK M1034D 2034D 1134DW 1134D
 SERVICE MANUAL FOR HOMELOCK M1034D 2034D 1134DW 1134D 11.2000 2.2012 I HOW TO USE THIS MANUAL... 1 II HOW TO ADJUST... 2 1. Height of needle bar... 2 2. Position of the lowerlooper... 3 3. Timing of the
NILUS II COUNTER-BALANCED
 NILUS II COUNTER-BALANCED 36" 45" 60" 1026-0000 1027-0000 1028-0000 On receiving the loom, unpack and lay out the loom components. Do NOT discard any packing material until all parts are inventoried. Check
SINGER* SEWING MACHINE NO. 27 & 28 VIBRATING SHUTTLE, FOR FAMILY USE
 INSTRUCTIONS FOR USING SINGER* SEWING MACHINE NO. 27 & 28 VIBRATING SHUTTLE, FOR FAMILY USE When requiring Needle, Oil, Parts or Repairs, for your Machine Look for the Red "S" There are Singer Shops in
40 & 50 Foot PS-1 Box Car Assembly Instructions
 40 & 50 Foot PS-1 Box Car Instructions Push the #2100 coupler/stirrup assembly onto the ends of the metal floor. Slide them into the slots and slightly lift the ends (wings), then press firmly on the front
Serging Ahead For all current BERNINA serger models
 2 Serging Ahead For all current BERNINA serger models 2011 BERNINA of America, Inc. Permission granted to copy and distribute in original form only. Content may not be altered or used in any other form
INSTRUCTIONS FOR USING THE GREIST ZIGZAG / AUTOMATIC BUTTONHOLE ATTACHMENT Model #;s 6, 7, 8, 9 &10
 INSTRUCTIONS FOR USING THE GREIST ZIGZAG / AUTOMATIC BUTTONHOLE ATTACHMENT Model #;s 6, 7, 8, 9 &10 The possession of a Buttonhole Attachment is one luxury which is also an economy and sewing becomes a
TIPS & TROUBLESHOOTING
 Achieving good stitch quality 5450 North W Street Pensacola FL 32505 850-433-1414 www.martellinotions.com TIPS & TROUBLESHOOTING Understanding how your long arm machine makes a stitch will help you make
INSTRUCTIONS and PARTS BOOK. U. S. Blind Stitch Machines
 r- INSTRUCTIONS and PARTS BOOK for U. S. Blind Stitch Machines Model 88-R. S. BLIND STITCH MACHINE CORP. 12 SEVENTH AVENUE NEW YORK 1, N. Y. LAclcawanna 4-9144-5-6 A SUPPLEMENT TO PARTS CATALOGUE FOR U.S.
HOW TO USE YOUR LONG SHUTTLE MANUAL SEWING MACHINE. 4çJ MODEL NO.768
 NO.768 MODEL 4çJ Ii SEWING MACHINE LONG SHUTTLE MANUAL HOW TO USE YOUR INDEX Zigzag Formation 18 Zigzag Sewing And Pattern Formation 17 Turning a Corner 14 Placement of Needle 4 Picking Up Bobbin Thread
Overlocker Threading Overview
 BERNINA ebook Series JUST OVERLOCK IT! Overlocker Threading Overview BERNINA L 450 / L 460 Threading Written by: Jaime David, BERNINA Educator, Overlocker Specialist Threading Aids Threading Steps Machine
ARTISAT 36 JACK-TYPE 8 SHAFTS
 ARTISAT 36 JACK-TYPE 8 SHAFTS 1009-0008 1573 Savoie C. P. 4 Plessisville, Qc. G6L 2Y6 TEL: 819-362-7207 FAX: 819-362-2045 www.leclerclooms.com info@leclerclooms.com On receiving the loom, unpack and lay
STOP! READ THIS FIRST
 STOP! READ THIS FIRST 1 Getting Started With Your Meistergram Embroidery System (the quick guide) Thank you for choosing Pantograms for your embroidery system provider. We encourage you to read the following
Brother Industries, Ltd. Nagoya, Japan
 4. 2001. This service manual has been compiled for explaining repair procedures of the MODEL XL-6562, XL6452, XR- 46. This was produced based on up-to-date product specifications at the time of issue,
WSG 8-115; 8-125; P; WSG ; WSG P; WSG PS; WSG P; WSG 15-70Inox
 Repair instructions Page of 47 Contents. Models described 2. Technical data 3. Notes and requirements 4. Tools required 5. Lubricants and auxiliary substances required 6. Disassembly 7. Assembly 8. Connection
SAVE THESE INSTRUCTIONS
 INSTRUCTION BOOK IMPORTANT SAFETY INSTRUCTIONS Your sewing machine is designed and constructed only for HOUSEHOLD use. Read all Instructions before using this appliance. DANGER To reduce the risk of electric
Cover Stitch Wide. Cover Stitch Looper Thread. Cover Stitch Wide page 1
 Cover Stitch Wide Cover Stitch Wide This professional Cover Hem stitch is a necessary requirement for today s sewing. The stitch is often seen in ready-to-wear garments. Two needles create parallel rows
Owner s Manual For Sit Down
 Owner s Manual For Sit Down Table of Contents Warranty...3 Attaching your square tubing...4 Your Light Fixture...5 Your Thread Stand...6 What is the Tension Release Lever?...7 How Do I Adjust the Height
Maintenance manual. 1. Check height seat adjusment
 1. Check height seat adjusment 1.1 By control hand lever seat, seat must always going down when person is sitting on it. 1.2 Squeaky noise when control hand lever seat? 1.1 1.2 2. Check table height adjustment
PARTS LIST MODEL: HDEJ1800
 First Edition: June 0 PARTS LIST 0 8 4 8 8 4 8 0 KEY PARTS NO. NO. DESCRIPTION 0400 Top cover (unit) 00 Top cover (unit) 0000 Top cover 4 40A04 Flip-top sewing instruction panel 000 Hinge rod (right) 00
Owyhee County 4-H. Cloverbud. Activity Book
 Owyhee County 4-H Cloverbud Activity Book Name Age Year in 4-H 20 Club Name Member s Signature Parent/Guardian s Signature Leader s Signature Projects or activities I worked on this year were: I attended
From the library of: Superior Sewing Machine & Supply LLC
 SEIKO {( im (B JP M t O ^ mid jmt ^ IO JES JLi X) 2n> ^ ^ ^ ^ ^ ^ SSlSiD STSRM SlUMRSS 1? /tf SPECIFICATIONS Maximum speed: Number of needle : Needle: Thread: Feed : Stitch: Presser foot: Presser bar lift:
Installation Instructions for FC2 & FC15 Forward Controls for the Super Magna
 Installation Instructions for FC2 & FC15 Forward Controls for the Super Magna It is highly recommended that you use a thread lock compound such as Loctite brand on all threads to keep them from vibrating
...r.smcefbdb. DNSEWe CONSOLIDATED SEWING MACHINE CORP. L INDUSTRIAL SEWING & CUTTING EQUIPMENT OPERATING INSTRUCTIONS. and PARTS LIST.
 ...r.smcefbdb DNSEWe CONSOLIDATED SEWING ACHINE CORP. L INDUSTRIAL SEWING & CUTTING EQUIPENT OPERATING INSTRUCTIONS and PARTS LIST for CONSEW ODELS 18 and 118 INDUSTRIAL SEWING ACHINES IDA TED SEWING ACHINE
COMPACT 24 8 SHAFTS
 COMPACT 24 8 SHAFTS 1022-0001 1573 Savoie C. P. 4 Plessisville, Qc. Canada G6L 2Y6 TEL: 819-362-7207 FAX: 819-362-2045 www.leclerclooms.com info@leclerclooms.com On receiving the loom, unpack and lay out
Lumber Smith. Assembly Manual. If you are having problems assembling the saw and need assistance, please contact us at:
 Lumber Smith Assembly Manual If you are having problems assembling the saw and need assistance, please contact us at: 804-577-7398 info@lumbersmith.com 1 Step 1 Safety Carefully read the Owners Manual.
S E L E C T I O N. Arm Curl. User manual
 S E L E C T I O N T H E S T R E N G T H E V O L U T I O N User manual The identification plate of the and manufacturer, affixed behind the seat, gives the following details: A Name and address of the manufacturer
52/8 04/2005 UNIVERSAL. Narrow Stitching Head. Operating-Instructions Spare parts list
 Operating-Instructions Spare parts list UNIVERSAL 52/8 04/2005 Narrow Stitching Head hohner Maschinenbau GmbH Gänsäcker 19, 78532 Tuttlingen, Telephone 07462 / 9468-0, Fax 07462 / 9468-20 hohner Maschinenbau
AMermaid s. Basic technique. Raising the surface. Jennifer Rochester creates simply folded containers encrusted with stitch
 Jennifer Rochester creates simply folded containers encrusted with stitch PHOTO BY ALAN BENNINGTON For centuries, nomadic tribes have used folded squares of fabric to create soft containers. These folded
ML-4 INSTRUCTION BOOK. From the library of: Superior Sewing Machine & Supply LLC
 ML-4 INSTRUCTION BOOK FOREWORD Many thanks for your perchasing of MAMMY LOCK machine, ML type. For use of the machine, please read carefully this instruction book. With your machine you can make an elegant
Owner s Manual For Sit Down
 Owner s Manual For Sit Down Feb 2015 Table of Contents Warranty...3 Your Light Fixture...4 Attaching the Belt Guard...4 Your Thread Stand...5 Control panel...6 Needle position...7 Speed Setting...8 What
PFAFF. rom the library of: Superior Sewing Machine & Supply LLC. Service Manual Justieranl. engi. 7.92
 PFAFF 5642 Service Manual 296-12-13925 Justieranl. engi. 7.92 Notes on safety The machine must only be commissioned in full knowledge of the instruction book and operated by persons with appropriate training.
SEWING MACHINE MODEL 385, 15358
 SERVICE MANUAL SEWING MACHINE MODEL 385, 15358 BER, 2006 CONTENTS LOCATE AND identify THE PARTS... WiND THE BOBBIN... PREPAREYOURTOPTHREAD... WHAT TO DO WHEN... 1 2 3 4-6 SERVICE ACCESS FACE COVER... BELT
MACHINE PARTS CHART SINGER*
 Form U3174 (Rev. 983) Part No. 643197 002 (Rev. 1) MACHINE PARTS CHART for SINGER* 220 220 U2 U3 * A Trademark of THE SINGER COMPANY Copyright 1980 THE SINGER COMPANY All Rights Reserved Throughout the
COMPACT 24 8 SHAFTS
 COMPACT 24 8 SHAFTS 1022-0001 1573 Savoie C. P. 4 Plessisville, Qc. Canada G6L 2Y6 TEL: 819-362-7207 FAX: 819-362-2045 www.leclerclooms.com nfo@leclerclooms.com On receiving the loom, unpack and lay out
Symbols used. Move the part in the direction of the arrow. Set the clearance as indicated. Move the part to its highest or lowest position.
 4.1999. This service manual was compiled for use when repairing the XL5300, 5200, 5100, 5030, 5020, 5010,PX300,200,100 Zigzag Stitch Sewing Machines. Use this manual, together with the Parts Catalog, when
TORO 4000 TORO and. INSTRUCTION and SPARE PARTS MANUAL. artisanu. TORO 3000 and TORO Threading Diagram
 Please make sure that the thread is inserted between the two thread tension disks. If your brand of Thread pops-out of the tension disks, wind the thread all the way around the disks and back through the
Janome 204D Instruction Manual. MODEL 204D. 204D Owners Manual/ User Guide
 Janome 0D Instruction Manual Janome 0D serger Janome 0D Instruction Manual MODEL 0D 0D Owners Manual/ User Guide Janome 0D Instruction Manual IMPORTANT SAFETY INSTRUCTIONS Your sewing machine is designed
Q-Zone Hoop-Frame. Assembly Instructions. Copyright July 11, 2018 Grace Company (Reproduction Prohibited) Version 1.8
 Version 1.8") Q-Zone Hoop-Frame Assembly Instructions Copyright July 11, 2018 Grace Company (Reproduction Prohibited) Version 1.8 Table of Contents Table of Contents... i Warranty... ii Parts List Box 1...iii Box 2...
Q-Zone Hoop-Frame Assembly Instructions Copyright July 11, 2018 Grace Company (Reproduction Prohibited) Version 1.8 Table of Contents Table of Contents... i Warranty... ii Parts List Box 1...iii Box 2...
Table of Contents. Warranty...3. Attaching your square tubing...4. Your Light Fixture...5. Your Thread Stand...6. Attaching your Laser Light...
 Owner s Manual Table of Contents Warranty...3 Attaching your square tubing...4 Your Light Fixture...5 Your Thread Stand...6 Attaching your Laser Light...7 What is the Tension Release Lever?...7 Needle
WARNING! ETCHED PARTS CONTAINED IN THIS KIT HAVE SHARP POINTS, EDGES AND CORNERS.
 MPD18 chassis build instructions K A (see below for details) J I G H L C D F E B M Parts list: Ident Quantity A Etched Nickel/Silver fret 1 B Wheel sets 2 C Worms 2 D Worm gears 2 E Shaft adapters 2 F
NAMES OF PARTS. 1 Thread guide for bobbin winding 2 Take-up lever. 3 Upper thread tension dial. 4 Face cover. 5 Thread guide for upper threading
 6 Presser foot thumb screw 9 Spool pins (retractable) 8 Shuttle cover 5 Thread guide for upper threading 7 Presser foot 4 Face cover NAMES OF PARTS.r4r : VjN S* ;WWE7-17 16 15 MODEL 860.-.-.- --. :.---.-
COMPACT 24 4 SHAFTS Savoie C. P. 4 Plessisville, Qc. G6L 2Y6
 COMPACT 24 4 SHAFTS 1022-0000 1573 Savoie C. P. 4 Plessisville, Qc. G6L 2Y6 TEL: 819-362-7207 FAX: 819-362-2045 www.leclerclooms.com info@leclerclooms.com On receiving the loom, unpack and lay out the
16U288 SINGER' SEWING MACHINE. From the library of: Superior I Sewing Machine & Supply LLC INSTRUCTIONS. Form UIO3 (Rev, 377)., THE SINGER COMPANY
., THE SINGER COMPANY") iiv^- Form UIO3 (Rev, 377)., INSTRUCTIONS FOR USING AND ADJUSTING SINGER' SEWING MACHINE 16U288 THE SINGER COMPANY From the library of: Superior I Sewing Machine & Supply LLC CONTENTS PAGE DESCRIPTION
iiv^- Form UIO3 (Rev, 377)., INSTRUCTIONS FOR USING AND ADJUSTING SINGER' SEWING MACHINE 16U288 THE SINGER COMPANY From the library of: Superior I Sewing Machine & Supply LLC CONTENTS PAGE DESCRIPTION
SEWING AND HAND APPLICATION CRYSTAL THREADS
 SEWING AND HAND APPLICATION CRYSTAL THREADS APPLICATION MANUAL PRECIOSA CRYSTAL COMPONENTS and hand application Preciosa Crystal Components offer a wide range of various products ideal for sewing and
Four-Thread Safety Stitch
 Four-Thread Safety Stitch Four-Thread Safety Stitch This stitch is an alternative to the Five-Thread Safety Stitch. It offers the same type of Two-Thread Chainstitch. However the Three-Thread Overlock
Motorized M3 AX7200 Rotary-Style Gasket Cutter Operating Instructions
 Motorized M3 AX7200 Rotary-Style Gasket Cutter Operating Instructions INTRODUCTION Congratulations! You are the owner of the finest rotary-style gasket cutter in the world. Originally developed and patented
MIRA II Savoie C. P. 4 Plessisville, Qc. G6L 2Y6 TEL: FAX:
 1573 Savoie C. P. 4 Plessisville, Qc. G6L 2Y6 TEL: 819-362-7207 FAX: 819-362-2045 www.leclerclooms.com info@leclerclooms.com On receiving the loom, unpack and lay out the loom components. Do NOT discard
Instructions for service
 Instructions for service 8 - Minerva Boskovice, a.s., Sokolská 0, CZ - 80 7 Boskovice Tel.: +0--,, Fax: +0-- http://www.minerva-boskovice.com Edition: 0/00 Printed in Czech Republic S7 0008 CONTENTS:.
ADJUSTMENT MANUAL. This adjustment manual applies to machines from the following serial numbers onwards: #
 45 46 ADJUSTMENT MANUAL This adjustment manual applies to machines from the following serial numbers onwards: # 6 500 4 96--9 00/00 Justieranleitung engl. 0. The reprinting, copying or translation of PFAFF
CONTENTS: 1. General safety instructions Introduction... 1
 CONTENTS:. General safety instructions.... Introduction.... Head of the sewing machine.... Hook and hook box..... Description.. Height setting of the hook.. Setting the distance of the hook from the needle..
Assembly Instructions. Copyright May 01, 2013 Jim M. Bagley, GraceWood, Inc (Reproduction Prohibited)
") Assembly Instructions Copyright May 01, 2013 Jim M. Bagley, GraceWood, Inc (Reproduction Prohibited) Table of Contents Part List Part List... 3 Assembly Steps Step 1-Foot Assembly... 5 Step 2-Leg Assembly...
Assembly Instructions Copyright May 01, 2013 Jim M. Bagley, GraceWood, Inc (Reproduction Prohibited) Table of Contents Part List Part List... 3 Assembly Steps Step 1-Foot Assembly... 5 Step 2-Leg Assembly...
Overlocker Model. Air, Flow,Go! janome.co.uk
 Overlocker Model Air, Flow,Go! janome.co.uk The JANOME AirThread 2000D PROFESSIONAL unites ease-of-use with the specialised functionality of an advanced overlocker. It s our easiest to thread overlocker
CONTENTS LOCATE AND IDENTIFY THE PARTS... WIND THE BOBBIN... PREPARE YOUR TOP THREAD... STITCH SELECTOR / STITCH LENGTH/STITCH WIDTH CONTROLS...
 SERVICE MANUAL SEWING MACHINE MODEL 385. 15218400 OCTOBER, 2003 CONTENTS LOCATE AND IDENTIFY THE PARTS... WIND THE BOBBIN... PREPARE YOUR TOP THREAD... STITCH SELECTOR / STITCH LENGTH/STITCH WIDTH CONTROLS...
Sample Packet. Directions: Describe the functions of the following basic parts of a sewing machine.
 Sample Packet NAME: Directions: Describe the functions of the following basic parts of a sewing machine. SEWING MACHINE PARTS: Needle stitch plate: Feed dog system: Presser foot: Bobbin case: Spool pin:
Electric Skein Winder
 Electric Skein Winder Assembly and Use Package Contents 1 - Triangular Body (w/ motor) 1 - Cross Arm 1 - Left Foot (w/ yarn guide) 1 - Right Foot 1 - Adjustable Finger (w/ yarn clip) 3 - Adjustable Fingers
Brother PQ- Series Accessories
 Brother PQ- Series Accessories The PQ-series of high-speed straight stitch machines (1300, 1500 and 1500S) are designed to sew quickly and accurately with a wide variety of fabrics, even combinations of
STOP! READ THIS FIRST
 STOP! READ THIS FIRST Page 1 of 37 Getting Started With Your Pantograms GS1501 Embroidery Machine (the quick guide) Thank you for choosing Pantograms for your embroidery system provider. We encourage you
This guide contains everything you need to set up and operate all three. Inspira Imperial Quilting Frame Assembly...2
 Congratulations on the purchase of your Husqvarna Viking Mega Quilter 18x8, Inspira Imperial Quilting Frame, and QBOT by Inspira! This guide contains everything you need to set up and operate all three.
Depending on the size you ordered you will have either 5 Foot sections which will build the 10 Foot frame or 6 Foot sections which will build the 12
 XL Quilting Frame 1 Depending on the size you ordered you will have either 5 Foot sections which will build the 10 Foot frame or 6 Foot sections which will build the 12 Foot frame Printed 2 June 2014 Updated
JOY 2 SPINNING WHEEL
 INSTRUCTIONS JOY 2 SPINNING WHEEL SINGLE & DOUBLE TREADLE WITH A SLIDING HOOK FLYER JASW110618V8 Ashford Handicrafts Limited Factory and Showroom: 415 West Street PO Box 474, Ashburton 7700 New Zealand
Machine No. 62=53 LIST OF PARTS COMPLETE. Cp'2.- THE SINGER MANUFACTURING COMPANY. From the library of: Superior Sewing Machine & Supply LLC
 Cp'2.- e NUMIJEKINO DEPAilTMENT AuilEST 7, 1014 LIST OF PARTS COMPLETE A Machine No. 62=53 %= THE SINGER MANUFACTURING COMPANY iiv ^ --. : ' '', - - - -- W. ;.y -::- -^=v c v; > >,- -- ^/;c. V ^. r,.'
Basic Sewing Machine Parts/Their Purpose and Function
 Basic Sewing Machine Parts/Their Purpose and Function Basic Sewing Machine Parts/Their Purpose and Function: 1) Bobbin Provides the bottom thread, the underside of the stitches a sewing machine forms.
The Queen Quilter Professional Quilters Kit Frame
 The Queen Quilter Professional Quilters Kit Frame Assembly Instructions Table of Contents: Before you begin......................... Pg. 2 Wood parts............................. Pg. 3 Hardware..............................
For a flat or four-sided reticule:
 Page 1 of 8 DRAWSTRINGS When purchasing, one fabric store meter is the minimum to make two drawstrings of a nice length for one reticule in most designs. If you like longer drawstrings, increase the length.
Assembly Instructions Beta Prusa Standard & Deluxe
 Assembly Instructions Beta Prusa Standard & Deluxe 3D Printer Version 2.6 Date Page 1 / 67 General data about the assembly instructions for an incomplete machine according to appendix VI of the EG machinery