The Lynda Lyre Kit
|
|
|
- Bruno Collins
- 5 years ago
- Views:
Transcription

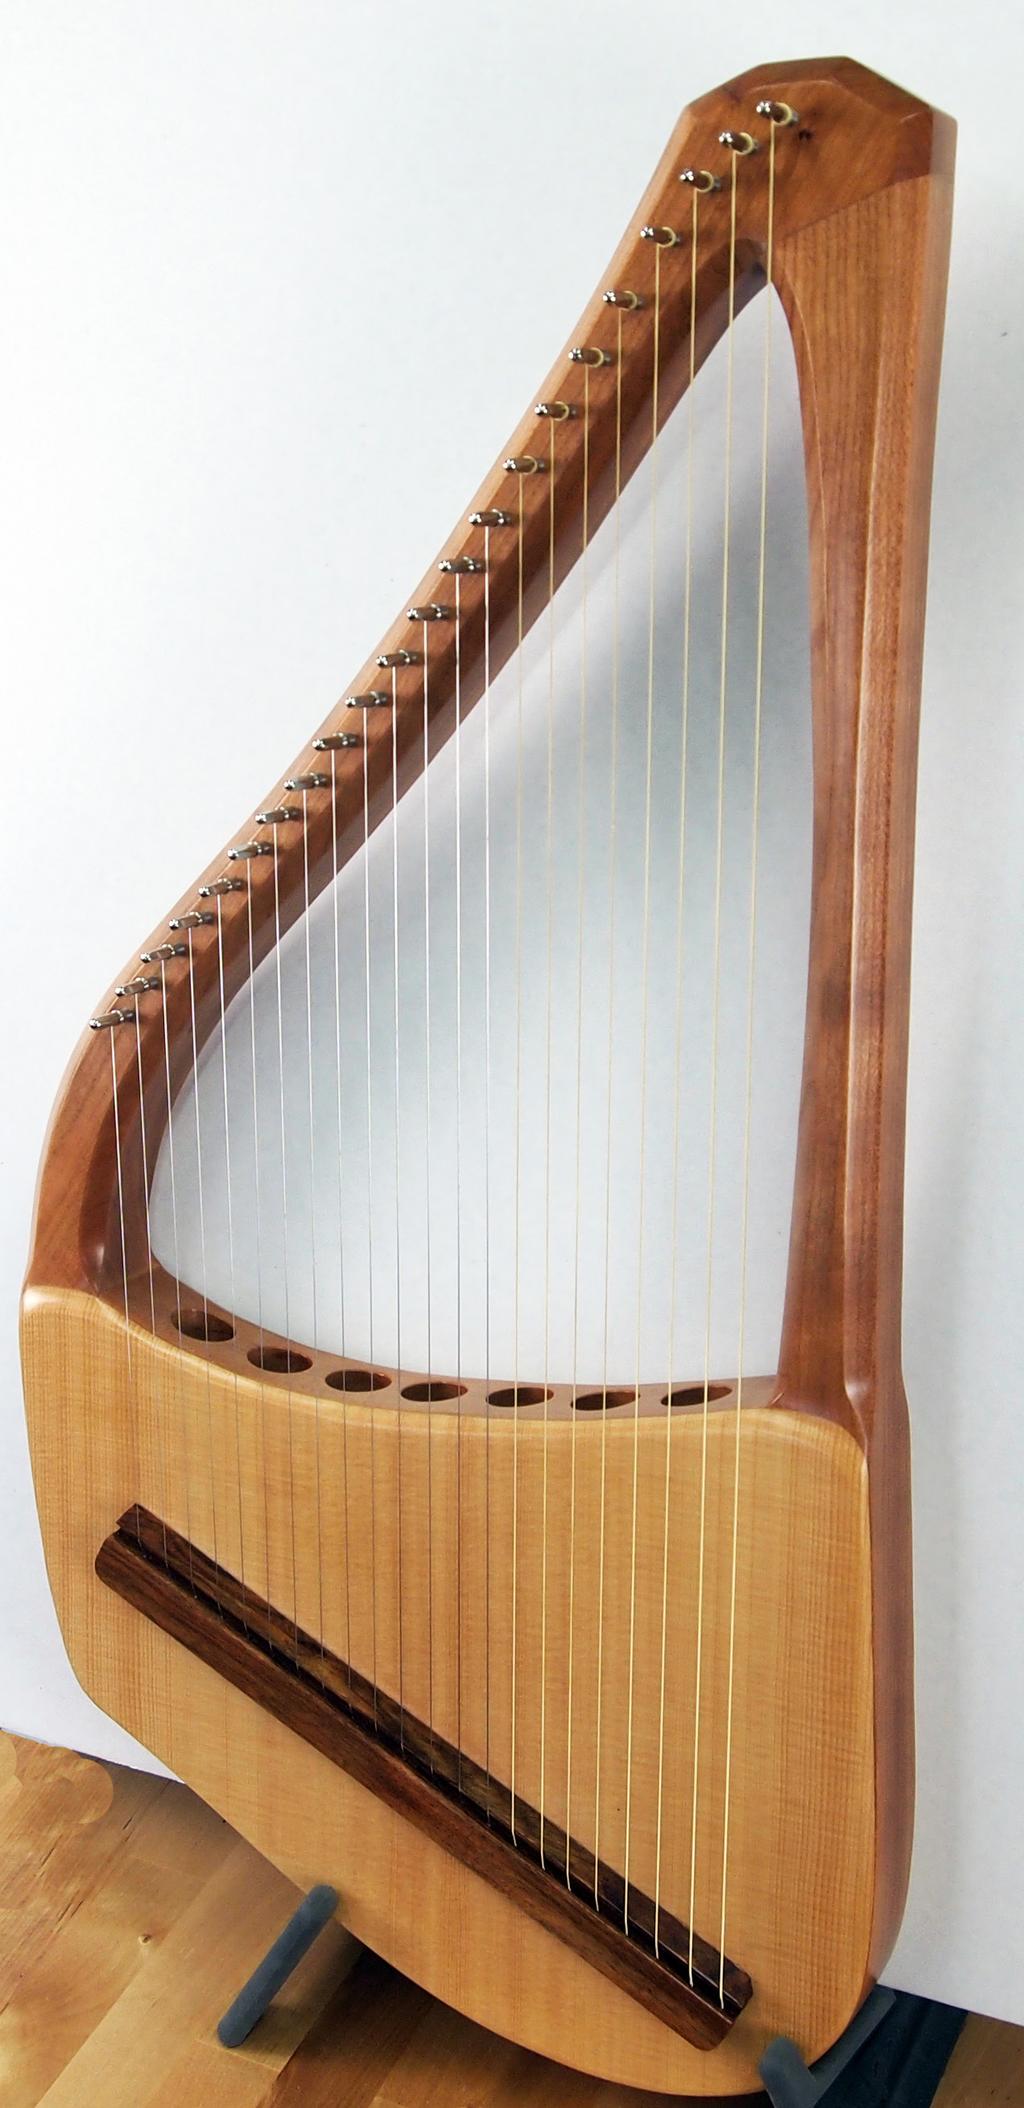


1 The Lynda Lyre Kit
 1 Drill bit - 9/64\" 1 set of 22 strings, nylon or")

2 Wood Parts: A Side A B Side B C Soundhole Arch D Tail Strip E Front Panel (Soundboard) F Back Panel G Bridge H Bridge Pad I Bridge Cap J Inner Brace K Kerfing Strip Hardware Parts: 1 Wood Screw, 3" 1 Square drive bit, #2 size 1 Cherry plug, 3/8" dia 22 Zither Tuning Pins 5 Machine Screws, flat head 6-32 x 1" 5 Stop Nuts 6-32 x 5/16" (for bridge) 1 Drill bit - 9/64" 1 set of 22 strings, nylon or wire 1 Strap w/mounting button and screw 1 L-handle tuning wrench 1 Assembly Instructions LYNDA LYRE KIT A C J D K B H F E G I BEFORE YOU BEGIN Please take the time to check over the parts of your kit now, to make sure everything is there. If you discover a problem, contact us right away so we can rectify it quickly without causing you much delay in your project. We also suggest skimming through the entire directions before beginning, just to get an overview of the project. You may decide that you need to gather more tools or purchase a few optional decorations or accessories to enhance the finished instrument. Now is a good time to decide so you can avoid delays when you reach those steps of construction. A NOTE ABOUT GLUE: Many luthiers (guitar & violin makers) still use the natural hide glues that have been around for centuries, carrying on a fine old tradition, but that does not mean that you should do the same. Animal glues require lots of experience for successful use. We build this instrument with modern woodworking adhesive, such as Elmer s Carpenter s glue or Titebond (yellow aliphatic resins), because they hold the parts even more securely than the old hide glues. The few advantages that some people claim with hide glue are more than offset by the strength, durability, ease of application, and availability of the modern woodworking adhesives. ASSEMBLY INSTRUCTIONS: 1. Test-fit the frame parts together so you can be sure everything fits well and that you understand how each part is oriented. Note that the Soundhole Arch looks like it might fit either way, but it fits best only one way. Same for the Tail Strip. All parts should match in thickness quite well, but you may need to sand a little to get the joints to mate nicely. You might want to sand off any burn marks or rough spots on the arms of the frame before assembly because some areas will be hard to access after assembly. 2. Please take time to clear enough space on a flat table for assembling the frame. Begin assembly by gluing and screwing Side A to Side B, as shown here. Make doubly sure that the frame remains flat and level on your work surface. If you discover a twist in the frame after the glue dries, you re likely to experience some frustration, and we d like you to avoid that! 2


3 NOTE: The screw is important for drawing the parts together, but it may also shift them slightly, requiring some sanding to even out the faces, and that is fine. The cherry wood is easy to shape with a sanding block or a hand-held random orbital sander. Cover the screw by gluing the cherry wood plug into the hole, as shown. 3. Once the two sides are joined, you can fit the soundhole arch in place. This may require shaping the ends a little with a disk sander to change the angles slightly. Make sure to orient it as shown in the parts photo -- it should fit most easily that way. The important thing is to have a tight-looking joint where it will be visible on the outside of the finished instrument. A gap on the inside will be covered by the front and back panels. When satisfied with the fit, apply glue to each end of the Arch and position it between the sides as shown. You can use a bar clamp, bungee cord, painter s tape, or shrink wrap to hold the sides together until the glue dries. CHECK that joints are flush with surrounding wood on both sides and that the arch does not slide out of place under pressure! 4a. Test fit the curved tail strip to the bottom of the frame. It fits best only one direction, but you may need to do a little sanding of the frame pieces or the ends of the tail strip so they fit together nicely. Check specifically how the joints will appear on the outside of the instrument when assembled, so there will be no open cracks showing. When satisfied with the fit, apply glue to the mating surfaces and use clamps to hold the parts together until dry. We have specifically made these joints to be easy to clamp, either with c-clamps or spring clamps, as shown. When dry, saw off the excess tail piece and sand it to blend with the side of the instrument. 4b. Cut the kerfing strip to fit inside the tail piece as shown -- it does not need to be perfectly tight at each end. The purpose is simply to give more glue surface for the soundboard in this area. kerfing flush with tail piece long sanding block, 60 grit When satisfied with the fit, glue and clamp the flat side of the kerfing to the tail piece so the wider edge is flush with the the edge of the tail piece. Use small spring clamps or clothes pins to hold the kerfing in place until dry. 4c. IMPORTANT: Use a long flat sanding block with coarse sandpaper (60 grit) to sand the joints & kerfing level, as shown at left. You ll be gluing the spruce front on this frame, and that panel is thin and fragile, so it is very important to smooth & even edges on the frame. Otherwise you might crack the spruce as you clamp it in place. Better to have a gentle slope at a joint than an abrupt step. 3


4 5. The Front panel is the light colored Spruce wood with straight grain. We have packed a roughly cut piece that is oversize, just to make sure you can cover the sound chamber of the instrument all the way around. When we position the soundboard, we like to have the top edges of the spruce lined up just above where the soundhole arch meets each side piece, as shown at left. That reduces the amount of sanding needed to taper and blend the spruce with the arms of the lyre. CAUTION: Be sure to glue the soundboard to the proper side of the frame -- the side where the tuning pin holes are pre-drilled. Instrument is face down in this photo You ll need to gather a number of clamps to press around the perimeter of the sound chamber when gluing the spruce in place. If you are short on clamps, you can use scraps of wood on top of the spruce to help distribute your clamping pressure over more of the perimeter. Most any kind of clamps will work, as long as they open far enough -- c-clamps, spring clamps, cam clamps, etc. kerfing We like to turn the frame upside-down when gluing the soundboard in place, as shown at right. This makes it easier to see that your clamps are squeezing out glue all the way around the frame, and the excess glue will not drip down the cherry frame and onto your table. 6. When the glue is dry, you can trim off the excess spruce around the edges. We use a flush-trim router bit for this job, moving the router clockwise around the frame. But you can also use a coarse sanding block or randomorbital hand sander to wear away the overhanging panels. The spruce is quite soft, so it sands down quickly, but work carefully so you don t chip the wood or cause splinters that deface the top surface. Once the spruce is trimmed close, you can round over the edges lightly around the frame and tackle the two places where the spruce needs to be bevelled to blend into the cherry arms. We love a random-orbital hand sander for this purpose, as shown below. You can literally sculpt the wood to the shape you want, blending the bevels of the cherry frame into the spruce, as shown below. 4


5 7. Find the bridge parts shown at right. The bridge and bridge pad are carefully drilled so the holes line up for 5 mounting screws. The parts will fit correctly only one way, with the flat surfaces facing each other. Check it out to make sure. You may have to flip the bridge pad endfor-end to get all 5 holes into alignment. Also find the Bridge Mounting Template on pages 6-7 of these directions. You will need to remove it from this booklet to use for this next step. Bend the staples to release that centerfold page. Inner Brace Bridge Cap Bridge Pad Bridge 7. Fold the paper template along the heavy black lines marked Tuning Pin holes and Leading Edge of Bridge, folding the flaps under the main sheet. Carefully line up the shorter diagonal fold alongside the first nine holes drilled in the neck of the lyre, as shown at left. You want the string lines to lead toward the left edge of each hole, as though the strings are wrapped around the tuning pins on that side of the holes. When aligned, use masking tape to hold the paper in place. The paper should cover most of the soundboard as shown at right. The Leading Edge of the bridge is where the triangle cut is located all along the length. Place the bridge against the paper template as shown. Then look at the instrument from the perspective of the bottom of the soundboard as shown below. Notice the 22 holes drilled through the back of the bridge for the strings. You want the string lines to aim directly toward the corresponding holes. Slide the bridge one way or the other until the strings each line up with the holes in the bridge, and the leading edge of the bridge touches the fold in the paper, as shown here. Tape Use tape to hold the ends of the bridge in place so it does not wander out of place as you drill the mounting holes for the screws. Then remove the paper template and double-check the distance from the first tuning pin to the top of the triangle where the first string will pass over the top. It should be close to 8 inches (203 mm). Don t worry if it is 1/8" (3mm) different either way -- that is close enough. Tape Check the span of the last (longest) string too. It should be about 25 inches (635 mm). Then you can return the template to the booklet, folding the staples back in place. 5


 Test-fit the bridge pad over the screws. Remember it will fit only one way.")

6 8. The photo at right shows the template back in place, but that is not necessary as long as the bridge is held in place by tape. Find the 9/64" drill bit supplied in the kit and drill JUST ONE HOLE straight through the soundboard as shown here. You may notice that the bridge wiggles a little as you drill, and that s why we must be careful to drill one hole at a time and push a mounting screw into each hole as we drill, just to make sure the bridge stays in place. We like to drill the hole at the opposite end next, as shown at right, and place a screw through that one before drilling the other three holes. Mounting Screw 9. DO THIS STEP WITHOUT GLUE! When all five mounting holes are drilled through the soundboard, flip the instrument over. (HINT: If you place masking tape over the screw heads, they won t fall out when you flip the instrument over.) Test-fit the bridge pad over the screws. Remember it will fit only one way. Make sure the flat surface is facing the soundboard and the screws line up, as shown at right. NOTE: If the bridge pad interferes with the frame of the sound chamber, feel free to trim the ends so it fits. We like it to come fairly close to the edges of the frame. 10. When you are saitsfied that everything fits. we recommend marking an X near one end of the bridge pad so you remember how it should be oriented. NO GLUE YET Bridge Pad NOTE: We also suggest sanding the outside face of the soundboard now, before gluing the bridge in place. It is easier to sand in the direction of the grain without the bridge in the way. Use 180 or 220 grit paper for this fine sanding. ALSO, we recommend using the same grit sandpaper to smooth any roughness of the bridge now, while it is easy to hold up to the light and inspect. Then gather the tools (and assistance) needed for gluing and fastening these pieces permanently in place: ITEMS REQUIRED: 6 Power Screwdriver with Phillips bit 5/16" socket wrench, nut driver, or end wrench to fit the stop nuts 5 Stop nuts provided in kit Glue Damp Rag Two spare hands for holding, and eyes for seeing, both inside and outside of sound chamber at once. (If you don t have a helper available, use a clamp or two to hold the instrument on its edge as shown on next page.)
. Apply glue to the flat mating faces of the bridge and bridge pad, as shown.")


7 11. Use a vise or large clamp to hold the instrument firmly on its edge, as shown here, so you have easy access to both sides of the soundboard (inside and outside). Apply glue to the flat mating faces of the bridge and bridge pad, as shown. You don t need a lot of glue, but just enough to get spread over the surfaces when clamped. You ll use your wet rag to clean up the excess glue after the screws are tightened. Start by putting the 5 screws through the bridge and through the soundboard. Then you can place the bridge pad inside onto the same 5 screws. Use your 5/16" wrench in one hand and the power screwdriver in the other to fasten the 5 lock nuts firmly in place, so they draw the bridge and bridge pad tightly together on either side of the soundboard. This is the only clamping pressure you need to hold these parts -- the screws and nuts will be left permanently in place to make sure the string tension does not gradually pull the bridge off the front. Before the glue dries, we recommend cleaning off the excess that squeezes out from under the bridge and bridge pad, as shown below. The outside front of the instrument is the most critical, so be thorough about cleaning around the bridge, using fresh parts of the rag to make sure you are not just spreading the glue further out on the surrounding wood. We use a flat screwdriver inside the folded rag to help get into the tight corners for final cleanup. 5/16 Nut Driver Phillips Screw Driver 12. The inner brace may be a little too long to fit inside the frame. It should be positioned at an angle mid-way between the bridge pad and the sound holes, as shown. 13. Balance blocks of scrap wood on top of the brace for clamping the brace firmly down against the inside of the sound board, as shown below. Mark where it needs to be trimmed and either saw or sand it to fit in place. The ends of the brace do not need to touch the sides of the frame -- you can trim them a little shorter to make sure you don t bump into dried glue blobs near the frame. 7
8 8
9 NOTE: We try to print this double page at full size, but the printer shrinks it slightly so the strings don t line up with the holes in the bridge. So we just center the bridge on this pattern to achieve the proper angle for the bridge. That works fine, but it means the first and last strings will not quite point to the holes at each end of the bridge. 9

 Before closing up the sound chamber, be sure to decide if you want to install an electric pickup for amplification.")


10 14. (OPTIONAL) This is a good time to sign and date the inside of the back panel. We like to create a label on our computer and print it on parchment style paper, but you can easily sign with pencil or pen right on the wood itelf. Your signature should be positioned so it can be seen through the sound holes. Label can be seen through sound holes 15. (OPTIONAL) Before closing up the sound chamber, be sure to decide if you want to install an electric pickup for amplification. The Lyre has good sound without a pickup, but if you plan to use it for performing or recording, you might like amplifying the sound. If so, install that hardware now, as shown below. The sensor should be centered between the brace and the bridge pad, above the middle screw. If you purchase one of our piezo pickups, you can mount it through a 1/2" diameter hole in the frame near the lower end of the bridge, as shown. The sensor disc will be glued directly to the soundboard with adhesive provided with the pickup. Be sure to gather the excess lead wire into a little bundle that will hang free of the soundboard -- otherwise the wire might vibrate against the soundboard or back panel as you play the instrument. Use good tape to secure the wires together permanently. 16. Check the edges of the frame to make sure all the joints are smooth and level before gluing the back panel in place. When satisfied, put a bead of glue all around the circumference of the sound box and clamp the back panel in place, as shown at right. Just as with the front panel, this requires a lot of clamps, but you can use many different kinds -- c-clamps, spring clamps, cam clamps (shown), etc. Be sure to keep the clamping pressure close the edges. You don t want to deflect the wood downward in the center of the box. Look for glue to squeeze out all around the perimeter. You will be trimming and sanding the outside after the glue dries. 17. When the glue is dry, you can trim off the excess back material and round over the corners of the sound chamber using a router (1/4" radius round-over bit), a random-orbital sander (120 grit), or a sanding block. You want the edges of the box to be smooth and rounded so it feels good in your hands. BE CAREFUL, however, not to sand through the thin veneer on the back panel. The back is quite smooth already, so it should only require very light sanding with 220 grit paper. 10


11 18. The long thin bridge cap will form a little roof over the string ends to clean up the appearance of the bridge. This piece requires a little trimming to match the length of the bridge and light sanding to soften the sharpness around the edges. When ready, apply glue sparingly to the flat top of the bridge, as shown, use just hand pressure or masking tape for clamping, unless the cap tends to warp and lift up or something. In that case a little weight should hold it down until dry. CAUTION: Make sure the cap does not slide out of position under the pressure. We like to line up the leading edges of the bridge and cap so the cap overhangs the back of the bridge, as shown. bridge cap bridge Wa-La! That s all the gluing and clamping needed for this project. 19. When the glue is dry, use a chisel to scrape off any excess glue that squeezed out from the bridge cap, and begin your final sanding of the whole instrument. There are two main goals for this step: 1) smooth all wood surfaces so they feel good (no machine marks or roughness), and 2) remove any glue residue that might show up when you apply finish. You should be able to accomplish the smoothing and cleaning with 180 grit sandpaper and then switch to 220 grit to make everything baby-bottom smooth. You may have some small cracks to fill at the joints of the frame too. We like cherry- or mahogany-colored putty from the hardware store to match the cherry frame. If there is a dimple to fill in the front soundboard or the light-colored band around the plywood back, a natural or birch filler paste will work for those areas. Some woodworkers like to mix up their own paste using sanding dust from the same wood. Just add a little glue and a drop of water, and you can stir the fibers into a nice paste that will dry to the same color as the rest of the wood. Now you are ready to apply the finish. Here are some recommendations: STAIN -- STAINS are coloring agents and should only be used if you dislike the natural color of the wood. We generally discourage people from trying to stain this project because the natural wood grain is so beautiful with a simple clear finish. If you are a novice at finishing, or facing a deadline for completion, we especially recommend avoiding stain. OIL -- An oil finish (such as Watco Danish Oil) will give your wood a low luster appearance, bringing out the natural color of the grain, but it tends soak into the wood and appear dry and thirsty after awhile, unless you use the more expensive gunstock oils that require a lot of hand polishing. POLYURETHANE -- Any polyurethane will work fine on this project, but we like the solvent-based ones better than water-borne versions. Our favorite is a wipe-on gel polyurethane, available from hardware stores and building centers. Two good brands are Minwax and General Finishes. The advantage of a gel finish is that it is simple to apply (no drips or runs), and it has excellent durability, and a deep, soft luster. We recommend avoiding a high gloss finish, as that is very difficult to apply successfully. LACQUER -- Many professional instrument makers still use nitro-cellulose lacquer for their finish. The most readily available lacquer is called Deft Clear Wood Finish. If you choose this product, it will work best if you seal the wood first with clear shellac, such as the Zinsser brand. Then you can lightly sand the first coat smooth and spray the aerosol can of Deft lacquer for the final coats. The advantage of this finish is its quick drying time, but the disadvantage is the strong odor and toxic lacquer fumes. So choose your weapon and proceed with finishing all the wood parts. Plan on applying at least three coats of finish, and sanding lightly between coats with 400 grit sandpaper. Be sure to follow the directions on the can. NOTE: If you wish to add other decorations to the instrument (decals, paints, etc.), it is smart to do that work between layers of gel finish. The urethane will seal the decorations permanently to the instrument. 11


 Thread the other end into the hole in the back of the bridge.")
12 Stringing and Tuning 20. When the finish is dry, find the tuning pins in your hardware pack and pound them into the 22 holes pre-drilled in the neck of the lyre. Orient them with the fine threads going into the wood, and the square shaft facing up so you can turn the pins with the tuning key. HINT: if you have a drill press (turned off please!), you can press the tuning pins in using the handle of the tool to push the chuck down against the pins, setting them all at the same height (7/8"). NOTE: We offer this kit with either nylon or wire strings. If you have wire strings, skip to step 22 for the instructions for installing those. 21. If you have nylon strings in your kit, here are the instructions: a) Find the longest and fattest string -- a red one with a leather washer at the knotted end. This washer may need to be clipped a little to fit under the bridge cap. Use a scissors to cut a small wedge off one side, as shown. b) Thread the other end into the hole in the back of the bridge. It may be difficult to work it up and over the triangle edge. We lay the blade of a butter knife or a small metal or plastic ruler against the slope to guide the nylon upwards. c) Pull the string all the way through until the leather washer fits nicely under the bridge cap. d) Then poke the sharp end of the string through the small hole in the first tuning pin at the point of the frame and pull some of the slack through, leaving enough slack below the pin to allow for 2-3 windings around the pin as you use the tuning wrench to turn the pin clockwise. We like to guide the first wrap or two down under the hole of the pin and then lift the next wrap over those previous wraps as shown here. This cinches the string around the circumference of the tuning pin so it won t slip when you tune it up to pitch. e) Repeat this process for the rest of the wound strings that already have knots at the end. Make sure to install them in order according to the string chart. The red strings will be tuned to C notes, and the blue strings to F notes. We have indicated which octave each note is by a number. Middle C is C4, and the first red string (C3) you just installed is one octave below Middle C4. The other six wrapped strings go up the C-major scale, just like the white keys of the piano (C3-D3-E3-F3-G3-A3-B3). f) When you get to the fattest smooth nylon strings (.055" diameter), you need to tie a simple overhand knot at one end, as shown at right. Poke these three strings through the next three holes, beginning with the red one, and wrap them onto the next three tuning pins the same as the others. overhand knot g) The next two strings are.050" diameter (blue F4 and clear G4) strings. Install these in the same way. The overhand knot will tighten up a little smaller but should still be bulky enough to prevent being pulled through the hole when you tune it up to pitch. 12


 length of leftover thick nylon from the larger strings and insert that scrap into the knot as you pull the knot tight.")
13 h) When you come to the.045" diameter strings, you ll need to tie a bulkier knot at the end, as shown here. Begin with the same overhand knot, but before pulling it closed, poke the tail end back into the knot, just to increase the bulk of it. You will tie the knot this way for the next several strings until you come to the.032" size. It also helps to secure the knots with a small drop of Superglue on top of the knot. Be careful to avoid gluing the string into the bridge. Just a little bit of glue in the knot will prevent the slippery nylon from slowly untying itself under tension when you tune it up to pitch. MAKE SURE TO PLACE THE COLORED STRINGS IN THE PROPER POSITIONS! i) When you get to the.032" and.028" diameter strings, you need to add even more bulk to the knots, as shown at right. Cut a short (1/2") length of leftover thick nylon from the larger strings and insert that scrap into the knot as you pull the knot tight. Add the drop of Superglue, and install these highest strings to the proper tuning pins. When all the strings are installed, tune them up to pitch according to the string chart. If you need help hearing the correct pitch, we recommend using an electronic tuner or a tuner app on your smart phone. This type of device will hear the note that you pluck and tell you the exact pitch of what it hears. That should help you figure out if you need to raise the pitch or lower it to get the proper note in tune. If you need further assistance, find a musical friend who can help you discern the pitches. Notice that each tuning pin has 3-5 wraps of string around it when tuned up to pitch. Too many windings tend to look messy and bulky. If you need to rewind a few tuning pins, go ahead -- just turn the tuning pin backwards and pull more or less of the slack through the tiny hole before tuning the string up again. For nylon strings, we recommend trimming off the excess string tails to about 1/4" from the tuning pins after they are installed. If you leave long tails, they may interfere with the vibration of neighboring strings. Please note that it will take several tunings before the strings will stretch to a stabilized tension and stay in tune. If you tune the instrument 2-3 times a day, it should settle nicely in a few days, staying in tune longer each time, and eventually require only occasional tuning. 1/4" long tails of nylon 13


 Turn the tuning pin clockwise about 1/2 turn before pulling on the wire to set the hook, as shown here.")
 Install the rest of the wire strings in the same way.")
14 22. If you have wire strings for your Lyre, install them as follows: a) Refer to the string chart for the proper gauge (thickness) of string to install in each position. The steel strings are not pre-colored to mark the F and C strings, but you can use colored paint markers from a local art/hobby store after they are installed. Note: some people mark just a short area near each end of the wires so the colors don t wear off on their fingers. b) Start with the thickest wound strings (.032" diameter). Find the tiny brass washers in your string pack and add one washer to each string, as shown. Then thread the strings through the first two holes at the lowest end of the bridge. These will be the longest strings that play the lowest notes. c) Draw each string across to the first tuning pin near the point of the instrument and cut off the excess 2" beyond the pin, as shown. This shortens the string enough to allow 2-4 wraps around the tuning pin before it comes up to pitch. Too many wraps around the pins will be messy! d) insert the end of the string into the tiny hole in the proper tuning pin just far enough so the end is visible, as shown, so the sharp end will be hidden inside the tuning pin, unable to snag your clothing or poke your fingers. e) Turn the tuning pin clockwise about 1/2 turn before pulling on the wire to set the hook, as shown here. This should create a sharp bend in the wire where it enters the hole and allow you to continue holding tension on the wire as you turn the pin until the wire is taut. No need to tune it to pitch yet -- just get the strings tight enough so they make a clear sound when plucked. f) Install the rest of the wire strings in the same way. Be sure to put them in the proper order according to the string chart. g) When all the strings are installed, start at the bottom (longest string) and tune it to C3 (one octave below Middle C). If you don t have a piano or other instrument to check for proper pitch, you can buy an electronic tuner or download a tuner app to your smart phone to use for perfect pitch. Be sure to get a chromatic tuner. That means it will hear all the notes of the piano, not just the 6 notes for tuning a guitar, for example. 14

, between two of the tuning pins, at whatever position you find")
.")
15 Installing strap mounting button on the finished lyre. Mark the center of the side B piece near the bottom corner of the instrument (along the straighter side), as shown. Punch-mark for drilling a pilot hole for the mounting screw. The drill will poke through into the cavity of the box, and that is fine -- there is still plenty of wood to hold the button securely. Bass end of Bridge Lowest corner of instrument center line Joint thicker wood on this side of joint 7/64" drill bit Install the button tightly against the wood. Most guitar straps will fit this button, and they will have a string at the other end that can be used to tie around the Side A (neck), between two of the tuning pins, at whatever position you find comfortable for holding the instrument on your lap. Test it out until you find the best length for the strap and the best position for tying the loose end of the strap to Side A (see photos on back cover for ideas for positioning the strap). Congratulations! You have completed the project. We hope you enjoyed the process and will make good use of your new musical instrument. Let us know if you have any feedback or suggestions for improving this kit. We appreciate hearing ideas that might help future builders and players. Thanks for doing business with Musicmakers! 15


16 Playing while seated Playing while standing Musicmakers PO Box 2117 Stillwater, MN
HOGNOSE PSALTERY KIT Assembly Instructions
 HOGNOSE PSALTERY KIT Assembly Instructions WOOD PARTS 1 Plywood Top (Soundhold Pre-Cut) 1 Plywood Bottom 2 Pin Blocks 1 Short Side 1 Long Side 1 Bridge 1 Scrap of Plywood HARDWARE 1 L-Handle Tuning Wrench
THE PODIUM MUSIC STAND
 THE PODIUM MUSIC STAND 1 Set Assembly Instructions Wooden Parts: a. 1 Column b. 2 Long Slide Pieces c. 2 Slide Spacers (1 long & 1 short) d. 4 Feet e. 2 Fork Pieces f. 1 Fork Spacer g. 2 Long Desk Frame
Finished Limerick Lap Harp
 Finished Limerick Lap Harp Musicmaker s Kits P.O. Box 2117 Stillwater MN 55082 (651) 439 9120 www.harpkit.com Finished Limerick Parts List: 1 Set of Stringing & Tuning Directions 1 L-shaped Tuning Wrench
Shepherd Lap Harp. Musicmaker s Kits PO Box 2117 Stillwater MN (651)
") Shepherd Lap Harp Musicmaker s Kits PO Box 2117 Stillwater MN 55082 (651) 439 9120 info@harpkit.com Parts List: 1 Set of Assembly Instructions a) 1 Walnut Neck/Pillar assembly b) 2 Walnut Sides c) 1 Walnut
Shepherd Lap Harp Musicmaker s Kits PO Box 2117 Stillwater MN 55082 (651) 439 9120 info@harpkit.com Parts List: 1 Set of Assembly Instructions a) 1 Walnut Neck/Pillar assembly b) 2 Walnut Sides c) 1 Walnut
MUSICMAKER S KITS, INC.
 SMART HARP KIT MUSICMAKER S KITS, INC. PO Box 2117 Stillwater, Minnesota 55082 651-439-9120 info@harpkit.com SMART HARP KIT Pre-Cut Kit Parts Supplied: A - Front Corner Mouldings B - Rear Corner Mouldings
Bowed Psaltery Kit. Musicmaker s Kits P.O. Box 2117 Stillwater MN (651)
") Bowed Psaltery Kit Musicmaker s Kits P.O. Box 2117 Stillwater MN 55082 (651) 439-9120 www.harpkit.com Parts list: BOWED PSALTERY KIT 2 long side rails 2 short side rails 1 pin block 1 front (soundboard)
Bowed Psaltery Kit Musicmaker s Kits P.O. Box 2117 Stillwater MN 55082 (651) 439-9120 www.harpkit.com Parts list: BOWED PSALTERY KIT 2 long side rails 2 short side rails 1 pin block 1 front (soundboard)
Adjustable Hammered Dulcimer Stand
 Adjustable Hammered Dulcimer Stand Musicmaker s Kits (Hwy 36 behind Joseph s Restaurant) P.O. Box 2117 Stillwater MN 55082 651 439 9120 www.harpkit.com PARTS LIST: 1 Set of Assembly Instructions A. 2 front
Dusty Harp Pickup for lever harps
 q P10 for 24 30 string harps q P20 for 32 40 string harps Dusty Harp Pickup for lever harps Installation Kit Contents and Diagram of Pickup A. Pickup Element B. Grommet C. Pickup Harness D. Jack E. F.
F-F-Fiddle Assembly Instructions
 F-F-Fiddle Assembly Instructions Bout Bridge Neck Machine Heads/Tuners Truss Rod Strings An open-source FFF 3d-printable electric violin. 1. Assemble materials 5 3 8 1 9,10, 11 7 4 2 6 PARTS 1. Bout part
Instructables Butcher Block Top
 Instructables Butcher Block Top Project Overview: This project requires basic woodworking skills and access to woodworking machines. Woodworking machines have sharp cutting edges and are NOT forgiving.
Riverboat Banjo Musicmaker's Kits Inc. (One block north of Hwy 36 & behind Joseph s Restaurant)
") Riverboat Banjo Musicmaker's Kits Inc. (One block north of Hwy 36 & behind Joseph s Restaurant) P.O. Box 2117 Stillwater, MN 55082 (651) 439-9120 info@harpkit.com RIVERBOAT BANJO Wooden Parts List: A --
Riverboat Banjo Musicmaker's Kits Inc. (One block north of Hwy 36 & behind Joseph s Restaurant) P.O. Box 2117 Stillwater, MN 55082 (651) 439-9120 info@harpkit.com RIVERBOAT BANJO Wooden Parts List: A --
DAKOTA OCTAVE MANDOLIN KIT and MANDOCELLO KIT
 DAKOTA OCTAVE MANDOLIN KIT and MANDOCELLO KIT MUSICMAKER S KITS, INC PO Box 2117 Stillwater, MN 55082 651-439-9120 harpkit.com WOOD PARTS: DAKOTA OCTAVE MANDOLIN KIT A - Neck B - Fretboard C - Heel Block
DAKOTA MANDOLA KIT. MUSICMAKER S KITS, INC PO Box 2117 Stillwater, MN harpkit.com
 DAKOTA MANDOLA KIT MUSICMAKER S KITS, INC PO Box 2117 Stillwater, MN 55082 651-439-9120 harpkit.com DAKOTA MANDOLA KIT WOOD PARTS: A - Neck B - Fingerboard C - Heel Block D - Tail Block E - Clamping Block
U-bass Kit Assembly Instructions
 U-bass Kit Assembly Instructions Compiled by playubass.com This guide is built from the instructions found here: http://kalabrand.com/ubass-kit/index.html Tools Needed 5/8 (16 mm) Wrench 7/16 (~11 mm)
LOVELAND BRAND SHARPING LEVERS
 LOVELAND BRAND SHARPING LEVERS GENERAL INFORMATION Sharping levers are used on folk harps to facilitate key changes. Installing a lever over a string allows you to raise the pitch of that string one-half
Dakota Concert Ukulele
 Dakota Concert Ukulele Updated February 2019 Musicmakers 14525 61st ST CT N Stillwater, MN 55082 WOOD PARTS: A - Neck B - Fingerboard C - Heel Block D - Tail Block E - Clamping Block F - 2 Short Ribs G
Max Launch Abort System Prod. No *Kevlar is a registered trademark of Dupont
 Flying Model Parts List Max Launch Abort System Prod. No. 3014 A 11820 - Body Tube 3.5 Diam x 5.5" Long B 11824 - Orange Capsule Base Shoulder Ring C 16032 - Laser-cut Ring motor mount rear D 16033 - Laser-cut
ASSEMBLY INSTRUCTIONS
 WWW.NUKE.ROCKS ASSEMBLY INSTRUCTIONS 1 Let s begin our satisfying journey to 3D Printed music by downloading a copy of Nuke s 3D model from www.nuke.rocks. You will obtain a ZIP file which you must decompress,
Contents. pages 20-24: Installing Edge sinks into. custom laminate countertops page 8: Installing Edge sinks into postform laminate countertops
 Contents pages 2-8: Installing Edge sinks into custom laminate countertops page 8: Installing Edge sinks into postform laminate countertops pages 9-14: Installing Acrylic sinks into custom laminate countertops
Regency Harp Kit. Musicmakers P.O. Box 2117 Stillwater MN (651)
") Regency Harp Kit Musicmakers P.O. Box 2117 Stillwater MN 55082 (651) 439 9120 info@harpkit.com Regency Harp Kit WOOD PARTS: A - 1 pre-drilled neck, solid hardwood B - 1 pillar, solid hardood C - 2 dowels
Regency Harp Kit Musicmakers P.O. Box 2117 Stillwater MN 55082 (651) 439 9120 info@harpkit.com Regency Harp Kit WOOD PARTS: A - 1 pre-drilled neck, solid hardwood B - 1 pillar, solid hardood C - 2 dowels
Owner s Manual. Bass-Guitar Kit J-Style
 Owner s Manual Bass-Guitar Kit J-Style Contents Introduction... 3 Body finish... 4 Neck finish... 4 Assembling of tuners... 5 Neck... 6 Wiring... 6 Bridge assembly... 8 Strap buttons... 8 Setting up...
Solo JB Style DIY Electric Bass Guitar Kit
 Solo JB Style DIY Electric Bass Guitar Kit Assembly Manual JBK-1 V 1.02 Copyright 2011 Solo Music Gear. All rights reserved Materials List Press-fit peghead bushings String Retainer (1 mounting screw included)
Making Simple Bookbinding Equipment
 Tony Firman 20 1 2 19 Notes Tony Firman Tony Firman Bookbinding 18 3 : 2012 Tony Firman Bookbinding P.O. Box 507 Haslet, TX 76052 www.tonyfirmanbookbinding.com 4. When all the tapes have been pinned in
For Barrel Tapers. Installation and Operating Instructions For use with small combination belt & disk sanders. Assembled Taper Tool
 Tim s Taper Tool For Barrel Tapers Installation and Operating Instructions For use with small combination belt & disk sanders Assembled Taper Tool Your taper tool is capable of making barrel tapered shafts.
Installing your new Bevella Top. L Shaped Countertop with Joints No Finished Ends (Fits Between Four Walls)
") Installing your new Bevella Top L Shaped Countertop with Joints No Finished Ends (Fits Between Four Walls) Bevella RTI Countertops are engineered and manufactured to the highest quality standards, built
Installing your new Bevella Top L Shaped Countertop with Joints No Finished Ends (Fits Between Four Walls) Bevella RTI Countertops are engineered and manufactured to the highest quality standards, built
31 String Gothic Harp Kit
 31 String Gothic Harp Kit Musicmaker s Kits P.O. Box 2117 Stillwater, MN 55082 (651) 43 120 www.harpkit.com 31 STRING GOTHIC HARP KIT 1 set of Assembly Instructions WOOD PARTS: 1 soundboard, laminated
Central New York Rocket Team Challenge 2018 Rocket Assembly Instructions
 Central New York Rocket Team Challenge 2018 Rocket Assembly Instructions Note: These instructions vary from those provided by the manufacturer of the rocket kits. There is also considerable varying discussion
A Slim,Comfortable. In 1979 I spent five months designing. This system works for most chairs and uses common materials
 A Slim,Comfortable This system works for most chairs and uses common materials An upholstered slip seat complements a beautiful chair. Using modern materials, it s not difficult to construct an elegant
SCULL HANDLES AND GRIPS INSTRUCTION BOOKLET
 SCULL HANDLES AND GRIPS INSTRUCTION BOOKLET Contents Section I: Scull Grip Replacement: Fixed Handle or 10 cm Length Adjustment System Refer to this section if you need to replace the grips on your fixed
Owner s Manual e-guitar Kit sg-style Harley Benton E-Guitar Kit SG-Style
 Owner s Manual E-Guitar Kit SG-Style Contents Introduction... 3 Body finish... 4 Neck finish... 4 Assembling of tuners... 5 Neck... 6 Wiring... 7 Bridge assembly... 10 Strap buttons... 11 Setting up...
15 Dovetail Jig. Instruction Manual. Part # 3452
 15 Dovetail Jig Instruction Manual Part # 3452 CAUTION: Please read, understand, and follow all manufacturers instructions, guidelines and owners manuals that come with your power tools. Peachtree Woodworking
Extendable Large Dovetail Jig
 Extendable Large Dovetail Jig Instruction Manual Part # 3458 CAUTION: Please read, understand, and follow all manufacturers instructions, guidelines and owners manuals that come with your power tools.
CAL-K1 Self-build guitar kit UK Version 1.0
 CAL-K1 Self-build guitar kit 174.460UK Version 1.0 Thank you for buying the CAL-K1 kit. All the wood, hardware and electrical components of a Chord CAL93 guitar are contained in this package. Please read
The Ballistic Blaster Rocket Kit should contain the following items. If anything is missing, call Customer Service at
 Ballistic Blaster User Guide Materials Included The Ballistic Blaster Rocket Kit should contain the following items. If anything is missing, call Customer Service at 800-358-4983. Body tube, 6-1/2" long,
APPENDIX TUNING YOUR HARP
 APPENDIX TUNING YOUR HARP Learning to tune your harp is an important part of learning to play, and it is essential that you keep your harp in tune by tuning it daily. New harps go out of tune quickly,
!! " # $ % & '! ( ) * +, -
 * +, -") !! " # $ % & '! ( ) * +, - North Pegasus This carton contains: (1) Instruction package. Response Curves North Creek Cabinet Handbook North Creek Wiring Guide (2) 6 oz. Rolls of Dacron stuffing. (1) Tube
!! " # $ % & '! ( ) * +, - North Pegasus This carton contains: (1) Instruction package. Response Curves North Creek Cabinet Handbook North Creek Wiring Guide (2) 6 oz. Rolls of Dacron stuffing. (1) Tube
Electric Guitar Kit DC Style electric guitar kit
 Electric Guitar Kit DC Style electric guitar kit user manual Musikhaus Thomann Thomann GmbH Hans-Thomann-Straße 1 96138 Burgebrach Germany Telephone: +49 (0) 9546 9223-0 E-mail: info@thomann.de Internet:
TOOLS You will need some tools. Mostly, they re tools you probably have around the house, anyway.
 INTRODUCTION Congratulations on your purchase of your RAS Kit. While it can be a great challenge for an inexperienced builder, with care and attention to details, it can produce an excellent instrument
36 String Gothic Harp
 36 String Gothic Harp Musicmaker s Kits P.O. Box 2117 Stillwater MN 55082 (651) 439 9120 info@harpkit.com 1 set assembly instructions Gothic 36 Harp WOOD PARTS: 1 soundboard, laminated spruce/birch 1 back
Agricultural Mechanics and Technology Power Tool Safety Rules
 Agricultural Mechanics and Technology Power Tool Safety Rules Name: BAND SAW Use: Cutting curves, circles and irregular shapes. 1. Use clean SHARP blades. 2. The teeth should always point DOWN. 3. Adjust
Tools and Tips: ( 1 )
") Tools and Tips: As you build instructions will show in my many picture manual how to assemble. You can use your own methods as you desire, my results are very good. A smooth, flat work surface is very
Tools and Tips: As you build instructions will show in my many picture manual how to assemble. You can use your own methods as you desire, my results are very good. A smooth, flat work surface is very
Grade 11 Woods Lift Lid Coffee Table. Based on Under the big Top from Popular Mechanics Website
 Grade 11 Woods Lift Lid Coffee Table Based on Under the big Top from Popular Mechanics Website TABLE TOP 1. Select enough lumber to construct a top that is between 22 ½ and 24 wide after jointing. Ensure
 America s leading woodworking authority To download these plans, you will need Adobe Reader installed on your computer. If you want to get a free copy, visit: http://adobe.com/ reader. Having trouble downloading
GTS Music diy-guitar.com
 GTS Music diy-guitar.com IB Jem Style Kit GTS Music 313 Strachan St. Port Hope, Ontario L1A 0C2 Canada sales@diyguitarkits.net Please read these instructions carefully before beginning in order to have
Installation Guide. Pionite Decorative Surfaces One Pionite Road, Auburn, Maine PIONITE ( )
") Installation Guide A Subsidiary of Panolam Surface Systems SMPBRO00-012 6/14 Pionite decorative laminates are designed for finished interior surfaces which require high impact, wear and stain resistance
Installation Guide A Subsidiary of Panolam Surface Systems SMPBRO00-012 6/14 Pionite decorative laminates are designed for finished interior surfaces which require high impact, wear and stain resistance
WILDING WALLBEDS INSTALLATION INSTRUCTION Side Mount
 WILDING WALLBEDS INSTALLATION INSTRUCTION Side Mount For Wallbed models: Do-It-Yourself Insturction booklet C92 WARNING! ALL MURPHY/WALLBED SYSTEMS CONTAIN STORED ENERGY. FAILURE TO USE AND FOLLOW THESE
Build your own Drawer unit. D3 / D4
 Page1 Build your own Drawer unit. D3 / D4 1: Introduction. This guide will give you the plans, materials and how to information to build your own drawer unit. The dimensions given will fit a D3 or D4,
Classic Mitered Jewelry Box
 America s leading woodworking authority Premium Plan In this plan you ll find: Step-by-step construction instruction. A complete bill of materials. Construction drawings and related photos. Tips to help
RFS Class II Rocket Assembly Instructions
 RFS Class II Rocket Assembly Instructions Instructions by: Loc Precision Photos by: Great Lakes Space Port Sheboygan Education Foundation, Inc. Welcome and thank you for joining the Rockets for Schools
129 KITCHEN BASE CABINET 480
 129 KITCHEN BASE CABINET 480 There are two sorts of kitchen cabinets: base cabinets, which sit on the floor, and wall cabinets. Base cabinets provide both storage space and work surfaces. They often house
Treviso POCKET BILLIARD TABLE INSTALLATION MANUAL. SERVICE DEPARTMENT P.O. BOX 68 BRISTOL, WI 53104
 Treviso TM POCKET BILLIARD TABLE INSTALLATION MANUAL www.brunswickbilliards.com SERVICE DEPARTMENT P.O. BOX 68 BRISTOL, WI 53104 51-905881-000 NOVEMBER 2008 NOTE: Please use the instructions in this manual
ARTS AND CRAFTS CHAIR
 ARTS AND CRAFTS CHAIR 491 MATERIALS LIST--DINING CHAIR Key No. Size and description (use) A 2 1-3/4 x 1-3/4 x 16-1/4'' oak (front leg) B 2 1-3/4 x 3-3/4 x 40-1/2'' oak (rear leg) C 1 1-3/4 x 3-3/16 x 15''
GENERAL NOTES: Page 1 of 9
 Laminating A Zia Into A Turning Blank by W. H. Kloepping, Jan. 2009 This describes how a zia (the New Mexico state symbol) can be laminated into a turning blank. Materials needed: Square Turning Block
Oakland II POCKET BILLIARD TABLE INSTALLATION MANUAL
 TM Oakland II POCKET BILLIARD TABLE INSTALLATION MANUAL www.brunswickbilliards.com SERVICE DEPARTMENT P.O. BOX 68 BRISTOL, WI 53104 EMAIL: BRUNSWICKSERVICE@BRUNSWICKBILLIADS.COM 51-906253-000 OCTOBER 2016
How to install backchecks
 How to install backchecks Note: All pictures can be enlarged for better clarification. Revision 7 8/2009 Backchecks wear out in a piano much like brake pads in an automobile. While wear is a valid reason
Bass Guitar Kit J-Style bass electric guitar kit
 Bass Guitar Kit J-Style bass electric guitar kit user manual Musikhaus Thomann Thomann GmbH Hans-Thomann-Strasse 1 96138 Burgebrach Germany Telephone: +49 (0) 9546 9223-0 E-mail: info@thomann.de Internet:
Bass Guitar Kit P-Style bass electric guitar kit
 Bass Guitar Kit P-Style bass electric guitar kit user manual Musikhaus Thomann Thomann GmbH Hans-Thomann-Strasse 1 96138 Burgebrach Germany Telephone: +49 (0) 9546 9223-0 E-mail: info@thomann.de Internet:
SE5a Instrument Board part 2 - rev 1.1
 SE5a Instrument Board part 2 - rev 1.1 Fuel (Petrol) Valve This valve uses two circular name plates, eight brass screws, one black plastic base, copper wire and two black plastic risers. You can pick any
guitar Musicmaker s Kits
 GUIT-A-LONG guitar Musicmaker s Kits (Hwy 36 behind Joseph s Restaurant) P.O. Box 2117 Stillwater, MN 55082 (651) 439 9120 info@harpkit.com harpkit.com GUIT-A-LONG GUITAR 1 - Set Assembly Instructions
DIY Kalimba Thumb Piano
 DIY Kalimba Thumb Piano By Caleb Schepart of nykalimba.com This DIY Kalimba Thumb Piano build is made using materials, tools, and supplies that are commonly found at a home improvement center, or at a
DIY Eliza: Instructions
 Make sure you first download from Redlightsonthebrain the list of things required for a DIY Eliza. 1. Take your bucket, ruler and marking pen. We will put on all the markings before we start cutting the
Balustrade Systems / Installation Instructions
 A. PARTS AND SUPPLIES NEEDED FOR INSTALLATION Hardware included for each 10 section of rail: 2 3 x 1-1/2 L-brackets 4 1-3/4 x 3/16 Blue hex-head screws for anchoring the L-brackets to the newel cap, column
For Barrel Tapers. Installation and Operating Instructions for use with table saws and large disk sanders
 Tim s Taper Tool For Barrel Tapers Installation and Operating Instructions for use with table saws and large disk sanders Your taper tool is capable of making barrel tapered shafts. The term barrel is
Palladian/ Keystone Models 202/204 Maintenance Kit
 Palladian/ Keystone Models 202/204 Maintenance Kit Please read all of the instructions before you begin. Confirm that you have all the necessary tools and parts required. Allow about one hour to complete
Legacy Classic Twist Pencil Kit
 Legacy Pencil Kit Description: The pencil is great kit and has features to make it a step-up pen. It is slightly more difficult to make, but still very easy if you follow these instructions carefully.
Tools and Tips: ( 1 )
") Tools and Tips: As you build instructions will show in my many picture manual how to assemble. You can use your own methods as you desire, my results are very good. A smooth, flat work surface is very
Tools and Tips: As you build instructions will show in my many picture manual how to assemble. You can use your own methods as you desire, my results are very good. A smooth, flat work surface is very
About.com :
 http://woodworking.about.com/gi/dynamic/offsite.htm?sit...//www.popularwoodworking.com/features/fea.asp%3fid=1088 (1 of 8)1/28/2004 12:05:01 AM Modern Storage Tower The last thing I want to do when starting
Standard Kit #1 (3-way switch)
") Standard Kit #1 (3-way switch) Please Read All Instructions Before Beginning. Tools you will need: Soldering Iron (35 watt preferably) Solder Wet Sponge Wire Clippers 3/8 Drill Bit 1/4 Drill Bit Variable
Standard Kit #1 (3-way switch) Please Read All Instructions Before Beginning. Tools you will need: Soldering Iron (35 watt preferably) Solder Wet Sponge Wire Clippers 3/8 Drill Bit 1/4 Drill Bit Variable
INSTALLATION GUIDE VERSION 11/14
 INSTALLATION GUIDE VERSION 11/14 In this guide we will demonstrate effective techniques and methods for installing EDGE stainless steel sinks seamlessly in both laminate and solid surface. These techniques
RIM: Use a purchased rim, or cut and drill a donut rim from plywood or MDF.
 Home-made DIY e-drums These e-drums are pretty simple to make from MDF and/or plywood, inexpensive wooden embroidery hoops, purchased rims, and fiberglass window screen. They are very low profile, less
3Insert the second rod no. 4
 Yamato: Step-by-step 37 The stern block and searchlight control towers a b c d e f Recommended tools and materials Wood glue Sandpaper (no. 800 grain) Metal file Putty Craft knife For metal: Super Glue
MUDGUN Drywall Finishing System
 Watch the demonstration video online at hydetools.com MUDGUN Drywall Finishing System Quick Start Guide Hyde Tools, Inc. / A Hyde Group Company / 800-872-4933 / custrelations@hydetools.com / hydetools.com
woodworkersjournal.com MATERIAL LIST
 MATERIAL LIST T x W x L 1 Legs (2) 1 1 2" x 3 1 2" x 36 7 16" 2 End Uprights (2) 1 1 2" x 3 1 2" x 32 1 2" 3 Stringers (4) 1 1 2" x 3 1 2" x 42" 4 Top Cladding, Long (2) 3/4" x 7 1 4" x 65 3 4" 5 Side
Cockpit Kit. Full Depth - Builds Quickly - Light Weight READ THROUGH THIS INSTRUCTION MANUAL FIRST. IT CONTAINS IM- laser cut wood kit
 The Savage Light Sukhoi Su- 27 Cockpit Kit contains everything you need to build a full depth semi scale Su-27 cockpit, yet adds less than an ounce to your finished model s weight (not including pilot).
Fig2: The Sliding Glue Block from the back.
 Ornament Stand Introduction It was one of those forehead smacking moments. I was taking the #2 jaws off my Stronghold chuck, to put on my homemade wooden two jaw chuck set-up. For some reason instead of
Building Tips This model can be built using the following types of adhesives:
 Page 1 Building Tips This model can be built using the following types of adhesives: Epoxy (with or without microballons) Odorless cyanoacrylate (CA) with accelerator UHU Creativ for Styrofoam (or UHU
All Terrain Flares 2014 Chevy Silverado
 Page 1/8 Components: 1. Front Flares (2) 2. Rear Flares (2) Tools required: - Utility knife - #2 Phillips driver - Socket wrench - 13 mm Socket - 6 mm Allen Wrench - T-15 Torx bit - Trim Removal Tool -
How to Make a Hat Bending Jig
 How to Make a Hat Bending Jig MATERIALS One 2" x 8" x 11" long (Base Block) exact measurements are 7 ½" x 1 ½" x 11" (Pine is OK to use, I have used scrap Walnut for my benders) Four pieces of Oak 1" x
Explorer Wiring Kit (assembled)
") Explorer Wiring Kit (assembled) For Vintage, Firestorm & Standard Series Please Read All Instructions Before Beginning. Tools you will need: Soldering Iron (35 watt preferably) Solder Wet Sponge Wire Clippers
Explorer Wiring Kit (assembled) For Vintage, Firestorm & Standard Series Please Read All Instructions Before Beginning. Tools you will need: Soldering Iron (35 watt preferably) Solder Wet Sponge Wire Clippers
Frameless Inline Door With Return QCI5263
 INSTALLATION INSTRUCTIONS Frameless Inline Door With Return QCI5263 WALL MOUNT HINGES FRAMELESS DOOR / PANEL / RETURN PANEL QCI5263 REV. 0 Page 1 Certified 06/17/2016 Parts List with wall mount hinges
Three Legged Stool. Randy Cordle / 2016
 Three Legged Stool Randy Cordle / 2016 This stool could easily qualify as fine furniture, being equally at home in the living room or featured at the local arts and crafts fair. A few unique construction
Assembly instructions
 Nerdy Gurdy Assembly instructions This manual describes how to assemble a Nerdy Gurdy. Go to http://www.nerdygurdy.nl for more info about these instruments. Jaap Brand The Netherlands January 2018 General
2. Sanding the Modules Sand the entire surface of each cyc module with 60-grit sandpaper. This will provide for better paint adhesion.
 ASSEMBLY INSTRUCTIONS SYSTEM SUPER 2.5 EZ Congratulations on your decision to use the world s most advanced and user-friendly cyclorama system. We have taken a great deal of care to create and ship your
CUSTOM SHUTTERS IN-A-BOX
 CUSTOM SHUTTERS IN-A-BOX SHUTTER ASSEMBLE INSTRUCTIONS & INSTALLATION INSTRUCTIONS 1. Inspect the contents of your package. Do not discard the shutter packaging box until you have started painting your
Aerospace Speciality Products
 Specifications:! Length: 18.75"/47.6 cm! Diameter: 0.98"/24.9 mm! Weight: 1.5 oz/44 gm! Streamer Recovery! Recommended Engines:!! A8-3; B4-4; B6-4; C6-5! Skill Level: Beginner This is a model rocket kit
SINGLE-CUT JR GUITAR KIT
 Sheet #i-5203 Updated 10/18 StewMac SINGLE-CUT JR GUITAR KIT Assembly Instructions Welcome to guitar building! If you re a first-time builder, this kit is a great way to start. You ll have fun and learn
The Useless Machine. DIY Soldering Edition. Instruction Guide v0004
 The Useless Machine DIY Soldering Edition Instruction Guide v0004 TM For the best outcome, follow each step in order. We recommend reading this guide entirely before you get started. Tools required: Soldering
BABY WOLF LOOM. Assembly Instructions for Knocked-Down Looms
 BABY WOLF LOOM Assembly Instructions for Knocked-Down Looms BEFORE YOU BEGIN Please read through the directions before beginning to assemble your loom. Unpack the loom parts carefully. Do not throw away
TECHNIQUE. Because of the flexibility of the woven paper elements, this necklace moves nicely when worn. BEGINNER PAPER/WOOD. facetjewelry.
 TECHNIQUE FCT-SR-09248-03 BEGINNER PAPER/WOOD Because of the flexibility of the woven paper elements, this necklace moves nicely when worn. 203 Kalmbach Publishing Co. This material may not be reproduced
Parts & Tools. O'Cello printing and assembly instructions. o-cello.com
 The O'Cello is a 3D-printable cello developed by Conor O'Kane, which is free to download and print for personal use. This document will show you how to print and assemble your own O'Cello. For the latest
Learn to weave on the. Inklette Loom
 Learn to weave on the Inklette Loom THE ASHFORD INKLETTE LOOM top rear peg Inkle bands are strong and useful braids. Create colourful belts, bracelets, ties, guitar straps, shoe laces or trims for weaving.
#4 Phillips Driver Bit 1/8, 4mm, 5.5mm & 8mm (5/16 ) Allen Wrench. Safety Glasses
 Allen Wrench. Safety Glasses") ATLANTIS RAIL Contact Information: Atlantis Rail Systems 70 Armstrong Road 3900 Civic Center Drive Plymouth, MA 02360 North Las Vegas, NV 89030 (800) 541-6829 or (508) 732-9191 (508) 732-9798 www.atlantisrail.com
ATLANTIS RAIL Contact Information: Atlantis Rail Systems 70 Armstrong Road 3900 Civic Center Drive Plymouth, MA 02360 North Las Vegas, NV 89030 (800) 541-6829 or (508) 732-9191 (508) 732-9798 www.atlantisrail.com
Legacy Bullet Click Pen Kit
 Description: The Bullet Click pen is a step-up kit, with similar features to a Power Click Pen. It has a click mechanism instead of a twist. It uses an 8mm tube and a Parker style gel refill. It is popular
Chapter Four, Fitting out the Shell
 Chapter Four Fitting out the Shell This chapter outlines the process for fitting the parts that go into a round or stave back shell. Square back sound boxes usually have the cap and base of the sound box
PRO CYC PRO CYC, INC. SYSTEM SUPER 3EZ
 ASSEMBLY INSTRUCTIONS SYSTEM SUPER 3 EZ Congratulations on your decision to use the world s most advanced and user-friendly cyclorama system. We have taken a great deal of care to create and ship your
INSTALLATION INSTRUCTIONS
 INSTALLATION INSTRUCTIONS For Wallbed models: Do-It-Yourself BOOKLET #C90 WARNING! ALL MURPY/WALLBED SYSTEMS CONTAIN STORED ENERGY. FAILURE TO USE AND FOLLOW THESE INSTRUCTIONS DURING THE INSTALLATION
135 ROLLTOP DESK 515
 135 ROLLTOP DESK 515 For the person who hates to clear off a desk, who wants to leave everything where it is overnight yet still have the clutter hidden, a rolltop desk is a godsend. The tambour hides
Denise M. DeRose Handled Clamshell Handbag
 Denise M. DeRose Handled Clamshell Handbag Materials: Wood 2 discs between 6 and 9 in diameter -- 4/4, 6/4 or 8/4 1 piece of thin hardwood ¼ inch thick and 4 x 10 Wood for waste blocks Supplies Small piece
Plug-n-Show Stake Down Pixel Tree Kit 16 strips of 25 pixels Assembly Instructions
 www.lightorama.com Plug-n-Show Stake Down Pixel Tree Kit 16 strips of 25 pixels Assembly Instructions Read all instructions before you start Kit assembly! STEP 1. Check that all parts are included Parts
7th/8th Grade Industrial Tech General Safety. Give your undivided attention to the machine in which you are using.
 7th/8th Grade Industrial Tech General Safety Wood Lab Safety General Safety Always wear safety glasses. Report all injuries to the instructor. No baggy clothing or open toed shoes. Give your undivided