Sword Blade. Leave the bottom of the blade untouched so you can fit it to the crossguard perfectly.
|
|
|
- Alannah Young
- 6 years ago
- Views:
Transcription
1 Sword Blade Trace the pattern onto the wrong side of your foam (if there is a rougher edge) twice and use a sharp knife to cut it out. You will save foam if you make the blade fit twice onto once piece of foam. The reason for doing this on the wrong edge is just in case you haven t cut at a perfect 90 degree angle. The edges of the sword glued should be cut perfectly, while the right side will be shaved down to make the sharp edge. Trace the middle line onto the wrong side of your foam on both pieces starting at least 2 inches from the tip all the way to the bottom. Use a dremmel to carve out the space you will need for your dowel, making sure not to go all the way through your foam. Put contact cement onto the wrong sides of your foam (including the space you carved out) and your dowel. Once the glue is dry, press your dowel down on one of the pieces and sandwich the other foam piece down on it. Press them together well (I someitmes stand on my pieces to squish it together well). Trace the inside line of the blade onto the sides of the sword. Use a dremel or sandpaper glued to a paint stick to create the angled edges. The tip of the sword should have edges that sland and meet at the tip and then the outside edge can be carved to make the edge that does from the center of the middle to the tip of the blade. Use reference photos for assistance. The middle line around the tip on the pattern isn t perfect, so round it out by hand. The squared sections at the base of the blade should be tapered, but not formed into a point. Leave about 2-3mm of an edge on them. Trace the emblem onto the blade (you can cut it out in parts to trace it). Using a very fine dremel point or a very fine wood burner point, carve the emblem into the sheath. Leave the bottom of the blade untouched so you can fit it to the crossguard perfectly.
2
3
4 Follow special cutting instructions Cut 2 Cut 2 Cut 1

5 Hilt: Cross Guard Trace all of the lines of the crescent piece 2 times onto foam. Cut them out, making sure your blade is very sharp in order to get the most accurate lines. The tight curve on the square part of the cross guard is difficult to cut, so you can cut straight across and carve it out with your dremel easily. First we want to taper the edges of the crescent to form them into points. The ends are points and the middle is thickest. Hold the pieces sideways. Hold a pair of scissors at an angle and make a 2cm cut from the bottom corner of the crescent towards the center of the crescent, ending your cut at the top. For the carving, you can either choose to use a coarse sanding bit on your dremel first and then clean your edges with a fine bit, or work it completely with a find sanding bit. Use a fairly low speed for shaving. Hold your dremel at a 45 degree angle. Starting with the inner edge, shave the 45 degree angle needed until you read the drawn line. Next, hold your dremmel at a 45 degree angle pointed down. Line up the edge of your dremel bit with the next line and shave the next edge, meeting with the one you just made. Work on the next ednges in the same fashion. If your dremel is flicking the tip of the crescent, hold the piece against your finger tightly for support. Make sure you don t drill all the way through your foam. For the piece that attaches to the blade, you will need to cut a piece out of the back so it can fit over the blade. Trace the gap from the pattern for the middle piece and either shave it out with your dremel or cut it out with a knife. Only cut out half of the width of the foam. Next, you will need to round the edge from the crescent shape. You will also need about a 45 degree angle cut on the edge. For the middle of the squared part, you will need to make it curved. Hold your dremel in the middle of the piece facing the outer edge of the crescent and shave downward, and then shave up to meet the edge, making a curve rather than a flat edge. If you haven t already cut the curve, draw on the line and use your dremel to carve it out. Lastly, trace the gem shape on your foam where it should be placed. Carve this area so that the gem can sit flat when it is glued on. You might have to use alternative dremel bits to carve this out. Make sure all your edges are very sharp using a fine dremel bit is the best for this. Otherwise, you can use a wood-burning tool with a bit with a large flat surface to glide over the foam, making sure not to burn it. Note that using a lot of heat on this piece can shrink your foam slightly. After you are finished carving these pieces, put them aside. For the next part of the hilt, you will want to cut out the 2 gem shapes with a very sharp knife. If you are a pro at cutting really deep angles with a ruler and knife, you can try cutting the gem shape straight out of the foam without needing to carve it. To do this, you would need to trace the shape on the back of your foam. Using a ruler on the inside edge of your line, hold your knife at an angle that will end at the middle of the gem and make your cuts. Otherwise, cut out the shapes normally and use a dremel to carve out the shapes using a fine sanding bit. Carving the shapes is really simple just make sure to hold onto your pieces really well as the dremel tends to make them fly out of your hand. You will carge an angle on each flat edge until you meet the center. Working on two opposite edges and then the next opposite edges seems to be the easiest way to do this. Tapering the edges of the crescent piece Carving the bumps on the crescent shape Example of bit with flat edge

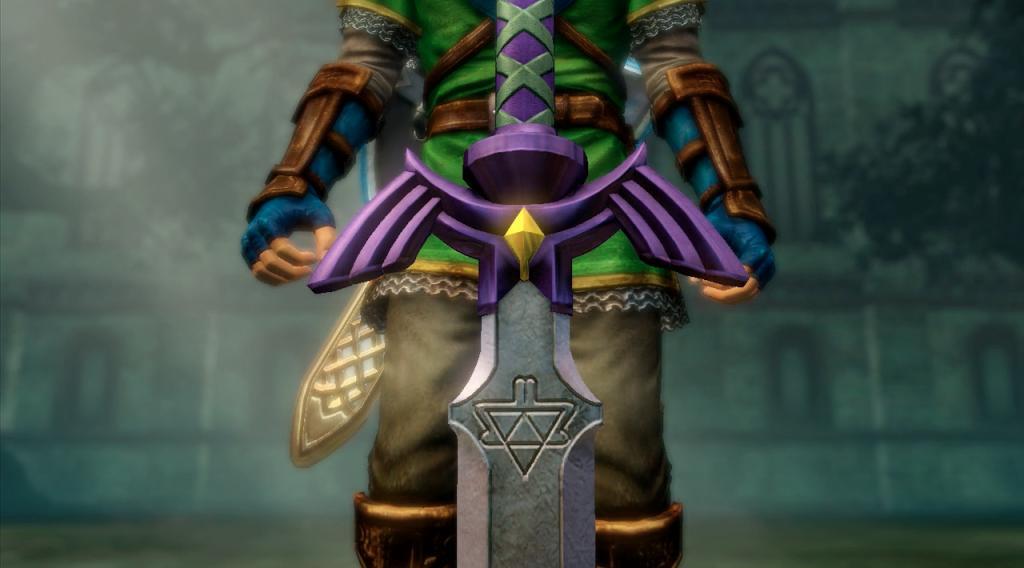
6 The next step is the winged bits. Creating these is really simple. With a very sharp knife and a metal ruler, hold your knife at a 45 degree angle against the ruler and cut a long line down yoru foam. Flip your foam around and cut the same angle in order to get long pointed strips of foam. You will need these strips in different widths. You can use the pattern pieces to draw points for how wide each piece should be. Note that they are slightly wider at the top than at the base and that the outermost piece is the widest and the innermost is the smallest. You will need 12 pieces total, but it is a good idea to cut a few extra in case the ones you cut are too large or small when combined. Cut each piece longer than it needs to be and taper the edges so that they will sit flush on the ridges you carved on the crescent piece. You can do this easily with a pair of scissors starting on the sharp edge. The last piece to cut out is the center piece, which you only need one of. If you have bumpy edges at the back of your foam, you might want to sand them down so they are flat and glue down smoothly. There are two ways in which you can do the center piece. You can either glue everything together and drill the hold where the dowel will go, or more simply you can trace your dowel onto the center of the middle piece and cut it out (giving you two pieces). Next, there are some small cuts to be made to help the strips from the winged pieces fit into place. Cut out the winged pieces from the final product image below. Trace the lines from the gaps made into your crescent pieces. Next, make the gap more narrow by drawing lines about 3mm closer to the center. Using a 45 degree angle on the edge, use your knife to cut all the way down into the foam. Follow the curve of the crescent with your knife to cut out the pieces. Finally, it is time to glue all of the pieces together. Using contact cement, cover the backs of the crescent pieces and both sides of the middle pieces. Also cover the backs of the gems and the strips for the winged pieces. You will also need glue on a few small areas, such as the 45 degree angles cut into the crescent pieces, the tapered edges of the thin strips for the wings, the area on the crescent pieces where the tapered edges of the strips will meet the crescent, and the spot where the gem will go. When the contact cement is dry, attach the center piece to the crescent pieces and secure well. Next, attach the strips for the winged edges, curving them along the edge, ensuring a close fit. When one side of strips is done, cut the excess off so the edge is flat. You can use a pair of scissors for this, but make sure your scissors are flat along the top and not angled in any direction. Lastly, glue on the gems. If you didn t cut a space for your dowel, you will drill a hole in the center of the piece at this point. Check your piece to make sure everything is perfect and do extra demeling where it might need to be done. You will need to check the fit of the cross guard over the blade on your dowel. You might need to shave more on the inside of your crossguard to make it fit. Once your fit is good, cover the bottom of the blade and the inside of the cross guard with contact cement. Once it is dry, slide your cross guard on and press your glued areas on well. You might want to use your dremel at this point to do some fine tuning on the fit of the crossguard. Your edges should be completely straight, and if the blade makes the piece bump out at an angle, shave it down.
7 Image of final product Hilt: Bump Between the Guard and the Grip The patterns here are the side and top views of this piece. Cut out about 5 pieces of foam using the largest circle pattern on the right. Glue them together using rubber cement. Using your dremel, smooth the edges of your foam so you have a nice cylindar to work with. Next, shape the top piece of the first layer of foam to look like the image below. Leave the second piece flat. Next, carve the last curve to match the image below. You will need to hold onto your piece tightly while using your dremel so it doesn t fly away on you. Make sure to use a fine dremel bit to make your piece smooth. Lastly, you will need to drill a hole through the center of this piece to fit it over the dowel. Attach the bump to your dowel using Goop glue or another suitable glue. Push it up your dowel so it is snug.

8 Grip To create the base for the grip, you will want to wrap a long strip of thin foam around the dowel. Using the pattern below, use the measurements of the width of the blue lines to create a long strip of thin foam. Put contact cement on both sides of the foam and your dowel from the bump to the length of the grip. Wrap the foam tightly around the dowel until you reach a thickness just a bit smaller than this: Because the edge of your foam will stick out, use your dowel to smooth out the edge to match the rest of the grip. Next you will need to cut 4 long strips of thin foam in the width shown below (in green). You will also need to cut two more of these strips to fit around the edges of the grip (shown with the red line). Cut out the pattern below and cut off the edge with the red line. Check to see if it fits around your grip perfectly. If it doesn t, resize the pattern and print it again. Cut all of the spaces between the green lines using either a blade or a pair of scissors (you can fold the piece to make cutting easier). Line up the piece on your foam and use pins to hold it on. You want the edge with 4 gaps to line up with your gem on your cross guard. Using a pen or fine marker, draw the lines on the grip. Cut the strips of the foam at the bottom at the proper angle (see the red line). Next, put contact cement on your strips and glue them down. You will need to cross over the strips in a certain way. Two opposite sides will be left under right, and the others will be right under left. See the images of the one I made to view how this was done. You can either place the strips of foam at the edges of the grip first or last. I recommend cutting your strips to size first and then adding contact cement to the edges of the foam as well as the back as mine separated a little when I sprayed it with Flexi Dip. One very important thing to keep track of is that your placement of these strips is perfect. Somehow mine became slightly off center. You can draw a line down the center of your grip following the middle of your gem if it helps.
9 Grip Strip Pattern
10 Pommel This piece is made of about 5 layers of foam. One of the pattern pieces is the side view, and the other is the bottom view. First, trace the middle circle on your foam 3 times and cut them out. Glue them together using contact cement and smooth the edges using a dremel. Draw the small circle in the middle of one end. Next, cut out two of the largest circles and glue them together. Use your dremel to smooth out the edges and then glue them to your smaller piece using contact cement. Use a dremel to shape the angle on the pieces. Use a dremel to carve a hole big enough for your dowel, making sure not to drill all the way through as this is meant to cap off your sword. You want the bottom of the dowel to reach the bottom of your pommel. At this point you might have to cut down your dowel to size using a small hand saw or power tools. Use Goop glue or another suitable glue to glue the pommel to the dowel. Finishing, Coating, Painting, and Protecting In order to seal the foam, you will want to use a heat gun on it. Set your gun to about degrees ferenheit and run it over your piece until you get a somewhat sparkly appearance on your foam. It generally doesn t take more than a second to see this as you run your gun over it. This helps make the pores of the foam small so it doesn t suck up all your product for the next step. Before painting, you will want to prep your surface to make the paint adhere to the foam. The best way to do this is by spraying Flexi Dip or Plasti Dip onto your piece (I added about 3 layers). You can also do this by adding several layers of wood glue to the surface. Using the reference photos, paint your sword. You can use acrylic or spray paints. Link s sword isn t crazy silver and has an aged look, so you can use sponges to lightly apply a variety of greys and browns to the surface. You can also use white to add highlights and darker colours to add shadows to make the sword pop. If you make mistakes, you can easily repaint the surface. Lastly, use a clear coat to your finished piece. This will protect the paint from chipping. I recommend using a spray with a very shiny sheen to give yoru finished piece a metallic look.

11 Reference Photos


12
13 Notes Tips Use an exacto knife with good quality blades. I tried using one from the dollar store and it didn t work at all with the foam. I recommend purchasing a knife sharpener like the one pictured below. If you sharpen your blade after a few small cuts or one long cut, you will cut through your foam like butter. The softness of the foam dulls blades incredibly fast. If you don t sharpen your blades, you will have to change your blades constantly. This sharpener is a good investment for foam work. For great tutorials on how to work with foam, I recommend viewing Evil Ted Smith s videos on YouTube. He demonstrates how to sharpen blades, create patterns, work at an angle, and how to use contact cement. Be sure not to hold your heat gun too long on your final product as the heat can release the glue. This happened to me a little bit on the edge of the sword blade. If this happens, run some contact cement in the crevice and squeeze it together again after it dries. Supplies I am using Eva foam floor mats that are 7/16 (11mm) thick just under half an inch. This means the blade is 7/8 thick and the hilt at its widest point is 1 5/8 thick. I purchased mine from Walmart for about $12. You only need one sheet of foam to make this sword if no mistakes are made. You can buy thin pieces of foam in 1-2mm thicknesses. I purchase mine in big rolls from Michaels, which cost about $10. You can use their 40% off cupons to make this foam very cheap to aquire. Acrylic paints are cheap to purchase from Michael s or dollar stores. I recommend getting silver paint in a spray can as it tends to have the best finish. The dowel for the center of the sword can be purchased at Michael s for less than $1. I believe Home Depot also carries them. Flexi Dip can be purchased at Home Depot for about $12. Safety Make sure you wear a proper dust mask/respirator and goggles while drilling at the foam. Protect your work area with newspaper. This also makes cleanup much easier. The very fine dust from sanding gets everywhere and spreads far. You can protect your clothing by wearing an apron (or better yet, wear old clothes). Contact cement, Goop glue, spraypaint, and Flexi Dip/Plasti Dip have a strong smell and should be used in a wellventilated area. The Flexi Dip spray is especially strong (I m not sure about Plasti Dip, but I assume it s similar). Be careful when using the heat gun and wood burner as they reach really high heats and can burn your skin on contact. A hair dryer will not work as a substitute for a heat gun.
Hubble Space Telescope Paper Model Directions Downloads, patterns, and other information at:
 Hubble Space Telescope Paper Model Directions Downloads, patterns, and other information at: www.hubblesite.org/go/model Materials: model pattern printed onto cardstock/coverstock instructions printed
GENERAL NOTES: Page 1 of 9
 Laminating A Zia Into A Turning Blank by W. H. Kloepping, Jan. 2009 This describes how a zia (the New Mexico state symbol) can be laminated into a turning blank. Materials needed: Square Turning Block
Rosalina Accessories Tutorial Version March 2011 Martyn
 Rosalina Accessories Tutorial Version 1.0 - March 2011 Martyn Star Brooch Feel free to experiment with these dimensions, you should make a template you are happy with, the method still works. 1) Creating
Foam Core Construction
 Tools Tips and Tricks X-Acto knife and blades Your most important tool for working with foam core will be an X-Acto knife with plenty of sharp blades. When choosing a knife, get one with replaceable blades
Step by Step Wing Bagging
 Step by Step Wing Bagging By Evan Shaw 073 589 9339 evanevshaw@gmail.com Preparing the Leading Edge 1. Cut cores. (Cutting of wing cores is covered in another article elsewhere) 2. Sand the LE to a nice
WRIGHT FLYER 1 INSTRUCTIONS FOR THE D10LC KIT
 WRIGHT FLYER 1 INSTRUCTIONS FOR THE D10LC KIT Manufactured in the USA by Easy Built Models PO Box 681744, Prattville, AL 36068-1744 Visit us at www.easybuiltmodels.com Easy Built Models GLUE METHODS Always
Peach, Daisy, Rosalina Crown Tutorial Version August 2010 Martyn
 Peach, Daisy, Rosalina Crown Tutorial Version 1.0 - August 2010 Martyn 1) Creating the template Right, this isn't the most enjoyable part but it is required, get your calculator out we're going to do some
3Insert the second rod no. 4
 Yamato: Step-by-step 37 The stern block and searchlight control towers a b c d e f Recommended tools and materials Wood glue Sandpaper (no. 800 grain) Metal file Putty Craft knife For metal: Super Glue
Wallpaper. the Right Way. Wallpaper is trendy again, both with designers, who are speccing it more often, and
 Wallpaper the Right Way Installed correctly, this wall covering should last a lifetime and come off easily once it has worn out its welcome By John Clift Wallpaper is trendy again, both with designers,
A Precision 2000 Mixed Media Project
 Día de los Muertos (Day of the Dead) Panel A Precision 2000 Mixed Media Project PROJECT TITLE: Día de los Muertos (Day of the Dead) Panel DESIGNED BY: Andy Spencer SKILL LEVEL: (Adult 1-5: 1 being the
PROJECT PLANS WOODEN GIFT BOX
 PROJECT PLANS WOODEN GIFT BOX Make the gifts you give even more special by presenting them in this one-of-a-kind gift box. In fact, the box may be valued more than whatever it contains. The box is sized
3Position the hull of the ship as
 Yamato: Step-by-step 25 The hull and stern deck c b d a b d c e e f a Rear frame b Stern deck x 2 c Stern deck x 2 d Side wall x 2 Wood glue Sandpaper (no. 400 grain) Craft knife Pliers d Side wall x 2
TECHNIQUE. Because of the flexibility of the woven paper elements, this necklace moves nicely when worn. BEGINNER PAPER/WOOD. facetjewelry.
 TECHNIQUE FCT-SR-09248-03 BEGINNER PAPER/WOOD Because of the flexibility of the woven paper elements, this necklace moves nicely when worn. 203 Kalmbach Publishing Co. This material may not be reproduced
5If the protruding part is. 6Place 1 as is shown in the. 7Place what was assembled
 Yamato: Step-by-step 49 The base of the bridge and strakes a c b d a Base of the bridge b Base of the bridge c Base of the bridge d Strakes x 10 THE BASE OF THE BRIDGE 1Smooth 1 to 3, first using the metal
SASKATOON, Saskatchewan
 CONSTRUCTION GUIDE AVRO ARROW (CONTEST VERSION) Copyright, Bill Jones, 2004 SASKATOON, Saskatchewan This is a work in progress, so there are a couple of rough areas ( I ll point out those that I m aware
Max Launch Abort System Prod. No *Kevlar is a registered trademark of Dupont
 Flying Model Parts List Max Launch Abort System Prod. No. 3014 A 11820 - Body Tube 3.5 Diam x 5.5" Long B 11824 - Orange Capsule Base Shoulder Ring C 16032 - Laser-cut Ring motor mount rear D 16033 - Laser-cut
Building the Gothic Church
 Building the Gothic Church Mold #54 does not contain all of the blocks to build this church. You will need extra regular blocks (1/2" x 1/2" x 1") and square blocks (1/2" x 1/2" x 1/2"). These blocks can
Wanderlust Suitcase Vanity
 Wanderlust Suitcase Vanity If you re like me, you re always up for an adventure. When I saw some examples of DIY reclaimed suitcases, paired with the exciting new Wanderlust embroidery design collection,
Homemade Weaving Jig By David Dosser
 Homemade Weaving Jig By David Dosser Items needed for a 100 thread weaving jig: 1. 8x10 -.080 Plastic sheet (Optix brand or Lexan). Clear or white Plastic is easier to work with and can be found at most
MUDGUN Drywall Finishing System
 Watch the demonstration video online at hydetools.com MUDGUN Drywall Finishing System Quick Start Guide Hyde Tools, Inc. / A Hyde Group Company / 800-872-4933 / custrelations@hydetools.com / hydetools.com
Obtained from Omarshauntedtrail.com
 DaveintheGrave's Halloween Props Animated Crawling Skeleton Build a life-size skeleton torso that realistically crawls across the lawn one arm at a time. 1. Motor Base and Linkage Assembly BASE - I used
Aerospace Speciality Products
 Specifications:! Length: 18.75"/47.6 cm! Diameter: 0.98"/24.9 mm! Weight: 1.5 oz/44 gm! Streamer Recovery! Recommended Engines:!! A8-3; B4-4; B6-4; C6-5! Skill Level: Beginner This is a model rocket kit
Jimmy s 2 nd demonstration was what he called an African Drum style box made from Iroko with a cocobolo insert in the lid with inlaid sterling silver.
 Jimmy s 2 nd demonstration was what he called an African Drum style box made from Iroko with a cocobolo insert in the lid with inlaid sterling silver. He started by roughing out the block with a roughing
The Park Hotel Instructions for Assembly of N Scale Kit
 The Park Hotel Instructions for Assembly of N Scale Kit Kit Contents: 198 ea. Laser Cut Acrylic Parts, 2 ea. Chimney Parts Sheets, 1 ea.2".040 styrene rod, 5 ea. Sidewalk Parts, 14 ea. Cast Resin Dormers,
Tools and Tips: ( 1 )
") Tools and Tips: As you build instructions will show in my many picture manual how to assemble. You can use your own methods as you desire, my results are very good. A smooth, flat work surface is very
Tools and Tips: As you build instructions will show in my many picture manual how to assemble. You can use your own methods as you desire, my results are very good. A smooth, flat work surface is very
There are three primary units to this box: two three-sided trays (one made to fit over the other) and one case that wraps around the trays.
 and one case that wraps around the trays.") Instructions for Basic Drop-Spine Box by Sandra Liddell Reese There are three primary units to this box: two three-sided trays (one made to fit over the other) and one case that wraps around the trays.
Instructions for Basic Drop-Spine Box by Sandra Liddell Reese There are three primary units to this box: two three-sided trays (one made to fit over the other) and one case that wraps around the trays.
#P571 - Victorian Queen Fretwork Clock inspired by 18th century Victorian elegance. 17 H x 21 W. Requires a 3 1/2 clock insert.
 - Victorian Queen Fretwork Clock inspired by 8th century Victorian elegance. 7 H x 2 W. Requires a 3 /2 clock insert. Cut on dashed line for Back Cut on solid line for Frame only. Stock: /8 - /4, cut each
PITTS S2S CONSTRUCTION
 PITTS S2S CONSTRUCTION FUSELAGE CONSTRUCTION 1) Place the right fuselage side over the plan and mark the former positions. Place the left side over the right side and mark the former positions. Glue F1
I am using 2 # polyethylene plank foam for the core of the shield and a Carbon Fiber 1/2 inch thick Core.
 Making a Down-spear Style Madu (with Plastidip covering) First, determine what size/shape you want your Madu, both the Shield portion of your Madu and the overall length of the weapon portion. This step
Colori. Part I Geometry
 Colori Part I Geometry 1 2 Determine the size of your cane. TOOLS & MATERIALS FOR BUILDING A CANE: - photocopy paper - ruler - pen or a black marker - color markers (optional) - pasta machine - clay of
doodle me - do nikolina otržan Doodle me - do with Nikolina Otržan A CraftArtEdu Class Web: Customer Service:
 Doodle me - do with Nikolina Otržan doodle me - do by nikolina otržan TOOLS & MATERIALS: flat clean surface (glass would be ideal) pasta machine acrylic roller rigid blade ruler photocopy & parchment paper
Ben Franklin 5&10 Store
 Ben Franklin 5&10 Store RIVER LEAF MODELS, LLC RIVER LEAF MODELS, LLC Thank you for purchasing the Ben Franklin 5&10 structure kit. Your kit includes everything you need to assemble the final product.
Cardboard Model Buildings
 Cardboard Model Buildings Get more model kits from http://www.modelbuildings.org PRINTING & ASSEMBLY TIPS: These OO designs can easily be resized by reducing the print percentage as follows: OO scale is
The Park Hotel Instructions for Assembly
 The Park Hotel Instructions for Assembly Kit Contents: 280 ea. Laser Cut Acrylic Parts. 1 ea. 6" Plastic Coated Wire. 5 ea. Sidewalk Parts. 14 ea. Cast Resin Dormers. 12 ea. Window Glass Templates, 12
This book, or portions of it, may not be duplicated, resold, or redistributed in any way, without the expressed written consent of Stay Tooned, Inc.
 Copyright 2006 - Stay Tooned, Inc. All rights reserved worldwide. This book, or portions of it, may not be duplicated, resold, or redistributed in any way, without the expressed written consent of Stay
Basic Modeling: Mold Seam Profiles
 Special Edition Modeling Reference Basic Modeling: Mold Seam Profiles By Michael D. Roof Jeffrey A. Nelson AMPS #1632 AMPS #2102 AMPS Central SC Wildcats Manufacturing Flaws on Injection Molded Kit Parts
Installation Instructions
 www.marlite.com Effective Date 03/01/2018 ARTIZAN FRP, SYMMETRIX FRP, ENVUE FRP, STANDARD FRP Installation Instructions Statements expressed in this technical bulletin are recommendations for the application
Curved Metal Segmenting
 Curved Metal Segmenting A Tutorial by: David Washburn A.K.A djwood1 This tutorial was downloaded from The International Association of Penturners Introduction As I continue to learn about pen turning,
Building Tips This model can be built using the following types of adhesives:
 Page 1 Building Tips This model can be built using the following types of adhesives: Epoxy (with or without microballons) Odorless cyanoacrylate (CA) with accelerator UHU Creativ for Styrofoam (or UHU
Cobra X Q Construction Tips Construction: Bel y pan
 Cobra X Q Construction Tips : The white plastic in this kit is high impact styrene. It can be painted with most types of coatings if light coats are applied this is necessary due to the thickness of the
Robert Bosch GmbH. Wall organiser
 Wall organiser The organisational talent Wall organiser Say goodbye to messiness! The wall organiser is the ideal place to store everything that tends to lie around. 1 Introduction Wardrobes, drawers and
Mamba. Combat Wing Glider
 Mamba Combat Wing Glider Congratulations for your purchase of the Mamba radio-controlled combat glider! The Mamba is a very fast and agile glider and yet it can stay up in very light winds when built correctly.
From "American Woodturner" the Journal of the American Association of Woodturners, April 2015, vol 30, no 2 - CUSTOM - TOOL HANDLES
 From "American Woodturner" the Journal of the American Association of Woodturners, April 2015, vol 30, no 2 - CUSTOM - TOOL HANDLES Carl Ford I have found most commercially available tool handles uncomfortable
INSTRUCTIONS FOR REFINISHING A UBERTI STOCK.
 INSTRUCTIONS FOR REFINISHING A UBERTI STOCK. I have been refinishing gunstocks for 30 years on and off. Over the past several years I have done quite a few Uberti rifles and handgun grips to get the red
Kam Aero 43% Extra 300.
 Stab Sheeting Kam Aero 43% Extra 300. Stabs / Elevator: Make your skins using the same method as you did for the fuselage foam parts. The stabs require 8 sheets (4 per stab) of 4 x 48 A grain sheeting.
MAGNUM BOARD INTERIOR INSTALLATION GUIDELINES
 TECHNICAL BULLETIN No.: 090509-1405 Subject: Issue Date: September 4, 2009 Issue No.: II MAGNUM BOARD INTERIOR INSTALLATION GUIDELINES 1. CUTTING MAGNUM BOARD You can easily cut Magnum Board with carbide
Seascape Bungalow Assembly instructions. Laser Dollhouse Designs
 Seascape Bungalow Assembly instructions Laser Dollhouse Designs NOTE: Please do a dry assembly using only tape to hold house together. This will get you familiar with parts, location, and fit. This also
The Rubley Building Instructions for Assembly of the N scale kit. v1.1
 The Rubley Building Instructions for Assembly of the N scale kit. v1.1 Kit Contents: 197 ea. laser cut 1/16" acrylic parts. 1ea. adhesive backed.020 styrene part. 10 ea..060 x 1" styrene alignment pins.
Tools and Tips: ( 1 )
") Tools and Tips: As you build instructions will show in my many picture manual how to assemble. You can use your own methods as you desire, my results are very good. A smooth, flat work surface is very
Tools and Tips: As you build instructions will show in my many picture manual how to assemble. You can use your own methods as you desire, my results are very good. A smooth, flat work surface is very
ParkJet Builder s Manual
 ParkJet Builder s Manual Thank you for purchasing the ParkJet. The ParkJet is a profile ducted fan airplane that can be flown in a larger park. The ParkJet was initially designed by Scott Stoops and modified
1Use the metal file to smooth
 Yamato: Step-by-step 85 Parts of the bridge and the hull a b c d e f a Part of the bridge b Part of the bridge c Part of the bridge d Radar x 2 e Part of the bridge x 2 f Wire Recommended tools and materials
Sky-in-a-Box Instructions
 Strand 1 Activity 7 The Shifting Stars Sky-in-a-Box Instructions Large or Small? The Sky-in-a-Box designs are provided ready to print on A4 or US Letter size paper. Used at this size they will require
#P536 Mary Wall Plaque Create our beautiful and intricate fretwork wall plaque in honor of the Mother of our Savior. Over 17 tall.
 Mary Wall Plaque Create our beautiful and intricate fretwork wall plaque in honor of the Mother of our Savior. Over 7 tall. Cut on dashed line for Back Cut on solid line for Frame only. Stock: /8 - /4,
Swift assembly guide
 Swift assembly guide Download the assembly guide at www.scihighmodels.com/swift.pdf Sample kit shown with aluminium bells (available with the Deluxe kit) Shown here without main tanks Version 10/12/2010
Chapter Six. Getting started inboard. Installing the false deck
 A close look at the thinning down of the bulkhead extensions. They are just 1/16 thick after fairing them. Chapter Six Getting started inboard This next step is one of the last remaining messy tasks to
Cockpit Kit. Full Depth - Builds Quickly - Light Weight READ THROUGH THIS INSTRUCTION MANUAL FIRST. IT CONTAINS IM- laser cut wood kit
 The Savage Light Sukhoi Su- 27 Cockpit Kit contains everything you need to build a full depth semi scale Su-27 cockpit, yet adds less than an ounce to your finished model s weight (not including pilot).
Copyright WilkerDos.com Dining Table. Project Designed By April Wilkerson - Plan Created By Jay Bates (jayscustomcreations.
 Copyright WilkerDos.com 2017 Project Designed By April Wilkerson - Plan Created By Jay Bates (jayscustomcreations.com) Layout & Shopping List Page 2 of 12 Layout & Shopping List Item Quantity Description
Coat Rack. Materials: Directions:
 Coat Rack 2x2 wooden poplar (foundation of the rack) 3/4 inch diameter wood dowels (5-8 depending on how many arms you want) 1/4 inch dowel screw 1/4 inch drill bit Power drill Ruler Pencil Paint/spray
Nanton Grain Mill Assembly
 ( 1 ) Nanton Grain Mill Assembly Locate package for assembling storage building. These are cut from 1/8 masonite. Inspect and lightly sand edges where it will be bonded. Use white glue or CA glue to bond.
F-F-Fiddle Assembly Instructions
 F-F-Fiddle Assembly Instructions Bout Bridge Neck Machine Heads/Tuners Truss Rod Strings An open-source FFF 3d-printable electric violin. 1. Assemble materials 5 3 8 1 9,10, 11 7 4 2 6 PARTS 1. Bout part
Turn Beautiful Artist's Paper into a Book
 Turn Beautiful Artist's Paper into a Book Let's start... 1. Have all of your materials at your work station ready to use. 2. Remove five pages from the A3 pad. Take one sheet and fold the paper in half
After the canopy hinge is square with the firewall and the nut plates are installed you can set up the hinge mounts. Start by clamping a 1/16 tongue
 Written by: Sean Cole September 19, 2008 When fitting the stiffener use 3/32 clecos to hold it in place, it makes a smaller hole and is easier to work with. Only use the amount needed to hold the stiffener
NASTY Build Guide. Supplies needed
 NASTY Build Guide Supplies needed Blucore or Depron Foam. Blucore (Fan Fold Foam) is available at Lowes. Approximately $25 for 50 feet of Blucore. Depron can be ordered on the internet for slightly more.
Hubble Space Telescope Expert Model Interior Directions Downloads, patterns, and other information at:
 Hubble Space Telescope Expert Model Interior Directions Downloads, patterns, and other information at: Materials: Construction tips: The patterns and instructions, which can be downloaded at. The pattern
1Take the keel (3) and
 and") 1 The hull and the bridge 1Take the keel (3) and apply PVA wood glue in the second slot from the left: a toothpick may make it easier. Take care: the left end is the one that has a projection. THE HULL
1 The hull and the bridge 1Take the keel (3) and apply PVA wood glue in the second slot from the left: a toothpick may make it easier. Take care: the left end is the one that has a projection. THE HULL
DIY Shaving Cream. Ingredients:
 DIY Shaving Cream Ingredients: 1/3 cup coconut oil (solid, not fractioned) 1/3 cup shea butter ¼ cup sweet almond oil 4-6 drop tobacco bay leaf fragrance oil Plastic bale jar Tools: Microwave-safe bowl
Hotel Belvedere Instructions for Assembly of the HO scale kit. v1.1
 Hotel Belvedere Instructions for Assembly of the HO scale kit. v1.1 Kit Contents: 319 ea. laser cut.090" acrylic parts. 132 ea. laser cut.060" acrylic parts. 8 ea. window glass templates 8 ea. window glazing
Pressed Flowers. Materials: Directions: Pressed flowers Heavyweight paper Picture frame Craft glue Small paint brush Tweezers
 Pressed Flowers Pressed flowers Heavyweight paper Picture frame Craft glue Small paint brush Tweezers 1. Pressed flowers can be purchased online or you can easily press them yourself. Begin by folding
Desk Tidy Project. Design Brief. Design Specification. The products. Researching Materials. Essential Desirable Additional
 Function and Performance - The desk tidy should fulfill it main purpose and function of holding a range of stationary securely and in a tidy way. It should be easy to put th stationary tidy and not be
After printing these plans, several pages will need to be taped together to form a larger plan. Below is a diagram of which pages need assembled.
 Watermill Building Plans For complete building instructions and instructional videos, please visit the main web site at www.hirstarts.com/watermill/watermill.html. Using these plans alone will not give
DRAWING KEY FOLD TYPES A B C EDGE BEVEL REFERENCE/ OPTIONAL
 RR Finch B DRAWING KEY FOLD TYPES A B C A - FOLD (ABOVE) B - FOLD (BESIDE) C - FOLD (COVER) LINE TYPE/COLOR SYMBOLS PART NUMBER CUT 50% SCORE CREASE NAME MATERIAL MODEL - VERSION QUANTITY 45 DOUBLE BEVEL
!! " # $ % & '! ( ) * +, -
 * +, -") !! " # $ % & '! ( ) * +, - North Pegasus This carton contains: (1) Instruction package. Response Curves North Creek Cabinet Handbook North Creek Wiring Guide (2) 6 oz. Rolls of Dacron stuffing. (1) Tube
!! " # $ % & '! ( ) * +, - North Pegasus This carton contains: (1) Instruction package. Response Curves North Creek Cabinet Handbook North Creek Wiring Guide (2) 6 oz. Rolls of Dacron stuffing. (1) Tube
Tools: Scissors, hand held single-hole punch, metal ruler or other good straight-edge, sharp knife or Exacto-knife.
 Instructions for Building a Kepler Paper Model Version 30 Mar 3, 2010 You need the following files: File Sheet # Printer Paper Color Kepler_model_instructionspdf plain b/w Photometerpdf 1 Photo stock color
DIY Eliza: Instructions
 Make sure you first download from Redlightsonthebrain the list of things required for a DIY Eliza. 1. Take your bucket, ruler and marking pen. We will put on all the markings before we start cutting the
Working with Wood & Tools. Marking and Measuring. Tools you will need:
 Marking and Measuring English Measure If you want to make pieces of a certain size, you will have to measure and mark them before you do any cutting. Examine a rule and find an inch mark. The mark (")
Tools and Tips: ( 1 )
") Tools and Tips: As you build the book will show in my many picture manual how to assemble. You can use your own methods as you desire, but these worked best for me. A smooth, flat work surface is very
Tools and Tips: As you build the book will show in my many picture manual how to assemble. You can use your own methods as you desire, but these worked best for me. A smooth, flat work surface is very
How to make climbing grips. By,
 How to make climbing grips By, Items needed: * Items may be needed depending on your preference. - Carving Foam - Level Table - Cardboard - Pen - Ruler - Straight Edge - Box cutter - Hot melt glue gun
The Midtown Apartment Building
 The Midtown Apartment Building Instructions for Assembly of The Midtown Apartment Building. Kit Contents: 70 each laser cut acrylic parts. 3 each sidewalk parts. 3each Window Glass Templates, 3 each Window
Building the Circular Tower
 Building the Circular Tower You will need to fill this mold 18 times to have enough blocks to build the circular tower. Be sure the blocks are completely dry before gluing them together. For detailed instructions
Once you ve mastered these circular bangles, expand your design vocabulary with other shapes. Gohaywirewithovals,squares,ortriangles!
 Haywire Bangles Once you ve mastered these circular bangles, expand your design vocabulary with other shapes. Go haywire with ovals, squares, or triangles! 42 what you will need 20- or 18-gauge half-hard
#P570 - Leavenworth Requires a pendulum movement kit (#A309 - #A312) 24 H x 14 W
 24 H x 14 W") - Leavenworth Requires a pendulum movement kit (#A309 - #A32) 24 H x 4 W Cut on dashed line for Back Cut on solid line for Frame only. Stock: /8 - /4, cut each Left pattern piece. GENERAL SCROLLSAW TIPS
- Leavenworth Requires a pendulum movement kit (#A309 - #A32) 24 H x 4 W Cut on dashed line for Back Cut on solid line for Frame only. Stock: /8 - /4, cut each Left pattern piece. GENERAL SCROLLSAW TIPS
How To Make A. Large Diameter Brayer
 How To Make A Large Diameter Brayer Charles G. Morgan Mossworks Studio 77 Moss Street Victoria, B.C. V8V 4M2 CANADA 2008 www.mossworks.com charlesgmorgan@yahoo.com I got the basic design for this homemade
Build the Spitfire: Step-By-step. Pack 7 Stages 61-71
 Pack 7 Stages 61-71 1 Stage Contents Page Number 61 212-215 62 216-218 63 219-221 64 222-224 65 225-228 66 229-231 67 232-235 68 236-238 69 239-241 70 242-245 71 246-249 Editorial and design by Continuo
Big Oz. Rocket. User Guide V0313
 Big Oz Rocket User Guide 59824 V0313 Materials Included The Big Oz Rocket Kit should include the following materials. If something is missing, contact Customer Service at 800-358-4983. 20-ounce plastic
#P2-21 Victorian Wall Pocket Organize and decorate all at the same time with this handy wall pocket. 12 tall.
 Victorian Wall Pocket Organize and decorate all at the same time with this handy wall pocket. 12 tall. Cut on dashed line for Back Cut on solid line for Frame only. Stock: 1/8-1/4, cut 1 each Left pattern
Piper Cherokee /3 scale. Construction Manual
 Piper Cherokee 140 1/3 scale Construction Manual STAB CONSTRUCTION 1. Remove foam cores from cradle and place on flat surface. Inspect pieces before you epoxy halves together making sure leading and trailing
NOT ALLOW YOUNG CHILDREN TO PLAY WITH THIS TOY UNSUPERVISED.
 SNAPPING ALLIGATOR This wooden toy is great for parents or grandparents to play with young children. Hold by the tail and move the alligator slowly along with the front wheel slightly off the ground and
EXTREME LOAD no. TWO
 1602 - EXTREME LOAD no. TWO Kit Features: 22' 4 " x 14' x 3'-6 Oversize Load 49mm (1.9") actual height Bolt Head Details Welded Load Mounting Fins Painting Handles Tools Required: Hobby Knife Tweezers
John Rumming. Making Custom Foam Inserts.
 John Rumming. Making Custom Foam Inserts. I, like plenty of people out there, need foam holders for quite a few of my models that sometimes come without boxes, or just to keep them in one area in groups.
MAKE IT YOURS. Digital Photo Decoupage Art. How-2 instruction books for cool projects you can make your own.
 MAKE IT YOURS Digital Photo Decoupage Art How-2 instruction books for cool projects you can make your own. DIGITAL PHOTO DECOUPAGE ART WHAT YOU WILL NEED Computer / Internet Connection Digital photos you
Fine Feathers. Make a pair of silver-clay peacock earrings
 Fine Feathers Make a pair of silver-clay peacock earrings Objectives Create a base design which can stand alone or work with embellishments Add color to silver with permanent markers Make a narrow channel
Engineering Directive
 Thing-a-ma-Jig Finishing To Finish a model means to apply paint and other decorations to complete the look of your model. Meaning to apply a finish. That is what we will discuss in this section. Applying
Assembly Instructions for Busted Bricks Marble Machine #1
 Assembly Instructions for Busted Bricks Marble Machine #1 Ver. 2 instructions Page number 1 Required for assembly: Wood glue (PVA or aliphatic resin recommended) and/or Cyanoacrylate (CA) glue Clamps or
Please read through the entire document before starting your installation process to better understand what is required.
 1 P a g e How s It Hanging? Step-by-Step Guide for Hanging your Wallpaper Walls Republic offers a richer and wider selection of designs, textures and colours than ever before found in the wallpaper world,
U-bass Kit Assembly Instructions
 U-bass Kit Assembly Instructions Compiled by playubass.com This guide is built from the instructions found here: http://kalabrand.com/ubass-kit/index.html Tools Needed 5/8 (16 mm) Wrench 7/16 (~11 mm)
#P6-18 Floral Shelf Graceful vines flow and swirl to create the elegant brackets on this Victorian style shelf. 15 wide.
 Floral Shelf Graceful vines flow and swirl to create the elegant brackets on this Victorian style shelf. 15 wide. Cut on dashed line for Back Cut on solid line for Frame only. Stock: 1/8-1/4, cut 1 each
Star Trek TOS communicator upgrade kit Install instructions Hyperdyne Labs 2002
 Star Trek TOS communicator upgrade kit Install instructions Hyperdyne Labs 2002 Package Your package should include: Assembled TOS sound/motor/light board with LEDs and sound chip Moiré motor 9V snap connector
Central New York Rocket Team Challenge 2018 Rocket Assembly Instructions
 Central New York Rocket Team Challenge 2018 Rocket Assembly Instructions Note: These instructions vary from those provided by the manufacturer of the rocket kits. There is also considerable varying discussion
Part 3 J. Serresseque, 2012
 Part 3 J. Serresseque, 2012 Vellum wings are among my favorite wing media. I get excited when I see a new pattern that can be translated into a potential wing design. The nice thing about Vellum is the
1983 Jaguar XJS Interior Wood Trim Repair and Refinishing
 The following describes and shows one method of wood trim repair/restoration/refinishing for wood trim on Jaguar cars, specifically this 1983 Jaguar XJS, although the wood trim should be the same in all