ROOF Drainage System Creating Waterfall. Made in Sweden
|
|
|
- Leona Robinson
- 5 years ago
- Views:
Transcription


1 ROOF Drainage System Made in Sweden


2

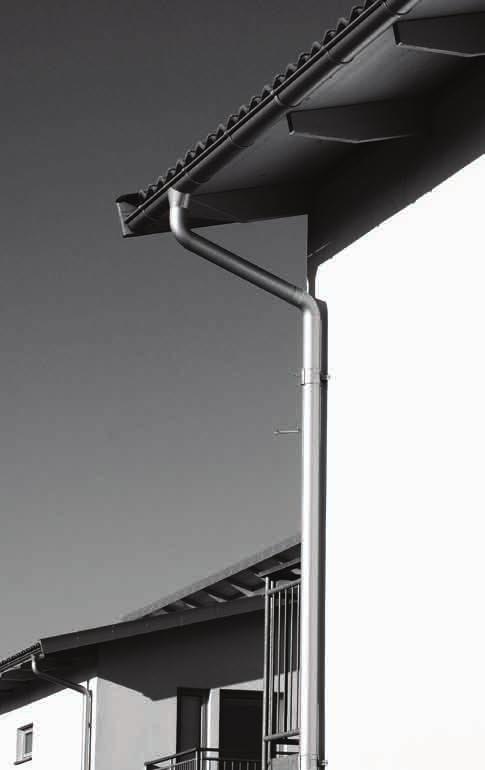
3 ULTRA MODERN PRODUCTION CARACOL. A new star in the sky. CARACOL rainwater system is designed to integrate aesthetically and functionally with the rest of the roof. CARACOL is a brand new, complete range of roof drainage products. Many years of close collaboration with sheet metal workers and other professionals has given us invaluable knowledge about the expectations and needs of the market. Such as the ability to integrate a roof drainage system with absolutely any type of roof at all, without compromising either aesthetically or functionally. In addition to extreme durability, this system also provides exceptional fitting accuracy, which makes it a delight to install. These insights and experiences together have helped us to develop a product system that is guaranteed to handle roof drainage simply, effectively and for a very long time... Fully automated process In our new fully automated production line for CARACOL products in Malmö, Sweden, you will only find the very latest tools and machines from the world s leading manufacturers. All of our production lines consist of computer-controlled, fully automated machines and industrial robots. This is to ensure that we can fulfil both the toughest technical specifications and environmental demands. Our new 10,000 m 2 factory site has been built to handle large volumes with low staffing. In this way we are equipped to meet the toughest competition in Europe. Large stocks of finished goods secure our deliveries All processes are therefore entirely autonomous, from manufacture to packaging and dispatch. The common factors for all the equipment in the facility where CARACOL is manufactured, are high performance and high quality. For example, our pipe and gutter machine has a capacity of up to 25 metres per minute, with retained high precision. An importance component in our logistics is stock holding. In order to ensure rapid delivery to our customers, we required the ability to store thousands of transport pallets. We have therefore built a very large storage area directly adjacent to the production facility.


")


4 CARACOL produ White AR9002 Brown AR8019 GUTTER Length: 3, 4, 5, 6 m GUTTER ANGLE Inner Angle: 90 degree Brick Red AR8004 GUTTER JOINT COMPACT BRACKET Diameter: 125 mm Red AR3009 Silver Metallic AR9006 HOPPER HEAD hopper Dark Grey AR7011 pipe bracket (wood) pipe bracket (Stone) Black AR9005 Alu-zinc pipe knee outlet shoe connecting downpipe shoe Färgerna som presenteras här kan avvika från de verkliga färgerna. För exakta färger, kontakta oss och beställ plåtprover.


")
")


5 ct assortment GUTTER ANGLE OUTER Angle: 90 degree SELF-LOCKING GUTTER END Diameter: 125 mm UNIVERSAL GUTTER END OVERFLOW PROTECTION STRAIGHT ADJUSTABLE BRACKET Diameter: 125 mm GUTTER BRACKET Length: 70, 160, 210 mm QUICK BRACKET Length: 146, 196, 336 mm OVERFLOW PROTECTION ANGLED intermediate pipe Length: 1000 mm sliding pipe pipe bend Angle: 70 degree leaf trap (plastic) spike (for pipe bracket) Length: 175 mm trap connector (plastic) branch pipe self-cleaning leaf TraP (plastic) folding downpipe shoe Diameter: 90 mm StaY STRAP Length: 280 mm downpipe Length: 2.5, 3, 4, 5, 6 m


6 KARAT. Long lasting with a stylish finish. In order to increase the lifetime of CARACOL products even further and increase their aesthetic value, we coat both sides of the product with KARAT, the sharpest painting system on the market. KARAT is a genuine colour coating system that provides optimal values for good weather and wear resistance while maintaining high gloss and colour retention. A product that we guarantee for 20 years without hesitation.


7 Well designed products that combine functionality with a smart appearance

8
9 Mounting instructions Tools Areco s Rainwater system is constructed so that installation is easy. The tools you will need are: pliers, hammer, screwdriver, hacksaw, tape measure and string. If you need a tool to bend the brackets you can hire one from your builders yard. Sawing and cutting Use a hacksaw when sawing rainwater pipes and guttering. Curve shears must not be used because swarf and the heat from the disc can damage the sheet metal s outer layer and galvanised surface. INSTALLING YOUR GUTTERING Estimating quantities The amount of guttering, rainwater pipes and accessories needed will vary depending on your house. Calculate on the basis that each drainpipe can cope with a maximum gutter length of 12 m. Fascia brackets should be mounted so that the guttering falls towards the drainpipe. Bracket spacings should not exceed 600 mm, with a fall of 5 mm per metre. The dimensions of the guttering and drainpipes should be chosen according to the surface area of the roof. Roof size up to c. 50 m 2 (drainage area): guttering and pipe dimensions 100/75 mm Roof size c m 2 (drainage area): guttering and pipe dimensions 125/90 mm For larger surfaces guttering and pipes with dimensions 150/100 mm are available Roof lengths up to 12 metres = 1 drainpipe Roof lengths up to 24 metres = 2 drainpipes 4 Decide in which direction the gutter is to fall. Choose which bracket you will use. Fix the first and last bracket c. 10 cm from the edge of the roof. Other brackets should be fixed with 600 mm centres (see sketch). Fall 5 mm/metre. Fix the brackets with screws or ring shank nails. FITTING GUTTER BRACKETS Choose which bracket you will use. Begin to fix the brackets 1-1 c. 300 mm from the middle and fall in both directions. The last bracket should be fixed c. 10 cm from the edge of the roof. The other brackets should be fixed with 600 mm centres (see sketch). Fall 5 mm/metre. Fix the brackets with screws or ring shank nails. Adjustable bracket Adjustable bracket Gutter bracket Combined bracket Quick bracket Compact bracket Securing to fascia board Compact brackets or short iron brackets are fixed to the fascia board. If this is angled use adjustable bracket. With roof lengths up to 12 metres fit the first and last bracket c. 10 cm in from the edge of the roof. Fall 5 mm per metre. Attach a string to the underside of the first bracket (see arrow). Attach the string to the last bracket, check that it s taut and the fall is correct. Use the taut string to help you fix the other brackets with 600 mm centres. With roof lengths longer than 12 metres start fitting from the centre. Short gutter bracket BENDING GUTTER BRACKETS Fascia bracket 2 1 Securing to lathes Medium/long brackets must be bent so that the gutter has a fall. Line up all the brackets you will need. Draw a line over across all the brackets where they should be bent (arrow 1). Measure from the line on the last bracket so that the fall will be 5 mm/metre. Mark a new line (arrow 2). Bend the brackets according to this line.
10 Mounting instructions FITTING THE GUTTER Place the gutter in the brackets, press down the front of the gutter on the brackets and bend the tab over. Then push the gutter down so that it is resting on the bracket and bend the second tab over. When quick bracket is used the gutter s front edge should be pushed into the hook. Then the gutter should be pressed down so that it locks under the notch in the back of the bracket. FITTING RUNNING OUTLETS Mark on the gutter where the drainpipe is to be placed. Saw two angled cuts so that you make an opening of c. 10 cm. Bend the edges of the hole down slightly so that the water can run into the drainpipe. Press the folded edge of the running outlet into the front edge of the gutter. Then move the running outlet down towards the back of the gutter. Bend the outlet s tabs over the back of the gutter so that it locks in place. FITTING STOPENDS The stopend is combined, for both left and right attachment. Bend off the ear and round, according to the etched line in the stopend, on the side you are not going to fit it (see sketch). Place joint sealant according to the dotted line. Attach strip sealant on the stopend. Position the stopend in c. 2 cm in the front edge of the gutter, turn it down into the gutter and push it completely in. JOINTING WITH UNION CLIPS Bend the union clip slightly outwards before fitting. Then place at least two strings of strip sealant along the whole of the rubber seal that is placed in the union clip. Push the gutters towards each other and put a little joint sealant above and below the joint. Continue by fastening the union clip over the back edge of the gutter (1) (see previous picture also) and then over the front edge of the gutter (2) (round). Then push the union clip together with your hand (1) so that it is in contact with the gutter. Then fold over the tab so that it is locked in place (2). JOINTING WITHOUT UNION CLIPS Fold up a c. 4 cm long flap along the back edge of the lower gutter. Place joint sealant according to the dotted lines and push in the upper gutter in the lower according to the picture. Fold down the upper gutter in the lower, fold over the flap and push together so that both gutters are locked in place.
11 Mounting instructions ANGLES & INTERMEDIATE PIECES The intermediate piece s length is decided by the roof s overhang. Measure distance A and use the table to work out how long the intermediate piece should be. Cut-off drainpipes can also be used as intermediate pieces. A 70 ANGLE A cm Intermediate piece s length in cm app. app. app. app. app. app USEFUL ACCESSORIES 1. Branches are used if, for example, you wish to drain several roofs into the same drainpipe. 2. Collapsible spouts are used if you want to be able to collect the rainwater. Fit the collapsible spout into the drainpipe. 3. Leaf guards and leaf filters prevent leaves and debris getting into the ground drains. Sleeves are available for different pipe dimensions. 4. A drain cuff is used between the drainpipe and the ground drain. A run-off filter prevents debris in the ground drain and is mounted directly in it. 5. A spout is fitted when the drainpipe is not attached to the drain system. Use screws or rivets when you fit the spout to the drainpipe FITTING CLIPS 4 The clip is fitted c. 10 cm under the lower angle. The distance between clips should not be greater than 2 metres. The clip is locked in place with a wedge (wedge s broad side downwards). Hammer the wedge into place with a hammer and wooden block. Clips are available for both timber and stone walls. In stone or brick walls holes should be pre-drilled for attaching the clips (drill in the mortar). Fit the pipe details on to the drainpipe and attach to the running outlet. Check that the pipe is straight.

12 CARACOL is a brand new, complete range of roof drainage products. The name is inspired by a beautiful waterfall in Brazil. Studies of forces and dynamics in natural water courses have given us completely new insights into key concepts such as functionality and durability. The Caracol waterfall in Brazil Length: 130 m Width: 35 m GPS-coordinates: S W Please contact your local sales representative for more information Caracol. All rights reserved. ARE /2012 For more information, visit
Roof drainage system
 Kroftman storage building Roof drainage system (E and H Models) Installation manuel V0.00KR 180501 HANG GUTTER Hang gutters are available in dimensions 125mm and in 2 different. HANG GUTTER GUTTER JOINT
INSTALL GUTTERING. 2 - Planning the work. Care is needed in setting out the guttering accurately, but actually fitting it is relatively easy.
 INSTALL GUTTERING Care is needed in setting out the guttering accurately, but actually fitting it is relatively easy. Before you climb a ladder, make sure it is stable and fixed securely to the structure
Installation Instructions for Icopal Guttering System.
 Installation Instructions for Icopal Guttering System. Cutting & Handling (1) Where it is necessary to cut or trim the components of the rainwater system tin snips or hacksaws should be used, the use of
Guide to steel rainwater system components
 Guide to steel rainwater system components Gutters & fittings Gutters R Half Round Gutter Roll formed 0.6mm steel with bead stiffened fronts Can be joined using RSK gutter joint or roll joint method Supplied
INSTALLATION AN EXPLODED VIEW OF A TYPICAL BRETT MARTIN RAINWATER INSTALLATION RAINWATER PRODUCT GUIDE
 AN EXPLODED VIEW OF A TYPICAL BRETT MARTIN RAINWATER HANDLING Brett Martin Rainwater systems are light in weight and are therefore easy to handle. As with all other quality materials, Rainwater components
ACE MINI-LINE INSTALLATION GUIDE / HANDY HINTS
 ACE MINI-LINE INSTALLATION GUIDE / HANDY HINTS Please note - Ace Gutters Pty Ltd supply Rainwater Product Installations Guides to assist our customers. Ace Gutters are not responsible for the design of
COMPONENTS OF THE CLICKFAST FASCIA AND GUTTER SYSTEM 5: INTERNAL MITRE
 INTRODUCING THE CLICKFAST FASCIA AND GUTTER SYSTEM The Clickfast Fascia and Gutter System was originally designed by Stratco and has proven to be the most successful fascia and gutter system in Australia
hargreaves cast iron installation guide
 Jointing Methods for Rainwater Pipes Vertical rainwater pipes would not normally be sealed. Only seal joints between gutter outlet and rainwater pipe or offset plus any joints in a horizontal position
INFINITY GALVANISED STEEL FASCIA & SOFFIT SYSTEM
 INFINITY GALVANISED STEEL FASCIA & SOFFIT SYSTEM INFINITY GALVANISED STEEL FASCIA & SOFFIT SYSTEM Aesthetically pleasing and robust, the unique option for colour matching Infinity Rainwater systems Welcome
REGENCY TIMBER BUILDINGS
 REGENCY TIMBER BUILDINGS TEL 01948 830460 UNIT 22 PENLEY IND EST, PENLEY.WREXHAM. LL13 0LQ 1 Garage fitting instructions Tools needed handsaw, hammer, Stanley knife with hook blade, tape measure, battery
DESIGNER SERIES GUTTER SYSTEM INSTALLATION INSTRUCTIONS
 DESIGNER SERIES GUTTER SYSTEM INSTALLATION INSTRUCTIONS GENERAL DESCRIPTION: The Designer Series Gutter System is a specially designed roof edge drainage product for industrial, commercial, and high end
Assembly instructions
 Assembly instructions Plannja Profiles 20 105, 20 75, Sinus 18, Sinus 51, 45, 45R, 19R, 35 including flashings and fittings 2017 Roofing Sheet & Wall Cladding TABLE OF CONTENTS Some words of advice...
DUTCH GABLE FREESTANDING CARPORT
 DUTCH GABLE FREESTANDING CARPORT STRATCO OUTBACK ASSEMBLY INSTRUCTIONS. Your complete guide to building a FREESTANDING Outback DUTCH GABLE CARPORT BEFORE YOU START Carefully read these instructions. If
CertainTeed. Shake / Slate Installation Guide
 CertainTeed Shake / Slate Installation Guide Table of Contents System Components... 2 General Conditions, Safety and Roof Preparations... 3... 4 Eave/Drip Edge... 5 Inner Gable... 6 Outer Gable... 7 Open
Shingle Installation Guide
 Installation Guide Roof Framing Information Installation Installation Accessory Installation Estimating Data General Information Roof Framing Information It is the responsibility or roofers, building contractors
Stratco Sanctuary INSTALLATION BEFORE YOU START TOOLS REQUIRED GUIDE
 INSTALLATION GUIDE Stratco Sanctuary Verandahs, Patios and Carports BEFORE YOU START It is important to check with your Local Government Authority prior to the installation of your new Stratco Sanctuary
ROOF FRAMING INFORMATION BATTEN INSTALLATION CORONA SHAKE INSTALLATION ACCESSORY INSTALLATION ESTIMATING DATA GENERAL INFORMATION
 ROOF FRAMING INFORMATION BATTEN INSTALLATION CORONA SHAKE INSTALLATION ACCESSORY INSTALLATION ESTIMATING DATA GENERAL INFORMATION ROOF FRAMING INFORMATION It is the responsibility or roofers, building
Installation Guide. Step 3. Valley Flashing. Step 7. Transition Flashings and Accessories. Step 6. Hip and Ridge Installation
 Step 7. Transition s and Accessories Step 3. Valley Step 6. Hip and Ridge Installation Step 2. Rake Trim Step 5. Installing the Shingles Step 1. Eave Starter Installation Step 4. Endwall s Installation
INSTALLATION PROCEDURE
 Vinyl Siding INSTALLATION PROCEDURE Tools Needed and Preparation MOST ESSENTIAL TOOLS The proper tools, materials and equipment can make the installation of Durabuilt Vinyl Siding much easier. Here are
Installation guide for 20/20
 Introduction The following installation instructions are recommended minimum requirements for the 20/20. The designer and fixer should ensure that tiles are installed in accordance with BS 5534; The British
This installation guide has been created to assist in constructing a Liniar conservatory roof from a kit format.
 1.00 - Introduction This installation guide has been created to assist in constructing a Liniar conservatory roof from a kit format. Please note, each roof has been individually designed to meet specific
Roof drainage. Simply beautiful
 Roof drainage Simply beautiful Rainwater collectors Collectors hearts beat faster! LempHirz: rainwater collectors allow the use of rainwater and convince with their simple implementation. Basic model (zinc)
Installation Guide. Capped Cellular PVC Fencing. Table of Contents. Storage and Handling Tools Needed Fence Layout and Locating Posts
 Capped Cellular PVC Fencing Installation Guide Table of Contents Storage and Handling Tools Needed Fence Layout and Locating Posts Installation instructions 4 x 4 Over Sleeve Post - 3.5 Rail Privacy Shadowbox
Hard wearing and durable Quick and easy to install Fully adjustable for batten gauges of mm
 INSTALLATION GUIDE Watch the installation VIDEO arielplastics.com Hard wearing and durable Quick and easy to install Fully adjustable for batten gauges of 260-350mm www.arielplastics.com Coroverge is a
CURVED ROOF ASSEMBLY INSTRUCTIONS ATTACHED VERANDAH. Your supplementary guide to building an ATTACHED CURVED ROOF VERANDAH or PATIO BEFORE YOU START
 ROOF ATTACHED VERANDAH ASSEMBLY INSTRUCTIONS Your supplementary guide to building an ATTACHED ROOF VERANDAH or PATIO This set of instructions should be used in conjunction with the Stratco instruction
Wall flashing profiles FP 60 WA 1 WA 150 WA 1 - ÜK WA 1 - Ü 150 E
 Wall flashing profiles FP 60 WA 1 WA 150 WA 1 - ÜK 150-275 WA 1 - Ü 150 E 1 F Ü R D I E ZU K U N FT G E DAC HT. The alwitra waterproofing system alwitra wall flashing profiles are part of the practically
INSTALLATION DETAILS
 INSTALLATION DETAILS Front Issued January 23rd, 2005 These install details are provided to demonstrate the recommended installation method for Metro Roof products and accessories. The details and information
6 Wide AMATEUR CEDAR GREENHOUSE
 6 Wide AMATEUR CEDAR GREENHOUSE ASSEMBLY INSTRUCTIONS PLEASE READ ALL INSTRUCTIONS BEFORE PROCEEDING 04/11 6 WIDE AMATEUR CEDAR GREENHOUSE Assembly Instructions Contents Page YOUR NEW GREENHOUSE Introduction
THANK YOU FOR PURCHASING FROM HERITAGE PATIOS
 Installation Guide THANK YOU FOR PURCHASING FROM HERITAGE PATIOS Your purchase is engineered by nearly a half century of commercial and residential product design proudly manufactured in the USA from responsibly
INSTALLATION GUIDE. Outback. Flat Attached BEFORE YOU START ADDITIONAL MATERIALS TOOLS REQUIRED. VERAnDAHS PATIOS CARPORTS
 INSTALLATION GUIDE Outback VERAnDAHS PATIOS CARPORTS Flat Attached BEFORE YOU START It is important to check your Local Government Authority requirements before the installation of your new Stratco Outback
Dura-Lock Roof System
 DLR-14 Dura-Lock Roof System Assembly and Installation Instructions Read the instructions before starting the job. They explain the steps required to produce a finished product that will meet factory specifications.
OUTBACK FLAT ATTACHED VERANDAH PATIO CARPORT - INSTALLATION GUIDE BEFORE YOU START TOOLS REQUIRED ADDITIONAL MATERIALS
 BEFORE YOU START It is important to check your Local Government Authority requirements before the installation of your new Stratco Outback Flat Verandah. It is the builder s responsibility to ensure any
W L. Standard Sizes: 2.125m underside of gutters m total height m roof m roof m roof.
 H Standard Sizes: H 2.125m underside of gutters. 2.280m total height. L L 5.450m roof. 6.050m roof. 7.250m roof. W W 3.000m roof/2.640m between posts. 3.600m roof/3.240m between posts. 5.400m roof/5.040m
Installation Manual. Last Updated 4 February, Postal PO Box 932 Bayswater VIC
 Installation Manual Last Updated 4 February, 2013 Part 1: Provided Material The Panel Expandable Foam Sealing Strip Barge Capping Z-Fascia Structural Screws Timber: 3/8 head size Metal: 5/16 head size
Installation Guide Simplicity Alfresco. V1.9 Lu070318
 0333 305 5272 www.canoports.co.uk Installation Guide Simplicity Alfresco V1.9 Lu070318 Tools Required Below is a list of tools that you will require to install your the Simplicity Alfresco System. Cordless
Three layer Felt Roofing using cold applied adhesive
 Three layer Felt Roofing using cold applied adhesive Useful tips - Skill level - Safety - Felt Roofing Materials - Tools and Equipment Laying a felt roof is within the capabilities of most diy people providing
8 Wide AMATEUR CEDAR GREENHOUSE
 8 Wide AMATEUR CEDAR GREENHOUSE ASSEMBLY INSTRUCTIONS Our Help Line provides support and advice to customers of Summer Greenhouses after ordering. For advice before you buy phone us free 7 days a week
Installation Guide 2016
 Installation Guide 2016 BUILDERS EDGE INSTALLATION GUIDE This guide will show you the products of the Builders Edge family. It provides specific installation steps and application details. Our main goal
GABLE END CHIMNEY FITTING INSTRUCTIONS STANDARD LITESTACK CHIMNEY FITTING INSTRUCTIONS. HEALTH & SAFETY WARNING:
 GABLE END CHIMNEY FITTING INSTRUCTIONS STANDARD LITESTACK CHIMNEY FITTING INSTRUCTIONS. HEALTH & SAFETY WARNING: THESE INSTRUCTIONS ASSUME THAT THE CHIMNEY IS BEING FITTED BY A PROFESSIONAL CONSTRUCTION
8 Wide AMATEUR CEDAR GREENHOUSE
 8 Wide AMATEUR CEDAR GREENHOUSE ASSEMBLY INSTRUCTIONS PLEASE READ ALL INSTRUCTIONS BEFORE PROCEEDING 04/11 8 WIDE AMATEUR CEDAR GREENHOUSE Assembly Instructions Contents Page YOUR NEW GREENHOUSE Introduction
INSTALLATION INSTRUCTIONS
 INSTALLATION INSTRUCTIONS Thank You, for your recent purchase with TrimLine Windows, Inc. This is a quality product and deserves a quality installation. Please follow the attached instructions for a quick
Best Buy Metals Toll Free / Phone / Fax
 DETAIL MANUAL for Vertical Seam Best Buy Metals Toll Free 1-800-728-4010 / Phone 423-479-6382 / Fax 423-728-3066 www.bestbuymetals.com Vertical Seam Roofing Panels Fig. 2 Vertical Seam Has 1-3/4" high
Stock & Spares Catalogue
 Stock & Spares Catalogue Internal Lining Racks & Pinions Roof Sheets Guttering Ancillaries Ironmongery harlowbros.co.uk Contents Internal Linings 2 Racks & Pinions 5 Roof Sheets 8 Guttering 12 Anciliaries
FABA. Installation Instructions. Conductor Bar System. Publication #FABA-03 3/1/04 Part Number: Copyright 2004 Electromotive Systems
 FABA Conductor Bar System Installation Instructions Publication #FABA-03 3/1/04 Part Number: 005-1062 Copyright 2004 Electromotive Systems 1S 100 Z Installation Instructions Contents: Basic Diagram - -
Step 1: Planning the project
 Step 1: Planning the project 1 of 1 Completed gutter Evaluate and plan the project Professionally installed continuous gutters using strip miters or the box style corners, remember to add 5 for each outside
Installation Guide (888)
") BamDeck Installation Guide (888) 788-2254 The Collection Decking Systems BAMDECK 3G 5-7/16 Wide Plank Dims: 96 L x 5-7/16 W x 13/16 H BAMDECK 3G 16FT. 5-7/16 Wide Plank Dims: 192 L x 5-1/2 W x 13/16 H
BamDeck Installation Guide (888) 788-2254 The Collection Decking Systems BAMDECK 3G 5-7/16 Wide Plank Dims: 96 L x 5-7/16 W x 13/16 H BAMDECK 3G 16FT. 5-7/16 Wide Plank Dims: 192 L x 5-1/2 W x 13/16 H
Installation guide. Step-by-step instructions
 Installation guide Step-by-step instructions Contents Tools Required to Install p1 Screws & Fixings p2 Injection Moulded Solid Components p3 Components p4 Georgian Hips & Ancillaries p5 Fixing Eaves Beam
TECHNICAL/PLUMBING ADVISORY SERVICE
 INSTALLATION ADVIE (Read in conjunction with BSEN 12056-3) The purpose of this Guide is to provide detailed information and clear instructions to assist the installer, with methods, to simplify the installation
FASTENERS & ACCESSORIES
 Staples General purpose staples to suit most popular staple guns. Particularly useful for stapling external angles and PVC mouldings to timber frames. PlasterX staples are designed to fit PLASTERX Arrow
TRADITIONAL GABLE ATTACHED PATIO AND CARPORT. Your complete guide to building an ATTACHED Outback TRADITIONAL GABLE PATIO or CARPORT
 TRADITIONAL GABLE ATTACHED PATIO AND CARPORT STRATCO OUTBACK ASSEMBLY INSTRUCTIONS. Your complete guide to building an ATTACHED Outback TRADITIONAL GABLE PATIO or CARPORT BEFORE YOU START Carefully read
GABLE ROOF CARPORT RECOMMENDED INSTRUCTION MANUAL
 GABLE ROOF CARPORT RECOMMENDED INSTRUCTION MANUAL Table of Contents Introduction 2 Components 3 Step 1a Marking out the Perimeter of the Carport with Footing only 3 Step 2a Footing Set-Out for Concrete
Job no. 5241_Accessories Brochure_Size: 8.2 x 8.2 _ KOHLER Genuine Accessories
 KOHLER Genuine Accessories CHOOSING THE PERFECT WALL-HUNG TOILET FOR YOUR BATHROOM IS N0T ENOUGH. KOHLER presents a range of accessories to enhace your bathroom experience. INSTAFIT+ Specially designed
IFRC SHELTER TOOL KIT
 IFRC SHELTER TOOL KIT PP ROPE ROPE, polypropylene, black, 12mm diam., twisted Diameter: 12mm +/- 0.5mm Length: 30m Weight: 1.9kg Number of strand: 3 minimum Type: twisted Material: polypropylene, no recycled
Installation Guide Simplicity 6. v3.5 lu171117
 0845 869 6006 www.canoports.co.uk Installation Guide Simplicity 6 v3.5 lu171117 Tools Required Below is a list of tools that you will require to install the Simplicity 6 Canopy or Carport. Cordless Drill
Installation Guidelines
 Page 1 Tools You ll Need 4 ft. Carpenter s level Chalk line (to mark U channel locations) Cordless drill/nut driver Caulking gun Chop saw with a metal cutting blade on it (required to make accurate and
Installation Guide Contemporary Alfresco V1.3 LU
 Installation Guide Contemporary Alfresco V1.3 LU 010818 Tools Required Below is a list of tools that you will require to install you're the Contemporary Alfresco System. Cordless Drill Mastic Gun Spirit
Insulated Corrugated. Patio Installation Guide. SupaCore Insulation Superior Thermal Performance. Colorbond Steel Roof & Ceiling. InsulRoof roof panel
 Using the slot on the Turn-up/Turn-down tool, place the tool into the steel sheeting InsulRoof roof panel Rivet fixing through flashing Insulated Corrugated Roof pan turned down - gutter en 100mm Gutter
6 5 Wide TRADITIONAL CEDAR GREENHOUSE
 6 5 Wide TRADITIONAL CEDAR GREENHOUSE ASSEMBLY INSTRUCTIONS PLEASE READ ALL INSTRUCTIONS BEFORE PROCEEDING 08/04 6 5 WIDE TRADITIONAL CEDAR GREENHOUSE Assembly Instructions Contents Page Introduction 3
Bracket guide. LK Pipe Pole. LK Radiator fixture Uni
 Bracket guide LK Radiator fixture Uni LK Radiator fixture Uni c/c 40 (Article no. 481 43 92) LK Radiator fixture Uni c/c 50 (Article no. 481 44 03) LK Pipe Pole (Article no. 481 43 91, 481 43 90) Used
SpeedDeck. Fixing and Handling Guide
 SpeedDeck Section 1 Delivery/Storing On Site/Handling l SpeedDeck is factory or on-site manufactured. l Straight SpeedDeck bundles are a maximum 1 tonne, sheets nestled and banded with polypropylene or
150 MM FREE STANDING WOOD FIRE FLUE KIT INSTALLATION INSTRUCTIONS
 www.jayline.co.nz www.fisherstoves.co.nz 150 MM FREE STANDING WOOD FIRE FLUE KIT INSTALLATION INSTRUCTIONS WARNING: This flue kit has been manufactured in accordance with as/nzs 2918:2001 and tested to
Recommended Slating Tools
 Recommended Slating Tools Product Size L Sketch of Article No. Description 60-070 Scriber 60-00 Slater s Hammer 60-00 Slater Ripper 60-080 Parallel Shears 60-0 Slate Cutter Kwiksnip Slate Guuillotine Slate
Halny Romana by. The roofing pantile with the invisible fastening system. Made from. Steel. Aluminium. Copper. need of special tools
 Halny Romana by The roofing pantile with the invisible fastening system 1 Made from Steel Aluminium 2 Copper - ultra lightweight modular panels - easy installation - fixing spots only visible on the outer
10 Wide AMATEUR CEDAR GREENHOUSE
 10 Wide AMATEUR CEDAR GREENHOUSE ASSEMBLY INSTRUCTIONS Our Help Line provides support and advice to customers of Summer Greenhouses after ordering. For advice before you buy phone us free 7 days a week
Siding Components. Installation Guide
 Siding Components Installation Guide 2016 MID-AMERICA SIDING COMPONENTS INSTALLATION GUIDE This guide will show you the products of the Mid-America Siding Components family. It provides specific installation
BUILDING A TREE BENCH
 INSTRUCTIONS FOR A In just a few steps, we show you how to build your own tree bench and paint it perfectly. 1 SIDE PIECES OF THE SEATING SURFACE Purchase the materials from the enclosed list. Draw a 10
Series 1500 Aluminum Door Canopy
 Series 500 Aluminum Door Canopy with Sidewings It is our recommendation that you read instructions carefully prior to assembly and installation. Series 500 with Sidewings mounting bar (A) top trim (B)
GENUINE PARTS INSTALLATION INSTRUCTIONS
 GENUINE PARTS INSTALLATION INSTRUCTIONS DESCRIPTION: APPLICATION: PART NUMBER: REAR SPOILER KIT - CARBON FIBER INFINITI Q60 T99J1 5CH0B KIT CONTENTS: Item Qty. Part Description A 1 Spoiler Assembly B 4
Installation Instructions
 READ BEFORE INSTALLING UNIT INSTALLATION WARNINGS AND CAUTION Carefully read the installation manual before beginning. Follow each step as shown. Observe all local, state, and national electrical codes
Installation Instructions
 For Medium (15-18.5K) + Heavy duty (-8.5K) Air Conditioner READ BEFORE INSTALLING UNIT To avoid risk of personal injury, property damage, or product damage due to the weight of this device and sharp edges
10 Wide AMATEUR CEDAR GREENHOUSE
 10 Wide AMATEUR CEDAR GREENHOUSE ASSEMBLY INSTRUCTIONS PLEASE READ ALL INSTRUCTIONS BEFORE PROCEEDING 04/11 10 WIDE AMATEUR CEDAR GREENHOUSE Assembly Instructions Contents Page YOUR NEW GREENHOUSE Introduction
REGAL. Installation Manual
 REGAL Installation Manual General Information The details shown on the following pages are suggestions or guidelines for installing the Regal system. The installation details shown here are proven methods
INSTRUCTION GUIDE SANCTUARY CANOPY. C & A SUPPLIES LTD, Bidder Street, London E16 4ST tel: WEB:
 INSTRUCTION GUIDE SANCTUARY CANOPY 1. Add gasket to wall plate 2. Drill holes in wall plate along the two rib lines The first pair of holes should be 25mm from the edge and then spaced every 525mm along
Series 1100 Aluminum Door Canopy
 Series 00 Aluminum Door Canopy with Support Arms It is our recommendation that you read instructions carefully prior to assembly and installation. Series 00 with Support Arms MOUNTING BAR (A) TOP TRIM
External cladding technical instructions
 External cladding technical instructions Contents External cladding technical instructions... 1 General... 2 Vertical cladding... 3 Horizontal cladding... 5 Lower end of the cladding and the plinth...
Synseal assembly guide 2009:Synseal assembly guide /2/09 12:38 Page 1. Conservatory Roof Assembly Guide
 Synseal assembly guide 2009:Synseal assembly guide 2007 9/2/09 12:38 Page 1 Conservatory Roof Effective from February 2009 Synseal assembly guide 2009:Synseal assembly guide 2007 9/2/09 12:39 Page 6 3.1
ASS 70 FD folding / sliding door. Installation Guide
 ASS 70 FD folding / sliding door Installation Guide IMPORTANT! These doors should be fitted by competent and trained installers. Please read these instructions thoroughly before beginning the installation.
XL JOINERY LTD LA PORTE VISTA MODULAR 3 ASSEMBLY INSTRUCTIONS
 XL JOINERY LTD LA PORTE VISTA MODULAR 3 2090mm High x 4687mm Wide ASSEMBLY INSTRUCTIONS READ AND UNDERSTAND THESE INSTRUCTIONS FULLY PRIOR TO STARTING INSTALLATION. IT IS STRONGLY RECOMMENDED THAT A COMPETENT
Assembly instructions
 Commission: Order no.: Rondo Pavilion PR Ø3.9 Technical changes reserved Assembly instructions As at: 05.011 Sliding door Dear Garden lover, we congratulate you on the purchase of a quality product from
YOUR LIFE. YOUR FIRE. Ortal Curved & Islands Fireplaces User s Manual
 YOUR LIFE. YOUR FIRE. Ortal Curved & Islands Fireplaces User s Manual [USA Fireplace Models [THIS ISTALLATION MANUAL INCLUDES ASSEMBLY INSTRUCTIONS FOR THESE MODELS: STAND ALONE 7565 CURVED TUNNEL DOUBLE
manthorpe Roll-Out Dry Fix Ridge System building products Fixing Instructions MBP 8265e
 manthorpe building products Roll-Out Dry Fix Ridge System Fixing Instructions MBP 8265e Ridge Details Fig A. Assembly View of Dry Ridge Detail s/s screw clamping plate rubber washer foam spacer ridge tile
 SUPREME WALL GARDEN ASSEMBLY INSTRUCTIONS 24/08/16 www.hallsgreenhouses.com Please refer to website for the most up to date instructions. SAFETY WARNING 1. Always wear protective glasses, shoes, gloves
Internal joint strap bedded in silicone mastic supplied by the manufacturer and secured with stainless steel bolts with coated heads.
 CI/SfB (52.5) lh4 Oct 2012 Arundel Range DATA SHEET Description This extruded aluminium gutter faithfully reproduces the shape of the Moulded 46 Ogee gutter which in cast iron was used on many traditional
LOCKN LOAD FIRST TIME INSTALLATION
 LOCKN LOAD TM TRACK MOUNTING KIT ISUZU MU-X 2013+ LS-M & LS-U MODELS ONLY 3 BAR TRACK HEAVY DUTY ROOF RACK SYSTEM MAX VEHICLE ROOF LOAD RATING: 100KG TOTAL LOAD EQUALS WEIGHT OF ROOF RACKS + ACCESSORIES
Product Guide & RFQ Form
 BUILDING PRODUCTS Call: 800.720.0867 Product Guide & RFQ Form RFQ Form on pgs 7 & 8 e-mail RFQ to buildingproducts@specialtydesign.com or fax to 610.779.5091 21 COLORS AVAILABLE IN ALUMINUM BLACK ROYAL
ASSEMBLY INSTRUCTIONS FOR STORETTE STA42
 ASSEMBLY INSTRUCTIONS FOR STORETTE STA42 A01 CAUTION: Some parts have sharp edges. Care must be taken when handling the various pieces to avoid a mishap. For safety sake, please read the safety information
PRO Series Brakes Operating Instructions
 PRO Series Brakes Operating Instructions Tapco Products Company PRO Brake System PRO Cut Off Gauge Simplifies cutting. PRO Cut-Off Quickly, safely, and easily makes factory quality cuts in coil stock,
Vertical Mute Rail Installation
 Vertical Mute Rail Installation Before you start the installation we recommend that you take note of the present state of the piano in which the QuietTime system with be installed into. 1. Check the over
Answer Power Beam and Boundary Screen
 Answer Power Beam and Boundary Screen 5/16 MAGNETIC 3/8 If you have a problem, question, or request, call your local dealer, or Steelcase Line 1 at 888.STEELCASE (888.783.3522) for immediate action by
SLIDING GATES BRUNDLE
 SLIDING GATES BRUNDLE 32 BRUNDLE TOOTHED GATE RACK & ACCESSORIES TO BE WELDED TO GATE. GALVANISED OR SELF COLOUR IN ROLLED STEEL FOR GATES UP TO 1800KG Rack 22 x 22 H Art L H T L T Self Colour Self Colour
SHADOWBOX INSTALLATION FOR: Standard 6 H x 8 W Shadowbox Fence 5 x 5 Routed Posts Dog Ear or Straight-Edge Pickets 1.75 x 3.5 Rail
 SHADOWBOX INSTALLATION FOR: Standard 6 H x 8 W Shadowbox Fence 5 x 5 Routed Posts Dog Ear or Straight-Edge Pickets 1.75 x 3.5 Rail Storage and Handling Fence Preparation and Layout Locate and Set Posts
Installation Guide (888)
") BamDeck Installation Guide (888) 788-2254 The Collection Decking Systems BAMDECK 4G 5-7/16 Wide Plank Dims: 192 L x 5-7/16 W x 13/16 H BAMDECK 4G WIDE 8-1/4 Wide Plank Dims: 96 L x 8-1/4 W x 13/16 H BAMDECK
BamDeck Installation Guide (888) 788-2254 The Collection Decking Systems BAMDECK 4G 5-7/16 Wide Plank Dims: 192 L x 5-7/16 W x 13/16 H BAMDECK 4G WIDE 8-1/4 Wide Plank Dims: 96 L x 8-1/4 W x 13/16 H BAMDECK
GROWING BETTER THROUGH DESIGN. 6ft Lean-To LEAN-TO. Assembly Instructions 04/02
 GROWING BETTER THROUGH DESIGN 6ft Lean-To LEAN-TO Assembly Instructions 04/02 6ft Lean-To Greenhouse Base Plan Introduction/Tools/Contents / / Contents This is a copy of our Lean-To greenhouse base plan.
INSTALLATION GIUDE.
 INSTALLATION GIUDE INTRODUCTION The instructions and drawings included here are intended only as a guide for the installation of ECO Roofing Systems Spanish and Modern profiles. The materials and methods
SunTrackerTwo Preparation
 TOLL FREE:(888)29-2705 FAX:(941)77-9460 info@eco-smart.com SunTrackerTwo Preparation Cutting Holes and Preparing Curbs T.G.I Or Truss CIRALIGHT INSTALLATION MANUAL Page 1 Cutting Holes and Preparing Curbs
Bear-Resistant Trash Can Caddy: Enclosed Design Designed by Eagle Scout Michael Mezich
 Bear-Resistant Trash Can Caddy: Enclosed Design Designed by Eagle Scout Michael Mezich The Florida Fish and Wildlife Conservation Commission offers the following design for areas with frequent bear visits.
CINTRALUX ALU BARREL VAULT EP 10/10
 CINTRALUX ALU BARREL VAULT EP 10/10 Installation instructions EN 14963 Artn 43984 E_MH_Cintralux EP 10/10 mm AG.PLASTICS QUALITY 1 Installation instructions Cintralux aluminium barrel vault: Cintralux
ASSEMBLY INSTRUCTIONS SS2520. BASE SIZE: 2.520m x 2.020m
 ASSEMBLY INSTRUCTIONS SS50 BASE SIZE:.50m x.00m CONGRATULATIONS ON PURCHASING A SMART STORE SHED. BEFORE YOU BEGIN THE ASSEMBLY PLEASE NOTE SOME IMPORTANT POINTS: BEFORE YOU START: Read all instructions
Installation Instructions
 READ BEFORE INSTALLING UNIT For Slider Casement Air Conditioners To avoid risk of personal injury, property damage, or product damage due to the weight of this device and sharp edges that may be exposed:
Converting a Gutter to GC123
 1. Remove the Gutter Disconnect the downspout from the gutter. Then remove the mounting spikes, screws and or nails that secure the gutter to the fascia board and lay the gutter on the ground. 2. Inspect