How to fit an Internal Door
|
|
|
- Gervais Casey
- 5 years ago
- Views:
Transcription
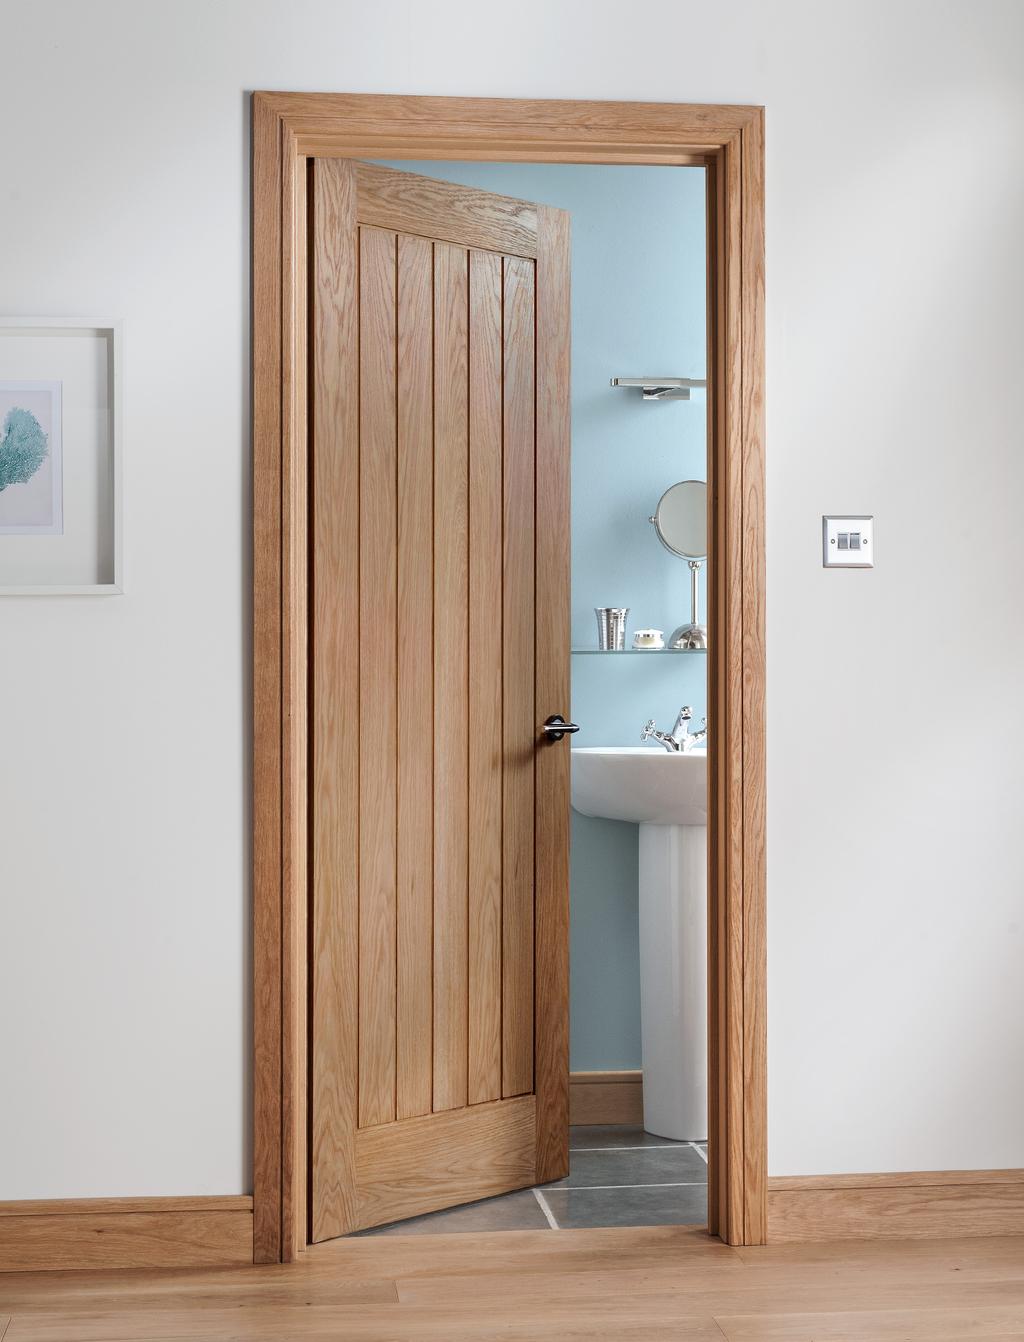
1 How to fit an Internal Door How to fit an Internal Door
2 The following instructions are for installing a internal door only. If you have any queries please contact Cheshire Mouldings technical helpline on (0800) All components should be inspected BEFORE installation commences for any damage and all your items are correct before installation. Whilst every care has been taken to ensure the information contained within these fitting instructions are correct, they are only a general guide, every situation is different. Please read through the fitting instruction fully before commencing any fitting, Cheshire Mouldings will not be held responsible for any mistakes made through incorrect fitting. Cheshire Mouldings reserve the right to amend the fitting instructions at any time. You will need to take extra care when installing pre-finished components and some touching up will undoubtedly be necessary around the cut areas. Cheshire Mouldings provides its top tips on how to fit an internal door: Tools needed Screwdriver Pencil Hammer Drill/driver and bits Safety glasses Tape measure Chisel Saw Plane Cheshire Mouldings supplies interior doors in four different sizes 610mm, 686mm, 767mm and 838mm, all in keeping with standard door sizes. This means the doors are designed to fit a standard door frame and therefore only a small amount may need to be trimmed off the height and edges in order for them to fit. If you are replacing a door then make sure you use the same sized hinges and position in the same place as previously used.


3 Step 1 Remove the old door in the first instance. The aim is to replace the existing door, with a new door of the same thickness. If the door thickness is different, the doorstop position will need to be changed. Step 2 Position the new door in the door frame. If the doors is too big, mark the top of the door frame on the door height. Transfer this measurement to the bottom of the door and add 3mm taking into account the finished level of the floor. Draw a straight line across the door on both sides and depending on the amount to be removed either saw or plane off. Step 3 Position the new door back in the frame again and this time check the width. There should be 3mm gaps along both sides. If the door is too big mark the door to the required size and reduce both sides equally using a plan.


4 Step 4 Reposition the new door in the frame and mark the exact position of the old hinges onto the new door edge, ensuring there is a 3mm gap around all sides. Step 5 Next lay the door on its side and use the marks to position the hinges. Draw round the hinges and also mark the hinge thickness on the front edge of the door as well. Step 6 Once the markings for the hinges are in place, use a chisel to cut along the pencil markings. Step 7 Make several cuts 5mm apart in the marked hinge area as this stops the wood from splitting. Use the chisel flat side down and tap it to remove the wood from the new hinge recess.


5 Step 8 Once all the wood is removed from the hinge recess area, hold each hinge in place and mark screw holes using a drill. A 2-3mm bit is ideal for this. Step 9 Screw the hinges in place on the doors. Step 10 Fit the other half of the hinge in the existing hinge marks on the door frame and screw into place. You may need someone to hold the door in place for you while you screw the hinges in place. If you are not using the same hinge positions, the standard positioning on a door edge are 15cm down from the top and 22.5cm up from the bottom. Step 11 Once the door is hung, it s now time to add on your door handles and catch.
French Door W/Cut-Out (Outside Mount L-Frame-Single Panel)
") NORMAN SHUTTERS INSTALLATION INSTRUCTIONS French Door W/Cut-Out (Outside Mount L-Frame-Single Panel) Getting Started Recommended Tools: Nail Gun or Cordless Drill, Tape Measure, Torpedo Level, Box Knife,
NORMAN SHUTTERS INSTALLATION INSTRUCTIONS French Door W/Cut-Out (Outside Mount L-Frame-Single Panel) Getting Started Recommended Tools: Nail Gun or Cordless Drill, Tape Measure, Torpedo Level, Box Knife,
McCue Bumper Installation Instructions
 McCue Bumper Installation Instructions McCue 8" Bumper Tools Required: Saw with 10-12" blade Tape measure Flat head screwdriver Phillips screw driver Pencil or chalk line Drill with Philips driver bit
ROOM FOLD SLIDING FOLDING INTERNAL DOORSET FITTING & FIXING GUIDELINES
 EDITION 7 ROOM FOLD SLIDING FOLDING INTERNAL DOORSET IMPORTANT You can only assemble these door configurations by using the frame provided. Your warranty will be invalid if other alternatives are used.
AXXYS Stairparts Fitting Instructions
 These Fitting Instructions are for use with the AXXYS range with metal balusters within B&Q These instructions are not for use with any other ranges outside the AXXYS range. If you are using our glass
How to build a Ram for Challenge E: Twist-O-Rama
 How to build a Ram for Challenge E: Twist-O-Rama Notes The Ram is like the Structure Tester it is not Interference for a Team Manager or other non-team members to build it. Construction time is approximately
Mod e l A urora P l u s Walk-In Doo r
 Installation Instructions Mod e l A urora P l u s Walk-In Doo r Contractors Wardrobe DESIGNERS MANUFACTURERS TOLL FREE: (800) CW-DOORS (800) 29-66 www.cwdoor.com 26121 Avenue Hall Valencia, CA 9155 (661)
WALL MOUNT LOCKER ASSEMBLY. 208 Chestnut St, Reading, PA (610)
") WALL MOUNT LOCKER ASSEMBLY 208 Chestnut St, Reading, PA 19602 (610)376-2666 Locker Assembly Wall Mount: locker Installation Introduction: Before beginning, check to ensure the floor is level, and the wall
WALL MOUNT LOCKER ASSEMBLY 208 Chestnut St, Reading, PA 19602 (610)376-2666 Locker Assembly Wall Mount: locker Installation Introduction: Before beginning, check to ensure the floor is level, and the wall
Rim-Lock Door Set Installation Instructions
 Rim-Lock Door Set Installation Instructions Let s get started Check Your Parts List Two Doorknobs with Set Screws B. Doorknob Spindle C. Rim Lock with Mounting Screws D. Keeper with Mounting Screws E.
Installation Instructions. Oakmont Folding Doors
 Before You Start For quick and easy installation of your Oakmont folding door, read these instructions thoroughly. A few minutes of prior planning will make the job easier and ensure years of trouble-free
Direct Importers of the Finest Exotic Hardwood Decking, Lumber, & Flooring
 Direct Importers of the Finest Exotic Hardwood Decking, Lumber, & Flooring These Instructions can be found online at: http://www.advantagelumber.com/how-to/buildwoodstoragebox.html Material List 72 FEET
Frameless Fixed Panel Slider
 INSTALLATION INSTRUCTIONS Frameless Fixed Panel Slider QCI-5279 SINGLE ROLLER WITH ANTI-JUMP DOUBLE ROLLERS QCI5279 Rev Page Certified 08/09/6 Tools: To install your New Shower Enclosure, you may need
Tools: Drill/Driver Kreg Jig Miter Saw Jigsaw Circular Saw Adjustable Square Tape Measure Veneer Trimmer Sandpaper and Sander
 R PROJECT PLANS DROP-FRONT DESK Create a workspace almost anywhere with this drop-front desk. Mounted to a wall, it doesn t take up any floor space, which means you can hang it wherever you need to work.
Melamine Plastic Laminate. Toilet Partition Installation Manual
 Melamine Plastic Laminate Toilet Partition Installation Manual PHONE: FAX: 1-866-317-2786 ATTENTION DO NOT MIX FASTENER PACKS EACH FASTENER PACK HAS THE NECESSARY BOLTS, BARRELS AND SCREWS TO INSTALL THE
Triple Wheelie Bin Chest Instructions
 Triple Wheelie Bin Chest Instructions Please read the instructions carefully before assembling this product and check pieces and fixings using the list below. Parts list: 1 x Left Panel 3 x Back Panel
Box Track INSTALLATION INSTRUCTIONS
 Box Track INSTALLATION INSTRUCTIONS BOX TRACK Recommended Tools Level Tape Measure Pencil Drill with 1/8, and 1/4, Drill Bits, Phillips Bit and Slotted Bit Socket Wrench with 9/16 Socket 9/16 and 5/8 Wrench
Double Frameless Swing Door QCI5247
 INSTALLATION INSTRUCTIONS Double Frameless Swing Door QCI5247 WALL MOUNT HINGES QCI5247 REV. 0 Page 1 Certified 06/16/2016 Parts List with wall mount hinges *Quantities may vary **Quantities double where
Installation Manual MODEL NE-42
 Installation Manual MODEL NE-42 GET TO KNOW YOUR UNIT 1 1. CROSS BRACES - Stud Finder - 12-14 Level - Tape Measure - Small Flathead Screwdriver Tools Needed: - Electric Drill (with 1/4 & 1/8 drill bit)
x2 1/4 (6mm) Floor Anchor
 Floor Anchor") INSTALLATION GUIDE Main Components x1 Rail x5 Wall Spacer x2 Anti-jump Block x2 Straight Strap x1 Right Stopper x1 Left Stopper x5 5/16 (8mm x 60mm) Carriage Bolt x5 5/16 (8mm x25mm) Anchor x5 5/16 (8mm
INSTALLATION GUIDE Main Components x1 Rail x5 Wall Spacer x2 Anti-jump Block x2 Straight Strap x1 Right Stopper x1 Left Stopper x5 5/16 (8mm x 60mm) Carriage Bolt x5 5/16 (8mm x25mm) Anchor x5 5/16 (8mm
2&3 SECTION LOFT LADDER Images feature the 3 section loft ladder, but the same instructions apply to both 2& 3 section ladders
 TWIST CATCH ASSEMBLY A4 A2 A1 A3 A7 A6 A5 2&3 SECTION LOFT LADDER Images feature the 3 section loft ladder, but the same instructions apply to both 2& 3 section ladders A Installation and Operating Instructions
Installation Instructions
 Supafold Slide Aside System Three Fold Room Divider Installation Instructions Distinctive Doors Ltd Supafold Slide Aside Internal Folding System IMPORTANT: Before proceeding with the installation, and
2&3 SECTION LOFT LADDER
 2&3 SECTION LOFT LADDER TWIST CATCH ASSEMBLY A4 A2 A1 A3 A7 A6 A5 Images feature the 3 section loft ladder, but the same instructions apply to both 2 & 3 section ladders Installation and Operating Instructions
Frameless Heavy Glass Door with Wall Mount Hinges
 INSTALLATION INSTRUCTIONS Frameless Heavy Glass Door with Wall Mount Hinges QCI-5245 QCI5245 REV. 0 Page 1 Certified 06/16/16 Frameless Door with Wall Mount Hinges ITEM NUMBER DESCRIPTION QUANTITY 1 DOOR
Garage Door Frame Retro-Fit Clad Installation Instructions
 Garage Door Frame Retro-Fit Clad Installation Instructions Patent # US 7,111,433 B2, CA 2,415,545, Other Patents Pending Tools required Screw driver (screw gun), hammer, pry bar, tape measure, compound
RETRACTABLE SCREEN ASSEMBLY AND INSTALLATION INSTRUCTIONS. SINGLE OUTSWING (Retro) / (Full-Size) STEP 1: REVIEW & CHECK FIG.
 / (Full-Size) STEP 1: REVIEW & CHECK FIG.") STEP 1: REVIEW & CHECK ) CONFIRM DOOR HEIGHT & WIDTH You have purchased a SINGLE Retractable Screen for an INSWING door. HEIGHT: This unit is available in two sizes: Retro and Full-Size. Please make sure
STEP 1: REVIEW & CHECK ) CONFIRM DOOR HEIGHT & WIDTH You have purchased a SINGLE Retractable Screen for an INSWING door. HEIGHT: This unit is available in two sizes: Retro and Full-Size. Please make sure
Frameless Door QCI5284
 Frameless Door QCI5284 F AB GLASS AND MIRROR www.fabglassandmirror.com Call: +1 888-474-2221 Fax: (614)-334-4919 Office Timing: 8:30-18:00 EST info@fabglassandmirror.com INSTALLATION INSTRUCTIONS Frameless
IDP Entry-Fit Steel Door Frames. Installation Instructions K2A and NK2A Series Frames
 IDP Entry-Fit Steel Door Frames Installation Instructions K2A and NK2A Series Frames IDP Inc 21300 W. 8 Mile Rd. Southfield, MI 48075 1-877-645-2770 www.idpframes.com email: info@idpframes.com K2A and
" BASE CABINET
 INSTALLATION GUIDE INSTALLATION GUIDE Before You Begin Installing Your Kitchen Cabinets 1. Read through installation guide to understand all steps and gather tools needed. 2. Verify that all of the hardware,
Building and installing dividing walls, by Tobias Sternberg
 Building and installing dividing walls, by Tobias Sternberg This instruction sets out to show one way to build and install simple dividing walls for studio spaces. I have written it as clearly as possible.
TIP FOR GETTING STARTED
 Tip for getting started TIP FOR GETTING STARTED Be careful not to drill into any electrical wires, ductwork, plumbing or other damagable components. If you have any questions on the locations of these
Gallium 03 Installation Instructions & Parts List
 Gallium 03 Installation Instructions & Parts List Illustration Gallium 03, H1 Handle Left Hand: Open Out 04/05/2016 Revision 1.1 Page 1 of 19 IMPORTANT This shower screen / enclosure must be installed
Sauna & Steam. Vision Sauna Manual Wall Hung Heater Version (Covers all models)
") Vision Sauna Manual 14.7.18 Wall Hung Heater Version (Covers all models) Oceanic Ltd, Pountney Street, Wolverhampton, WV2 4HX Phone: 01902 450 550 sales@oceanic-saunas.co.uk www.oceanic-saunas.co.uk Table
Vision Sauna Manual 14.7.18 Wall Hung Heater Version (Covers all models) Oceanic Ltd, Pountney Street, Wolverhampton, WV2 4HX Phone: 01902 450 550 sales@oceanic-saunas.co.uk www.oceanic-saunas.co.uk Table
Stainless Steel 95C34 Series
 Stainless Steel 95C34 Series Toilet Partition Installation Manual PHONE: FAX: 866-317-2786 ATTENTION DO NOT MIX FASTENER PACKS EACH FASTENER PACK HAS THE NECESSARY BOLTS, BARRELS AND SCREWS TO INSTALL
Frameless Inline Door With Return QCI5263
 INSTALLATION INSTRUCTIONS Frameless Inline Door With Return QCI5263 WALL MOUNT HINGES FRAMELESS DOOR / PANEL / RETURN PANEL QCI5263 REV. 0 Page 1 Certified 06/17/2016 Parts List with wall mount hinges
Frameless Inline Door QCI5248
 INSTALLATION INSTRUCTIONS Frameless Inline Door QCI5248 FRAMELESS PANEL / DOOR / PANEL QCI5248 REV. 0 Page 1 Certified 06/16/2016 Parts List with glass to glass hinges *Quantities may vary. **Support Bar
Installation Manual MODEL ANE-42
 Installation Manual MODEL ANE-42 GET TO KNOW YOUR UNIT 1 2 1. CROSS BRACES 2. SIDE BRACKETS - Stud Finder - 12-14 Level - Tape Measure - Small Flathead Screwdriver Tools Needed: - Electric Drill (with
Installing Your Electronic Deadbolt
 Ultra Security Plus Electronic Deadbolt Installation Instructions http://www.hberger.com/video-gallery/electronic-deadbolt New Installation Lock Location Preparation (Skip this section if you door has
Xenon 05 Installation Instructions & Parts List
 Xenon 05 Installation Instructions & Parts List Illustration Xenon 05, H1 Handle Left Hand: Open Out 26/05/2016 Revision 2.1 Page 1 of 19 IMPORTANT This shower screen / enclosure must be installed by suitably
Free Doghouse Plans Page 1 of 2
 Free Doghouse Plans Page 1 of 2 This doghouse is designed with the beginner in mind. It might even be a good project to involve the kids. The entire project requires only one sheet of plywood, two 2"x4"s
Chapter 23. Garage Construction
 Chapter 23. Garage Construction 23.1 ESTABLISHING CHALK LINES 23.2 MEASURING AND CUTTING WALL PLATES 23.3 MARKING WINDOW & DOOR LOCATIONS ON EXTERIOR WALL PLATES 23.4 MARKING STUDS ON EXTERIOR WALL PLATES
Ohio - TV Unit MADE IN BRITAIN. Assembly Instructions - Please keep for future reference 309/6561
 Ohio - TV Unit ssembly Instructions - Please keep for future reference 09/6561 Dimensions Width - 120cm Depth - 9.5cm Height - 61.5cm MDE IN RITIN Important - Please read these instructions fully before
Curium 19H Installation Instructions & Parts List
 Curium 19H Installation Instructions & Parts List Illustration Curium 19H Right Hand Page 1 of 15 01/07/2016 Revision 2.1 IMPORTANT This shower screen / enclosure must be installed by suitably qualified
Installation Instructions
 Installation Instructions Walk-in Shower Screen with 180 o Return Panel (700 + 350mm & 900 + 350mm) Installation Instructions Parts supplied A B C D Wall Channel (x1) Wall fixing screw (x6) Return Straight
Jabiru Aircraft. Fit Ailerons
 Fit Ailerons Reference: Drawings 2033091 and 20210K1 Photos Parts Required: 2021091 Wing LS 202209N Wing RS 2027092 Aileron LS 202809N Aileron RS 2036034 Aileron reinforcement Left 203703N Aileron Reinforcement
INSTALL INSTRUCTIONS CONTENTS: INSIDE MOUNT PAGE 2-7 OUTSIDE MOUNT PAGE 8-12
 INSTALL INSTRUCTIONS CONTENTS: INSIDE MOUNT PAGE 2-7 OUTSIDE MOUNT PAGE 8-12 HOW TO INSTALL INSIDE MOUNT SHUTTERS Your shutters are designed to be easy to install and maintain. Depending on the shutter
How To Measure Your Finished Opening
 3000 Series Bifold Doors How To Measure Your Finished Opening MEASURE FROM RIGHT TO LEFT 2 PLACES (WIDTH) MEASURE FROM TOP TO BOTTOM 2 PLACES (HEIGHT) Tools Required for Assembly: Tools Needed: Phillips
Pet Door Panel Installation Manual
 Pet Door Panel Installation Manual 400-558-1 1 4/3/03, 3:26 PM Components: Pet Door Panel Panel Latch Assembly Foam Weather-stripping Glass Sweep (4) Binding Posts (6) #6 x 1/2 Sheet Metal Screws (4) 8-32
Dubnium 11 Installation Instructions & Parts List
 Dubnium 11 Installation Instructions & Parts List Illustration Dubnium, H1 Handle Right Hand: Open Out Page 1 of 25 IMPORTANT This shower screen / enclosure must be installed by suitably qualified individuals.
MyOutdoorPlans.com. By Julian King [2X4 GARDEN BENCH]
![MyOutdoorPlans.com. By Julian King [2X4 GARDEN BENCH]](/thumbs/75/72876801.jpg "MyOutdoorPlans.com. By Julian King [2X4 GARDEN BENCH]") MyOutdoorPlans.com By Julian King [2X4 GARDEN BENCH] CUT LIST A 2 pieces of 2 4 lumber 24 long, 2 pieces 32 1/2 long LEGS B 2 pieces of 2 4 lumber 45 long, 2 pieces 15 1/2 long, 1 piece 12 1/2 long SEAT
MyOutdoorPlans.com By Julian King [2X4 GARDEN BENCH] CUT LIST A 2 pieces of 2 4 lumber 24 long, 2 pieces 32 1/2 long LEGS B 2 pieces of 2 4 lumber 45 long, 2 pieces 15 1/2 long, 1 piece 12 1/2 long SEAT
Replacement Guide. For Handle Side Z-bar on Fullview Doors with Laminated Glass and Multi-Point Locking System RECOMMENDED TOOLS:
 Replacement Guide For Handle Side Z-bar on Fullview Doors with Laminated Glass and Multi-Point Locking System IMPORTANT: READ ENTIRE GUIDE BEFORE BEGINNING INSTALLATION. PLEASE NOTE: Proper assembly, installation
Cardo DOOR & RETURN SHOWER ENCLOSURE INSTALLATION PLEASE READ THESE INSTRUCTIONS CAREFULLY.
 Cardo DOOR & RETURN SHOWER ENCLOSURE INSTALLATION PLEASE READ THESE INSTRUCTIONS CAREFULLY. IT IS RECOMMENDED TO USE A TRAINED SHOWER INSTALLER FOR THIS SHOWER TO OBTAIN THE BEST INSTALLATION. D Square
Installation Instructions. Walk-in Shower Screen. with 180 Return Panel
 Installation Instructions Walk-in Shower Screen O with 180 Return Panel Installation Instructions Important Information Please read these instructions carefully before starting installation and keep for
Entry Mortise Handleset
 1. Pencil 2. No. 2 and No. 3 Phillips Head Screwdrivers 3. No. 1 and No. 2 Slotted Screw Drivers 4. 1/8" Allen Head Wrench 5. 3/4" Wood Chisel or Corner Chisel 6. Measuring Device 7. Lock Mortising Tool
Curium 19.4H Installation Instructions & Parts List
 Curium 19.4H Installation Instructions & Parts List Illustration Curium 19.4H Right Hand Page 1 of 21 30/06/2016 Revision 1.0 IMPORTANT This shower screen / enclosure must be installed by suitably qualified
(1) 2x4 Ft. Sheet of ¼-inch Plywood. 1 ¼-inch Wood Screws. 1 ¼-inch Brad Nails ¾-inch Brad Nails Wood Glue CUT LIST:
 2x4 Ft. Sheet of ¼-inch Plywood. 1 ¼-inch Wood Screws. 1 ¼-inch Brad Nails ¾-inch Brad Nails Wood Glue CUT LIST:") MATERIALS: (5) 1x3x8 Ft. Boards (3) 2x4x8 Ft. Boards (10) 1x4x8 Ft. Boards (1) 1x2x10 Ft. Board (1) 2x2x4 Ft. Board (2) 1x6x8 Ft. Boards (1) 4x8 Ft. Sheet of ¾-inch Plywood (1) 2x4 Ft. Sheet of ¼-inch
MATERIALS: (5) 1x3x8 Ft. Boards (3) 2x4x8 Ft. Boards (10) 1x4x8 Ft. Boards (1) 1x2x10 Ft. Board (1) 2x2x4 Ft. Board (2) 1x6x8 Ft. Boards (1) 4x8 Ft. Sheet of ¾-inch Plywood (1) 2x4 Ft. Sheet of ¼-inch
Assembly Instructions
 10' and 12' Octagon Cedar Gazebo Assembly Instructions Toll Free: 866.768.8465 Hours: 9-5 Monday-Friday EST www.homeplacestructures.com Package ships as shown revised 06/20/09 Cedar Gazebo Assembly Instructions
EASY STOW/HIDEAWAY LOFT LADDER
 EASY STOW/HIDEAWAY LOFT LADDER TWIST CATCH ASSEMBLY A4 A3 A2 A1 A7 A6 A5 A Installation and Operating Instructions Read Carefully Before Installation Please check you have all components listed (tick Boxes)
Installation Instructions
 Important 1. Install product in environmentally controlled conditions. 2. Acclimate materials 24 hrs before installation. Maintain temperature controlled environment after installation. 3. Installers should
LOWLINE SINGLE FOLD DOWN WALL BEDS
 ASSEMBLY INSTRUCTIONS LOWLINE SINGLE FOLD DOWN WALL BEDS Tools Required For Assembly No 2 & No 4 Phillips Head Screwdrivers No 2 Slot Head Screwdriver Hammer Electric Drill (Hammer Drill for Masonry) 6.5mm
Patrol Box Plans by David J. Yarusso Troop 609
 Patrol Box Plans by David J. Yarusso Troop 609 Materials List: 1. One 4 x8 sheet of ½ thick cabinet grade (birch or oak) or AC plywood. If using AC grade, use the A grade surface on the outside for a clean
Measuring Guidelines
 Measuring Guidelines Table of Contents Page. Panel Anatomy 2. Basic Measuring 2 3. Mounting Options 2 4. General Frame Categories 4 Frame Decision Tree Number of Sides 5. Measuring for 7 Different Frames
TOOLS REQUIRED FOR ASSEMBLY. Rubber Mallet or Plastic Tip Hammer PARTS REQUIRED FOR ASSEMBLY OF SINGLE ENTRY STARTER.
 TOOLS REQUIRED FOR ASSEMBLY Rubber Mallet or Plastic Tip Hammer Top Cover Support PARTS REQUIRED FOR ASSEMBLY OF SINGLE ENTRY STARTER Back Stop Divider Closed 'L' Upright Slotted Reinforcement Support
Chapter 9. Windows and Exterior Doors
 Chapter 9. Windows and Exterior Doors 9.1 INSTALLING WINDOWS 9.2 INSTALLING EXTERIOR HOUSE DOORS 9.3 INSTALLING SHED DOOR 9.4 INSTALLING EGRESS COMPONENTS Tools needed by volunteers: Hammer Nail apron
Argon 02 Installation Instructions & Parts List
 Argon 02 Installation Instructions & Parts List Illustration Argon, H1 Handle Right Hand: Open Out 16/06/2016 Revision 1.1 Page 1 of 10 IMPORTANT This shower screen / enclosure must be installed by suitably
Tools Required. * When installing on a fire door, please see instructions below. *
 CL615 Tubular Mortice Latch with Code Free option CL615 Tubular Mortice Latch with Code Free option Number relating to picture Item 1 Front Plate and handle * 2 Back Plate and handle * 3 Neoprene seals
Allora ALCOVE ENCLOSURE INSTALLATION BEFORE INSTALLATION CHECK THAT YOUR ALLORA SHOWER ENCLOSURE SYSTEM IS UNDAMAGED
 Allora ALCOVE ENCLOSURE INSTALLATION BEFORE INSTALLATION CHECK THAT YOUR ALLORA SHOWER ENCLOSURE SYSTEM IS UNDAMAGED ALCOVE SHOWER Your shower can be installed to open Left hand or Right hand by rotating
Contour Hanger ASSEMBLY INSTRUCTIONS
 Contour Hanger ASSEMBLY INSTRUCTIONS CONTOUR HANGER Recommended Tools Drill with 1/8, 1/4, and 3/8 Drill Bits, 1-1/8 Forstner Bit or 1-1/8 Spade Bit, and Phillips Bit 9/16 and 5/8 Combination Wrench Socket
Industrial Hanger ASSEMBLY INSTRUCTIONS
 Industrial Hanger ASSEMBLY INSTRUCTIONS INDUSTRIAL HANGER Recommended Tools Drill with 1/8, 1/4, and 3/8 Drill Bits, 1-1/8 Forstner Bit or 1-1/8 Spade Bit, and Phillips Bit 9/16 and 5/8 Combination Wrench
PROFESSIONAL LOFT LADDER
 PROFESSIONAL LOFT LADDER TWIST CATCH ASSEMBLY A4 A3 A2 A1 A7 A6 A5 A Installation and Operating Instructions Read Carefully Before Installation Please check you have all components listed (tick Boxes)
INSTALLATION INSTRUCTIONS
 INSTALLATION INSTRUCTIONS GLI POOL PRODUCTS / 1100 PERFORMANCE PLACE / YOUNGSTOWN, OH 44502 PH. 800-448-2343 FAX 330-744-1228 www.glipoolproducts.com WARNING THERE IS NO SUBSTITUTE FOR COMPETENT ADULT
Triple Bypass System
 Triple Bypass System ASSEMBLY INSTRUCTIONS TRIPLE BYPASS SYSTEM Recommended Tools Drill with 1/4 Drill Bit and Phillips Screw Bit 7/16 Combination Wrench Socket Wrench with 7/16 and 9/16 Socket Level Tape
New Sywell - 2 Door Robe
 New Sywell - 2 Door Robe ssembly Instructions - Please keep for future reference 282/4150 266/3768 267/7606 266/2965 281/8960 Dimensions Width - 70.5cm Depth - 50cm Height - 172cm MDE IN RITIN Important
AC GATE TOOLS REQUIRED
 AC 30988 GATE FOR USE WITH: PARADISE ISLE BRIDGE SYSTEM BS ENCLOSEB TOOLS REQUIRED Phillips head screwdriver Drill with 1/16 drill bit This gate is the final component of the Paradise Isle Bridge System.
diy outdoor bar from diyhuntress.com
 diy outdoor bar from diyhuntress.com 2 DIMENSIONS & DISCLAIMER: Please double check the overall dimensions for your specific build before starting. Please wear appropriate safety gear when operating power
Chapter 18. Interior Doors
 Chapter 18. Interior Doors 18.1 SWINGING DOORS 18.2 SLIDING DOORS 18.3 BIFOLD DOORS Tools needed by volunteers: Hammer Nail apron Tape measure Square Pencil Tools and equipment needed: Extension cords
Installation Instructions
 Installation Instructions Walk-in Shower Screen End Panel Installation Instructions Important Information Please read these instructions carefully before starting installation and keep for future reference.
1 PREPARE HEADER AND ROUGH OPENING
 CONTENTS. HEADER & TRACK ASSEMBLY. END BRACKET PLAIN 3. FLOOR PLATE.. 8. 4. SPLIT STUD 6 5. CARRIER (987) 6. QUICK RELEASE PLATE (960) 7. DOOR GUIDE SET (9883) 3. 4. 7. 8. BUMPER KIT (988) 9. #8 X 3/4
UNIT 12: INTERIOR DOORS AND TRIM
 KEY CONCEPTS 1. Identify tools needed for finishing and trim work 1. Cabinet and door hardware 2. Installation of doors 2. Identify common finishing tasks (trim, shelves, doorstops, bath accessories, etc.)
BARN DOOR HARDWARE KIT
 INSTALLATION GUIDE Main Components x1 Rail x5 Wall Spacer x2 Anti-jump Block x2 Bent Strap x1 Right Stopper x1 Left Stopper x5 5/16 (8mm x 60mm) Carriage Bolt x5 5/16 (8mm x25mm) Anchor x5 5/16 (8mm x
Installation Guide. Bi-fold Doors
 Installation Guide Bi-fold Doors Installation Guide Components box 1. 6. 2. 3. 7. 5. 4. 8. Contents 1. Fixing plugs 2. Wedge gasket 3. Bottom trolley 4. Top trolley 5. Magnetic keep (x 2 if door height
WARNING. Not suitable for children under 36 months Contents
 For domestic and family use only Children of any age should not be left to play unsupervised Retain Instructions for future reference WARNING. Not suitable for children under 36 months Contents Length
KITCHEN INSTALLATION GUIDE
 KITCHEN INSTALLATION GUIDE The step-by-step guide to installing your new kitchen right The materials and tools you ll need This brochure is your guide to preparing and installing your new kitchen. Inside
FRAMELESS DOOR / PANEL WITH WALL MOUNT HINGES QCI5274
 FRAMELESS DOOR / PANEL WITH WALL MOUNT HINGES QCI5274 QCI0274 QCI5274 REV. Rev. 1 0 Page Page 1 1 Date Certified: Certified 06/16/2016 10/01/10 Parts List with wall mount hinges ITEM NO. Part # DESCRIPTION
PREHUNG INTERIOR DOOR INSTALLATION
 PREHUNG INTERIOR DOOR INSTALLATION Although prehung door units cost a little more, homeowners and builders alike often find the convenience and finished product well worth the difference in price. Prehung
Malibu - 3 Drawer 2 Door Robe
 Malibu - 3 Drawer Door Robe ssembly Instructions - Please keep for future reference 7/83 38/3574 58/904 37/187 58/7679 79/1496 6/617 58/803 57/51 79/1960 55/7788 47/766 66/7355 49/661 78/5189 78/0830 Dimensions
Radon 07 Installation Instructions & Parts List
 Radon 07 Installation Instructions & Parts List Illustration Radon 07, H1 Handle Right Hand: Open Out 14/06/2016 Revision 1.1 Page 1 of 21 IMPORTANT This shower screen / enclosure must be installed by
TWIG Hanger ASSEMBLY INSTRUCTIONS
 TWIG Hanger ASSEMBLY INSTRUCTIONS TWIG HANGER Recommended Tools Drill with 1/8, 1/4, and 3/8 Drill Bits, 1-1/8 Forstner Bit or 1-1/8 Spade Bit, and Phillips Bit 9/16 and 5/8 Combination Wrench Socket Wrench
SINGLE TRACK BYPASS (patent pending) barn door hardware
 barn door hardware") SINGLE TRACK BYPASS (patent pending) barn door hardware Installation Manual What is included in your kit: Part number Part name Quantity 1 Inner door hanger 2 2 Outer door hanger 2 3 5/16 x 1.5 lag bolts
SINGLE TRACK BYPASS (patent pending) barn door hardware Installation Manual What is included in your kit: Part number Part name Quantity 1 Inner door hanger 2 2 Outer door hanger 2 3 5/16 x 1.5 lag bolts
Frameless Inline Door QCI5254
 INSTALLATION INSTRUCTIONS Frameless Inline Door QCI5254 FRAMELESS DOOR / PANEL QCI5254 REV. 0 Page 1 Cer fied 06/16/2016 Parts List with wall mount hinges *Quanes may vary QCI5254 REV. 0 Page 2 Cer fied
KITCHEN INSTALLATION GUIDE
 KITCHEN INSTALLATION GUIDE The step-by-step guide to installing your new kitchen right This brochure is your guide to preparing and installing your new kitchen. Inside you ll find tips and ideas, clear
Installation Guide. deckorum Composite Decking
 Installation Guide deckorum Composite Decking 1. Introduction Welcome to Deckorum installation Guide Please fully read the installation guide before commencing any installation works. This will provide
A-935 RODA WALL MOUNT HINGES
 INSTALLATION INSTRUCTIONS A-935 RODA WALL MOUNT HINGES NEED INSTALLATION HELP? Call 1-800-45-BASCO (452-2726) Monday - Friday 8:00 A.M. - 4:30 P.M. Eastern Time FRAMELESS DOOR / PANEL CELESTA QCI0274 REV.
HAND TOOL NOTES For each tool picture and name, please write what it s used for. You will have a quiz on this.
 HAND TOOL NOTES For each tool picture and name, please write what it s used for. You will have a quiz on this. Tool (Name & Nut drivers Speed Square Adjustable Bevel Square CONSTRUCTION TOOLS: Tool (Name
INSTALLATION INSTRUCTIONS
 INSTALLATION INSTRUCTIONS LAMINATED P LASTIC TOILET PArTITIONS 1540 ClassicSeries with Options IMPORTANT: Storage and Handling Information on last page. For faster, easier installation, please review these
2 Section Slider Loft Ladder Instructions
 WARNING! - Safety information 2 Section Slider Loft Ladder Instructions All ladders have potential injury risks, before installing this loft ladder carefully read and follow all of the safety, installation
Cellar Hanger ASSEMBLY INSTRUCTIONS
 Cellar Hanger ASSEMBLY INSTRUCTIONS CELLAR HANGER Recommended Tools Drill with 1/8 and 1/4 Drill Bits, 1-1/8 Forstner Bit or 1-1/8 Spade Bit, and Phillips Bit 9/16, 7/16, and 5/8 Combination Wrench Socket
Assembly Instructions Please keep for future reference Inspire 40
 Assembly Instructions Please keep for future reference Inspire 40 Version 3 : 28/07/2014 Important - Please read these instructions fully before starting assembly ALR2902 Safety and Care Advice Important
Silverware Chest Plan
 Silverware Chest Plan 05L14.01 Introduction 1. Measure the space required for your cutlery before beginning this project to be sure that it will fit in the drawers and top compartment. The best way to
SLAT WALL INSTALLATION GUIDE
 Versatile Building Products, Inc. 245 Carl Karcher Way, Anaheim CA. 92801 www.garagecoatings.com 714-829-2600 SLAT WALL INSTALLATION GUIDE TOOLS REQUIRED 1. Impact cordless driver / drill + spare battery
Pvcu Bi Folding Doors Fitting Instructions.
 Pvcu Bi Folding Doors Fitting Instructions. THE FOLLOWING INSTRUCTIONS ARE GIVEN IN GOOD FAITH AND ARE FOR GUIDANCE ONLY. NO RESPONSIBILITY WILL BE ACCEPTED FOR ANY MIS- INTERPRETATION. WHEN INSTALLING
Grand Garden Chalet 6X3 Assembly Manual - Costco
 Revision #16 March 22nd, 2013 Grand Garden Chalet 6X3 Assembly Manual - Costco Thank you for purchasing a Grand Garden Chalet. Please take the time to identify all the parts prior to assembly. Please use