Ignitability Index Spread of Flame Index Heat Evolved Index Smoke Developed Index. Range 0-20 Range 0-10 Range 0-10 Range
|
|
|
- Evangeline Armstrong
- 5 years ago
- Views:
Transcription
1


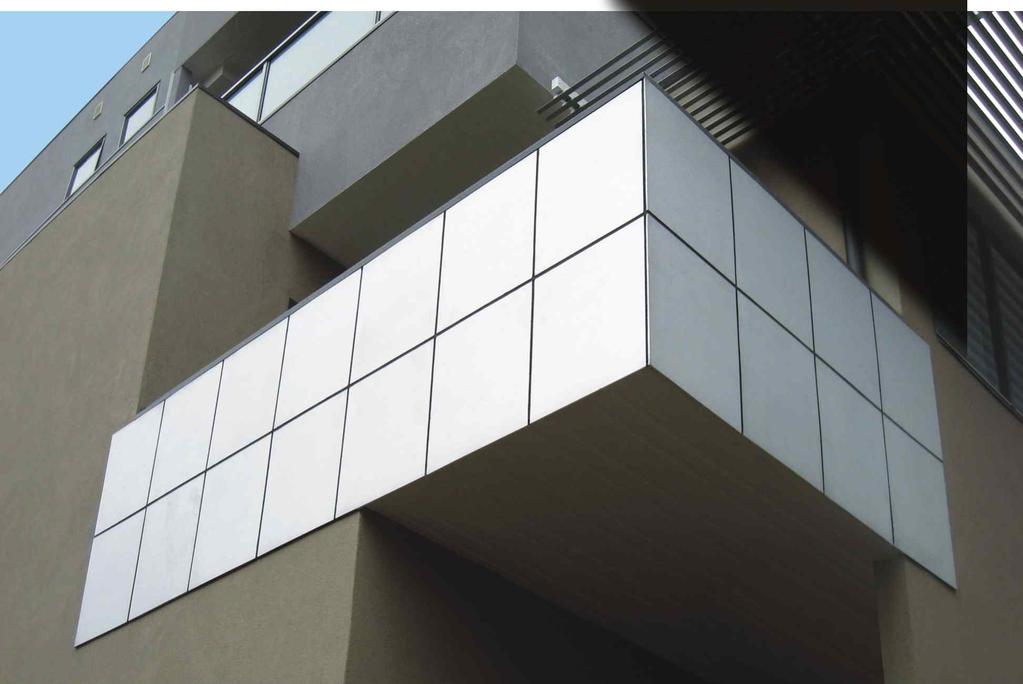
2 (Expressed Panel Facade System) is a versatile, glass fibre-reinforced, recycled wood fibre and magnesium cement based cladding. The panels are fabricated from a combination of recycled timber materials, mineral fibres and the latest fire retardant chemicals. Conventional woodworking equipment required to cut and shape Multiboard. is a lightweight and exceptionally strong board that provides a solid substrate for many decorative finishes. is up to 50% the weight of traditional compressed cement sheeting and has exceptional fire resistance. Non combustible. Tested to AS is an external cladding system that can be erected quickly and efficiently. There is no need for special top hat sections; instead standard, seasoned, treated pine battens are used. has been designed for use in light commercial, light industrial and residential applications where the main external trade is carpentry and the maximum height from ground level is 6.0m kg 26.14kg 29.04kg Tested to the strict requirements of AS % - 50% lighter than traditional compressed cement sheeting. Fastening is by commonly available straight and angled powered brad nailers. This gives one distinct advantage over other systems. Once installed, there is no extra cost or labour requirement filling screw holes; it s ready for texture coating. comprises of 8mm panels that are installed in a vertical or horizontal layout. The panel sizes can be altered in to smaller sized panels to suit different architectural designs. This is made possible by the batten system lay out being totally independent of the wall frame stud spacing and the ease in which Multiboard can be cut in comparison to other linings on the market. The installation takes a fraction of the time of commercial expressed-edge systems. Labour and time saving installation procedure, without the need of specialist trades or tooling. Jointing of the system can be designed "off stud" which means that the facade design is independent of the wall engineering design requirements. Boards can be easily cut to alternative sizes with standard carpentry tools. This will easily allow for alternative design layouts. Ready for texture coating without the need of filling and sanding of screw holes. A good fit for current Environmental & Sustainability Design (ESD) principles. Contains recycled wood fibre and other recycled materials. No Portland cement - Magnesium Oxide Cement is used, which is an eco-friendly and environmentally stable compound. No harmful substances to humans or environment such as crystalline silica. Up to 50% lighter than traditional compressed cement sheeting. High water resistance. High fire resistance. Ignitability Index Spread of Flame Index Heat Evolved Index Smoke Developed Index Range 0-20 Range 0-10 Range 0-10 Range 0-10 Tested to ASTM E standard test method for Water Penetration & Leakage through Masonry. Laboratory tested by Termimesh Australia. No harmful crystalline silica or asbestos. No special requirements required when cutting with power tools. Tested as safe. High acoustic performance. 50% recycled bamboo / wood fibre, 40% less embodied energy to produce than fibre cement. must be stored in a dry and covered area. If stored externally, must be stacked flat, and raised off the ground. The panels should be supported on level ground and must be protected from the weather. Care should be taken to avoid damage to the products edges and surfaces. If the product becomes wet, the product must be allowed to dry before fixing. must be coated within 2 months of exposure to the elements.


3 should be stacked and handled carefully to avoid damage. Boards should be lifted from the pallet by sliding sideways and carried on its long edges. Tape CS-3/25. Board adhesive MB RLA 1018 PU adhesive. When designing with, the following needs to be considered: Panel layout - layout so that the battens are at a maximum of 550mm centres. Control joints - Install double-batten control joint every 6m - refer to details section "Detail 1". Maximum height - is designed for a maximum of 12m from ground level. Insulation / Sarking requirements. Coating systems finish requirements. Maintenance. Galvanised steel angles and flashings with a minimum of 1mm BMT. The 90 x 35mm batten must be fixed on to the top plate, nogging and bottom plate with at least two framing nails at each junction. Strict adherence to the BCA must be followed for the number of noggings for walls greater than 2.4m in height. It is important to ensure that the battens are installed so they are straight in both horizontal and vertical directions over the full length of each wall. Adjust battens as required to achieve this. Apply a single 6mm high bead of Silkaflex Pro along the length of the intermediate battens. For smooth cuts, use a circular saw with a fine toothed blade. Determine panel layout then mark out the centre point of each 90 x 35mm batten on the frame. Batten spacing must be at a maximum of 400mm centres. can also be cut easily using a normal hand saw. The edge of can be planed or smoothed with an electric planer, rasp or file, or conventional papers if sanding is required. Position the batten according to predetermined and marked spacing's and ensure that they are vertical (check this with a spirit level in all planes). Apply recommended to the 90 x 35mm TP batten that will form the expressed channel. Ensure the seal is applied to the centre of the purpose designed seal channel on the 90 x 35mm batten. Also apply two 6mm high beads of MB RLA 1018 PU adhesive along the length of the expressed channel battens on either side of the recommended tape. When drilling holes in use a standard timber drill tip. Do not use hammer action. comprises of Multiboard panels fastened to a simplified sub system that incorporates 90mm x 35mm seasoned battens, horizontal backing strip and Multiboard butyl gasket tape 50mm BFT-3/25. Fastening is by Clad Seal and polyurathane adhesive. Pre-painted horizontal backing strip - 10mm x 0.55mm BMT. Fix the battens on the flat to the frame using appropriate framing nails or screws. Use Stainless Steel (SS) brading nails Plaslode C50/SS or DA2150/SS equivalent. Fasteners must be driven just under the face of the board. It is essential to adjust the fixing gun to ensure that the pins are not over or under driven. Refer to figure below. Nail head must be approximately 1mm below the surface of the

4 Align the first sheet and begin fixing to the battens at a maximum of 150 mm centres. Use a 150mm centre nailing pattern on all battens. 30mm 150mm 150mm Insert the backing strip behind the top of the board. Beads of adhesive Recommended Seasoned T.P. Batten Backing Strip When installing the next layer of apply a bead of the appropriate sealant to the top of the backing strip and then rest an sheet on the purpose designed 3mm edge of the backing strip. fixing details bottom layer of board Where a horizontal joint is required, fix the bottom row of allowing a 15mm overlap of the recommended. Do not nail the top half of the boards at this point. This will facilitate the insertion of the backing strip to the board. Beads of adhesive Backing strip joint details - the backing strip has been designed to overlap whilst retaining a flush fit behind the board. Position the sheet to ensure that all joints are 10mm wide and then finalise the nailing of the panel. Beads of adhesive Panel Recommended fixing details bottom layer of board Backing strip joints must overlap the nearest batten and be sealed with two beads of an appropriate sealant, to ensure a water tight joint. 2 Beads of Continue with this installation process until all sheets are installed. All expressed joints can be filled with a flexible acrylic sealant to ensure water tightness in the system. The sealant can be applied directly on to the expanded recommended. Panels to overlap seal minimum of 15mm Backing Strip overlaps at the nearest top hat by at least 50mm Finished wall must be coated within 2 months of exposure to the elements. Ensure that all edges are completely sealed. Use only reputable texture systems and ensure that the application directions are strictly followed After the backing strip is in position, finalise the nailing of the top half of the lower board. This will draw the sheet and backing strip against the batten, completing the seal. Joint - Class A polyurethane sealant should be installed with strict adherence to manufacturers instructions. Ensure that a bead of at least 8mm in diameter is applied.
5 Vertical Sheet Joint Detail Double Batten Every 3rd Sheet or 3.3m DETAIL 1 Multiboard 12mm 600mm Max DETAIL 1 Studs 450nom. 600 Max Detail 1 - Construction Joint 1.5mm EPDM Foam Seal Continuous 5mm Sikaflex Bead 90mm Nogging 15 min. Horizontal Sheet Joint Detail Vertical Sheet Joint Detail Recommended Sikaflex Bead Centres Seasoned Treated Pine Pre-Painted Horizontal Backing Strip 10mm x 0.55BMT Internal Corner Detail Brad Nail Continuous Bead of External Corner Detail Window Head Detail Brad Nail Note: Order of for Expressed Joint Brad Nail Continuous Bead of Seasoned Brad Nail Vapour Barrier Panel Continuous Bead of Window Sill Detail Internal Window Head To Architects Details Window Jamb Detail Slab Edge Detail 1 Continuous Bead of Metal Angle Jamb Window Frame Sill Shown Indicative Window Sub-Sill Continuous Bead of Window Frame Shown Indicative Soffit Detail Panel Seasoned Treated Pine 10 nom. Seasoned Vapour Barrier Internal Wall Lining Internal Window Head To Architects Details Head Continuous Bead of Behind Head - Leave Gap Open Between Sheet & Window Frame Head- Shown Indicative Concrete Slab

6 Slab Edge Detail 2 Concrete Slab Brick Sill Detail 90mm Nogging Brick on Edge Sill legal rights of any person under the Trade Practices Act or otherwise which cannot be excluded or modified at law. The Warranty is strictly subject to the following conditions:- 1. The product, and any other products including fasteners and jointing systems, applied to or used in conjunction with the product must be used and installed strictly in accordance with the recommended installation methods at the time of installation. 2. Under no circumstances will Multiboard be liable for defects arising from:- (a) A failure to use and/or install the product, or any products, strictly in accordance with the product manual. (b) Defective materials not supplied by Multiboard; or (c) Impact. 3. Multiboard will not be liable for breach of Warranty, and no breach of Warranty claim will be accepted, unless the Claimant makes a written claim and provides proof of purchase within 30 days of the alleged defect becoming apparent. 4. This Warranty is not transferable under any circumstances without the prior written consent of Multiboard. 5. A Claimant's sole remedy for breach of Warranty is (at Multiboard's option) that Multiboard will either replace or repair the defect, supply replacement product, or pay for the cost of replacement or rectification of the affected product. Brickwork is manufactured from woven glass fibre, recycled wood fibres, magnesium cement, and additives which catalyse the cementing action. As manufactured, the product will not release airborne dust, however during drilling and sanding operations, glass fibres and fine dust may be released. When using power saws in a confined space, dust extraction equipment is recommended to control dust levels. If power tools are used externally, wear an approved P1 or P2 dust mask, respirator and safety glasses. No special safety precautions are necessary when handling or working with Multiboard. For further information refer to the Materials Safety Data Sheet, please refer to our website. exres (Multiboard) warrants for a period of ten (10) years ("the warranty period") from the date of purchase that all products ("the product") will be free from defects due to faulty manufacture or materials, and will be resistant to cracking, rotting, fire and damage to the extent set out in Multiboard's published literature current at the time of installation, and strictly subject to the conditions set out below. Nothing in this document shall exclude or modify any 6. Under no circumstances shall Multiboard be liable for any consequential loss, property damage or personal injury, economic loss or loss of profits, arising in Contract or negligence or howsoever arising. Without limiting the foregoing, Multiboard will not be liable for any claims, damages or defects arising from or in any way attributable to poor or defective workmanship, defective materials or poor design or detailing, settlement or structural movement and/or movement of materials to which the product is attached, incorrect design of the structure, in the event of but not limited to earthquakes, cyclones, floods or other severe weather conditions or unusual climatic conditions, normal wear and tear, or growth of any organism on any product surface. 7. The express warranties set out above are in lieu of all other representations, warranties or conditions, express or implied including but not limited to implied warranties or conditions of merchantable quality and fitness for a particular purpose, and those arising by statute or otherwise in law or from a course of dealing or use of trade and which are excluded to the fullest extent permitted by law. Specifications can change without notice.
Axent FASCIA. Installation Manual AUGUST 2014 I NEW ZEALAND
 Axent FASCIA Installation Manual AUGUST 2014 I NEW ZEALAND Content 1 INTRODUCTION 3 2 SAFE WORKING PRACTICES 5 Warning 5 Recommended safe working practices 5 Working instructions 6 HardieBlade saw blade
4256HM JAMES HARDIE MONOLITHIC CLADDING
 4256HM JAMES HARDIE MONOLITHIC CLADDING 1. GENERAL This section relates to the supply and fixing of fibre cement flush finish cladding: - James Hardie Monotek Sheet for textured coating systems - James
Timber Appeal. With Fibre Cement Durability
 Timber Appeal With Fibre Cement Durability ENVIRONMENTAL FRIENDLY Minimises the cutting down of trees for timber. Raw material from managed resources. DIMENSIONALLY STABLE An autoclaved composite material
3M Air and Vapour Barrier 3015 Technical guide
 3M Air and Vapour Barrier 3015 Technical guide Product overview Typical physical properties For installation ease and flexibility, 3M Air and Vapour Barrier 3015 High performance 3M acrylic adhesive grabs
ADGV_001_FASTPOS. Date Jan 2013 Detail. Profile. Fastener Positioning Scale 1:20 Detail No. ADGV_ mm from top edge. 600mm MAX CTRS TIMBER STUDS
 ADGV_001_FASTPOS Panel Timber Frame 12mm from top edge 600mm MAX CTRS TIMBER STUDS 200 mm MAX CTRS 50mm from corner Fastener Positioning Scale 1:20 No. ADGV_001 ADGV_003_SHTEDGEPOS Centre line of Timber
Installation Manual for Thermo Panel
 Installation Manual for Thermo Panel 1 About Thermo Panel is a building wrap, insulation, air and water barrier, mold inhibitor and cold bridge eliminator all-in-one. Delivering an R-value of up to 5 on
Fold-A-Way Patio Door ASSEMBLY & INSTALLATION GUIDE
 Fold-A-Way Patio Door ASSEMBLY & INSTALLATION GUIDE This instruction guide provides the minimum recommended procedures to correctly prepare the rough opening, install a fold-a-way patio door unit and apply
Ulltraclad Aluminium Cladding. Contents. 1.0 General Information Design Information Installation Information 7. 4.
 Ulltraclad Aluminium Cladding Contents 1.0 General Information 2 2.0 Design Information 4 3.0 Installation Information 7 4.0 Maintenance 10 5.0 Health & Safety 10 1 1.0 General Information 1.1 Introduction
Tools required by installer: Materials required by installer:
 Installation Guidelines For Quaker Window Products Vinyl product line (Single Hung, Double Hung, Sliding Window, Fixed Window, Casement, Awning, and Hopper) Installer: Read these instructions completely
Read guide from beginning to end before starting installation. Read all warnings and cautions during unit installation.
 Installation Guide for E-Series/Eagle High-Performance Mullion Windows with LVL Reinforcement and Installed Using Type B Clips Thank you for choosing Andersen. Instructions are for typical, new wood-framed
COMPOSITE SIDING INSTALLATION GUIDE
 CENTURY HOME LIVING COMPOSITE SIDING INSTALLATION GUIDE Read all instructions prior to installing any siding product. Failure to install and finish this product in accordance with all local building codes,
EXOTEC FACADE PANEL AND FIXING SYSTEM AUSTRALIA APRIL 2006 INSTALLATION MANUAL
 EXOTEC FACADE PANEL AND FIXING SYSTEM AUSTRALIA APRIL 2006 INSTALLATION MANUAL CONTENTS 1 INTRODUCTION 2 2 INSTALLATION OVERVIEW 3 3 PRODUCT INFORMATION 4 ExoTec 4 Accessories/tools supplied by James Hardie
DuraplankTM External Cladding
 DuraplankTM External Cladding smooth, woodgrain & rusticated profiles for external cladding Duraplank TM - Traditional look external cladding Build it better with BGC Australian Owned & Manufactured www.bgc.com.au/fibrecement
General Installation Guidelines
 g e n e r a l i n s t a l l a t i o n g u i d e l i n e s General Installation Guidelines Although Nutec Building Planks do not contain asbestos fibres, it is nevertheless recommended that when working
Installation Guidelines For ALUMINUM M-SERIES 3 PANEL SLIDING DOOR
 www.quakerwindows.comv www.quakercommercialwindows.com PO Box 128 504 Highway 63 South Freeburg, MO 65035 800-347-0438 573-469-4151 (fax) Installation Guidelines For ALUMINUM M-SERIES 3 PANEL SLIDING DOOR
STACKING MULTI-SLIDE DOOR SYSTEM INSTALLATION INSTRUCTIONS
 STACKING MULTI-SLIDE DOOR SYSTEM INSTALLATION INSTRUCTIONS 1290363 Revision 1 12/16 Page 1 Weather Shield Mfg., Inc. NOTICE CAUTION! Failure to install and maintain our product according to these instructions
INSTALLATION INSTRUCTIONS IMPERVIA SLIDING PATIO DOOR WITH FINS
 2008 Pella Corporation Part Number: 803V0101 INSTALLATION INSTRUCTIONS IMPERVIA SLIDING PATIO DOOR WITH FINS Installation Instructions for Typical Wood Frame Construction. These instructions were developed
Aluminum Clad Wood Window 1/2 Reinforced Field Mulling and Stacking Supplement
 Aluminum Clad Wood Window 1/2 Reinforced Field Mulling and Stacking Supplement 1 Aluminum Clad Wood Window 1/2 Reinforced Field Mulling and Stacking Supplement The following instructions are a supplement
ClearVue Roofing System Components, Installation & Maintenance Manual
 Components, Installation & Maintenance Manual Important Installation Considerations Manual & Design, Span Table & Technical Manual also available Components CLEARVUE RAFTER BRACKETS CV-02 3 Components
REMEMBER TO USE APPROPRIATE PERSONAL PROTECTIVE EQUIPMENT.
 Vinyl Windows and Doors Manufactured by Pella Corporation WINDOW REPLACEMENT INSTRUCTIONS FOR DOUBLE-HUNG VENT REPLACEMENT WINDOWS INTO EXISTING DOUBLE-HUNG FRAME USING FRAME SCREWS FROM THE EXTERIOR Part
Metal & Vinyl, Flush Mount and Recessed Fin Windows Recommended Installation Instructions
 PO Box 480 Ph: 417-235-7821 Monett, MO 65708 Fax: 417-737-7140 Metal & Vinyl, Flush Mount and Recessed Fin Windows Recommended Installation Instructions These installation instructions are recommendations
Installation Guidelines For Quaker Window Products Aluminum flange fin sub sill & receptor system using a T mulled twin window unit.
 Installation Guidelines For Quaker Window Products Aluminum flange fin sub sill & receptor system using a T mulled twin window unit. Installer: Read these instructions completely before starting any installation.
INSTALLATION MANUAL AUSTRALIA FEBRUARY 2005
 INSTALLATION MANUAL AUSTRALIA FEBRUARY 2005 1 INTRODUCTION CONTENTS 1 INTRODUCTION 2 2 SAFE WORKING INSTRUCTIONS 4 2.1 Cutting 4 2.2 Score and Snap 4 2.3 Fibreshear Heavy Duty by Toolex 4 2.4 Hand sawing
PAREFEU PANEL Environmentally Sustainable Product with High Fire Rating
 PAREFEU PANEL Environmentally Sustainable Product with High Fire Rating WHY PAREFEU PANEL Parefeu Panels is made from special fire rated minerals that have been reinforced with palm fibres and glass fibres
Installation Guide. ExoTec TM Facade Panel And Fixing System COMMERCIAL
 Installation Guide ExoTec TM Facade Panel And Fixing System COMMERCIAL Certificate CM40221 Australia April 2018 Make sure your information is up to date. When specifying or installing James Hardie products,
Adorn Mortarless Stone Veneer Installation Natural Concrete Products
 Adorn Mortarless Stone Veneer Installation Adorn Mortarless Stone Veneer can be used on new or existing construction. Adorn is nailed or screwed onto the wall; therefore no brick ledge is required. Adorn
Installation Instructions Palladium Wall Panels - Demountable Factory Finished Edges and Field Cut Edges
 Please read all instructions before installing Palladium Wall Panel System. 1. Before installation: a. Acclimate Palladium Panels, reveals, adhesives and wall substrates to room temperature 24 hours before
Installation Guide. for E-Series/Eagle Clad Hinged Inswing French Door
 Installation Guide for E-Series/Eagle Clad Hinged Inswing French Door Thank you for choosing Andersen. Instructions are for typical, new wood-framed wall construction with weather protection in place.
Kinro Metal, Vinyl, Flush Mount and Recessed Fin Windows OEM INSTALLATION MANUAL
 Kinro Metal, Vinyl, Flush Mount and Recessed Fin Windows OEM INSTALLATION MANUAL TABLE OF CONTENTS Introduction 2 Safety Requirements 2 Fasteners 3 Preparation 3 Rough Opening Preparation 3 Resources Required
pacific build supply ltd
 Product Information ETERPAN is a medium density fibre cement sheet that is used for external cladding, plastered finish, base for stone and brick slips, rigid air barrier, weatherboards, soffits, louvres,
Eagle clad double-hung window installation instructions
 Eagle clad double-hung window installation instructions These instructions are for typical installation in new typical wood frame wall construction. These instructions and methods are not intended for
Cladding. Quick Installation Guide. HardiePlank Cladding with ColorPlus Technology. For façades that last longer. Simple. Reliable. Durable.
 Cladding Quick Installation Guide HardiePlank Cladding with ColorPlus Technology. For façades that last longer. Simple. Reliable. Durable. Installation instructions This document is a step by step guide
INSTALLATION GUIDE. Biowood Outdoor Wall Panel BWWPO20018 Shiplap 8x6 Deep. Green Resources Material Australia Pty Ltd
 Green esources Material Australia Pty Ltd Congratulations on the fine choice you have made in the selection of this product. outdoor wall panels will give you many years of carefree maintenance. When installed
Installation Instructions
 Installation Instructions AUSTRALIA SEPTEMBER 2008 IMPORTANT S 1. Failure to install, finish or maintain this product in accordance with applicable building codes, regulations, standards and James Hardie
Installation Instructions
 Installation Instructions IMPORTANT NOTES 1. Failure to install, finish or maintain this product in accordance with applicable building codes, regulations, standards and James Hardie s written application
WoodTrac Direct Mount Ceiling System
 WoodTrac Direct Mount Ceiling System Assembly Instructions All product is Class C rated and some product is available Class A rated. Check the ordering information to obtain the class rating for your product.
KuraStone TM Installation Guide
 Installation Guide Read these installation guidelines completely and thoroughly before beginning installation. Construction Requirements KuraStone pieces can be installed on braced wood or steel stud (18
Installation Guide. PineRidge Lining INTERIORS
 Installation Guide PineRidge Lining INTERIORS Australia August 2018 Make sure your information is up to date. When specifying or installing James Hardie products, ensure you have the current installation
How To Install Windows: Nail-Fin Application
 How To Install Windows: Nail-Fin Application Required Tools & Materials: Materials: 1 3/4" galvanized roofing nails. Nails must penetrate at least 1" into framing For mulled and/or DP50 or above units:
Ready-To-Assemble VersaRail INSTALLATION INSTRUCTIONS
 Ready-To-Assemble VersaRail INSTALLATION INSTRUCTIONS Read all instructions prior to installing product. Refer to manufacturers safety instructions when operating any tools. To register your product, please
Installation Instructions and Details
 Installation Instructions and Details Contents Page General Notes 2 Typical System Perspective 3 Panel, Hardware & Trim Details 4-6 Hardware & Trim Fabrication Details 7-9 Installation Procedures 10-12
CUTTING THE PIPE: BLUE DUCT Pipe can be easily cut using a Circular Saw or Reciprocal Saw. Trim all edges as necessary.
 Installation Instructions In the past it has been IMPOSSIBLE to install an air and water tight underground system. BLUE DUCT (AKDUCT ) has produced a user friendly system that will reduce the amount of
Installation Guide for E-Series/Eagle Clad Mechanically Fastened Windows
 Guide for E-Series/Eagle Clad Mechanically Fastened Windows Thank you for choosing Andersen. Instructions are for typical, new wood-framed wall construction with weather protection in place. Instructions
Integrity Polygon and Round Top Installation and Finishing Instructions
 Integrity Polygon and Round Top Installation and Finishing Instructions 08/20/2004 70852 BEFORE YOU BEGIN IMPORTANT: Read these instructions thoroughly before beginning to install your Integrity Polygon
Page 1 of 18. SunRail System Installation Instructions
 Page 1 of 18 SunRail System Installation Instructions Page 2 of 18 SunRail Stainless Steel Railing Installation Guide Table of Contents Before You Begin 3 Installing Surface Mount Bases for a Two Rail
Installation Instructions
 www.marlite.com Effective Date 03/01/2018 ARTIZAN FRP, SYMMETRIX FRP, ENVUE FRP, STANDARD FRP Installation Instructions Statements expressed in this technical bulletin are recommendations for the application
Vinyl Windows and Doors
 Vinyl Windows and Doors Part Number: V983571 2011 Pella Corporation INSTALLATION INSTRUCTION - INSTRUCCIONES DE INSTALACION 350 SERIES WINDOW INTO EXISTING WOOD FRAME WINDOW Lea las instrucciones en español
KEITH PANEL SYSTEMS FUNDERMAX- MAX EXTERIOR EXPOSED FASTENER PRESSURE EQUALIZED WALL SYSTEM
 S Y S T E M D E T A I L S FUNDERMAX- MAX EXTERIOR EXPOSED FASTENER PRESSURE EQUALIZED WALL SYSTEM PAGE TITLE PAGE Table of Contents Fundermax Max Exterior Product Information Design and Installation Information
R-TECCISYSTEM R-TECCIBRACKET. R-TEC The One-Step Engineered Solution for. ASHRAE 90.1 Continuous Insulation. American Fiber Cement Corporation
 R-TECCISYSTEM R-TEC The One-Step Engineered Solution for ASHRAE 90. Continuous Insulation Horizontal Bracket Vertical Bracket R-TECCIBRACKET The R-TEC CI System for ventilated rain screen constructions
SPECIFICATION FOR. BRANZ Appraisal Certificate # 621 (2008)
") SPECIFICATION FOR TEKTON WEATHERIZATION SYSTEM BRANZ Appraisal Certificate # 621 (2008) MW TWS 10/07/2012 Page 1 SYSTEM DESCRIPTION The Tekton Weatherization System consists of TEKTON Wall Underlay, Tekton
SPECIFICATION FOR TEKTON WEATHERIZATION SYSTEM BRANZ Appraisal Certificate # 621 (2008) MW TWS 10/07/2012 Page 1 SYSTEM DESCRIPTION The Tekton Weatherization System consists of TEKTON Wall Underlay, Tekton
MICHAEL RIZZA COMPANY Premium Silicone Systems
 MICHAEL RIZZA COMPANY Premium Silicone Systems A Division of www.balcousa.com 1-800-767-0082 INSTALLATION INSTRUCTIONS FOR MICHAEL RIZZA EV SERIES EXTERIOR VERTICAL SILICONE SEAL JOINT COVER SYSTEMS 2013,
Installation Guidelines. Next Dimension. Single Hung / Single Hung Fixed / Double Hung / Sliding Window / Fixed Window
 Installation Guidelines Next Dimension Single Hung / Single Hung Fixed / Double Hung / Sliding Window / Fixed Window Windsor Windows & Doors Windsor Windows & Doors 900 S. 19 th St. 2210 Stafford St. Extn
DURABARRIER RIGID SHEATHING / AIR BARRIER
 APRIL 2013 RIGID SHEATHING / AIR BARRIER AUSTRALIAN OWNED & MANUFACTURED WWW.BGCINNOVADESIGN.CO.NZ WWW.BGC.COM.AU/FIBRECEMENT APRIL 2013 INTRODUCING INNOVA INNOVA IS A BRAND NEW RANGE OF FACADE AND FLOORING
INSTALLATION GUIDE WOOD PIVOTING CIRCLE/ OVAL
 WOOD PIVOTING CIRCLE/ OVAL READ SPECIFIC INSTALLATION INSTRUCTIONS COMPLETELY BEFORE STARTING ANY INSTALLATION Failure to install and maintain our product according to these instructions will VOID any
HR175 Sash Replacement Kit Installation Instructions
 HR175 Sash Replacement Kit Installation Instructions IMPORTANT: Please read before you begin. Weather Shield HR175 Sash Replacement Kits Important: Thoroughly read and follow these instructions, failure
Best Materials LLC distributes backer rod, caulking and sealants for all types of EIFS joints and penetration sealing applications.
 Best Materials LLC distributes backer rod, caulking and sealants for all types of EIFS joints and penetration sealing applications. EXTERIOR INSULATION & FINISH SYSTEM CONSTRUCTION Data Published Courtesy
MAXISHINGLE LAP SIDING INSTALLATION GUIDE
 MAXISHINGLE LAP SIDING INSTALLATION GUIDE Read all instructions prior to installing any siding product. Failure to install and finish this product in accordance with all local building codes, regulations
The Passive Fire Protection Handbook
 Uniclass L5:P:N3 CI/SfB Rf9 EPIC E:X:Y41 (K)+(K3) December 003 NBSPlus The Passive Fire Protection Handbook VICUCLAD VICUCLAD Applications Fire protection of metal ducts Construction of smoke extract ducts
ALLORA SWING PANEL INSTALLATION INSTRUCTIONS
 ALLORA SWING PANEL INSTALLATION INSTRUCTIONS Before Installation Please check that your Allora Swing Panel is undamaged SEQUENCE OF INSTALLATION These instructions are also available from the Athena website:
System for 2+ Level Buildings
 Issued Sept 205 Contact Info@symonite.co.nz System for 2+ Level Buildings Typical Details Issued: September 205 TYPICAL DETAILS CONTENTS.0 TYPICAL VERTICAL JOINTS 2.0 EXT. CORNER / TYPICAL HORIZONTAL JOINT
Steel Reinforced Joining Thank you for choosing Andersen. Please leave this guide with building owner.
 Steel Reinforced Joining (Horizontal/Vertical) for Andersen 400 Series Woodwright & Tilt-Wash Double-Hung, Picture, and Transom Windows and 400 Series Double-Hung Half Circle and Flexiframe Specialty Windows
INTERNAL LININGS INSTALLATION GUIDE
 Your partner in building solutions INTERNAL LININGS INSTALLATION GUIDE General remarks on This installation guide is to be used in conjunction with: specifications Architects specific details Pacific Build
WINDOW REPLACEMENT INSTRUCTIONS FOR CASEMENT, DOUBLE-HUNG AND CLAD FRAME WINDOWS USING FRAME SCREWS
 WINDOW REPLACEMENT INSTRUCTIONS FOR CASEMENT, DOUBLE-HUNG AND CLAD FRAME WINDOWS USING FRAME SCREWS These instructions were tested developed for replacing windows in wood-frame wall construction systems
Resysta 6 and 4 Flat Board Siding System Assembly Installation Guidelines
 Resysta 6 and 4 Flat Board Siding System Assembly Installation Guidelines NOTE: Proper planning of the siding layout is essential for ease of installation of siding boards and siding components. Thoroughly
Installation Recommendations for Finless Frame Doors
 Installation Recommendations for Finless Frame Doors These installation recommendations are made available by MI Windows and Doors, LLC (MI) to assist with the integration of finless or flange sliding
Technical Data February, 2016
 Technical Data February, 2016 Product Description 3M DP-600 is a non-sag, grey, rapid setting, two-component polyurethane. It is packaged as 1:1 ratio liquids in a duo-pak cartridge. With the squeeze of
Flashing Materials. Rough Opening Preparation
 Installation Instructions for CertainTeed New Construction Windows Handling vinyl windows CAUTION: Always store vinyl windows and doors in an upright position on a slight angle. Never lay them flat or
Installation Guide. Pionite Decorative Surfaces One Pionite Road, Auburn, Maine PIONITE ( )
") Installation Guide A Subsidiary of Panolam Surface Systems SMPBRO00-012 6/14 Pionite decorative laminates are designed for finished interior surfaces which require high impact, wear and stain resistance
Installation Guide A Subsidiary of Panolam Surface Systems SMPBRO00-012 6/14 Pionite decorative laminates are designed for finished interior surfaces which require high impact, wear and stain resistance
TECHNICAL GUIDE BEONSTONE PANELIZED STONE SIDING
 TECHNICAL GUIDE BEONSTONE PANELIZED STONE SIDING TABLE OF CONTENTS This installation guide provides detailed step-by-step instructions for do-it-yourself projects. We invite you to read it carefully and
INSTALLATION, STORAGE AND WALL CONSTRUCTION DETAILS
 www.capecodsiding.com INSTALLATION, STORAGE AND WALL CONSTRUCTION DETAILS IMPORTANT READ THE FOLLOWING INSTRUCTIONS CAREFULLY BEFORE INSTALLING YOUR WOOD SIDING. FAILURE TO STRICTLY FOLLOW THESE INSTALLATION,
SERIES M MIXER MASTS
 SERIES M MIXER MASTS T AB L E O F C O N T E N T S V e n d o r D a t a Material Data Sheet 4-in. Mixer Mast Specification 3-in. Mixer Mast Specification 2 - in. M i x e r M a s t S p e c i f i c a t i o
Features & Benefits: For Use with OSI QUAD Window & Door System. Recommended For:
 Description: OSI Butyl Flash is a rubberized butyl backed, self-adhering 15-mil membrane. The foil backed exterior allows the flashing to be exposed to UV rays for at least 12 years. It is efficient, easy
FENCE INSTALLATION GUIDE 8 HIGH WALLS
 FENCE INSTALLATION GUIDE 8 HIGH WALLS 1.866.648.9336 www.simtekfence.com INSTALLATION GUIDE These instructions are designed to assist both professional installers and do-it-yourselfers of SimTek decorative
INSTALLATION SUGGESTIONS LEVEL APPLICATION LIMITED WARRANTY
 INSTALLATION SUGGESTIONS LEVEL APPLICATION LIMITED WARRANTY L.J. Smith, Inc. issues the following Limited Warranty: The product(s) furnished hereunder are warranted to be free from defects in material
ASSEMBLY INSTRUCTIONS GL75. BASE SIZE: 2.190m x 1.520m
 ASSEMBLY INSTRUCTIONS GL75 BASE SIZE: 2.190m x 1.520m CONGRATULATIONS ON PURCHASING A DURATUF GUARDIAN SHED. BEFORE YOU BEGIN THE ASSEMBLY PLEASE NOTE SOME IMPORTANT POINTS: BEFORE YOU START: Read all
Installation Guide (888)
") BamDeck Installation Guide (888) 788-2254 The Collection Decking Systems BAMDECK 4G 5-7/16 Wide Plank Dims: 192 L x 5-7/16 W x 13/16 H BAMDECK 4G WIDE 8-1/4 Wide Plank Dims: 96 L x 8-1/4 W x 13/16 H BAMDECK
BamDeck Installation Guide (888) 788-2254 The Collection Decking Systems BAMDECK 4G 5-7/16 Wide Plank Dims: 192 L x 5-7/16 W x 13/16 H BAMDECK 4G WIDE 8-1/4 Wide Plank Dims: 96 L x 8-1/4 W x 13/16 H BAMDECK
LuxCore Installation Instructions
 LuxCore Installation Instructions ATTENTION: LuxCore PANELS MUST BE ACCLIMATIZED FOR 24 HOURS BEFORE INSTALLATION PLEASE READ ALL INSTRUCTIONS PRIOR TO INSTALLATION The guidelines provided herein have
INSTALLATION INSTRUCTIONS
 CERBER FIBER CEMENT SIDING - SIERRA PREMIUM SHAKE Construction Requirements Sierra Premium Shake boards must be installed over vertical wood framing spaced no greater than 16 oc. with an APA rated 7/16
INSTALLATION MANUAL VERANDA ENCLAVE RAILING. Model # SEC17 EW R15 PRE W/H SEC17 EW R15 KD W/HW SEC17 EWS R13 KD W/H
 Model # SEC17 EW R15 PRE W/H SEC17 EW R15 KD W/HW SEC17 EWS R13 KD W/H INSTALLATION MANUAL VERANDA ENCLAVE RAILING Questions, problems, missing parts? Before returning to the store, call Veranda Customer
SECTION LAP SIDING. A. Fiber cement lap siding, panels, single, trim, fascia, moulding and accessories.
 SECTION 07460 LAP SIDING PART 1 GENERAL 1.1 SECTION INCLUDES A. Fiber cement lap siding, panels, single, trim, fascia, moulding and accessories. B. Factory-finished fiber cement lap siding, panels, single,
Vista SCREEN. Installation Manual for. For left hinged doors. Quick and Easy to Size and Install
 Installation Manual for Vista SCREEN For left hinged doors Quick and Easy to Size and Install Durable. Reliable. Attractive. For door openings up to 36 (914mm) wide and 81 3 /16 (2,062mm) high QC03-0512L
Installation instructions: Elements Vulcan+ Newport Hector Cladding
 Technical Data Wood Species Thermally Modified Softwood (Pinus Radiata) Images Profile Newport Hector - Light Band Sawn face - Secret fix 5.4 6.0 8.5 3.0 25.0 3.0 111.0 3.0 12.0 R 3.0 7.0 7.0 123.0 15.0
ASSEMBLY INSTRUCTIONS SS2520. BASE SIZE: 2.520m x 2.020m
 ASSEMBLY INSTRUCTIONS SS50 BASE SIZE:.50m x.00m CONGRATULATIONS ON PURCHASING A SMART STORE SHED. BEFORE YOU BEGIN THE ASSEMBLY PLEASE NOTE SOME IMPORTANT POINTS: BEFORE YOU START: Read all instructions
340 & 350 SERIES BATH ENCLOSURES
 INSTALLATION INSTRUCTIONS 340 & 350 SERIES BATH ENCLOSURES 800-643-1514 www.alumaxbath.com Copyright Alumax Bath Enclosures 2010. All rights reserved. LIMITED WARRANTY AND REMEDY ALUMAX BATH ENCLOSURES
ASSEMBLY INSTRUCTIONS SS2010. BASE SIZE: 2.020m x 1.020m
 ASSEMBLY INSTRUCTIONS SS010 BASE SIZE:.00m x 1.00m CONGRATULATIONS ON PURCHASING A SMART STORE SHED. BEFORE YOU BEGIN THE ASSEMBLY PLEASE NOTE SOME IMPORTANT POINTS: BEFORE YOU START: Read all instructions
Shapes Siding. Perfection Shingles. Chalk Line
 Snap a Chalk Line Shapes Siding Perfection Shingles Chalk Line To establish a straight reference line to guide the positioning of the starter strip and the first course of siding, snap a chalk line. starter
TECHNICAL SPECIFICATION
 D3-COMTEX FACADE SYSTEM AUSTRALIA OCTOBER 2005 TECHNICAL SPECIFICATION CONTENTS 1 INTRODUCTION 2 1.1 Application 2 1.2 Factors to be considered 3 1.3 Levels of finish 3 1.4 Finishes 3 2 FRAMING 4 2.1 General
890 SERIES PIVOT STEAM DOOR
 BATH ENCLOSURES An Alcoa Company Tel: 800-643-1514 Fax: 870-234-3181 www.alumaxbath.com INSTALLATION INSTRUCTIONS 890 SERIES PIVOT STEAM DOOR Copyright Alumax Bath Enclosures 1997. All rights reserved.
INSTALLATION INSTRUCTIONS for Wood Bay or Bow Windows with Nailing Fin or Exterior Trim (JII032) IMPORTANT INFORMATION AND GLOSSARY ROUGH OPENINGS
 IMPORTANT INFORMATION AND GLOSSARY ROUGH OPENINGS") for Wood Bay or Bow Windows with Nailing Fin or Exterior Trim (JII0) Thank you for selecting JELD-WEN products. Attached are JELD-WEN s recommended installation instructions for wood and clad wood bay
for Wood Bay or Bow Windows with Nailing Fin or Exterior Trim (JII0) Thank you for selecting JELD-WEN products. Attached are JELD-WEN s recommended installation instructions for wood and clad wood bay
NEW HOME WARRANTY A REFERENCE GUIDE FOR TYPICAL WALL AND WINDOW DETAILS (RAINSCREEN SYSTEM) SHOWN AS FIBRE CEMENT CLADDING
 SHOWN AS FIBRE CEMENT CLADDING") NEW HOME WARRANTY A REFERENCE GUIDE FOR TYPICAL WALL AND WINDOW DETAILS (RAINSCREEN SYSTEM) SHOWN AS Reference Guide 0.1 GENERAL 0.1 Reference Guide 0.2 Index 0.3 Disclaimer & Limitations 0.4 General Notes
NEW HOME WARRANTY A REFERENCE GUIDE FOR TYPICAL WALL AND WINDOW DETAILS (RAINSCREEN SYSTEM) SHOWN AS Reference Guide 0.1 GENERAL 0.1 Reference Guide 0.2 Index 0.3 Disclaimer & Limitations 0.4 General Notes
INSTALLATION INSTRUCTIONS - INSTRUCCIONES DE INSTALACION FOR HURRICANESHIELD IMPACT-RESISTANT DOUBLE-HUNG, SINGLE-HUNG AND SIMULATED-HUNG
 2008 Pella Corporation Part Number: 80ED0101 INSTALLATION INSTRUCTIONS - INSTRUCCIONES DE INSTALACION FOR HURRICANESHIELD IMPACT-RESISTANT DOUBLE-HUNG, SINGLE-HUNG AND SIMULATED-HUNG Instrucciones en español
Make every component count.
 Make every component count. Technical Bulletin Installation Instructions ABOUT THE MATERIAL The frame and material have been thoroughly tested for strength, durability and low maintenance, offering a never
Installation Manual for M4-Exterior Sheathing
 Installation Manual for M4-Exterior Sheathing 1 Application Area - Testing M4 complying with: 2015 and 2012 International Building Code (IBC) and 2015 and 2012 International Residential Code (IRC). The
Curium 19.4H Installation Instructions & Parts List
 Curium 19.4H Installation Instructions & Parts List Illustration Curium 19.4H Right Hand Page 1 of 21 30/06/2016 Revision 1.0 IMPORTANT This shower screen / enclosure must be installed by suitably qualified
Installation Guide: NC 25 System
 Installation Guide: NC 25 System Table of Contents INSTALLATION GUIDE: NC 25 SYSTEM 1 PROPER STORAGE AND HANDLING 3 SUITABLE SUBSTRATES 3 FLASHING 3 MOISTURE BARRIER 4 METAL CHANNELS/COMPONENTS 4 STAINLESS
Side Light Frame Pack Assembly Instructions
 Please read this complete set of assembly instructions before starting the installation and only when you understand the construction method start to follow the step by step guide. IDENTIFY THE PACK CONTENTS
window installation Guide wood FRaMinG New Construction
 window installation Guide wood FRaMinG New Construction IMPORTANT NOTICES AND INFORMATION Read these instructions in their entirety prior to installing windows. Any local building code requirements supersede
Kinro Metal, Vinyl, Flush mounted and Recessed Fin Windows (HUD) OEM INSTALLATION MANUAL
 OEM INSTALLATION MANUAL") Kinro Metal, Vinyl, Flush mounted and Recessed Fin Windows (HUD) OEM INSTALLATION MANUAL TABLE OF CONTENTS Introduction 2 Safety Requirements 2 Resources Required 2 Tools Required 2 Fasteners 3 Preparation
Kinro Metal, Vinyl, Flush mounted and Recessed Fin Windows (HUD) OEM INSTALLATION MANUAL TABLE OF CONTENTS Introduction 2 Safety Requirements 2 Resources Required 2 Tools Required 2 Fasteners 3 Preparation
The WANZ Guide to Window Installation
 The WANZ Guide to Window Installation as described in E2/AS1 Amendment 5 1 October 2012 Ver. 1.2 Window Association of New Zealand Page 2 of 74 Contents Overview Page 5 Objective Page 5 Scope Page 5 Opening
INSTALLATION INSTRUCTIONS for Vinyl Windows with Integral Nailing Fin (JII001) IMPORTANT INFORMATION & GLOSSARY ROUGH OPENINGS
 IMPORTANT INFORMATION & GLOSSARY ROUGH OPENINGS") Thank you for selecting JELD-WEN products. Attached are JELD-WEN s recommended installation instructions for Vinyl windows with an integral nailing fin. While the use of these installation instructions
Thank you for selecting JELD-WEN products. Attached are JELD-WEN s recommended installation instructions for Vinyl windows with an integral nailing fin. While the use of these installation instructions