Montgomery Ward 1903
|
|
|
- Howard McKenzie
- 5 years ago
- Views:
Transcription
1 Montgomery Ward 1903


2 .. " ~l _, ". ~. MO~L OPEN ARM Sl-RETCH STITCH SEWING MACHINE
3
4 GETTING TO KNOW YOUR SEWING MACHINE 1. Bobbin Winder Stop 2. Bobbin Winder Spindle Stitch Width Dial 4. Stitch Selector 5. Thread Tension Dial 6. Front Thread Guide 7. Arm Cover Thread Guide 8. Bobbin Winder Tension Disc 9. Thread Take-Up Lever 10. Face Plate (Light Inside) Thread Check Spring Large Thread Guide 13. Lower Thread Guide Needle Bar Thread Guide 15. Presser Foot Thumb Screw Needle Presser Foot Holder 18. Presser Foot Fabric Feed Dogs Bobbin Case Cover (Shuttle Inside) Needle Plate 22. Seam Guide Lines Needle Clamp Screw 24. Free Arm 25. Stitch Length Dial 26. Reverse Stitch Button 27. Hand Wheel FRONT VIEW


5 ELECTRICAL CONNECTION Remove foot control from carton and connect it to the machine by inserting 3-hole plug over the three prongs on the side of the sewing machine head. When you are ready to sew, set foot control on the floor and connect cord plug into electrical outlet. Nlf1rr-: C'i1-f": The push button light switch is located inside the hinged face plate cover. To open, pull and swing the hinged cover back. The switch is on the sewing light socket. Push the button in to turn it on and off. If you are interrupted while sewing or stop sewing, disconnect the cord plug from electrical outlet-this is important to help you prevent accidents. -I 31 I Spool Pin 29. Stop Motion Knob 30. Terminal Box 31. Number Plate 32. Bed Cover 33. Presser Foot Release Lever 34. Thread Cutter 35. Presser Foot Lifter 36. Handle 37. Arm Cover REAR VIEW I ( CAUTION-----~ When the machine is not in use, or when cleaning the machine, disconnect the electrical cord from the wall outlet.


6 IMPORTANT Record and retain the model number and serial number of your new sewing machine for future reference. You will find this information on the number plate as shown on the diagram inside the front cover. MODEL NUMBER 1_9_0_3 SERIAL NUMBER YOUR NEW MONTGOMERY WARD OPEN ARM STRETCH STITCH SEWING MACHINE Your new Montgomery Ward open arm stretch stitch sewing machine is the product of many years of research and development in the field of household sewing machines. High quality materials have been used to assure perfect operating efficiency and years of dependable service. Your machine was thoroughly tested before it was shipped to make sure that it sewed perfectly. Before attempting to sew, however, please read the instruction book carefully. This booklet was prepared to help you learn how to operate your new Montgomery Ward machine and how to make use of its numerou8 sewing possibilities. The time you spend learning about your machine will result in complete satisfaction and enjoyment of its performance. 3


7 TABLE OF CONTENTS GETTING TO KNOW YOUR SEWING CHANGING THE PRESSER FOOT FREE MOTION EMBROIDERY MACHINE WHERE TO USE EACH STITCH DARNING ELECTRICAL CONNECTION REGULATING THREAD TENSION OPEN ARM SEWING YOUR NEW MONTGOMERY WARD OPEN ARM STARTING TO SEW BUTTONHOLE AND BUTTON STRETCH STITCH SEWING STRAIGHT STITCH SEWING SEWING MACHINE TACKING ENDS OF SEAMS SEAM AND EDGE FINISHING THE 2 IN 1 OPEN ARM SEWING TURNING CORNERS MAINTENANCE SURFACE REMOVING THE WORK OILING SELECTING NEEDLE & THREAD SEWING VERY SHEER FABRIC CLEANING THE STITCHING NEEDLE, THREAD, AND FABRIC ZIGZAG SEWING MECHANISM CHART SA TIN STITCH SEWING MOTOR BELT SETTING THE NEEDLE STRETCH STITCH SEWING SEWING LIGHT BULB REMOVING BOBBIN CASE AND BUTTONHOLE SEWING HELPFUL HINTS BOBBIN BUTTON SEWING HOW TO OBTAIN SERVICE WINDING THE BOBBIN BLIND HEM STITCHING HOW TO OBTAIN REPLACEMENT I THREADING THE MACHINE SEWING ZIPPERS AND CORDING PARTS REPLACING THE BOBBIN EASY CONTROL GUIDE I SETTING LENGTH OF STITCH VARIOUS SEWING PROCEDURES INDEX REVERSE STITCHING PLAIN SEAM ATTACHMENTS, ACCESSORIES AND STITCH SELECTOR DIAL MACHINE BASTING REPLACEMENT PARTS STITCH WIDTH DIAL OVERCASTING SEAMS ACCESSORIES GATHERING, SHIRRING, AND GETTING AQUAINTED WITH YOUR RUFFLING MACHINE'S ACCESSORIES APPLIQUE


8 THE 2-IN-1 OPEN ARM SE\NING SURFACE Your open arm sewing machine is designed with an exclusive 2-in-1 sewing surface. For all regular sewing, it's a flat bed machine. Then by simply removing the extension table, it becomes an open arm machine, to simplify sewing on any hard to reach area. To remove the extension table, lift the left side of the case up and away. To attach, set the extension table studs into the holes of the mc;ichine base and press down. The drawer in the extension table is for storing the accessories. Here are some of the many uses for your open arm sewing machine: Mending and repairing pantlegs Darning socks Blind hem stitching cuffs Button and buttonhole sewing on sleeves Embroidery on cuffs and sleeves All of the features of flat bed sewing are now available to you on an open arm machine allowing you more versatility than ever before. 5


9 SELECTING NEEDLE & THREAD.. I I - Best results can be obtained only when you use the correct needle and thread for the fabric being sewn. Lightweight fabrics require a thin needle and fine thread; heavier fabrics, a thicker needle and coarser thread. Too thick of needle can cause skipped stitches on delicate fabrics; too thin of needle may bend or break on heavy fabrics. Never use a needle that is bent, or blunt at the point. There should be a similarity between the fiber of the fabric and the fiber of the thread. This is important because the thread should react as the fabric does to repeated dry cleanings or washings, bleaches, and a hot iron. The knit needle (with blue shank) is designed especially for sewing synthetic woven stretch and knit fabrics, as well as lingerie, elastic and other lightweight fabric that is usually difficult to sew. It is designed with a ball point that enables the needle to penetrate the fabric without cutting the fibers and with a deep long groove which protects the thread from interference by knits that hug the needle. Correct needle length is 1-1 '1».". 6


10 NEEDLE 1 THREAD AND FABRIC CHART The chart shows size and type of thread, and needle size. for various weights and types of fabrics. Size means the fineness or thickness of both needle and thread. Use the same thread for needle and bobbin. DELICATE: chiffon, tulle, organdy, sheer lace and net #60 Mercerized Cotton A Silk Fine Polyester Synthetic 9 LIGHTWEIGHT: batiste, voile, taffeta, crepe, velvet, satin, surah, peau de soie, brocade, tricot, matte jersey, single knits #50 Mercerized Cotton A Silk Fine Polyester Synthetic 11 MEDIUM WEIGHT: gingham, seersucker, percale, pique, linen, lightweight woolens, chintz, fine corduroy, velveteen, suitings, double knits, spandex, stretch terry, sweater knits #50 Mercerized Cotton A Silk Polyester Synthetic 14 MEDIUM HEAVY: denim, duck, sailcloth, gabardine, tweed, drapery fabrics, vinyl, corduroy, bonded fabric, short-pile fabrics, heavy knits HEAVY: coatings, upholstery fabric, canvas, deep-pile fabrics Heavy-Duty Mercerized Cotton A Silk Polyester Synthetic Heavy-Duty Mercerized Cotton Polyester Synthetic


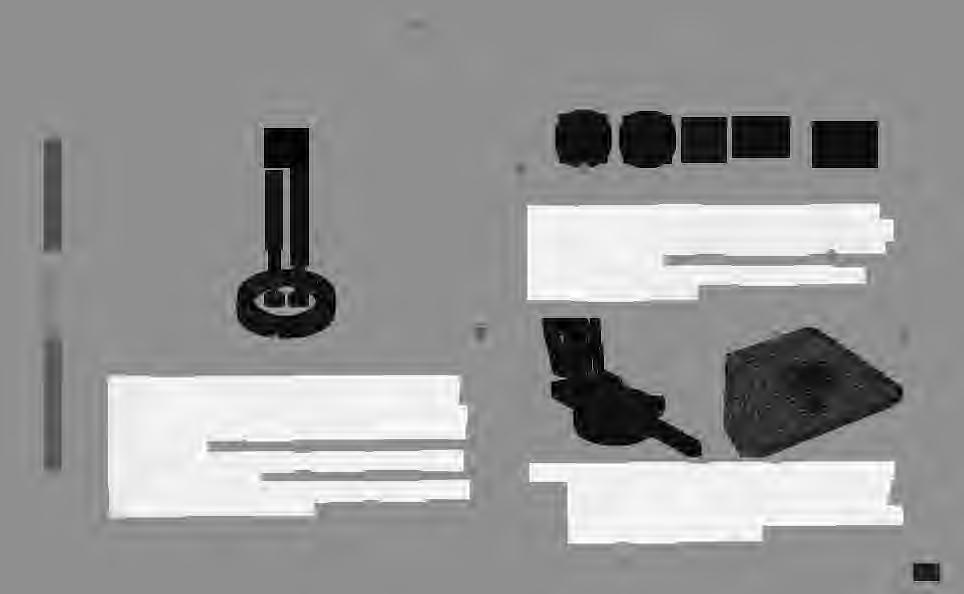
11 SETTING THE NEEDLE Select a needle of proper type and size for fabric to be sewn... I I -.:., 0 1 Turn hand wheel toward you until the needle bar raises to its highest point 2 Loosen screw on needle clamp and remove the needle I FLAT SIDE OF NEEDLE.. 3 Place flat side of needle toward ba< 1 of the machine, and insert 1n needl!' clamp as far as 1t will go, tighten screw.. 8


12 REMOVING BOBBIN CASE AND BOBBIN In preparing your machine for sewing, it is necessary to wind a bobbin with thread, place it properly in bobbin case, and insert bobbin and case in shuttle body of machine. This Montgomery Ward Sewing Machine was shipped from factory with a bobbin and case in position as for sewing. To remove the bobbin for winding with thread, remove the extension table first, then: 2 Open bobbin case cover 9


13 \NINDING THE BOBBIN - I ~ When your machine has been properly set f... up or winding the bobbin, it will look like illustration for at ~1ght. Th~ sequence of steps this operation is described a d illustrated on next pag:. 10

14 :j GOOD NOT GOOD- ~==- NOTGOO~ ~ SCREW~llj - NOTE If bobbin winds unevenly, loosen screw which holds bobbin tension disc and move disc up or down. as required. to align it with bobbin winder. When the tension disc is properly positioned. tighten the screw 1 1


15 .. I I - THREADING THE MACHINE There is only one correct way to thread your machine for sewing. The illustration at right shows machine completely threaded. The sequence of steps is described and illustrated on next page. 1 2

16 I~ 1 Raise presser foot lifter. 2. Turn hand wheel toward you to raise thread take-up lever to its highest point. 3. Place a spool of thread on spool pin Shp thread under arm cover thread guide and bring thread forward over the arm and through front thread guide. 4. Draw the thread down around and between the tension discs from right to left. Bring the thread all the way to the right and hook the thread over the top of the check spring from right to left. 5. Pull the thread under the large thread guide and slip into the hole of the thread take-up lever from right to left 13


17 REPLACING THE BOBBIN bobbin in case When bobbin has been wound with thread, it must be fitted properly into bobbin case... I I - 1 Hold bobbin case in left hand with the slot in the edge of the case on top Hold bobbin in right hand with thread on top leading from left to right 2 Insert bobbin in case and draw thread up into slot in case 1 4

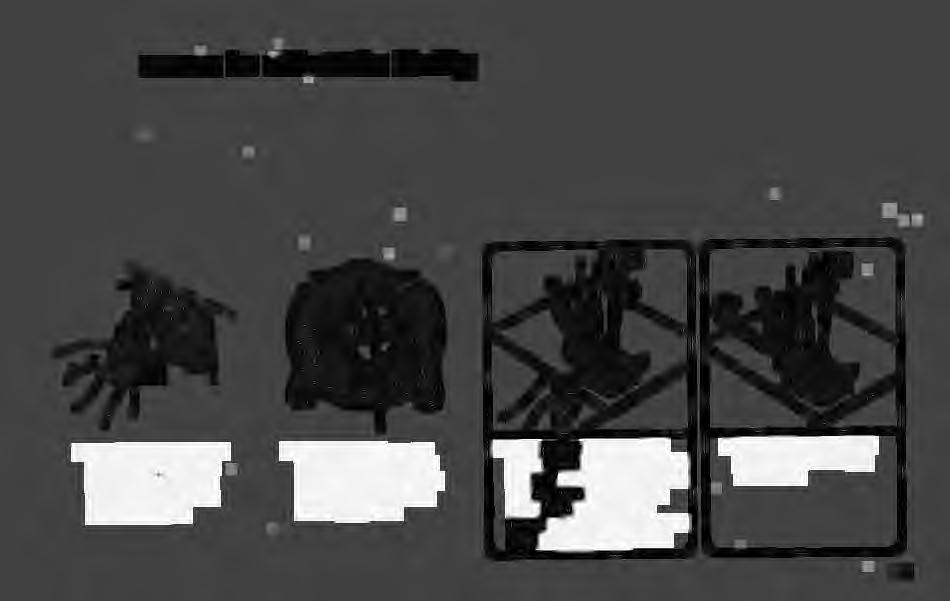

18 casein. shuttle body


19 SETTING LENGTH OF STITCH Your sewing machine can make from six to thirty stitches per inch. As a rule, firm, closely woven fabric takes a shorter stitch. Loosely woven fabrics sew best with a longer stitch. Very thick, bulky fabrics, whether firm or loosely woven, require a longer stitch. STITCH LENGTH REVER SE STITCH LENGTH REVERSE For shortest stitch, turn dial to " w;::::::11 ". For longest stitch. turn dial to " MOST NORMAL SEWING is done with stitch length dial set at 4 or 5. This produces a medium length stitch which makes a strong seam and is suitable for most fabrics... I I - REVERSE STITCHING Fabric normally moves from front to rear (away from the operator) when sewing. 1 6


20 STITCH SELECTOR DIAL The stitch selector dial shows the stitches your machine is capable of making automatically. Turn the stitch selector dial to the desired stitch. STITCH SELECTOR I STITCH \NIDTH DIAL STITCH WIDTH I The stitch width dial controls the width of the zigzag stitch. For wider zigzag width, turn dial to the right; the higher the number, the wider the stitch. 1 7


21 ACCESSORIES m -11!1~ ~ ff~ ~ ~ i I I <

22 GETTING ACBUAINTED WITH YOUR MACHINE'S ACCESSORIES Your new Montgomery Ward Sewing Machine was shipped from the factory with the regular general purpose sewing foot attached in sewing position. The following accesso ries (shown on opposite page) are supplied in the drawer of the extension table.


23 CHANGING THE PRESSER FOOT -I - The presser foot must be changed in order to use the other accessories. ~- t 2 II I! I! I ~ ~ l1t1l1 Turn the hand wheel toward you until the needle 1s at its highest point. 2. Lift up the presser foot by raising the presser foot lifter. 3. Remove the presser foot by pulling the presser foot release lever toward you. and the presser foot will be disengaged. 4. I- I 111 ' 5. ~ Place the desired foot below the presser foot holder so that the pin on the foot fits into the space between the presser foot holder bracket and the spring. Lower the presser bar by means of the presser foot lifter and the presser foot will snap into place. Certain presser feet cannot be constructed as snap-on feet, In those instances the presser foot holder must also be changed. 1. Turn the hand wheel tow ;11 you until the needle 1s at 11 highest point. 2. Turn the presser foot thu11,i screw away from you unl il foot can be slipped off. 3. Replace with the desired f, attachment: tighten thu 1111, screw using screwdriver I 1, the accessory kit to mak1 it is secure. 20 When a job is completed that required special adjustment of the controls or a special sewing foot, always return the settings to normal sewing position for straight sewing, and attach the Regular presser foot.


24 WHERE TO USE EACH STITCH Straight Stretch Rick Rack \V//\V// good for active sportswear strong stretch stitch which holds where an ordinary straight stitch breaks reinforces stress areas such as pants crotches and armholes on woven fabrics as well as stretch fabrics topstitches indispensable for bias sewing embroiders attaches appliques topstitches Overcast makes and finishes seams at the same time good for repairing worn edges of older garments good for sewing jersey fabrics Blind Invisibly hems edge of fabric 21


25 r REGULATING THREAD TENSION Thread tension must be properly balanced. If adjustment is required, it can usually be made by regulating upper thread tension -NOT bobbin thread. TOP OF FABRIC UPPER THREAD TENSION TOO TIGHT.. MUST DECREASE.. I I ~ BOTTOM OF FABRIC BOTH SIDES UPPER THREAD TENSION TOO LOOSE.. MUST INCREASE CORRECT When stitch is unsatisfactory and seam Puckers. tension may be too tight on both upper and bobbin threads. 22


26 STARTING TO SEW When you have followed the steps outlined up to this point, your machine is threaded and ready to sew. However, before actually working on your garment, use a scrap of the fabric you will be sewing to test the stitching. Some adjustment in stitch length or tension may be required. 23


27 ' STRAIGHT STITCH SE\NING Straight stitch sewing is done with the regular presser foot. STITCH SELECTOR STITCH WIDTH 0 PRESSER FOOT Regular foot STITCH LENGTH


28 TACKING ENDS DF SEAMS TURNING CORNERS To reinforce the end of a seam, position the needle in the fabric about 1 / 2-inch from the beginning point and lower the presser foot. Push the reverse button all the way in and hold while backstitching to the edge of the fabric. Release the button and sew the seam. When you reach the end, again push the reverse button all the way in and backstitch for about 1 / 2-inch. 25


29 REMOVING THE \NORK When you stop the machine to remove the work, have needle at its highest position. Avoid sewing off end of the fabric. SE\NING VERY SHEER FABRIC... I I 1 Raise presser foot and draw 2 Cut threads by passing them fabric back and to the left. over thread cutter and pulling down on thread, or with scissors. 26


30 ZIGZAG SEWING Your machine will produce zigzag stitches of various widths and lengths by setting the Stitch Selector dial for zigzag stitching and setting the other controls as specified. PRESSER FOOT Regular foot ~ STITCH STITCH SELECTOR D STITCH WIDTH 1-5 LENGTH NV\/\/\N\/\/\/\l\l\J\N\f\/\/VV\ 2 27


31 SATIN STITCH SEWING The satin stitch presser foot is used for satin stitching. This foot has a full indentation on the underside to permit easy sewing over closely spaced zigzag stitches, and even feeding of the fabric. STITCH SELECTOR STITCH W IDTH 2-5 PRESSER FOOT Satin stitch foot STI TCH LENGTH \\\'.~:::::.','// 28


32 STRETCH STITCH SE\NING Over 55% of all fabrics sold today are synthetics. Stretch fabrics are used for many things. But without the stretch stitch it would be impossible to sew these stretch fabrics. That's what's so nice about Model 1903 with its built-in stretch stitches. It assures you of a stitch that will give with the fabric... no binding or breaking. PRESSER FOOT STITCH SELECTOR :r STITCH WIDTH u 1- w er 0-5 I- V! Regular or Satin stitch foot STITCH LENGTH 8 Turn stitch selector dial to "STRETCH". Your machine has 2 built-in stretch stitches; STRAIGHT STRETCH RICK RACK STITCH WIDTH AT 0 STITCH WIDTH AT \V//\V//\V// 29


33 BUTTONHOLE SE\NING A buttonhole consists of two parallel rows of satin stitches connected at the ends. Correct positioning of the fabric and accurate measuring and marking of the hole length are important in producing a professional-looking buttonhole. Fabric must be guided carefully so that lines of stitching will be straight and close together. but not touching. First work a sample buttonhole in the same fabric as the garment and adjust the stitch length within " 11 :::: ::::" " mark to make sure that you have the most suitable setting. Use a double thickness of fabric, and include interfacing for stability. The closer " 11:.::::: ::// " is to zero, the closer the stitches in the buttonhole. STITCH SELECTOR STITCH W IDTH See chart START MARK.. I - I PRESSER FOOT Satin stitch foot STITCH LENGTH \\\: ~: ::: :,','// ADJUST WITH STITCH LENGTH DIAL CENTER LINE MARK END MARK Mark position and length of buttonhole on fabric. Length of the hole is determined by the width and thickness of the button combined. The finished buttonhole should be 1 / 8-inch longer than this measurement to allow for bartacks at each end. 3 0


34 STITCH STITCH WIDTH LENGTH SEWING 5 T Set stitch width dial at 5 and stitch length dial at "w.::::::::11". Sew a few stitches for bartack and stop with needle in fabric on left side of stitching, lift presser foot. Turn stitch width dial to 2 %. Lower presser foot. Sew length of buttonhole required and stop with needle in fabric on right side of stitching. \\'.~ ~ ~::::.','// Lift presser foot and turn the fabric clockwise, using the needle as a pivot so needle now is at back of buttonhole. Lower presser foot and turn the hand wheel toward you until needle is out of the fabric. 5 l Turn stitch width dial to 5. Sew a few stitches for bartack and stop with needle in fabric on left side of stitching. Lift presser foot. Turn stitch width dial to 2 %. Lower presser foot. Sew forward up as far as the other bartack and stop with needle out of fabric. Raise the presser foot and remove the fabric leaving several inches of thread for knotting. 3 1


35 BUTTON SE\NING 1 I It is possible to sew two- or four-hole buttons with your Montgomery Ward machine. STITCH SELECTOR STITCH WIDTH 3-4 PRESSER FOOT Satin stitch foot... I I - STITCH LENGTH 0 Raise presser foot and place button between foot and fabric. Turn hand wheel toward you and check to be sure needle goes down into the left-hand hole 11, the button at the left side of the foot. Lower tl11 presser foot. 32

36 33


37 BLIND HEM STITCHING The blind hem stitch produces a durable hem which is almost invisible on the right side of the article sewn. It may be used on regular hems, or hems finished with seam binding. STITCH SELECTOR STITCH WIDTH 2-5 PRESSER FOOT Regular foot... STITCH LEN GTH 3-6 I 34


38 5. When hem is completed, press hem 4. Guide fabric evenly while sewing 35


39 SE\NING ZIPPERS AND CORDING The zipper foot is designed for stitching close to a raised edge. When sewing zippers and cording, the foot can be adjusted to either the right or left side of the needle for sewing close to the edge of the zipper or cording. STITCH SELECTOR STITCH WIDTH 0 PRESSER FOOT Zipper foot STITCH LENGTH 2-5 ~ I Cording 36

40


41 r PLAIN SEAM A plain seam is the most frequently used and the simplest seam to sew. It consists of sewing two pieces of fabric with the right sides together. Most garment patterns make allowance for a 5/8" seam. STITCH SELECTOR STITCH WIDTH 0 PRESSER FOOT Regular foot I STITCH LENGTH


42 MACHINE BASTING Basting is temporary stitching used to join fabric sections so that the garment can be tried on and fitted before permanent seams are sewn. STITCH SELECTOR STITCH WIDTH 0 PRESSER FOOT Regular foot STITCH LENGTH 8 I I 39


43 OVERCASTING SEAMS Seam edges which tend to ravel can be given a durable finish with machine overcasting. STITCH SELECTOR STITCH WIDTH STITC H LENGTH Overcasting stitch 8 PRESSER FOOT Regular foot zigzag overcasting Method 1: I Method 2: 40


44 GATHERING, SHIRRING AND RUFFLING Fabric can be gathered, ruffled or shirred without a special attachment. STITCH SELECTOR STITCH WIDTH 0 PRESSER FOO T Regular foot STITCH LENGTH


45 APP LI GUE Applique is a cut-out design of one fabric sewn to another. This method of decoration adds beauty and interest to wearing apparel and household items. The design may be finished with a satin stitch or close zigzag stitch. STITCH SELECTOR STITCH WIDTH Qand 3-5 PRESSER FOOT Regular or Satin stitch foot I Method 1:, STITCH LENGTH \\~:~::::: // -3 42


46 FREE-MOTION EMBROIDERY Free-motion machine embroidery is attractive and practical on wearing apparel and many household items. It is impossible to describe the unlimited effects that can be produced when the operator acquires dexterity in this method of embroidering. However, each pattern requires different handling which can be achieved by test and practice. Basic steps in free-motion machine embroidering are: STITCH SELECTOR STITCH WIDTH 0-3 PRESSER FOOT Remove the Presser Foot STITCH LENGTH 0 43


47 DARNING Worn or torn areas on household items and clothing can be darned quickly with little practice. STITCH SELECTOR STITCH WIDTH 0-5 PRESSER FOOT Remove the Presser Foot STITCH LENGTH 0 44


48 OPEN ARM SEVVING Your open arm sewing machine is very convenient for sewing sleeves, trousers and/ or similar places that are difficult to sew on an ordinary flat bed machine. Practical uses and examples are shown on the following pages. 45


49 BUTTONHOLE AND BUTTON SE\NING Buttonholes and button sewing on cuffs can be easily done on an open arm machine. Refer to pages 30 and 31 for buttonholes and to pages 32 and 33 for button sewing. 46


50 SEAM AND EDGE FINISHING Fabric turns freely around the open arm which makes sewing cuffs and sleeves for various types of garments very easy and accurate. Ir ~ \ ~. 4 7


51 MAINTENANCE oiling If machine is in use all day everyday, oil every week. With moderate use. oil it every two to three months. If machine has not been used for a long period of time, oil it before sewing. Place one drop of oil at each oiling point, indicated by arrows. Remove excess oil from parts that could possibly come in contact with fabric and stain it. Use only sewing machine oil or a light weight non-detergent oil. 1 Open face plate to reach oiling points 2 Lift arm cover and drop oil 1n holes 1n housing 48
52 A B o~r::==~jbhh F D Tilt sewing head back and remove bed cover and bottom cover by removing screws A. B, C. D, E and F to oil parts beneath Place one drop of oil at each Oiiing point indicated by arrows 49


53 ---- ' cleanin.g the stitching mechanism If lint and bits of thread accumulate under the needle plate, around the fabric feed dogs, and in the shuttle, this will interfere with the operation of the machine. Check occasionally and clean the stitching mechanism when necessary. 50


54 motor belt The motor belt may stretch from use. It should be tight enough to tum the hand wheel without slipping, but not so tight as to cause the machine to run heavily. Belt should run in a straight line from motor pulley to hand wheel. sewing light bulb The sewing light is controlled by the light switch which is located on the light socket. To replace the bulb, open face plate and unscrew bulb from socket. 5 1


55

56 HELPFUL HINTS

57 HELPFUL HINTS

58 HELPFUL HINTS


59 HELPFUL HINTS


60


61 STRAIGHT STITCH ZIGZAG STITCH 1-5 SEE CHART PAGE 27. To INCREASE upper thread tension, turn Tension Dial to a HIGHER BLIND HEM 2-5 number; to DECREASE, turn to a STITCH ~ LOWER number. After a > < satisfactory setting is established, it is seldom necessary to adjust MACHINE Tension Dial. See detailed BASTING instructions on Page 22. Set i SATIN STITCH Tension Settings at a LOWER number for Machine Basting ,,,,...,.,,,,,, \\'""'"''I Regular Presser Foot SEWING ON BUTTONS SET TO FIT HOLES IN BUTTON OR SEE PAGE32. 0 Satin Stitch Foot 58 *Do not adjust Stitch Width Dial or Stitch Selector with needle in fabric. Turn hand wheel until needle is clear of fabric before making adjus~ment in settings.


![8 0 0 Regular Foot Zipper Foot Remove the Attach Presser the Foot darning Remove the plate Presser Foot BUTTONHOLES I] SEE PAGES 30 AND](/docs-images/90/101222940/images/62-2.jpg "31. '''\"\"'\"''Z'' \\Ulllflfll I Adjust within this area.")
62 STRETCH STITCH PATTERNS ZIPPER SEWING DARNING FREE MOTION EMBROIDERY :r: ===== u ~V/~V/~ f- UJ 0: f- 2-5 (f) ~ 3-5 ~ 0 To INCREASE upper thread tension, turn Tension Dial to a HIGHER number; to DECREASE. turn to a 2-5 ', LOWER number. After a satisfactory setting is established, it is seldom necessary to adjust Tension Dial. See detailed instructions on Page 22. Set Tension Settings at a LOWER number for Machine Basting Regular Foot Zipper Foot Remove the Attach Presser the Foot darning Remove the plate Presser Foot BUTTONHOLES I] SEE PAGES 30 AND 31. '''""'"''Z'' \\Ulllflfll I Adjust within this area. Satin Stitch Foot *Do not adjust Stitch Width Dial or Stitch Selector with needle in fabric. Turn hand wheel until needle is clear of fabric before making adjustment in settings. 59


63 ALPHABETICAL INDEX ACCESSORIES (INCLUDED WITH THE MACHINE) , 19 SA TIN STITCH FOOT ZIPPER FOOT ACCESSORY KIT..., , 19 APPLIQUE ATTACHMENTS, ACCESSORIES, AND REPLACEMENT PARTS BASTING BELT, MOTOR BLIND HEM STITCHING , 35 BOBBIN INSERTING IN CASE , 15 REMOVING WINDING , 11 BOBBIN THREAD TENSION ADJUSTMENT BUTTON SEWING , 33 BUTTONHOLE SEWING , 31 CHANGING THE PRESSER FOOT CLEANING THE STITCHING MECHANISM CORDING DARNING EASY CONTROL GUIDE , 59 ELECTRICAL CONNECTION EMBROIDERY FREE-MOTION GATHERING, SHIRRING, RUFFLING HELPFUL HINTS HEMMING, BLIND HEM , 35 LENGTH OF STITCH, ADJUSTING LIGHT BULB MACHINE BASTING MOTOR BELT NEEDLE INSERTION NEEDLE, SELECTION NEEDLE, THREADING , 13 60
64 NEEDLE, THREAD AND FABRIC STITCH LENGTH DIAL CHART STITCH SELECTOR DIAL OILING , 49 STITCH WIDTH DIAL OPEN ARM SEWING STRAIGHT STITCH SEWING OVERCAST STITCH , 29 STRAIGHT STRETCH STITCH , 29 OVERCASTING SEAMS STRETCH STITCH SEWING PARTS OF MACHINE , 2 TACKING ENDS OF SEAMS REMOVING THE WORK TENSION ADJUSTMENT REPLACEMENT PARTS AND THE 2-IN-1 OPEN ARM SEWING ACCESSORIES , 63 SURFACE REVERSE STITCHING THREAD, SELECTION RICK RACK STITCH , 29 THREADING THE MACHINE RUFFLING TURNING CORNERS SA TIN STITCHING UPPER THREAD TENSION SEAMS (PLAIN) ADJUSTMENT SEAM, OVERCASTING WHERE TO USE EACH STITCH SERVICE, HOW TO OBTAIN WIDTH OF STITCH, ADJUSTING SEWING LIGHT , 51 WINDING THE BOBBIN , 11 SHIRRING ZIGZAG SEWING STARTING TO SEW ZIPPER SEWING

65 MEMO _.;- I ii : I. 'I I 1 I
 1002 Bobbins (Package of 12) 1024 Regula r, Needles (Package of 5 Size 16) 1003 Regutar Needles (Package of 5 Size 18) 1004 Oiler/ brush 1016 Regular Needles (Package of 5 Assorted sizes 9, 11,")
 2001 Ballpoint Needles (Package of 5 Size 16) 1009 Quilting Guide 111.")
66 ATTACHMENTS 1 ACCESSORIES & REPLACEMENT PARTS NEEDLES Regular Needles (Package of 5 Size 9) 1000 ATTACHMENTS AND PARTS Regular Needles (Package of 5 Size 11) 1001 Regular Needles (Packa e of 5 Size 14) 1002 Bobbins (Package of 12) 1024 Regula r, Needles (Package of 5 Size 16) 1003 Regutar Needles (Package of 5 Size 18) 1004 Oiler/ brush 1016 Regular Needles (Package of 5 Assorted sizes 9, 11, 1005 Seam Ripper , 16, 18) Ballpoint Needles (Package of 5 Size 9) 1006 Screwdrivers (Large) 2000 Ballpoint Needles (Package of 5 Size 11) 1007 Ballpoint Needles (Package of 5 Size 14) 1008 (Small) 2001 Ballpoint Needles (Package of 5 Size 16) 1009 Quilting Guide Ballpoint Needles (Package of 5 Assorted sizes 9, 11, , 16) Sewing Light Bulb 1015 Twin Needles (One per package) 1011 Knit Needles (Package of 4) 1012 Felt Washer 1407 PRESSER FOOT Snap-on Feet Spool Pin Holder for snap-on feet 1025 Regular foot Spring for Spool Pin Satin Stitch foot Needle Clamp and Screw 7063 Straight stitch foot Buttonhole foot 1026 Needle Plate Narrow hemming foot Blind stitch foot Motor Belt Button sewing foot Overcasting foot Cording foot Bobbin Winder Rubber Ring 1352 Concealed zipper foot Screw-on Feet Bobbin Case (Complete) 1020 Zipper foot 1028 Darning foot 1029 Roller foot 1030 Electric Foot Control for Portable 170 Presser foot screw S154 Automatic Buttonholer 9259 Magnetic Seam Guide


67 PRINTED IN TAIWAN
4300B. /".y, instructions. Z1GoZAG SEWING MACHINE # 4300B
 4300B,r /".y, k instructions Z1GoZAG SEWING MACHINE # 4300B TABLE OF CONTENTS Adjusting for Good Stitches... 24 Adjusting Pressure of Presser Foot... 10 Adjusting Tensions... 12-13 Blind Stitching... 19
When using an electrical appliance, basic safety precautions should always be followed, including the following:
 Instruction book IMPORTANT SAFETY INSTRUCTIONS This appliance is not intended for use by persons (including children) with reduced physical, sensory or mental capabilities, or lack of experience and knowledge,
pô1e -/C INSTRUCTION MANUAL FOR SEWING MACHINE WHITE
 pô1e -/C -- INSTRUCTION MANUAL I FOR SEWING MACHINE WHITE Retain these numbers for future reference. Model No. Serial No. The Model No. is located on Rating Plate. The Serial No. is located on Bed Plate.
MAIN PARTS
 MAIN PARTS 7 8 9 10 11 12 13 1 2 3 17 4 5 6 01 02 03 04 05 12 23 34 45 56 13 24 35 46 57 14 25 36 47 58 15 16 26 27 37 38 48 49 59 60 06 07 08 09 10 17 18 28 29 39 40 50 51 61 62 19 30 41 52 63 20 21 31
CAUTION- SAVE THESE INSTRUCTIONS This product is for household use, or equivalent.
 Never operate this sewing machine if it has a damaged cord or plug, if it is not working properly, if it has been dropped or damaged, dropped into water. Return this sewing machine to the nearest authorized
2. ACCESSORIES. Zigzag foot Straight foot. machine) Bobbins Denim needle 16 (1 pci. (3 pcs) Ordinary needles 14(2pcs.)
 Bobbins Denim needle 16 (1 pci. (3 pcs) Ordinary needles 14(2pcs.)") 0 0mr -a- 0-I WHITE SEWING MACHINE Record in space provided below the Serial No. and Model No. of this appliance. The Serial No. is located Rear of arm. The Model No. is located Rear of arm. Serial No.
0 0mr -a- 0-I WHITE SEWING MACHINE Record in space provided below the Serial No. and Model No. of this appliance. The Serial No. is located Rear of arm. The Model No. is located Rear of arm. Serial No.
This sewing machine is designed and manufactured for household use only. Read all instruction before using this sewing machine.
 Instruction book IMPORTANT SAFETY INSTRUCTIONS This sewing machine is not a toy. Do not allow children to play with this machine. The machine is not intended for use by children or mentally infirm persons
SAVE THESE INSTRUCTIONS
 INSTRUCTION MANUAL IMPORTANT SAFETY INSTRUCTIONS This appliance is not intended for use by persons (including children) with reduced physical, sensory or mental capabilities, or lack of experience and
Janome. Janome 7312 Instruction Manual. Magnolia 7312 Owners Manual/ User Guide
 Janome Magnolia 732 Instruction Manual IMPORTANT SAFETY INSTRUCTIONS This sewing machine is not a toy. Do not allow children to play with this machine. The machine is not intended for use by children or
SAVE THESE INSTRUCTIONS
 INSTRUCTION BOOK IMPORTANT SAFETY INSTRUCTIONS When using an electrical appliance, basic safety precautions should always be followed, including the followings: Read all instructions before using this
Congratulations! * A Trademark of THE SINGER COMPANY Copyright 1987 SINGER SEWING MACHINE COMPANY All Rights Reserved Throughout The World
 \ Congratulations! As the owner of a SINGER* artisan zigzag sewing machine Model 20U, you are about to enter a wonderful new world of sewing! From the moment you begin to sew at your Model 20U, you will
11210 INSTRUCTION MANUAL
 11210 INSTRUCTION MANUAL Important Safety Instructions When using an electrical appliance, basic safety precautions should always be followed, including the following: Read all instructions before using
SERVICE MANUAL AND PARTSLIST
 SERVICE MANUAL AND PARTSLIST Next 20 CONTENTS WHAT TO DO WHEN... 1~3 SERVICE ACCESS FACE COVER... 4 TOP COVER... 4 BASE COVER... 5 REAR COVER... 6 FRONT COVER... 7 MECHANICAL ADJUSTMENT NEEDLE THREAD TENSION...
WHITE SEWING MACHINE CORPORATION WHITE SEWING MACHINE PRODUCTS LTD. Toronto 16, Ontario, Canada
 V -a a; S a a a. a,.. I.. I S. Co Toronto 16, Ontario, Canada CLEVELAND 11, OHIO WHITE SEWING MACHINE PRODUCTS LTD. WHITE SEWING MACHINE CORPORATION tension adjustments, maintenance, or any of the operations
SAVE THESE INSTRUCTIONS
 USER S GUIDE E10 This houshold sewing machine is designed to comply with IEC/EN 60335-2-28 and UL1594 IMPORTANT SAFETY INSTRUCTIONS When using an electrical appliance, basic safety precautions should always
FEATURES AND PARTS Reverse Button. 1. Thread Take-up Lever. 10. Fly Wheel Clutch 20. Face Plate. 2. Pressure Release (Darning) 11.
 11.") p 19 18 17 15 20 1- Pattern Selector Dial 3. Top Plate Thread Guide 6. Handle 8. Zigzag Width Control Dial 9. Bobbin Winder 2. Pressure Release (Darning) 4. Tension Regulator 5. Top Plate 7. Needle Position
p 19 18 17 15 20 1- Pattern Selector Dial 3. Top Plate Thread Guide 6. Handle 8. Zigzag Width Control Dial 9. Bobbin Winder 2. Pressure Release (Darning) 4. Tension Regulator 5. Top Plate 7. Needle Position
4830 & 4832 INSTRUCTION MANUAL
 INSTRUCTION MANUAL Table of contents Important safety instructions Getting to know your machine Principal parts Accessories Connecting the machine Running the machine Choosing and changing the needle Changing
Perfect Finish. Model ET-1
 Over 1,000 Stitch Functions Select from over 1,000 Stitch Functions. Fulfill your creative dreams with a large selection of decorative stitches, alphabet stitches, and construction stitches. Large Back-Lit
STARTED! Get. Let s. Americana Series AMERICAN DENIM Model SA1100 Use This Guide First. Simplicity Sewing Machine Education Helpline:
 Let s Get STARTED! Americana Series AMERICAN DENIM Model SA1100 Use This Guide First To help you get started using your new sewing machine, this booklet shows you, step-by-step, how to thread your machine
INSTRUCTION MANUAL 2263
 INSTRUCTION MANUAL 2263 TABLE OF CONTENTS Congratulations on the purchase of your new SINGER sewing machine! May we recommend that before you start using your machine, you take time to discover the many
The SEWING MACHINE NEEDLE ORGANIZER
 The SEWING MACHINE NEEDLE ORGANIZER Parts of a Sewing Machine Needle Eye: The size and shape of the needle eye influences what kind of thread will work best with it Scarf: An indentation on the back of
Darning plate 31. Sewing embroidery 31. Sewing zippers 30. Sewing buttonholes Blind hem 27. Threading the upper thread 18
 r TABLE OF CONTENTS KNOW YOUR SEWING MACHINE Name of parts 45 Accessories 6-7 the to connect the machine to the power supply 8 How to use the foot control 8 Sewing light 8 Thread and needle chart 9 Changing
Sewing Machine Model SA200 INSTRUCTION MANUAL & REFERENCE GUIDE. Simplicity Sewing Machine Education Helpline:
 Sewing Machine Model SA200 INSTRUCTION MANUAL & REFERENCE GUIDE Simplicity Sewing Machine Education Helpline: 636-651-0030 IMPORTANT SAFETY INSTRUCTIONS When using the sewing machine, basic safety precautions
TABLE OF CONTENTS ESSENTIAL PARTS UTILITY STITCHES GETTING READY TO SEW DECORATIVE STITCHING CARE OF YOUR MACHINE STITCH PATTERN BASIC SEWING
 Instruction Manual TABLE OF CONTENTS ESSENTIAL PARTS Names of Parts 6 Standard Accessories 7 Dust cover 7 Sewing table 8 Accessory box 8 Free arm Sewing 8 GETTING READY TO SEW Connecting the Power Supply
IMPORTANT SAFETY INSTRUCTIONS
 INSTRUCTION BOOK IMPORTANT SAFETY INSTRUCTIONS When using an electrical appliance, basic safety precautions should always be followed, including the following: This sewing machine is designed and manufactured
Janome Decor Excel Janome 5024 Instruction Manual. Instruction Manual INSTRUCTION BOOK Owners Manual/ User Guide
 Janome Decor Excel 02 Janome 02 Instruction Manual Instruction Manual INSTRUCTION BOOK IMPORTANT SAFETY INSTRUCTIONS When using an electrical appliance, basic safety precautions should always be followed,
Instruction Manual Item No.: V~, 60Hz, 15W
 rm Free Ang! Sewi Sewing Machine MODEL: JW12 Montgomery Ward Customer Service 1112 7Th Avenue, Monroe, WI 53566 8:00 am to Midnight, Monday through Friday 1 888 557 3848 Instruction Manual Item No.: 724723
Press the Elongation button and eight stitches are made 2 to 3 times longer.
 LCD Screen with Stitch Selection Dial Provides clear and easy viewing of stitch settings including the number and image of the selected stitch, stitch length settings and stitch width settings. Block Alphabets
Superb Model Over 1,000 Stitch Functions
 Over 1,000 Stitch Functions Select from over 1,000 Stitch Functions. Fulfill your creative dreams with a large selection of decorative stitches, alphabet stitches, and construction stitches. Large Back-Lit
SAVE THESE INSTRUCTIONS This product is for household use, or equivalent.
 IMPORTANT SAFETY INSTRUCTIONS When using an electrical appliance, basic safety precautions should always be followed, including the following. Read all instructions before using this sewing machine. CAUTION-
IMPORTANT SAFETY INSTRUCTIONS
 INSTRUCTION BOOK IMPORTANT SAFETY INSTRUCTIONS This appliance is not intended for use by persons (including children) with reduced physical, sensory or mental capabilities, or lack of experience and knowledge,
Survey of the machine
 I 7iy ( / the placing of the accessories, please refer to transportea. thread take-up spring Place the machine on the table and remove the the space around the needle. The machine is equipped with a number
NAMES OF PARTS. 1 Thread guide for bobbin winding 2 Take-up lever. 3 Upper thread tension dial. 4 Face cover. 5 Thread guide for upper threading
 6 Presser foot thumb screw 9 Spool pins (retractable) 8 Shuttle cover 5 Thread guide for upper threading 7 Presser foot 4 Face cover NAMES OF PARTS.r4r : VjN S* ;WWE7-17 16 15 MODEL 860.-.-.- --. :.---.-
PARTS LIST MODEL: HDEJ1800
 First Edition: June 0 PARTS LIST 0 8 4 8 8 4 8 0 KEY PARTS NO. NO. DESCRIPTION 0400 Top cover (unit) 00 Top cover (unit) 0000 Top cover 4 40A04 Flip-top sewing instruction panel 000 Hinge rod (right) 00
I N R U C T I 0 N S ZIG- ZAG SEWING MACHINE
 I N R U C T I 0 N S ZIG- ZAG SEWING MACHINE 52880 FRONT VIEW @ @! I - 1. Bobbin Winder 2. Special Stitch Control and Width Control 3. Stitch Length Control 4. Light Switch 5. Feed Dog Control 6. Nomenclature
CONTENTS. Changing Light Bulb 28. Zigzag Width Control NAMES OF PARTS 2. ACCESSORIES 3 3. BEFORE SEWING 4. Detaching Extension Table 4
 E Changing Light Bulb 28 9. APPLIQUE WORK 23 12. TROUBLE CHART 27 Drop Feed Lever 12 Oiling 26 Adjusting Lower Thread 11 Adiusting Threao Tension 17 Cleaning 25 11. MAINTENANCE 25 7. SEWING ON BUTTONS
INSTRUCTION MANUAL. Attention. COMPUTER SEWING MACHINE HZL-L series
 COMPUTER SEWING MACHINE HZL-L series INSTRUCTION MANUAL EN Attention Please read this instruction manual before using the machine as it contains important operational and safety information. Keep this
Janome Memory Craft 9500 Instruction Manual. MC9500 Owners Manual/ User Guide
 Janome Memory Craft 900 Instruction Manual TABLE OF CONTENTS Janome Memory Craft 900 Instruction Manual KNOW YOUR MACHINE... Name of Parts... Standard Accessories and Storage... Extension Table... GETTING
SERVICE MANUAL PARTS LIST MODEL: NH40
 SERVICE MANUAL & PARTS LIST MODEL: NH40 CONTENTS What to do when... 1-3 SERVICE ACCESS Face Cover... 4 Bed Cover... 5 Free-arm Cover... 6 Front Cover... 7 Rear Cover... 8 MECHANICAL ADJUSTMENT Presser
SAVE THESE INSTRUCTIONS
 INSTRUCTION BOOK IMPORTANT SAFETY INSTRUCTIONS When using an electrical appliance, basic safety precautions should always be followed, including the followings: Read all instructions before using this
Brother PQ- Series Accessories
 Brother PQ- Series Accessories The PQ-series of high-speed straight stitch machines (1300, 1500 and 1500S) are designed to sew quickly and accurately with a wide variety of fabrics, even combinations of
SERVICING MANUAL 419S/423S
 SERVICING MANUAL 415 419S/423S TROUBLESHOOTING PROBLEM CAUSE REMEDY REFERENCE 1. SKIPPING 1. NEEDLE IS NOT INSERTED INSERT THE NEEDLE PROPERLY. STITCHES PROPERLY. 2. NEEDLE IS BENT OR WORN. CHANGE THE
") .JLLJ
.JLLJ IMPORTANT SAFETY INSTRUCTIONS
 USER S GUIDE E10 This household sewing machine is designed to comply with IEC/EN 60335-2-28 and UL1594. IMPORTANT SAFETY INSTRUCTIONS When using an electrical appliance, basic safety precautions should
INTRODUCTION THANK YOU FOR CHOOSING OUR OVERLOCK MACHINE FOR YOUR SAFETY BEFORE YOU USE - 1 -
 INTRODUCTION THANK YOU FOR CHOOSING OUR OVERLOCK MACHINE This overlock machine can stitch dependable seams on all kinds of fabric, both light and heavy, including cotton, wool, rayon, tricot, jersey, and
A. Preparing the fabric (not shown):
:") INSERTING ZIPPERS - CENTER INSERTION The zipper can be snapped on to the right or to the left side of the needle so that you can sew close to the zipper. When sewing on the right side of the zipper, attach
INSERTING ZIPPERS - CENTER INSERTION The zipper can be snapped on to the right or to the left side of the needle so that you can sew close to the zipper. When sewing on the right side of the zipper, attach
HOW TO USE YOUR LONG SHUTTLE MANUAL SEWING MACHINE. 4çJ MODEL NO.768
 NO.768 MODEL 4çJ Ii SEWING MACHINE LONG SHUTTLE MANUAL HOW TO USE YOUR INDEX Zigzag Formation 18 Zigzag Sewing And Pattern Formation 17 Turning a Corner 14 Placement of Needle 4 Picking Up Bobbin Thread
BEL0093 Sewing Machine
 4 BEL0093 Sewing Machine THE SCIENCE BEHIND SEWING BEL0093 Sewing Machine 5 4 8 10 9 21 11 12 1 2 14 19 13 23 7 6 5 21 3 17 18 22 15 6 BEL0093 Sewing Machine 16 22 Auto Low Foot Pedal Auto High THE SCIENCE
the needle, the user must take sufficient care to avoid injury and observe the sewing area continuously while sewing.
 / - nstruct0fl maflua 7 the needle, the user must take the light bulb is 15 watts. agent. by anyone but an authorized Pfaff D) The drive belt must never be adjusted B) When leaving the machine, chan C)
INSTRUCTION MANUAL 9970
 INSTRUCTION MANUAL 9970 INSTRUCTION MANUAL This sewing machine is intended for household use. This sewing machine is not intended for use by young children or infirm persons without supervision. IMPORTANT
Kenmore INSTRUCTIONS ZIG ZAG SEWING MACHINE MODEL 1430/1431/1625/1641/1940/1941
 Kenmore INSTRUCTIONS ZIG ZAG SEWING MACHINE MODEL 1430/1431/1625/1641/1940/1941 59982 TABLE OF CONTENTS..., = KNOWING YOUR SEWING MACHINE Identifying Parts... 2, 3 Installing Machine... 4, 5 Converting
User s Guide. Prelude 350, 370 KEEPING THE WORLD SEWING
 User s Guide Prelude 350, 370 KEEPING THE WORLD SEWING This houshold sewing machine is designed to comply with IEC/EN 60335-2-28 and UL1594 IMPORTANT SAFETY INSTRUCTIONS When using an electrical appliance,
IMPORTANT SAFETY INSTRUCTIONS
 Instruction Book IMPORTANT SAFETY INSTRUCTIONS When using an electrical appliance, basic safety precautions should always be followed, including the following: Read all instructions before using this appliance.
Table of Contents NAMES OF PARTS 7 GETTING READY TO SEW 10 DECORATIVE STITCHING 48 BASIC SEWING 28 PROGRAMMING PATTERNS AND LETTERS 55
 Instruction Manual Table of Contents NAMES OF PARTS 7 Names of Parts 7 Standard Accessories 8 Extension table 8 Sewing Table and Accessory box 9 Free-arm sewing 9 Stitch overview 9 GETTING READY TO SEW
Silver Crest SNM 33 A1. List of contents
 List of contents Silver Crest SNM 33 A1 Guarantee...1 Service number...1 Important safety instructions / Appropriate use...2 Details of the Machine...3 Accessories...3 Fitting the snap-in sewing table...3
The 787 Dreamstitcher Portable Serger
 The 787 Dreamstitcher Portable Serger INSTRUCTION MANUAL TABLE OF CONTENTS 1. KNOWING YOUR MACHINE Identification chart 2 Accessories 3 Setting up your machine 4 Preparation for threading 5-6 Lint tray,
XL5050us_cover. Operation Manual. English XC Printed in China. XC XL5050 (NA03J061) Bk
 Bk") XL00us_cover Operation Manual English 88-8 XC67-0 Printed in China XC67-0 XL00 (NA0J06) Bk XL000us.book Page Tuesday, November, 00 9: AM IMPORTANT SAFETY INSTRUCTIONS When using this machine, basic safety
XL00us_cover Operation Manual English 88-8 XC67-0 Printed in China XC67-0 XL00 (NA0J06) Bk XL000us.book Page Tuesday, November, 00 9: AM IMPORTANT SAFETY INSTRUCTIONS When using this machine, basic safety
803, 806, 807 instruction book 800., 801, 802, Hobbymatic
 A 803, 806, 807 instruction book 800., 801, 802, Hobbymatic I 4 Fold out this page Contents Page Removing the carrying case cover 1 Foot control receptacle 1 Electrical connection 2 Foot control 2 Disengaging
Quantum L Built-in Stitch Patterns. Large Back-Lit LCD Screen with Brightness Control
 Quantum L-500 Feature 401 Built-in Stitch Patterns Fulfill your creative dreams with a large selection stitches including basic, decorative and stretch stitches for clothing construction, quilting, home
Operation Manual. Sewing Machine. Product Code: 888-X53/X54/X55/X56
 Operation Manual Sewing Machine Product Code: 888-X/X/X/X6 Please visit us at http://solutions.brother.com where you can get product support and answers to frequently asked questions (FAQs). IMPORTANT
N S T R U C T R O N S
 N S T R U C T R O N S I ZIG-ZAG SEWING MACHINE P/N 52882 INDEX Adjusting for Good Stitching... 26 Blind Stitching... 18, 19 Bobbin: Inserting & Threading... 8 Picking up Bobbin Thread... 10 Removing...
SAVE THESE INSTRUCTIONS
 INSTRUCTION BOOK IMPORTANT SAFETY INSTRUCTIONS Your sewing machine is designed and constructed only for HOUSEHOLD use. Read all Instructions before using this appliance. DANGER To reduce the risk of electric
FREE ARM SEWING MACHINE
 INSTRUCTION MANUAL your creative assistant CELEBRITY 550 FREE ARM SEWING MACHINE Safety instructions Like any other electrical device, a sewing machine can cause serious, even life-threatening injuries.to
NAMES OF PARTS. (I Top Thread Guide. 2 Take-up Lever. (7 Snap-on Presser Foot. Upper Thread Tension. Face Cover. Needle Clamp Screw.
 z. 3 w I, 0 E 1 Feed Dog NAMES OF PARTS Face Cover Needle Clamp Screw Automatic Stitch Length Indicator Stitch Length Dial Tacking Button Reverse Button Speed Control Buttons Pattern Selection Buttons
GrandQuilter. Owner s manual
 GrandQuilter Owner s manual This household sewing machine is designed to comply with IEC/EN 60335-2-28 and UL1594 IMPORTANT SAFETY INSTRUCTIONS When using an electrical appliance, basic safety precautions
SEQS Built-In Sewing Stitches. 6 Basic, 17 Decorative, 5 Stretch and 2 Buttonholes. 2 Fully Automatic 1-Step Buttonholes
 30 Built-In Sewing Stitches 6 Basic, 17 Decorative, 5 Stretch and 2 Buttonholes 2 Fully Automatic 1-Step Buttonholes A simple 1-step process that provides reliable, precisely balanced buttonholes every
After opening the box, check that the following accessories are enclosed. If any item is missing or damaged, contact your retailer.
 Enclosed Accessories After opening the box, check that the following accessories are enclosed. If any item is missing or damaged, contact your retailer. Accessories The following items should also be enclosed
INSTRUCTIONS MODEL 3800/20 ZIG ZAG SEWING MACHINE. rçi 1 I J H
 ZIG ZAG SEWING MACHINE MODEL 3800/20 INSTRUCTIONS d J H 1 I V pg I \ I k 1 rçi Stitch Selector. Adjusting Top Tension. Adjusting Bobbin Tension. Top Tension Control.9 USING THE CONTROLS Threading of Top
EC Satisfaction from your Sewing Machine
 University of Nebraska - Lincoln DigitalCommons@University of Nebraska - Lincoln Historical Materials from University of Nebraska- Lincoln Extension Extension 1956 EC56-408 Satisfaction from your Sewing
Another quality product from. Instruction Manual. Model 9105
 Another quality product from Instruction Manual Model 9105 SYMBOL INSTRUCTIONS Raise needle Raise presser foot Lower presser foot When using an electrical appliance, basic safety should always be followed,
quilt expression 2048 Quilting - Sew something unique! German Engineering Innovative Design
 quilt expression 2048 Quilting - Sew something unique! German Engineering Innovative Design Quilters have special needs! The quilt expression 2048 fills them all. Sewing convenience of the highest level
INSTRUCTION BOOK 750 WHITE. Call Toll Free corn
 www.whitesewng. corn 800-331-3164 Call Toll Free WHITE = 0 0 INSTRUCTION BOOK 750 To reduce the risk of burns, fire, electric shock, or injury to persons: 2. Use this sewing machine only for its intended
After opening the box, check that the following accessories are enclosed. If any item is missing or damaged, contact your retailer.
 Enclosed Accessories After opening the box, check that the following accessories are enclosed. If any item is missing or damaged, contact your retailer. Accessories te (For U.S.A. only) Foot controller:
User s Guide KEEPING THE WORLD SEWING
 User s Guide 605 KEEPING THE WORLD SEWING This houshold sewing machine is designed to comply with IEC/EN 60335-2-28 and UL1594 IMPORTANT SAFETY INSTRUCTIONS When using an electrical appliance, basic safety
Important safety instructions
 Important safety instructions IMPORTANT When using an electrical machine, basic safety precautions should always be followed, including the following: Please read the instruction manual carefully before
Intro to the Sewing Machine
 Intro to the Sewing Machine 1. Bobbin Cover Opens to allow you to put the bobbin and bobbin case in the machine. 2. Stitch Plate Where the seam allowance guidelines are found. Each line is 1/8 apart, beginning
IMPORTANT SAFETY INSTRUCTIONS
 IMPORTANT SAFETY INSTRUCTIONS IMPORTANT When using an electrical machine, basic safety precautions should always be followed, including the following: Please read the instruction manual carefully before
You are now the owner of a new straight stitch machine, the most. versatile machine of its type you can possess.
 Time-saving attachments such as rufflers, binders, buttonholes, ed ment the accessories, are available from your dealer. with many hours of trouble-free sewing. To aid you in obtaining the greatest performance
User s Guide KEEPING THE WORLD SEWING
 User s Guide KEEPING THE WORLD SEWING This houshold sewing machine is designed to comply with IEC/EN 60335-2-28 and UL1594 IMPORTANT SAFETY INSTRUCTIONS When using an electrical appliance, basic safety
SERVICE MANUAL MODEL: 13512, 14412, 15312
 SERVICE MANUAL MODEL: 13512, 14412, 15312 CONTENTS TROUBLESHOOTING... 1-3 SERVICE ACCESS (1) FACE COVER, BELT COVER... 4 SERVICE ACCESS (2) BASE PLATE... 5 SERVICE ACCESS (3) FRONT COVER... 6 SERVICE ACCESS
Instruction Book D1S D2S D3S. Memory Craft 7700 QCP
 Instruction Book DS DS DS APC Autom omatic Plate Co nverter Memory Craft 7700 QCP IMPORTANT SAFETY INSTRUCTIONS This appliance is not intended for use by persons (including children) with reduced physical,
Janome MC10001 Instruction Manual. Janome Memory Craft Instruction Manual. MC10001 Owners Manual/ User Guide
 Janome Memory Craft 000 Instruction Manual Table of Contents GETTING REDY TO SEW... Name of Parts... Standard ccessories and Storage... 4 Detachable Extension Table... 6 Connecting the Power Supply...
Blue Machine. Jeans WHITE BEWINQ MACHINE
 BEWINQ MACHINE WHITE Jeans Blue Machine CONTENTS 1. NAMES OF PARTS 2 2. ACCESSORIES 3 3. BEFORE SEWING 4 Detaching Extension Table 4 Connecting Foot Controller and Power Cord 5 Changing Needle 6 Changing
Janome 204D Instruction Manual. MODEL 204D. 204D Owners Manual/ User Guide
 Janome 0D Instruction Manual Janome 0D serger Janome 0D Instruction Manual MODEL 0D 0D Owners Manual/ User Guide Janome 0D Instruction Manual IMPORTANT SAFETY INSTRUCTIONS Your sewing machine is designed
Home Sewing Machine Accessories
 Home Sewing Machine Accessories Feb. 2019 Edition Standard Presser Foot This Standard presser foot is used for sewing straight stitches and zigzag stitches. It can be used to sew lightweight to heavyweight
HZL-60 Series INSTRUCTION MANUAL. Attention
 HZL-60 Series INSTRUCTION MANUAL Attention Please read this instruction manual before using the machine as it contains important operational and safety information. Keep this manual accessible so that
Construction Cards Beginning Level (9-11 Years)
") Beginning Level (9-11 Years) Division of Agricultural Sciences and Natural Resources Oklahoma State University Beginning Level (9-11 Years) No. 801 Seam Finishes Seam finishes make clothes look neat on
Beginning Level (9-11 Years) Division of Agricultural Sciences and Natural Resources Oklahoma State University Beginning Level (9-11 Years) No. 801 Seam Finishes Seam finishes make clothes look neat on
INSTRUCTION MANUAL C240
 INSTRUCTION MANUAL C240 This household sewing machine is designed to comply with IEC/EN 60335-2-28 and UL1594. IMPORTANT SAFETY INSTRUCTIONS When using an electrical appliance, basic safety precautions
S2_BrotherE_cover DIC181p K. ENGLISH 885-S06 XC Printed in China
 S_BrotherE_cover DIC8p K ENGLISH 885-S06 XC57-0 Printed in China S_brotherE_Cover.fm Page A Tuesday, March 0, 00 :6 PM Enclosed Accessories After opening the box, check that the following accessories are
SINGER* SEWING MACHINE NO. 27 & 28 VIBRATING SHUTTLE, FOR FAMILY USE
 INSTRUCTIONS FOR USING SINGER* SEWING MACHINE NO. 27 & 28 VIBRATING SHUTTLE, FOR FAMILY USE When requiring Needle, Oil, Parts or Repairs, for your Machine Look for the Red "S" There are Singer Shops in
S-85SCH
 4411-4423-4432-4443-4452 5511-5523-5532-5554 44S-85SCH Service Manual 104 73 14-26 2014-02-24 CONTENTS 1. Names of principal parts...2 2. Removing methods of external parts 2-1 Sewing table...3 2-2 Face
CONTENTS (1) PRINCIPAL PARTS... 2 (2) UPPER SHAFT, NEEDLE BAR AND FEED MECHANISM... 4 (3) SHUTTLE HOOK, BH AND FEED ADJUST MECHANISM...
 PRINCIPAL PARTS... 2 (2) UPPER SHAFT, NEEDLE BAR AND FEED MECHANISM... 4 (3) SHUTTLE HOOK, BH AND FEED ADJUST MECHANISM...") 11.1999. CONTENTS (1) PRINCIPAL PARTS... 2 (2) UPPER SHAFT, NEEDLE BAR AND FEED MECHANISM... 4 (3) SHUTTLE HOOK, BH AND FEED ADJUST MECHANISM... 8 (4) PATTERN SELECTION MECHANISM... 10 (5) LAMP, THREAD
11.1999. CONTENTS (1) PRINCIPAL PARTS... 2 (2) UPPER SHAFT, NEEDLE BAR AND FEED MECHANISM... 4 (3) SHUTTLE HOOK, BH AND FEED ADJUST MECHANISM... 8 (4) PATTERN SELECTION MECHANISM... 10 (5) LAMP, THREAD
Simply select and sew!
 Simply select and sew! TM German Engineering! Innovative Design! TM With the original Pfaff Feature! Ultimate Ease High Quality Typical Pfaff Feel the need to sew? The select is ready to go! Once a Pfaff
After opening the box, check that the following accessories are enclosed. If any item is missing or damaged, contact your retailer.
 Enclosed Accessories After opening the box, check that the following accessories are enclosed. If any item is missing or damaged, contact your retailer. Accessories The following items should also be enclosed
SEWING MACHINES BERNETTE SEWING MACHINE WORKBOOK MASTERY BOOK SERIES. For bernette models sew&go, b33 and b35
 MASTERY BOOK SERIES SEWING MACHINES BERNETTE SEWING MACHINE WORKBOOK For bernette models sew&go, b33 and b35 2017. Permission granted to copy and distribute in original form only. Content may not be altered
CONTENTS LOCATE AND IDENTIFY THE PARTS... WIND THE BOBBIN... PREPARE YOUR TOP THREAD... STITCH SELECTOR / STITCH LENGTH/STITCH WIDTH CONTROLS...
 SERVICE MANUAL SEWING MACHINE MODEL 385. 15208400 OCTOBER, 2003 CONTENTS LOCATE AND IDENTIFY THE PARTS... WIND THE BOBBIN... PREPARE YOUR TOP THREAD... STITCH SELECTOR / STITCH LENGTH/STITCH WIDTH CONTROLS...
Top Innovations, Inc. Innovative Products to Make Your Life Easier. Model SP-402 Owner s Manual
 Top Innovations, Inc. Innovative Products to Make Your Life Easier Model SP-402 Owner s Manual THIS IS NOT A TOY! Adult supervision recommended Item contains sharp functional points and small parts Machine
machines IT sewing MODEL 714 SEWING MACHINE OWNER S MANUAL SINCE 1876
 IT sewing SINCE 1876 machines OWNER S MANUAL SEWING MACHINE MODEL 714 This booklet has been written for you so that you may use and enjoy fully all Please read the instructions pertaining to your machine
Sewing Machine 911 with Claudia Miller
 Sewing Machine 9 JAMMED MACHINE MACHINE IS NOT STITCHING Threads are too long and get caught in the bobbin holder Machine is dirty Bobbin thread was not drawn up through the machine Threads are stuck when
You're reading an excerpt. Click here to read official TOYOTA SUPER JEANS user guide
 You can read the recommendations in the user guide, the technical guide or the installation guide for TOYOTA SUPER JEANS. You'll find the answers to all your questions on the TOYOTA SUPER JEANS in the