Egger Roofing Board Fast, Easy, Safe: With this board you can reach the top.
|
|
|
- Cassandra Douglas
- 5 years ago
- Views:
Transcription

1 Egger Roofing Board Fast, Easy, Safe: With this board you can reach the top. 1
2 2
3 Content Content 1 2 Roof Sheathing 4 Importance 4 EGGER Roofing Board 5 Benefits 5 Principles of the EGGER Roofing Board 6 3 General Recommendations 7 Installation 8 Horizontal installation 8 Fastening recommendations Snow load capacity 10 Roof Systems 12 Vapour-permeable warm roof 13 Non-permeable warm roof 13 Handling 14 Storage and packaging 14 Stock programme 14 Service 15 3
4 Importance of Roof Sheathing Importance of Roof Sheathing The roof sheathing fulfills multiple functions in a building and plays a load-bearing role in house construction: Enhances roof stiffness Braces the roof framing and reduces the effect of dynamic load (wind and earthquake) upon roof structure. Improves sound insulation Attenuates the airborne and impact sounds (rain, hail) and improves the acoustics of the living habitat under roof. Reduces heat losses through roof Helps preserving the heat inside, especially when using tongue and groove (or similar) roofing panels or straight-edge panels (OSB, plywood) with joints tape sealed. Protection Installation inside the roof is important for additional protection from moisture (caused by condensation, rain and snow), considering that most breathable membranes decay and crumble away after few years. Tightness Better tightness against insects and rodents penetration inside the roof. Stability Stable support for easy installation of skylights. Safety Protects craftsmen against falling down through rafters and prevents drop of heavy tools (eg. hammers) that might injure people working under roof. In order to provide optimal protection from above, EGGER has launched a new, ergonomic roof decking panel, the EGGER Roofing board. It is an innovative product that provides a perfectly even sub-layer for further roof works get to know all benefits of the Roofing Board on the upcoming pages. 4
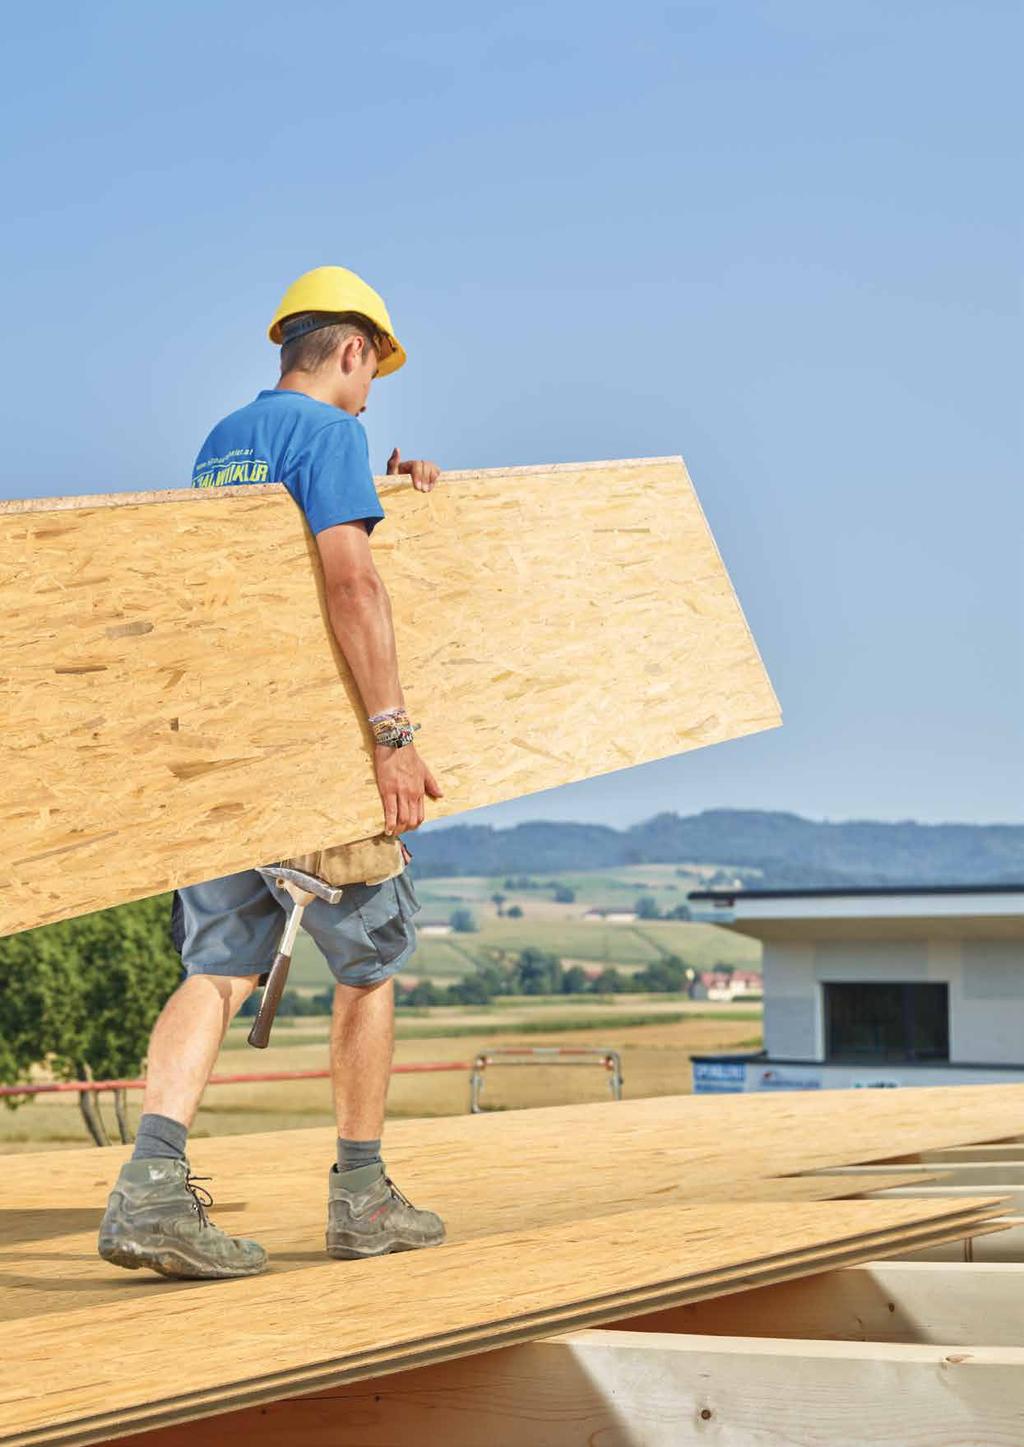
5 EGGER Roofing Board EGGER Roofing Board Easy to carry fast to install The main benefits for you: Work safer and faster thanks to easy handling and installation, allowing you to save time and costs. Innovation Unique combination of shiplap joint and tongue and groove profile with integrated 2 mm expansion gap. Fast and easy installation by either fold in & slide or plug in & slip. The compensation of height differences between rafters is possible to a limited extent. Allows endless installation with non-supported joint due to tongue and groove joint at the short edge of the board. Cost and time savings Up to 30 % faster installation compared to OSB with straight edge. Twice as fast installation compared to sawn timber. Less efforts and less fasteners. No additional H-clips required on the horizontal shiplap joint. Endless installation minimizes cutting waste. Safety High load bearing capacity and stiffness of an EGGER OSB 3 board. Complies with roofing standards due to moisture resistant bonding. Tested as safe for pointload with 100 kg man load between the rafters up to cc-span 600 mm according to EN Safe hold of the installed second row of boards until fastening is done. User-friendly Narrow panel width for secure grip and transport to the roof. Low package weights allow temporary storage on the roof construction. Two packages contain the necessary number of boards for a standard roof of 130 m² including 15 % reserve. Efficient one-man-installation due to low panel weight of approximately 12 kg. 5


6 Principles of the EGGER Roofing Board Principles of the EGGER Roofing Board EGGER Roofing Board is the ergonomic solution for fast and safe roof decking. The small EGGER OSB 3 panel has a special profiling over the edges, which allows fast, precise and truly endless installation as rigid roofing underlay. There are two ways to benefit from the optimised edges of the board. b1 Tongue a1 Shiplap Installation direction a2 Shiplap b2 Groove a Fold in & Slide Fold in Slide The first option to guarantee an easy installation is to fold in the shiplap joint of the long panel side and then slide the panel easily in the right position. A 2 mm expansion gap is created automatically due to the edge profile. Vertical section b Plug in & Slip Plug in b2 b1 Slip The second possibility is to plug in the tongue and groove joint on the short panel side and then slip down the panel. This also creates a 2 mm expansion gap automatically. 2 mm expansion gap Horizontal section 6
7 General recommendations for the roof framework General recommendations for the roof framework For trouble free installation of the roof cladding, it is recommended to use always kiln-dried and planed rafters, which allow perfect alignment of the roof framing and guarantee evenness of the roof boarding layer. Fresh cut rafters will lead to unwanted twisting and bowing which makes flatness of roof cladding underlay difficult to achieve. Therefore their use should be avoided. Ideally, rafters must be spaced exactly 600 mm cc and must be installed perfectly parallel to each other. The dimension of the rafters and permissible centre-to-centre span must result from static design. The rafters should be butt-jointed when fixing them to the ridge purlin. It is not recommended to connect the rafters from the opposite roof slopes laterally at the ridge purlin level. Before proceeding to Roofing Board installation, make sure that all rafters head from the eave end are perfectly aligned horizontal. No rafter head should offset the horizontal roof overhang level set while installation. Hint The span rate of 600 mm complies with most East European building codes and allows the vertical jointing on panel s short sides to be located on top of the rafters when mm EGGER Roofing Board format is used. To achieve faster progress in working, the panel size of mm allows endless installation see graphic below. cc-span 600 mm 7
8 Installation Installation Horizontal installation with self-supporting panel joint between the rafters Rest of row A Rest of row B A1 D1 C1 B1 A2 C2 B2 This type of installation is suitable for new buildings, as well as for refurbishment of old roof structures. It doesn t matter if the cc-span between the rafters varies. Due to the panel size of or mm the boards can be installed fast and easy. The self-supporting tongue and groove panel joint provides enough stiffness to build an even surface and a rigid sublayer for the roof decking. 1. Start with one full size panel A1 at any corner of the eave. Make sure the shiplap joint on the panel s upper side is facing the carpenter and not the rafters, in other words, the print this edge up stays visible. 2. Lay the panel horizontally, with its short edge supported by rafters. Make sure that the lower long side is tangent to the rafters head and rectangular to the aligned rafters. Remark: Never install the boards vertically (parallel to rafters) Make sure that the shiplap joint is in the right position. 300 mm 3. Fix the board on the rafters. 4. Lay the next panel A2 and connect it with the previously installed one, by plugging firmly the tongue and groove joint in the field. 5. Fix the 2 nd panel on the rafters, once connected on the side. 6. Continue with the next panels until the row is completed. 7. Laying the next row make sure that the panel tongue and groove joints are staggered from row to row (T-joint) by minimum 300 mm. 8. Cut-off-pieces at the end of row A can be used as a starting board in the opposite corner of the next row B if the length allows a cover of minimum 1,5 spans. 9. It is not essential that the short side of the board ends on the rafters. It is also possible to place the joint between the rafters. Make sure that there are staggered T-joints by mimimum 300 mm. For wind-proofing and roof securing against any rain or condense water ingress inside, we recommend to additionally seal all panel joints with UVresistant strong self adhesive EGGER Tape. 8
9 Fastening recommendations To use the EGGER Roofing Board we recommend the following fastener types: Fastener type Wood screws with countersunk head Ring nails Pneumatically gun-shot staples Fastener size 4,0 45 mm 3,0 50 mm 1, mm Please observe the following spacing distances: Maximum fastener spacing Centres at edges (on board s perimeter) Centres at the intermediate supports Minimum fastener spacing from board s edge Distance from the edge of the board Distance from the corner of the board Nails and screws 150 mm 300 mm 9 mm 25 mm Staples 75 mm 150 mm 20 mm 25 mm 9 mm 25 mm 150 mm 300 mm 300 mm Spacing distances for nails and screws. EGGER Tape 9
10 Snow load capacity Snow load capacity Depending on location specific snow load conditions, the thickness of EGGER Roofing Board panels has to be chosen by taking into account various influencing factors. If the EGGER Roofing Board is applied under roof shingles, we recommend the following panel thickness, depending on rafter span, roof slope and snow load. Span Roof slope Snowload on the ground (kn/m²), Sg 0,80 1,20 1,80 2,40 3,20 4,00 0,56 m ,60 m ,70 m ,80 m mm 25 mm Calculations acc. EN (Eurocode 5); double span; all short edge splices on rafters; service class 2; medium-term load duration class; characteristic load combination; l/150 (deflection limit); S=Sg*m; m=0,7 (for roof slope); m=1,0 (for 0-25 roof slope); kmod=0,6; γm=1,2; kdef=2,25; ψ=0,2; 0,25 kn/m² (dead load for shingles and roofing board) 10

11 11
12 Roof systems Roof systems We would recommend these two types of roof systems as ventilated pitched roofs. The first recommendation is a vapour-permeable warm roof construction with ventilated bituminous roof decking on EGGER Roofing Board. This system is a very robust construction and free of condensation. The second suggestion is a non-permeable warm roof construction with ventilated metalprofile cover. This system complies with traditional constructions and allows refurbishment from the outside. Installation of the roof construction (from inside out) Vapour-permeable warm roof construction with ventilated bitumenous roof decking on EGGER Roofing Board Non-permeable warm roof construction with ventilated metal-profile cover A Plasterboard 12,5 mm 12,5 mm B EGGER OSB 3 with airtight sealed joints with EGGER Tape C Vapour barrier s d 5 10 m D Glass wool 11 kg/m³ Rock wool 30 kg/m³ Cellulose insulation 50 kg/m³ between the rafters min. 200 mm min. 200 mm E Rafters section acc. to static design section acc. to static design F EGGER Roofing Board G Diffusion-open roofing membrane (permeable) yes yes H Counter roof battens mm mm I Roof battens mm J EGGER Roofing Board K Bitumen membrane yes L Asphalt shingles yes Cold-formed metal sheeting yes The maximum spacing of the rafters is recommended with a cc-span of 600 mm. For this span the Roofing Board passed performance testing for point load and man loads successfully. The s d -value of the vapour barrier needs to be checked by calculation. 12


13 Vapour-permeable warm roof construction with ventilated bitumenous roof decking on EGGER Roofing Board a b j e g i d k l h Non-permeable warm roof construction with ventilated metal-profile cover a b c e f g d l i h We strongly recommend to seal off all panel joints or open penetrations from inside wall sheathing and outside roof decking with EGGER Tape, to get efficient air and wind tightness. 13
14 Handling Handling Storage and packaging Correct storage and protective measures during transport are essential for problem-free handling. The following simple principles should be taken into account: EGGER Roofing Board should be stored flat in a dry area on several pieces of squared timber. The span width should be no greater than 80 cm and the pieces of squared timber should all be the same height. If several pallets are stacked on top of each other then the squared timber should be aligned by height. General rule for safe pallet stacking: ratio H (stacking height) / W (pallet width) 6:1. Please find the max. number of of pallets allowed for vertical stacking in the table below (stock programme**). Steel bands should be undone immediately on site to prevent compressive strain on the pallet. When stored outside provide clear space from the ground and cover with a waterproof tarpaulin on wooden battens, providing air circulation around the panel. Before using the boards, a 48-hour conditioning period is recommended to allow the wood to acclimatise to local humidity. Tarpaulin 80 cm Stock programme EGGER Roofing Board Panel size Length Width Thickness * Weight / board Area covered / board Number of boards / pallet Netto weight / pallet Area covered / pallet Max. number of pallets** ,1 kg 1,68 m² 52 pcs 629 kg 87,4 m² ,4 kg 1,44 m² 52 pcs 539 kg 74,9 m² kg 1,44 m² 42 pcs 544 kg 60,5 m² ,5 kg 1,44 m² 34 pcs 529 kg 49 m² 5 * The coverage size incl. 2 mm expansion gap. ** Maximum number of pallets allowed for vertical stacking 14

15 Service Service technical information portal on the internet targeted support and professional advice upon purchase and assembly technical field service extensive planning and product documentation participation in trade fairs association work technical training plant visits Find all information and benefits as well as the installation video about the Egger Roofing Board also online 15
16 t f info-ro@egger.com Do you want to know more? Simply scan here and get detailed information. SC EGGER Romania SRL Str. Austriei Rădauti, jud. Suceava Romania EGGER Building Products GmbH Weiberndorf St. Johann in Tirol Austria EN_ _10/17 Technical changes reserved. No warranty for printing errors, specification errors and mistakes.
Installation Guide - Evolution Series Wood Siding
 Installation Guide - Evolution Series Wood Siding The following instructions pertain to the installation of Fraser Wood Siding Evolution Series on a typical wood frame construction allowing for nail penetration
Polytegola N. Bitumen Roof shingles. Application guide
 Polytegola N Bitumen Roof shingles Application guide Application manual POLYTEGOLA N CONTENT 1. Foreword - General conditions 3 2. POLYTEGOLA N designs 4 3. Roof pitches 5 4. Storage 5 5. Roof decking
SuperFOIL Insulation. Solutions Guide. Pitched Roof - Under Rafter
 SuperFOIL Insulation Solutions Guide Pitched Roof - Under Rafter SF19+ Pitched Roof Under Rafter Solutions CONSTRUCTION THICKNESS R -VALUE EXTERNAL SURFACE - 0.040 TILES / SLATES 10mm - BATTEN CAVITY 25mm
Shingle Installation Guidelines
 Shingle Installation Guidelines General Guidelines Materials to be used Key definitions Cost of roofing Preparation of the roofing deck Materials used for roofing should conform to approved norms and regulations
HOW TO Fix Onduline Corrugated Bitumen Sheets
 HOW TO Fix Onduline Corrugated Bitumen Sheets BBA BRITISH BOARD OF AGREMENT CERTIFICATE NO. 87 / 1823 W ROOFING PLAN IT Roofing components: Ridge Roof decking Apex Verge Barge board Purlins / battens Rafters
BARDOLINE INSTALLATION INSTRUCTIONS
 BARDOLINE INSTALLATION INSTRUCTIONS www.onduline.com CONTENTS General conditions Material requirements Terms Estimating shingle requirements Roof preparation Shingle application 9 GENERAL CONDITIONS ONDULINE
SIDING INSTALLATION GUIDE
 READ THIS ENTIRE GUIDE CAREFULLY BEFORE INSTALLING NOBELIA SIDING. This installation guide applies to all NOBELIA siding profiles, including SPF tongue-and-groove and exposed nail siding. IMPORTANT: FAILURE
15 YEAR GUARANTEE. Tough and long lasting Guaranteed waterproof for 15 years Economical and easy to fix AVAILABLE IN A RANGE OF COLOURS
 INSTALLATION GUIDE AVAILABLE IN A RANGE OF COLOURS 15 YEAR GUARANTEE Tough and long lasting Guaranteed waterproof for 15 years Economical and easy to fix Coroline corrugated bitumen sheet is a tough lightweight
June Residential Refurbishment Pitched roofs - rafter level
 June 2010 Residential Refurbishment 3.2.2 Pitched roofs - rafter level Residential refurbishment 3.0 Residential Refurbishment Pitched Roof - Rafter Level Contents Introduction find online page Solution
June Non - Residential Refurbishment Pitched roofs - rafter level
 June 2010 Non - Residential Refurbishment 5.2.3 Pitched roofs - rafter level Non-residential refurbishment 5.0 Non-residential Refurbishment Pitched Roof - Rafter Level Contents Introduction find online
August 2008: Issue 1. Non - Residential New Build Pitched Roofs - Rafter Level
 Non - Residential New Build 4.2.3 Pitched Roofs - Rafter Level August 2008: Issue 1 Non-residential new build 4.0 Non-residential New Build Pitched Roof - Rafter Level Contents Introduction find online
Installation Instructions
 Installation Instructions XTRACTOR VENT X18 / X18 XTRA / XLP Page X18 and X18 Xtra General Installation 2 XLP General Installation 3 Asphalt Fiberglass Shingles Detail 4 Ridge Beam Detail 5 Hip Roof Detail
Tuff-Rib Install Guide
 Install Guide bestbuymetalroof.com Page 2 of 27 Page 3 of 27 1. Page 4 2. a. Installation Guide b. Panel Squaring Pages 5, 6 Pages 7, 8 3. Pages 9, 10 4. a. Fascia (optional) b. Eave / 1.5x3.5 Angle c.
Inspire Slate Starter Piece Hip and Ridge. 13 1/2" Height: 13 ½" Width: 12" Squares/ Pallet. Bundles/ Square
 December 2017 Classic Slate Application Guidelines Only Basic Roofing Tools Required Hand fastened or fastened with a pneumatic nail gun Utility knife or a standard circular saw Tape measure, pry bar,
A Shell construction
 A Shell construction A 4/2012 Content 1 BASE AND WALL ANCHORING 1.1 Base with mortar bed 1.2 Base with sill plate 1.3 Base with raised sill plate 1.4 Concrete base (mortar bed) 1.5 Concrete base (sill
Pitched roofs rafter level
 Pitched Roofs - Rafter Level Pitched roofs rafter level Insulation at rafter level design Rafter level insulation Insulation between the rafters can be designed in two ways: Breathing roof with Low Resistance
Inspire Aledora Slate Application Guidelines
 July 2014 Inspire Aledora Slate Application Guidelines Only Basic Roofing Tools Required Hand fastened or fastened with a pneumatic nail gun Utility knife or a standard circular saw Tape measure, pry bar,
SUPER-UNDERLAY SHEET
 SUPER-UNDERLAY SHEET SBS modified bitumen underlay sheet Producer: KATEPAL OY P.O.Box 33 FI-37501 LEMPÄÄLÄ FINLAND Telephone +358 3 375 9111 Telefax +358 3 375 0974 E-mail: katepal@katepal.fi www.katepal.fi
The better way to build TM. Installation Manual ROOF SIPs
 The better way to build TM Installation Manual ROOF SIPs August 2017 ROOF SIPs Installation Manual Table of Contents Topics General Requirements.................................... 3 Materials..............................................
BRACING BRACING SECTION 7 SECTION 7
 If we are to learn from the past, it is clear that there is generally a lack of understanding of the purpose of roof bracing and who should be responsible for it. This has led to disputes, claims and,
REDLAND DRY VALLEY. Installation Instructions for Redland Dry Valley. Version: 6. Date: May Redland Technical Solutions
 REDLAND DRY VALLEY Installation Instructions for Redland Dry Valley Version: 6 Date: May 2013 Author: Department: Redland Technical Solutions Redland Technical Solutions 1 Introduction 1.1 TECHNICAL DATA
INSTALLATION INSTRUCTIONS TRI-ROOF. energy for a better world
 energy for a better world INSTALLATION INSTRUCTIONS TRI-ROOF The flexible roof integration system Compatible for framed module types* Simple exchange of modules Replaces existing roofing Special profiles
Installation. Openings: Valley: Installation on timber roofs (new buildings) 1. Fit a support (noggins) around the opening.
 1. Fit a support (noggins) around the opening.") Installation Openings: 1. Fit a support (noggins) around the opening. 2. Apply Isola Sealant to the support and then fit Pro Super. 3. Install an Isola Opening Fitting for round or square openings. (Remember
Installation Openings: 1. Fit a support (noggins) around the opening. 2. Apply Isola Sealant to the support and then fit Pro Super. 3. Install an Isola Opening Fitting for round or square openings. (Remember
METSÄ WOOD SPRUCE PLYWOOD MANUAL
 METSÄ WOOD SPRUCE PLYWOOD MANUAL Introduction Metsä Wood delivers competitive and eco-efficient wood-based solutions for the needs of the construction industry, other industrial customers and home improvers.
The City of Winnipeg SHINGLE ROOF REPLACEMENT Section Replacement of Shingle Roof - Louis Riel Library Page 1 of 5 Bid Opp. No.
 Replacement of Shingle Roof - Louis Riel Library Page 1 of 5 PART 1 GENERAL 1.1 SCOPE OF WORK.1 Total roof area approximately 1,312 m 2. The Work includes, but is not limited to:.1 Removal and disposal
Tapersawn Shake Installation Instructions
 Smart-Shingle TM System Tapersawn Shake Installation Instructions INSTALLATION GUIDE MARKS Shake-Strip 0 1 2 3 4 5 6 7 8 9 10 11 12 13 14 15 16 17 18 19 20 21 22 23 24 25 26 27 28 29 30 31 32 33 34 35
INSTALLATION, STORAGE AND WALL CONSTRUCTION DETAILS
 www.capecodsiding.com INSTALLATION, STORAGE AND WALL CONSTRUCTION DETAILS IMPORTANT READ THE FOLLOWING INSTRUCTIONS CAREFULLY BEFORE INSTALLING YOUR WOOD SIDING. FAILURE TO STRICTLY FOLLOW THESE INSTALLATION,
Installation Guide. Guardian Slate Roof System. England, Scotland & Wales
 Installation Guide Guardian Slate Roof System England, Scotland & Wales March 2016 Product Information Construction: Manufactured from resin bonded crushed limestone Size (slate): 445 x 294mm (ridgecap):
SG-30 A P P L I C A T I O N I N S T R U C T I O N S. Directions For Application
 1 2 3 General Instructions NOTICE: THESE SHINGLES MUST BE APPLIED TO CONFORM WITH ALL APPLICABLE BUILDING CODES. THESE DIRECTIONS REPRESENT COMMON AND ACCEPTED ROOFING PRACTICES. DEVIATIONS FROM THESE
Shingle Installation Guide
 Installation Guide Roof Framing Information Installation Installation Accessory Installation Estimating Data General Information Roof Framing Information It is the responsibility or roofers, building contractors
50948-RHN Putney. 06 January This document includes: Aluminium strip/ sheet coverings/ flashings 1. Code Section Revision Dated
 50948-RHN Putney 06 January 2018 This document includes: Code Section Revision Dated H72 Aluminium strip/ sheet coverings/ flashings 1 Table of Contents Title H72 Aluminium strip/ sheet coverings/ flashings
Five Star Panel Installation Instructions
 Five Star Panel Installation Instructions How to Store Five Star Panels You will need to store FIVE STAR PANELS in dry place to prevent staining, deterioration and possibly void all warranties. Stand the
External cladding technical instructions
 External cladding technical instructions Contents External cladding technical instructions... 1 General... 2 Vertical cladding... 3 Horizontal cladding... 5 Lower end of the cladding and the plinth...
eco-shake INSTALLATION INSTRUCTION
 1 eco-shake INSTALLATION INSTRUCTION NOTE: Shuffling the eco-shakes during installation may be necessary to obtain a uniform color throughout the roof. Due to the natural wood content in the ecoshakes,
ROOF FRAMING INFORMATION BATTEN INSTALLATION CORONA SHAKE INSTALLATION ACCESSORY INSTALLATION ESTIMATING DATA GENERAL INFORMATION
 ROOF FRAMING INFORMATION BATTEN INSTALLATION CORONA SHAKE INSTALLATION ACCESSORY INSTALLATION ESTIMATING DATA GENERAL INFORMATION ROOF FRAMING INFORMATION It is the responsibility or roofers, building
Installation Instructions
 Installation Instructions XTRACTOR VENT X18 / X18 XTRA / XLP Page Installation Considerations 3 X18 and X18 Xtra General Installation 4 XLP General Installation 5 Steep Pitch Guidelines 6 Asphalt Shingles
With Illustrations, Drawings & Step By Step Details. Click Here To Download 12,000 Shed Plans. 1 P a g e Download 12,000 More Shed Plans
 With Illustrations, Drawings & Step By Step Details Click Here To Download 12,000 Shed Plans 1 P a g e Download 12,000 More Shed Plans Table of Contents OVERVIEW... 3 MATERIALS & CUTTING LISTS... 4 DRAWINGS,
Viva Synthetic Thatch Installation Instructions
 Viva Synthetic Thatch Installation Instructions Overview Structure This instruction manual is for the installation of VIVA on an open battened roof frame. Structure should be framed with weatherable wood
SECTION 9: ROOF STRUCTURE, ROOFING MATERIALS AND FLASHING, GUTTER, DOWNSPOUTS, AND SKYLIGHTS. Background
 Background SECTION : ROOF STRUCTURE, ROOFING MATERIALS AND FLASHING, GUTTER, DOWNSPOUTS, AND SKYLIGHTS There are two basic types of roofs, flat and pitched. These two types have numerous variations. The
COMPOSITE SIDING INSTALLATION GUIDE
 CENTURY HOME LIVING COMPOSITE SIDING INSTALLATION GUIDE Read all instructions prior to installing any siding product. Failure to install and finish this product in accordance with all local building codes,
PROJECT INSTRUCTIONS Roofing
 PROJECT INSTRUCTIONS Roofing This handout outlines some basic regulations contained within the 2015 Minnesota State Building Code, as well as other good building practices. However, this handout is not
SANERI 3 º. Self-adhesive SBS-elastomer bitumen cap sheet
 SANERI 3 º Self-adhesive SBS-elastomer bitumen cap sheet 0809 www.katepal.fi 06 EN 13707 Producer: KATEPAL OY P. O. Box 33 FI-37501 LEMPÄÄLÄ FINLAND Tel. +358 (0)3 375 9111 Fax +358 (0)3 375 0974 E-mail:
HECO-TOPIX -CombiConnect HECO-TOPIX -Therm HCS-Calculation software
 HECO-TOPIX -CombiConnect HECO-TOPIX -Therm HCS-Calculation software THE WOOD SCREW FOR THE PROFESSIONAL The HECO-Calculation software (HCS) and HECO-TOPIX Woodscrews for easy estimation and safe assembling
8 x 10 Timber-frame Garden Shed
 8 x 10 Timber-frame Garden Shed Includes: Step-By-Step Instructions, Complete Details & Materials Lists Timber-framing is a traditional building method that uses a simple framework of heavy timber posts
Installation instructions for co-extruded louver-board profiles
 Installation instructions for co-extruded louver-board profiles www.silvadec.com / info@silvadec.com / tel.:+33 (0)2.97.45.09.00 TO BE READ CAREFULLY BEFORE INSTALLATION Before starting installation on
Site Installation Guide
 Site Installation Guide Site Checklist Stop and read this now. Tick box when checked. Floor Joist Layout If a floor joist design/layout was done, was a site copy of the layout provided with the joists,
BUILDING THE BASIC SHED. Step A: Build the Foundation & Floor Frame
 BUILDING THE BASIC SHED Step A: Build the Foundation & Floor Frame 1. Excavate the building site and add a 4" layer of compactible gravel. If desired, add an extension to the base for the optional wood
BARRELL VAULT BATTENLESS
 i BARRELL VAULT BATTENLESS INSTALLATION GUIDE INSTALLATION NOTIFICATION The installation procedures demonstrated in this manual are recommended methods for the installation of the Gerard Barrel Vault battenless
Wood characteristics
 Wood characteristics Wood has a number of specific characteristics, which are natural and inherent to it. The biggest practical moment is, that the wood has its specific colour and density, also the effect
Western Red Cedar Shingles Product Guide
 Western Red Cedar Shingles Product Guide Western Red Cedar Shingles & Shakes from John Brash are a truly renewable and sustainable roofing and cladding material; with one of the lowest carbon footprints
With Illustrations, Blueprints & Step By Step Details Brought To You By ShedPlansz.Com Click Here To Get More Shed Plans
 12 X 8 Shed Plans With Illustrations, Blueprints & Step By Step Details Brought To You By ShedPlansz.Com Click Here To Get More Shed Plans Blueprints And Diagrams Instructions For Building The Shed
IRONWOOD SHAKE & FLASHING SPECIFICATIONS
 3 1-51 3-3/4 1 IRONWOOD SHAKE & FLASHING SPECIFICATIONS 6 1-13- 1-1-1/4 2-1.5 Drip Edge 2.5 Drip Edge 2-7/8 1-1-1/4 3/4 1 2-1 IRONWOOD SHAKE Overall Length 51 Length of Coverage 48 Width of Coverage 1
DIRECTIONS FOR APPLICATION
 Instructions 1 General NOTICE: THESE SHINGLES MUST BE APPLIED TO CONFORM WITH ALL APPLICABLE BUILDING CODES. THESE DIRECTIONS REPRESENT COMMON AND ACCEPTED ROOFING PRACTICES. DEVIATIONS FROM THESE DIRECTIONS
os brace The environmentally sustainable bracing panel
 os brace The environmentally sustainable bracing panel www.egger.com/osbrace THE ENVIRONMENTALLY SUSTAINABLE BRACING PANEL WHAT IS OS Brace? OS Brace is a high quality, moisture resistant, innovative and
ForceField Air & Water Barrier System. installation instructions
 ForceField Air & Water Barrier System installation instructions Protection and Performance inside and out The ForceField air and water barrier system consists of engineered wood sheathing panels laminated
HUB REV 9/18 ROOF INSTALLATION MANUAL ZIPSYSTEM.COM
 ROOF INSTALLATION MANUAL ZIPSYSTEM.COM 2 ATTENTION: This installation guide is intended to provide general information for the designer and end user. The following guidelines will help you safely and properly
Installation Guide. Step 3. Valley Flashing. Step 7. Transition Flashings and Accessories. Step 6. Hip and Ridge Installation
 Step 7. Transition s and Accessories Step 3. Valley Step 6. Hip and Ridge Installation Step 2. Rake Trim Step 5. Installing the Shingles Step 1. Eave Starter Installation Step 4. Endwall s Installation
A P P L I C A T I O N I N S T R U C T I O N S
 1 2 3 General Instructions NOTICE: THESE SHINGLES MUST BE APPLIED TO CONFORM WITH ALL APPLICABLE BUILDING CODES. THESE DIRECTIONS REPRESENT COMMON AND ACCEPTED ROOFING PRACTICES. DEVIATIONS FROM THESE
3-Tab Shingle Instructions DURA-SEAL 20 DURA-SEAL 25
 3-Tab Shingle Instructions DURA-SEAL 20 DURA-SEAL 25 1 Directions For Applying Malarkey 3-Tab Shingles GENERAL INSTRUCTIONS Install Malarkey 3-tab shingles according to building code and local amendments.
BBA BRITISH BOARD OF AGREMENT CERTIFICATE NO. 87 / 1823 / C
 Fixing Guide BBA BRITISH BOARD OF AGREMENT CERTIFICATE NO. 87 / 1823 / C Onduline Fixing Guide Introduction Onduline is the world s largest manufacturer of bituminous corrugated sheets. Onduline roofing
Multi-layer Insulation Blanket for Roofs, Walls & Floors The Highest Performing Certificated MultiFoil on the Market
 Multilayer Insulation Blanket for Roofs, Walls & Floors e The Highest Performing Certificated MultiFoil on the Market MultifoilInsulation.com UK and European Distributors Specialising in Multifoil Insulation
technical bulletin Roofline Installation Details No.7 Fascia Installation Details Typical Eaves Details K16 Fascia & 9mm Vented Soffit
 Roofline Installation Details This is intended to provide you with a brief overview of the popular products in Kestrel s Roofline range, where they can be used and the main criteria for installation. Typical
NP TD Wood characteristics The bad Downsides Peculiarity of the wood (taints)
") preparations, which are toxic to fungus and insects, - antiseptics. - 1 - Wood characteristics Wood has a number of specific characteristics, which are natural and inherent to it. The biggest practical
preparations, which are toxic to fungus and insects, - antiseptics. - 1 - Wood characteristics Wood has a number of specific characteristics, which are natural and inherent to it. The biggest practical
FIXING GUIDE. Designed for Garages & Sheds, Houses, DIY, Flat Roofs, Industrial & Agricultural Buildings etc. IS THE LONG TERM ROOFING SOLUTION
 FIXING GUIDE Designed for Garages & Sheds, Houses, DIY, Flat Roofs, Industrial & Agricultural Buildings etc. IS THE LONG TERM ROOFING SOLUTION Permaroof Permaroof Permaroof Profile Roofing Manufacturers
Wood shakes and wood shingles
 Wood shakes and wood shingles Material description Wood shakes and wood shingles are manufactured from western red cedar, cypress, pine and redwood trees. Shakes are split from logs and reshaped by manufacturers
Installation Guide. Please read before installing SIPs Kit. 1 Method Statement for the erection of a SIPS Industries Kit Materials...
 30a Renewable Chase Bibra Lake WA 6163 Tel: (08) 9494 2211 Fax: (08) 9494 2202 Email: info@sipsindustries.com.au Web: www.sipsindustries.com.au Installation Guide Please read before installing SIPs Kit.
ZIP System Roof Sheathing INSTALLATION MANUAL A REVOLUTION IN ROOFING
 A REVOLUTION IN ROOFING FROM THE CREATORS OF ZIP System Roof Sheathing INSTALLATION MANUAL Sales Office: 10925 David Taylor Dr., Suite 300 Phone: 800-933-9220 zipsystem.com Charlotte, NC 28262 Fax: 704-547-9228
Brava Old World Slate Installation Guide
 Brava Old World Slate Installation Guide Brava Roof Tile Phone: 844-290-4196 www.bravarooftile.com This document includes the recommended and suggested installation procedures for Brava Old World Slate
RED DIAMOND SHINGLES Roof Installation Introduction:
 RED DIAMOND SHINGLES Roof Installation Introduction: The guidelines set forth in this manual are intended for use with the application of Red Diamond shingles. Wallaba specie (Eperua Falcata) shingles
HERITAGE LAMINATED ASPHALT SHINGLES Frederick, MD
 Application Instructions for FORMERLY 30 THESE ARE THE MANUFACTURER S APPLICATION INSTRUCTIONS FOR THE ROOFING CONDITIONS DESCRIBED. TAMKO BUILDING PRODUCTS, INC. ASSUMES NO RESPONSIBILITY FOR LEAKS OR
Installation Instructions for Siding
 Smart-Shingle TM System "The new smart way to install cedar shingles." - This Old House Installation Instructions for Siding V3.2 INSTALLATION GUIDE MARKS Shingle-Strip 0 1 2 3 4 5 6 7 8 9 10 11 12 13
Ulltraclad Aluminium Cladding. Contents. 1.0 General Information Design Information Installation Information 7. 4.
 Ulltraclad Aluminium Cladding Contents 1.0 General Information 2 2.0 Design Information 4 3.0 Installation Information 7 4.0 Maintenance 10 5.0 Health & Safety 10 1 1.0 General Information 1.1 Introduction
2 ½ Corrugated Panel Installation Specifications
 2 ½ Corrugated Panel Installation Specifications ROOF APPLICATION: Roof slope must be a minimum of a 2/12 pitch to use this product. When using this product butyl lap sealant is recommended for all slopes.
Installation Instructions for Panel Siding and Soffit
 Installation Instructions for Panel Siding and Soffit 7/16 in. Panels Include: Sturdy Panel, Square Edge, 3/4 in. Channel and Reverse Board and Batten (RB&B) 1/2 in. Panels Include: Adobe Shiplap and 808
1 Exam Prep NRCA Roofing Manual: Steep-Slope Roof Systems 2013 Tabs and Highlights
 1 Exam Prep NRCA Roofing Manual: Steep-Slope Roof Systems 2013 Tabs and s These 1 Exam Prep Tabs are based on the National Roofing Contractors Association (NRCA) manual listed below: Steep-Slope Roof Systems
1INSTALLATION GUIDE: ENGINEERED WOOD FLOORING
 1INSTALLATION GUIDE: ENGINEERED WOOD FLOORING INSTALLATION GUIDELINES FOR ENGINEERED WOOD FLOORING These guidelines are designed to complement the current South African Flooring Standards. Engineered wood
PREMIUM LAMINATED ASPHALT SHINGLES Dallas, TX Tuscaloosa, AL Phillipsburg, KS
 Application Instructions for FORMERLY 50 THESE ARE THE MANUFACTURER S APPLICATION INSTRUCTIONS FOR THE ROOFING CONDITIONS DESCRIBED. TAMKO BUILDING PRODUCTS, INC. ASSUMES NO RESPONSIBILITY FOR LEAKS OR
Joshua Woodsman
 CONSTRUCTION GUIDE of one of our design Please Note This electronic document is protected by the identifier against unauthorized dissemination on the Internet. Before building any structure make sure you
900 SERIES PANEL SHEET INDEX STAGGERED ENDLAP STAGGERED MALE LEG AT ENDLAP CONTINUOUS FEMALE ENDLAP INSTALLATION SEQUENCE CI-WR
 900 SERIES PANEL CI-DS-01-900 CI-PJ-01-900 CI-PJ-02-900 CI-EL-01-900 CI-EL-02-900 CI-EL-03-900 CI-EL-04-900 CI-EL-05-900 CI-EL-06-900 CI-EL-07-900 CI-EL-08-900 CI-RD-01-900 CI-RD-02-900 CI-RD-03-900 CI-EV-01-900
technical bulletin Roofline Installation Details No.7 Fascia Installation Details Typical Eaves Details K16 Fascia & 9mm Vented Soffit
 Roofline Installation Details This is intended to provide you with a brief overview of the popular products in Kestrel s Roofline range, where they can be used and the main criteria for installation. Typical
PRIMED STRAND REVERSIBLE SHAKE
 PRIMED STRAND REVERSIBLE SHAKE PRIOR TO INSTALLATION Inspect product for any issues before installing (breakage, surface defects, foreign objects). Do not install questionable product. Report any problems
IKO0716 July Roofing Shingles. Selector & Fixing Guide
 IKO0716 July 2016 Roofing Shingles Selector & Fixing Guide Durable, waterproof and beautiful Protecting what s under your roof from the elements is simplicity itself with IKO Roofing Shingles. Roofing
DIRECTIONS FOR APPLICATION
 Instructions 1 General NOTICE: THESE SHINGLES MUST BE APPLIED TO CONFORM WITH ALL APPLICABLE BUILDING CODES. THESE DIRECTIONS REPRESENT COMMON AND ACCEPTED ROOFING PRACTICES. DEVIATIONS FROM THESE DIRECTIONS
Installation Manual for Thermo Panel
 Installation Manual for Thermo Panel 1 About Thermo Panel is a building wrap, insulation, air and water barrier, mold inhibitor and cold bridge eliminator all-in-one. Delivering an R-value of up to 5 on
DIRECTIONS FOR APPLICATION
 Instructions 1 General NOTICE: THESE SHINGLES MUST BE APPLIED TO CONFORM WITH ALL APPLICABLE BUILDING CODES. THESE DIRECTIONS REPRESENT COMMON AND ACCEPTED ROOFING PRACTICES. DEVIATIONS FROM THESE DIRECTIONS
Engineered Hardwood Flooring Installation Instructions
 Engineered Hardwood Flooring Installation Instructions 1 Important Information before You Begin 1.1 Installer/Owner Responsibility Carefully inspect all materials before installation. Materials installed
 www.cabinsunlimited.co.uk 01362470075 info@cabinsunlimited.co.uk Wood characteristics Wood has a number of specific characteristics, which are natural and inherent to it. The biggest practical moment is,
Asphalt Shingle Installation at Roof Edges, Intersections and Valleys
 & Asphalt Shingle Installation at Roof Edges, Intersections and Valleys Abstract This updated document is intended to provide additional guidance and options for asphalt shingle installations at roof edges,
Product Information & Installation Instructions
 Product Information & Installation Instructions TUFF-STRAND TM OSB Sheathing OSB Structural Panels from MARTCO Installation Instructions: Site-Built and Modular Construction Important Notice to Buyers
GLOSSARY OF TERMS SECTION 8
 GLOSSARY OF TERMS SECTION 8 Anchor Bolt Angle Base Plate Bay Blocking CCB Centerline Chord Cladding Clip Closure Strip An A-307 steel bolt embedded in the concrete footing to anchor the base plate of the
Tuff Rib Panel Installation Specifications
 Tuff Rib Panel Installation Specifications ROOF APPLICATION: Roof slope must be a minimum of a 2/12 pitch to use this product. For slopes lower than a 3/12 pitch, lap sealant is suggested on the side laps
ONDUVILLA. The Attractive Alternative to Shingles I N S T A L L A T I O N I N S T R U C T I O N S
 ONDUVILLA The Attractive Alternative to Shingles I N S T A L L A T I O N I N S T R U C T I O N S 1 INSTALLATION INSTRUCTIONS Even though ONDUVILLA is easy to install, it is important to read through these
LVL8 H1.2 GENERAL FRAMING. Eco Friendly Revolutionary H1.2 Treatment Azotek by Zelam
 LVL8 H1.2 GENERAL FRAMING Eco Friendly Revolutionary H1.2 Treatment Azotek by Zelam NPIL/MARCH2015 Introduction to NelsonPine LVL8 H1.2 NelsonPine LVL is an engineered wood composite made from rotary peeled
Installation Guide. Cedar Shake. Distributed by: BEST MATERIALS LLC, Phoenx AZ
 RPM ROOFING Installation Guide Cedar Shake Distributed by: BEST MATERIALS LLC, Phoenx AZ 602-272-8128 800-474-7570 www.bestmaterials.com Table of Contents OVERVIEW... 1 CAUTION... 1 DISCLAIMER... 1 PRODUCT
IRONSTONE SLATE & FLASHING SPECIFICATIONS IRONSTONE SLATE
 8 5/8" A) 1 5/8" 5/8" 1 10" 10 1 5 50" 9 7/8" IRONSTONE SLATE & FLASHING SPECIFICATIONS IRONSTONE SLATE 1/8" 1 B) 3/8" 2 7/8" 1 3/8" 3/8" 3/8" 3/8" 1" 1 5/8" 1 5/8" 1 2 1 8.3" 3/4" Overall Length 52 Length
Cembrit Patina. Cembrit Cover. Cembrit Solid. Cembrit Transparent
 Rainscreen Cladding Your choice. In addition to the range of colours and shades, Cembrit cladding boards are available in four compositions, each with distinctive performance and characteristics. Cembrit
Production Technology woodtec Fankhauser GmbH Timber Frame + swiss quality Construction Table The Modular System for Timber Frames
 woodtec Fankhauser GmbH Production Technology For Timber Frame Timber Frame + swiss quality Construction Table The Modular System for Timber Frames 2 woodtec Fankhauser The modules are only mechanically
RHEINZINK - Angled Standing Seam
 RHEINZINK - Angled Standing Seam Product Overview RHEINZINK - Seam technology A vibrant, elegant structure even for large surfaces. Feasable with tapered surfaces as well as concave and convex rounded
Vertical Offset Base and Safety Rail System Installation Instructions
 Section 5 Vertical Offset Base and Safety Rail System Installation Instructions The vertical offset base and safety rail assembly are designed to be used in residential construction for sloped or flat
KERRAFRONT INSTRUCTION FOR INSTALLATIONS AND USE. Cellular cladding FS-201 / FS-202. kerrafront.com
 KERRAFRONT INSTRUCTION FOR INSTALLATIONS AND USE Cellular cladding kerrafront.com - 2 - SUMMARY Installation - general rules 3 Cladding boards - detailed description 4 Trims and accessories 5 Horizontal