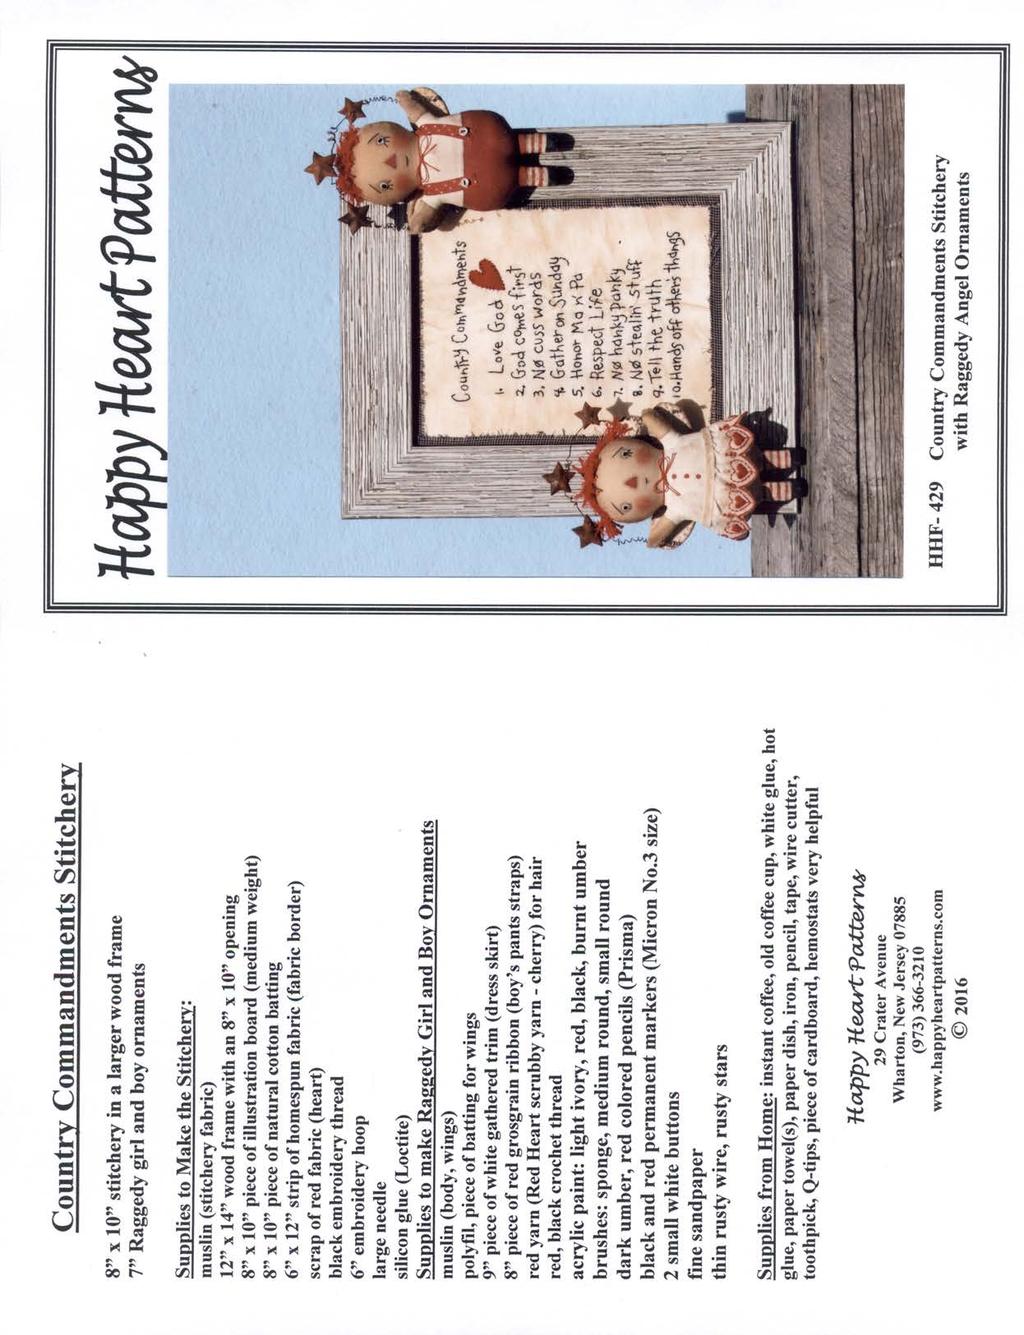
Country Commandments Stitchery
|
|
|
- Priscilla Moody
- 5 years ago
- Views:
Transcription
1
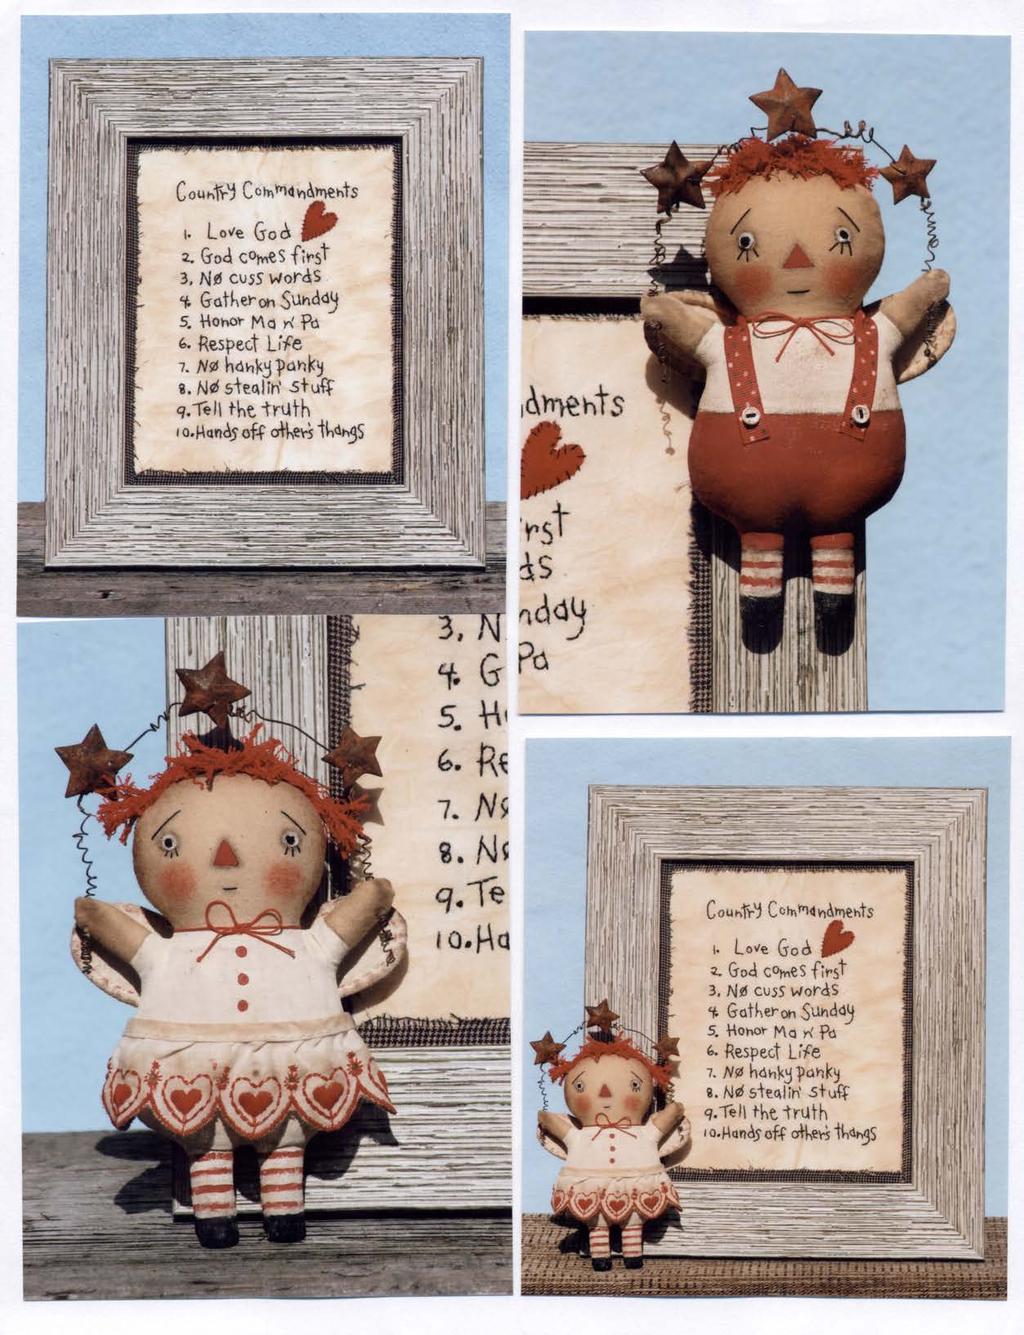
2 Country Commandments Stitchery Notes 1. Read pattern through before starting. 2. Sewing Terms: RST-right sides together RSO right side(s) out 3. Thank you for purchasing my pattern! You may sell the finished Country Commandments stitchery or the raggedy girl & boy angel ornaments at craft shows, on your website and on ebay or Etsy. On the internet, please give me credit for this design. Thank you again. Happy Sewing and Happy Heart Hugs! 1. Preparing and Staining the Stitchery Muslin Cut or tear a piece of muslin 12 X 14. Prepare a small amount of strong coffee stain by mixing one tablespoon of instant coffee with 1/3 cup of hot water. Wet the muslin with water and then crumple it up into a ball open it back up sprinkle it with the coffee stain and then crumple it back up again. Open the muslin up leaving in all the wrinkles. Take a paper towel and wad it up dip towel into coffee stain (not too much stain) and lightly wipe stain/towel across wrinkled muslin hitting the tops of all the wrinkles. You are going to oven dry the muslin. Place a piece of foil on a cookie sheet. Place a piece of batting on top of the foil. Place muslin on top of the batting. Put cookie sheet with muslin into a 200 degree oven for five minutes to dry the muslin. When the muslin is dry it will be nicely stained and wrinkled. 2. Preparing the Stained Muslin to Stitch On Now it might be a bit difficult to trace the commandments and sew them on the wrinkled muslin so you are going to iron it. The wrinkles and stain will remain on the muslin but it will be flat. Place the muslin on a terry towel. Get a slightly damp paper towel and place it over the muslin dab iron down onto damp paper towel first (it has a tendency to stick) and then iron paper towel (and muslin under it) flat. Move paper towel around on muslin so all of it gets ironed and flattened. 3. Tracing the Commandments on the Muslin One side of the muslin will be stained a little darker than the other the darker side is the right side. Place the muslin down on your work area so the right side is facing down (the wrong side is facing you). Center the country commandments pattern right side down onto the muslin tape the corners of the pattern to the muslin (use tape like painters tape so it can easily be removed). Pick muslin/pattern up and tape it to a sunlit window with the muslin facing you you will be able to see the country commandments pattern through the muslin. Use the No. 5 black permanent marker and trace all the commandments onto the muslin if you re tracing is off a bit, just improvise some by lengthening the commandment we are working with a prim influence and mistakes look good! Remove the paper pattern. 4. Stitching the Commandments Insert and secure the top section of your traced commandments into the 6 embroidery hoop. You will be working with 2 strands (taken out of a 6 strand piece) of black embroidery thread. Stitch the commandments using a back stitch, stitching over the traced letters - take your time, taking smaller stitches on the curves of letters and bigger stitches on the straight lines when you use up the black embroidery thread, tie it off at the back of the stitchery then rethread needle with 2 more strands of black embroidery thread and continue on. Make 2 wrap French knots for periods or for dotting i s. I like to stitch while watching TV or on the phone talking then I don t feel like it s a big project and I have to hurry up and get it done. Move the embroidery hoop around on the muslin to get all the commandments stitched. 5. Cut a small heart out of red fabric (or flannel) and stitch it to your commandments stitchery right after the first commandment Love God (I know it should say One God but the greatest commandment of all is to Love God with all your heart so that s why I wrote Love God). 6. Preparing to Frame the Country Commandments Cut an 8 X 10 piece of illustration board. Cut an 8 X 10 piece of cotton batting. Squeeze a puddle of white glue on the illustration board, Happy Heart Patterns Page 1
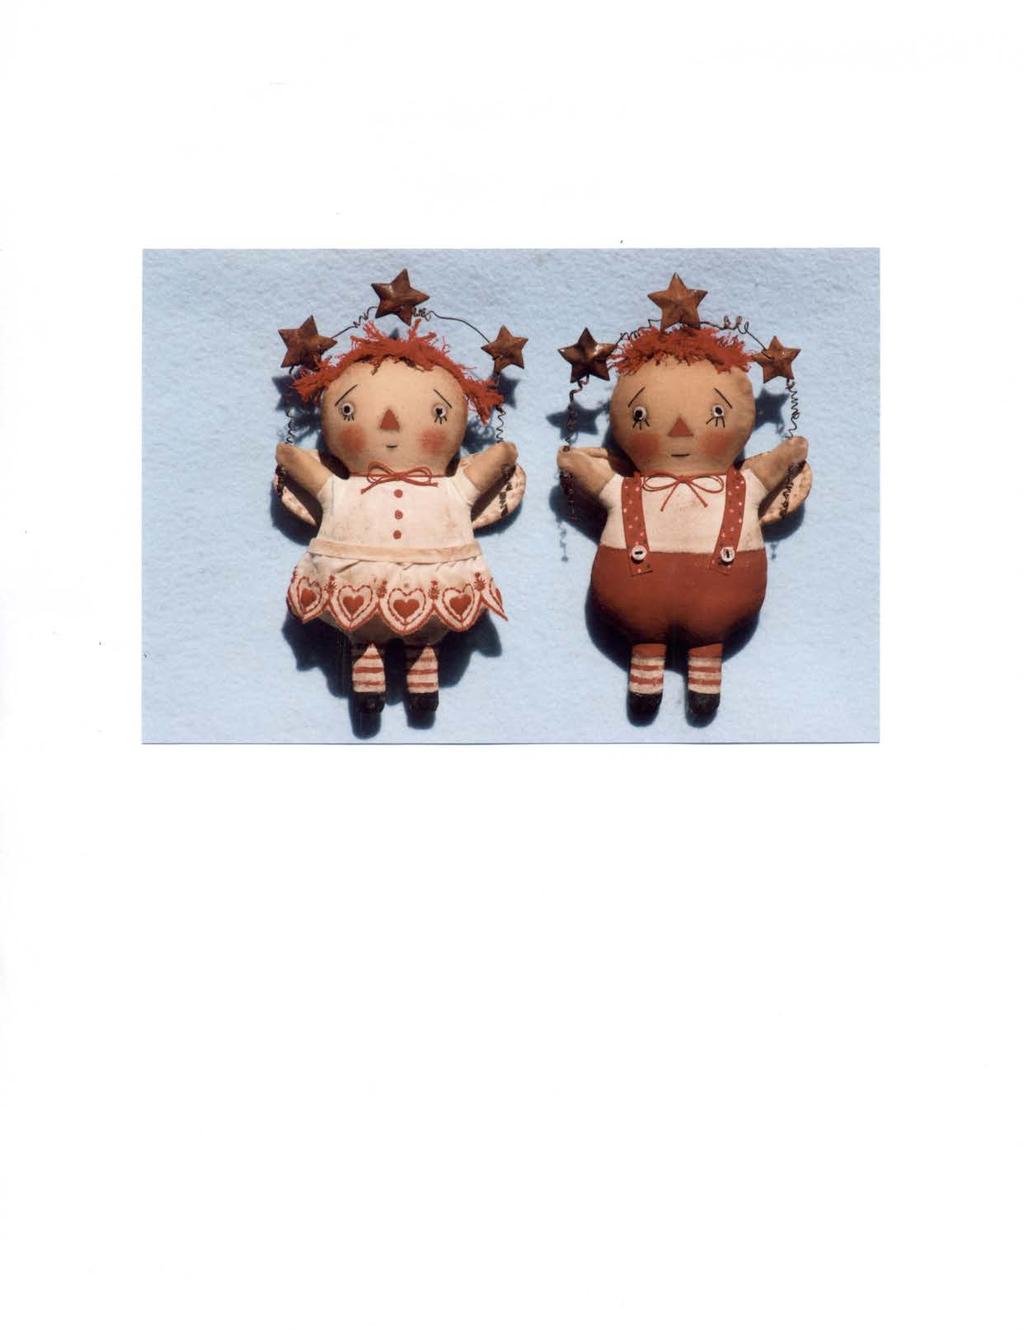
3 Country Commandments Stitchery in the middle of the illustration board - use an old credit card (or a square piece of cardboard) - skim the glue over the board to cover it but not so much that it will seep through the batting - roll the cotton batting up and then align the top edge of it to the top edge of the illustration board - allow rest of batting to unroll down onto illustration board (working from top to bottom) so the batting is centered onto the illustration board press batting down, smoothing it out so it is flat on the illustration board. Let batting/ board dry it will have a tendency to bow from the wet glue so place it flat, carefully put the 8 X 10 glass from the frame on top of it and then put a light weight (I used my 16oz. tacky glue) on the glass to hold it flat keep it like this for an hour or so until glue dries and batting/board is dry and flat. 7. Carefully place the 8 X 10 glass over the stitched country commandments so they are centered under the glass use a pencil and draw around the glass carefully remove glass and put aside you have penciled a frame around the country commandments. Tear two ½ X 9 strips of fabric and two ½ X 11 strips of fabric to frame the commandments. Put white glue on your finger and spread it down and along one 9 strip (on the back or wrong side of the strip), spreading on just enough glue to almost cover the fabric strip, but not so much it will seep through fabric strip. Place this strip (glue side down) onto the bottom of the commandments so that the bottom edge of the fabric strip is just above the bottom pencil line press fabric strip down onto stitchery. Repeat this same process with the other 9 fabric strip gluing and placing right below the top pencil line you drew. Iron top and bottom fabric strips on stitchery to flatten them and dry the glue. Repeat this same process with the other two 11 fabric strips, gluing and placing them to the inside of the pencil lines (on left and right sides) you drew at the sides of the commandments. Iron fabric strips and entire stitchery. 8. Place the stitchery over the cotton batting side of the batting/board (the nicely stitched side is up) match the fabric strip frame to the sides of the batting/board slip a few pins into stitchery (the fabric strip frame) here and there to hold it in place. Turn stitchery over to back side (illustration board side). Notice that you have extra muslin sticking out on all sides (diagram 1). Spread a line of white glue along excess muslin at top spread a line of white glue along excess muslin at bottom (see diagram 1 again). Fold the excess muslin (at the top and bottom) over and onto the board (pull slightly so muslin is snug) and glue in place (diagram 2 check right side of stitchery to see if fabric frame is straight). Fold and glue all 4 corners in (diagram 3). Spread a line of glue along the right side of the excess muslin (diagram 4). Fold the right side over onto the back of the illustration board (see right side of diagram 5). Spread a line of glue on left side of excess muslin (see left side of diagram 5) fold left side over onto back of illustration board (diagram 6). Check to see if side fabric frame strips are straight. Remove pins in stitchery and let glue dry. 9. Carefully place glass into wood frame - make sure glass is clean. Place the Country Commandments stitchery into the frame. Close back of frame and secure with little attached tabs. Make the Raggedy Angel Girl and Boy (steps 11 through 24). 10. Attaching the Girl or Boy Angel to the Wood Frame of the Stitchery The best way to attach the angels to the wood frame is to use a strong glue this will keep them flat and fairly close to the frame. I originally tried using Velcro to attach the angels but they were too far from the frame and didn t look right. Use silicon glue for this step (it has body to it) squeeze some glue onto the back of each angel place the angel onto the wood frame (make sure any little legs don t go past the bottom of the frame) place a little weight on top of the angels to hold them down let glue dry remove weight and hang frame up or set it on a table or in a shelf! Making the Girl and Boy Raggedy Angels 11. The Little Girl & Boy Raggedy Angels Trace the little raggedy girl & boy patterns onto doubled muslin (they are really the same pattern). Machine stitch all around the little raggedy angels on Happy Heart Patterns Page 2
4 Country Commandments Stitchery the traced lines. Cut the raggedy angels out a generous 1/8 away from the stitching. Clip seams at all inward curves between legs, under arms and at neck (at neck I cut the seam more like a v ). Draw a vertical slit line on the back of each raggedy about 2 long (see boy pattern). Cut slit lines through one layer of fabric only. Turn raggedy angels RSO through slit openings. Stretch sewn bodies between legs and at sides of neck to ease fabric out. Stuff the raggedy angels with polyfil and then neatly whip stitch the slit openings closed (the slit side is the back side). 12. Coffee Staining the Raggedy Angel Bodies Make a coffee stain using 1 teaspoon of instant coffee and 1/3 cup of hot water in an old coffee cup. Use the sponge brush and brush the coffee stain all over the angel bodies. Let stain dry naturally out in the sun or oven dry. To oven dry: place raggedy bodies on a foil lined cookie sheet that has a piece of batting on top and place in a low temperature oven (200 degrees) for 5 to 10 minutes, turning bodies over, halfway through drying time. Please don t leave oven unattended! 13. Refer to the girl and boy angel patterns - use a pencil and draw the outfit lines onto the bodies. 14. Painting the Girl Angel Use the medium round brush and paint the girl angel light ivory from her neck line down to the bottom of her feet and also the sleeve part of the arms let paint dry. Lightly sand painted part of body. Use the small round brush and paint 4 red stripes on each leg (leave room for the shoes) use the handle end of the brush dip it into red paint and dot 3 red buttons down the front (upper) part of her body let red paint dry. Paint the shoes black let paint dry lightly sand the shoes. Use the burnt umber pencil and shade the ends of the sleeves. Use a Q-tip and blend shading out onto arms. 15. Painting the Boy Angel Use the medium round brush and paint the boy angel s shirt and the legs (below the pant legs) light ivory let paint dry. Lightly sand painted shirt and legs. Use the same brush and paint the boy s pants red let dry. Lightly sand the boy s pants. Use the small round brush and paint 2 red stripes on each of the legs (leave room for the shoes) let paint dry. Paint the shoes black let paint dry lightly sand the shoes. Use the burnt umber pencil and shade the ends of the sleeves shade the ends of the pant legs shade the top waist of the pants. Use a Q-tip and blend shading out onto arms, down onto legs and from waist, up onto shirt. 16. The Girl and Boy Angel s Face Use the pencil and draw the nose in the middle of the face. Use the small round brush and paint the nose red let paint dry. Use the pencil and make 2 dots where the eyes will go draw a little mouth and eyebrow(s) over the eyes. Cut 2 tiny circles of muslin and glue them over the eye dots (use white glue). Thread a long piece of black crochet thread in the 3 needle and knot the end. Poke needle into the top of the angel s head and exit needle out of one muslin eye (just off center a bit) make a 2 wrap French knot and poke needle back into muslin circle (just off to other side a bit so knot is centered) and exit needle over to other muslin eye circle repeat process with other eye - exit needle to top of head again, tack and cut thread. Use the pencil and draw 3 lashes under each eye. Double thread needle with (all-purpose) black thread and knot end. Poke needle into top of head and come out at one eyebrow stitch the eyebrow and exit the needle down to one eyelash stitch eyelashes exit needle to mouth and stitch the mouth reverse the process to stitch rest of face exit needle to top of head again, tack and cut thread. Use the dark umber pencil and shade around the eyes, nose and under the mouth blend shading out into fabric using a Q-tip. Use the red pencil and shade red cheeks onto the face blend shading out into fabric using a Q-tip. 17. Distressing the Angel Bodies - Squeeze burnt umber paint onto a paper dish. Get a damp paper towel (I like to wet my hands and then dry them on a paper towel for the perfect wetness) and wad it up into a ball. Dip the wadded up towel into the paint and then move it on the paper dish in a circular motion to distribute the paint on it evenly (if you have too much paint on towel, dab it onto a dry paper towel you want the paint on the damp paper towel almost dry). Rub the towel/paint over the painted parts of the body to get the feel/idea of how to stain/distress with the Happy Heart Patterns Page 3
5 Country Commandments Stitchery burnt umber paint by wiping it onto the doll s body. Now rub burnt umber paint very lightly over the ends of the arms and along the sides of the head. For the girl angel, distress the piece of 9 gathered lace you are using for her dress skirt with the burnt umber paint. For the boy, distress the 8 piece of red ribbon you are using for the pants straps with the burnt umber paint. 18. Finishing the Girl Angel - Glue the distressed 9 gathered trim around the girl angel s waist (ends overlapped in back) to give the idea of a dress. Use red crochet thread and tie a bow around the angel girl s neck. 19. Finishing the Boy Angel - Pants straps find the middle of the distressed red ribbon and glue it to the back neck of the boy angel bring ends of the ribbon over the boy s shoulders and down onto the waist of the pants in the front glue ends of straps to pants. Stitch black (all purpose) thread through 2 white buttons and tie off. Glue buttons to ends of pants straps. Tie a piece of red crochet thread around the boy angel s neck, tying it into a bow. 20. Hair for the Angels The hair will cover knots/tacks at the top of the angel heads. Girl: cut five 5 pieces of red yarn. Use red thread and stitch the middle of the yarn pieces to the top of the girl s head stitch yarn to sides of girl s head leaving pigtail ends. Make a small yarn pompom and stitch it the middle of the hair for bangs. Boy: make 3 small yarn pompoms and stitch them to the top of the boy s head using red thread. 21. Making the Wings for the Girl and Boy Angels The directions are for one wing, but make 2 wings. Cut 2 pieces of muslin 3 x 6 and cut one piece of batting 3 x 6. Center and trace the wing pattern onto one piece of muslin trace the slit line on cut the slit line. Place the muslin with the traced wing directly on top of the other (plain) muslin piece place both pieces of muslin directly on top of the batting piece (you have 3 layers) pin layers together inside wing tracing. Machine stitch all around the wings on the traced line through all 3 layers. Cut wings out a scant ¼ from stitching. Turn wings RSO through slit opening (the batting will be sandwiched in between the 2 pieces of muslin). The good side of the wings will be the slit side. Using doubled all-purpose off white thread, take a running stitch around the outside edge of the wings, then whip stitch the opening closed. Iron wings flat if too puffy. 22. Paint the wings light ivory let paint dry lightly sand the wings. Distress the outside edge of the wings by lightly wiping them with the burnt umber paint. Use the red marker and draw red stitches around the edge of the wings (on the stitched slit side) between the stitches already there. Hot glue the wings (the stitched slit side) to the back of the angel. 23. Making the Star Banner You will need 3 small rusty stars for each banner. My stars had little holes in them because they were attached to a garland. If you can t find stars with holes you can wrap the rusty wire around the little stars to hold them in place on the banner. Use a wire cutter and cut a 24 piece of thin rusty wire (cut a 36 piece of wire if you are wrapping the stars on). Attach (or wrap) the middle of the wire to (or around) one star curl wire on a toothpick for about 1 ½ on each side of the star. Attach or wrap stars to the wire on each side of the centered star. Curl the wire 1 ½ beyond the side stars leaving some wire just straight on the ends. Use a large needle and poke it through both of the angel s hands (from top to bottom) to make a way for the wire thread the straight wire ends through the needle holes in the hands curl wire under hands to secure the star banner to the angel. 24. A Hanger for Angel Girl and Boy Ornaments Thread red crochet thread into needle take a big stitch through the bottom back of the head pull needle off thread and even up thread ends tie an overhand knot in the thread ends making a loop hanger trim off excess thread beyond knot. This company cannot be responsible for printing error, human error or individual workmanship. All designs and photos are protected by copyright and may not be reproduced for commercial use (including enlargements or reductions) without prior written permission. Happy Heart Patterns Page 4
6
7
8
9
10
 Supplies WARM AND NATURAL COTTON BATTING FIBER FILL STUFFING COTTON PRINT FABRIC FOR DRESS OLD LIGHT WEIGHT SWEATER TO CUT UP SMALL PIECE OF MUSLIN FOR CANDY RABBIT PLAID-APPLE BARREL NUTMEG BROWN CRAFT
Embroidery Floss: To match cuff, black, red, and to match doll's dress. 2 Rusty bells (medium size) or use rusting recipe below
 or use rusting recipe below") Approximately 18 inches tall You Will Need: Material: Material for stocking and cuff. Scraps of muslin, tea-dyed muslin, brown flannel (gingerbread man), material for snowman's hat & scarf, doll's dress,
Approximately 18 inches tall You Will Need: Material: Material for stocking and cuff. Scraps of muslin, tea-dyed muslin, brown flannel (gingerbread man), material for snowman's hat & scarf, doll's dress,
Kitschy Friend. Finished Size Approximately 23½in (60cm) tall
 tall") 1 Kitschy Friend This fun lady will always raise a smile, especially if you give her as a gift to your friends. We chose certain fabrics, with details given in the instructions, but you can easily replace
1 Kitschy Friend This fun lady will always raise a smile, especially if you give her as a gift to your friends. We chose certain fabrics, with details given in the instructions, but you can easily replace
Sewing. # Yanna Jo Doll. Fulk-size Patterns for 22" Doll and Clothing
 Sewing LeisureArtsLibrary.com #800613 Yanna Jo Doll Fulk-size Patterns for 22" Doll and Clothing Click Here to sign up for the FREE Leisure Arts E-newsletters at www.leisurearts.com to receive free projects,
Embroidery thread: Black, cream. Three small 1/2 inch rusty bells. Cream colored flannel scraps. Mechanical pencil. Sandpaper
 Approximately 8 inches tall when completed. You Will Be A Needin: Muslin Stuffing Acrylic Paint: Black paintbrush Six 5/8 inch black matte buttons Three small 1/2 inch rusty bells Doll needle ( 3 or 5
# Holiday Hanna Witch
 Tan or tea stained fabric for head and arms Deena s Shirt and bloomers....plain print Apron. 29 x 7 of print Apron straps.(2)1 x 5 pieces Apron ties (2) 1 x7 Body Muslin #174 19 Holiday Hanna Witch Witch
Muslin Snow Family. Sewing # Approx Finished Sizes: 19", 12½", & 4½" h. 3 Designs by Susan Brack
 Sewing LeisureArtsLibrary.com #800468 Muslin Snow Family 3 Designs by Susan Brack Approx Finished Sizes: 19", 12½", & 4½" h Click Here to sign up for the FREE Leisure Arts E-newsletters at www.leisurearts.com
Josephine Doll Pattern
 Josephine Doll Pattern Making these dolls means pulling out your scrap bin and button box and having a wonderful time pairing up patterns and prints. Each doll has felt hair and some have felt balls as
Christmas Mousie In A Can
 Christmas Mousie In A Can E-Pattern 2008 designed By Dee Duncan for Ginger and Company Christmas Mousie In A Can E-Pattern 2008 Mouse: Cut out mouse pattern and pin to your natural muslin fabric and cut
Materials. 1 Cut out the pattern pieces for the doll. Cut out the pattern for the arms and legs twice in mirror image.
 Making the doll All the dolls are made from the same pattern (see Doll Template). The body and head are the same, only the facial expressions and the hair change. Carefully follow the instructions below,
MATERIAL REQUIREMENTS:
 This pattern contains a pattern for a 30-inch doll. The doll may be made of flesh, tan or peach broadcloth, percale or any plain cotton material. Use six strand cotton for embroidering features and straw
Copyright Bumblebee Linens LLC
 Crafts Instructions Included 1. Hankie Wedding Dress 2. Pillowcase Dress 3. Hankie Bonnet 4. Hankie Pin Cushion 5. Hankie Angel 6. Hankie Bunny 7. Pillowcase Reusable Grocery Bag 8. Linen Towel Drawstring
Pajama Sock Monkey 2009 Cutest Creations
 Materials needed: Pajama Sock Monkey 2009 Cutest Creations 1 pair of size Large Brown Red-Heel socks can be purchased from my online store www.ohboyorgirl.com Black embroidery thread Other color embroidery
AMY S GURUMIS MANUAL TABLE OF CONTENTS. Yarn Weight and Hook Size. Tips and Tricks p. 3. Magic Loop p.5. Attaching Limbs p. 7. Puppets p.
 AMY S GURUMIS MANUAL version 1 December 2015 amysgurmis Everything you need to know to assemble your own delightful amigurumis! This manual does not include instructions on how to crochet. If that s what
Table of Contents. Crafts
 Crafts - Section I Table of Contents Crafts Aardvark to Zebra... I-3 Special Furniture Techniques... I-4 Stretchy Bracelet Jewelry... I-4 Miss Kitty...I-5 Patterns for Miss Kitty and Miss Annie...I-6 Miss
Make a dimensional candy holder with embroidery and quilted accents.
 By Evy Hawkins Santa Claus is coming to town and he has two bags of treats for good little girls and boys! A delightful addition to your holiday décor, this embroidered treat holder is assembled using
Ornament Dolls: A Doll Project Tutorial. Ornament Dolls
 1 Ornament Dolls These 6 (15cm) mini dolls make perfect holiday ornaments or small gifts! The faces are sealed paper, which makes these dolls fast and easy to create. Try printing and drawing your own
Page 1. Jumblenut. The Head. Design by Barbara Allen
 Page 1 Needle felting Needle felting is quite different from creating felt by shrinking wet wool. There s no water involved, it requires very little space and creates no mess at all. It s a craft that
SMURF s. Amigurumi Pattern. This pattern is protected under Creative Commons Attribution- No Derivative works 3.0 Unported License
 SMURF s Amigurumi Pattern Designed by Sherry www.chiwaluv.etsy.com This pattern is protected under Creative Commons Attribution- No Derivative works 3.0 Unported License By purchasing our patterns: 1.
Lyly and Lip Giraffe RNata COPYRIGHT:
 Lyly and Lip 19.03.2018 Giraffe RNata COPYRIGHT: This is a pattern designed and written by RNata. It s for personal use only. You may not sell, share (printed or online), reproduce, distribute and alter
Skull Party Favors. Instructions:
 Skull Party Favors Treat your Halloween party guests to a frightfully fantastic table! Easy to make decorations with Tulip 3D Fashion Paint, Fashion Glitter, Iron-On Crystals and Aleene s Acid-FreeTacky
Dollytime. Tiny Topsy the tooth fairy. who are new to the craft. She measures 12cm (5 in) and is a topsy turvy or upside and added lots of pictures.
 and is a topsy turvy or upside and added lots of pictures.") Dollytime Tiny Topsy the tooth fairy As I d like to encourage e more people to knit I ve designed Tiny Topsy for knitters who are new to the craft. She measures 12cm (5 in) and is a topsy turvy or upside
Dollytime Tiny Topsy the tooth fairy As I d like to encourage e more people to knit I ve designed Tiny Topsy for knitters who are new to the craft. She measures 12cm (5 in) and is a topsy turvy or upside
Suggested Shopping Sites for Fragrance. Quick Make Small Projects Section. Quick Make Small Projects Section
 This 'n' That #3 In this E-Book you will n;' find: Staining Recipe Rusting Recipe Suggested Shopping Sites for Fragrance Oils Terms of Use Quick Make Small Projects Section Quick Make Small Projects Section
The Panty Pack Skill Level: Intermediate
 The Panty Pack Skill Level: Intermediate http://www.pellonprojects.com Designed By Michelle Dorsey Sewn By Michelle Dorsey What girly girl wouldn t want a special bag to hold her delicate undies when she
HOW TO MAKE A COMPOSITION ZISA DOLL
 HOW TO MAKE A COMPOSITION ZISA DOLL WITH STUFFED FELT BODY AND 3D PRINTED HANDS AND HEAD A composition doll is made of different materials, in this case the body and limbs are sewn in felt and then padded,
CAMELOT FABRICS. 3. Draw a vertical line on the pointed end of each Strap, a tiny bit longer than the diameter of your buttons.
 Other Supplies - 2 buttons in coordinating color - paper printer - basic sewing supplies - sewing machine with buttonhole foot - iron & pressing surface - scissors & fabric shears - measuring tape - fabric
Bunny Doodle Pad great for journaling or child s drawing tablet!!
 Bunny Doodle Pad great for journaling or child s drawing tablet!! Materials Needed: 1/2 yd print inside fabric of cover and binding of inner pockets 1/3 yd. coordinating print outer fabric of cover 1/4
Small Light Fabric: 9 x 4.5 Medium to Dark Fabric: 4.5 x 4.5
 Havf a Heart Heart Ornament or pincushion in 2 sizes Tracy L. Chapman & Sew Thankful Inc. December 2011. All rights reserved. Permission to copy and distribute this complimentary pattern at no charge to
1. Print our the Fox Hat pattern (pages 8-11 of this tutorial) at 100% of actual size. Cut out the
 at 100% of actual size. Cut out the") Other Supplies - 2 black buttons (for eyes) - One bag of fiber stuffing - Paper printer - Basic sewing supplies: - sewing machine - needle & coordinating thread - straight pins - scissors & fabric shears
Other Supplies - 2 black buttons (for eyes) - One bag of fiber stuffing - Paper printer - Basic sewing supplies: - sewing machine - needle & coordinating thread - straight pins - scissors & fabric shears
Jamie - 11 Soccer Bear
 Jamie - 11 Soccer Bear Artist Designed Bear with Flexlimb by Laura Matthews of TeddiesbyLauraLynn.com and FreeTeddyBearPatterns.NET This is not intended to be a child s toy due to the glass eyes and pellets.
Table of Contents. Pom-Pom Bookmark Yarn covered Pencil Holder Yarn Hangers... Yarn Hair Bows
 1 Table of Contents Pom-Pom Bookmark... 3-5 Yarn covered Pencil Holder... 6-8 Yarn Hangers... 9-11 Yarn Hair Bows... 12-14 Tassel Necklace or Gift Wrapping... 15-17 No Knit Infinity Scarf... 18-20 Braided
BONUS DOLL PATTERN: ILMARIA: GUARDIAN OF THE STARS 16-INCH (43CM) ALL CLOTH DOLL 2009 PATTI MEDARIS CULEA
 ALL CLOTH DOLL 2009 PATTI MEDARIS CULEA") BONUS DOLL PATTERN: ILMARIA: GUARDIAN OF THE STARS 16-INCH (43CM) ALL CLOTH DOLL 2009 PATTI MEDARIS CULEA 1 Ilmaria Cloth Doll Making Supplies 1/3 yard/meter White 100% Cotton Fabric for the body Thread
BONUS DOLL PATTERN: ILMARIA: GUARDIAN OF THE STARS 16-INCH (43CM) ALL CLOTH DOLL 2009 PATTI MEDARIS CULEA 1 Ilmaria Cloth Doll Making Supplies 1/3 yard/meter White 100% Cotton Fabric for the body Thread
Gather your old holiday sweaters and get crafting with these festive projects as seen in the
 SWEATER WEATHER Gather your old holiday sweaters and get crafting with these festive projects as seen in the December 2014 issue of Better Homes and Gardens magazine. produced by paul lowe photos alexandra
19" emily, Jenny, & Portrait Dolls. By Dianna effner. Body Pattern and Construction. Strip
 Original Designs for the Doll Industry, Inc. PO BOX 174 JAMESTOWN, MISSOURI 65046 19" emily, Jenny, & Portrait Dolls Copyright 2001 By Dianna effner Body Pattern and Construction ArmATure ConSTruCTIon
Lesson 2 CREATING THE SKIRT: LACE SHAPING
 1 Extension 1 Extension Lesson 2 CREATING THE SKIRT: LACE SHAPING For this lesson we will be working with the skirt pieces one skirt front and two skirt backs and your lace insertion. Are you ready to
Whimsy Rose. Party Dress. By Khristal Jouett. Pattern Adaptations and Construction Notes Continued from Issue #139
 Whimsy Rose Party Dress By Khristal Jouett Pattern Adaptations and Construction Notes Continued from Issue #139 View the Whimsy Flower Tutorial in Tutorials & Video Tips www.sewbeautifulmag.com 1 DESIGN
Easter Bunnies. Finished Size Approximately 11½in (29cm) tall. Fig A
 tall. Fig A") 1 Easter Bunnies These sweet bunnies make cute gifts at any time of year. We chose certain fabrics, with details given in the instructions, but you can easily replace these fabrics with others from the
1 Easter Bunnies These sweet bunnies make cute gifts at any time of year. We chose certain fabrics, with details given in the instructions, but you can easily replace these fabrics with others from the
PAXTON VALLEY FOLK ART BOX 38, MONTE LAKE, B.C. CANADA V0E 2N0
 PAXTON VALLEY FOLK ART BOX 38, MONTE LAKE, B.C. CANADA V0E 2N0 paxtonvalleyfolkart@gmail.com www.paxtonvalleyfolkartshop.blogspot.com www.paxtonvalleyfolkart.blogspot.com www.artfire.com/users/paxtonvalleyfolkart
Sasha Sundress, Knickers, Bolero & Flip-flops
 Sasha Sundress, Knickers, Bolero & Flip-flops Materials: 0.5 metre Cotton Fabric 0.25 metre fabric for lining Bolero 0.5 metre 1/4 wide elastic for Waist and legs 2 Snap Fasteners Small Beads or Sequins
Flannel Apron with Rick Rack Accents
 Published on Sew4Home Flannel Apron with Rick Rack Accents Editor: Liz Johnson Wednesday, 06 March 2019 1:00 An apron in flannel makes for some cozy cookin'! We created our original sample from fat quarters,
Kitchen Crafts Hot Potatoes
 Half Apron Size: 28 W x 31 H Pot Holder Size: 9 x 6 ½ Placemat Size: 18 x 13 Tote Bag with Pockets Size: 21 W x 16 H x 6 D Designed by: Phyllis Dobbs Skill Level:Beginner Toaster Cover Size: 11 W x 8 H
Scraps of Wool Felt for Calico Markings on Kitty and Penny. 3/4 Yard Warm 'N Natural for Pillow Lining. 1 Pkg. Jumbo Black Rick Rack
 SUPPLIES: 3/4 Yard Homespun Fabric for Pillow, Front and Back Fat Quarter of Beige Wool Felt for Cat's Body Scraps of Wool Felt for Calico Markings on Kitty and Penny Rug Circles 1 Skein Black Perle Cotton
Original Recipe. Authentic Toddler Wear by Angela Yosten
 Original Recipe Authentic Toddler Wear by Angela Yosten Ingredients: - 2 Dessert Rolls - if using Authentic by Sweetwater {you can make both outfits using 1 dessert roll if the roll contains 2 or more
Paint: Acrylic paint black, barn red, antique white. Embroidery Floss: Country red. Doll needle (3 or 5 inches long)
") Bits & Pieces Annie Doll Designs Basic Supplies for Dolls Only: Muslin Stuffing Card Stock Mechanical Pencil Doll needle (3 or 5 inches long) Paint: Acrylic paint black, barn red, antique white Embroidery
Bits & Pieces Annie Doll Designs Basic Supplies for Dolls Only: Muslin Stuffing Card Stock Mechanical Pencil Doll needle (3 or 5 inches long) Paint: Acrylic paint black, barn red, antique white Embroidery
Dancing Rain Dolls. Knot Doll. Created By. Amy Prentice
 Dancing Rain Dolls Knot Doll Created By Amy Prentice Copyright 2007 1 Dear Friends, This pattern is the easiest of all dolls to make. This doll will take about 2 hours to complete and is the perfect doll
School & Crayon Totes
 LeisureArtsLibrary.com Sewing #803361 School & Crayon Totes Basic Tote Design by Nancy Burdette 2 Variations by Paula Hagerman Approx Design Size: 12" x 13 3 /4" each Click Here to sign up for the FREE
A Button Owl Sewing Pattern.
 A Button Owl Sewing Pattern HELLO! Are you ready to start sewing? At the end of this fun project, you will not only have a cute BUTTON OWL, you will also be able to tell your friends that you know how
Top of the Morning Shamrock Ornies. Top of the Morning Shamrock Ornies. Lillie Mae's Crafts. By Brenda Greenwalt of Lillie Mae's Crafts
 You Will Need: Top of the Morning Shamrock Ornies Material: Green, muslin, black Embroidery floss: Black, green, dark brown Two black seed beads (eyes) Doll needle Embroidery needle Stuffing Barn red acrylic
Dolly. By Dianna Effner. Dolly Painting and Assembly Instructions. Original Designs for the Doll Industry, Inc. PO BOX 174 JAMESTOWN, MISSOURI 65046
 Original Designs for the Doll Industry, Inc. PO BOX 174 JAMESTOWN, MISSOURI 65046 Copyright 1991 Dolly By Dianna Effner Dolly Painting and Assembly Instructions SUPPLIES Slip- Bell Porcelain Doll Flesh
INSTRUCTIONS BFC716 QIH LEOPARD BAG
 INSTRUCTIONS BFC716 QIH LEOPARD BAG This bag can be done in many ways! You can stitch it as I did the medium size bag shown at the end of this document (with the Orange trim). For this bag I embroidered
Original Designs for the Doll Industry, Inc. PO BOX 174 JAMESTOWN, MISSOURI March 31, 1998 (660) fax (660) Gigi - Painting Ins
 fax (660) Gigi - Painting Ins") Original Designs for the Doll Industry, Inc. PO BOX 174 JAMESTOWN, MISSOURI 65046 March 31, 1998 (660) 849-2114 fax (660) 849-2358 Gigi - Painting Instructions GiGi 14 Gigi bydiannaefner by DiannaEffner
Original Designs for the Doll Industry, Inc. PO BOX 174 JAMESTOWN, MISSOURI 65046 March 31, 1998 (660) 849-2114 fax (660) 849-2358 Gigi - Painting Instructions GiGi 14 Gigi bydiannaefner by DiannaEffner
Happy Winter Snowman Quilt
 1 Happy Winter Snowman Quilt This quilt is sure to become a classic addition to your décor at Christmas time. Rows of fun snowmen and loving hearts are highlighted against a deep blue winter sky. The quilt
Hanging Holiday Helper
 Hanging Holiday Helper Keep all your gift wrap essentials in one place with this Hanging Holiday Helper! Made with large pockets for wrapping paper, bows, ribbon, tape, and scissors, this handydandy caddy
Thread Catcher Patern. withdetachable Pincushion and OptionalPosy
 Thread Catcher Patern withdetachable Pincushion and OptionalPosy andscisorstab Sew In Style Thr hread Catcher with Detachable Pincushion and Optional Posy and Scissors Tab Materials and Supplies Outside
Jewelry Making Techniques
 Jewelry Making Techniques ITSY BITSY LEAVES: The itsy bitsy leaves are created by taking a piece of clay about one half the size of a pea and making a small leaf shape. The leaves do not have to be exact.
shiba cube puppy plush a sewing pattern by
 shiba cube puppy plush a sewing pattern by If you ve ever sewn a cube before, this pattern takes it to the next level! The classic geometric shape forms a chubby little puppy body complete with four stubby
SUPPLIES OTHER SUPPLIES Carson 10 Teddy Bear Pattern
 SUPPLIES Fat 1/8 yd of 5/8 faux fur or mohair (sample is faux fur) 5 x 5 piece of wool felt for paw pads 11mm black glass eyes (1 pair) Small piece white felt (optional) eye whites 2 1 1/8 Joint discs
Ornament Finishing Techniques
 Ornament Finishing Techniques by Anne Gale The back of the ornament should enhance, not detract from the quality of the finished ornament. There are many ways to finish ornaments depending on type, shape
Elf On a Shelf. LOOM: KB Sock Loom 2 (KB All-n-One Loom could also be used).
.") Designed by Bethany Dailey. LOOM: KB Sock Loom 2 (KB All-n-One Loom could also be used). YARN: 1 each (or portion of 1 skein each) Lion Brand Vanna's Choice (170 yrds per skein, #4 worsted weight, 100%
Designed by Bethany Dailey. LOOM: KB Sock Loom 2 (KB All-n-One Loom could also be used). YARN: 1 each (or portion of 1 skein each) Lion Brand Vanna's Choice (170 yrds per skein, #4 worsted weight, 100%
Figure Out Your Feet!
 i s s u e 1 7 Figure Out Your Feet! By Yvonne Porcella These feel good" sewing projects give you opportunities to try a variety of specialty presser feet that make stitching easier and the results better.
Enchanted 18M to 6 Smocked shirt and triple ruffle skirt pattern *Seam allowance is 3/8 except where indicated
 Enchanted 18M to 6 Smocked shirt and triple ruffle skirt pattern *Seam allowance is 3/8 except where indicated For shirt front cut out a piece of fabric that is 44 by 18M 11.5 2T 12.25 3T 13.25 4 14.5
QUILTED FRIDGE FRAMES
 QUILTED FRIDGE FRAMES Designs by Nancy Richoux Show off your grandchildren in a themed fridge frame. PROJECT SPECIFICATIONS Skill Level: Beginner Frame Sizes: 4/" x 6/" and 4/" x 0/" SUPPLIES All-purpose
Beautiful Bouquet. Designed by Heidi Pridemore. Page All Rights Reserved The Whimsical Workshop
 O - 3/5/12 Designed by Heidi Pridemore #FR-032 Fabric Requirements: 1/3 yard of Green- for all 1/3 yard of Yellow- Daisy 1/3 yard of Orange- Daisy 1/4 yard of Pink- Poppy 1/4 yard of Yellow Print- Poppy
Maritime Knots. Materials: Directions: Red jute twine Scissors
 Maritime Knots Red jute twine 1. Measure twine to gift box size (with a little extra). 2. Cut 6 equal lengths. 3. Separate into two sets of 3 strands. 4. Form each into a loop. 5. Arrange side-by-side.
CHAPTER 1. Kid Stuff
 CHAPTER 1 Kid Stuff KID STUFF SECTION 1 Child s Necklace, Bracelet & Pin Set CHILD S NECKLACE, BRACELET AND PIN SET Designed by Priscilla Hewitt Copyright 2001 Priscilla s Crochet Materials: Hot glue or
Tiny Bunny Couple by Kathy Lewinski
 Tiny Bunny Couple by Kathy Lewinski These bunnies can be knit up in any weight yarn, the bigger the yarn, the bigger the bunnies. Just make sure to use the same weight yarn throughout the project. My girl
Merida the Brave. Abbreviations:
 Merida the Brave This doll model was made by Jo Merriman based on Fairy Doll Pattern by AmigurumiBB 2013-2014 Abbreviations: St(s) stitch(es) Sc - single crochet Sl st slip stitch Ch chain Hdc half double
The 12 DOs. of Christmas. Recycled Arts and Crafts Guide. Festive. The 12 DOs of Christmas
 Festive Recycled Arts and Crafts Guide Proud partner and page sponsors 1300 733 712 1 About this Guide Whether you re celebrating Christmas, Passover or just the summer season of festivities, we hope you
SUPPLIES. OTHER SUPPLIES Marking pen Masking tape Aleene s Stop Fraying Toothpick Basic sewing supplies (See Tools link at
 SUPPLIES 30 x 9 piece of 5/8 curly matted mohair 7 x 6 piece of wool felt or ultrasuede 8 mm black glass eyes (1 pair) 6-1 fiberboard discs (neck & front legs) 4-1 ¼ fiberboard discs (rear legs) 5 Cotterpins
This is an original pattern not intended for sale.
 Levi's Hoot! is a small quilt measuring 28" x 36" finished. It is done using the Crayola crayon tinting technique and is fairly easy to master with beautiful results! You can visit my blog site at byyourlightdesigns.blogspot.com
Designed by Melissa DiRenzo thesweetescape.ca
 instructions Designed by Melissa DiRenzo thesweetescape.ca YOU WILL NEED 3 -diameter foam ball Christmas sweater Hot glue gun and glue sticks 3/8 -wide satin ribbon Elastic thread: metallic Note: A child
sugar skull kit ty plush a sewing pattern by
 sugar skull kit ty plush a sewing pattern by sugar skull kit ty plush This pattern pays homage to the beautiful calaveras seen in Dia de Muertos art. It s a simple kitty plush with button jointed limbs
Waistline. Groin Seam. Outside Seam. Pajama Front: Right Side. Inseam
 Other Supplies - 1 yard of 2 wide elastic - paper printer - a buddy for hemming - basic sewing supplies - sewing machine - fabric shears & scissors - needle & coordinating thread - straight pins - fabric
Bound and Determined:
 Think You Don t Have Time to Create Beautiful Quilts? From quick-quilt adaptations of classic patterns to fun, fresh novelty designs, McCall s Quick Quilts provides you with a treasury of time- and effort-saving
Freestanding Mrs. Claus #12762 DESIGN
 #12762 1 DESIGN Freestanding Mrs. Claus 1 DESIGNS Note: Some designs in this collection may have been created using unique special stitches and/or techniques. To preserve design integrity when rescaling
Sew Sweet Bunny Basket
 Sew Sweet Bunny Basket Crafter level: Intermediate to Advanced Time needed: 2½ hours What you'll need Printouts of templates ¾ yd. linen fabric for basket ¾ yd. cotton print fabric for lining Pins Sharp
GHOSTS & GHOULS. This is a free pattern provided by The Red Boot Quilt Company 2017 STRICTLY NOT FOR RESALE OR DISTRIBUTION
 GHOSTS & GHOULS This is a free pattern provided by The Red Boot Quilt Company 2017 STRICTLY NOT FOR RESALE OR DISTRIBUTION The Red Boot Quilt Company GHOSTS & GHOULS Wall-hanging 40 1/2in square Trick
Level: Intermediate Beginner
 Some Bunny Loves You! Designed by Day Dreams 2012 (This is the pattern for the bunny above and depicted on Crochet 4 the Masses. See changes marked Options to make this for the Awareness Bunny) Level:
Intermediate Doll. Materials. Tools
 Intermediate Doll Tania is an elf princess who is getting ready for a grand affair. She is made with the second body pattern and the face pattern (pages 276 277 in Creative Cloth Doll Collection). The
Basic Bearmaking Instructions
 Laying out the Pattern Basic Bearmaking Instructions We recommend that you read the instructions right through before commencing. This will help you to understand the steps you need to take. Copying your
Freestanding Lace Bouquet #12454 / 6 Designs / 14 Files
 Note: Some designs in this collection may have been created using unique special stitches and/or techniques. To preserve design integrity when rescaling or rotating designs in your software, always rescale
Design, pattern, text and images are 2017 Anna Maria Horner and are intended for personal use.
 Introducing the Snuggle & Play Dress inspired by my feisty, littlest girl, Mary Anna, who loves being able to get dressed by herself every morning. The ease and comfort of the stretch knit top of the dress
B.F.F. & Sweetheart Dolls
 B.F.F. & Sweetheart Dolls Soft knitted 10 girl and 12 boy dolls Materials Yarn Washable cotton or medium weight wool Pink B.F.F. 1 ball each of pink (C1), blue (C2), yellow gold (C3), dark pink (C4) Brown
Christmas Decorations Christmas Decorations RNata
 Christmas Decorations 24.11.2017 Christmas Decorations RNata COPYRIGHT: This is a pattern designed and written by RNata. It s for personal use only. You may not sell, share (printed or online), reproduce,
Sew from bottom to top making sure you have not sewn over the cord. ( you may need to hand stitch the very top of the skirt just to be careful)
") Instructions for making a new dress for Cinderella. What you will need. 1/2 yard fabric for 4 panels of the dress, shirt and sleeves. 1/4 yard fabric for the complimenting color front panel 1/2 yard of
Instructions for making a new dress for Cinderella. What you will need. 1/2 yard fabric for 4 panels of the dress, shirt and sleeves. 1/4 yard fabric for the complimenting color front panel 1/2 yard of
A SPOOKY SLEEPOVER. This is a free pattern provided by The Red Boot Quilt Company The Red Boot Quilt Company
 A SPOOKY SLEEPOVER The Red Boot Quilt Company The Red Boot Quilt Company A SPOOKY SLEEPOVER Approx. Size 38 1/2in x 57 1/2in BEFORE THE FUN BEGINS Please read all instructions before you begin. Abbreviations.
A few notes about PDF patterns from Designs by Jude...
 A few notes about PDF patterns from Designs by Jude.... This PDF pattern requires legal size paper (8.5 x 14 ) or A4 size paper (8.27 x 11.69, 210mm x 297mm). It will not print on standard letter. Patterns
Woodkirk Academy Summer Challenge Project Textiles Technology
 Woodkirk Academy Summer Challenge Project Textiles Technology Upcycling craft has become popular in society over the last few years. There are many different ways of recycling, upcycling and re-using old
Gumnut Crochet Designs from Aus
 Size Splinter Doll Not Australian but made at the request of my adorable 3 year old grandson. Skill Level 21 cm in height Intermediate A beginner who has access to google and u- tube, should be able to
Aliphatic Resin Wood Glue. Launch Lug. Part #10009 Kevlar* Cord. Part #J0053
 ADANCED Prod No. 5014 * What you will need to build the Quest Lil GRUNT Hobby Knife * Pencil Straight Edge Aliphatic Resin Wood Sanding Sealer & Brush Spray Paint Parts and exploded view of the Quest Lil
Aimee s Dolly Apron. SAGA Stitches - A Kids Can Stitch Tutorial
 Aimee s Dolly Apron SAGA Stitches - A Kids Can Stitch Tutorial Aimee s Dolly Apron Purpose- To inspire the next generation of smockers. The Yankee Chapter of SAGA with the assistance of Denis Lamb, came
Materials. 1 Cut out the pattern pieces for the doll. Cut out the pattern for the arms and legs twice in mirror image.
 Making the doll All the dolls are made from the same pattern (see Doll Template). The body and head are the same, only the facial expressions and the hair change. Carefully follow the instructions below,
ADVANCED ROCKETRY. Page 01. What you will need to build the Quest MEAN GREEN. Parts and exploded view of the Quest MEAN GREEN. Prod No.
 ADANCED Prod No. 5013 * What you will need to build the Quest MEAN GREEN Hobby Knife * Pencil Straight Edge Aliphatic Resin Wood Sanding Sealer & Brush Spray Paint Parts and exploded view of the Quest
Dog With Fleas Play Set Crochet Pattern
 Dog With Fleas Play Set Crochet Pattern By: Donna Collinsworth Of Donna s Crochet Designs All rights are held by the author. No one can reproduce in any manner without written permission from the author
Christmas Bride. HereandAbove.com. Materials needed. Doll Preparation. by Deborah K. Lauro. Abbreviations Used. Gauge
 from by Deborah K. Lauro Abbreviations Used ch dc sc sl st st(s) tr chain double crochet single crochet slip stitchst(s) stitch(es) triple crochet Gauge With F hook and worsted weight yarn - 7 dc = 2";
Top 5 Favorite Free Sewing Patterns featuring a pattern from our friends at Riley Blake!
 ALLFREESEWING Top 5 Favorite Free Sewing Patterns featuring a pattern from our friends at Riley Blake! 1 Top 5 Favorite Free Sewing Patterns Copyright 2017 by Prime Publishing LLC All rights reserved.
Cut first cork in half in the middle (the two pieces will serve for two horses). Cut 2 corks in half lengthwise for the four legs.
. Cut 2 corks in half lengthwise for the four legs.") Christmas Cork Horse Supplies: 3 1/2 corks. 4 x 4 piece red bandanna material for bandanna (cut in half diagonally makes two bandannas). White/Black yarn for mane & tail. Two black push pins for eyes.
Christmas Cork Horse Supplies: 3 1/2 corks. 4 x 4 piece red bandanna material for bandanna (cut in half diagonally makes two bandannas). White/Black yarn for mane & tail. Two black push pins for eyes.
Delightful Miniature Purses! By Karin Buttigieg
 Delightful Miniature Purses! By Karin Buttigieg The idea for this came to me a few months ago when a customer ordered lots of miniature purse frames that I thought were pretty unattractive and I had sold
squid amigurumi free crochet pattern
 squid amigurumi free crochet pattern - squid amigurumi - 2 - introduction - squid amigurumi This angry little squid is ready to rage! The fun conical shape is adorned with two triangular fins and 8 cute
NOTES 1. Please wash, dry & iron your fabric before beginning. 2. Use a 1/4 seam allowance throughout. 3. All seams are sewn Right Sides together.
 OTHER TOOLS & SUPPLIES - fiber stuffing or fabric scraps - paper printer - 24 contrasting embroidery floss & an embroidery hoop, for eyes - 2 yds of ribbon, for hanging (optional) - basic sewing supplies: