TIMBER CLADDING & DETAIL DESIGN
|
|
|
- Karen Bradley
- 6 years ago
- Views:
Transcription


1 TIMBER CLADDING & DETAIL DESIGN Machined Timber Specialists. Unit 8 Block B, Bullford Business Campus, Kilcoole, Co. Wicklow Telephone: Fax: info@woodcomponents.ie
2 Cladding & Choice of Species Softwoods The most common choice for cladding is softwood and there are a number of alternative species suitable. The most commonly used include European Redwood, European Whitewood, Douglas Fir and Western Red Cedar. However, it is the Western Red Cedar that has the advantage over these softwoods as it is very durable, very stable regardless of constant wetting and drying and it is available in some good sizes and lengths. It does not require any treatment unlike some of the other mentioned softwoods. Other softwoods are coming onto the market, eg, Western Hemlock, Southern Yellow Pine, Sequoia, that have suitable properties for cladding but are as yet rarely used in the Ireland and the UK. The majority however are non-durable and will therefore require treatment with preservative. Tropical hardwoods There has always been a wide range of tropical hardwoods used for timber cladding, even if less frequently used than softwood and generally limited to use on more prestigious buildings. These woods include Teak, Opepe, Balau, African Mahogany, Sapele and more recently, Australian woods such as Jarrah. Currently the most commonly used Tropical Hardwood is Iroko. This is due, at least in part to the fact that it has many of the traditional properties of Teak. As it is not possible to include a full range of tropical hardwoods that are suitable for cladding, it is necessary to generalise on the typical features relevant to their use. Generally Tropical Hardwoods are stronger, more robust and more durable than Softwoods and may be a preferable choice if there is a high risk of mechanical damage, frequent wetting etc. Because of their density they are less absorbent and will react more slowly to any variations in moisture but it is still preferable to use a species referred to as a small or medium movement wood. Tropical woods are often supplied kiln dried rather than green, and if imported in log form the wood will need to be dried after cutting into boards. While many Tropical Timbers are rated as durable or very durable, this only applies to the heartwood and all sapwood should be excluded. Most tropical hardwoods are highly resistant to any treatment with preservative. Care should be taken to ensure that the timber species selected either possesses sufficient natural durability or can be treated effectively with a wood preservative. All the tropical hardwoods commonly used for cladding and listed above, can be left unfinished and in this form they will all eventually weather to grey, whatever the original colour. While tropical hardwoods can be satisfactorily finished with coatings, care must be taken with the oilier woods, such as iroko and teak. It is likely that coatings may require more frequent maintenance than when used on softwoods. If the bleached colour is acceptable, they are therefore better left unfinished and should not then require any maintenance for the lifetime of the building. Exposure to ultra-violet light will not damage these hardwoods other than bleaching out the natural colour, but the increased uptake or loss of moisture can lead to some surface checking. Because these woods are denser and stronger than softwoods, thinner sections can be used and tongued or rebated profiles are less likely to be damaged during construction or in use.
3 Temperate hardwoods As an alternative to using tropical hardwoods for cladding, there is increasing use of durable temperate hardwoods such as European Oak or Sweet Chestnut. European oak is readily available either home-grown or imported from other parts of Europe, particularly France. Home-grown Oak may not be generally available in the lengths of the imported wood, and this should be considered when designing the cladding layout. It is rated as a durable timber and can be used untreated for cladding providing sapwood is excluded. As a medium movement wood it will, if left unfinished, tend to develop small surface checks due to variation in moisture content but this will not affect the durability of the wood. Although American White Oak is technically suitable for use as external cladding, most of the supplies available in the UK and Ireland are dried to levels suitable only for internal environments. If this timber is selected, care should be taken to ensure that it can be sourced at an appropriate moisture content. It may not be sufficient to recondition timber previously dried to low moisture content levels. While kiln dried temperate hardwoods can be used in the same way as tropical hardwoods, there is a considerable economy if the wood is used green as this saves the cost of kiln drying. Because boards used for cladding are relatively thin they will air dry quite rapidly after installation but in the process the boards will shrink and tend to distort if not firmly restrained. It is important to make sufficient allowance for this shrinkage by using narrow boards and keeping fixings relatively close together. The fixings must also be designed to absorb this shrinkage without the boards developing stresses that can lead to splitting. Because the boards will tend to distort as well as shrink, fixings should be close enough along the length of the board to restrain these natural tendencies. The other characteristic of using European oak or sweet chestnut green is that both woods contain a great deal of tannin which will exude from the wood as it dries. This will appear as a black deposit on the face of the boards and will be gradually washed down by rainfall. This tannin can cause corrosion in steel and stain porous surfaces below the cladding such as brick walls or paving. Tannin may continue to be exuded for many months, and it is therefore sensible to use corrosion resistant fixings and to protect any surfaces below during this period. This is because, whilst it is possible to remove the staining from masonry or concrete, this can be a laborious and timeconsuming process.

4

5 Detail design - Timber Cladding Basic principles In principle, any Timber Cladding should be designed as a rainscreen. Assuming that the Cladding will always be subject to some penetration of moisture, a separate protective membrane will be necessary behind the Cladding largely protected from wind, rain and daylight by the Cladding itself. If there is a masonry wall behind the Cladding, a separate membrane is not usually necessary. The amount of moisture that penetrates will depend on the design of the cladding, an open-jointed system obviously allowing more moisture penetration than, for instance, a tongued and grooved design. Whatever system is used, a cavity should always be provided behind the Cladding to allow for the drainage of any moisture that penetrates the Cladding and to provide sufficient ventilation to dissipate any internally generated vapour. Ventilating the cavity will also mean that both external and internal faces of the cladding are exposed to the same ambient humidity and consequently will have a similar moisture content. This will reduce any natural tendency of the wood to distort due to any variation of the moisture content on opposite faces. Cladding support The cavity behind the cladding should not be less than 19mm wide but the width is usually determined by the size of battens necessary to fix the boards. For standard nails the battens should be at least 2.5 times the thickness of the boards to be fixed, but with improved nails (eg annular ring shank) or screws, a batten twice the thickness as the board is adequate. Horizontal boards only require to be fixed to vertical battens and these will not restrict either drainage or the vertical circulation of air in the cavity, see Figure 1. Figure 1 Typical construction: horizontal weatherboarding on vertical timber battens. Note: The drawings show cladding details on conventional timber frame construction. For other forms of construction, the details from the breather membrane out are the same.

6 Figure 2 Typical construction: vertical tongued and grooved boarding on horizontal battens and counterbattens. Vertical boards will be fixed to horizontal battens and if the boards are tight-jointed it will be necessary to introduce vertical counter battens behind these horizontal battens which would otherwise prevent drainage and vertical circulation of air, see Figure 2. Although a 12mm minimum gap would theoretically be adequate between the horizontal battens and the inner wall, counter battens of solid wood should be increased in thickness to reduce the risk of the wood splitting when the battens are nailed through to studwork or masonry behind. If the horizontal battens are only to be fixed to the counter battens, these must be of sufficient thickness to take the fixing nails. If the horizontal battens are unsupported other than at studs or counter battens they should also be stiff enough not to flex unduly when the boards are nailed to them.

7 If a board-on-board or an open-jointed type of vertical cladding is used it is not necessary to provide counterbattens as there will be sufficient ventilation and drainage behind the outer boards, through the open joints, see Figure 3. In this case it is preferable if the horizontal battens are on the top edge to shed any water outwards. When counter battens are used, the horizontal battens should be chamfered to slope inwards and drain any water into the cavity behind the horizontal battens. Support battens should not exceed 600mm spacing, whether vertical or horizontal, in order to limit the span of the cladding board and therefore its thickness. For diagonal boards it is preferable if the batten centres do not exceed 400mm, unless these are also fixed diagonally. Another reason for limiting the spacing of the support battens is that the relatively close spacing of fixings will tend to restrain any natural tendency for the boards to twist, bow or cup. To avoid infestation by insects any openings at the top or bottom of close jointed boards should be protected by an insect mesh. If insect protection is considered necessary with openjointed or board-on-board types of cladding an insect mesh layer should be stapled to the battens across the whole wall surface before the boards are fixed. Figure 3 Typical construction: board-on-board cladding on horizontal timber battens. Note: The drawing shows cladding details on conventional timber frame construction. For other forms of construction, the details from the breather membrane out are the same.
8 Board profiles Recommendations have already been made as to the suitability of particular profile for various cladding layouts and in particular the need to ensure that there is sufficient overlap or engagement of tongues to minimise any water penetration. Open-jointed systems will always be subject to some water penetration. Although the strength of the species chosen has some bearing on the thickness of board, this thickness is more likely to be determined by the profile chosen. While square cut boards might be reduced to 16mm thickness, rebated boards should never be less than 17mm thick and tongued and grooved boards also not less than 17mm thick when used externally. The thin edge of feather-edged boards should never be less than 7 mm. Horizontal Boards Horizontal boards should preferably not exceed 150mm width and for this width the vertical overlaps on square or feather-edge boards should be a minimum of 15mm. Figure 4 Horizontal boarding profiles. For shiplap or rebated feather edge boards the overlap can be reduced to a minimum 9mm but a 2mm gap should be provided between upstand or rebate to allow for possible expansion of the boards. The curved or chamfered shoulder to shiplap boards drains water away effectively and produces a strong shadowline. Horizontal tongued and grooved boards should be limited to 144mm face width, with a minimum 9mm deep groove, and 2mm clearance above the tongue when installed to allow for possible expansion. Horizontal tongued and grooved boards should always be installed tongue uppermost with the shoulder of the board at the base of the tongue chamfered to shed water away from the tongue. The underside of the board should be square cut or slightly chamfered away from the tongue. Horizontal open-jointed boards should have a 9-12mm gap at the outer face. If the top and bottom edges of the board are chamfered at different angles, the increasing gap towards the inner face will tend to reduce pressure and consequently the amount of water driven into the cavity. Chamfered edges also allow the boards to be slightly overlapped, reducing any view into the cavity and ensuring that any breather membrane behind is not exposed to direct sunlight.
9 A shiplap profile is most appropriate for this application as the curved shoulder will effectively channel water away from the upstand, providing it is sufficiently large. Simple overlapping boards are not suitable as they will let water through by capillary action or wind pressure. Tongued and grooved boards should be installed tongue up, but even so, water will tend to be drawn up the face of the tongues by capillary action which can result in sustained wetting of the joint. Figure 5 Profiles suitable for diagonal and vertical boarding. Vertical Boards Although tongued and grooved boards work effectively vertically they should not exceed 144mm face width. The tongues should be of the same size as those recommended for tongued and grooved boards used horizontally but the traditional v-joint can be used in this case. A rebated board similar to the horizontal shiplap board is frequently used for vertical boards in North Europe but rarely in the Ireland and the UK. Providing that there is a minimum 9mm overlap this profile works well vertically, and gives a strong shadow line. The simplest and most versatile arrangement for vertical cladding is board-on-board. Simple squarecut boards can be used but the width of top or bottom boards can be varied to give different visual effects. The outer board can also be shaped in different ways to add more modelling of the surface. The preferred overlap between outer and inner board should be approximately 25mm. An additional refinement is to run drainage grooves near the edges of both the inner and outer boards. When installed these grooves oppose each other and provide an effective pressure relief and drainage channel. With this additional grooving the board-on-board arrangement can even work effectively as a roof finish. Figure 6 Profiles suitable for vertical boarding.

10
11 Fixings Softwood Softwood boards are normally nailed in position. Standard wire nails can be used but annular ring-shank nails are preferred for their improved holding power. Lost-head, small head, or siding nails are suitable for most softwoods, but round-head nails are recommended for Western red cedar because small heads can tend to pull through this soft wood. Stainless Steel or Galvanised nails should also be used for Cedar due to its highly corrosive properties. Nail penetration into the batten should normally be 2.5 times the thickness of the board being fixed (2 times when annular ring shank nails are used). Nails should be driven marginally below the surface to compensate for possible shrinkage of the wood which may otherwise cause the nail heads to stand proud of the surface. Overlapping boards 100mm wide or above should be double nailed. Nails should preferably be located at quarter points in the board width, but it is important that where boards are overlapped, or in a boardon-board pattern, that the nails fixing the outer boards do not penetrate the inner boards, as this can lead to splitting of these boards. Where boards are butt-jointed the junction should always occur over battens and nail fixings should be at least 20mm from the end of the boards and this may require wider or additional fixing battens behind. For all boards to be left without a surface coating austenitic stainless steel nails should be used in order to avoid long term rust stains on the wood. This is especially important on woods with a high tannin content, where the reaction between the tannin and any ferrous metal will produce purple-black staining which cannot be removed. Stainless steel will weather to a matt grey colour similar to that of bleached wood, reducing the visibility of nails. Even if the cladding is to have a surface coating, stainless steel nails are preferred, rather than plated steel, because galvanising or other plating can be damaged when the nails are driven home, leading to corrosion. The typical low-build stain coatings applied to cladding will not provide long term protection to exposed mild steel. Hardwood Hardwood boards are normally fixed by screwing to treated softwood fixing battens. Even for boards erected close to their in-use moisture content it is advisable to overdrill the holes in the boards to provide a clearance around the shank of the screw to allow for seasonal variations in moisture content. The head of a countersunk screw will normally provide sufficient retention but using larger diameter screws with bigger heads is preferred for this reason. Restricting the board width to a maximum 150mm, and locating the screws on the quarter points of the board width, will limit the width of wood that will swell or shrink between the screws. A 2mm clearance between the shank of the screw and the hole in the board should be adequate for woods rated as small or medium movement if the boards are installed at about 16% moisture content.

12 Figure 7 Use of oversized washers to allow timber movement. However if green wood is to be used considerable shrinkage of the wood will take place between the fixings. It is advisable in this case to predrill the boards to provide a 4-6mm clearance between the shank of the screw and the hole. As the head of the screw will not then be large enough to hold the board it will be necessary to fit washers under the screw heads in order to provide sufficient cover. The washers can be slotted to allow them to move with the wood, although care must be taken in aligning the slots and ensuring that the screws are in the outer ends of the slots initially. Alternatively drilled washers can be set into recessed holes in the wood which are sufficiently oversized to allow movement between the washers and the wood. Roundhead or panhead screws are normally used with washers, but there are also various sheeting screws available with built in washers and these have been successfully used for fixing green wood. They have the additional advantage of including a compressible rubber seal under the metal washer which will keep pressure on the boards even if they shrink in thickness. The use of large screws particularly in conjunction with metal washers, will have a strong impact on the appearance of the cladding. While this might often be desirable, sometimes concealing the fixings is preferred. One way of achieving this is to assemble the boards into panels by screwing through the battens into the back of the boards. It is possible to get sufficient screw retention in the thickness of a hardwood board but this is not feasible with a softwood board. In this case adequate clearance holes must be provided in the battens rather than the boards. The panels can then be fitted as a whole to the face of the building, either by screwing back the battens through open joints between the boards or screwing right through both the boards and battens and pelleting these holes after the panels are in place.


13 Figure 8 'Secret fixing. An alternative method of secret fixing horizontal boards is to hold each board on metal clips fixed to the vertical battens, which engage in a slot in the underside of the board. The top of the board is then held by screwing through the rebated upstand. This is a similar principle to tongued and grooved boarding, but the upstand of the clip can be long enough to allow for considerable shrinkage in the board width and is both easier to engage and less liable to damage than an extended tongue. An additional advantage is that the bottom edge of abutting boards fixed to the vertical batten can be held and aligned with a single wide clip. This system is best suited to an open-joint type of boarding. The clip system however requires careful design for each specific use taking into account the likely shrinkage, species, thickness of board and other characteristics. Screw fixings should be at least 40mm away from the ends of hardwood boards to avoid splits developing. At butt joints it is usually necessary to have separate fixing battens for the ends of each board. This is best accommodated by panelising the board layout so that the ends of boards always occur in line. All unfinished hardwood boards should be fixed with austenitic stainless steel screws and any washers or clips should be of the same material. Even if the boards are to be stained or painted, stainless steel screws are preferable as any damage to a plated screw during fixing can result in corrosion and staining. However, if the boards are to be directly fixed to mild steel or galvanised members, electrolytic action may occur between the metals if stainless steel fixings are used. For this reason it is always preferable to introduce wood battens between the boards and any metal framing. The boards can then still be fixed to the battens with stainless steel screws but plated screws or bolts can be used to fix the battens to the steelwork. Relating timber cladding to building configuration The overall visual quality of timber cladding will be very dependent on the details relating it to building configuration such as corners, changes of level, parapets, openings, junctions with other materials etc. These conditions need careful consideration, particularly in relating the natural dimensions of the cladding system to other elements of the building. Openings Most areas of timber cladding will either contain openings for windows or doors, or be contained within a dimensional framework determined by areas of glazing or a regular pattern of windows. Ideally any openings should be in multiples of the chosen board width to avoid the need to notch or split boards. Even diagonal boards have dimensional implications if the end of boards are not to require notching. Having to notch or split boards around openings is difficult practically and can lead to poor appearance. A dimensional relationship is particularly important between openings and board widths for board-onboard cladding otherwise the pattern of boarding may end up being different on either side of an opening. If the sizes and locations of openings are already determined, it may be necessary to choose a size of board, or vary the amount of overlap, specifically to relate to the predetermined dimensions of the openings. It is also important to consider the three dimensional relationship of flashings, sills and dpcs around any openings formed in the timber cladding to ensure that any water is drained away to the outside of the wall.
14 Figure 9 Typical elevation detail of window in horizontal boarding. Figure 10 Typical elevation detail of window in vertical board-on-board cladding.


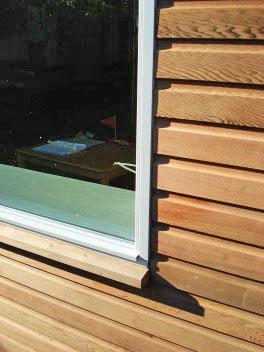


15 Pictures of some Timber Window Reveals
16 Board layout It has already been noted that there are limits on the length of board likely to be available in any species. In softwood a reasonable maximum length would probably be about 4.8m, although longer lengths might be available to special order. For tropical hardwoods, depending on the species, maximum lengths between 4.0 and 5.0m might be the limits. For temperate hardwoods such as European oak while 3.6m may be the maximum length available, lengths of 2.4m would be more easily obtainable, particularly in home-grown wood. The reason for considering these dimensions is that they can have a significant impact on how the pattern of cladding will relate to the overall dimensions of the building elevations either vertically or horizontally. Another consideration should be the structural module of the building, particularly if the cladding is to be directly fixed to a timber or steel framed structure. Non-orthogonal shapes ie curved surfaces in plan, section or elevation, or angled facades need careful choice of cladding. These may determine whether vertical, horizontal or even diagonal board layouts are the most practical. For instance a shallow angle pitched façade can be more easily accommodated by cutting the ends of vertical boards, than tapering horizontal boards, but for steeper angles either method is suitable. Using diagonal boards can sometimes simplify the junction with sloping planes. Junctions with other materials Where timber cladding with a cavity behind abuts walls of other material, either at re-entrants or in line, it is not usually necessary to introduce an additional dpc if there is already a breather membrane which can be extended around to the edge of the wall and held tight against it by a vertical batten. This applies if the connection is to the outer leaf of a cavity wall, but if the cavity is in line, or behind a vertical dpc between the leaves, this dpc should be extended to cover the joint between any framing or sheathing and the wall. Compressed bitumen, wax or neoprene loaded foam sealing tapes may be preferred to dpc s or mastic in these locations, because they maintain good contact over uneven surfaces and will continue to expand to fill any gaps even if there is shrinkage or movement at the interface between the wall and any timber component. Whatever junction is made between battens and the abutting wall it is important that there is at least an 8-10 mm gap between the wood and any other wall material. Corners The detailing of both external and internal corners in timber cladding will have a strong visual impact, and should be related to such features as the detailing of the cladding around window openings. In horizontal cladding, whether overlapped or flush, window openings were traditionally surrounded with an architrave section which covered the cut ends of the boards and the edge of the window frame. Corners were therefore treated in a similar way, with cover boards over the ends of the boards. It is now more common to stop the boards short of a fully expressed window frame, creating a shadow gap all round. This requires a high standard of workmanship in cutting the boards, particularly if they are overlapped. The window frames are then usually carried forward flush with the ends of the boards. Transferring this principle to the corner, means that a solid corner piece is required flush with the outer face of the boards in the same relationship as the window framing. This can be achieved either with a solid square section, or by forming an L-shaped corner. An L-shape is sometimes reversed to emphasise and create a reentrant corner.
17 Can be produced in a solid L shape section
18 Can be produced in a solid L shape section


19 Shadow Gap Mitred Corner details


20
STRUCTURAL PERFORMANCE OF TIMBER EXTERNAL CLADDING
 STRUCTURAL PERFORMANCE OF TIMBER EXTERNAL CLADDING David Crawford 1 Dr Robert Hairstans 2 Ivor Davis 3 ABSTRACT: Although timber cladding has been used for centuries, the current design guidance for timber
Secret Fixed Shiplap rev OCT External Cladding. 70x19mm Secret Fixed Shiplap 1
 External Cladding 70x19mm 1 External Cladding V Joint Shiplap 1.0 PRODUCT Radially sawn secret fixed Shiplap provides a stylish and strong alternative to traditional softwood or manufactured cladding systems.
External cladding technical instructions
 External cladding technical instructions Contents External cladding technical instructions... 1 General... 2 Vertical cladding... 3 Horizontal cladding... 5 Lower end of the cladding and the plinth...
V Joint Shiplap rev OCT External Cladding V JOINT SHIPLAP 1
 External Cladding V JOINT SHIPLAP 1 External Cladding V Joint Shiplap 1.0 PRODUCT Radially sawn V joint Shiplap provides a stylish and strong alternative to traditional softwood or manufactured cladding
Natural Wood Siding. Installation Procedures
 Natural Wood Siding Installation Procedures Priming & Prefinishing Material which has been properly seasoned, stored and handled will often pick up moisture after installation but prior to finishing. Later,
Eaves Lining Installation Guide
 Eaves Lining Installation Guide feb 13 Design Pine Eaves Lining - Installation Like most building products, Design Pine eaves lining has both advantages and limitations therefore a clear understanding
Installation instructions: Elements Vulcan+ Newport Hector Cladding
 Technical Data Wood Species Thermally Modified Softwood (Pinus Radiata) Images Profile Newport Hector - Light Band Sawn face - Secret fix 5.4 6.0 8.5 3.0 25.0 3.0 111.0 3.0 12.0 R 3.0 7.0 7.0 123.0 15.0
50948-RHN Putney. 06 January This document includes: Aluminium strip/ sheet coverings/ flashings 1. Code Section Revision Dated
 50948-RHN Putney 06 January 2018 This document includes: Code Section Revision Dated H72 Aluminium strip/ sheet coverings/ flashings 1 Table of Contents Title H72 Aluminium strip/ sheet coverings/ flashings
Ulltraclad Aluminium Cladding. Contents. 1.0 General Information Design Information Installation Information 7. 4.
 Ulltraclad Aluminium Cladding Contents 1.0 General Information 2 2.0 Design Information 4 3.0 Installation Information 7 4.0 Maintenance 10 5.0 Health & Safety 10 1 1.0 General Information 1.1 Introduction
PANELTEK ENGINEERED SIDING/PANELLING INSTRUCTIONS
 PANELTEK ENGINEERED SIDING/PANELLING INSTRUCTIONS This product can be used for interior and exterior installations. Much of this guide refers to exterior installation, however, many of the construction
INSTALLATION, STORAGE AND WALL CONSTRUCTION DETAILS
 www.capecodsiding.com INSTALLATION, STORAGE AND WALL CONSTRUCTION DETAILS IMPORTANT READ THE FOLLOWING INSTRUCTIONS CAREFULLY BEFORE INSTALLING YOUR WOOD SIDING. FAILURE TO STRICTLY FOLLOW THESE INSTALLATION,
LOG CABIN 40 ASSEMBLY INSTRUCTIONS
 LOG CABIN 40 ASSEMBLY INSTRUCTIONS 4000 mm x 300 mm Canopy 350 mm Veranda depth 500 mm Wall thickness 34 mm Nordic region spruce wall logs 34 mm x 35 mm Dimensions of base 3800 mm x 4500 mm including terrace
Method of Build 1. Fire. Sound
 Method of Build 1 General Viso Fire & Acoustic in the solid form differs from most other systems as it can be erected using 12.5mm & 15.0mm boards within the same Aluminium framework. Also hidden fix board
STEEL FRAMING WEATHERBOARD SYSTEM
 T A R A NAK IPINE STEEL FRAMING WEATHERBOARD SYSTEM Installation information and technical drawings TIMBER WEATHERBOARDS NATURALLY BETTER FOR MORE THAN A CENTURY www.taranakipine.co.nz T A R ANAKIPINE
GARDEN SHED BRIGHTOLN
 ASSEMBLY INSTRUCTIONS GARDEN SHED BRIGHTOLN Dimensions: 10x10 (1 1/8") IMPORTANT Before beginning the assembly of your garden shed, please read the instructions carefully and follow them closely. By doing
Installation Guide - Evolution Series Wood Siding
 Installation Guide - Evolution Series Wood Siding The following instructions pertain to the installation of Fraser Wood Siding Evolution Series on a typical wood frame construction allowing for nail penetration
DUTCH GABLE FREESTANDING CARPORT
 DUTCH GABLE FREESTANDING CARPORT STRATCO OUTBACK ASSEMBLY INSTRUCTIONS. Your complete guide to building a FREESTANDING Outback DUTCH GABLE CARPORT BEFORE YOU START Carefully read these instructions. If
Special Roofs and Vertical Slating
 Special Roofs and Vertical Slating Roofs falling into the category of "special" roofs have the following characteristics: (a) any roof slope equal to or greater than the minimum pitch for the size of slate
DURABLE, STABLE AND LOW MAINTENANCE SIDING
 Innovation in wood DURABLE, STABLE AND LOW MAINTENANCE SIDING Available from: CREATED FROM SUSTAINABLY SOURCED WOOD AND COMPLETELY NON-TOXIC, ACCOYA IS A REVOLUTION IN WOOD TECHNOLOGY. Toronto train, Canada
4256HM JAMES HARDIE MONOLITHIC CLADDING
 4256HM JAMES HARDIE MONOLITHIC CLADDING 1. GENERAL This section relates to the supply and fixing of fibre cement flush finish cladding: - James Hardie Monotek Sheet for textured coating systems - James
The WANZ Guide to Window Installation
 The WANZ Guide to Window Installation as described in E2/AS1 Amendment 5 1 October 2012 Ver. 1.2 Window Association of New Zealand Page 2 of 74 Contents Overview Page 5 Objective Page 5 Scope Page 5 Opening
Feature T&G Timber Floor Installation and Finishing Recommendations
 Feature T&G Timber Floor Installation and Finishing Recommendations DATA SHEET 3 RECOMMENDED INSTALLATION PRACTICES Version 1 October 2005 3.0 Introduction This data sheet outlines the recommended practices
LOG CABIN 70 ASSEMBLY INSTRUCTIONS
 LOG CABIN 70 ASSEMBLY INSTRUCTIONS 400 mm x 400 mm Canopy 500 mm Veranda depth 500 mm Wall thickness 45 mm Nordic region spruce wall logs 45 mm x 35 mm Dimensions of base 3900 mm x 5400 mm including terrace
Installation Instructions for Siding
 Smart-Shingle TM System "The new smart way to install cedar shingles." - This Old House Installation Instructions for Siding V3.2 INSTALLATION GUIDE MARKS Shingle-Strip 0 1 2 3 4 5 6 7 8 9 10 11 12 13
SHIPLOCK CLADDING PRODUCT GUIDE INSTALLATION TECHNICAL SPECIFICATIONS CARE & MAINTENANCE
 SHIPLOCK CLADDING PRODUCT GUIDE INSTALLATION TECHNICAL SPECIFICATIONS CARE & MAINTENANCE SHIPLOCK CLADDING CN-04E / CN-04W / CN-W008 Prior to the installation of any form of Cladding, it is recommended
NewTech - CleverDeck Composite Decking Installation Guidelines
 NewTech - CleverDeck Composite Decking Installation Guidelines Composite decking has unique characteristics and requires specific fixing requirements that differ from timber. We strongly recommend that
REDLAND DRY VALLEY. Installation Instructions for Redland Dry Valley. Version: 6. Date: May Redland Technical Solutions
 REDLAND DRY VALLEY Installation Instructions for Redland Dry Valley Version: 6 Date: May 2013 Author: Department: Redland Technical Solutions Redland Technical Solutions 1 Introduction 1.1 TECHNICAL DATA
SIDING INSTALLATION GUIDE
 READ THIS ENTIRE GUIDE CAREFULLY BEFORE INSTALLING NOBELIA SIDING. This installation guide applies to all NOBELIA siding profiles, including SPF tongue-and-groove and exposed nail siding. IMPORTANT: FAILURE
 TARANAKIPINE WEATHERBOARD SYSTEM Installation information and technical drawings TIMBER WEATHERBOARDS NATURALLY BETTER FOR MORE THAN A CENTURY www.taranakipine.co.nz 1 CONTENTS May 2015 For the latest
Timber Check Moisture Meter
 Timber Check Moisture Meter (99N15.01) The following instructions were provided by the manufacturer. Using Your Timber Check Moisture Meter Step 1. Push the pins into the wood sample. Step 2. Turn the
Fibre Cement G C. Batten Fixing Setout ST-01. Jan 2014 A4 PROFILE DATE SCALE DETAIL DETAIL NO. Plank joint. 600mm stud crs.
 Plank joint 600mm stud crs 600mm 600mm 600mm Horizontal Structural Timber Cavity atten 50x20mm H3.1 atten fixing points 800mm 800mm 300mm 800mm Max. Nog spacing 50mm All intermediate battens to be 50x20mm
PRIMED STRAND REVERSIBLE SHAKE
 PRIMED STRAND REVERSIBLE SHAKE PRIOR TO INSTALLATION Inspect product for any issues before installing (breakage, surface defects, foreign objects). Do not install questionable product. Report any problems
General Installation Guidelines
 g e n e r a l i n s t a l l a t i o n g u i d e l i n e s General Installation Guidelines Although Nutec Building Planks do not contain asbestos fibres, it is nevertheless recommended that when working
technical bulletin Roofline Installation Details No.7 Fascia Installation Details Typical Eaves Details K16 Fascia & 9mm Vented Soffit
 Roofline Installation Details This is intended to provide you with a brief overview of the popular products in Kestrel s Roofline range, where they can be used and the main criteria for installation. Typical
MADE IN OAK. Traditional Oak Buildings for Contemporary Living. Garage & Outbuilding Specifications
 MADE IN OAK Traditional Oak Buildings for Contemporary Living Garage & Outbuilding Specifications 01666330182/822234 info@madeinoak.com www.madeinoak.com Oak We only use structurally graded green oak from
CURVED ROOF ASSEMBLY INSTRUCTIONS ATTACHED VERANDAH. Your supplementary guide to building an ATTACHED CURVED ROOF VERANDAH or PATIO BEFORE YOU START
 ROOF ATTACHED VERANDAH ASSEMBLY INSTRUCTIONS Your supplementary guide to building an ATTACHED ROOF VERANDAH or PATIO This set of instructions should be used in conjunction with the Stratco instruction
INSTALLATION GUIDE. Biowood Outdoor Wall Panel BWWPO20018 Shiplap 8x6 Deep. Green Resources Material Australia Pty Ltd
 Green esources Material Australia Pty Ltd Congratulations on the fine choice you have made in the selection of this product. outdoor wall panels will give you many years of carefree maintenance. When installed
technical bulletin Roofline Installation Details No.7 Fascia Installation Details Typical Eaves Details K16 Fascia & 9mm Vented Soffit
 Roofline Installation Details This is intended to provide you with a brief overview of the popular products in Kestrel s Roofline range, where they can be used and the main criteria for installation. Typical
How to build your Sauno kiln dryer
 How to build your Sauno kiln dryer The following description shows our recommendation how to build an efficient low price kiln dryer for indoor or outdoor use. We are here showing how to make a chamber
Expressed Hardwood Structures
 Expressed Hardwood Structures Introduction This guide provides ideas and design information to assist in the development of expressed native timber structures in buildings. Basic information on how to
Wooden façade damage and the design of new wooden façades - Long-term durability of timber Façades in Finland
 Wooden façade damage and the design of new wooden façades - Long-term durability of timber Façades in Finland Soikkeli, Anu 1 ABSTRACT Wooden facings on façades are durable if the boarding and its details
Yellow Balau Hardwood Decking How to Guide January 2015
 Page 1 of 5 Yellow Balau Hardwood Decking How to Guide January 2015 Information Yellow Balau is a very durable hardwood. It is sourced mainly from Indonesia and Malaysia where it is known as Bangkirai
Installation guide for 20/20
 Introduction The following installation instructions are recommended minimum requirements for the 20/20. The designer and fixer should ensure that tiles are installed in accordance with BS 5534; The British
BRACING BRACING SECTION 7 SECTION 7
 If we are to learn from the past, it is clear that there is generally a lack of understanding of the purpose of roof bracing and who should be responsible for it. This has led to disputes, claims and,
Cembrit Patina. Cembrit Cover. Cembrit Solid. Cembrit Transparent
 Rainscreen Cladding Your choice. In addition to the range of colours and shades, Cembrit cladding boards are available in four compositions, each with distinctive performance and characteristics. Cembrit
EXPOSED FASTENING SYSTEM WITH SCREWS OR RIVETS
 External EXPOSED FASTENING SYSTEM WITH SCREWS OR RIVETS Parklex Facade may be installed using mechanical fasteners, such as screws or rivets. The panels are attached to vertical battens. In the event that
XL JOINERY LTD LA PORTE VISTA MODULAR 3 ASSEMBLY INSTRUCTIONS
 XL JOINERY LTD LA PORTE VISTA MODULAR 3 2090mm High x 4687mm Wide ASSEMBLY INSTRUCTIONS READ AND UNDERSTAND THESE INSTRUCTIONS FULLY PRIOR TO STARTING INSTALLATION. IT IS STRONGLY RECOMMENDED THAT A COMPETENT
Installation Guide Classic Series Wood Siding
 Installation Guide Classic Series Wood Siding Please read the following instructions prior to beginning your installation. The following installation guidelines have been produced in accordance with the
Installation Instructions for Panel Siding and Soffit
 Installation Instructions for Panel Siding and Soffit 7/16 in. Panels Include: Sturdy Panel, Square Edge, 3/4 in. Channel and Reverse Board and Batten (RB&B) 1/2 in. Panels Include: Adobe Shiplap and 808
C.00. Ullrich Aluminium Co. Ltd. Ulltraclad Aluminium Cladding September Wall Batten Elevation. Horizontal battens between verticals at soffit
 Horizontal battens between verticals at soffit 2 C.04 600 600 600 600 Cavity batten at 600 mm centres 1 C.03 Batten fixing points 1 C.04 1 C.07 1 C.12 1 C.13 1 C.14 Meter Box Window 1 C.08 1 C.09 800 800
WITH HEAT - NATURALLY
 WITH HEAT - NATURALLY Clock House, Station Approach, Shepperton, Middlesex TW17 8AN T +44 (0)1932 256590 F +44 (0)1932 229989 E info@mbmspeciality.co.uk W www.mbmspeciality.co.uk Continue About the company
Newport Ridge Clad. urbanline.com.au
 Newport Ridge Clad Newport Ridge Clad NRC 81 x 26 Sharp and stylish With standout lines and a stylish sharpness about it, the Urbanline Newport Ridge Clad profile is prestigious and stunning. The diamond-shaped
Sun Windows General Information New Construction Hinged Door Installation Instructions
 A G H F H H A. Apply Weather Resistive Barrier B. Apply Bottom Flashing Tape C. Install Sill Pan End Caps & Pan D. Caulk Sides & Top Nailing Surface, Set Door, Fasten E. Apply Side Flashing Tape F. Apply
How-To-build guide Garden shed
 How-To-build guide Garden shed What you can build using this guide This guide will show you how to build a re-locatable garden shed. Before you begin building Contact your local territorial authority to
Corner Potting Store Assembly Instructions
 Corner Potting Store Assembly Instructions English SS225E Before assembly We recommend that time is taken to read the instructions before starting assembly, then follow the easy step by step guide. The
INSTALLATION INSTRUCTIONS for Vinyl Windows with Integral Nailing Fin (JII001) IMPORTANT INFORMATION & GLOSSARY ROUGH OPENINGS
 IMPORTANT INFORMATION & GLOSSARY ROUGH OPENINGS") Thank you for selecting JELD-WEN products. Attached are JELD-WEN s recommended installation instructions for Vinyl windows with an integral nailing fin. While the use of these installation instructions
Thank you for selecting JELD-WEN products. Attached are JELD-WEN s recommended installation instructions for Vinyl windows with an integral nailing fin. While the use of these installation instructions
(773) INSTALLATION INSTRUCTIONS for Vinyl Windows with Integral Nailing Fin (JII001) IMPORTANT INFORMATION & GL OSSARY ROUGH OPENINGS
 INSTALLATION INSTRUCTIONS for Vinyl Windows with Integral Nailing Fin (JII001) IMPORTANT INFORMATION & GL OSSARY ROUGH OPENINGS") Thank you for selecting C l i m a t e G u a r d products. Attached are our recommended installation instructions for Vinyl windows with an integral (2400-02) will not affect application of the ClimateGuard
Thank you for selecting C l i m a t e G u a r d products. Attached are our recommended installation instructions for Vinyl windows with an integral (2400-02) will not affect application of the ClimateGuard
Installation Instructions
 TEL: 09 579-8895 FAX: 09 579-2933 EMAIL: sales@nzfiredoors.co.nz NZ Fire Doors Ltd, 89 Gavin Street, Ellerslie, PO Box 12709, Penrose 1642, Auckland, New Zealand. www.nzfiredoors.co.nz Installation Instructions
Load Tables, Technical Data and Installation Instructions
 W22. W22. W22. W22. W22 W22.. Simpson Strong-Tie Fastening Systems Structural Wood-to-Wood Connections Including Ledgers Designed to provide an easy-to-install, high-strength alternative to through-bolting
6 x 6 OCTAGONAL CEDAR GREENHOUSE
 6 x 6 OCTAGONAL CEDAR GREENHOUSE ASSEMBLY INSTRUCTIONS PLEASE READ ALL INSTRUCTIONS BEFORE PROCEEDING 07/2010 6 x 6 OCTAGONAL CEDAR GREENHOUSE Assembly Instructions Contents Page Introduction 3 Safety
application instructions
 application instructions architectural collection cedar shake 76 series lap siding General At the time of manufacture, siding meets or exceeds the performance standards set forth in Composite Panel Association
How to Build Good Decks..
 How to Build Good Decks.. Worldwide Sleeping Company, Inc Cary, North Carolina Decking Overview.. Decking Overview.. more Decking Joist.... Joist Hanger Ledger Lag Screw House Wall Decking House Floor
Glulam Connection Details
 T E C H N I C A L N O T E Glulam Connection Details Note: This version is superseded by a more current edition. Check the current edition for updated design and application recommendations. ENGINEERED
Installation Guide. Shingles. Classical. Shingles. Warning. Storage. Cutting Shingles. Touch-Up. Eastern White Cedar
 Installation Guide Before you begin, take the time to read this entire guide to clearly understand the requirements and steps to follow for proper installation. The Fastening Make shingle fastening simpler
INSTALLATION INSTRUCTIONS for Wood/Clad Wood Windows without Exterior Trim or Nailing Fin (JII025) ImpOrTaNT INFOrmaTION & GlOssary.
 ImpOrTaNT INFOrmaTION & GlOssary.") for Wood/Clad Wood Windows without Exterior Trim or Nailing Fin (JII025) Thank you for selecting JELD -WEN products. Attached are JELD-WEN s recommended installation instructions for metal clad wood windows
for Wood/Clad Wood Windows without Exterior Trim or Nailing Fin (JII025) Thank you for selecting JELD -WEN products. Attached are JELD-WEN s recommended installation instructions for metal clad wood windows
Tapersawn Shake Installation Instructions
 Smart-Shingle TM System Tapersawn Shake Installation Instructions INSTALLATION GUIDE MARKS Shake-Strip 0 1 2 3 4 5 6 7 8 9 10 11 12 13 14 15 16 17 18 19 20 21 22 23 24 25 26 27 28 29 30 31 32 33 34 35
Technical Data Sheet Pergolas and Carports
 Recommended Practice / March 2006 Introduction This data sheet contains Timber Queensland s recommendations for attached and detached timber pergolas and carports with relatively flat skillion roofs and
Best Materials LLC distributes backer rod, caulking and sealants for all types of EIFS joints and penetration sealing applications.
 Best Materials LLC distributes backer rod, caulking and sealants for all types of EIFS joints and penetration sealing applications. EXTERIOR INSULATION & FINISH SYSTEM CONSTRUCTION Data Published Courtesy
ASSEMBLY INSTRUCTIONS GARDEN SHED - ModernaDimensions: 10 x 10 (3/4 )
") ASSEMBLY INSTRUCTIONS GARDEN SHED - ModernaDimensions: 0 x 0 (/4 ) IMPORTANT Before beginning the assembly of your garden shed, please read the instructions carefully and follow them closely. By doing
ASSEMBLY INSTRUCTIONS GARDEN SHED - ModernaDimensions: 0 x 0 (/4 ) IMPORTANT Before beginning the assembly of your garden shed, please read the instructions carefully and follow them closely. By doing
Installation Instructions for Standard Lap and Self-Aligning Lap Siding
 Installation Instructions for Standard Lap and Self-Aligning Lap Siding 7/16 in. Standard Laps Include: All Old Mill Widths, Cedar Shake Lap and Smooth Lap 1/2 in. Self-Aligning Include: 8 in. and 12 in.
NEVADA ASSEMBLY INSTRUCTIONS
 NEVADA ASSEMBLY INSTRUCTIONS BASE SIZE: 2.700m x 1.500m NEVADA Tools Required: Battery Drill Riveter Hammer Tape Measure Ladder Skillsaw Level Screwdriver - Flat 3/8 Hex Drive bit 8mm Hex Drive bit Drill
OUTDOOR TIMBER PERFORMANCE
 TECHNICAL DATA SHEET ISSUED BY TIMBER QUEENSLAND OUTDOOR TIMBER PERFORMANCE RECOMMENDED PRACTICE // MARCH 2014 25 The satisfactory performance and life expectancy of timber used in outdoor applications
SECTION CARPENTRY
 SECTION 06100 CARPENTRY PART 1 GENERAL 1.01 SUMMARY A. Section Includes: Carpentry work including grounds, nailers, blocking, miscellaneous framing, plywood backing panels, plywood sheathing, preservative
INSTALLATION INSTRUCTIONS for Wood Bay or Bow Windows with Nailing Fin or Exterior Trim (JII032)
") for Wood Bay or Bow Windows with Nailing Fin or Exterior Trim (JII0) Thank you for selecting JELD-WEN products. Attached are JELD-WEN s recommended installation instructions for wood and clad wood bay
for Wood Bay or Bow Windows with Nailing Fin or Exterior Trim (JII0) Thank you for selecting JELD-WEN products. Attached are JELD-WEN s recommended installation instructions for wood and clad wood bay
Sun Windows General Information New Construction Sliding Door Installation Instructions H F
 A G B D C H F H E H A. Apply Weather Resistive Barrier B. Apply Bottom Flashing Tape C. Install Sill Pan End Caps & Pan D. Caulk Sides & Top Nailing Surface, Set Door, Fasten E. Apply Side Flashing Tape
Overlapping panel Cladding system made up of horizontal overlapping panels fixed on a wooden or metal wall-mounted framework.
 facade Overlapping panel Cladding system made up of horizontal overlapping panels fixed on a wooden or metal wall-mounted framework. Specification and installation guide Presentation of the system VMZ
INSTALLATION INSTRUCTIONS for Vinyl Windows with Integral Nailing Fin (JII001)
") Thank you for selecting JELD-WEN products. Attached are JELD-WEN s recommended installation instructions for Vinyl windows with an integral nailing fin. While the use of these installation instructions
Thank you for selecting JELD-WEN products. Attached are JELD-WEN s recommended installation instructions for Vinyl windows with an integral nailing fin. While the use of these installation instructions
Installation Instructions for Old Mill Shingle and Designer Shake Lap Siding
 Installation Instructions for Old Mill Shingle and Designer Shake Lap Siding Includes: Cove, Craftsmen Staggered, Diamond, Fish Scale, Octagon, Round and Old Mill Shingle Lap Important: Read and understand
Western Red Cedar Shingles Product Guide
 Western Red Cedar Shingles Product Guide Western Red Cedar Shingles & Shakes from John Brash are a truly renewable and sustainable roofing and cladding material; with one of the lowest carbon footprints
With Illustrations, Drawings & Step By Step Details. Click Here To Download 12,000 Shed Plans. 1 P a g e Download 12,000 More Shed Plans
 With Illustrations, Drawings & Step By Step Details Click Here To Download 12,000 Shed Plans 1 P a g e Download 12,000 More Shed Plans Table of Contents OVERVIEW... 3 MATERIALS & CUTTING LISTS... 4 DRAWINGS,
NEW HOME WARRANTY A REFERENCE GUIDE FOR TYPICAL WALL AND WINDOW DETAILS (RAINSCREEN SYSTEM) SHOWN AS FIBRE CEMENT CLADDING
 SHOWN AS FIBRE CEMENT CLADDING") NEW HOME WARRANTY A REFERENCE GUIDE FOR TYPICAL WALL AND WINDOW DETAILS (RAINSCREEN SYSTEM) SHOWN AS Reference Guide 0.1 GENERAL 0.1 Reference Guide 0.2 Index 0.3 Disclaimer & Limitations 0.4 General Notes
NEW HOME WARRANTY A REFERENCE GUIDE FOR TYPICAL WALL AND WINDOW DETAILS (RAINSCREEN SYSTEM) SHOWN AS Reference Guide 0.1 GENERAL 0.1 Reference Guide 0.2 Index 0.3 Disclaimer & Limitations 0.4 General Notes
Playaway Swiss Cottage Assembly Instructions
 Playaway Swiss Cottage Assembly Instructions English SS288C IMPORTANT SAFETY INFORMATION Adult assembly is required. Checks and maintenance needs to be carried out on the main parts (fixings etc.) at regular
SECTION ROUGH CARPENTRY
 SECTION 06 10 00- ROUGH CARPENTRY PART 1 - GENERAL 1.1 RELATED DOCUMENTS A. Drawings and general provisions of the Contract, including Contracting Requirements and Division 1 Specification Sections, apply
GARDEN SHED - WALESDimensions: 10x10 (1 1/8')"
") ASSEMBLY INSTRUCTIONS GARDEN SHED - WALESDimensions: 0x0 ( /8')" IMPORTANT Before beginning the assembly of your garden shed, please read the instructions carefully and follow them closely. By doing so
ASSEMBLY INSTRUCTIONS GARDEN SHED - WALESDimensions: 0x0 ( /8')" IMPORTANT Before beginning the assembly of your garden shed, please read the instructions carefully and follow them closely. By doing so
A. Rough carpentry includes but is not limited to the following:
 SECTION 06100 ROUGH CARPENTRY PART 1 - GENERAL 1.01 RELATED DOCUMENTS A. Drawings and general provisions of Contract, including General and Supplementary Conditions and Division-1 Specification Sections,
Shingle Installation Guidelines
 Shingle Installation Guidelines General Guidelines Materials to be used Key definitions Cost of roofing Preparation of the roofing deck Materials used for roofing should conform to approved norms and regulations
DIVISION 6 WOOD AND PLASTICS
 DIVISION 6 WOOD AND PLASTICS PART 1 - GENERAL 1.01 SUMMARY A. This Section includes the following: 1. Wood framing. 2. Wood supports. 3. Wood blocking. 4. Wood cants. 5. Wood nailers. 6. Wood furring.
AUSTRALIAN HARDWOOD AND CYPRESS
 AUSTRALIAN HARDWOOD AND CYPRESS 1 Expressed Hardwood Structures Trusses, Cathedral Ceilings, Post and Beam Frames SCOPE This guide provides ideas and design information to assist in the development of
IDAHO ASSEMBLY INSTRUCTIONS. BASE SIZE: 1.800m x 1.200m
 IDAHO ASSEMBLY INSTRUCTIONS BASE SIZE: 1.800m x 1.200m IDAHO Tools Required: Battery Drill Riveter Hammer Tape Measure Ladder Skillsaw Level Square Drive Bit No.2 3/8 Hex Drive Bit 8mm Hex Drive Bit Drill
CARE OF TIMBER DOORS ON SITE
 CARE OF TIMBER DOORS ON SITE Contents 1. Introduction 2. Delivery and Storage 3. Installation 4. Finishing INTRODUCTION Doors and doorsets manufactured by members of the British Woodworking Federation
Installation Guide for Andersen 400 Series Tilt-Wash Transom and 200 Series Narroline Transom Windows
 for Andersen 400 Series Tilt-Wash Transom and 200 Series Narroline Transom Windows Congratulations! You have just purchased one of the many fine Andersen products. Proper assembly, installation and maintenance
Contents. Installation Guide. Dynex Soffit Installation Guide V03 March The Smart Choice in Soffit
 The Smart Choice in Soffit Installation Guide Looks great - A contemporary tongue and groove styled soffit, with hidden fixings, that provides a versatile and sleek lining complimenting a range of building
APPLICATION INSTRUCTIONS FOR DINGEWOOD SIDING
 APPLICATION INSTRUCTIONS FOR DINGEWOOD SIDING SQUARE FOOTAGE Customers should plan on ordering 10-20% more wood because wood is, by nature, imperfect. Prefinished wood will come pre-stained, but wood planks
GREEN WORLD LUMBER GENUINE MAHOGANY DECKING INSTALLATION GUIDE
 GREEN WORLD LUMBER GENUINE MAHOGANY DECKING INSTALLATION GUIDE Genuine Mahogany is among the most durable natural wood decking available. When properly installed and maintained, you should have a beautiful
10X12 Arched Breeze Pergola Assembly Manual Outdoor Living Today
 10X12 Arched Breeze Pergola Assembly Manual Outdoor Living Today ITEM# BZ1012ARCH Revision 2 March 25th/2015 Note: Post Mounting Hardware is NOT included in this kit. Please confirm with your local building
KERRAFRONT INSTRUCTION FOR INSTALLATIONS AND USE. Cellular cladding FS-201 / FS-202. kerrafront.com
 KERRAFRONT INSTRUCTION FOR INSTALLATIONS AND USE Cellular cladding kerrafront.com - 2 - SUMMARY Installation - general rules 3 Cladding boards - detailed description 4 Trims and accessories 5 Horizontal
REFERAT REFERAT WOOD FOR GOOD. A study on the service life of external wood claddings. Anu Soikkeli
 Anu Soikkeli REFERAT REFERAT WOOD FOR GOOD A study on the service life of external wood claddings In 1998 99 the University of Oulu s Department of Architecture conducted a broad study on the long-term
Method of Build 1. General
 Method of Build 1 General GLAZED ELEVATIONS Viso Double Glazed in glazed form differs from many other systems as the vertical joints can have Viso dry joints or the unique HIDDEN mullion post between glazed
rondo exangle drywall finishing sections
 rondo exangle drywall finishing sections SUMMARY The EXANGLE range of building board finishing profiles are designed to give plasterers a clean, defined edge on straight or curved details for internal
Posts INSTALLATION INSTRUCTIONS
 Posts Pedestrian gates are up to 4 wide and up to 7 tall. 5.5 min. 3.5 min. Gate and posts should be aligned as needed to accommodate hinges and / or latching mechanisms. Refer to appropriate installation