Overlapping panel Cladding system made up of horizontal overlapping panels fixed on a wooden or metal wall-mounted framework.
|
|
|
- Caitlin Rogers
- 5 years ago
- Views:
Transcription

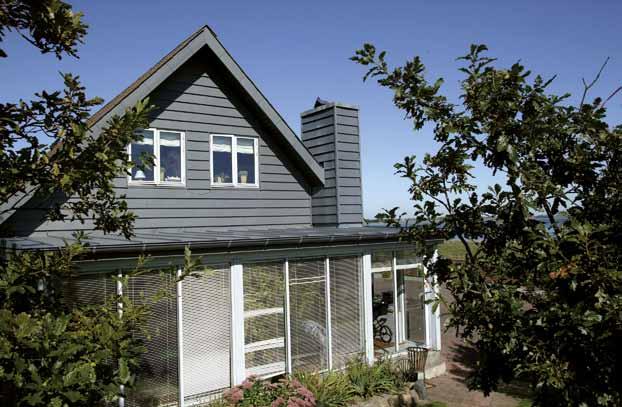
1 facade Overlapping panel Cladding system made up of horizontal overlapping panels fixed on a wooden or metal wall-mounted framework. Specification and installation guide
2

3 Presentation of the system VMZ Overlapping panel is a wall-mounted cladding system made up of horizontal overlapping panels fixed to the substructure using brackets. The system is designed to be compatible with external insulation. The panels fit easily into each other, making them quick and easy to install. PIGMENTO green A durable natural material VMZ Overlapping panel is manufactured using rolled copper titanium zinc that complies with European standard EN 988. Zinc is a natural material that is recognised for being robust and exceptionally durable. PIGMENTO blue A low maintenance material Zinc does not require any particular maintenance. It remains aesthetically harmonious throughout its lifespan and is also rot-proof and non-flammable. ANTHRA-ZINC Surface aspects The system is available in the 6 VMZINC preweathered surface aspects: a range of grey and subtle shades. This range of colours provides creative possibilities including elegant blending in combination with other materials. QUARTZ-ZINC Easy to install VMZ Overlapping panel is lightweight and easy to install: the panels fit easily into each other. The panels can be cut easily on site, without creating dust. PIGMENTO brown Universal flashings The system is available with the VMZINC universal flashings range, making it possible to manage an entire project with a single elegant solution. PIGMENTO red Overlapping panel 1
 3,000 x 200 mm Depths 13 mm 20 mm Weight per unit 4.56 Kg 4.67 kg Weight per m 2 7.6 7.78 Number of panels per m 2 1.66 (i.e. 5 for 3 m 2 ) Number of splice plates per m 2 1.")
4 Presentation of the system Technical characteristics Surface aspects QUARTZ-ZINC, ANTHRA-ZINC and PIGMENTO Zinc thickness 0.7 mm Dimension of the panels (L x H) 3,000 x 200 mm Depths 13 mm 20 mm Weight per unit 4.56 Kg 4.67 kg Weight per m Number of panels per m (i.e. 5 for 3 m 2 ) Number of splice plates per m Number of screws per m 2 10 Joints VMZ Overlapping panel can be installed with aligned or staggered joints. 2 Overlapping panel
5 Presentation of the system Vertical section 13 mm or 20 mm 200 mm VMZ Overlapping panel Secondary framework External insulation Fixing bracket Spacer to break thermal continuity Horizontal section VMZ Overlapping panel Secondary framework Splice plate External insulation Fixing bracket Spacer to break thermal continuity Overlapping panel 3


6 Projects 4 Overlapping panel

7 Projects Overlapping panel 5
8 Area of use Designed for Wall-mounted framework Reaction to fire Flat, vertical supports in rendered brickwork or concrete, or on wooden or metal substructures, on new or renovated buildings. Maximum building height is 40 m (maximum altitude 900 m). For buildings higher than 40 m, please contact us. The wall-mounted framework (not supplied) can be wooden or metal (galvanized steel, aluminium). The frameworks are fixed to the main structure with galvanized steel or aluminium adjustable brackets, using screws and rawlplugs suited to the support. The zinc cladding is classified Euroclasse A1 and A2s1d0, making it suitable for general use on condition that the specific design and installation rules pertaining to various buildings are respected. N.B. in coastal areas, highly visible white marks may appear on parts not exposed to rain. This is an aesthetic drawback. It does not alter the quality of the zinc. Ultimate load Based on the following 2 criteria: safety factor for ruin > 2.5 and horizontal deformation under load (deformation at centre less deformation at fixed point < 1/100 th of the distance between fixed points). For all other criteria, contact us (especially permanent deformation). Preparing buildings The installation company must possess facade know-how. It must ensure that the system is used in compliance with the conditions and area of use described in this document. Ventilated cladding VMZ Overlapping panel is installed on a wall-mounted framework as part of a ventilated facade that provides a sound and durable solution for the building. Ventilation Ventilation of the facade must be ensured by an air gap of 2 cm minimum, situated between the insulation and the back of the overlapping panel, or between the brickwork and the back of the overlapping panel. A perforated panel on the base trim is used to allow air flow. Layout plan Prior to installation, the contractor must draw up a precise layout plan to determine the positioning of the secondary framework elements and the precise quantity of panels required. The design and installation of the framework will take into account constraints arising from expansion and local installation rules. Storage recommendations The overlapping panels must be stored on their original pallet on a dry floor, in a ventilated sheltered area. 6 Overlapping panel
 and must correspond to the layout plan provided by the architect.")


9 Installation STEP 1: Installing the framework VMZ Overlapping panel can be installed on wooden and metal frameworks. Installation of the framework is prepared by marking out (laser or tracing line) and must correspond to the layout plan provided by the architect. The framework is fixed to the main building by adjustable aluminium or Galva Z 275 steel brackets. Installation of brackets Once the vertical tracing is done, the brackets are fixed in a staggered arrangement that positions them on either side of the beam. The centre distance between beams must not exceed 600 mm on the main building. The length of the fixing brackets is determined according to the thickness of the insulation. The distance between brackets along each rafter must not exceed 1,350 mm. 600 mm Special care must be taken when aligning the framework to ensure perfect flatness of the facade. Installation of insulation Mineral wool insulation is installed directly onto the substructure. A galvanised steel corner piece is fixed on the base trim and acts as a stop for the insulation. Insulation is fixed mechanically with starshaped fixing to avoid any settlement, in accordance with the manufacturer s specifications. In certain countries, we recommend installing a rain screen membrane. In this case, the membrane manufacturer s installation recommendations must be followed. Overlapping panel 7


10 Installation STEP 1: Installing the framework Wooden framework The beams must be timber (pine, spruce, scots pine with compatible fungicide and insect treatment) : water resistant according to risk category 2 or 3 of French standard NF EN 335-2, according to the risk of dump of the beams. load resistant according to category C18 of the French standard NF EN 338. The section of the beams must be minimum 40 x 60 mm. Each panel must be fixed to at least 3 beams. If panels can only be fixed on two beams, the centre distance between beams is reduced to 400 mm. Metal framework VMZ Overlapping panel can also be installed on a 40 x 40 cm L profile type metal framework in 1.5 mm Z 275 galvanised steel that is fixed to the substructure with adjustable brackets. The L profiles are fixed onto the brackets using rivets or screws. Use a spirit level to check that the beams or metal profiles are perfectly aligned on the base trim, vertically and perpendicular to the substructure. 8 Overlapping panel


.")

11 Installation STEP 2: Installation on the main part of the facade No specific tools are necessary to install VMZ Overlapping panel. We recommend fixing the panels using screws, but nails may also be used. Three parts are used for installation on the main section of the facade: the overlapping panel, the base trim and the splice plate. Overlapping panel Ventilated base trim Splice plate Base Base: Start installing VMZ Overlapping panel by installing a perforated base trim to create the air inlet (100 cm 2 section per linear metre). It is important to ensure the base trim is horizontally aligned because it determines the correct position of the first row of panels. There must be a clearance of 150 mm between the base trim and the ground. Overlapping panel 9
12 Installation STEP 2: Installation on the main part of the facade Base trim VMZ Overlapping panel Secondary framework External insulation Fixing bracket Spacer to break thermal continuity VMZ perforated base trim Corner end-piece for insulation Top trim VMZ Overlapping panel Secondary framework External insulation Fixing bracket Spacer to break thermal continuity Bracket clip Coping 10 Overlapping panel


13 Installation STEP 2: Installation on the main part of the facade Installing the panels The panels must be handled with care and carried by one or two people by the edge in order to avoid deformation. The panels are installed from bottom to top and slot into each other easily. Make sure the panel is firmly slotted into place over the lower panel. On delivery, the front side of the panels are covered with a film to protect the surface aspect during installation. All film must be removed at the same time to avoid any marks on the surface aspect, at the latest 3 days after completion of installation. It is crucial to check that the first panel is perfectly horizontal to start installation correctly. Overlapping panel 11


14 Installation STEP 2: Installation on the main part of the facade The panels are fixed onto each beam using screws or nails. Fixing with screws: Fixing with screws can be used for wooden or metal frameworks. Screws are fixed onto the substructure through the VMZ Overlapping panel, under its upper fold. Screw details: minimum 4.8 x 25 mm screw with a flat round head of minimum 12 mm in diameter. Fixing with nails: Nails must be fixed with a pneumatic nail gun with grooved stainless steel nails. Fixing with nails is only authorized for wooden frameworks. Manual nailing is strictly prohibited. Nails are fixed onto the wooden framework through the VMZ Overlapping panel, under the upper fold. Nail details: Stainless steel grooved nail. Minimum length: 32 mm Diameter of flat head: 7 mm. Using a level, regularly check that the profiles are perfectly horizontal throughout the installation process. Expansion: For optimum expansion, oblong holes (5x20 mm) should be pierced when installing screws. The holes are made with a punch. 12 Overlapping panel


15 Installation STEP 3: Cutting and trim Cutting Elements At the ends of the facade, for window surrounds or vertical junction, the overlapping panel is cut to the required dimensions, preferably using a circular saw or a grinder : circular saw: opposed tooth metal blade grinder: 2 mm thin disc for stainless steel jig saw: thin metal blade metal saw: 24 tooth bi-metal blade. Be sure to follow the cutting equipment manufacturer s safety recommendations. The saw bench must be perfectly stable to ensure the cleanest cut possible. The cut edges are not exposed. They are covered with flashings. Transverse trim For transverse junctions, a trim splice plate is placed behind one end of the panel using screws or rivets, or by gluing. The next panel fits into the splice plate, making it possible both to ensure watertightness of the trim and harmonious appearance of the horizontal panels. Keep a free space of 3 to 5 mm to allow for expansion. When the panel is cut on site on one side, cut the other side industrially (regular cut) and use for vertical junctions. Overlapping panel 13


16 Flashings Universal flashings A range of universal zinc accessories that can be used with all VMZINC facade systems is available and makes working on flashings easy. This range features 8 articles in the 6 VMZINC preweathered surface aspects, ensuring perfect continuity with cladding panels and flawless flashings. Flashing articles Universal clip * Adjustment clip * To make installation of clips easier, a template is also provided. Universal ledge Recessed corner Protruding corner Universal reveal Universal lintel Corner piece 14 Overlapping panel

.")


17 Flashings Corners Protruding and recessed corners click easily onto the universal clips. The universal clips are installed for each panel at 500 mm intervals (2 clips/metre). A 21 mm x 21 mm zinc corner piece is fixed flush with the clips to conceal them and create aesthetic continuity. Make sure panels are installed flush with the corner piece. Fit the corner pieces directly into the clips. Proceed identically for recessed corners. Overlapping panel 15
18 Flashings Corners Recessed corner VMZ Overlapping panel Secondary framework External insulation Recessed corner Corner piece Clip Fixing bracket Spacer to break thermal continuity Protruding corner VMZ Overlapping panel Secondary framework External insulation Protruding corner Clip Corner piece Fixing bracket Spacer to break thermal continuity 16 Overlapping panel


19 Flashings Window surrounds Installing Universal clips Universal clips allow quick installation of flashings. Start fixing the clips on the rafters under the ledge and on the sides of the window. A galvanised steel template is provided with the clips, making it easier to position them correctly and fit the flashings into each other. Use a spirit level to check clips are aligned. For reveals, install the first clip at the edge of the lower panel, and then install clips at 500 mm intervals. Use a template to make sure clips are correctly positioned and to make installation of flashings easier. The last panel under the window ledge must be fixed with self-drilling screws (Ø 4.8, 12 mm head) through the clip. Overlapping panel 17


20 Flashings Window surrounds Installing corner pieces 21 mm x 21 mm corner pieces are fixed on either side of the window, flush with the clips to conceal the latter and create aesthetic continuity. Continue in parallel to install the VMZ Overlapping panels. The overlapping panels must be carefully cut in order to fit snugly against the corner piece. 18 Overlapping panel


21 Flashings Window surrounds Installing adjusting clips and corner pieces Cut the corner pieces to fit the depth of the frame and fix them in the corners. Install the adjusting clips all around the inside of the window. Overlapping panel 19


22 Flashings Window surrounds Ledge Adjust the width and depth of the ledge to the window frame. Ensure watertightness by using PH neutral silicon to glue the edges of the ledge to the corner pieces. Seam the ledge part into the adjusting clip or slide it under the frame divider. Fit into the universal clips. Reveal Adjust the reveals to the window frame and slide them into the adjusting clips. Fit them into the universal clips. Lintel For the lintel, the flashing is perforated to allow ventilation and evacuation of any incoming rain water. Make sure the lintel is cut so that the edges are perfectly aligned with the top of the reveals. 20 Overlapping panel


23 Flashings Window surrounds 5 steps to remember 1 Installation of universal clips 2 Installation of corner pieces flush with the clips 3 Installation of VMZ Overlapping panels 4 Installation of adjusting clips and corner pieces 5 Installation and fixing of flashings Overlapping panel 21
24 Flashings Window surrounds Ledge Lintel VMZ Overlapping panel Secondary framework External insulation Fixing bracket Spacer to break thermal continuity Clip Corner piece Ledge Perforated lintel Adjusting clip Overlapping panel
25 Flashings Window surrounds Reveal VMZ Overlapping panel Secondary framework External insulation Fixing bracket Spacer to break thermal continuity Clip Corner piece Reveal Adjusting clip Overlapping panel 23
26 Umicore Building Products France s.a.s. Les Mercuriales 40 rue Jean Jaurès Bagnolet Cedex VMZINC -09/ ANG 1 - Layout: Umicore Building Products France s.a.s - Photo: P. Kozlowski
VMZ Shingles Facade and roofing system made up of panels that interlock into each other on their sides on a wood support.
 facade VMZ Shingles Facade and roofing system made up of panels that interlock into each other on their sides on a wood support. Specification and installation guide Saint Mary of the Cross Mausoleum,
Installation instructions for co-extruded louver-board profiles
 Installation instructions for co-extruded louver-board profiles www.silvadec.com / info@silvadec.com / tel.:+33 (0)2.97.45.09.00 TO BE READ CAREFULLY BEFORE INSTALLATION Before starting installation on
Installation Instructions
 Installation Instructions Roof edge trim profile Series TAG multi-piece aluminium profile Front face height: 250-1050 mm supplied with patented 4F brackets as standard height-adjustable, horizontally moveable,
maintenance-free free from painting easy to install Fixing Guide Cedral Lap
 maintenance-free free from painting easy to install Fixing Guide Cedral Lap www.cedralsidings.com CONTENT Step by step guide to installing your Cedral façade Required materials and tools 1. Prepare wall(s)
General Installation Guidelines
 g e n e r a l i n s t a l l a t i o n g u i d e l i n e s General Installation Guidelines Although Nutec Building Planks do not contain asbestos fibres, it is nevertheless recommended that when working
Façade CUT-TO-SIZE FAÇADE STRIPS APPLICATION IN OVERLAP ON WOODEN SUPPORTING STRUCTURE APPLICATION INSTRUCTIONS 1 1. GENERAL
 Façade CUT-TO-SIZE FAÇADE STRIPS APPLICATION IN OVERLAP ON WOODEN SUPPORTING STRUCTURE APPLICATION INSTRUCTIONS 1 1. GENERAL These application instructions are specifically intended for the fastening of
Cembrit Patina. Cembrit Cover. Cembrit Solid. Cembrit Transparent
 Rainscreen Cladding Your choice. In addition to the range of colours and shades, Cembrit cladding boards are available in four compositions, each with distinctive performance and characteristics. Cembrit
INSTALLATION GUIDE DUOFUSE SLAT WALL SYSTEM
 06/2013 ENG 1 INSTALLATION GUIDE DUOFUSE SLAT WALL SYSTEM The Duofuse wood composite slat wall system is much more durable than wooden fences, and correct installation is necessary to enjoy the fences
KEITH PANEL SYSTEMS FUNDERMAX- MAX EXTERIOR EXPOSED FASTENER PRESSURE EQUALIZED WALL SYSTEM
 S Y S T E M D E T A I L S FUNDERMAX- MAX EXTERIOR EXPOSED FASTENER PRESSURE EQUALIZED WALL SYSTEM PAGE TITLE PAGE Table of Contents Fundermax Max Exterior Product Information Design and Installation Information
Table and Furniture Base Fittings Plinth Adjusting Fittings
 Adjusting screw with M8 or M thread Rigid, for glide inserts, steel thread Finish/Colour: Black, thread galvanized Version: With acceptance Ø30 mm Thread M8 650.22.381 M 650.22.382 Packing: 1 or 0 pcs.
Joshua Woodsman
 CONSTRUCTION GUIDE of one of our design Please Note This electronic document is protected by the identifier against unauthorized dissemination on the Internet. Before building any structure make sure you
Installation Manual 0318
 Installation Manual 0318 DOUBLE 7 CEDAR SHINGLE INSTALLATION GUIDE General Information CAUTION: REMEMBER THAT POLYMER UNDERGOES EXPANSION / CONTRACTION DUE TO VARIATIONS IN TEMPERATURE. THE FOLLOWING INSTRUCTIONS
SOPRATUILE ROOFING SHINGLES
 ROOFING SHINGLES : For appealing roofs. Lichen grey is a bituminous shingle with a glass fibre mat reinforcement intended for covering roofs with a pitch of over 20%. is fitted by nailing to a continuous
Siding Systems NOVIKSTONETM DS DRY STACK STONE INSTALLATION GUIDE
 Siding Systems NOVIKSTONETM DS DRY STACK STONE GENERAL INFORMATION CAUTION: REMEMBER THAT POLYMER UNDERGOES EXPANSION/CONTRACTION DUE TO VARIATIONS IN TEMPERATURE. THE FOLLOWING INSTRUCTIONS WILL ALLOW
KERRAFRONT INSTRUCTION FOR INSTALLATIONS AND USE. Cellular cladding FS-201 / FS-202. kerrafront.com
 KERRAFRONT INSTRUCTION FOR INSTALLATIONS AND USE Cellular cladding kerrafront.com - 2 - SUMMARY Installation - general rules 3 Cladding boards - detailed description 4 Trims and accessories 5 Horizontal
Installation Guide. Capped Cellular PVC Fencing. Table of Contents. Storage and Handling Tools Needed Fence Layout and Locating Posts
 Capped Cellular PVC Fencing Installation Guide Table of Contents Storage and Handling Tools Needed Fence Layout and Locating Posts Installation instructions 4 x 4 Over Sleeve Post - 3.5 Rail Privacy Shadowbox
ASS 70 FD folding/sliding door installation guide
 ASS 70 FD folding/sliding door installation guide 2 Preparation IMPORTANT These doors should be fitted by competent and trained installers. Please read these instructions thoroughly before beginning the
Siding Systems NOVIKSTONETM FS FIELDSTONE INSTALLATION GUIDE
 Siding Systems NOVIKSTONETM FS FIELDSTONE GENERAL INFORMATION CAUTION: REMEMBER THAT POLYMER UNDERGOES EXPANSION/CONTRACTION DUE TO VARIATIONS IN TEMPERATURE. THE FOLLOWING INSTRUCTIONS WILL ALLOW FOR
INSTALLING YOUR UNICLIC FLOOR - Small planks / 3 sizes
 INSTALLING YOUR UNICLIC FLOOR - Small planks / 3 sizes 1) General The panels must be rotated on both short and long edges to fit into one another. This can be performed by inserting either the tongue into
50948-RHN Putney. 06 January This document includes: Aluminium strip/ sheet coverings/ flashings 1. Code Section Revision Dated
 50948-RHN Putney 06 January 2018 This document includes: Code Section Revision Dated H72 Aluminium strip/ sheet coverings/ flashings 1 Table of Contents Title H72 Aluminium strip/ sheet coverings/ flashings
Fold-A-Way Patio Door ASSEMBLY & INSTALLATION GUIDE
 Fold-A-Way Patio Door ASSEMBLY & INSTALLATION GUIDE This instruction guide provides the minimum recommended procedures to correctly prepare the rough opening, install a fold-a-way patio door unit and apply
GUARDRAIL ALUMINIUM SECURIGARD
 GUARDRAIL ALUMINIUM SECURIGARD ZZNO041UK April 2018 REQUIRED TOOLS Metal shears ( to remove the pallet bindings) Metal saw/batterypowered grinder Mallet Tape measure Cord Screwdriver Rivet gun CAUTION:
Sauna & Steam. Traditional Sauna Installation Instruction Manual
 Traditional Sauna Installation Instruction Manual Oceanic Ltd, Pountney Street, Wolverhampton, WV2 4HX Phone: 01902 450 550 sales@oceanic-saunas.co.uk www.oceanic-saunas.co.uk Contents 1.Introduction................................................
Cladding. Quick Installation Guide. HardiePlank Cladding with ColorPlus Technology. For façades that last longer. Simple. Reliable. Durable.
 Cladding Quick Installation Guide HardiePlank Cladding with ColorPlus Technology. For façades that last longer. Simple. Reliable. Durable. Installation instructions This document is a step by step guide
SHIPLOCK CLADDING PRODUCT GUIDE INSTALLATION TECHNICAL SPECIFICATIONS CARE & MAINTENANCE
 SHIPLOCK CLADDING PRODUCT GUIDE INSTALLATION TECHNICAL SPECIFICATIONS CARE & MAINTENANCE SHIPLOCK CLADDING CN-04E / CN-04W / CN-W008 Prior to the installation of any form of Cladding, it is recommended
EXPOSED FASTENING SYSTEM WITH SCREWS OR RIVETS
 External EXPOSED FASTENING SYSTEM WITH SCREWS OR RIVETS Parklex Facade may be installed using mechanical fasteners, such as screws or rivets. The panels are attached to vertical battens. In the event that
DUTCH GABLE FREESTANDING CARPORT
 DUTCH GABLE FREESTANDING CARPORT STRATCO OUTBACK ASSEMBLY INSTRUCTIONS. Your complete guide to building a FREESTANDING Outback DUTCH GABLE CARPORT BEFORE YOU START Carefully read these instructions. If
Ulltraclad Aluminium Cladding. Contents. 1.0 General Information Design Information Installation Information 7. 4.
 Ulltraclad Aluminium Cladding Contents 1.0 General Information 2 2.0 Design Information 4 3.0 Installation Information 7 4.0 Maintenance 10 5.0 Health & Safety 10 1 1.0 General Information 1.1 Introduction
Evorail Guardrail has Evolved
 Evorail Guardrail has Evolved Introduction o About Evorail o Legislation & Hierarchy of Fall Protection o Evorail The Systems Evorail Standard Evorail Radius Evorail Collapsible Evorail Top Fixed Evorail
4256HM JAMES HARDIE MONOLITHIC CLADDING
 4256HM JAMES HARDIE MONOLITHIC CLADDING 1. GENERAL This section relates to the supply and fixing of fibre cement flush finish cladding: - James Hardie Monotek Sheet for textured coating systems - James
IF INSTALLING ANY OF THE PORTMAN SELF CLOSING SYSTEMS, PLEASE READ THE CORRESPONDING FITTING INSTRUCTIONS SUPPLIED WITH THE CLOSING SYSTEM FIRST
 Set A Set B PFD60 Fire Door Kit FITTING INSTRUCTIONS IF INSTALLING ANY OF THE PORTMAN SELF CLOSING SYSTEMS, PLEASE READ THE CORRESPONDING FITTING INSTRUCTIONS SUPPLIED WITH THE CLOSING SYSTEM FIRST SUGGESTED
Installation Guide. Deckorum. Composite Decking
 Installation Guide Deckorum Composite Decking 1. Introduction Welcome to Deckorum Installation Guide Please fully read the installation guide before commencing any installation works. This will provide
Installation Guide (888)
") BamDeck Installation Guide (888) 788-2254 The Collection Decking Systems BAMDECK 4G 5-7/16 Wide Plank Dims: 192 L x 5-7/16 W x 13/16 H BAMDECK 4G WIDE 8-1/4 Wide Plank Dims: 96 L x 8-1/4 W x 13/16 H BAMDECK
BamDeck Installation Guide (888) 788-2254 The Collection Decking Systems BAMDECK 4G 5-7/16 Wide Plank Dims: 192 L x 5-7/16 W x 13/16 H BAMDECK 4G WIDE 8-1/4 Wide Plank Dims: 96 L x 8-1/4 W x 13/16 H BAMDECK
COMPONENTS OF THE CLICKFAST FASCIA AND GUTTER SYSTEM 5: INTERNAL MITRE
 INTRODUCING THE CLICKFAST FASCIA AND GUTTER SYSTEM The Clickfast Fascia and Gutter System was originally designed by Stratco and has proven to be the most successful fascia and gutter system in Australia
CURVED ROOF ASSEMBLY INSTRUCTIONS ATTACHED VERANDAH. Your supplementary guide to building an ATTACHED CURVED ROOF VERANDAH or PATIO BEFORE YOU START
 ROOF ATTACHED VERANDAH ASSEMBLY INSTRUCTIONS Your supplementary guide to building an ATTACHED ROOF VERANDAH or PATIO This set of instructions should be used in conjunction with the Stratco instruction
SLIDING MECHANISM TROLLEY CATCH TROLLEY ASSEMBLY FLOOR GUIDE
 Set A Set B PFD30 Fire Door Kit FITTING INSTRUCTIONS For use with 44mm thick doors only For Single and Double doors IF INSTALLING A TOUCH LATCH, PLEASE READ THE CORRESPONDING FITTING INSTRUCTIONS FIRST
Good Neighbour INSTALLATION GUIDE GOOD NEIGHBOUR FENCING BEFORE YOU START TOOLS AND HARDWARE REQUIRED
 INSTALLATION GUIDE Good Neighbour GOOD NEIGHBOUR FENCING Stratco Good Neighbour fencing is both strong and attractive. Its design allows clean and uncluttered lines to be enjoyed by neighbours on both
Instructions for Installation on a Flat Roof
 Lightway, s.r.o. Registered office: Ledvinova 1714, 149 00 Praha 4 Offices: Za Humny 1054/4a, 161 00 Praha 6 tel.: 235 300 694, fax: 235 300 218 Company ID No.: 63669366, Tax ID No.: CZ63669366 Bank: KB
Installation Instructions Palladium Wall Panels - Demountable Factory Finished Edges and Field Cut Edges
 Please read all instructions before installing Palladium Wall Panel System. 1. Before installation: a. Acclimate Palladium Panels, reveals, adhesives and wall substrates to room temperature 24 hours before
Installation Guide. Step-by-Step Guide
 Installation Guide Step-by-Step Guide Thank you for choosing one of our quality products. We are the industry leaders in designer panel fencing. This product will provide you with years of trouble free
ClicWall. Decorative wall covering
 ClicWall Decorative wall covering ClicWall Installation guide Overview 1. Product description... 3 2. Dimensions and weight... 3 3. Transport... 3 4. Storage and installation conditions... 3 5. Installation
NEW equinox INSTALLATION GUIDE Issue
 NEW equinox INSTALLATION GUIDE Issue 2 CONTENTS 1. Preparing the ring beam 2 2. Installing the framework 3 3. How to install structural support posts 7 4. Insulation and waterproofing 8 5. Tile application:
COMPOSITE SIDING INSTALLATION GUIDE
 CENTURY HOME LIVING COMPOSITE SIDING INSTALLATION GUIDE Read all instructions prior to installing any siding product. Failure to install and finish this product in accordance with all local building codes,
EASY INSTALLATION GUIDE WPC DECKING.
 EASY INSTALLATION GUIDE WPC DECKING www.eva-last.com EASY INSTALLATION GUIDE Condensed / Quick glance Installation Instructions Thank you for your interest in our Eva-tech WPC product range. Whether you
AWNING SYSTEM INSTALLATION INSTRUCTIONS ALL VERTICAL WALLS
 INSTALLATION MANUAL AWNING SYSTEM INSTALLATION INSTRUCTIONS ALL VERTICAL WALLS TABLE OF CONTENTS Table of Contents... 3 Components... 4 System Components... 6 Attachment Components... 7 Module Compatibility...
ASS 70 FD folding / sliding door. Installation Guide
 ASS 70 FD folding / sliding door Installation Guide IMPORTANT! These doors should be fitted by competent and trained installers. Please read these instructions thoroughly before beginning the installation.
Cardo DOOR & RETURN SHOWER ENCLOSURE INSTALLATION PLEASE READ THESE INSTRUCTIONS CAREFULLY.
 Cardo DOOR & RETURN SHOWER ENCLOSURE INSTALLATION PLEASE READ THESE INSTRUCTIONS CAREFULLY. IT IS RECOMMENDED TO USE A TRAINED SHOWER INSTALLER FOR THIS SHOWER TO OBTAIN THE BEST INSTALLATION. D Square
ALLORA SWING PANEL INSTALLATION INSTRUCTIONS
 ALLORA SWING PANEL INSTALLATION INSTRUCTIONS Before Installation Please check that your Allora Swing Panel is undamaged SEQUENCE OF INSTALLATION These instructions are also available from the Athena website:
NEW equinox INSTALLATION GUIDE Issue
 NEW equinox INSTALLATION GUIDE Issue 1 CONTENTS If in doubt at any stage 1. Preparing the ring beam 2 2. Installing the framework 3 3. Insulation and waterproofing 7 4. Tile application: Steel tiles 9
60.AL. Lauder. Facade LAUDESCHER
 60.AL Facade Lauder LAUDESCHER General performance Industrial manufacturing process Rebated using halved joint assembly guaranteeing perfect hold of the linear panel. Solid wood All of our solid wood is
GOOD NEIGHBOUR FENCING INSTALLATION GUIDE GOOD NEIGHBOUR FENCING BEFORE YOU START TOOLS AND HARDWARE REQUIRED
 GOOD NEIGHBOUR FENCING Stratco Good Neighbour fencing is both strong and attractive. Its design allows clean and uncluttered lines to be enjoyed by neighbours on both sides of the fence. Good Neighbour
SHADOWBOX INSTALLATION FOR: Standard 6 H x 8 W Shadowbox Fence 5 x 5 Routed Posts Dog Ear or Straight-Edge Pickets 1.75 x 3.5 Rail
 SHADOWBOX INSTALLATION FOR: Standard 6 H x 8 W Shadowbox Fence 5 x 5 Routed Posts Dog Ear or Straight-Edge Pickets 1.75 x 3.5 Rail Storage and Handling Fence Preparation and Layout Locate and Set Posts
LUX INSTALLATION GUIDE. LUX Panel V Groove Installation. Installation Guide. February
 LUX Panel V Groove Installation Installation Guide February 2017 www.luxpanel.ca LUX Panel V Groove Installation LUX panel steel cladding is designed to be installed vertically, horizontally, diagonally
I N S TA L L AT I O N & M A I N T E N A N C E G U I D E
 I N S TA L L AT I O N & M A I N T E N A N C E G U I D E E N V I R O B U I L D. C O M + 4 4 ( 0 ) 2 0 8 0 8 8 4 8 8 8 Version 3.2 EnviroBuild 2018 C O N T E N T S Storage & Handling 03 Tools 04 Calculating
Installation Guide. deckorum Composite Decking
 Installation Guide deckorum Composite Decking 1. Introduction Welcome to Deckorum installation Guide Please fully read the installation guide before commencing any installation works. This will provide
External cladding technical instructions
 External cladding technical instructions Contents External cladding technical instructions... 1 General... 2 Vertical cladding... 3 Horizontal cladding... 5 Lower end of the cladding and the plinth...
TECHNICAL GUIDE BEONSTONE PANELIZED STONE SIDING
 TECHNICAL GUIDE BEONSTONE PANELIZED STONE SIDING TABLE OF CONTENTS This installation guide provides detailed step-by-step instructions for do-it-yourself projects. We invite you to read it carefully and
SIDING INSTALLATION GUIDE
 READ THIS ENTIRE GUIDE CAREFULLY BEFORE INSTALLING NOBELIA SIDING. This installation guide applies to all NOBELIA siding profiles, including SPF tongue-and-groove and exposed nail siding. IMPORTANT: FAILURE
This installation guide has been created to assist in constructing a Liniar conservatory roof from a kit format.
 1.00 - Introduction This installation guide has been created to assist in constructing a Liniar conservatory roof from a kit format. Please note, each roof has been individually designed to meet specific
WOODWORKS Walls. Installation Instructions WALL
 WALL Systems Between us, ideas become reality WOODWORKS Walls Installation Instructions 1. GENERAL 1.1. Product Description WoodWorks walls consist of 2' x 4', 2' x 8', 2' x 9' or 2' x 10' perforated and
installation care & maintenance instructions lifecycledecking.com 25-year limited residential warranty 20-year limited commercial warranty
 installation care & maintenance instructions lifecycledecking.com 25-year limited residential warranty 20-year limited commercial warranty Installation Instructions As with any building project, use proper
Installation Guide (888)
") BamDeck Installation Guide (888) 788-2254 The Collection Decking Systems BAMDECK 3G 5-7/16 Wide Plank Dims: 96 L x 5-7/16 W x 13/16 H BAMDECK 3G 16FT. 5-7/16 Wide Plank Dims: 192 L x 5-1/2 W x 13/16 H
BamDeck Installation Guide (888) 788-2254 The Collection Decking Systems BAMDECK 3G 5-7/16 Wide Plank Dims: 96 L x 5-7/16 W x 13/16 H BAMDECK 3G 16FT. 5-7/16 Wide Plank Dims: 192 L x 5-1/2 W x 13/16 H
Instructions for Installation on a Pitched Roof LIGHTWAY optical tube LW 260, LW 320, LW 520, LW 760
 Lightway, s.r.o. Registered office: Ledvinova 1714, 149 00 Praha 4 Offices: Za Humny 1054/4a, 161 00 Praha 6 tel.: 235 300 694, fax: 235 300 218 Company ID No.: 63669366, Tax ID No.: CZ63669366 Bank: KB
multipanel Installation (panels) CONTENTS
 CONTENTS") multipanel Installation (panels) The following is an installation guide for fitting multipanel to walls, tiles, plaster, chipboard or concrete. A separate guide is available for fitting multipanel shower
multipanel Installation (panels) The following is an installation guide for fitting multipanel to walls, tiles, plaster, chipboard or concrete. A separate guide is available for fitting multipanel shower
Installation Manual for Metal Emperor Lockers
 P a g e 1 Table of Contents Page General Notes and Tools Required 2-3 Assemble Shelves with Coat Hooks/Coat Rods 4 Fastening Chart 5 Knock Down Locker Assembly (Banks of Three) 6-12 Appendix A: Dress End
Columbia Laminate Installation Instructions
 Columbia Laminate Installation Instructions 1. General Uniclic is a revolutionary system for installing laminated flooring without using glue. Uniclic uses an ingenious form of tongue and groove to click
PRIVACY INSTALLATION FOR: Standard 6 H x 8 W Privacy Fence 4 x 4 Post Sleeve & Brackets Dog Ear or Straight-Edge Pickets 1.75 x 3.
 PRIVACY INSTALLATION FOR: Standard 6 H x 8 W Privacy Fence 4 x 4 Post Sleeve & Brackets Dog Ear or Straight-Edge Pickets 1.75 x 3.5 Rail Storage and Handling Fence Preparation and Layout Locate and Set
Siding Systems NOVIKSHAKE TM HR HALF-ROUND INSTALLATION GUIDE
 Siding Systems NOVIKSHAKE TM HR HALF-ROUND GENERAL INFORMATION CAUTION: REMEMBER THAT POLYMER UNDERGOES EXPANSION/CONTRACTION DUE TO VARIATIONS IN TEMPERATURE. THE FOLLOWING INSTRUCTIONS WILL ALLOW FOR
Safety Glasses Safety Gloves Ladders Measuring Tape Spirit Level String Line. Tin-Snips Rivet Gun Caulking Gun Silicone Socket Set
 BEFORE YOU START Carefully read these instructions and refer to them constantly during each stage of construction. If you do not have all the necessary tools or information, contact Stratco for advice.
Walls Fact Sheets. Partition Walls and Walls Cladding. Perforated Board. Sandwich Board
 s Partition and Perforated Board Sandwich Board Please consult Viroc Technical File available at www.viroc.pt, on EN language, on Downloads page. Other Viroc Recommended Solutions files, organized by type
DO NOT HESITATE TO CONTACT US TO BE GUIDE DURING THE INSTALLATION OF SQUAREDECKO PRODUCTS
 Table of contents Product specifications Step 1 : Surface preparation Installation guide Step 2-3-4 : Method of installation Step 5 : Layout of tiles Step 6 : Installation of tiles on the side of the structure
SLIDING MECHANISM TROLLEY CATCH TROLLEY ASSEMBLY FLOOR GUIDE
 Set A Set B PFD30 SG Fire Door Kit FITTING INSTRUCTIONS For use with 44mm thick doors only For Single and Double doors SUGGESTED TOOLS DRILL G-CLAMP TAPE MEASURE (Image for reference only) HACKSAW POCKET
Cabonyx Installation Manual
 Cabonyx Installation Manual Content Deck-Nyx and Plan-Nyx Installation Page 1 Flooring Products Page 1 Accessories Page 1 Installation Tools Page 2 Preparing Sub-structure Page 2 Installation Page 4 Cautions
Fitting Guide. Measuring your walls
 Fitting Guide Measuring your walls Once you have decided where you are fitting your panels you need measure the width and the height of each wall you are fitting onto. Our panels can be laid vertically
SANERI 3 º. Self-adhesive SBS-elastomer bitumen cap sheet
 SANERI 3 º Self-adhesive SBS-elastomer bitumen cap sheet 0809 www.katepal.fi 06 EN 13707 Producer: KATEPAL OY P. O. Box 33 FI-37501 LEMPÄÄLÄ FINLAND Tel. +358 (0)3 375 9111 Fax +358 (0)3 375 0974 E-mail:
Roofs. Installation instructions Models Classic C and D
 Roofs Installation instructions Models Classic C and D A complete roof includes a lot more than just the roofin g sheets. A combination of lead-ins, water removal systems, ladders, roof bridges and snow
Installation Instructions for Icopal Guttering System.
 Installation Instructions for Icopal Guttering System. Cutting & Handling (1) Where it is necessary to cut or trim the components of the rainwater system tin snips or hacksaws should be used, the use of
GSE INTEGRATION INSTALLATION MANUAL For photo-voltaic systems partially covering the roof
 GSE INTEGRATION INSTALLATION MANUAL For photo-voltaic systems partially covering the roof V 7.5 WWW.GSEINTEGRATION.COM Contents STEP BY STEP Presentation of system p.4 Contents of kit p.5 GSE Integration
lindab we simplify construction LindabSandwichPanels Installation instructions PIR Panels
 lindab we simplify construction LindabSandwichPanels Installation instructions PIR Panels Assembly instructions Before you start Check that the panel support structures are level. Position the packages
Aluminum Clad Wood Window 1/2 Reinforced Field Mulling and Stacking Supplement
 Aluminum Clad Wood Window 1/2 Reinforced Field Mulling and Stacking Supplement 1 Aluminum Clad Wood Window 1/2 Reinforced Field Mulling and Stacking Supplement The following instructions are a supplement
XL JOINERY LTD LA PORTE VISTA MODULAR 3 ASSEMBLY INSTRUCTIONS
 XL JOINERY LTD LA PORTE VISTA MODULAR 3 2090mm High x 4687mm Wide ASSEMBLY INSTRUCTIONS READ AND UNDERSTAND THESE INSTRUCTIONS FULLY PRIOR TO STARTING INSTALLATION. IT IS STRONGLY RECOMMENDED THAT A COMPETENT
Steel Reinforced Joining Thank you for choosing Andersen. Please leave this guide with building owner.
 Steel Reinforced Joining (Horizontal/Vertical) for Andersen 400 Series Woodwright & Tilt-Wash Double-Hung, Picture, and Transom Windows and 400 Series Double-Hung Half Circle and Flexiframe Specialty Windows
Installation manual. For setting in concrete/on base plates - Panel height 1830
 1 Aluminium fencing and drive-in gates Installation manual For setting in concrete/on base plates - Panel height 1830 Aluclos system components: U10 Connecting U-bracket 1900 mm CL18/CL18.XL Half-height
Method of Build 1. Fire. Sound
 Method of Build 1 General Viso Fire & Acoustic in the solid form differs from most other systems as it can be erected using 12.5mm & 15.0mm boards within the same Aluminium framework. Also hidden fix board
Roofstyle. touch. the individual. touch BUILDING PRODUCTS
 the individual touch touch BUILDING PRODUCTS Introduction decorative bargeboards and fascias can add a stylish finishing touch to any home. The Swish system has been designed to allow a wide choice of
Installation Instructions
 Supafold Slide Aside System Three Fold Room Divider Installation Instructions Distinctive Doors Ltd Supafold Slide Aside Internal Folding System IMPORTANT: Before proceeding with the installation, and
INSTALLATION GUIDE DECKING.
 INSTALLATION GUIDE DECKING www.ttp-online.de/resysta CONTENT LATEST TEST RESULT Classification C, DIN 51097: Features, made by, best skid-resistance properties and is eminently suitable for wet barefoot
Installation Instructions
 Installation Instructions Alcove Enclosure Before Installation please check that your shower enclosure system is undamaged Please read these instructions carefully March 2015 TOOLS REQUIRED Electric or
DECK 30 & DECK 30 XS DECKING BOARDS hollow and solid 30 cm boards
 DECK 30 & DECK 30 XS DECKING BOARDS hollow and solid 30 cm boards terrace - footpath - foot bridge - roof terrace TECHNICAL INSTALLATION GUIDE Ref LTGP 06/2015-010 TO READ CAREFULLY IMPORTANT INFORMATION
Wall mounting with holding profile
 B Main profile C Edge profile D Wall spacer E Heradesign acoustic panel Edge distance max. 250 mm c Centre distance of basic section (see table) B max. 600 mm or 625 mm a Centre distance of spacer (see
INSTALL IN 2 DAYS. *Assumes 3-man fitting team. equinox. Tiled roof system. Installation guide ISSUE 1
 INSTALL IN 2 DAYS *Assumes 3-man fitting team equinox Tiled roof system Installation guide ISSUE 1 Equinox tiled roof system Installation guide Contents Pre-installation checks 1. Installing the framework
Olympia Plus Sports Ceiling Impact Class 1A
 Olympia Plus Sports Ceiling Impact Class 1A Suspension system Exposed impact-resistant 50mm grid system 11 6 9 8 12 7 11 4 1 5 3B 3A 10 2 1. 50 mm main runner CMC 3050 2. 50 mm cross tee CMC 3054 3. Hold-down
LuxCore Installation Instructions
 LuxCore Installation Instructions ATTENTION: LuxCore PANELS MUST BE ACCLIMATIZED FOR 24 HOURS BEFORE INSTALLATION PLEASE READ ALL INSTRUCTIONS PRIOR TO INSTALLATION The guidelines provided herein have
Hardware Fitting Accessories Accessories
 Door viewer Suitable for door thicknesses (a) 34 52 mm Telescopic version Without flap Angle of vision: 160º Door drilling: 12 mm Suitable for door thicknesses (a) 35 78 mm Telescopic version Without flap
16ft Polytunnel Assembly Instructions
 CONTENTS Section Page 1. FOUNDATION TUBES: Option A Ground Anchor Plates 3 2. FOUNDATION TUBES: Option B Concreted Foundation Tubes 5 3. STEEL FRAME ASSEMBLY & INSTALLATION 6 4. CROP BARS 8 5. TIMBER END
Sheet Steel Facts. Most common head design for self-drilling, self-tapping screws.
 Sheet Steel Facts Fastener Guide for Sheet Steel Building Products August, 2003 Fastener Materials Fasteners are manufactured from several materials and coatings. For the purpose of this fact sheet, the
Robert Bosch GmbH. Lounge light fixture
 Lounge light fixture Nice and relaxing Lounge light fixture Light has an important effect on mood. This cool light fixture is perfect for creating a cosy lounge atmosphere. 1 Introduction This cool light
Installation guide for 20/20
 Introduction The following installation instructions are recommended minimum requirements for the 20/20. The designer and fixer should ensure that tiles are installed in accordance with BS 5534; The British
Standing seam installation guide
 ROOFING Standing seam installation guide Uniclass G:G:P:N CI/SfB () Mh March 0 Contents Company profile and background to zinc VMZINC has been manufacturing a wide range of rolled zinc products used primarily
PRODUCT INFORMATION FOR ARCHITECTS, ENGINEERS AND INSTALLERS Insulation spacers for commercial metal roofing
 www.roofrazor.com.au PRODUCT INFORMATION FOR ARCHITECTS, ENGINEERS AND INSTALLERS Insulation spacers for commercial metal roofing 1.0WHAT IS THE ROOF RAZOR? u The Roof Razor is a roof insulation spacer