Luxbanx Duo Softbox InStructIonS 1
|
|
|
- Lesley Strickland
- 5 years ago
- Views:
Transcription


1 Luxbanx Duo Softbox Instructions 1
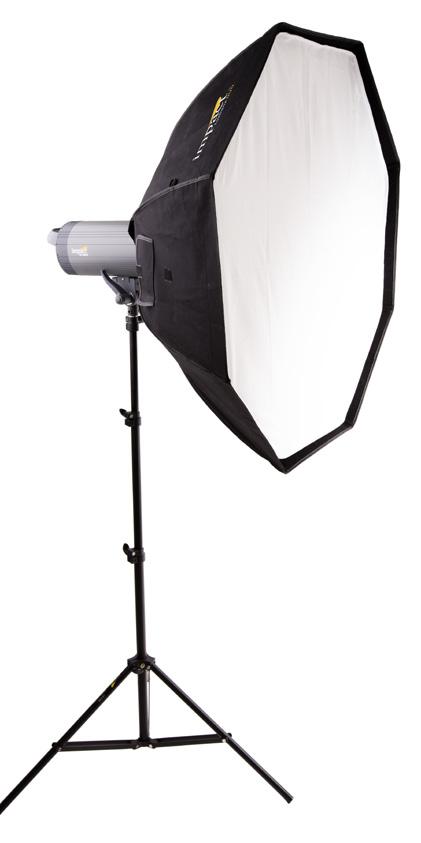
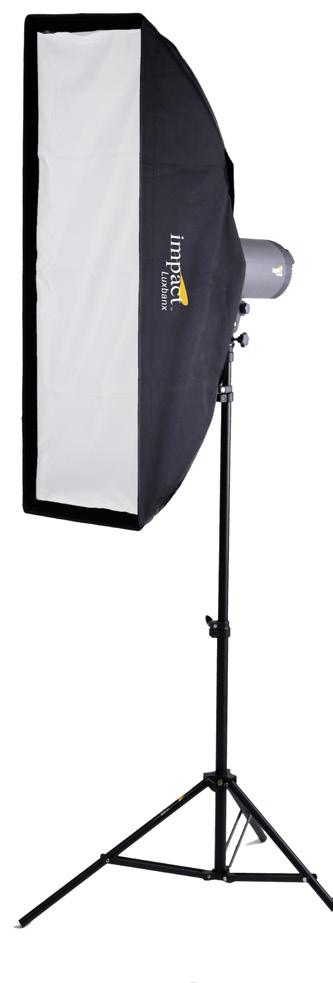
2 Introduction 2 Thank you for choosing the Impact Luxbanx Duo softbox. All Luxbanx softboxes are designed to control and soften light for your specific photographic needs. Duo softboxes are compatible with continuous light sources (including quartz, tungsten, HMI and other hot lights, as well as LED or fluorescent lights) and flash (strobe) lighting sources. Be sure to read and follow the included power and wattage guidelines for lights that can be used with the softbox you have purchased. Luxbanx Duo softboxes come in four shapes: square, rectangular, strip (a long, narrow rectangle), and octagonal. In addition, softboxes come in extra-small, small, medium, large and extra-large sizes. A speed ring (not included) is required to mount the softbox to a light. Each softbox has a front diffuser, which can be attached using touch fasteners. The diffuser can be removed to produce more intense light with increased contrast. Duo softboxes have a brighttextured silver interior finish, which produces bright light with less light loss than a white interior. The removable internal baffle will soften and diffuse light when installed in the softbox. The size and shape of the softbox is related to the lighting effect produced the larger the softbox, the softer the light. The distance from the softbox to the object being photographed also affects the quality of light produced when the softbox is close to the object, the light will be more intense, with more contrast. When the distance is greater, the light will be more diffused, with less contrast. The removable interior baffle will also soften and diffuse light you can add or subtract a degree of contrast through inserting or removing the baffle. Generally, the larger the object you re photographing, the larger the softbox you should use. A large rectangular or octagonal softbox will give more even light for a full-length portrait than a small softbox. The shape of the softbox affects the light produced as well: for a slender object, when photographing a slender object, use a strip softbox that has a similar shape to produce more even light than an octagonal softbox.
3 Instructions Please follow these instructions carefully when assembling your Luxbanx softbox. There are four parts to your Luxbanx: The softbox fabric shell Flex rods Front diffuser Removable internal baffle A speed ring (not included) is required to assemble the Luxbanx softbox and mount it to a light. Speed rings are available separately. Box Contents Softbox fabric shell Four flex rods (eight rods for the octagonal softbox) One spare flex rod Internal baffle Front diffuser Carrying case User instruction manual Warranty Warnings Please read and follow these instructions and keep this manual in a safe place. Keep this unit away from water and any flammable gas or liquid. Use only with lights of the recommended wattage. Handle this unit with care. Keep this unit away from children. Use parts provided by the manufacturer only. Make sure this item is intact and that no parts are missing. All photos in this manual are for illustrative purposes only. 3


4 Luxbanx Assembly Instructions 1. Insert the small tip of a flex rod through the guide loop along the seam of the softbox fabric shell. Insert the tip into the anchoring pocket at the front end of the softbox. The large tip of the flex rod should be positioned at the rear of the softbox fabric shell. Repeat this step with the remaining flex rods. 2. Insert the large tip of one flex rod into a hole on the speed ring. Position the speed ring with the narrower opening facing away from the softbox. 4


5 Luxbanx Assembly Instructions INSET: Strip Model 3. Insert the second flex rod in the softbox fabric shell into the hole in the speed ring that is directly opposite the first hole used. Bend the rod gently but firmly until it is securely seated in the speed ring. 4. Insert the third and fourth flex rods into the speed ring in the same manner. As each flex rod is inserted, flex it gently but firmly into position until each rod is securely seated in the speed ring. 5


6 Luxbanx Assembly Instructions 5. For octagonal softboxes, continue in the same manner, always working in opposite pairs. NOTE: the second pair of flex rods installed should be at a 90 orientation from the first pair so that a square framework is established. 6. Fold the flaps of the softbox shell over the speed ring and press down on the touch fasteners to close the back of the softbox. If you re using a hot light (quartz, tungsten, HMI, etc.), make sure to open the four vents on the sides of the softbox. 6


7 Luxbanx Assembly Instructions 7. If you are using the internal baffle, attach it to the interior now, using the straps with snaps that are built into the softbox. WARNING: Do not use the internal baffle when using a hot light with the Luxbanx Duo softbox. 8. Attach the diffuser to the front of the softbox with the touch fastener. Make sure that the touch fastener is in contact with the softbox all the way around the perimeter, so that no direct light can escape. Make sure that the light is off before attaching the softbox speed ring to your light unit. 7


8 Luxbanx Assembly Instructions NOTE: The first time you use your Luxbanx Duo softbox with a hot light, there may be a slight odor and a small amount of smoke. This is a result of manufacturing residue burning off, and it should only last for a minute or two. 8 An optional Luxbanx grid provides more control over the light of your softbox by producing a narrower beam of light than the softbox alone. When using the optional Luxbanx Grid, be sure to install the softbox front diffuser at the rear edge of the softbox touch fastener strip. This will allow enough of the softbox touch fastener strip to be visible so that there is room to install the Luxbanx grid at the front edge of the touch fastener strip. Press the grid s touch fastener firmly against the softbox s touch fastener strip as smoothly as possible along the length of one side. Repeat for the remaining sides of the grid, attaching sides in opposite pairs.


9 Luxbanx Disassembly Instructions 1. Turn off the power to your light head and disconnect the power cord from the power supply. 2. Allow time for the light unit, flex rods and speed ring to cool off before proceeding. 3. Unmount the softbox assembly from the light head. 4. Pull the flex rods out of the speed ring using the same opposite rod pattern used in assembly. 5. You can leave the diffuser in place if you wish. The softbox will roll up for storage with its diffuser and inner baffle in place. 9
10 Recommended Accessories Luxbanx Grid Speed Ring (Required) Notes 10
11 Limited One Year Warranty Impact provides a limited warranty that this product is free from defects in materials and workmanship to the original purchaser under normal use for a period of one (1) year from the original purchase date or thirty (30) days after replacement whichever occurs later. Our responsibility with respect to this limited warranty shall be limited solely to repair or replacement, at its option, of any product which fails during normal consumer use. To obtain warranty coverage during the Warranty Period, contact your place of purchase ( Seller ) to obtain a return merchandise authorization ( RMA ) number, and return to Seller the defective product along with proof of purchase and the RMA number. This warranty does not extend to damage or failure which results from misuse, neglect, accident, alteration, abuse, improper installation or maintenance. EXCEPT AS PROVIDED HEREIN, IMPACT MAKES NEITHER ANY EXPRESS WARRANTIES NOR ANY IMPLIED WARRANTIES, INCLUDING BUT NOT LIMITED TO ANY IMPLIED WARRANTY OF MERCHANTABILITY OR FITNESS FOR A PARTICULAR PURPOSE. This warranty provides you with specific legal rights, and you may also have additional rights which vary from state to state. Copyright 2013 Gradus Group 11
12 12
Whitebox INSTRUCTIONS
 Whitebox INSTRUCTIONS Introduction Congratulations on your purchase of an Angler Whitebox Octagonal Softbox! Angler softboxes are designed to control and soften light for your specific photographic needs.
Luxbanx Grid for Softbox INSTRUCTIONS
 Luxbanx Grid for Softbox INSTRUCTIONS Introduction Thank you for choosing this Impact Luxbanx Grid. Luxbanx grids provide more light control for Luxbanx softboxes by producing a narrower beam of light
PBSB-2436 Parabox Softbox INSTRUCTIONS
 PBSB-2436 Parabox Softbox 24 36 INSTRUCTIONS Precautions Please read and follow these instructions, and keep this manual in a safe place. Not for use with tungsten, halogen, or other high-heat light sources.
Quikbox Micro Softbox INSTRUCTIONS
 Quikbox Micro Softbox INSTRUCTIONS 1 Introduction Thank you for choosing the Impact Quikbox Micro On-Camera Softbox. This convenient 9 9 in. light modifier slips onto an on-camera flash in seconds, transforming
VE-TTLHX32. Hexoval Softbox 32. for Venture TTL 600 Ws Monolight INSTRUCTIONS
 VE-TTLHX32 Hexoval Softbox 32 for Venture TTL 600 Ws Monolight INSTRUCTIONS Introduction Thank you for choosing Impact. The Impact VE-TTLHX32 is a 32 hexoval softbox for the Venture TTL monolight. The
SPEED RING USER MANUAL SR-OCFF
 SPEED RING USER MANUAL SR-OCFF INTRODUCTION Thank you for choosing Raya. The Raya SR-OCFF Speed Ring is designed exclusively to mount the Raya OC-OSB80 32 or Impact FF- OSB60 24 Octa Softboxes to the Raya
EASY FOLD SOFTBOX SET EFS
 EASY FOLD SOFTBOX SET EFS INTRODUCTION Thank you for choosing the Raya Easy Fold Softbox Set. This set enables you to securely mount flashes of all sizes to a softbox using its adjustable shoe mount, even
Fresnel Spot S-Mount Attachment INSTRUCTIONS
 Fresnel Spot S-Mount Attachment 10 40 INSTRUCTIONS Introduction Thank you for choosing Impact. The Impact LM-FSA1040 is an innovative light-shaping tool that is compatible with studio strobes or LEDs with
UNIVERSAL DIFFUSER SERIES USER GUIDE
 UNIVERSAL DIFFUSER SERIES USER GUIDE 2 INTRODUCTION GENERAL INFORMATION Thank you for choosing a component of the Vello Universal Diffuser Series. Our diffusers and accessories extend the functionality
OLED-55 USER MANUAL OCTALUX LED. OctaLux LED - USER MANUAL 1
 OLED-55 OCTALUX LED USER MANUAL OctaLux LED - USER MANUAL 1 OctaLux LED INTRODUCTION Thank you for choosing Genaray. The OctaLux LED Light Softbox produces bright, soft, and consistent light that s designed
WHITE BALANCE CARD SET
 WHITE BALANCE CARD SET USER MANUAL THANK YOU FOR CHOOSING VELLO This White Balance Card Set is your tool to ensure accurate color in your photos and videos. The gray card provides a neutral color, while
CFC Series Cable Replacement Kit. for CFP Series Carbon Fiber Boom Poles. Owner s Manual
 CFC Series Cable Replacement Kit for CFP Series Carbon Fiber Boom Poles Owner s Manual TA (mini XLR) connector Right-angle XLR connector Nylon line Coiled XLR cable. mm hex key Tip strain relief Introduction
MW-C WALL MOUNT ADAPTER. For MD-ASL15W and MD-BSL15W Monitor Mounts. User Manual
 MW-C WALL MOUNT ADAPTER For MD-ASL15W and MD-BSL15W Monitor Mounts User Manual Thank you for choosing Gabor. The Gabor MW-C is a dedicated wall mount for the MD-ASL15W (single display) and MD-BSL15W (dual
Folding Beauty Dish. Guide
 Folding Beauty Dish Guide Introduction The Glow Folding Beauty Dish is a light modifier that provides extra large beauty light advantages with strobes, monolights, and most LED lights. The collapsible,
QuikBalance. Collapsible 18% Gray Panel INSTRUCTIONS
 QuikBalance Collapsible 18% Gray Panel INSTRUCTIONS 1 Introduction Thank you for choosing the Impact QuikBalance Collapsible 18% Gray Panel. This versatile, portable, easy-to-use photographic tool makes
HUMBUSTER. Dual Channel Hum Eliminator HMX-2. User Manual
 HUMBUSTER Dual Channel Hum Eliminator User Manual Thank you for choosing Kopul. Kopul s Humbuster is an effective yet costeffective way to eliminate the 60 cycle buzz and noise caused by ground loops.
FM-3250 / FIXED WALL MOUNT. For Flat Panel Screens. User Manual
 FM-3250 / FIXED WALL MOUNT For 32-50 Flat Panel Screens User Manual Thank you for choosing Gabor. Thank you for choosing Gabor s fixed flat panel screen wall mount. This heavy-duty wall mount has been
FSM / FULL SWING WALL MOUNT. For Flat Panel Screens. User Manual
 FSM- 3760 / FULL SWING WALL MOUNT For 37-60 Flat Panel Screens User Manual Thank you for choosing Gabor. Thank you for choosing Gabor s full swing flat panel screen wall mount. This heavy-duty wall mount
EZ Lock Octa Quick Softbox. Guide
 EZ Lock Octa Quick Softbox Guide Introduction Glow EZ Lock Octa Quick Softbox sports a dynamic eight-sided deep parabolic shape featuring flattering, soft and rich color lighting with all the great advantages
FSM / FULL SWING WALL MOUNT. For Flat Panel Screens. User Manual
 FSM- 2742 / FULL SWING WALL MOUNT For 27-42 Flat Panel Screens User Manual Thank you for choosing Gabor. Thank you for choosing Gabor s full swing flat panel screen wall mount. This heavy-duty wall mount
TSM / FULL MOTION WALL MOUNT. For Flat Panel Screens. User Manual
 TSM- 1327 / FULL MOTION WALL MOUNT For 13-27 Flat Panel Screens User Manual Thank you for choosing Gabor. Thank you for choosing Gabor s full motion flat panel screen wall mount. This heavy-duty wall mount
Inspiration strikes. VS-210 FLASH. User s Manual
 Inspiration strikes. VS-210 FLASH User s Manual Copyright 2015 Gradus Group. Bolt and other names of Bolt products are trademarks of Gradus Group. Other product and corporate names mentioned herein are
PA WATT PORTABLE PA SYSTEM PRODUCT MANUAL
 PA-5150 5 150-WATT PORTABLE PA SYSTEM PRODUCT MANUAL THANK YOU FOR CHOOSING POLSEN. The Polsen PA-5150 is an active PA system that s ideal for solo performers or vocalists. It can be used as a PA system
Installation Instructions Replacement Top (Part # ) Unlimited (4 Door) Replacement Top (Part # ) JK (2 Door)
 Unlimited (4 Door) Replacement Top (Part # ) JK (2 Door)") NOTE: Read entire instructions thoroughly before installing this product. It is recommended to install this Top when temperatures are above 70 degrees. The top can contract and stretch an inch or more.
NOTE: Read entire instructions thoroughly before installing this product. It is recommended to install this Top when temperatures are above 70 degrees. The top can contract and stretch an inch or more.
SCM-660 USER S GUIDE. Table of Contents:
 Table of Contents: USER S GUIDE Introduction... 2 Overview... 3 Precautions...4 Mounting the Microphone... 5 Selectable Polar Pattern Switch...6 High-Pass Filter... 7 Attenuation Pad... 7 Connecting the
SCM-600 USER S GUIDE. Table of Contents:
 Table of Contents: USER S GUIDE Introduction... 2 Overview... 3 Precautions...4 Mounting the Microphone... 5 Positioning the Microphone...6 High-Pass Filter...6 Attenuation Pad...6 Connecting the Microphone...
impact VC-500LR Monolight INSTRUCTIONS
 impact lighting equipment and accessories VC-500LR Monolight INSTRUCTIONS Congratulations on your purchase of the Impact VC-500LR Monolight. We feel that it will contribute much to your photographic skill
EZ Lock Deep Parabolic Softbox. Guide
 EZ Lock Deep Parabolic Softbox Guide Introduction Glow EZ Lock Deep Parabolic Softbox is an ingenious, portable version of the light modifier famous for stunning fashion and portraiture images showcasing
AcuteB Head. User s Guide
 User s Guide SAFETY PRECAUTIONS! Read and follow all safety instructions below carefully to avoid injuries or damages! Make sure that this user manual always accompanies equipment! Profoto products are
Radiant Pro 2500 Video Light (Cat. No. 6047)
") Fantasea Line Radiant Pro 2500 Video Light (Cat. No. 6047) Instruction Manual 1 TABLE OF CONTENTS TABLE OF CONTENTS... 2 DISCLAIMER... 3 INTRODUCTION... 3 GENERAL INFORMATION... 3 SPECIFICATIONS... 4 INCLUDED
Fantasea Line Radiant Pro 2500 Video Light (Cat. No. 6047) Instruction Manual 1 TABLE OF CONTENTS TABLE OF CONTENTS... 2 DISCLAIMER... 3 INTRODUCTION... 3 GENERAL INFORMATION... 3 SPECIFICATIONS... 4 INCLUDED
Radiant 3000F Video Light (Cat. No. 6052)
") Fantasea Line Radiant 3000F Video Light (Cat. No. 6052) Instruction Manual 1 TABLE OF CONTENTS TABLE OF CONTENTS... 2 DISCLAIMER... 3 INTRODUCTION... 3 GENERAL INFORMATION... 3 SPECIFICATIONS... 4 INCLUDED
Fantasea Line Radiant 3000F Video Light (Cat. No. 6052) Instruction Manual 1 TABLE OF CONTENTS TABLE OF CONTENTS... 2 DISCLAIMER... 3 INTRODUCTION... 3 GENERAL INFORMATION... 3 SPECIFICATIONS... 4 INCLUDED
Basic Spring Motor Roller Shades
 Basic Spring Motor Roller Shades ATTENTION!!! READ CAREFULLY! This shade has a reliable long-lasting Spring Motor. The Spring Motor must have proper tension in order to function as intended. Handling in
Assembly Instructions and Parts Manual JPSF-1 Fence and JPSR Rail Set
 Assembly Instructions and Parts Manual JPSF-1 Fence and JPSR Rail Set WALTER MEIER (Manufacturing) Inc. 427 New Sanford Road LaVergne, Tennessee 37086 Part No. M-708482 Ph.: 800-274-6848 Revision C2 02/2013
Installation Instructions Windjammer
 Installation Instructions Windjammer Vehicle Application Jeep Wrangler 2003 2006 Part Number: 80032 www.bestop.com - We re here to help! Visit our web site and click on Ask a Question. Click here for more
Installation Instructions Sailcloth Replace-a-top
 Installation Instructions Sailcloth Replace-a-top Upper Door Skins Not Included Vehicle Application Jeep Wrangler TJ 2003-2006 Tinted Glass Windows Part Number: 79141 www.bestop.com - We re here to help!
Sailcloth Fabric Replacement Top and Doors with Tinted Side and Rear Curtains Installation Instructions
 Sailcloth Fabric Replacement Top and Doors with Tinted Side and Rear Curtains Installation Instructions TM For: Wrangler / TJ 2003 - Current Part Number: 79129 Inc. This product is only designed for the
WESTPORT 8' SLATE POOL TABLE ASSEMBLY INSTRUCTIONS
 WESTPORT 8' SLATE POOL TABLE ASSEMBLY INSTRUCTIONS NG2690A THANK YOU! Thank you for purchasing this product. We work around the clock and around the globe to ensure that our products maintain the highest
Installation Instructions Fabric Replacement Top Upper Door Skins Not Included
 Installation Instructions Fabric Replacement Top Upper Door Skins Not Included Vehicle Application Jeep Wrangler TJ 1997 and 2002 Clear Glass Windows Part Number: 51127 Jeep Wrangler TJ 1997 and 2002 Tinted
EXTRA TALL WALK-THROUGH GATE
 OWNER S MANUAL MODEL: 0941, 0942 EXTRA TALL WALK-THROUGH GATE WITH SMALL PET DOOR! READ ALL INSTRUCTIONS BEFORE ASSEMBLY AND USE OF GATE. KEEP INSTRUCTIONS FOR FUTURE USE. www.carlsonpetproducts.com Carlson
SP2 CONTINUOUS LIGHT KIT
 SP2 CONTINUOUS LIGHT KIT Model: 2816 SP2 Light Kit ASSEMBLY AND USER MANUAL SP2 CONTINUOUS LIGHT KIT Congratulations on purchasing the best solution for photo studio lighting on a budget. This kit is perfect
INSTRUCTION BOOK FOR. Da-Snap Screen
 INSTRUCTION BOOK FOR Da-Snap Screen Included Hardware Large Wall Bracket (47" Long) Installation screws not included Quantities vary by screen size: Screens 80" and smaller viewing width = 1 Screens over
INSTRUCTION MANUAL INF Fax: (503)
") INSTRUCTION MANUAL INF151 1-800-547-5740 Fax: (503) 643-6322 www.ueiautomotive.com email: info@ueitest.com Introduction Congratulations on your purchase of the INF151 infrared thermometer. Like all UEi
INSTRUCTION MANUAL INF151 1-800-547-5740 Fax: (503) 643-6322 www.ueiautomotive.com email: info@ueitest.com Introduction Congratulations on your purchase of the INF151 infrared thermometer. Like all UEi
WoodTrac Direct Mount Ceiling System
 WoodTrac Direct Mount Ceiling System Assembly Instructions All product is Class C rated and some product is available Class A rated. Check the ordering information to obtain the class rating for your product.
Kit Includes: 4 Door Jeep Wrangler: Marker Tape Drill. 1 Left Door Check Strap/Arm 1 Left Hinge Plate 1 Right Door Check Strap/Arm
 Smart Door Installation Instructions PRODU UCT INSTALL LATION GUI IDE Prior to beginning this or any installation, completely read these instructions to familiarize yourself with the required steps and
INSTALLATION INSTRUCTIONS CJ-5 M38A PART # With Doors
 INSTALLATION INSTRUCTIONS CJ-5 M38A1 1955-1975 PART #109-011 With Doors Thank you for purchasing Specialty s Convertible Top for your Jeep vehicle. It has been designed for great fit and long wear. Please
Sunset Swings By Health in Motion, LLC
 Sunset Swings By Health in Motion, LLC Model 421 Lounge Swing Assembly and Operation Manual Record Serial Number Here www.sunsetswings.com by Health In Motion, LLC. 11/6/2009 421 Owners Assembly and Operation
Installation Instructions Cage Kit JK Unlimited (4-Dr) Part # 76902
 Part # 76902") Please read instructions entirely before installing this product. Drilling is required to install this part. Parts Included Qty Parts Included Qty Driver Front Upright 1 Pass Side Drill Template (7289)
Please read instructions entirely before installing this product. Drilling is required to install this part. Parts Included Qty Parts Included Qty Driver Front Upright 1 Pass Side Drill Template (7289)
SHEET METAL MACHINES, INC. SAFETY & INSTRUCTION MANUAL FOR MODEL N12016 BRAKE MADE IN USA
 NATIONAL SHEET METAL MACHINES, INC. SAFETY & INSTRUCTION MANUAL FOR MODEL N12016 BRAKE MADE IN USA CONTENTS For Safe and Efficient Operation.... 1 Safe Zone.. 2 Parts Lists... 3-4 Machine Dimensions...
Tilting & Swiveling Flat Panel Wall Mount Installation Guide Model: AXS2040
 Tilting & Swiveling Flat Panel Wall Mount Installation Guide Model: AXS2040 20-40 66 lbs. Supports VESA sizes up to: 200x200 For technical assistance or troubleshooting please call 1-855-994-2825 or visit
PRIMO 56" FOOSBALL TABLE ASSEMBLY INSTRUCTIONS
 PRIMO 56" FOOSBALL TABLE ASSEMBLY INSTRUCTIONS NG1035 THANK YOU! Thank you for purchasing this product. We work around the clock and around the globe to ensure that our products maintain the highest possible
ALEX. Assembly Instructions. PARTS - Supplied with Armless, Left and Right-End Chairs. Thank you for your purchase.
 ALEX Assembly Instructions Thank you for your purchase. Unpack all content and check to ensure that all of the parts are in proper condition. To help protect the environment, use the appropriate recycling
Fabric Replacement Top and Doors
 Fabric Replacement Top and Doors Installation Instructions For: Wrangler/TJ 1997 and Newer Part Number: 51131 WARNING This product is designed to enhance the appearance of the vehicle and to shield the
22'W x 13'H Peak Style Shelter Frame Assembly Instructions
 22'W x 13'H Peak Style Shelter Frame Assembly Instructions Recommended Tools Please read instructions COMPLETELY before assembly. This shelter MUST be securely anchored. THIS IS A TEMPORARY STRUCTURE AND
Installation Instructions Dual battery Tray Wrangler & Unlimited Part # 2799
 Please read instructions entirely before installing this product. Wiring is not included with this part and should be done by an experienced technician. This part is designed to work with Optima Class
Replay Top with Tinted Side and Rear Windows Installation Instructions For: Jeep Wrangler (TJ) Part Number: 51141
 Part Number: 51141") Replay Top with Tinted Side and Rear Windows Installation Instructions For: Jeep Wrangler (TJ) 2003 2006 Part Number: 51141 Table of Contents FABRIC REPLACEMENT TOP PARTS LIST... PAGE 2 FABRIC REPLACEMENT
Replay Top with Tinted Side and Rear Windows Installation Instructions For: Jeep Wrangler (TJ) 2003 2006 Part Number: 51141 Table of Contents FABRIC REPLACEMENT TOP PARTS LIST... PAGE 2 FABRIC REPLACEMENT
Assembly Instructions and Parts Manual JPSF-1 Fence and JPSR Rail Set #
 Assembly Instructions and Parts Manual JPSF-1 Fence and JPSR Rail Set #1002493 JET 427 New Sanford Road LaVergne, Tennessee 37086 Part No. M-708482 Ph.: 800-274-6848 Revision C3 02/2014 www.jettools.com
AND. Quick Start Guide
 AND Quick Start Guide Apollo Quick setup and long-lasting results Built on an umbrella frame Quick set up and teardown Fits virtually any studio light Pairs perfect with speedlites Warranty: 1-year (details
MANCHESTER VANITY BASE
 MANCHESTER VANITY BASE INSTALLATION INSTRUCTIONS Questions? Call our customer service department at 1-855-995-5578, 8:30 a.m. - 5 p.m., EST, Monday - Friday or e-mail: contactus@magickwoods.com. Models:
Planishing hammer stand For use with SKU Planishing hammer
 Planishing hammer stand For use with SKU 94847 Planishing hammer Model 96300 Assembly And Operation Instructions Please Note: Planishing Hammer not included with Stand. Due to continuing improvements,
Owner s Manual LSP38 38 Lawn Sweeper
 Owner s Manual LSP38 38 Lawn Sweeper Manual Contents Safety Instructions Assembly Operation Maintenance Parts Warranty 2 4-13 2 11 14-15 16 Your Lawn Sweeper Congratulations on your purchase of a new Precision
Instruction Sheet REB SERIES. Rotating Sliding Base REB18
 Instruction Sheet REB SERIES Rotating Sliding Base REB14 REB18 THANK YOU Thank you for purchasing the REB Series Rotating Sliding Base. Please read these instructions thoroughly before installing this
ProHead. User s Guide
 ProHead User s Guide 2Profoto ProHead Profoto ProHead Thank you for choosing Profoto. Thanks for showing us your confidence by investing in a ProHead unit. For more than four decades we have sought the
MAXIMIST ULTRA PREMIER HVLP SPRAY TANNING SYSTEM
 MAXIMIST ULTRA PREMIER HVLP SPRAY TANNING SYSTEM DO NOT USE EQUIPMENT BEFORE READING THIS MANUAL This manual contains important warnings and instructions. Please read these instructions carefully and keep
MaxiMist SprayMate Pro HVLP TANNING SYSTEM
 MaxiMist SprayMate Pro HVLP TANNING SYSTEM DO NOT USE EQUIPMENT BEFORE READING THIS MANUAL This manual contains important warnings and instructions. Please read these instructions carefully and keep for
LM600 Landmark Permanent Blind
 LM600 Landmark Permanent Blind Get parts online at www.huntriversedge.com P/N: 23033 REV1: 02/23/16 2016 RETI All Rights Reserved INTRODUCTION Landmark Permanent Blinds are engineered with you the hunter
User guide ProHead Plus
 User guide ProHead Plus For other languages visit: /support ProHead Plus 2 Congratulations on your new Profoto product! Thanks for showing us your confidence by investing in a ProHead unit. For more than
GAS HOT GLUE GUN PHKPG 150 A1. Operating and safety instructions IAN
 GAS HOT GLUE GUN PHKPG 150 A1 Operating and safety instructions IAN 285747 14 1 2 13 3 4 5 12 11 10 9 6 7 8 A B C 1. 3. 2. Table of contents 1. Scope of delivery / parts list... 04 Description of the parts...04
MAXIMIST ULTRA PRO HVLP SPRAY TANNING SYSTEM
 MAXIMIST ULTRA PRO HVLP SPRAY TANNING SYSTEM DO NOT USE EQUIPMENT BEFORE READING THIS MANUAL This manual contains important warnings and instructions. Please read these instructions carefully and keep
INSTALLATION INSTRUCTIONS Super Scout PART #
 INSTALLATION INSTRUCTIONS Super Scout 71-80 PART #443-010 Thank you for purchasing Specialty s Convertible Top for your Scout vehicle. It has been designed for great fit and long wear. Please read and
INSTRUCTION BOOK FOR. Parallax 0.8 Screen
 INSTRUCTION BOOK FOR Parallax 0.8 Screen Included Hardware Large Wall Bracket (47" Long) Installation screws not included Quantities vary by screen size: Screens 80" and smaller viewing width = 1 Screens
THANK YOU FOR PURCHASING OUR STUDIO RTA CREATION STATION
 THANK YOU FOR PURCHASING OUR STUDIO RTA MODEL# 20672 IF YOU REQUIRE ANY ASSISTANCE WITH ASSEMBLY, PARTS, OR INFORMATION ON OTHER PRODUCTS, PLEASE VISIT OUR WEBSITE: www.studiorta.com OR CALL OR WRITE THE
Operating Instructions
 3000 Operating Instructions Contents Introduction 1 Operating Instructions 2-4 Demonstrations 5-6 Storing/Handling/Cleaning 7 Safety Precautions 7-8 Specifications 8 FCC Compliance Statement 9-10 Limited
Convertable Binimi Top Assembly and Instruction Guide
 Convertable Binimi Top Assembly and Instruction Guide Taylor Made Convertible Bimini Top Assembly and Instruction Guide: This Kit contains the following components: If you are missing any of the listed
INSTALLATION INSTRUCTIONS Scout II - Fast Trac PART #
 INSTALLATION INSTRUCTIONS Scout II - Fast Trac PART #442-210 Thank you for purchasing Specialty s Convertible Top for your Scout vehicle. It has been designed for great fit and long wear. Please read and
Manual. Operators. DeVORE AVIATION CORPORATION OF AMERICA. Flash Measuring Gun. Patent #5,654,794
 Flash Measuring Gun Operators Manual 6104B JEFFERSON NE ALBUQUERQUE, NEW MEXICO. USA (S05)-345-8713 FAX (505) 344-3835 www.devoreaviation.com Patent #5,654,794 Manual No FGC00105 Table of Contents FMG
R6000 Series Installation Instructions (For Inside Mount Doors)
") R6000 Series Instructions (For Inside Mount Doors) TOOLS REQUIRED: Tape Measure Standard Screwdriver Phillips Head Screwdriver Drill Motor 3/32 Drill Bit 1/8 Drill Bit 3/16 Drill Bit Hack or Chop Saw Framing
R6000 Series Instructions (For Inside Mount Doors) TOOLS REQUIRED: Tape Measure Standard Screwdriver Phillips Head Screwdriver Drill Motor 3/32 Drill Bit 1/8 Drill Bit 3/16 Drill Bit Hack or Chop Saw Framing
 149mm 210mm Design Paw Extra Wide & Extra Tall Walk-Thru Pet Gate With Small Pet Door MODEL NO: 1130 & 1140 Owner s Manual READ ALL INSTRUCTIONS BEFORE ASSEMBLY AND USE OF GATE. KEEP INSTRUCTIONS FOR FUTURE
EASY CLOSE WALK-THROUGH GATE
 OWNER S MANUAL MODEL: 3030, 3036 EASY CLOSE WALK-THROUGH GATE WITH SMALL PET DOOR! READ ALL INSTRUCTIONS BEFORE ASSEMBLY AND USE OF GATE. KEEP INSTRUCTIONS FOR FUTURE USE. www.carlsonpetproducts.com Carlson
Model 6360/6361. Ambulance Cot Fastener INSTALLATION/OPERATION INSTRUCTIONS. IMPORTANT Keep manual on file at all times.
 IMPORTANT Keep manual on file at all times. Model 6360/6361 Ambulance Cot Fastener INSTALLATION/OPERATION INSTRUCTIONS For Parts or Technical Assistance 1 800 784 4336 Table of Contents Introduction..............................................................................
6' x 8' x 6'6" Quad-Vent Greenhouse-in-a-Box Assembly Instructions
 6' x 8' x 6'6" Quad-Vent Greenhouse-in-a-Box Assembly Instructions Description Model # 6' x 8' x 6'6" Quad-Vent Greenhouse-in-a-Box 70652 Recommended Tools Please read instructions COMPLETELY before assembly.
INSTALLATION INSTRUCTIONS ROLLER SHADES
 INSTALLATION INSTRUCTIONS ROLLER SHADES Tools Required: Tape measure, pencil, drill, drill bits, screw driver, step stool or ladder. Note: use a 5/64 drill bit to pre-drill the screw holes (for attachment
Tilting Flat Panel Wall Mount Installation Guide
 Tilting Flat Panel Wall Mount Installation Guide Model: A580TM Easy installation Built-in level for easy positioning Safety bolts lock the TV on the mount Easy to adjust tilt angles: +5 to -15 degrees
CANARY AUDIO. Power Amplifier CA-309 OWNER S MANUAL. Handcrafted in California MADE IN USA
 CANARY AUDIO 300B Push-Pull Parallel Power Amplifier Mono Block Handcrafted in California CA-309 OWNER S MANUAL MADE IN USA Dear Customer: Please allow us to take this opportunity to thank you for purchasing
USER GUIDE. Studio Flash Kit NS-DACMSFK/NS-DACMSFK-C. Before using your new product, please read these instructions to prevent any damage.
 USER GUIDE Studio Flash Kit NS-DACMSFK/NS-DACMSFK-C Before using your new product, please read these instructions to prevent any damage. Studio Flash Kit Contents IMPORTANT SAFETY INSTRUCTIONS..............................................................
Hands Free Safety Gate
 Hands Free Safety Gate OWNER S MANUAL MODEL: 1705 READ ALL INSTRUCTIONS BEFORE ASSEMBLY AND USE OF GATE. KEEP INSTRUCTIONS FOR FUTURE USE. www.regalo-baby.com Regalo International, LLC. 3200 Corporate
Versatile Binding Machine BooXTer Uno TM BooXTer Duo TM BooXTer Trio TM USER MANUAL
 Versatile Binding Machine BooXTer Uno TM BooXTer Duo TM BooXTer Trio TM USER MANUAL TABLE OF CONTENTS 1. INTRODUCTION 3 2. SPECIFICATIONS 4 3. MAIN PARTS AND CONTROLS 5 4. INSTALLATION 7 5. SUPPLIES 9
Replay Top w/ Tinted Side and Rear Windows and Upper Door Skins Installation Instructions For: Jeep Wrangler (TJ) Part Number: 51197
 Part Number: 51197") Replay Top w/ Tinted Side and Rear Windows and Upper Door Skins Installation Instructions For: Jeep Wrangler (TJ) 1997 2002 Part Number: 51197 Table of Contents FABRIC REPLACEMENT TOP PARTS LIST... PAGE
Replay Top w/ Tinted Side and Rear Windows and Upper Door Skins Installation Instructions For: Jeep Wrangler (TJ) 1997 2002 Part Number: 51197 Table of Contents FABRIC REPLACEMENT TOP PARTS LIST... PAGE
Installation Operation Care. Duette Honeycomb Shades EasyRise Lifting System
 Installation Operation Care Duette Honeycomb Shades EasyRise Lifting System CONTENTS Getting Started: Product View... 1 Tools and Fasteners Needed... 2 Installation: Installation Overview... 3 Mount the
ITEM Pipe Thread Kit (10 Piece Set - 7 Dies) Assembly and Operating Instructions
 Assembly and Operating Instructions") ITEM 94098 Pipe Thread Kit (10 Piece Set - 7 Dies) Assembly and Operating Instructions 3491 Mission Oaks Blvd., Camarillo, CA 93011 Copyright 2006 by Harbor Freight Tools. All rights reserved. No portion
ITEM 94098 Pipe Thread Kit (10 Piece Set - 7 Dies) Assembly and Operating Instructions 3491 Mission Oaks Blvd., Camarillo, CA 93011 Copyright 2006 by Harbor Freight Tools. All rights reserved. No portion
LD8000 Series LD8025 LD8050 LD8100
 LD8000 Series LD8025 LD8050 LD8100 CONTENTS Read this user s manual before use to ensure proper operation. Keep the manual on hand for reference in case there is a problem. Warranty Information Maintenance
14 Piece Slide Hammer and Puller Set
 Owner s Manual & Safety Instructions Save This This Manual Keep Keep this this manual manual for for the the safety safety warnings warnings and and precautions, assembly, assembly, operating, inspection,
Models 2130 and 2140
 Models 2130 and 2140 Overview... 2 Tools Needed... 2 Hardware... 2 Assembly... 3-10 Installation...11 Operation... 11 Maintenance... 12 Accessories...12 Limited Warranty... 12 Printed in USA 2007 Perform
Installation Operation Care
 Installation Operation Care Duette Honeycomb Shades UltraGlide Lifting System CONTENTS Getting Started: Product View... 1 Tools and Fasteners Needed... 2 Installation: Installation Overview... 3 Mount
Sailcloth Fabric Replacement Top and Doors Installation Instructions
 Sailcloth Fabric Replacement Top and Doors Installation Instructions For: Wrangler/TJ 1997-2002 Part Number: 79121 This product is only designed for the vehicles listed above. DO NOT INSTALL THIS PRODUCT
2015 RIGOL TECHNOLOGIES, INC.
 Service Guide DG000 Series Dual-channel Function/Arbitrary Waveform Generator Oct. 205 TECHNOLOGIES, INC. Guaranty and Declaration Copyright 203 TECHNOLOGIES, INC. All Rights Reserved. Trademark Information
RV 10 Interior Panels
 RV 10 Interior Panels Important Notice: This manual contains important information that may affect the safety of your aircraft. Read the Warranty / Agreement below. There is information in the Warranty
Page 1 of 18. SunRail System Installation Instructions
 Page 1 of 18 SunRail System Installation Instructions Page 2 of 18 SunRail Stainless Steel Railing Installation Guide Table of Contents Before You Begin 3 Installing Surface Mount Bases for a Two Rail
PORTROD WALL MOUNTED HEIGHT ROD
 PORTROD WALL MOUNTED HEIGHT ROD USER INSTRUCTIONS P/N UMPORTROD Rev 1-052112 1 PORTROD Thank you for your purchase of this Health o meter Professional product. Please read this manual carefully, and keep
Stop! Read This Important Information.
 Stop! Read This Important Information. Stop, Do Not Proceed, Read This This door replacement kit is designed for the replacement of doors on a Supertop ONLY! This door will not work on any other style
9 PIECE TUNGSTEN CARBIDE HOLE SAW KIT. Model 90721
 9 PIECE TUNGSTEN CARBIDE HOLE SAW KIT Model 90721 Set up And Operating Instructions Diagrams within this manual may not be drawn proportionally. Due to continuing improvements, actual product may differ