Folding Beauty Dish. Guide
|
|
|
- Bernard Short
- 5 years ago
- Views:
Transcription


1 Folding Beauty Dish Guide
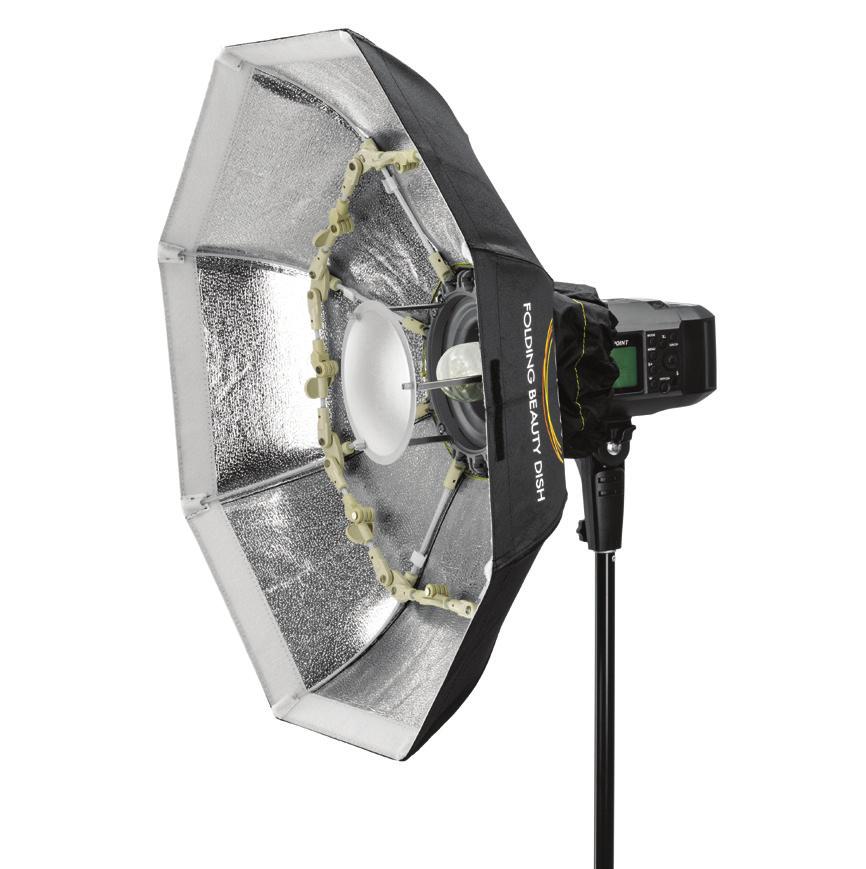
2 Introduction The Glow Folding Beauty Dish is a light modifier that provides extra large beauty light advantages with strobes, monolights, and most LED lights. The collapsible, light weight, compact and durable design is perfect for the portrait or event photographer shooting weddings, dinners, proms, or corporate events on location. The Glow Folding Beauty dish is ready for use immediately. No construction or assembly is needed. Simply follow the setup directions opening the fiberglass frame for a quick and secure finish. The flexible structure is impact resistant and holds up better than traditional metallic dishes, subject to damage in transportation and use. There is no struggling with assembling rods or speed rings. The setup is express and straightforward. The large collapsible beauty dish s hinged frame folds up neatly to a transportable size, ready for the next assignment. The classic look of beauty dish lighting is achieved by duplicating the indirect light design of a center deflector disk that is positioned directly over the flashtube. For an even softer effect, a removable front diffuser is included. The deflector cap can be removed to attain a harsher lighting effect through the diffuser, similar to a softbox. The Flashpoint Folding Beauty Dish comes with a Bowens Style reflector mount that can be easily be exchanged with any of the wide range of Beauty Dish Adapters (not included), for adaptation to most popular flash head mounts. 2 GlowLightControl.com
3 Precautions Please study this guide and store for future reference. The materials used in this product are not waterproof or flame resistant. Care must be taken to avoid damage. Attach strobes with modeling lamps following the recommended bulb wattage limits. Store in a cool and dry environment. Glow Folding Beauty Dishes are not designed for quartz or tungsten lighting. Prolonged exposure to high temperatures may damage the materials of the product. Beauty dish and diffuser can be hand cleaned with cold water and mild detergent. Air dry. Handle this beauty dish with care when opening and closing. Make sure the unit is intact and there are no missing parts. All photos in the manual are for illustrative purposes only. INCLUDES: Glow Folding Beauty Dish with integrated reflector mount White front diffuser material Removable Wrap Strip Binding Closure Carrying case 3 GlowLightControl.com


4 Setup Instructions 1. After removing the folding beauty dish from the carrying case, loosen or remove the Wrap Strip Binding Closure that is holding the beauty dish closed. 2. There are 2 ways to proceed. Both will require locking the beauty dish on the flashhead as per the Installing On Flashhead, either as the next step or the last one. 2A. Mount the closed Folding Beauty Dish on the flash you wish to use. The light must be firmly attached to a lightstand or support. Carefully spread the fiberglass rods out to open the umbrella completely. 2B. An alternative way without mounting on a flash first, is to rest the back of the beauty dish on a flat surface and spread out the fiberglass rods. 3. Push the flex tabs between each support rod toward the center of the beauty dish until each joint is straight and locked into place. When the circuit is completed, you are ready to use the beauty dish. Mount the dish on a light, if you have not done so already. NOTE: Prevent stress on the umbrella material during setup by locking the flex joints on opposite sides, simultaneously, rather than in a clockwise progression. Use both hands to lock the tabs. 4 GlowLightControl.com


5 Installing on Flash Head INSTALLING ON FLASH HEAD 1. Move the fabric collar aside to expose the reflector mount. 2. Align the tabs of the reflector mount ring with the mount of the light head. Carefully align and lock the beauty dish in place by turning the ring clockwise until it clicks, according to your mount design. 3. Now that the beauty dish is securely attached to the light head, cover the flashhead mount with the yellow fabric draw string collar and tighten to prevent light leaks. 4. When using an different Beauty Dish Mount Adapter, follow the strobe s instructions for installing a reflector. INSTALLING AN OPTIONAL BEAUTY DISH ADAPTER RING If your flash uses a different mount than the Bowens, a beauty dish adapter is needed. The process is simple to exchange the reflector s mount ring: 1. Unscrew 3 thumb nuts and remove the washers, leaving the 4th one attached. The reflector mount ring slips out easily. 2. The wide flange of the beauty dish adapter fits into the support ring. Slip the adapter under the 4th thumbnut. Fit the ring onto the screws. Replace the 3 washers and thumbnuts and securely tighten. 5 GlowLightControl.com


6 Light Modifiers ATTACHING THE FRONT DIFFUSER The included diffuser material fits snugly over the beauty dish front without the use of snaps or connectors. 1. Unfold the diffusion material and align the diffuser s corners with the outside corners of the opened beauty dish. 2. Secure the diffuser by stretching the edge over the matching corners of the beauty dish. Check that the diffuser covers all 8 corners of the perimeter of the beauty dish. THE OPTIONAL GLOW HONEYCOMB GRID is a powerful tool to gain more control of the beauty dish beam, and feathers the light for an attractive shadow. This strong directionality can be used to add high key depth for fashion images, and emphasis the model facial structure as well as the eyes, lips, nose and chin. The Grid attaches to the white Velcro strips surrounding the inside edge of the dish. Simply secure the grid by following around the perimeter in a clockwise fashion, until the circle is complete. Adjust to make the grid evenly spaced. 6 GlowLightControl.com

7 Closing and Storage 1. Unlock the beauty dish from the strobe light mount and carefully remove. 2. Press the flex joints toward the outer edge of the beauty dish to loosen the tabs. Bring the support rods in toward the center of the dish as if closing an umbrella. 3. Attach the removable Wrap Strip Binding Closure and secure it around the closed dish. Slide the folded beauty dish in the carrying case and tighten the draw string lock. Specifications GLFBDS/W-28 GLFBDS/W-34 GLFBDS/W-40 Diameter 27.5 / 70 cm 33.5 / 85 cm 39.5 / 100 cm Depth 7.75 / 19.5 cm 8.5 / 21.5 cm 9.5 / 24 cm Weight 2.5 lb. / 1.1 kg 2.7 lb. / 1.2 kg 3.0 lb. / 1.4 kg Shape Octagonal Octagonal Octagonal Deflector cap Yes Yes Yes Bowens mount adapter Yes Yes Yes 7 GlowLightControl.com
8 ONE YEAR GLOW LIMITED WARRANTY Glow warrants to the original purchaser that your Glow product shall be free from defects in material and workmanship for the period of one (1) year from the date of purchase (or delivery as may be required in certain jurisdictions), or thirty (30) days after replacement, whichever comes later. Glow s entire liability and your exclusive remedy for any breach of warranty shall be, at Glow s option, to repair or replace the hardware, provided that the hardware is returned to the point of purchase or such other place as Glow may direct with a copy of the sales receipt or dated itemized receipt. Glow may, at its option, replace your product, offer to provide a functionally equivalent product, or repair any product with new, refurbished or used parts as long as such parts are in compliance with the product s technical specifications. Any replacement hardware product will be warranted for the remainder of the original warranty period or thirty (30) days, whichever is longer, or for any additional period of time that may be applicable in your jurisdiction. If the product has been discontinued, the warranty provider reserves the right to replace it with a model of equivalent quality and function. This warranty does not cover problems or damage resulting from accident, abuse, misapplication, or any unauthorized repair, modification or disassembly, improper operation or maintenance, normal wear and tear, or usage not in accordance with product instructions or connection to improper voltage supply, use of consumables, such as replacement batteries, not supplied by Glow, except where such restriction is prohibited by applicable law. Except where prohibited by applicable law, this warranty is nontransferable and is limited to the original purchaser and the country in which the product was purchased. This warranty gives you specific legal rights, and you may also have other rights, including a longer warranty duration that may vary under local laws. To start a warranty claim contact the Glow Customer Service Department to obtain a return merchandise authorization ( RMA ) number, and return the defective product to Glow, along with the RMA number and proof of purchase. Question about our product line? Need Product Support? We are proud of our products and celebrate our customers. We are with you, from product selection to everyday use. Be secure with your purchase and reach us as you need. us: brands@adorama.com, Call: Address: Adorama Brands, 42 West 18th Street, New York, NY You can always contact us at BRANDS@ADORAMA.COM for personal technical support. Our web site contains a wide range of Support and FAQ pages with valuable technical assistance. GLOW is a registered trademark of ADORAMA CAMERA Adorama Camera, Corp. All Rights Reserved. 8 GlowLightControl.com
EZ Lock Octa Quick Softbox. Guide
 EZ Lock Octa Quick Softbox Guide Introduction Glow EZ Lock Octa Quick Softbox sports a dynamic eight-sided deep parabolic shape featuring flattering, soft and rich color lighting with all the great advantages
EZ Lock Deep Parabolic Softbox. Guide
 EZ Lock Deep Parabolic Softbox Guide Introduction Glow EZ Lock Deep Parabolic Softbox is an ingenious, portable version of the light modifier famous for stunning fashion and portraiture images showcasing
VE-TTLHX32. Hexoval Softbox 32. for Venture TTL 600 Ws Monolight INSTRUCTIONS
 VE-TTLHX32 Hexoval Softbox 32 for Venture TTL 600 Ws Monolight INSTRUCTIONS Introduction Thank you for choosing Impact. The Impact VE-TTLHX32 is a 32 hexoval softbox for the Venture TTL monolight. The
Whitebox INSTRUCTIONS
 Whitebox INSTRUCTIONS Introduction Congratulations on your purchase of an Angler Whitebox Octagonal Softbox! Angler softboxes are designed to control and soften light for your specific photographic needs.
OLED-55 USER MANUAL OCTALUX LED. OctaLux LED - USER MANUAL 1
 OLED-55 OCTALUX LED USER MANUAL OctaLux LED - USER MANUAL 1 OctaLux LED INTRODUCTION Thank you for choosing Genaray. The OctaLux LED Light Softbox produces bright, soft, and consistent light that s designed
PBSB-2436 Parabox Softbox INSTRUCTIONS
 PBSB-2436 Parabox Softbox 24 36 INSTRUCTIONS Precautions Please read and follow these instructions, and keep this manual in a safe place. Not for use with tungsten, halogen, or other high-heat light sources.
SPEED RING USER MANUAL SR-OCFF
 SPEED RING USER MANUAL SR-OCFF INTRODUCTION Thank you for choosing Raya. The Raya SR-OCFF Speed Ring is designed exclusively to mount the Raya OC-OSB80 32 or Impact FF- OSB60 24 Octa Softboxes to the Raya
EASY FOLD SOFTBOX SET EFS
 EASY FOLD SOFTBOX SET EFS INTRODUCTION Thank you for choosing the Raya Easy Fold Softbox Set. This set enables you to securely mount flashes of all sizes to a softbox using its adjustable shoe mount, even
Luxbanx Duo Softbox InStructIonS 1
 Luxbanx Duo Softbox Instructions 1 Introduction 2 Thank you for choosing the Impact Luxbanx Duo softbox. All Luxbanx softboxes are designed to control and soften light for your specific photographic needs.
Fresnel Spot S-Mount Attachment INSTRUCTIONS
 Fresnel Spot S-Mount Attachment 10 40 INSTRUCTIONS Introduction Thank you for choosing Impact. The Impact LM-FSA1040 is an innovative light-shaping tool that is compatible with studio strobes or LEDs with
Quikbox Micro Softbox INSTRUCTIONS
 Quikbox Micro Softbox INSTRUCTIONS 1 Introduction Thank you for choosing the Impact Quikbox Micro On-Camera Softbox. This convenient 9 9 in. light modifier slips onto an on-camera flash in seconds, transforming
Luxbanx Grid for Softbox INSTRUCTIONS
 Luxbanx Grid for Softbox INSTRUCTIONS Introduction Thank you for choosing this Impact Luxbanx Grid. Luxbanx grids provide more light control for Luxbanx softboxes by producing a narrower beam of light
AND. Quick Start Guide
 AND Quick Start Guide Apollo Quick setup and long-lasting results Built on an umbrella frame Quick set up and teardown Fits virtually any studio light Pairs perfect with speedlites Warranty: 1-year (details
Radiant Pro 2500 Video Light (Cat. No. 6047)
") Fantasea Line Radiant Pro 2500 Video Light (Cat. No. 6047) Instruction Manual 1 TABLE OF CONTENTS TABLE OF CONTENTS... 2 DISCLAIMER... 3 INTRODUCTION... 3 GENERAL INFORMATION... 3 SPECIFICATIONS... 4 INCLUDED
Fantasea Line Radiant Pro 2500 Video Light (Cat. No. 6047) Instruction Manual 1 TABLE OF CONTENTS TABLE OF CONTENTS... 2 DISCLAIMER... 3 INTRODUCTION... 3 GENERAL INFORMATION... 3 SPECIFICATIONS... 4 INCLUDED
CFC Series Cable Replacement Kit. for CFP Series Carbon Fiber Boom Poles. Owner s Manual
 CFC Series Cable Replacement Kit for CFP Series Carbon Fiber Boom Poles Owner s Manual TA (mini XLR) connector Right-angle XLR connector Nylon line Coiled XLR cable. mm hex key Tip strain relief Introduction
Manual Carton Closing Staplers
 Operator s Manual Manual Carton Closing Staplers SHB00-A Item No. 6400 -/8" Crown Carton Closing Stapler 5/8" and /4" (5mm and 8mm) Ask for Genuine INTERCHANGE A58 and A4 Staples SHB50-C Item No. 640 -/4"
QuikBalance. Collapsible 18% Gray Panel INSTRUCTIONS
 QuikBalance Collapsible 18% Gray Panel INSTRUCTIONS 1 Introduction Thank you for choosing the Impact QuikBalance Collapsible 18% Gray Panel. This versatile, portable, easy-to-use photographic tool makes
RUSH G1 MECHANICAL KEYBOARD PRODUCT MANUAL V.14
 RUSH G1 MECHANICAL KEYBOARD V.14 SOFTWARE INSTALLATION DOWNLOAD SOFTWARE INSTALLER From: http://download.fnatic.com RUN THE INSTALLER ACCEPT POP UPS If you are prompted by any pop ups during the installation,
AcuteB Head. User s Guide
 User s Guide SAFETY PRECAUTIONS! Read and follow all safety instructions below carefully to avoid injuries or damages! Make sure that this user manual always accompanies equipment! Profoto products are
Top Mount. See Installation 2 on page 2
 INSTALLATION INSTRUCTIONS TOILET SEAT Thank you for selecting American Standard the benchmark of fine quality for over 00 years. To ensure this product is installed properly, please read these instructions
Radiant 3000F Video Light (Cat. No. 6052)
") Fantasea Line Radiant 3000F Video Light (Cat. No. 6052) Instruction Manual 1 TABLE OF CONTENTS TABLE OF CONTENTS... 2 DISCLAIMER... 3 INTRODUCTION... 3 GENERAL INFORMATION... 3 SPECIFICATIONS... 4 INCLUDED
Fantasea Line Radiant 3000F Video Light (Cat. No. 6052) Instruction Manual 1 TABLE OF CONTENTS TABLE OF CONTENTS... 2 DISCLAIMER... 3 INTRODUCTION... 3 GENERAL INFORMATION... 3 SPECIFICATIONS... 4 INCLUDED
Models 2230 and 2240
 Models 2230 and 2240 Overview... 2 Tools Needed... 2 Hardware...3 Assembly... 4-13 Installation... 14 Drawer Removal... 15 Operation... 15 Maintenance... 15 Accessories... 16 Limited Warranty... 16 Perform
Basic Spring Motor Roller Shades
 Basic Spring Motor Roller Shades ATTENTION!!! READ CAREFULLY! This shade has a reliable long-lasting Spring Motor. The Spring Motor must have proper tension in order to function as intended. Handling in
INSTALLATION INSTRUCTIONS ROLLER SHADES
 INSTALLATION INSTRUCTIONS ROLLER SHADES Tools Required: Tape measure, pencil, drill, drill bits, screw driver, step stool or ladder. Note: use a 5/64 drill bit to pre-drill the screw holes (for attachment
UNIVERSAL DIFFUSER SERIES USER GUIDE
 UNIVERSAL DIFFUSER SERIES USER GUIDE 2 INTRODUCTION GENERAL INFORMATION Thank you for choosing a component of the Vello Universal Diffuser Series. Our diffusers and accessories extend the functionality
Installation Instructions HOSS Hardtop Organized Storage System
 Installation Instructions HOSS Hardtop Organized Storage System Application: Hard Top and Doors Storage System Part Number: 42801 www.bestop.com - We re here to help! Visit our web site and click on Ask
INSTALLATION INSTRUCTIONS TOOLS YOU WILL NEED GETTING STARTED
 INSTALLATION INSTRUCTIONS HONEYCOMB SHADES TOP-DOWN, MOVABLE ARCH Thank you for your purchase. This shade has been custom built for you from the highest quality materials. To avoid errors and save valuable
FP-4855 Flat Panel Television Stand ASSEMBLY INSTRUCTIONS
 FP-4855 Flat Panel Television Stand ASSEMBLY INSTRUCTIONS Patent Pending Italian Designed A Product of China Do not discard these instructions M-1_051607v3 Bell O International Corp. will not be responsible
PORTROD WALL MOUNTED HEIGHT ROD
 PORTROD WALL MOUNTED HEIGHT ROD USER INSTRUCTIONS P/N UMPORTROD Rev 1-052112 1 PORTROD Thank you for your purchase of this Health o meter Professional product. Please read this manual carefully, and keep
Installation Manual XRL Solar Rail System
 Installation Manual XRL Solar Rail System Solar Mounting Solutions June 2009 www.ironridge.com 2009 IronRidge, Inc. All Rights Reserved Version 1.0 2 XRL Solar Rail System Installation Guide Introduction
MW-C WALL MOUNT ADAPTER. For MD-ASL15W and MD-BSL15W Monitor Mounts. User Manual
 MW-C WALL MOUNT ADAPTER For MD-ASL15W and MD-BSL15W Monitor Mounts User Manual Thank you for choosing Gabor. The Gabor MW-C is a dedicated wall mount for the MD-ASL15W (single display) and MD-BSL15W (dual
SP2 CONTINUOUS LIGHT KIT
 SP2 CONTINUOUS LIGHT KIT Model: 2816 SP2 Light Kit ASSEMBLY AND USER MANUAL SP2 CONTINUOUS LIGHT KIT Congratulations on purchasing the best solution for photo studio lighting on a budget. This kit is perfect
WHITE BALANCE CARD SET
 WHITE BALANCE CARD SET USER MANUAL THANK YOU FOR CHOOSING VELLO This White Balance Card Set is your tool to ensure accurate color in your photos and videos. The gray card provides a neutral color, while
Models 2130 and 2140
 Models 2130 and 2140 Overview... 2 Tools Needed... 2 Hardware... 2 Assembly... 3-10 Installation...11 Operation... 11 Maintenance... 12 Accessories...12 Limited Warranty... 12 Printed in USA 2007 Perform
Models 2030 and 2040
 Models 2030 and 2040 Overview... 2 Tools Needed... 2 Hardware... 2 Assembly... 3-8 Installation... 9 Operation... 9 Maintenance... 10 Accessories... 10 Limited Warranty... 10 Document # 101290 0607 Printed
Heavy-Duty Gate Latch (Self-Latching)
") Heavy-Duty Gate Latch (Self-Latching) Installation Instructions PLEASE READ OWNER'S MANUAL COMPLETELY BEFORE INSTALLING YOUR HINGE KIT. 5010EPN V1 4/14 Owner's Manual Version 1.0 For use with; aluminum
Heavy-Duty Gate Latch (Self-Latching) Installation Instructions PLEASE READ OWNER'S MANUAL COMPLETELY BEFORE INSTALLING YOUR HINGE KIT. 5010EPN V1 4/14 Owner's Manual Version 1.0 For use with; aluminum
Assembly Instructions and Parts Manual JPSF-1 Fence and JPSR Rail Set
 Assembly Instructions and Parts Manual JPSF-1 Fence and JPSR Rail Set WALTER MEIER (Manufacturing) Inc. 427 New Sanford Road LaVergne, Tennessee 37086 Part No. M-708482 Ph.: 800-274-6848 Revision C2 02/2013
HARDINGE Installation booklet For: Dead-Length Collet Adaptation Chucks Stationary Collet
 HARDINGE Installation booklet For: Dead-Length Collet Adaptation Chucks Stationary Collet Read the enclosed instructions and recommendations before any installations CONTENTS Dead-Length Collet Adaptation
room essentials >> assembly instructions Drawer dresser w/ door Video instruction as Help to assembly, scan the QR code and see the video.
 room essentials 4 Drawer dresser w/ door DPCI # 249-05-0418 (Black Woodgrain) DPCI # 249-05-0419 (Virginia Walnut) >> assembly instructions 92380 Video instruction as Help to assembly, scan the QR code
TIRADE MMXI SOCCER TABLE
 TIRADE MMXI SOCCER TABLE Replacement Parts Order direct at or call our Customer Service department at (800) 225-7593 8 am to 4:30 pm Central Standard Time Publication 64-0908 Rev D August 2014 UPC Code
Assembly Instructions and Parts Manual JPSF-1 Fence and JPSR Rail Set #
 Assembly Instructions and Parts Manual JPSF-1 Fence and JPSR Rail Set #1002493 JET 427 New Sanford Road LaVergne, Tennessee 37086 Part No. M-708482 Ph.: 800-274-6848 Revision C3 02/2014 www.jettools.com
Installation Operation Care
 Installation Operation Care Designer Roller and Designer Screen Shades Standard and Cassette Cordless Lifting System CONTENTS Getting Started: Product Views... 1 Tools and Fasteners Needed... 3 Installation
Models 2130 and 2140
 Models 2130 and 2140 Overview... 2 Tools Needed... 2 Hardware... 2 Assembly... 3-10 Installation...11 Operation... 11 Maintenance... 12 Accessories...12 Limited Warranty... 12 Perform the following sequence
INSTALLATION MANUAL SONANCE SOUNDBARS SB46 M AND SB46 L. Introduction. Box Contents. Wall Mount Installations
 INSTALLATION MANUAL SONANCE SOUNDBARS SB46 M AND SB46 L Introduction Thank you for purchasing the Sonance Soundbar SB46 M or SB46 L. When properly installed your new Soundbar will give you years of entertainment
ProHead. User s Guide
 ProHead User s Guide 2Profoto ProHead Profoto ProHead Thank you for choosing Profoto. Thanks for showing us your confidence by investing in a ProHead unit. For more than four decades we have sought the
Installation Manual. Tamarack Solar Products. Top of Pole Mount Edition v1.01. For models:
 Mount Installation Manual 2016 Edition v1.01 For models: UNI-TP/06 UNI-TP/06LL UNI-TP/08 UNI-TP/08LL UNI-TP/10 UNI-TP/10LL UNI-TP/12 UNI-TP/12LL UNI-TP02-MAN Table of Contents 1 Introduction 1 2 Customer
20 TON HyDRAULIC SHOP PRESS with GRID GUARD 06/2015 INSTRUCTION MANUAL MODEL: KHP-20T-GG COPYRIGHT 2015 ALL RIGHTS RESERVED BY KING CANADA TOOLS INC.
 06/2015 20 TON HyDRAULIC SHOP PRESS with GRID GUARD MODEL: KHP-20T-GG INSTRUCTION MANUAL COPYRIGHT 2015 ALL RIGHTS RESERVED BY KING CANADA TOOLS INC. warranty INFORMATION 2-yEAR LIMITED WARRANTY FOR THIS
Planishing hammer stand For use with SKU Planishing hammer
 Planishing hammer stand For use with SKU 94847 Planishing hammer Model 96300 Assembly And Operation Instructions Please Note: Planishing Hammer not included with Stand. Due to continuing improvements,
Owner s Manual & Safety Instructions
 Owner s Manual & Safety Instructions Save This Manual Keep this manual for the safety warnings and precautions, assembly, operating, inspection, maintenance and cleaning procedures. Write the product s
Mortising Attachment
 Mortising Attachment Owner s Manual WARNING: Read carefully and understand all ASSEMBLY AND OPERATION INSTRUCTIONS before operating. Failure to follow the safety rules and other basic safety precautions
User guide ProHead Plus
 User guide ProHead Plus For other languages visit: /support ProHead Plus 2 Congratulations on your new Profoto product! Thanks for showing us your confidence by investing in a ProHead unit. For more than
User guide ProRing. For other languages visit:
 User guide ProRing For other languages visit: /support 2 Thank you for choosing Profoto. Follow the instructions in this booklet to use your new product. 3 Thanks for showing us your confidence by investing
PA WATT PORTABLE PA SYSTEM PRODUCT MANUAL
 PA-5150 5 150-WATT PORTABLE PA SYSTEM PRODUCT MANUAL THANK YOU FOR CHOOSING POLSEN. The Polsen PA-5150 is an active PA system that s ideal for solo performers or vocalists. It can be used as a PA system
Stop! Read This Important Information.
 Stop! Read This Important Information. Stop, Do Not Proceed, Read This This door replacement kit is designed for the replacement of doors on a Supertop ONLY! This door will not work on any other style
10-PIECE. Garage Storage Set OWNER'S MANUAL. Patent pending
 10-PIECE Garage Storage Set OWNER'S MANUAL Patent pending IMPORTANT When you open the cartons, carefully check the units and make sure there IS NO damage. If you have any problems with the units or with
impact VC-500LR Monolight INSTRUCTIONS
 impact lighting equipment and accessories VC-500LR Monolight INSTRUCTIONS Congratulations on your purchase of the Impact VC-500LR Monolight. We feel that it will contribute much to your photographic skill
CAUTION: WEIGHT ON THIS PRODUCT SHOULD NOT EXCEED 136KG / 300LBS.
 OWNER S MANUAL Thank you for choosing the Sit N Cycle. We take great pride in producing this quality product and hope it will provide many hours of quality exercise to make you feel better, look better
Installation Operation Care. Sonnette Cellular Roller Shades. LiteRise Operating System
 Installation Operation Care Sonnette Cellular Roller Shades LiteRise Operating System CONTENTS GETTING STARTED: Product View...1 Tools and Fasteners Needed...2 INSTALLATION: Installation Overview...3 Mount
Owner s Manual & Safety Instructions
 Owner s Manual & Safety Instructions Save This Manual Keep this manual for the safety warnings and precautions, assembly, operating, inspection, maintenance and cleaning procedures. Write the product s
MAINSTREET 36 INCH TABLE SOCCER
 Mainstreet 36 Inch Table Soccer MAINSTREET 36 INCH TABLE SOCCER Replacement Parts Order direct at or call our Customer Service department at (800) 5-7593 8 am to 4:30 pm Central Standard Time September
Acute/D4 Head User s Guide
 Acute/D4 Head User s Guide Guide de Iútilisateur Benutzerhandbuch Manuale Utente Manual del usuario Gebruikershandleiding 用户说明书 Användarhandbok Brukerhåndbok Brugerhåndbog Käyyttöopas 2 Thank you for choosing
Butterfly Hinge Standard & Heavy Duty PLEASE READ OWNER'S MANUAL COMPLETELY BEFORE INSTALLING YOUR HINGE KIT.
 Butterfly Hinge Standard & Heavy Duty Installation Instructions PLEASE READ OWNER'S MANUAL COMPLETELY BEFORE INSTALLING YOUR HINGE KIT. For use with Vinyl, Aluminum and Wood. Heavy Duty Butterfly Hinge
WESTPORT 8' SLATE POOL TABLE ASSEMBLY INSTRUCTIONS
 WESTPORT 8' SLATE POOL TABLE ASSEMBLY INSTRUCTIONS NG2690A THANK YOU! Thank you for purchasing this product. We work around the clock and around the globe to ensure that our products maintain the highest
AKZ13 13 OC Cantilever. Assembly and Operation Guide
 AKZ13 13 OC Cantilever Assembly and Operation Guide Thank you for your purchase of Treasure Garden s AKZ13 Cantilever Umbrella. Please remove all contents from the package, inspect and review checklist.
Installation Operation Care. Duette Honeycomb Shades EasyRise Lifting System
 Installation Operation Care Duette Honeycomb Shades EasyRise Lifting System CONTENTS Getting Started: Product View... 1 Tools and Fasteners Needed... 2 Installation: Installation Overview... 3 Mount the
OPERATOR S MANUAL Model 77E Pneumatic Cable Stripper
 110 Fairgrounds Drive P.O. Box 188 Manlius, NY 13104-0188 USA 315.682.9176 FAX: 315.682.9160 OPERATOR S MANUAL Model 77E Pneumatic Cable Stripper PRODUCTION WIRE PROCESSING EQUIPMENT Website: www.carpentermfg.com
Your Performance Partner
 Assembly Instructions Attic Storage System Your Performance Partner CONTENTS Safety Precautions.................................. 2 Warranty.......................................... 2 Important User Information............................
Installation Operation Care
 Installation Operation Care Applause Honeycomb Shades LiteRise Operating System with TrimKit Contents GETTING STARTED Product View... 1 Tools and Fasteners Needed... 2 INSTALLATION Installation Overview...
room essentials >> assembly instructions Nightstand DCPI # (Black Woodgrain)
") room essentials Nightstand DCPI # 249-05 - 0101 (Black Woodgrain) DCPI # 249-05 - 0104 (Espresso) DCPI # 249-05 - 0107 (Natural) DCPI # 249-05 - 0110 (White) >> assembly instructions 92331 F ROOM ESSENTIALS
room essentials Nightstand DCPI # 249-05 - 0101 (Black Woodgrain) DCPI # 249-05 - 0104 (Espresso) DCPI # 249-05 - 0107 (Natural) DCPI # 249-05 - 0110 (White) >> assembly instructions 92331 F ROOM ESSENTIALS
Single-Sliding Header Mount INSTALLATION INSTRUCTIONS
 1-800-701-4782 Single-Sliding Header Mount INSTALLATION INSTRUCTIONS GATEWAY SO# OPENING SIZE: W x H PULLEY SYSTEM: YES / NO Upon receiving your Gateway Door, inspect packaging and contents for freight
Balishutters. INSTALLATION guide FOR L-FRAME MOUNT INSTALL OPTIONS B OR C
 Balishutters INSTALLATION guide FOR L-FRAME MOUNT INSTALL OPTIONS B OR C Tools needed for installation Drill Phillips bit 1/8" drill bit 4. Hammer (preferably hard plastic) 5. Level 6. Phillips-head screwdriver
Heritage Solar Lamp Post
 Heritage Solar Lamp Post Instruction Manual 23108 Thank you very much for choosing a Nature Power product! For future reference, please complete the owner s record below: Model: Purchase Date: Save the
HARDINGE Installation booklet For:
 HARDINGE Installation booklet For: L Flange Nose Dead-Length Collet Adaptation Chucks Draw Collet Read the enclosed instructions and recommendations before any installations WARRANTY & RETURN PROCEDURES
OPERATOR S MANUAL Model 58B Prefeed / Dereeler
 110 Fairgrounds Drive P.O. Box 188 Manlius, NY 13104-0188 USA 315.682.9176 FAX: 315.682.9160 OPERATOR S MANUAL Model 58B Prefeed / Dereeler PRODUCTION WIRE PROCESSING EQUIPMENT Website: www.carpentermfg.com
INSTALLATION INSTRUCTIONS CJ-5 M38A PART # With Doors
 INSTALLATION INSTRUCTIONS CJ-5 M38A1 1955-1975 PART #109-011 With Doors Thank you for purchasing Specialty s Convertible Top for your Jeep vehicle. It has been designed for great fit and long wear. Please
Installation Operation Care
 Installation Operation Care Duette and Applause Honeycomb Shades SkyLift Lifting System with Manual Operation CONTENTS Getting Started: Product View... 1 Tools Needed... 2 Assembly: Arrange the Shade Components
TSM / FULL MOTION WALL MOUNT. For Flat Panel Screens. User Manual
 TSM- 1327 / FULL MOTION WALL MOUNT For 13-27 Flat Panel Screens User Manual Thank you for choosing Gabor. Thank you for choosing Gabor s full motion flat panel screen wall mount. This heavy-duty wall mount
4-Piece Table Tennis Table
 Item# 45-6074 4-Piece Table Tennis Table Please keep this instruction manual for future reference If you have any problems with your new product, please contact Triumph Sports USA at 1-866-815-4173, or
Model 3104C. Biconical Antenna. User Manual
 Model 3104C Biconical Antenna User Manual ETS-Lindgren L.P. reserves the right to make changes to any product described herein in order to improve function, design, or for any other reason. Nothing contained
ASPEN OUTDOOR TABLE TENNIS
 ASPEN OUTDOOR TABLE TENNIS Replacement Parts Order direct at or call our Customer Service department at (800) 225-7593 8 am to :30 pm Central Standard Time January 201 UPC Code 7-19265-51830-3 Staple your
Installation Instructions. Tools Needed. Tape measure. Level. Shovel or Post hole digger. Concrete. Drill. Stakes. Mallet or hammer.
 Installation Guide EcoStone Fence 1330 West 400 North Orem, UT 84057 Toll Free 1.866.648.9336 Tel. 1.801.655.5236 Fax 1.801.655.5240 www.ecostonefence.com Installation Instructions Introduction. These
Installation Instructions Hinged Roof Rack
 Installation Instructions Hinged Roof Rack Application: Jeep Wrangler Unlimited 2004 - Current Part Number: 41435-01 www.bestop.com - We re here to help! Visit our web site and click on Ask a Question
INSTALLATION INSTRUCTIONS Scout II - Fast Trac PART #
 INSTALLATION INSTRUCTIONS Scout II - Fast Trac PART #442-210 Thank you for purchasing Specialty s Convertible Top for your Scout vehicle. It has been designed for great fit and long wear. Please read and
M ACS Instructions
 APPLICABLE MODELS: Nissan Frontier 2005 and up short bed with Utili-Trak mounting rails PACKAGE CONTENTS 00-0060-M-01-1205 ACS Instructions Leitner Designs 25675 Taladro Circle Unit E Mission Viejo, CA
SS/SW3230RTA Assembly Instructions Ready to Assemble Multimedia Lectern
 650 Anthony Trail, Suite D, Northbrook, IL 60062 Phone: (800)267-5486 Fax: (800)267-5489 www.ampli.com - info@ampli.com SS/SW3230RTA Assembly Instructions Ready to Assemble Multimedia Lectern Thank you
Specifications. Important Safety Information
 Specifications Tire Rim Capacity 4 to 12 Rim Height 16 (2) Bead Breaker Handles 21 Long Includes Aluminum Centering Cone (2) Nylon Spacers Important Safety Information 1. Do not exceed max. tire capacity.
INSTRUCTION MANUAL. 1 Light Exterior Wall Lantern. Home Depot SKU (UPC ) Home Depot SKU (UPC ) (Prairie Bronze)
 Home Depot SKU (UPC ) (Prairie Bronze)") INSTRUCTION MANUAL 1 Light Exterior Wall Lantern Home Depot SKU 477405 (UPC 718212230107) Home Depot SKU 495682 (UPC 718212230282) (Prairie Bronze) Page 1 Thank you for purchasing this Hampton Bay exterior
INSTRUCTION MANUAL 1 Light Exterior Wall Lantern Home Depot SKU 477405 (UPC 718212230107) Home Depot SKU 495682 (UPC 718212230282) (Prairie Bronze) Page 1 Thank you for purchasing this Hampton Bay exterior
15 Planer Stand. Model Due to continuing improvements, actual product may differ slightly from the product described herein.
 15 Planer Stand Model 96316 Assembly And Operation Instructions Due to continuing improvements, actual product may differ slightly from the product described herein. 3491 Mission Oaks Blvd., Camarillo,
lighting your creativity HONEY BADGER 320Ws Digital Flash Instruction Manual
 lighting your creativity HONEY BADGER 320Ws Digital Flash Instruction Manual www.interfitphotographic.com Honey Badger 320 Digital Flash What s cool about the Honey Badger? The Honey Badger is the perfect
20 Ton HYDRAULIC SHOP PRESS
 20 Ton HYDRAULIC SHOP PRESS Stock Number W41063 OWNER S MANUAL WARNING! It is the owner and/or operators responsibility to study all WARNINGS, operating, and maintenance instructions contained on the product
Table of Contents. 2. Included System Components Tools and Parts Provided Optional Components and Consumables...
 Operator s Manual Table of Contents 1. System Specifications... 3 2. Included System Components... 4 3. Tools and Parts Provided... 4 4. Optional Components and Consumables... 4 5. Safety Precautions...
Flat Sheer Shade owner's handbook
 Flat Sheer Shade owner's handbook INSTALLATION INSTRUCTIONS Step 1. Check Package Contents Mounting hardware kit includes the following: Part a.mounting Brackets Quantity 2 for shades up to 45 wide 3 for
Model 72D Twin Blade Rotary Wire Stripper
 110 Fairgrounds Drive P.O. Box 188 Manlius, NY 13104-0188 USA 315.682.9176 FAX: 315.682.9160 OPERATOR S MANUAL Model 72D Twin Blade Rotary Wire Stripper PRODUCTION WIRE PROCESSING EQUIPMENT Website: www.carpentermfg.com
Inspiration strikes. VS-210 FLASH. User s Manual
 Inspiration strikes. VS-210 FLASH User s Manual Copyright 2015 Gradus Group. Bolt and other names of Bolt products are trademarks of Gradus Group. Other product and corporate names mentioned herein are
CLUTCH Product Manual
 CLUTCH Product Manual SOFTWARE INSTALLATION 1 Download Software Installer From: http://download.fnatic.com 2 Run the Installer 3 Accept Pop ups If you are prompted by any pop ups during the installation,,
3 Emergency Breakaway Coupling
 SM64227 July 2008 Applicable addition manuals: N/A Aerospace Group Conveyance Systems Division Carter Ground Fueling Maintenance & Repair Manual 3 Emergency Breakaway Coupling Model 64227 Table of Contents
FENCE INSTALLATION GUIDE 6 HIGH FENCE
 FENCE INSTALLATION GUIDE 6 HIGH FENCE 1.866.648.9336 www.simtekfence.com INSTALLATION GUIDE These instructions are designed to assist both professional installers and do-it-yourselfers of SimTek decorative
FENCE INSTALLATION GUIDE 8 HIGH WALLS
 FENCE INSTALLATION GUIDE 8 HIGH WALLS 1.866.648.9336 www.simtekfence.com INSTALLATION GUIDE These instructions are designed to assist both professional installers and do-it-yourselfers of SimTek decorative
Pneumatic Carton Closing Staplers
 Operator s Manual Pneumatic Carton Closing Staplers SAB100-A Item No. 640 1-/8" Crown Carton Closing Stapler 5/8" and /4" (15mm and 18mm) Ask for Genuine INTERCHANGE A58 and A4 Staples SAB150-C Item No.
THANK YOU FOR PURCHASING OUR STUDIO RTA CREATION STATION
 THANK YOU FOR PURCHASING OUR STUDIO RTA MODEL# 20672 IF YOU REQUIRE ANY ASSISTANCE WITH ASSEMBLY, PARTS, OR INFORMATION ON OTHER PRODUCTS, PLEASE VISIT OUR WEBSITE: www.studiorta.com OR CALL OR WRITE THE