FSM / FULL SWING WALL MOUNT. For Flat Panel Screens. User Manual
|
|
|
- Cuthbert Fletcher
- 5 years ago
- Views:
Transcription

1 FSM / FULL SWING WALL MOUNT For Flat Panel Screens User Manual
2 Thank you for choosing Gabor. Thank you for choosing Gabor s full swing flat panel screen wall mount. This heavy-duty wall mount has been engineered to provide your flatscreen monitor with sturdy, long-lasting support that can be relied upon for years of viewing enjoyment. With an impressive lineup of versatile mounting brackets possessing various functionalities - along with a resilient, userfriendly mounting method that simplifies the installation process - Gabor s reputation for providing quality viewing solutions and longlasting dependability is readily apparent...from every angle. 2 Welcome


3 Welcome 3
4 Product Specifications For Mounting Flat Panel Screens On Wooden Studs & Concrete Walls Tools Required For Installation 1. Power Drill 3. Tape Measure 2. Phillips Screwdriver 4. Socket Wrench Product Contents VESA Mounting Pattern 75/100/200/300/400 Maximum Load Capacity 66lbs/30kg Supplied Parts & Hardware A (4) M4 X 12 Bolt B (4) M4 X 30 Bolt C (4) M5 X 12 Bolt D (4) M5 X 30 Bolt E (4) M6 X 12 Bolt F (4) M6 X 30 Bolt G (4) M8 X 16 Bolt H (4) M8 X 30 Bolt I (4) Small Washer J (4) Spacer M8 K (3) Large Washer L (3) Long Bolt M (3) Lead Anchor N (8) Hex Nut 4 Specifications / Tools Required / Contents
5 Wall Mount Bracket Extenders M4 M5 M6 M8 Washer/Spacer Washer/Long Bolt/ Lead Anchor Hex Nut K x3 A x4 C x4 E x4 G x4 I x4 L x3 N x8 B x4 D x4 F x4 H x4 J x4 M x3 Contents 5
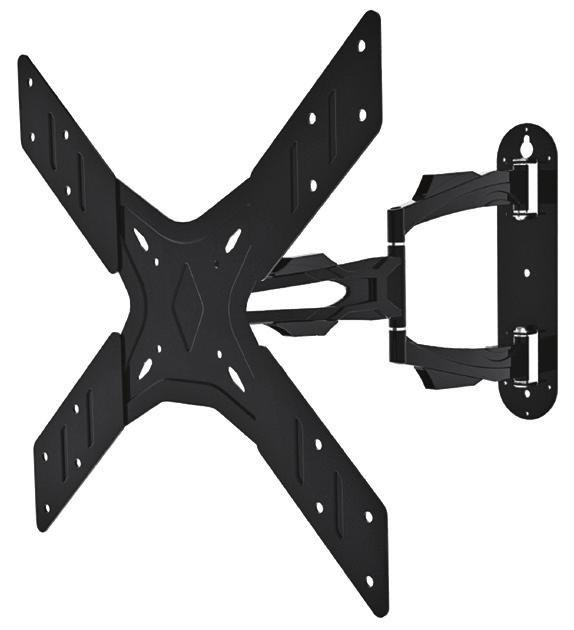
6 Installation Instructions STEP 1: Installing Mounting Bracket On Rear Of Flatscreen Begin by aligning brackets with hole pattern on rear of flatscreen device, while ensuring that device screen is resting on a non-scratch surface. The appropriate bolts and washers should be selected by measuring the height, size and position of holes on rear of flatscreen device, and determining which bolts and washers fit best. This may vary according to specific brand, make and model of flatscreen device. (Fig. 1) Depending on the hole distance found on flatscreen, included bracket extenders may be required; measure holes to determine so. If indeed required, align all 4 bracket extenders against main bracket to form an enlarged X shape; insert both screw threads on bracket extenders through the holes found on each front corner of main bracket; fasten included hex nuts securely with a wrench. (Fig.2) Use the shortest configuration of bolts, washers and spacers for a secure fit. Spacers may or may not be required depending on curvature of flat screen device and rear dimensions. During hardware installation, ensure that extending arm does not wobble or flop around. 6 Installation Instructions
7 (Fig. 1) Installation Instructions 7
8 Hardware Configurations (Fig. 2) For Display With Flat Back: Install bracket directly to flatscreen device using only bolts and washers provided; align bolt with proper sized hole on washer. (Fig. 3) For Display With Curved Backs & Recessed Mountings: Install appropriate sized spacer between bracket and flatscreen device; then fasten securely with bolts and washers. (Fig. 4) Note that bolts must be hand-fastened into holes with a screwdriver or socket wrench, to avoid overtightening and possible damage. (Fig. 3) (Fig. 4) 8 Installation Instructions
9 STEP 2: Positioning Mount Correctly On Wall The optimal height to position a flatscreen device is by mounting it at eye-level of viewer. This can be accomplished in one of two ways: Eyelevel Height Measure distance from seating area to viewing area to determine proper placement. The ideal position should place the center of the panel (where the diagonals meet) as close as possible to eye-level. 15 Viewing Angle For a simpler calculation, cut a piece of sturdy cardboard that s approximately the same size as flatscreen device and tape to wall; gaze at cardboard to determine if it is at a comfortable level; reposition the cardboard until it is sitting at a perfect height and mark location of cardboard on wall with a pencil. Installation Instructions 9
10 STEP 3: Installing Mounting Bracket Directly On Wall After confirming height positioning is appropriate by marking wall with a pencil, hold wall mount of mounting bracket firmly against wall and use pencil to mark exact location of drill holes; have another person maintain a firm grip on attached flatscreen device at all times during this process; remove wall mount and pre-drill holes (see sidebar for specific mounting details regarding sheetrock and concrete walls). To ensure wall mount is not being installed upside down, verify that oversized rounded hole is positioned on the upper part of mount. (Fig. 5) Screw a bolt into upper hole, leaving a few threads of bolt showing. Hold wall mount securely and begin inserting large upper hole into bolt; then pull wall mount downwards so bolt slides into smaller hole found above; tighten upper bolt completely.finish by inserting bottom bolts into place and tighten securely. (Fig. 6 & 7) 10 Installation Instructions
11 Wall-Type Mounting Details Mounting To Wood Studs Under Sheetrock Wall: Pre-drill holes according to markings on wall with a 3mm drill bit; be sure pre-drilled holes are at least 30mm deep; use appropriate wall anchors to attach wall mount (please verify that included anchors are appropriate). Mounting To Solid Concrete Wall: Pre-drill holes according to markings on wall with a 12.7mm drill bit; be sure pre-drilled holes are at least 60mm deep; use appropriate wall anchors to attach wall mount (please verify that included anchors are appropriate). 12.7mm (Fig. 5) 12.7mm Installation Instructions 11
12 12 Installation Instructions (Fig. 6) (Fig. 7)
13 STEP 4: Positioning Installed Wall Mount Upon installation completion, secure power cord for flatscreen device by running it through the plastic housing found on top or bottom of arm joints; then attach plug to power source. Wall mount can be positioned in of the following 3 configurations: (Fig. 8) (Fig. 9) FULLY EXTENDED mm/2-20.8" PARTIALLY EXTENDED FPO FULLY FOLDED (Fig. 10) FPO Installation Instructions 13
14 Safety Warnings 1 Do not use this product for any flat panel screen device other than what it is intended for; the exact specifications, size parameters and weight limits are found both on the product box and in the instruction manual 2 It is strongly recommended that this product be installed by a qualified professional or installation contractor; Gabor takes no responsibility for any product damage or personal injury resulting from mishandling, incorrect mounting, faulty assembly or improper use of this product 3 This product has been designed specifically for mounting directly on wooden studs or concrete walls; depending on wall type and material, the use of additional appropriate mounting hardware and/ or accessories such as heavy-duty anchors may be required 4 The supplied mounting hardware is not intended for use on metal studs or cinderblock walls, and may not be appropriate for old or weak walls; it is best to consult with a qualified professional to determine whether your walls are capable of supporting this bracket 5 Product must always be mounted directly to center of wooden wall studs or on a solid concrete wall to properly support the weight of the device; the wall may require reinforcement prior to mounting (i.e. metal studs; plaster on lath; or irregular spacing of studs), which should be determined by a qualified professional 6 Do not mount device on structures that may be affected by vibrations or noticeable impacts; do not install near heater, fireplace or any other source of direct heat energy 7 It is recommended that at least 2 people should perform the installation process to prevent injury from mishandling or dropping of the product and/or flatscreen device; proper safety gear and tools must be utilized at all times when installing product 8 When installing this product, be sure to refer to mounting instructions detailed in this manual; failure to abide by mounting instructions may void product warranty 9 This product may contain small parts which can possibly pose a choking hazard; keep out of reach of children and pets 10 Excessive exposure to liquids may damage the finish of this product; when cleaning this product, use only a mild detergent solution and quickly wipe dry with a soft cloth 14 Safety Warnings
15 Customer Support For more information or to arrange service, visit or call Customer Service at Product warranty is provided by the Gradus Group. Gabor is a registered trademark of the Gradus Group Gradus Group LLC. All Rights Reserved. GG2 ONE-YEAR LIMITED WARRANTY: This GABOR product is warranted to the original purchaser to be free from defects in materials and workmanship under normal consumer use for a period of one (1) year from the original purchase date or thirty (30) days after replacement, whichever occurs later. The warranty provider s responsibility with respect to this limited warranty shall be limited solely to repair or replacement, at the provider s discretion, of any product that fails during normal use of this product in its intended manner and in its intended environment. Inoperability of the product or part(s) shall be determined by the warranty provider. If the product has been discontinued, the warranty provider reserves the right to replace it with a model of equivalent quality and function. This warranty does not cover damage or defect caused by misuse, neglect, accident, alteration, abuse, improper installation or maintenance. EXCEPT AS PROVIDED HEREIN, THE WARRANTY PROVIDER MAKES NEITHER ANY EXPRESS WARRANTIES NOR ANY IMPLIED WARRANTIES, INCLUDING BUT NOT LIMITED TO ANY IMPLIED WARRANY OF MERCHANTABILITY OR FITNESS FOR A PARTICULAR PURPOSE. This warranty provides you with specific legal rights, and you may also have additional rights that vary from state to state. To obtain warranty coverage, contact the Gabor Customer Service Department to obtain a return merchandise authorization ( RMA ) number, and return the defective product to Gabor along with the RMA number and proof of purchase. Shipment of the defective product is at the purchaser s own risk and expense. Customer Support / Warranty 15
16
TSM / FULL MOTION WALL MOUNT. For Flat Panel Screens. User Manual
 TSM- 1327 / FULL MOTION WALL MOUNT For 13-27 Flat Panel Screens User Manual Thank you for choosing Gabor. Thank you for choosing Gabor s full motion flat panel screen wall mount. This heavy-duty wall mount
FSM / FULL SWING WALL MOUNT. For Flat Panel Screens. User Manual
 FSM- 3760 / FULL SWING WALL MOUNT For 37-60 Flat Panel Screens User Manual Thank you for choosing Gabor. Thank you for choosing Gabor s full swing flat panel screen wall mount. This heavy-duty wall mount
FM-3250 / FIXED WALL MOUNT. For Flat Panel Screens. User Manual
 FM-3250 / FIXED WALL MOUNT For 32-50 Flat Panel Screens User Manual Thank you for choosing Gabor. Thank you for choosing Gabor s fixed flat panel screen wall mount. This heavy-duty wall mount has been
MW-C WALL MOUNT ADAPTER. For MD-ASL15W and MD-BSL15W Monitor Mounts. User Manual
 MW-C WALL MOUNT ADAPTER For MD-ASL15W and MD-BSL15W Monitor Mounts User Manual Thank you for choosing Gabor. The Gabor MW-C is a dedicated wall mount for the MD-ASL15W (single display) and MD-BSL15W (dual
Luxbanx Grid for Softbox INSTRUCTIONS
 Luxbanx Grid for Softbox INSTRUCTIONS Introduction Thank you for choosing this Impact Luxbanx Grid. Luxbanx grids provide more light control for Luxbanx softboxes by producing a narrower beam of light
WHITE BALANCE CARD SET
 WHITE BALANCE CARD SET USER MANUAL THANK YOU FOR CHOOSING VELLO This White Balance Card Set is your tool to ensure accurate color in your photos and videos. The gray card provides a neutral color, while
CFC Series Cable Replacement Kit. for CFP Series Carbon Fiber Boom Poles. Owner s Manual
 CFC Series Cable Replacement Kit for CFP Series Carbon Fiber Boom Poles Owner s Manual TA (mini XLR) connector Right-angle XLR connector Nylon line Coiled XLR cable. mm hex key Tip strain relief Introduction
Whitebox INSTRUCTIONS
 Whitebox INSTRUCTIONS Introduction Congratulations on your purchase of an Angler Whitebox Octagonal Softbox! Angler softboxes are designed to control and soften light for your specific photographic needs.
EASY FOLD SOFTBOX SET EFS
 EASY FOLD SOFTBOX SET EFS INTRODUCTION Thank you for choosing the Raya Easy Fold Softbox Set. This set enables you to securely mount flashes of all sizes to a softbox using its adjustable shoe mount, even
VE-TTLHX32. Hexoval Softbox 32. for Venture TTL 600 Ws Monolight INSTRUCTIONS
 VE-TTLHX32 Hexoval Softbox 32 for Venture TTL 600 Ws Monolight INSTRUCTIONS Introduction Thank you for choosing Impact. The Impact VE-TTLHX32 is a 32 hexoval softbox for the Venture TTL monolight. The
Quikbox Micro Softbox INSTRUCTIONS
 Quikbox Micro Softbox INSTRUCTIONS 1 Introduction Thank you for choosing the Impact Quikbox Micro On-Camera Softbox. This convenient 9 9 in. light modifier slips onto an on-camera flash in seconds, transforming
INSTALL INSTRUCTIONS WELCOME TO THE NEWAGE PERFORMANCE CABINETRY SERIES NEWAGE STEEL WELDED CABINETRY
 NEWAGE STEEL WELDED CABINETRY WELCOME TO THE NEWAGE PERFORMANCE CABINETRY SERIES ALL CABINETS MUST BE MOUNTED TO STUDS ON A SECURE WALL, AS PER THESE INSTRUCTIONS. FAILURE TO DO SO MAY RESULT IN SERIOUS
Fresnel Spot S-Mount Attachment INSTRUCTIONS
 Fresnel Spot S-Mount Attachment 10 40 INSTRUCTIONS Introduction Thank you for choosing Impact. The Impact LM-FSA1040 is an innovative light-shaping tool that is compatible with studio strobes or LEDs with
P4263TP. Installation Guide. Low-Profile Tilting Portrait Mount for Flat-Panels
 Low-Profile Tilting Portrait Mount for Flat-Panels 1321 S. State College Blvd., Fullerton, CA 92831 USA Weight Limit Maximum Flat Panel Weight: 175 lbs. Warning Statements THE WALL STRUCTURE MUST BE CAPABLE
INSTALLATION INSTRUCTIONS
 INSTALLATION INSTRUCTIONS AM2 / AM2-B Articulating Swingout Arm NORTH AMERICA 3130 East Miraloma Avenue Anaheim, CA 92806 USA USA and Canada Phone: 1.800.368.9700 Fax: 1.800.832.4888 Other Locations Phone:
SPEED RING USER MANUAL SR-OCFF
 SPEED RING USER MANUAL SR-OCFF INTRODUCTION Thank you for choosing Raya. The Raya SR-OCFF Speed Ring is designed exclusively to mount the Raya OC-OSB80 32 or Impact FF- OSB60 24 Octa Softboxes to the Raya
Tilting, Swiveling & Rotating Flat Panel Wall Mount
 Tilting, Swiveling & Rotating Flat Panel Wall Mount Model: VXA980TC +5 to -5 +5 to -5 Supports most 0-80 Flat Panel TVs Maximum Weight Capacity: 32 lbs. Supports VESA Sizes up to 600x500 For technical
INSTALLATION INSTRUCTIONS
 INSTALLATION INSTRUCTIONS Universal Swingout Arm for 37 to 47 Flat Panels Model: AM80 NORTH AMERICA 3130 East Miraloma Avenue Anaheim, CA 92806 USA USA and Canada Phone: 1-800-368-9700 Fax: 1-800-832-4888
PRC-LA Installation Guide
 1321 S. State College Blvd., Fullerton, CA 92831 USA Weight Limit Maximum Flat Panel Weight: Warning Statements 50 lbs. THE WALL STRUCTURE MUST BE CAPABLE OF SUPPORTING AT LEAST FOUR TIMES THE WEIGHT OF
INSTALLATION INSTRUCTIONS
 CREATING POSITIVE CUSTOMER EXPERIENCES INSTALLATION INSTRUCTIONS Universal Low Profile Tilt Mount for 42 to 63 Flat Panels NORTH AMERICA 3130 East Miraloma Avenue Anaheim, CA 92806 USA USA and Canada Phone:
Install Instructions. NewAge Steel Welded Tall Locker
 Kit Contains Full Width Adjustable Steel Shelves (4) Height-Adjustable Steel Leveling Legs (4) Aluminum Door Trim (2) 2.5 x ¼ Cabinet Mounting Lag Bolts (4) Large Zinc Plated Mounting Washers (4) 5/8 x
Dual Arm Tilt LCD Mount
 Installation Manual model # 51324 M o u n t i n g S y s t e m s Dual Arm Tilt LCD Mount Fits Displays 13 to 32 Supports Up to 50 lbs (23 kgs) Projection from Wall from 3 to 17 Meets VESA Standards 50/75/100,
Tilting & Swiveling Plasma/LCD Flat Panel Wall Mount Installation Guide Model: A380SM
 Tilting & Swiveling Plasma/LCD Flat Panel Wall Mount Installation Guide Model: A380SM Easy installation Built-in level for easy positioning Corrective leveling adjustments after installation Forward /
PRIMO 56" FOOSBALL TABLE ASSEMBLY INSTRUCTIONS
 PRIMO 56" FOOSBALL TABLE ASSEMBLY INSTRUCTIONS NG1035 THANK YOU! Thank you for purchasing this product. We work around the clock and around the globe to ensure that our products maintain the highest possible
INSTALLATION INSTRUCTIONS
 INSTALLATION INSTRUCTIONS P4263F Universal Low Profi le Flat Mount for 42 to 63 Flat Panels NORTH AMERICA 3130 East Miraloma Avenue Anaheim, CA 92806 USA USA and Canada Phone: 1.800.368.9700 Fax: 1.800.832.4888
SM-RAZOR-F-M/L/XL. Strong Low Profile Fixed Mount for Ultra-Thin Flat-Panel TVs INSTALLATION MANUAL
 SM-RAZOR-F-M/L/XL Strong Low Profile Fixed Mount for Ultra-Thin Flat-Panel TVs INSTALLATION MANUAL WARNINGS: Installation of this product should be done by a qualified professional. Do not begin installation
NOVA-EXT Versatile Projector Mount Model: NOVA-EXT
 INSTALLATION MANUAL NOVA-EXT Versatile Projector Mount Model: NOVA-EXT NORTH AMERICA 3130 East Miraloma Avenue Anaheim, CA 92806 USA USA and Canada Phone: 800-368-9700 Fax: 800-832-4888 Other Locations
Tilting Flat Panel Wall Mount Installation Guide
 Tilting Flat Panel Wall Mount Installation Guide Model: A580TM Easy installation Built-in level for easy positioning Safety bolts lock the TV on the mount Easy to adjust tilt angles: +5 to -15 degrees
FIXED-POSITION WALL MOUNT FOR TVs in.
 INSTALLATION GUIDE FIXED-POSITION WALL MOUNT FOR TVs 19-39 in. NS-HTVMFAB For wood-stud, solid concrete wall, or concrete block installations Safety information and specifications..... 2 Tools needed.............................
INSTALLATION INSTRUCTIONS
 INSTALLATION INSTRUCTIONS Universal Low Profile Flat Mount Model: U.S. Toll Free: 1-866-752-6271 Outside N. America: 1-503-748-5799 E-mail: ts@planar.com FRANCE Phone: +33 5 6378 3810 E-mail: emeats@planar.com
PBSB-2436 Parabox Softbox INSTRUCTIONS
 PBSB-2436 Parabox Softbox 24 36 INSTRUCTIONS Precautions Please read and follow these instructions, and keep this manual in a safe place. Not for use with tungsten, halogen, or other high-heat light sources.
HUMBUSTER. Dual Channel Hum Eliminator HMX-2. User Manual
 HUMBUSTER Dual Channel Hum Eliminator User Manual Thank you for choosing Kopul. Kopul s Humbuster is an effective yet costeffective way to eliminate the 60 cycle buzz and noise caused by ground loops.
UNIVERSAL DIFFUSER SERIES USER GUIDE
 UNIVERSAL DIFFUSER SERIES USER GUIDE 2 INTRODUCTION GENERAL INFORMATION Thank you for choosing a component of the Vello Universal Diffuser Series. Our diffusers and accessories extend the functionality
INSTALLATION INSTRUCTIONS
 INSTALLATION INSTRUCTIONS Premier Mounts Tilting Wall Mount Model: TWM-085 For use with Panasonic 85 Flat Panel NORTH AMERICA 3130 East Miraloma Avenue Anaheim, CA 92806 USA USA and Canada Phone: 1.800.368.9700
INSTALLATION MANUAL SFM2
 INSTALLATION MANUAL SFM2 Sony Electronics, Inc. 16540 West Bernardo Drive San Diego, CA 92127 www.sony.com IN-SFM2.R1 Table of Contents WARNING STATEMENTS... - 3 - PARTS LIST... - 4 - INSTALLATION TOOLS...
Worktop. Weight Capacity. 100 lbs. 21 Corner Worktop. 48 Worktop. Fits over 2 Cabinets. 72 Worktop. Fits over 3 Cabinets. 200 lbs. 150 lbs.
 Bold.0 Warning: Excessive weight hazard! Use two or more people to move, assemble or install cabinets and locker to avoid back injury. Do not leave children unattended near cabinets. High risk of tipping
INSTALLATION INSTRUCTIONS
 INSTALLATION INSTRUCTIONS Universal Low Profile Tilt Mount Model: U.S. Toll Free: 1-866-752-6271 Outside N. America: 1-503-748-5799 E-mail: ts@planar.com FRANCE Phone: +33 5 6378 3810 E-mail: emeats@planar.com
SM-RAZOR-T-M/L/XL. Strong Low Profile Tilt Mount for Ultra-Thin Flat-Panel TVs INSTRUCTION MANUAL
 SM-RAZOR-T-M/L/XL Strong Low Profile Tilt Mount for Ultra-Thin Flat-Panel TVs INSTRUCTION MANUAL WARNINGS: Installation of this product should be done by a qualified professional. Do not begin installation
USE AND CARE GUIDE FIXED LED / LCD TV WALL MOUNT (UNIVERSAL MOUNTING PATTERN, FITS VESA
 Item #302-080 Model #50710 USE ND CRE GUIDE FIXED LED / LCD TV WLL MOUNT (UNIVERSL MOUNTING PTTERN, FITS VES 100/200/300/400/600) Questions, problems, missing parts? Before returning to the store, call
LC200DS1 Double Stud Articulating Wall Mount for Flat Panel Screens up to 32" with up to 200mm x 200mm VESA Mounting Patterns
 Page 1 of 6 LC200DS1 Double Stud Articulating Wall Mount for Flat Panel Screens up to 32" with up to 200mm x 200mm VESA Mounting Patterns A multi-position dual articulating arm for flat screens up to 60
PA WATT PORTABLE PA SYSTEM PRODUCT MANUAL
 PA-5150 5 150-WATT PORTABLE PA SYSTEM PRODUCT MANUAL THANK YOU FOR CHOOSING POLSEN. The Polsen PA-5150 is an active PA system that s ideal for solo performers or vocalists. It can be used as a PA system
INSTALLATION INSTRUCTIONS
 INSTALLATION INSTRUCTIONS Universal Swingout Arm Model: AM300/AM300-B NORTH AMERICA 3130 East Miraloma Avenue Anaheim, CA 92806 USA USA and Canada Phone: 1.800.368.9700 Fax: 1.800.832.4888 Other Locations
PFW 6851 Display Wall Mount, Turn & Tilt 80 kg INSTALLATION INSTRUCTIONS
 Display Wall Mount, Turn & Tilt 80 kg INSTALLATION INSTRUCTIONS 9531-007-Z00-01 Table of Contents Warning Statements 2 Parts List 3 Installation Tools 3 Wood Stud Installation 5 Concrete Surface Installation
OLED-55 USER MANUAL OCTALUX LED. OctaLux LED - USER MANUAL 1
 OLED-55 OCTALUX LED USER MANUAL OctaLux LED - USER MANUAL 1 OctaLux LED INTRODUCTION Thank you for choosing Genaray. The OctaLux LED Light Softbox produces bright, soft, and consistent light that s designed
DX-TVMLPTB03. Low-Profile TV Wall Mount ASSEMBLY GUIDE. For either wood-stud or concrete wall installations
 ASSEMBLY GUIDE DX-TVMLPTB03 Low-Profile TV Wall Mount For either wood-stud or concrete wall installations Safety information and specifications...2 Tools needed...........................3 Package contents......................3
SCM-600 USER S GUIDE. Table of Contents:
 Table of Contents: USER S GUIDE Introduction... 2 Overview... 3 Precautions...4 Mounting the Microphone... 5 Positioning the Microphone...6 High-Pass Filter...6 Attenuation Pad...6 Connecting the Microphone...
SB-WM-ART1-M-BL. Weatherproof Universal Single-Arm Articulating Mount for Medium Displays INSTALLATION MANUAL
 SB-WM-ART1-M-BL Weatherproof Universal Single-Arm Articulating Mount for Medium Displays INSTALLATION MANUAL WARNING The maximum weight of this wall mount is 90 lbs (41 kg). Use with heavier than the maximum
ECM Installation Guide Installationsanleitung, Guía de Instalacíon, Guida de Installazione, Guide d Installation, Installatie gids
 Elliptical Ceiling Mount for 37 to 63 Flat Panels Model: ECM-3000 Warranty, Garantie, Garantía, Garanzia, Garantie, Waarborg: http://www.mounts.com/warranty 9531-000-001-0X Rev.0 www.mounts.com North America
SB-WM-ART2-L-BL SB-WM-ART2-XL-BL
 SB-WM-ART2-L-BL SB-WM-ART2-XL-BL Weatherproof Universal Dual-Arm Articulating Mount for Large TVs INSTALLATION MANUAL WARNING The maximum weight of this wall mount is 150 lbs (68.04 kg). Use with heavier
LC200DS2 Double Stud Dual Articulating Wall Mount for Flat Panel Screens up to 32" with up to 200mm x 200mm VESA Mounting Patterns
 LC200DS2 Double Stud Dual Articulating Wall Mount for Flat Panel Screens up to 32" with up to 200mm x 200mm VESA Mounting Patterns Multi-position triple pivoting arms allows you to position the monitor
INSTALLATION MANUAL SONANCE SOUNDBARS SB46 M AND SB46 L. Introduction. Box Contents. Wall Mount Installations
 INSTALLATION MANUAL SONANCE SOUNDBARS SB46 M AND SB46 L Introduction Thank you for purchasing the Sonance Soundbar SB46 M or SB46 L. When properly installed your new Soundbar will give you years of entertainment
QLF215 INSTRUCTION MANUAL
 QLF215 INSTRUCTION MANUAL We ll Make It Stress-Free If you have any questions along the way, just give us a call. 1-800-359-5520. We re ready to help! 1 2 3 IMPORTANT SAFETY INSTRUCTIONS SAVE THESE INSTRUCTIONS
Tilting & Swiveling Flat Panel Wall Mount Installation Guide Model: AXS2040
 Tilting & Swiveling Flat Panel Wall Mount Installation Guide Model: AXS2040 20-40 66 lbs. Supports VESA sizes up to: 200x200 For technical assistance or troubleshooting please call 1-855-994-2825 or visit
HUSTLER 7' & 8' POOL TABLE ASSEMBLY INSTRUCTIONS
 HUSTLER 7' & 8' POOL TABLE ASSEMBLY INSTRUCTIONS Please Do Not Hesitate to Contact Our Consumer Hotline at 800-759-0977 with Any Questions That May Arise During Assembly or Use of This Product! NG2515PB/NG2520PB
QuikBalance. Collapsible 18% Gray Panel INSTRUCTIONS
 QuikBalance Collapsible 18% Gray Panel INSTRUCTIONS 1 Introduction Thank you for choosing the Impact QuikBalance Collapsible 18% Gray Panel. This versatile, portable, easy-to-use photographic tool makes
Loading Dock Safety Gate
 Installation Instructions/Operation and Maintenance Manual Models LDSG-120-PCY LDSG-144-PCY Table of Contents Product Information...2 Parts List...3 Installation Instructions...5 Operation...13 Inspection
PAM-200 Universal Projector Mount
 INSTALLATION MANUAL PAM-200 Universal Projector Mount Sony Electronics 16540 West Bernardo Drive San Diego, CA 92127 www.sony.com IN-PAM200.R0 Table of Contents Parts List...- 3 - Installation Tools...-
Please Do Not Return This Product To The Store!
 MODEL NOS. T8512 TOURNAMENT SERIES 3 TABLE TENNIS TABLE OWNER'S MANUAL 1. Read this manual carefully before starting assembly. Read each step completely before beginning each step. 2. Some smaller parts
Full Motion Gas Spring TV Wall Mount - 24" to 55" Installation Instructions
 Full Motion Gas Spring TV Wall Mount - 24" to 55" Installation Instructions 04-1102A Caution Prior to installation of this product, the installation instructions should be read and completely understood.
Powered by. For further installation assistance: prxperformance.com/pages/murphy-rack
 Powered by The 90 Fold-in Murphy Rack is made by the creators of the original Profile Folding Rack at PRx Performance and is Patent Pending. An up-to-date record of patents and patent pending items can
SCM-660 USER S GUIDE. Table of Contents:
 Table of Contents: USER S GUIDE Introduction... 2 Overview... 3 Precautions...4 Mounting the Microphone... 5 Selectable Polar Pattern Switch...6 High-Pass Filter... 7 Attenuation Pad... 7 Connecting the
Swing Arm TV Wall Mount. Model Number: AWBS-0816-W INSTRUCTION MANUAL
 Swing Arm TV Wall Mount Model Number: AWBS-0816-W INSTRUCTION MANUAL AUS 1300 886 649 Model: AWBS-0816-W Product Code: 54265 08/2017 Contents Warranty Details 3 Welcome 4 General Safety Instructions 5
INSTALLATION INSTRUCTIONS
 INSTALLATION INSTRUCTIONS Universal Short Throw Projector Arm Model: UNI-STA/UNI-EXT NORTH AMERICA 3130 East Miraloma Avenue Anaheim, CA 92806 USA USA and Canada Phone: 1-800-368-9700 Fax: 1-800-832-4888
QLF214 INSTRUCTION MANUAL
 QLF214 INSTRUCTION MANUAL We ll Make It Stress-Free If you have any questions along the way, just give us a call. 1-800-359-5520. (UK: 0800 056 2853) We re ready to help! CAUTION: IMPORTANT SAFETY INSTRUCTIONS
Installation and Assembly: Articulating Swivel Arm for 37" - 60" Flat Panel Displays
 Installation and Assembly: Articulating Swivel Arm for 37" - 60" Flat Panel Displays Models: PLA60, PLA60-S, PLAV60, PLAV60-S Max UL Load Capacity: 175 lb (79 kg) 2300 White Oak Circle Aurora, Il 60502
TV WALL MOUNT ASSEMBLY GUIDE RF-TVMLPT01V2
 TV WALL MOUNT RF-TVMLPT01V2 For wood-stud and concrete wall installations Safety information and specifications...2 Tools needed...2 Package contents...3 Installation instructions...4 ASSEMBLY GUIDE Before
Installation Guide. Model VLS-TM1540. Universal Tilt/Pivot Wall Mount for use with Flat Panel Displays
 Installation Guide www.revenaproducts.com 4915 SW Griffith Drive Suite 302 Beaverton, OR 97005 Model VLS-TM1540 Universal Tilt/Pivot Wall Mount for use with 15-40 Flat Panel Displays Installation Guide
INSTALLATION INSTRUCTIONS
 INSTALLATION INSTRUCTIONS CTM-MS1 Flat Panel Display Mount (26 to 37 ) NORTH AMERICA 3130 East Miraloma Avenue Anaheim, CA 92806 USA USA and Canada Phone: 800-368-9700 Fax: 800-832-4888 Other Locations
Planar FWMG-MXL INSTALLATION INSTRUCTIONS
 Planar FWMG-MXL INSTALLATION INSTRUCTIONS Fixed Wall Mount for Ultra Large Displays 50-98 weighing less than 300 lbs. Part Number: 955-0217-00 Planar, A Leyard 1195 NW Compton Drive Beaverton, OR 97006
QLF214 INSTRUCTION MANUAL
 QLF214 INSTRUCTION MANUAL We ll Make It Stress-Free If you have any questions along the way, just give us a call. 1-800-359-5520 We re ready to help! Scan for easy install video san.us/1145 CAUTION: IMPORTANT
Planishing hammer stand For use with SKU Planishing hammer
 Planishing hammer stand For use with SKU 94847 Planishing hammer Model 96300 Assembly And Operation Instructions Please Note: Planishing Hammer not included with Stand. Due to continuing improvements,
SAN25BB Instruction Manual
 SAN25BB Instruction Manual Scan here to view product demo and install videos or visit san.us/109 Milestone AV Technologies 6436 City West Parkway Eden Prairie, MN 55344 USA Customer Service Americas: 800-359-5520
INSTALLATION INSTRUCTIONS Small Flat Panel Height-Adjustable, Extended Pitch Swing Arm Wall Mount Model KWE-110
 INSTALLATION INSTRUCTIONS Small Flat Panel Height-Adjustable, Extended Pitch Swing Arm Wall Mount Model KWE-110 The KWE dual swing arm wall mount is designed to provide a broad range of viewing for Small
AM500-U Installation Guide
 1321 S. State College Blvd., Fullerton, CA 92831 USA Included Components Maximum Flat Panel Weight: 500 lb. / 226.79 kg. Wall Mount Bracket (Qty 2) Cross Bar 5/16 Flat Washers (Qty 6) Universal Spacers
Performance 2.0 Series
 Performance. Series Warning: Excessive weight hazard! Warning: Excessive weight hazard! Use two or more people to move, assemble, or install cabinets and locker to avoid back injury. Do not leave children
Installation Instruction
 Tools Needed for Assembly Stud finder (for wood stud wall) Pencil Mark Electric drill Wood Stud Wall Installation Step 1. Locate the Wood Studs Installation Instruction Drill bit (for wood stud wall) Masonry
Hardware Box 1 1/4 Diameter x 3/4 Long Bolts 24 1/4 Nylon Lock Nut 24 1/4 Diameter x 3 Long Lag Bolt 8 1/4 Washers 56
 Warning: Excessive weight hazard! Use two or more people to move, assemble or install overhead rack to avoid back or other injury. Do not leave children unattended near overhead rack. High risk of injury
Worktop INDEX eight Capacity Unpacking
 Pro.0 Series Warning: Excessive weight hazard! Use two or more people to move, assemble or install cabinets and locker to avoid back injury. Do not leave children unattended near cabinets. High risk of
Models: PLAV70-UNL, PLAV70-UNLP. Installation and Assembly - Universal Articulating Swivel Double-Arm for 42" - 95" Plasma Screens
 Installation and Assembly - Universal Articulating Swivel Double-Arm for 42" - 95" Plasma Screens Models: PLAV70-UNL, PLAV70-UNLP Max UL Load Capacity: 200 lb (91 kg) 2300 White Oak Circle Aurora, Il 60502
Installation Instructions
 Tilt/Pivot Mount Premier Mounts 3130 E. Miraloma Avenue Anaheim, CA 92806 Phone: (800) 368-9700 Fax: (800) 832-4888 techsupport@mounts.com www.mounts.com IN-PTMB.R0 TABLE OF CONTENTS Warning Statements
INSTALLATION MANUAL PBC-UMS
 INSTALLATION MANUAL. PBC-UMS Premier Mounts 3130 E. Miraloma Avenue Anaheim, CA 92806 Phone: (800) 368-9700 Fax: (800) 832-4888 mounts@mounts.com www.mounts.com Rev. 01 PBL-110 Projector Mount Page 2 Installation
Installation and Assembly - Universal Articulating Swivel Double-Arm for 42" - 60" Plasma Screens
 Installation and Assembly - Universal Articulating Swivel Double-Arm for 42" - 60" Plasma Screens Models: PLAV 70-UNL, PLAV 70-UNL-S PLAV 70-UNLP, PLAV 70-UNLP-S R This product is UL Listed. It must be
QLT25 INSTRUCTION MANUAL
 QLT25 INSTRUCTION MANUAL We ll Make It Stress-Free If you have any questions along the way, just give us a call. 1-800-359-5520. (UK: 0800 056 2853) We re ready to help! CAUTION: IMPORTANT SAFETY INSTRUCTIONS
INSTALLATION MANUAL SFM3
 INSTALLATION MANUAL SFM3 Sony Electronics, Inc. 16540 West Bernardo Drive San Diego, CA 92127 www.sony.com IN-SFM3.R0 Table of Contents WARNING STATEMENTS...- 3 - PARTS LIST...- 4 - INSTALLATION TOOLS...-
19 to 39 TV WALL MOUNT - FULL MOTION
 19 to 39 TV WALL MOUNT - FULL MOTION RF-HTVMMAB For wood-stud and concrete wall installations Safety information and specifications...2 Tools needed...2 Package contents...3 Installation instructions...5
One Shelf, Wall Mounted A/V Component Stand Installation Guide Model: EX101SS
 One Shelf, Wall Mounted A/V Component Stand Installation Guide Model: EX0SS For technical assistance or troubleshooting please call -855-994-3832. This product is intended for use only with Audio/Video
Installation and Assembly - Universal Articulating Swivel Double-Arm for 42" - 60" Plasma Screens
 Installation and Assembly - Universal Articulating Swivel Double-Arm for 42" - 60" Plasma Screens Models: PLAV 70-UNL, PLAV 70-UNL-S PLAV 70-UNLP, PLAV 70-UNLP-S R This product is UL Listed. It must be
SM-RAZOR-ART2-L / SM-RAZOR-ART2-XL
 SM-RAZOR-ART2-L / SM-RAZOR-ART2-XL Strong Razor Series Articulating Mount for Large and Extra Large Displays INSTRUCTION MANUAL Installation Manual Warnings: Installation of this product should be done
Installation Instructions
 Installation Instructions AM2 Articulating Swingout Arm Premier Mounts 3130 E. Miraloma Avenue Anaheim, CA 92806 Phone: (800) 368-9700 Fax: (800) 832-4888 techsupport@mounts.com www.mounts.com IN-AM2.R1
SAN213 Instruction Manual
 SAN213 Instruction Manual Scan here to view product demo and install videos or visit san.us/105 Milestone AV Technologies 6436 City West Parkway Eden Prairie, MN 55344 USA Customer Service Americas: 800-359-5520
15 Planer Stand. Model Due to continuing improvements, actual product may differ slightly from the product described herein.
 15 Planer Stand Model 96316 Assembly And Operation Instructions Due to continuing improvements, actual product may differ slightly from the product described herein. 3491 Mission Oaks Blvd., Camarillo,
Installation and Assembly: Flat Video Wall Mount For 40" to 65" Flat Panel Displays
 Installation and Assembly: Flat Video Wall Mount For 40" to 65" Flat Panel Displays Model: DS-VW665 Maximum Load Capacity: 125 lb (57 kg) 1 of 11 ISSUED: 03-22-12 SHEET #: 125-9288-4 06-25-13 NOTE: Read
Full-Motion TV Mount - 47" to 90" Installation Guide
 Full-Motion TV Mount - 47" to 90" Installation Guide Full-motion Articulating LCD/Plasma TV Wall-mount TV size: 47" - 90" Tilt angle: +/- 12 degrees Max load capacity: 200 lbs / 90 kg Wall distance (at
PROTECT HOME & FAMILY LOCK IT UP WITH OUR ADVANCED PET DOOR SECURITY COVER INSTALLING YOUR NEW WATCHDOG SECURITY PET DOOR COVER TOOLS NEEDED
 PROTECT HOME & FAMILY LOCK IT UP WITH OUR ADVANCED PET DOOR SECURITY COVER INSTALLING YOUR NEW WATCHDOG SECURITY PET DOOR COVER WE ALWAYS RECOMMEND INSTALLING YOUR WATCHDOG SECURITY PET DOOR COVER ON THE
MM750 Installation Instructions
 MM750 Installation Instructions IMPORTANT SAFETY INSTRUCTIONS - SAVE THESE INSTRUCTIONS Please read this entire manual before you begin. Do not unpack any contents until you verify all requirements on
AST-2446 INSTALLATION INSTRUCTIONS
 AST-2446 Suspension Adapter AST-2446 INSTALLATION INSTRUCTIONS Single Stud Installation Step 1. Secure the ceiling plate to the ceiling structure (see WARNING). Step 2. Use suitable hardware (commercially
MM340 Installation Instructions IMPORTANT SAFETY INSTRUCTIONS - SAVE THESE INSTRUCTIONS
 MM30 Installation Instructions IMPORTANT SAFETY INSTRUCTIONS - SAVE THESE INSTRUCTIONS Please read this entire manual before you begin. Do not unpack any contents until you verify all requirements on PAGE.
UNIVERSAL AIR CONDITIONER MOUNTING BRACKET
 ANYMOUNT INSTALLATION INSTRUCTIONS UNIVERSAL AIR CONDITIONER MOUNTING BRACKET KT-04L (MEDIUM/LARGE) Supports up to 165 lbs. KT-04S (SMALL/MEDIUM) Supports up to 88 lbs. SAVE THIS MANUAL FOR FUTURE REFERENCE.
Instruction Sheet D-CPU. Secure CPU Holder
 Instruction Sheet D-CPU Secure CPU Holder I-00457 Rev A PARTS LIST NOTE: Select Security Components when a more secure application is desired. Mounting Track with Mounting Tape Security Bracket Assembly
MANCHESTER VANITY BASE
 MANCHESTER VANITY BASE INSTALLATION INSTRUCTIONS Questions? Call our customer service department at 1-855-995-5578, 8:30 a.m. - 5 p.m., EST, Monday - Friday or e-mail: contactus@magickwoods.com. Models: